Author: admin@glaciertattoo.com

  • How to Check Ink Levels on Epson Printer in 7 Easy Steps

    How to Check Ink Levels on Epson Printer in 7 Easy Steps

    To check ink levels on your Epson printer, start by steering to the control panel’s Ink Levels or Maintenance menu.

    You can also use Epson’s printer utility software on Windows or Mac to view detailed cartridge status.

    For EcoTank models, turn off the printer and visually inspect the ink tanks.

    Don’t forget to keep your software and firmware updated for accurate readings.

    Using the Epson iPrint app lets you monitor levels remotely.

    Keep following to discover tips for troubleshooting and maintaining your ink efficiently.

    How to Check Ink Levels on Epson Printers (Overview of Methods)

    check ink levels easily

    Wondering how to check ink levels on your Epson printer? You have several straightforward options. Many Epson models let you check ink levels directly through the control panel, especially if your printer has an LCD screen. This method gives you quick access without needing a computer.

    Check Epson ink levels easily via the control panel on models with an LCD screen—no computer needed.

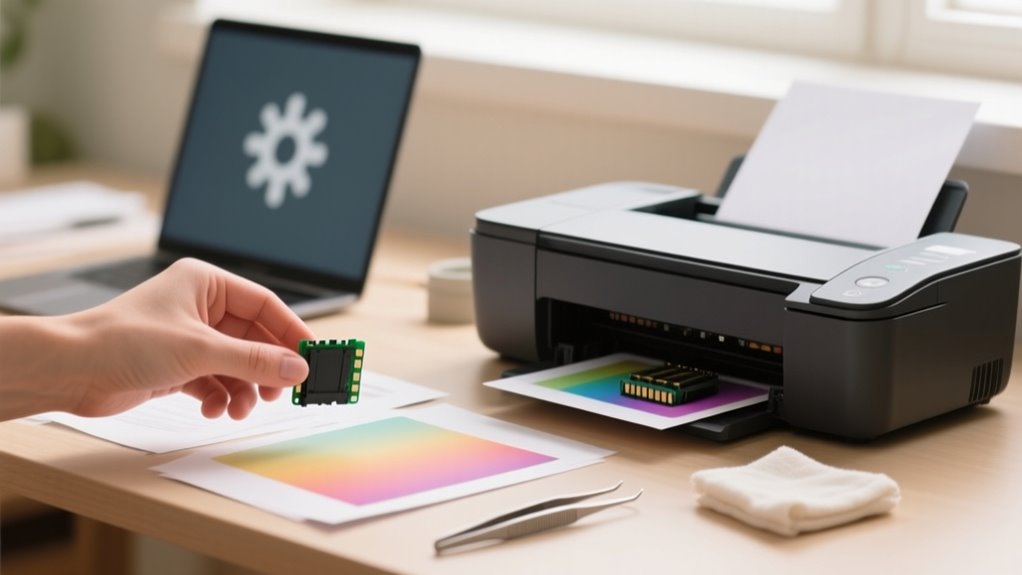
    Alternatively, you can use Epson’s printer utility software to monitor ink levels on your Windows or Mac device. This software provides detailed status updates and is easy to navigate.

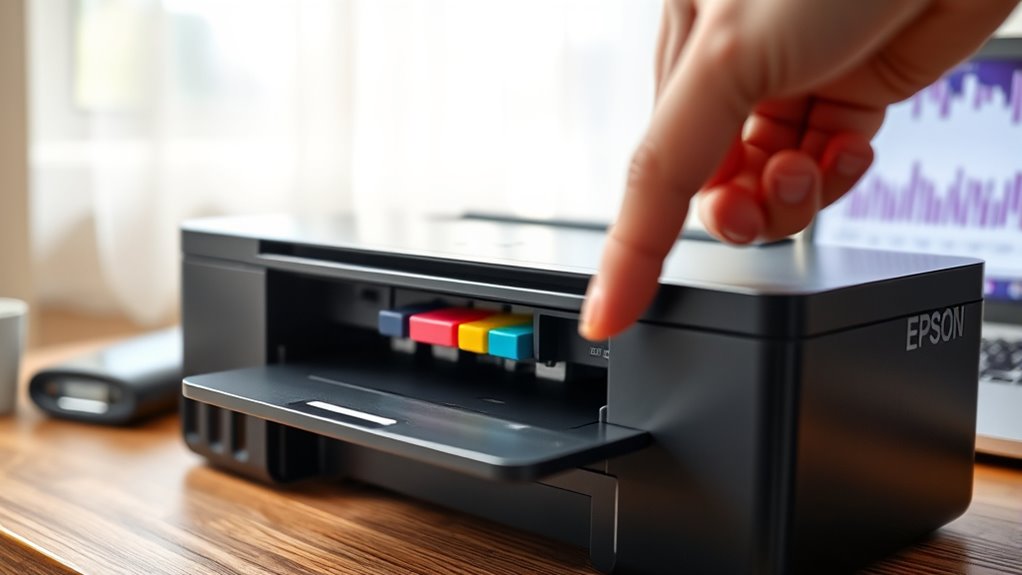
    If you own an EcoTank or refillable model, you can also inspect the ink tanks physically for a visual gauge of the remaining ink.

    Moreover, Epson offers mobile apps like Epson iPrint or Epson Smart Panel, which let you monitor ink levels remotely via Wi-Fi.

    To ensure accurate readings, make sure your printer drivers and firmware are regularly updated. Using these methods, you’ll always know when it’s time to refill or replace your ink, keeping your printing smooth and efficient.

    Check Ink Levels Using Epson Software on Windows and Mac

    You can easily check your Epson ink levels using the Epson Status Monitor on Windows or the Supplies Levels tab on your Mac. Both options give you a clear graphic showing how much ink is left in each cartridge. Just make sure your software is up to date so you get the most accurate ink status information.

    Accessing Epson Status Monitor

    How do you quickly check your Epson printer’s ink levels using its software? Start by opening the Epson printer software on your computer and navigate to the Utility or Maintenance tab to access the Epson Status Monitor.

    On Windows, you can also double-click the printer icon in the system tray or go through Control Panel, select your printer, and click the ink level or Status Monitor option. For Mac users, head to System Preferences > Printers & Scanners, select your printer, then click Options & Supplies and choose the Supplies Levels tab.

    The Epson Status Monitor utility will show you the current ink levels for each ink cartridge. Make sure your printer software is up to date to get accurate readings from the monitor.

    Viewing Ink Levels Graphically

    After accessing the Epson Status Monitor through your printer software, you can view ink levels graphically for a clearer understanding of each cartridge’s status. On Windows, open the Epson Printer Utility to see a color-coded graphical display that shows ink levels as full, partial, or empty. This visual indicator makes it easy to assess your ink status at a glance.

    If you’re using a Mac, go to System Preferences > Printers & Scanners > Options & Supplies, then click the Supplies Levels tab for a similar display. Make sure your printer driver and Epson software are up to date to avoid inaccurate or missing ink level graphics.

    Using Epson’s official tools provides the most reliable information compared to checking physically or via control panel indicators.

    Updating Ink Status Information

    Although checking ink levels visually can be helpful, updating the ink status information through Epson’s software guarantees you get the most accurate and real-time readings. To do this, download and install the latest Epson printer drivers and utility software from the official website.

    On Windows, open Epson Printer Utility or Status Monitor via the control panel to view current ink levels. Mac users can check ink status under System Preferences > Printers & Scanners > Options & Supplies > Supplies Levels.

    Regularly updating your printer’s firmware and utility software improves sensor calibration, enhancing accuracy and preventing false readings. After replacing or refilling cartridges, perform a test print or cartridge reset, then verify ink levels through the software to assure your Epson printer provides precise and reliable ink status updates.

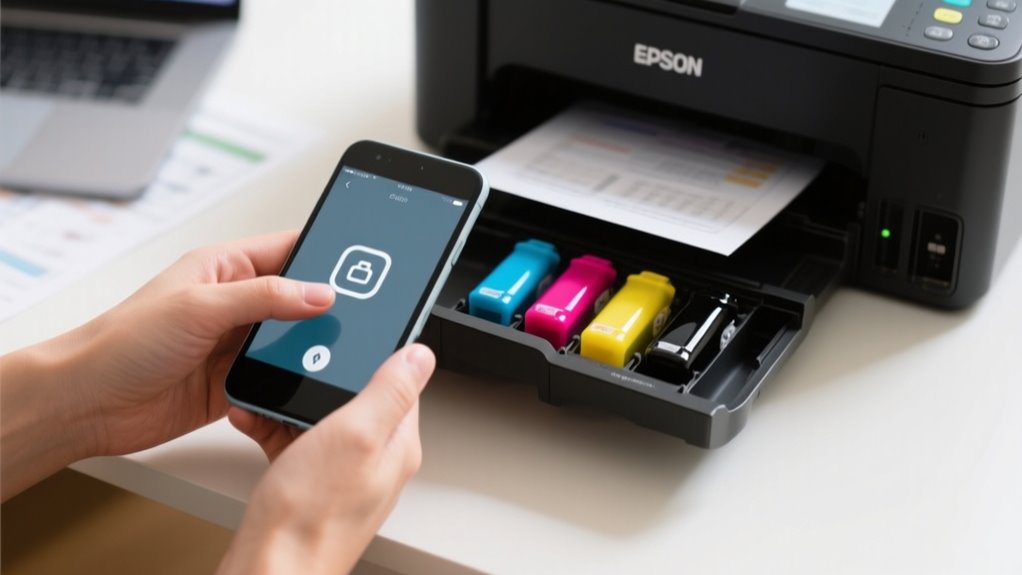
    Monitor Ink Levels With the Epson iPrint Mobile App

    When you want to keep an eye on your Epson printer’s ink levels without turning on your computer, the Epson iPrint mobile app makes it easy. First, download and install Epson iPrint from Google Play or the App Store on your mobile device.

    Make sure your printer and device are connected to the same Wi-Fi connection for smooth communication. Open the app, select your printer, and tap on the “Ink Levels” or “Status” option. You’ll see real-time ink levels displayed as percentages or colored bars, so you can monitor ink levels precisely.

    The app also sends low ink warnings, helping you maintain consistent print quality without interruptions. Beyond monitoring, Epson iPrint lets you order new cartridges and access maintenance tools like printhead cleaning directly from your phone.

    Using this mobile app means you stay informed and proactive about your printer’s ink status anytime, anywhere, without needing to access the printer physically.

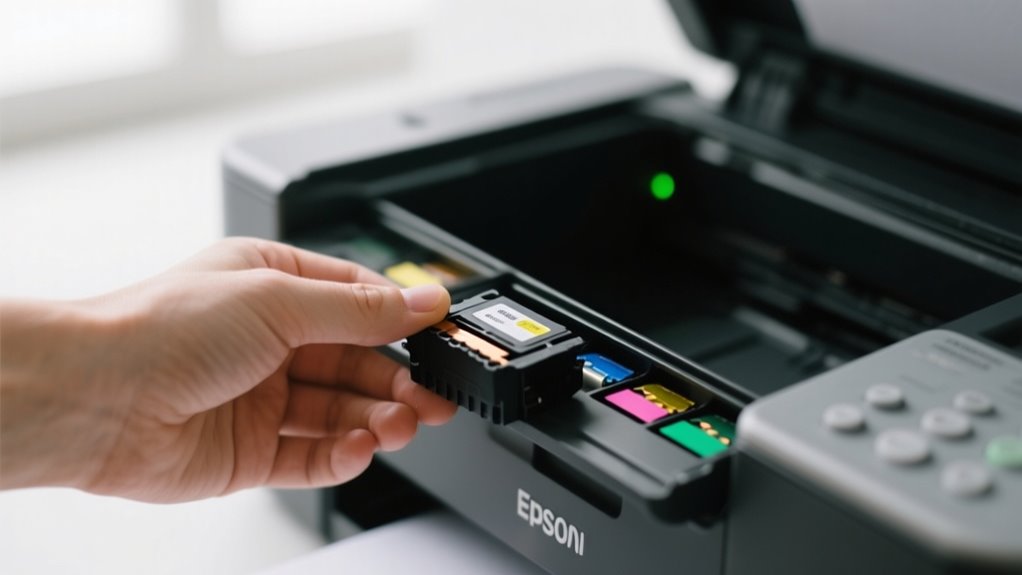
    View Ink Levels on Your Epson Printer’s Control Panel

    check ink levels directly

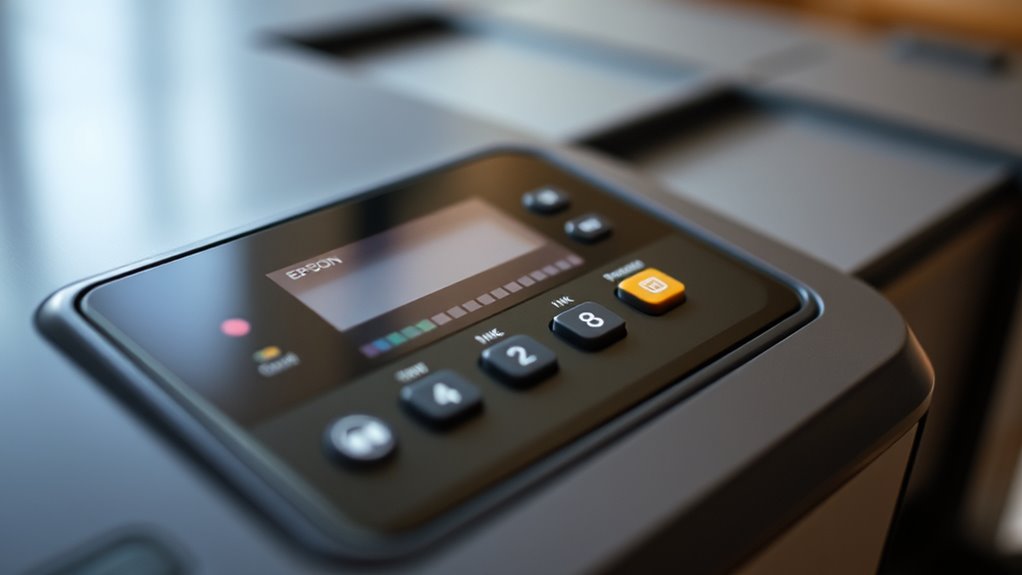
    If you prefer checking ink levels directly on your Epson printer without using an app, you can do so via the printer’s control panel. Start by pressing the Home or Menu button to access the main menu. Use the arrow buttons to navigate to the Maintenance or Ink Levels option, then press OK or Enter to select it.

    On the display, you’ll see individual cartridge levels represented by clear visual indicators like bars or percentages, providing an accurate view of your printer status. Some Epson models even offer a detailed breakdown of each ink cartridge’s remaining ink, helping you monitor cartridge levels precisely.

    Once you’ve reviewed the ink levels, simply press the Back or Home button to exit the menu and resume your printing or maintenance tasks. Checking ink levels through the control panel is a quick, straightforward way to keep tabs on your Epson printer’s ink supply without needing additional software.

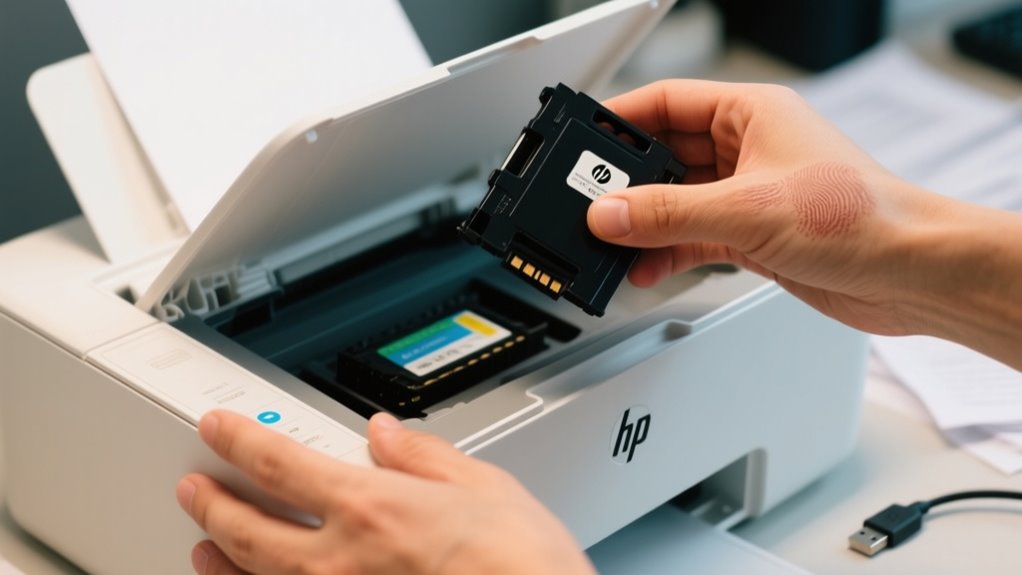
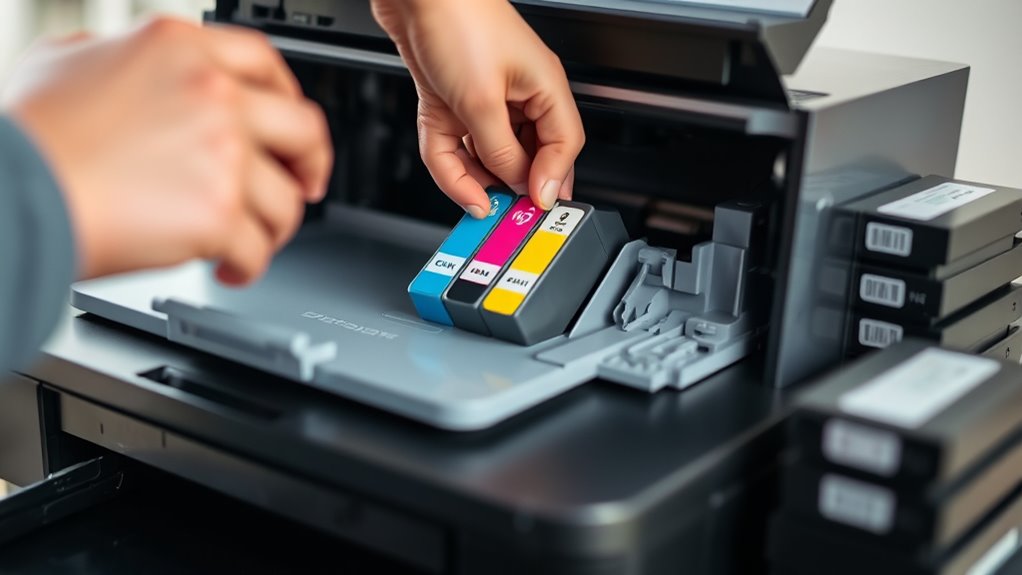
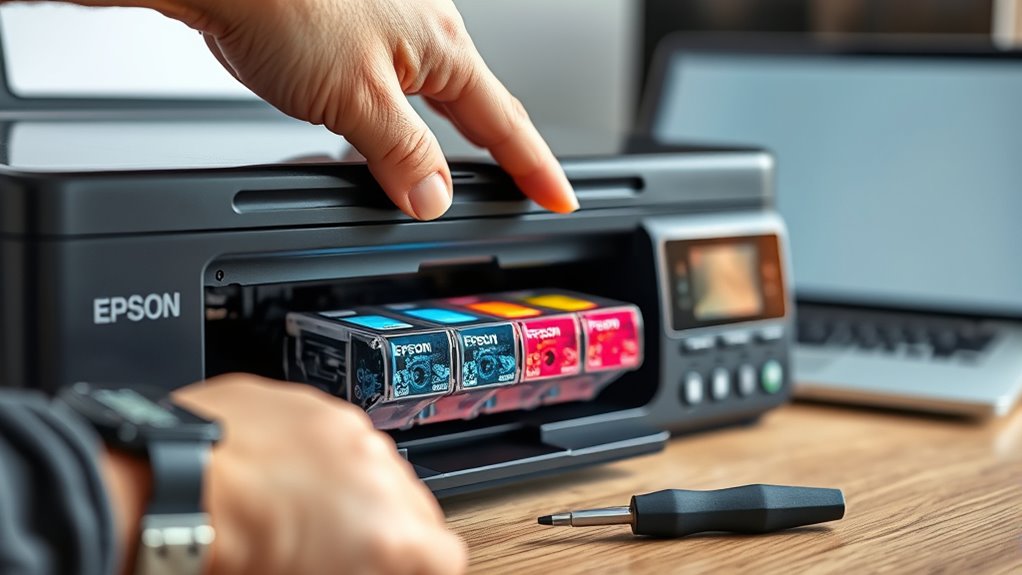
    Perform Visual Ink Level Checks on EcoTank and Refillable Models

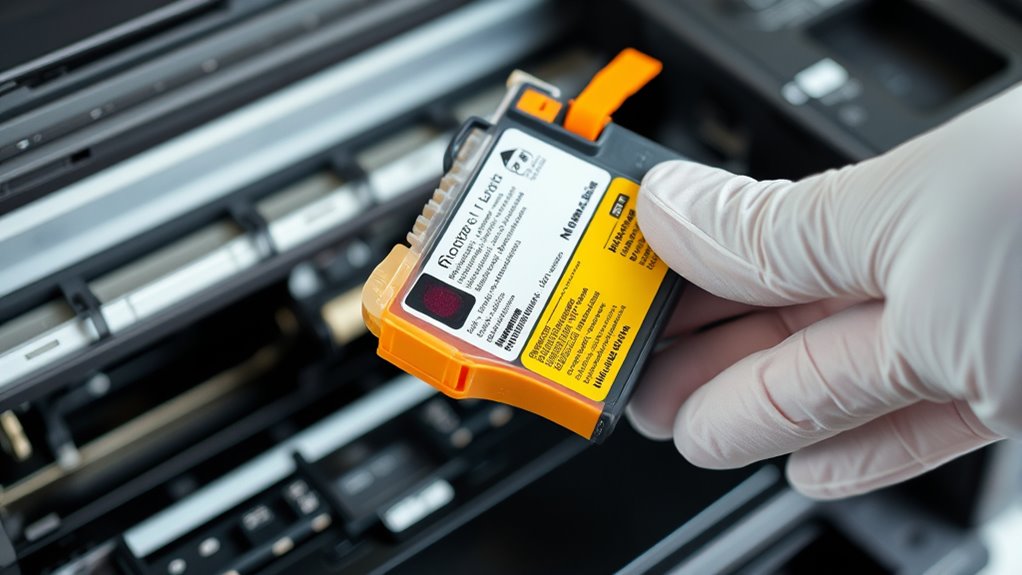
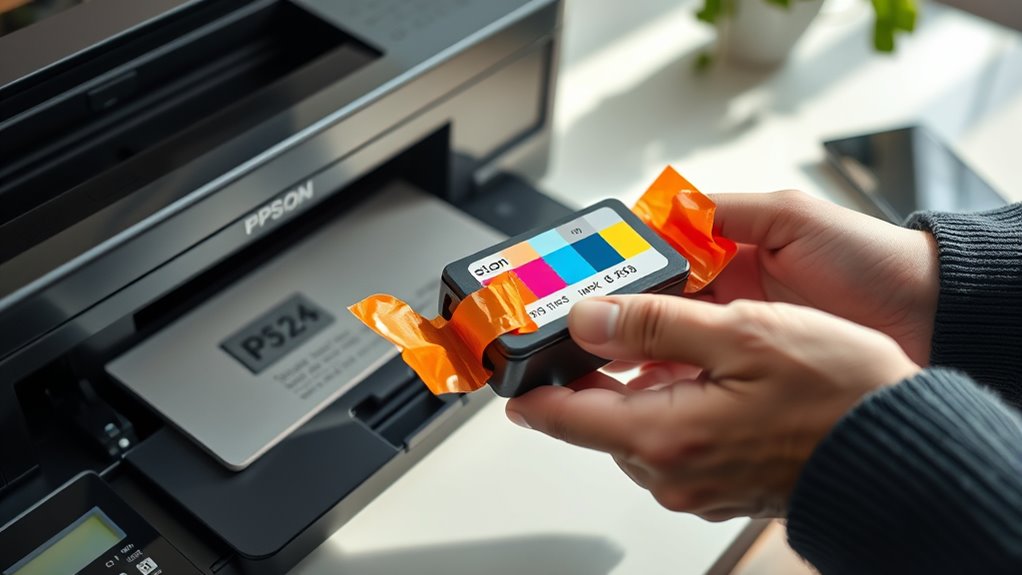
    To check ink levels on Epson EcoTank or refillable models, start by turning off your printer to prevent leaks and guarantee safety. Next, open the ink tank covers on your Epson EcoTank or refillable models to visually check the ink levels inside each transparent cartridge. You’ll want to compare the ink levels to the marked minimum and maximum lines to see if any tanks need refilling.

    When you’re ready to refill, use the recommended ink bottles carefully to avoid spills and overfilling. After inspection or refilling, always securely close the ink tank covers to maintain proper sealing and prevent ink evaporation or leaks.

    Here’s a quick checklist:

    • Turn off the printer before opening ink tank covers.
    • Visually check ink levels against marked lines on tanks.
    • Carefully perform the refill process with recommended inks and close covers tightly.

    This simple method helps you keep your Epson EcoTank running smoothly by monitoring ink levels effectively.

    Troubleshoot Inaccurate Ink Level Readings and Low Ink Alerts

    reset clean update recalibrate

    Although Epson printers generally provide accurate ink level readings, you might encounter false low ink alerts or incorrect levels after refilling or replacing cartridges. When this happens, start troubleshooting by resetting the ink monitor using the official Epson software or your printer’s control panel. This often clears persistent low ink alerts.

    False low ink alerts can often be resolved by resetting the ink monitor via Epson software or the printer’s control panel.

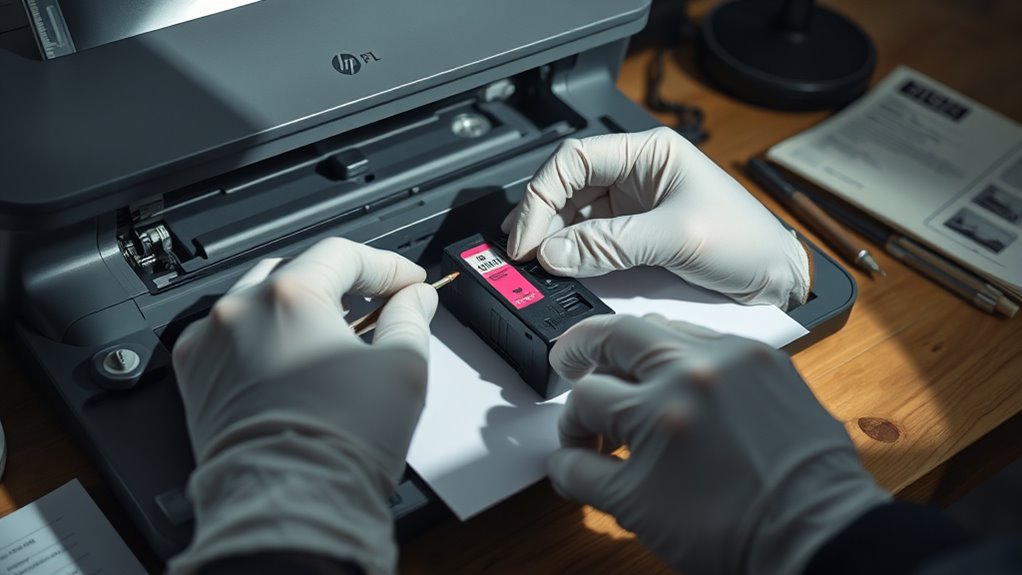
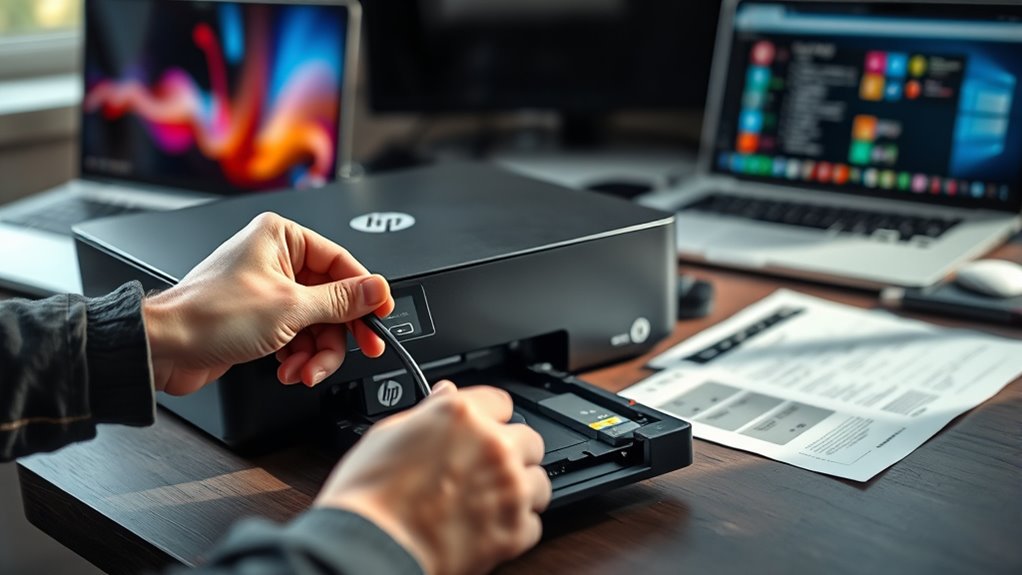
    Next, check cartridge recognition by reseating the cartridges and cleaning their contacts to ensure proper communication. If issues persist, updating your printer’s firmware can enhance sensor calibration and fix inaccurate ink level reports.

    Furthermore, restarting your printer or performing a calibration process can recalibrate sensors, improving ink level accuracy. By following these steps—resetting ink monitor, cleaning cartridges, updating firmware, and recalibrating—you’ll maintain accurate ink level readings and avoid misleading low ink alerts.

    This troubleshooting approach helps ensure your Epson printer reliably reflects the true ink status, preventing unexpected interruptions during printing.

    Why Regular Ink Level Checks Save You Printing Hassles

    You’ll avoid those annoying, unexpected print interruptions by regularly checking your Epson printer’s ink levels. When you stay on top of your ink, your documents come out clear and vibrant every single time. Plus, this simple habit makes sure your printing runs smoothly and hassle-free. It’s really an easy way to keep things moving without a hitch.

    Prevent Print Interruptions

    How often do you check your Epson printer’s ink levels before starting a big print job? Regularly checking ink levels is key to preventing print interruptions and ensuring smooth printing sessions. By staying on top of ink status, you can avoid unexpected pauses caused by running out of ink mid-task.

    Here’s how checking ink levels helps you prevent print interruptions:

    Receive a low ink warning early, so you can replace cartridges before they run dry. Maintain consistent printer maintenance, extending your Epson printer’s lifespan. And you can avoid faded or incomplete prints, protecting your print quality and professional output.

    Maintain Print Quality

    Because low ink levels can cause faded or streaked prints, regularly checking your Epson printer’s ink guarantees you maintain vibrant, consistent colors. When you check ink levels frequently, you can replace cartridges before they run out, ensuring every print job meets your quality expectations.

    Epson printers rely on genuine Epson ink and up-to-date printer firmware to deliver peak performance, so staying aware of ink status helps prevent damage to printer heads caused by low ink. This proactive approach saves you from frustrating interruptions and wasted time.

    Frequently Asked Questions

    How Often Should I Replace My Epson Printer’s Ink Cartridges?

    You should replace your Epson ink cartridges when the ink cartridge lifespan nears its end, usually around 10-15% ink remaining. How often you replace them depends on your refill frequency and print volume.

    Proper ink cartridge storage helps prevent ink drying time issues that affect color accuracy. Always use cartridges with good quality and compatibility to maintain print quality.

    Regularly monitoring your ink levels guarantees you swap cartridges before print quality drops or errors appear.

    Can I Use Third-Party Ink Cartridges With My Epson Printer?

    About 60% of Epson users consider third party ink to save on ink pricing. You can use third party ink, but ink compatibility and cartridge quality vary widely.

    Alternative brands and refill options might seem cheaper, but they often reduce ink lifespan and cause errors. Epson printers may reject non-genuine cartridges, affecting performance.

    To avoid issues, stick with genuine ink or carefully research compatible alternatives before buying third party ink.

    What Should I Do if My Printer Won’T Recognize New Ink Cartridges?

    If your printer won’t recognize new ink cartridges, first double-check cartridge compatibility and confirm proper cartridge installation. Clean the ink sensor and gold contacts to fix sensor issues that might block ink recognition.

    Try a printer reset by turning it off, unplugging it, then turning it back on. Also, update your printer’s firmware to improve ink sensor detection. These steps usually resolve most cartridge recognition problems quickly.

    How Do I Reset the Ink Level Counter on My Epson Printer?

    To reset the ink counter on your Epson printer, start by accessing the ink level indicators through the printer’s control panel or ink monitoring tools software. Use Epson’s official ink level software or maintenance utility to find the reset ink counter option.

    After replacing cartridges, select it to clear printer ink alerts and update cartridge status. If that doesn’t work, try pressing specific button combos or consult your manual for troubleshooting ink issues.

    Think of your Epson printer as a ship steering through ink seas. Epson offers warranty coverage to keep you afloat, covering ink cartridge compatibility issues and some ink leak problems.

    However, watch out for warranty exclusions like third-party ink use. If you face trouble, follow the warranty claim process to avoid repair costs.

    You can also explore extended warranty options for extra peace of mind and better service coverage on your ink system.

    Conclusion

    Checking your Epson printer’s ink levels might seem like a small task, but skipping it can lead to unexpected print failures. On the flip side, staying on top of ink levels using software, apps, or the control panel keeps your prints flawless and stress-free.

    Don’t wait for low ink alerts to surprise you. Regular checks save time, money, and frustration. It’s a simple habit that makes a world of difference in your printing experience.

  • How to Change Ink on Epson Printer in 10 Easy Steps

    How to Change Ink on Epson Printer in 10 Easy Steps

    To change ink on your Epson printer, first identify the correct cartridge for your model and power on the printer.

    Open the cover and wait for the print head to stop moving.

    Remove old cartridges carefully, then shake and unpack new ones without touching the chip.

    Insert firmly until they click, close the cover, and start the ink charging.

    Clean the print head afterward to maintain quality, and troubleshoot any issues to keep your printer running smoothly.

    Keep going to learn helpful tips for longer cartridge life.

    Identify the Right Ink Cartridge for Your Epson Printer

    check printer model compatibility

    How do you find the right ink cartridge for your Epson printer? Start by checking your printer’s model number. This helps you determine the compatible ink cartridge series, such as Epson 220XL or 252.

    Next, look closely at the labels and markings on your current cartridges to identify the specific model number and ink type. This guarantees you pick the correct cartridge that fits and works properly.

    You can also consult your printer manual or official Epson resources online to verify compatible ink options for your model. Keep in mind, Epson printers may vary in cartridge design. Some use refillable ink tanks instead of traditional cartridges, so identifying your printer’s system is vital.

    Always opt for original Epson ink cartridges or verified compatible ink to avoid performance issues. Steering clear of unverified third-party cartridges helps maintain print quality and printer longevity.

    Power On and Prepare Your Epson Printer for Replacement

    When should you power on your Epson printer to prepare it for ink replacement? You should power on your Epson printer at the very beginning of the process. This guarantees the printer is ready, and the print head will automatically move to the replacement position for easy access. Follow these steps to get started:

    1. Press the power button and wait until the power light stays steady, indicating the printer is fully powered on.
    2. Open the printer cover or lift the scanner unit carefully to reveal the ink cartridges.
    3. Watch for the print head’s movement as it shifts to the cartridge replacement position; this confirms the printer is ready.
    4. Avoid turning off or unplugging the printer during this phase to prevent misalignment or recognition errors.

    Access Epson Print Head and Cartridge Holder

    accessing print head safely

    To access the Epson print head and cartridge holder, start by lifting the scanner unit carefully to expose the internal components. Make sure your printer is powered on so the print head can automatically move to the cartridge replacement position.

    This is crucial because you shouldn’t try to move or touch the print head or the flat white cable inside, as it can cause damage. Once the print head stops moving and stays still, open the cover behind the scanner bed to reveal the cartridge holder and print head assembly.

    This lets you safely access the print head for cartridge replacement without risking harm to the internal parts. By following these steps, you’ll be ready to proceed with the cartridge replacement confidently and efficiently, keeping your Epson printer in good working order.

    Remove Old Ink Cartridges Safely

    Once the print head is in position, you’ll want to carefully squeeze the tab on the old ink cartridge and lift it straight up to remove it without causing any spills. When you remove the ink cartridges from your Epson printer, handle them gently to avoid ink leaks. Avoid touching the gold contact points or nozzles, as this can damage the cartridge or cause recognition problems later.

    For safety and proper disposal, follow these steps:

    1. Wear gloves if you want to keep ink off your skin.
    2. Squeeze the tab and lift the cartridge straight up. Don’t wiggle it side to side.
    3. Place the used cartridges on a paper towel or in a container to catch any drips.
    4. Dispose of the old cartridges responsibly, following your local recycling guidelines.

    Unpack and Prepare New Epson Ink Cartridges

    shake gently avoid contact

    Before you open the package, give the new Epson ink cartridge a gentle shake about four to five times. This helps mix the ink evenly inside.

    When you take the cartridge out, handle it with care and try not to shake it anymore to avoid any spills. Also, make sure you don’t touch the green chip or contacts—this keeps the cartridge working just right.

    Shake Cartridges Gently

    Although it might seem simple, shaking your new Epson ink cartridges gently 4-5 times before opening guarantees the ink inside is evenly distributed. This step assures consistent ink flow and prevents air bubbles that might affect print quality. When you shake the cartridge, use a gentle, controlled motion to avoid damaging it.

    Follow these steps to shake your new cartridge properly:

    1. Hold the cartridge upright.
    2. Shake gently 4-5 times to evenly distribute the ink.
    3. Avoid vigorous shaking to prevent leaks.
    4. Handle carefully to protect the contacts and avoid spillage.

    Remove Packaging Carefully

    Three simple steps will help you remove the packaging of your new Epson ink cartridges safely. First, keep the cartridges in their original packaging until you’re ready to install, as this helps protect the ink and maintain cartridge reliability.

    Next, carefully open the packaging without shaking or dropping the cartridge to prevent ink spills or damage. Finally, gently remove the yellow tape covering the cartridge’s ink outlet. Make sure to remove this tape completely, but avoid touching the nozzles or contacts to prevent contamination or print quality issues.

    Avoid Touching Chips

    Why should you avoid touching the green chip on your new Epson ink cartridge? Touching the chip can transfer oils or dirt, which may cause the printer to misread the cartridge. This can lead to installation errors or poor print quality.

    To ensure a smooth cartridge installation, handle the cartridge carefully by its edges, avoiding the chip area altogether. Follow these tips to prevent damage:

    1. Hold the cartridge by the sides, never touch the green chip.
    2. Remove the yellow tape covering the contacts carefully without touching the chip.
    3. Keep the chip area clean and free from fingerprints or debris.
    4. Handle cartridges gently to maintain proper contact and reliable recognition.

    Install New Ink Cartridges Step-by-Step

    Before installing the new ink cartridges, gently shake each one four to five times to help the ink flow properly. Next, carefully remove the cartridge from its packaging. Be sure to remove the yellow tape on the side without touching the green chip or nozzles to avoid damage.

    Now, take the ink cartridge and insert it into the designated slot in your Epson printer. Push it firmly until it clicks into place, and make sure the cartridge is securely seated. Repeat this process for each cartridge you need to replace.

    After installing all cartridges, close the scanner unit gently. This step guarantees everything is set for the printer to recognize the new ink cartridges. Remember, handling the cartridges carefully during installation prevents leaks or errors, keeping your printer functioning smoothly.

    Following these steps will help you install the ink cartridges correctly and get your Epson printer ready for use.

    Start the Ink Charging Process

    Once you’ve installed the new cartridges, press the ink symbol button to start the ink charging process. This action will initiate the ink charging sequence specific to your printer model.

    The printer automatically begins charging, which usually takes between 1.5 and 3 minutes. During this time, the power light may flash, and you’ll see the print head move to the correct position. Don’t turn off or unplug the printer while charging, as this can cause ink waste or errors.

    Here’s what to expect:

    1. Press the ink symbol to initiate ink charging.
    2. Watch for the power light flashing during the process.
    3. Observe the print head moving to align ink flow.
    4. Wait until the power light stops flashing and stays steady.

    Once the power light is steady, the ink levels are set, and your Epson printer is ready for use.

    Clean the Print Head After Replacement

    Although you’ve just replaced the ink cartridges, cleaning the print head is essential to prevent clogs and maintain sharp print quality. After you replace ink in your Epson printer, running a head cleaning cycle is the quickest way to perform print head cleaning.

    Access this option through the maintenance menu or control panel. The cycle usually takes 2 to 5 minutes, and you might need to repeat it if print quality doesn’t improve. Regular print head cleaning after ink replacement guarantees proper ink flow and prolongs the print head’s lifespan.

    If the automatic cleaning doesn’t fully resolve issues, you can clean the print head manually by gently wiping it with a lint-free cloth dampened with distilled water or isopropyl alcohol. Whether you use Epson ink cartridges or refilled ones, incorporating print head cleaning into your routine right after ink replacement helps keep your prints crisp and your printer running smoothly.

    Troubleshoot Common Epson Ink Cartridge Issues

    If your Epson printer isn’t recognizing the ink cartridge, first check to make sure it’s properly seated. Sometimes, just removing it and reinstalling it a few times can help the printer detect it correctly.

    Also, take a moment to clean the gold contact points on both the cartridge and the printer. This can often fix communication issues between the two.

    If you’re seeing ink level errors or warnings, don’t worry too much. You can usually bypass these by pressing “Proceed” on your printer. And if your print quality starts to look off, running a head cleaning cycle might do the trick.

    Cartridge Recognition Problems

    When your Epson printer doesn’t recognize an ink cartridge, it’s usually because the cartridge isn’t seated properly or the contacts are dirty. To fix cartridge recognition errors, start by ensuring the ink cartridge clicks firmly into place.

    Next, clean the gold contact points on both the cartridge and inside the printer with a lint-free cloth. If the problem persists, remove and reinsert the cartridge several times, making sure it’s aligned correctly.

    Avoid touching the chip or nozzles, as oils can cause recognition issues. Finally, if your Epson printer still rejects the cartridge, try resetting the ink counter or using a reset utility.

    Follow these steps to solve common cartridge recognition problems:

    1. Firmly seat the cartridge until it clicks
    2. Clean contact points thoroughly
    3. Reinsert cartridge multiple times
    4. Reset the printer’s ink counter

    Ink Level Errors

    Cartridge recognition issues often lead to other printer alerts, such as ink level errors. These errors usually happen when your Epson printer senses an empty cartridge or low ink supply, triggering warnings on the screen.

    To fix this, you can try replacing the Epson cartridge or resetting ink level indicators using printer software. Sometimes, dirty contacts on the cartridge or inside the printer cause false readings, so running a cleaning cycle or manually cleaning the contacts can help.

    Keep in mind, firmware updates may block third-party cartridges, leading to persistent ink level errors even with full cartridges. If warnings continue, you might need to reset ink level counters with specialized tools.

    Addressing these issues quickly ensures your printer accurately monitors ink supply and avoids unnecessary interruptions.

    Maintain Ink Cartridges for Longer Printer Life

    How often do you check your Epson printer’s ink levels? Keeping a close eye on ink cartridges helps you avoid running completely dry, which can damage the printhead. To maintain ink cartridges and extend your Epson printer’s life, follow these essential tips:

    Regularly checking your Epson printer’s ink levels prevents damage and keeps your printer running smoothly.

    1. Regularly check ink levels through the LCD menu to know when to replace ink or refill ink cartridges promptly.
    2. Store ink cartridges in their original packaging or upright in sealed containers to keep the ink fresh.
    3. Use only recommended ink types for your Epson model to ensure print quality and cartridge longevity.
    4. Perform printhead cleaning and wipe contacts periodically to prevent clogs and maintain consistent ink flow.

    Frequently Asked Questions

    Can I Use Third-Party Ink Cartridges With My Epson Printer?

    Yes, you can use third-party brands as compatible alternatives, but you should check cartridge compatibility with your Epson model first. These alternatives often offer better price comparison savings, sometimes up to 77%.

    Keep in mind ink quality can vary, so read reviews before buying. Follow installation tips carefully to avoid errors, and be aware using third-party ink might raise warranty concerns. Always weigh cost savings against potential risks for your printer.

    How Do I Recycle Used Epson Ink Cartridges?

    Wondering how to handle your used Epson cartridges? You’re in luck. Epson’s cartridge recycling programs make eco-friendly disposal easy.

    You can find designated recycling locations or use prepaid mailing labels for cartridge collection. Don’t just toss them. By participating in cartridge refurbishing and recycling programs, you reduce environmental impact considerably.

    Check Epson’s website for detailed steps and help to follow local rules, ensuring your cartridges are responsibly recycled every time.

    What Should I Do if My Epson Printer Shows a Paper Jam Error?

    If your Epson printer shows a paper jam error, start by inspecting the printer tray and properly loading paper to avoid jams. Carefully clear jam errors by opening the cover and gently removing stuck paper, cleaning the paper path as needed.

    Use quality paper within recommended specs to help with paper jam prevention. Also, troubleshoot the jam sensor by checking for debris or misaligned parts. Regularly cleaning and proper paper loading keep your printer running smoothly.

    How Often Should I Update My Epson Printer’s Firmware?

    You should update your Epson printer’s firmware only when necessary, like for security patches or fixing ink cartridge compatibility issues. Regularly check your printer ink levels and run ink quality testing to decide if updates might help.

    Firmware updates can improve ink cartridge installation or replacing ink cartridges, but avoid unnecessary updates to prevent ink cartridge troubleshooting problems. Also, keep ink cartridge storage in mind to maintain performance between updates.

    Can Ink Cartridges Expire if Unused for a Long Time?

    Yes, ink cartridges can expire if unused for a long time. Ink expiration happens due to dye degradation and loss of ink stability inside the cartridge.

    Even unopened cartridges have a limited shelf life, usually 1 to 2 years, depending on storage conditions. Proper storage in a cool, dark place and keeping cartridges upright helps maintain sealing and slows down ink breakdown.

    Once the sealing is compromised, ink quality drops, causing print issues with unused cartridges.

    Conclusion

    Changing your Epson ink cartridge is straightforward when you follow the steps carefully. For instance, Sarah, a small business owner, avoided costly downtime by regularly replacing her cartridges and cleaning the print head. This routine ensured sharp prints every time.

    By staying proactive and maintaining your cartridges, you’ll extend your printer’s life and keep your documents looking professional. So don’t hesitate. Keep your Epson running smoothly with these simple, effective steps.

  • How to Change HP Ink Cartridge in 7 Easy Steps

    How to Change HP Ink Cartridge in 7 Easy Steps

    To change your HP ink cartridge in 7 easy steps, first find the right cartridge for your printer model and check ink levels.

    Power off and unplug your printer, then gently open the ink access door.

    Remove the old cartridge carefully to avoid spills.

    Unpack your new cartridge without touching contacts, then install it firmly until it clicks.

    Close the door and run a test print to ensure everything works.

    Following this guarantees smooth printing.

    There’s more to help you keep your printer in top shape.

    Find the Right HP Ink Cartridge for Your Printer

    find correct hp ink cartridge

    Before replacing your HP ink cartridge, you’ll need to find the exact cartridge that fits your printer model. Start by checking your printer’s model number, usually located on the front or inside the ink cartridge door. This helps you find the right cartridge without guesswork.

    Next, visit the HP official website or consult your user manual to identify the specific ink cartridge recommended for your printer. You can also use your printer’s control panel or software to check current ink levels and see which cartridge requires replacement.

    Visit HP’s website or use your printer’s software to find the right cartridge and check ink levels.

    Make certain to choose genuine HP cartridges or verified third-party options that meet HP’s quality standards. This guarantees compatibility and maintains print quality.

    Also, confirm the type of ink you need, whether black, tri-color, or photo, to avoid installing the wrong cartridge. Taking these steps helps you replace your ink smoothly and keeps your printer running efficiently.

    Prepare Your Printer Safely Before Changing Ink

    After you’ve identified the right HP ink cartridge for your printer, you’ll want to prepare your device to change the ink safely. First, make sure your printer is on and has cooled down if you’ve used it recently. This prevents burns or damage during the process.

    Next, turn off your printer and unplug it from the power source. This step is vital to avoid any electrical hazards while handling the cartridges. Once unplugged, open the ink cartridge access door gently. Don’t force it, as that could damage the mechanism.

    Handling the cartridges carefully will help prevent spills and damage later on. By following these precautions, you’ll create a safe environment to replace your ink cartridges efficiently and avoid unnecessary risks. Taking these simple but essential steps ensures your printer stays in good condition and ready for the next phase of ink replacement.

    Remove the Old HP Ink Cartridge Without Spills

    careful cartridge removal technique

    To remove the old HP ink cartridge without spills, start by carefully opening the ink cartridge door and waiting for the cartridges to stop moving completely. Place a paper towel or disposable cloth under the cartridge area to catch any accidental drips.

    Next, gently press down on the old cartridge to release it from its slot. Be sure not to tilt or shake it, as this can cause ink to spill. Hold the cartridge upright while pulling it out slowly to avoid leaks.

    Avoid touching the electrical contacts or nozzles on the cartridge, as this can contaminate the ink and cause issues with your printer. Handling the cartridge carefully guarantees a clean removal and prepares you for installing your new HP ink cartridge without problems.

    Following these steps helps keep your workspace tidy and protects your printer’s functionality during the ink replacement process.

    Unpack and Inspect Your New HP Ink Cartridge

    When you get your new HP ink cartridge, start by carefully unpacking it. Be sure to take off all the protective materials, but handle it gently so you don’t accidentally damage anything.

    Next, take a good look at the cartridge. Check for any leaks, cracks, or parts that might be missing.

    Before you go any further, it’s a good idea to double-check that this cartridge is the right one for your printer. That way, you’ll avoid any compatibility issues down the line.

    Check Cartridge Packaging

    How do you guarantee your new HP ink cartridge is ready for use? Start by carefully unpacking the new cartridges from their packaging. Make sure you remove all protective tapes and seals without damaging the cartridge.

    Next, inspect the packaging itself. Check the expiration or manufacturing date to confirm the cartridge’s freshness. Also, verify that the cartridge model number matches your printer’s specifications to avoid compatibility issues.

    When handling the cartridge, hold it by the edges to avoid touching the electrical contacts or nozzles, which could affect print quality. By thoroughly checking the cartridge packaging and inspecting your new cartridges, you’ll secure a smooth installation and maintain your printer’s peak performance.

    Inspect For Damage

    After confirming your new HP ink cartridge matches your printer’s model and removing all protective tapes, it’s important to inspect the cartridge for any visible damage. Carefully unpack the cartridge, handling it by the edges to avoid contaminating the ink or damaging the nozzles and contacts.

    Take a close look to inspect for damage such as cracks, leaks, or broken parts. Also, verify the ink nozzles and electrical contacts are clean and free from debris or packaging residues.

    This step helps prevent printing issues and guarantees maximum performance. By thoroughly inspecting new ink cartridges before installation, you reduce the risk of malfunctions and keep your printer running smoothly.

    Always take this step seriously to maintain print quality and cartridge longevity.

    Install the New HP Ink Cartridge Correctly and Securely

    insert click align close

    Now, go ahead and carefully insert the new ink cartridge into the correct slot. You’ll know it’s in place when you hear a click—that means it’s secure. Just be sure the electrical contacts line up properly so you don’t run into any connection issues.

    Once it’s seated, close the cartridge door completely. This lets your printer recognize the new cartridge and get ready to print. Easy, right?

    Proper Cartridge Insertion

    When installing a new HP ink cartridge, make sure you align the cartridge’s contacts with the printer’s electrical contacts before pressing it firmly into place. Proper cartridge insertion is key to installing ink cartridges without errors.

    Match the color labels on the cartridge to the corresponding slots. Push the cartridge until you hear a click, confirming it’s seated correctly. Here’s a quick guide:

    Step Action Tip
    Align contacts Match electrical points Avoid touching contacts
    Match colors Color label to slot Double-check the label
    Press firmly Push until click Ensure cartridge is secure

    Following these steps guarantees a smooth installation process and prevents errors during printing.

    Confirm Secure Placement

    Once you’ve aligned the cartridge properly and pressed it firmly into place, make sure it clicks securely to confirm it’s locked in. Gently press down until you hear that click, signaling the cartridge is securely seated in its slot.

    Double-check the alignment with the contact points and confirm the cartridge sits flush with the printer. This step is vital to avoid ink flow issues or errors.

    After confirming the cartridge is secure, close the ink cartridge door completely to prevent any movement during printing. Finally, run a test print to verify the cartridge installs correctly and the ink flows smoothly.

    Taking these steps guarantees your new HP ink cartridge is installed properly and ready for use without any hiccups.

    Run a Test Print to Confirm Proper Installation

    Although you’ve just installed the new ink cartridge, you should run a test print to confirm it’s seated correctly and working properly. Most HP printers will either print a test page automatically or prompt you to do so. Just follow any on-screen instructions to run a test print on your HP printer.

    After installing a new ink cartridge, run a test print to ensure proper installation and functionality.

    Before printing, make sure the printer has completed any initialization or recognition processes to guarantee accurate results.

    Once the test page prints, carefully examine it for clear text, vibrant colors, and the absence of streaks or missing sections. These signs indicate the cartridge is properly installed and the print head is aligned.

    If you notice any issues, turn off the printer and recheck the cartridge seating. You might also want to clean the print heads or reinstall the cartridges to fix the problem.

    Running a test print is a quick way to verify your printer is ready to produce high-quality documents.

    Keep Your Printer Running Smoothly With Regular Maintenance

    To keep your HP printer running smoothly, you should perform regular maintenance that includes cleaning print heads and monitoring ink levels. Use the printer’s built-in cleaning utility to prevent clogs and maintain consistent print quality.

    Regularly check ink levels so you can replace cartridges before they run out, avoiding any printing delays. Don’t forget to unplug the printer before cleaning the exterior or handling cartridges to ensure safety.

    Keeping your printer free of dust and debris also helps prevent print defects and mechanical problems. By performing these simple tasks routinely, you not only improve print results but also extend your printer’s lifespan.

    Proper care and timely attention to maintenance reduce the chance of costly repairs or replacements. Staying proactive with these steps guarantees your printer stays reliable and efficient every time you need it.

    Frequently Asked Questions

    How Do I Recycle Used HP Ink Cartridges?

    To recycle your used HP ink cartridges, visit the HP Planet Partners website and create an account. You’ll order free recycling envelopes or find local cartridge recycling drop-off points.

    Once your ink cartridges are empty, pack them securely for ink cartridge disposal using the prepaid shipping labels or drop them off at a collection site. This way, you help reduce environmental waste and support HP’s sustainable cartridge recycling program efficiently.

    Can I Use Third-Party Ink Cartridges Safely?

    Yes, you can use alternative ink cartridges safely if you prioritize cartridge security. Make sure the third-party cartridge is specifically designed for your HP printer model and comes from a reputable brand with positive reviews. This helps prevent damage like clogs or leaks.

    Keep in mind, though, that using alternative ink might void your warranty. So weigh the cost savings against potential risks before you decide.

    What Should I Do if the Cartridge Is Not Recognized?

    Think of your printer like a stubborn friend refusing to recognize a new face at a party. If your cartridge isn’t recognized, start with recognition troubleshooting: turn off the printer, unplug it, then restart to trigger a cartridge reset.

    Clean contacts gently with isopropyl alcohol. Dirty connections often cause issues. Removing any protective tape is essential.

    If problems persist, updating your printer’s firmware can help it “remember” the cartridge correctly.

    How Long Do HP Ink Cartridges Typically Last?

    HP ink cartridges typically last between 200 to 300 pages for standard models, while high-yield versions can print 600 to 1,000 pages. Your ink cartridge lifespan depends on ink consumption rates, which vary based on what and how much you print.

    If you print a lot of color or high-quality images, you’ll use ink faster. Adjusting your print settings and maintaining your printer helps you get the most out of each cartridge.

    Are HP Ink Cartridges Compatible With All Printer Models?

    No, HP ink cartridges aren’t compatible with all printer models. You’ll find cartridge variations like HP 62, 63, or 64 designed specifically for certain printers.

    Printer compatibility is essential because using the wrong cartridge can cause errors or damage. Always check HP’s compatibility guides to match your printer model with the right cartridge.

    Don’t assume third-party options will work. Verify their compatibility to avoid problems.

    Conclusion

    Changing your HP ink cartridge might seem like a small task, but it’s a wonderful opportunity to give your printer a little TLC. By following these simple steps, you’re not just swapping cartridges, you’re ensuring your printer stays in tip-top shape and continues producing vibrant prints.

    A little care goes a long way in keeping your printer happy and your documents looking their best. So, embrace the process. It’s a small investment for lasting quality.

  • How to Bypass HP Instant Ink Step by Step

    How to Bypass HP Instant Ink Step by Step

    To bypass HP Instant Ink, first cancel your subscription and confirm via your HP account.

    Then disable web services and disconnect your printer from the internet to stop cloud syncing.

    Remove the printer from your HP account and perform a factory reset to clear Instant Ink settings.

    Use Wi-Fi Direct to connect without restrictions and manage firmware carefully to avoid automatic updates that may relock cartridges.

    Explore these steps closely to liberate more detailed guidance.

    How HP Instant Ink Cartridge Restrictions Work After Cancellation

    cartridge restrictions after cancellation

    Although you might expect to keep using your Instant Ink cartridges after canceling your subscription, HP’s firmware links these cartridges directly to your account and subscription status. When you cancel, HP’s servers communicate with your printer, triggering firmware restrictions that deactivate those cartridges.

    HP firmware disables Instant Ink cartridges upon subscription cancellation by linking them to your account status.

    This happens through cloud synchronization, meaning your printer regularly checks in with HP to enforce the cancellation status. As a result, even if you try to use your Instant Ink cartridges post-cancellation, they won’t work without technical workarounds.

    The firmware effectively locks them down, preventing further use unless you reactivate or re-enroll your printer with HP’s system. To keep printing after cancellation, you must replace Instant Ink cartridges with regular HP or third-party ones, as the firmware restrictions block the Instant Ink cartridges.

    Understanding these firmware restrictions is essential before you proceed with any workaround to bypass HP Instant Ink after cancellation.

    Confirm Your Instant Ink Subscription Cancellation

    After understanding how HP’s firmware restricts your Instant Ink cartridges post-cancellation, the next step is to confirm that your subscription has been fully canceled. Start by logging into your HP account either through the HP Smart app or the online portal. Check your subscription status; it should clearly show as canceled or inactive.

    Next, look for a confirmation email from HP. This serves as proof that your cancellation request was processed. Make sure the cancellation date is set before the upcoming billing cycle to avoid any unexpected charges.

    If you don’t see confirmation, repeat the cancellation process or contact HP support. Finally, disconnect your printer from the internet and HP servers to prevent it from automatically recognizing any active subscription.

    Taking these steps will ensure your Instant Ink subscription is officially canceled and won’t interfere with your printer’s functionality going forward.

    Disable Instant Ink Features Before Cancelling Your Subscription

    disable cloud services first

    Before canceling your Instant Ink subscription, you should disable key features like Web Services and ePrint on your printer to stop it from communicating with HP’s servers. Start by accessing your printer’s menu or using the HP Smart app to turn off these cloud-based services.

    Disabling Web Services ensures your printer won’t automatically send usage data to HP, which is essential before you cancel. Next, disconnect your printer from any Wi-Fi or Ethernet networks to halt any data exchange related to Instant Ink.

    To be thorough, consider performing a factory reset after disabling these features; this helps remove any lingering Instant Ink settings embedded in the device. Make sure all online and cloud-connected features are fully turned off.

    Remove Your Printer From Your HP Account and Stop Cloud Sync

    Once you’ve disabled Web Services and disconnected your printer from the network, the next step is to remove the printer from your HP account to stop any cloud synchronization. Log into your HP account online or through the HP Smart app, then locate your registered devices.

    Select your printer and remove it from the list to sever its link with your account. This action helps disconnect your device from HP’s cloud services, preventing any automatic cloud sync that could re-enable Instant Ink settings.

    Make sure your printer is also disconnected from Wi-Fi and that features like ePrint remain disabled. After removal, avoid reconnecting the printer to the internet to prevent it from syncing with HP servers again.

    Instead, use Wi-Fi Direct or a wired connection for local printing. By removing your printer from your HP account and disconnecting it from cloud communication, you effectively stop cloud sync and enhance control over your printer’s settings.

    How to Factory Reset Your Printer to Clear Instant Ink Settings

    reset printer to clear settings

    If you want to completely clear Instant Ink settings from your HP printer, performing a factory reset is essential. This reset wipes all your custom settings, including Instant Ink preferences and network configurations.

    To do this, find the “Reset” or “Restore Defaults” option in your printer’s menu or settings. Many HP models require you to turn off the printer, then hold specific buttons (like Wireless and Cancel) while powering it on.

    After the reset, reconnect to Wi-Fi but avoid enabling web services to stop Instant Ink from reactivating.

    Switch to Standard or Compatible Cartridges After Cancellation

    After resetting your printer to clear Instant Ink settings, the next step is to replace the deactivated Instant Ink cartridges with standard or compatible ones. When you cancel Instant Ink, your printer no longer recognizes those cartridges, so swapping them out is essential to resume printing without interruptions.

    Reset your printer, then replace deactivated Instant Ink cartridges with standard or compatible ones to keep printing uninterrupted.

    You can use genuine HP standard cartridges or compatible cartridges from third-party suppliers, depending on your preference and model compatibility.

    Keep these steps in mind:

    • Remove the Instant Ink cartridges carefully.
    • Insert standard cartridges or compatible cartridges designed for your printer.
    • Check that the printer firmware recognizes the new cartridges properly.
    • Stay current with firmware updates to maintain compatibility and avoid restrictions.

    Note that some firmware updates might lock out third-party cartridges, so regularly updating while ensuring compatibility is key. This approach lets you cancel Instant Ink and keep printing smoothly with your preferred cartridges.

    Bypass Cartridge Restrictions Using Wi-Fi Direct

    To bypass cartridge restrictions, first, disable your printer’s cloud sync. This will stop those automatic subscription checks from happening.

    Next, connect your device directly to the printer using Wi-Fi Direct. This creates a private link between your device and the printer without needing internet access.

    Disable Cloud Sync

    How can you bypass HP Instant Ink cartridge restrictions without relying on the cloud? To do this, you need to disable cloud sync by disconnecting your printer from the internet and HP servers. This cuts off the communication that enforces cartridge restrictions.

    Follow these steps:

    Access your printer’s settings menu and disable Web Services and ePrint features.

    Turn off Wi-Fi or unplug any network cables to disconnect from the internet.

    Enable Wi-Fi Direct on your printer to allow direct connections.

    Connect your device to the printer’s Wi-Fi Direct network instead of through your router.

    Connect Via Wi-Fi

    Disabling cloud sync cuts off HP’s control over your printer, but you still need a way to connect without triggering cartridge restrictions. To do this, enable Wi-Fi Direct on your HP printer by accessing the network settings and selecting the Wi-Fi Direct option.

    Your printer will broadcast a unique SSID that you can connect to directly from your computer or mobile device. After connecting, set your device’s network settings to a static IP or manually configure them to bypass internet restrictions.

    Use the printer’s IP address to access its embedded web server, where you can modify network or firmware settings if needed. Once done, reconnect your device to your regular Wi-Fi network to restore normal internet access.

    Risks of Firmware Downgrades When Bypassing Instant Ink

    While downgrading your printer’s firmware might seem like a quick way to bypass HP Instant Ink restrictions, you should be aware that it often voids your warranty and risks serious hardware problems. A firmware downgrade isn’t supported on all HP models, and forcing it can lead to permanent printer damage. You also lose access to crucial security updates, exposing your device to vulnerabilities. Using incorrect tools or firmware versions increases the chance of bricking your printer, leaving it unusable.

    Consider these risks before proceeding:

    • Firmware downgrade may void your warranty and prevent official support.
    • Hardware risks include permanent printer damage and malfunction.
    • Missing security updates can leave your printer vulnerable to exploits.
    • Temporary bypasses often get patched, requiring repeated risky downgrades.

    In short, the hardware risks and loss of security updates make firmware downgrades a dangerous solution for bypassing Instant Ink. So, proceed with caution.

    Managing Firmware Updates to Keep Cartridges Compatible

    You’ll want to keep a close eye on firmware updates because they can sometimes block third-party cartridges or fix important issues. It’s a good idea to stay informed about what each update does.

    Sometimes, disabling or postponing updates can help keep things compatible a bit longer. But just a heads-up—downgrading your firmware isn’t without risks, like possibly voiding your warranty.

    The best approach is to regularly check update logs. That way, you can make an informed call on when it’s smart to skip an update or when you should go ahead and install it based on how it might affect your cartridges.

    Firmware Update Impacts

    Because firmware updates on HP printers often disable third-party cartridges, you need to carefully manage these updates to maintain compatibility. Firmware updates related to HP Instant Ink frequently introduce restrictions that block non-HP cartridges, which impacts cartridge compatibility.

    To handle these updates wisely, disable automatic firmware updates via printer settings to avoid unexpected restrictions. You can also use specialized tools or network controls to block update servers.

    It’s a good idea to monitor HP forums for firmware versions that maintain third-party cartridge support. Just remember to balance avoiding updates with security risks, since outdated firmware can expose vulnerabilities.

    Downgrade Risks And Benefits

    Managing firmware updates doesn’t stop at disabling automatic installs. You might consider downgrading your printer’s firmware to keep using third-party cartridges. A firmware downgrade can restore cartridge flexibility by removing restrictions from newer updates, letting you bypass Instant Ink limitations and save on proprietary supplies.

    However, the risks are significant. If done improperly or on unsupported models, you could brick your printer or void its warranty. Not all HP printers allow firmware downgrades, and many updates are irreversible to enhance security.

    To minimize risks, use reliable tools and research the process thoroughly. Despite the benefits of regaining cartridge compatibility, be aware that a firmware downgrade is technically complex and might compromise your device’s stability. Proceed cautiously to weigh risks against rewards.

    Compatibility Monitoring Strategies

    While staying up to date with your printer’s firmware is important, you should actively monitor and control updates to prevent automatic locks on third-party cartridges. Managing firmware updates effectively guarantees continued compatibility and avoids disruptions.

    Focus on these key strategies:

    • Regularly check firmware updates via HP support or official channels for compatibility changes.
    • Disable automatic firmware updates in your printer’s settings or network to maintain control.
    • Keep a backup of your current firmware version to restore if an update restricts non-HP cartridges.
    • Use firmware downgrade tools cautiously, confirming they match your printer model to avoid issues.

    Tips to Avoid Future Instant Ink Restrictions on Your Printer

    To avoid future Instant Ink restrictions on your printer, you’ll want to take proactive steps before canceling your subscription. First, regularly update your printer’s firmware to prevent HP from locking features or cartridges after you stop the service.

    Before canceling, disable web services and perform a factory reset to remove cloud controls that could impose limitations remotely. Immediately disconnect your printer from the internet once you cancel to avoid any further remote updates or restrictions.

    Use genuine HP or reliable compatible regular cartridges, as firmware often detects and limits non-eligible ink types tied to Instant Ink. If you’re tech-savvy, consider cautiously downgrading your firmware with trusted tools to bypass newer restrictions, but be aware this may void warranties or cause issues.

    Frequently Asked Questions

    Can I Use Third-Party Cartridges Without Instant Ink Restrictions?

    You can use third-party cartridges without instant ink restrictions, but it depends on your printer model. Some compatible printer models allow third-party cartridges without issues, while others enforce restrictions through printer firmware updates.

    To avoid problems, you might need to disable updates or use ink refill kits designed for your printer. Keep in mind, firmware updates often reintroduce restrictions, so staying informed about your printer’s compatibility helps you avoid surprises.

    Will Bypassing Instant Ink Void My Printer’s Warranty?

    About 85% of printer issues stem from firmware or software modifications. Yes, bypassing Instant Ink will void your printer’s warranty because it involves altering printer firmware or software updates.

    These changes affect printer maintenance and ink cartridge compatibility, which manufacturers don’t cover once modified. If you tamper with the printer firmware to bypass restrictions, HP will likely refuse repairs, leaving you responsible for any damages or malfunctions.

    How Do I Know if My Printer Model Supports Bypassing Instant Ink?

    You’ll know if your printer supports bypassing Instant Ink by checking its model compatibility first. Start with model identification. Find your exact printer model and firmware version.

    Then, research online forums or HP support options to see if others have successfully bypassed that specific model. Keep in mind, firmware updates can change compatibility, so always verify the latest info before attempting any bypass method.

    Can I Still Print in Color After Bypassing Instant Ink?

    You absolutely can still print in color after bypassing Instant Ink. It’s like opening a treasure chest of vibrant possibilities! Just guarantee your cartridge installation involves compatible third-party or original HP cartridges to maintain excellent print quality.

    Adjust your printer settings accordingly, and be aware that ink compatibility plays a massive role in keeping colors sharp and accurate. With the right setup, you won’t sacrifice color vibrancy despite bypassing Instant Ink restrictions.

    Yes, you face legal implications if you bypass Instant Ink services. Doing so can violate service agreements you agreed to when setting up your printer.

    HP’s restrictions aim to protect their copyrighted technology, so bypassing them raises copyright concerns. You assume user liability for any consequences, including voided warranties or legal action.

    It’s important to understand these risks before attempting to circumvent HP’s system.

    Conclusion

    Did you know that over 60% of HP Instant Ink users face cartridge restrictions after cancellation? To truly bypass these limits, you’ll need to carefully disable features, remove your printer from your HP account, and consider a factory reset.

    While some opt for firmware tweaks or Wi-Fi Direct, be cautious of risks like bricking your device. Following these steps helps you regain control and avoid future restrictions, keeping your printing hassle-free and cost-effective.