Author: admin@glaciertattoo.com

  • Why Don’t Celebrities Sign in Blue Ink?

    Why Don’t Celebrities Sign in Blue Ink?

    You don’t see celebrities signing in blue ink because it’s much easier to forge and digitally reproduce, which can devalue the autograph.

    Blue ink’s high contrast makes scanning and copying a breeze, increasing the risk of counterfeit signatures flooding the market.

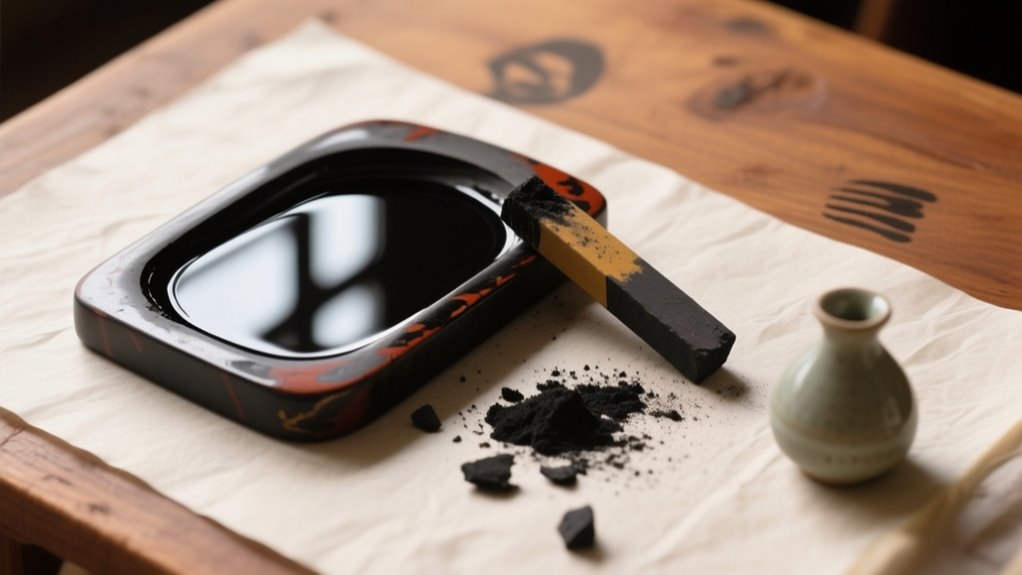
    Instead, black ink is preferred for its durability, resistance to fading, and difficulty to replicate.

    If you want to understand how these choices protect autograph authenticity and value, there’s more to uncover about the reasons behind this preference.

    Why Celebrities Avoid Signing in Blue Ink

    celebrities avoid blue ink

    Why do so many celebrities avoid signing in blue ink? You might not realize it, but blue ink signatures are often seen as easier to forge. When celebrities sign autographs in blue, these signatures can be quickly scanned and reproduced with modern technology.

    Many celebrities avoid blue ink as it makes their autographs easier to scan and forge with modern technology.

    This raises the risk of counterfeit autographs flooding the market. To protect their autographs’ value, many stars refuse to sign autographs in blue. Instead, they prefer black ink because it’s traditionally considered harder to copy or transfer.

    Although experts say blue ink isn’t inherently less secure, the longstanding preference for black ink helps fans and collectors authenticate signatures more confidently. So, when you see a celebrity avoiding blue ink, it’s not just a random choice. They’re actively helping prevent fraud.

    If you want a genuine autograph, you’ll often find that avoiding blue ink is one way celebrities guard their signatures against being duplicated.

    How Blue Ink Makes Autograph Forgery Easier

    Because blue ink offers high contrast against standard paper, it makes scanning and replicating signatures much easier for forgers. When you scan a signature in blue ink, the distinct color stands out sharply, allowing digital tools to capture every detail with precision.

    This high contrast enables counterfeiters to digitally overlay the signature onto other documents or items, creating convincing forgeries. You should know that blue ink signatures can be scanned and then transferred seamlessly onto different surfaces through printing, making them highly vulnerable.

    In contrast, black ink often blends more with the paper’s texture, complicating accurate scanning and reproduction. Anti-fraud experts frequently advise against blue ink for this reason. Its clarity in scans simplifies the copying process, making it easier for fake autographs to circulate.

    If you want to protect authenticity, understanding how blue ink facilitates forgery through easy scanning is paramount.

    How Ink Color Keeps Autographs Safe

    black ink enhances autograph security

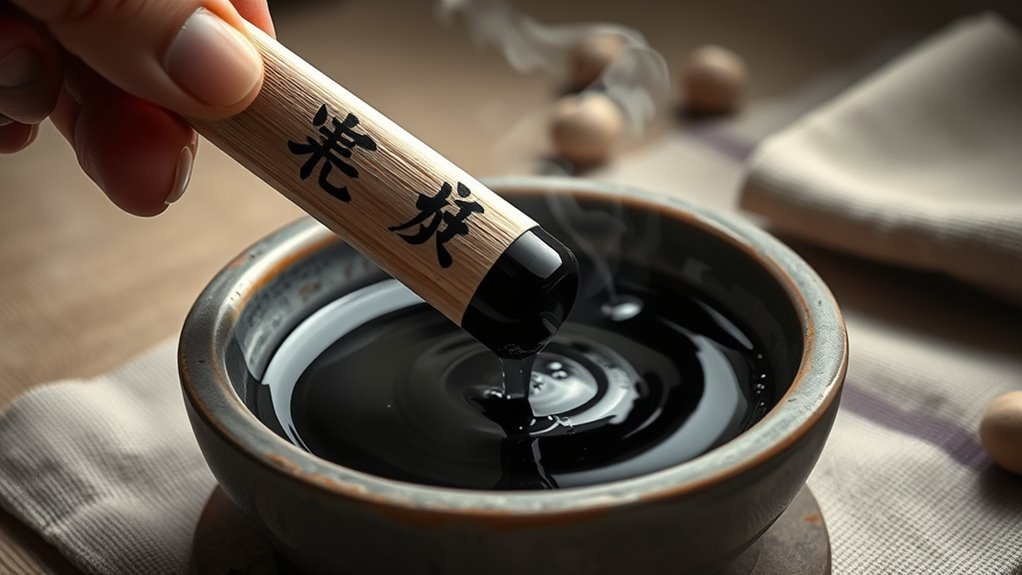
    Although blue ink may seem vibrant and eye-catching, black ink actually keeps autographs safer by making them harder to scan, copy, or digitally manipulate. When you sign with black ink, you reduce the chances of forgery because black ink’s contrast is less easily replicated by counterfeiters using modern technology.

    Blue ink signatures, on the other hand, are more vulnerable to being copied or altered since scanning devices and editing software often pick up blue ink more clearly. By choosing black ink, you help authenticate your signatures, making them tougher to reproduce without detection.

    This added layer of security protects the value and integrity of autographs, especially for celebrities who want to avoid unauthorized reproductions. While blue ink once had advantages in official documents, digital advances have diminished those benefits, pushing many to prefer black ink to keep their signatures safe and genuine.

    Claire Foy’s Blue Ink Refusal: What Happened

    Ever wondered why Claire Foy turned down a blue pen at Rockefeller Center? When a fan offered her a blue marker for signing, she clearly said, “I don’t do blue.” This moment was caught on video by photojournalist Michal Blank and quickly went viral.

    Instead of using the blue ink, Claire accepted a black marker, signed the autograph, and then handed the blue pen back to the fan. You might be curious why she refused blue ink so firmly. While Claire didn’t explain her choice, the incident sparked plenty of speculation.

    Some think it’s about how blue ink appears in photos or on documents, while others believe it’s a personal habit. Whatever the reason, her refusal highlights that even something as simple as the color of your signing pen can matter to celebrities.

    When you see Claire Foy’s autograph, you’ll know it’s never in blue ink.

    Why Black Ink Is the Best Choice for Signatures

    black ink ensures signature security

    When you choose black ink for a signature, you’re opting for clarity, durability, and security. Black ink offers higher contrast on most paper types, making your signatures stand out sharply and easier to verify.

    Choosing black ink ensures your signature is clear, durable, and easily verified on any paper.

    Over time, black ink tends to fade less than other colors, preserving the legibility and authenticity of your signature for years to come. This durability is vital for legal and official documents, where maintaining clear signatures is essential.

    Furthermore, black ink is tougher to scan and replicate accurately, providing an added layer of protection against forgery. By using black ink, you make it harder for counterfeiters to copy or transfer your signatures onto unauthorized items.

    Historically, black ink has been the standard for secure signatures, trusted by institutions and professionals alike. So, when it comes to signing important documents, black ink remains the best choice for reliable and secure signatures.

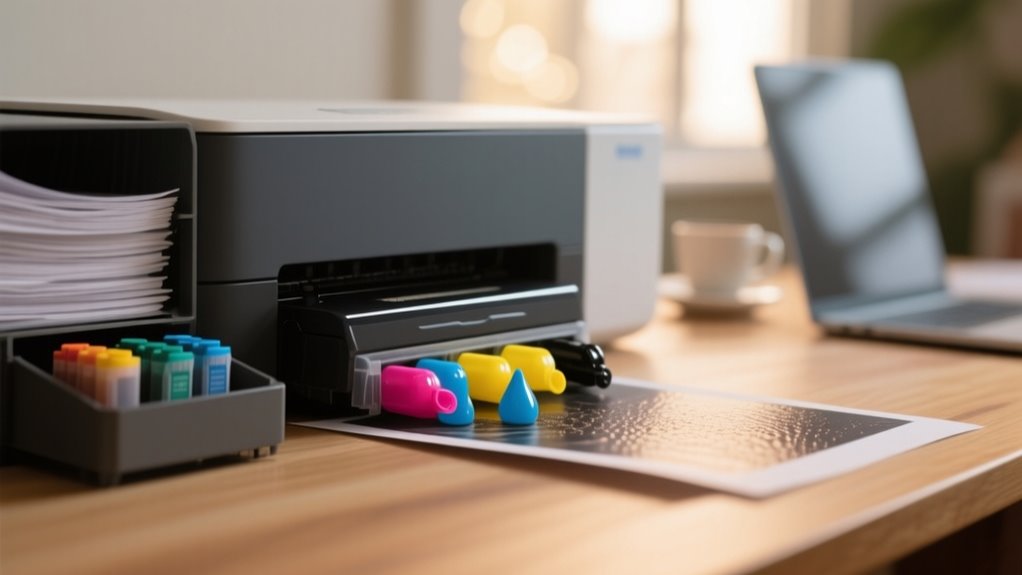
    How Forgers Exploit Blue Ink Signatures

    Because blue ink signatures can be easily scanned and digitally separated from their original documents, forgers often target them to create convincing fakes. When you scan a blue ink signature, digital tools let you isolate it cleanly, making it simple to forge and apply onto counterfeit items.

    Forgers exploit blue ink’s vulnerability by using image editing software to replicate signatures with high precision. This ease of scanning and printing makes blue ink a top choice for counterfeiters looking to produce fake memorabilia. Understanding how this works can help you recognize why celebrities avoid blue ink for signing.

    Step Action Why It Matters
    1 Scan blue ink signature Easy digital extraction
    2 Edit signature image Perfect replication possible
    3 Print on counterfeit Creates realistic forgeries
    4 Overlay on items Hard to detect fakes
    5 Sell as authentic Exploits trust in blue ink

    Why Ink Color Matters for Autograph Value

    You might not realize it, but the color of ink can actually make a big difference in an autograph’s value. Black ink, for example, offers better contrast and is harder to copy. This means it helps protect against forgery. So, when you choose black over blue, you’re giving the signature a boost in authenticity and resale potential.

    Ink Color Impact

    Although blue ink might seem like a harmless choice, it actually makes celebrity signatures easier to copy and forge. When you consider autograph value, ink color plays an essential role. Here’s why:

    1. Blue ink signatures are simpler to scan and reproduce, increasing forgery risks.
    2. Black ink resists accurate duplication through photocopying or scanning, preserving authenticity.
    3. The distinctiveness of black ink helps you verify genuine autographs, protecting their resale value.

    Forgery Prevention Benefits

    Ink color plays a significant role in preventing forgery and maintaining autograph value. When you choose black ink over blue ink, you make it harder for counterfeiters to replicate signatures.

    Blue ink is easily scanned and copied, increasing forgery risks and reducing autograph authenticity. Black ink signatures resist these scans, preserving the autograph’s originality and resale value.

    Here’s how ink color impacts forgery prevention:

    Ink Color Forgery Risk
    Black Low, hard to replicate
    Blue High, easily scanned
    Black Preserves authenticity
    Blue Susceptible to copying
    Black Standard anti-fraud measure

    Using black ink is a key tactic you’ll find celebrities rely on to protect their autographs from forgery.

    Why Celebrities Avoid Signing Autograph Blank Sheets

    You might not realize it, but when celebrities sign blank sheets, they actually put themselves at risk of forgery. These blank sheets can be easily copied or altered later on.

    And here’s the thing: when a signature doesn’t have any context—like a date, event, or photo—it’s much easier for counterfeiters to print fake images or messages over it. This makes the autograph less genuine and can really hurt its value.

    That’s why many stars avoid signing blank sheets altogether. They want to protect not just their reputation, but also the worth of their autographs. Makes sense, right?

    Risks Of Signing Blanks

    Why do celebrities refuse to sign blank sheets for autographs? It comes down to the risks involved with these blank pages. When you sign a blank sheet, you expose yourself to several dangers:

    1. Forgery: Blank sheets are prone to being copied or printed over, making it easier for counterfeiters to reproduce your autograph.
    2. Value loss: When images are printed over your signature, the autograph’s authenticity and resale value quickly diminish.
    3. Illegal reproduction: Signing blanks encourages unauthorized reproduction and resale, which damages your reputation and control over your signature.

    To protect their signatures, celebrities insist on signing official items only. This reduces the chances of forgery and preserves the autograph’s integrity. So, you see, avoiding blanks helps keep your autograph safe and valuable.

    Blank Sheet Forgeries

    Because blank sheets can be easily printed over with counterfeit images, celebrities often refuse to sign them. When you sign a blank sheet, forgers can use home printers to overlay fake pictures, turning your genuine autograph into a tool for creating convincing forgeries.

    This not only devalues your signature but also makes it less appealing to collectors and resellers who want authenticity. Using blue ink helps, but it’s no guarantee against these scams.

    Celebrities avoid signing blank sheets to stop their autographs from being exploited in unauthorized reproductions or fraudulent sales. You want your autograph to hold real value, so signing only on original posters or props, despite some fading issues, is safer than risking your signature ending up on easy-forged blank sheets.

    How Technology Affects Blue Ink Forgery Risks

    Although blue ink was once considered harder to forge, advances in scanning and digital editing have erased much of its security advantage. You might think blue ink causes a signature to stand out, but modern technology lets forgers easily replicate it. Here’s how technology affects the risks:

    1. High-resolution scanners capture fine ink details, but improvements in digital tools let you forge the signature seamlessly in blue or any color.
    2. Digital editing software allows overlays of signatures onto printed images, making forged blue ink signatures almost indistinguishable from originals.
    3. Photocopying and scanning reproduce blue ink signatures effortlessly, removing the ink color’s previous security edge.

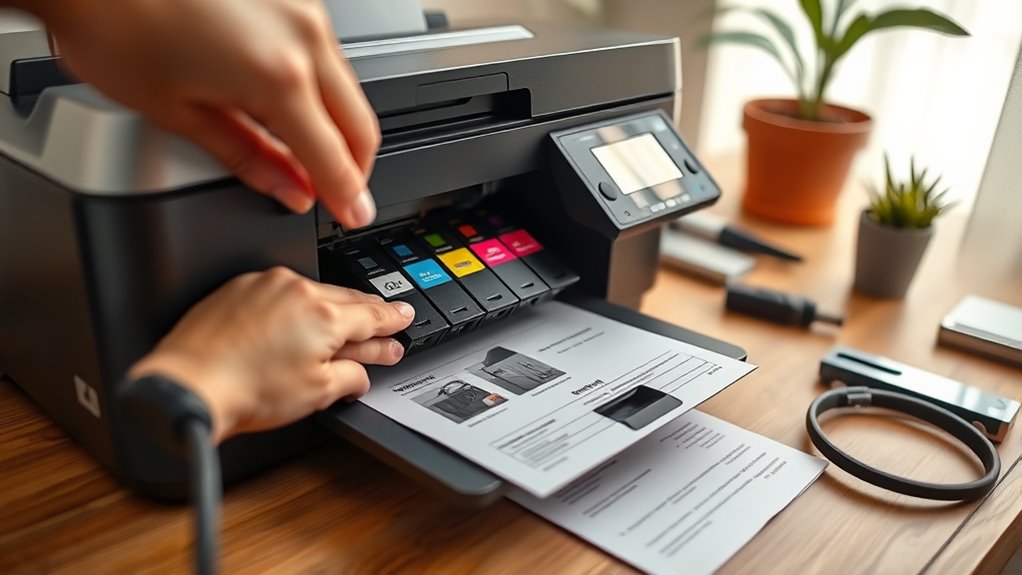
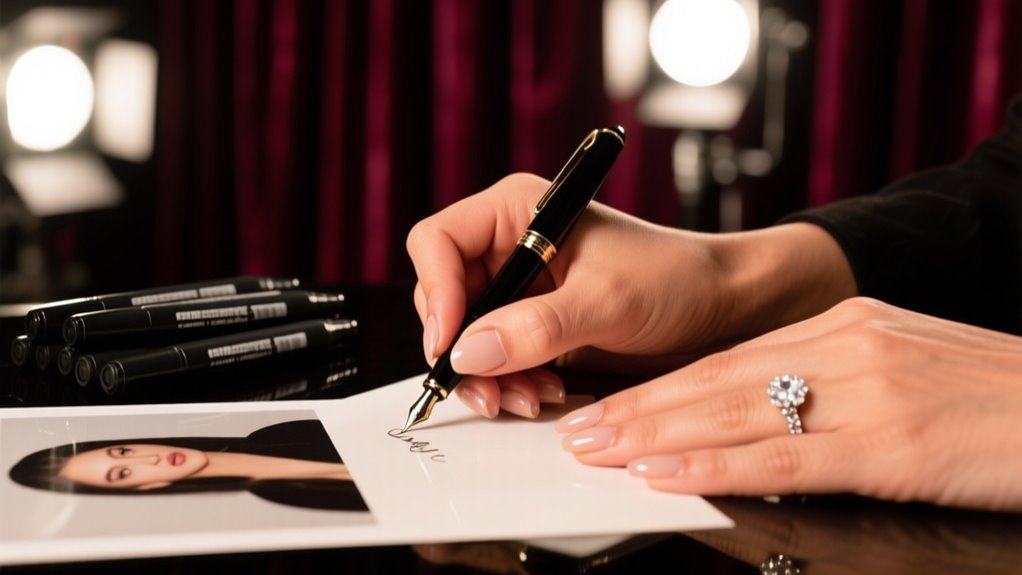
    Which Pen to Use When Getting Autographs

    When you’re asking for autographs, it’s always a good idea to bring a black pen. Celebrities usually prefer black ink because it looks more professional. Plus, black ink helps protect the signature from forgery, which is pretty important.

    You’ll want to choose a high-quality, permanent black marker to keep the autograph clear and long-lasting. That way, your signed item stays looking great for years to come.

    Preferred Ink Colors

    If you want an autograph that lasts and holds value, you’ll want to avoid blue ink. Celebrities generally choose black ink as their preferred ink because it offers several advantages over blue. Here’s why black ink is favored for signatures:

    1. Security: Black ink is harder to forge or duplicate, protecting the authenticity of the signature.
    2. Durability: It resists fading and scanning better, keeping the autograph clear and lasting longer.
    3. Authenticity: Black ink signals a genuine autograph, enhancing its collectible value.

    Many celebrities explicitly refuse to sign in blue ink to prevent counterfeiters from easily reproducing their signature. So, when you’re aiming for a valuable autograph, always opt for black ink as your go-to choice for the preferred ink color.

    Pen Selection Tips

    Choosing the right pen plays a big role in getting a signature that lasts and holds value. When it comes to pen selection, avoid blue ink since many celebrities refuse it to prevent forgery. Instead, bring a fine-tipped black permanent marker for a clear, authentic autograph that resists fading and tampering.

    Pen Type Best Use
    Fine-tipped marker Clear, lasting signatures
    Ballpoint pen Everyday casual autographs
    Gel pen Smooth writing, less fade
    Fountain pen Elegant but less practical
    Blue ink pen Often refused by celebrities

    Stick to black ink for secure, professional autographs. This pen selection strategy protects the autograph’s value and authenticity.

    Frequently Asked Questions

    Can Ink Color Affect a Celebrity’s Personal Brand Image?

    Yes, ink color can affect your personal brand image because signature consistency matters a lot. When you choose a specific ink, like black, it carries ink symbolism that conveys professionalism and trustworthiness.

    Sticking to one color helps your autograph become instantly recognizable, reinforcing your identity. So, by controlling these details, you boost how fans and collectors perceive you, making your brand stronger and more authentic through every signature you sign.

    Do Fans Prefer Black Ink Over Blue Ink for Autographs?

    If you’ve ever collected autographs, you’ll notice fans usually prefer black ink over blue. For example, a collector might avoid blue signatures on low-quality autograph paper because they risk ink fading faster.

    Black ink shows up clearer and lasts longer, preserving the autograph’s value. You want your memorabilia to stay authentic and vibrant, so black ink remains the trusted choice for fans who care about paper quality and long-term display.

    Are Colored Inks Other Than Blue and Black Ever Used?

    Yes, you’ll sometimes see celebrities use colored inks beyond blue and black, especially for personal or informal autographs. Ink color symbolism plays a role. Red might symbolize passion, green could represent freshness, and purple often signals creativity.

    However, you should know that colored inks tend to fade faster, so autograph ink fading is a concern for collectors. That’s why black and blue remain the standard for official signatures, balancing visibility and longevity.

    How Do Autograph Dealers Verify Ink Authenticity?

    Did you know over 90% of forgeries get caught through ink analysis? When you want dealer authentication, experts examine ink composition using ultraviolet or infrared light to spot alterations.

    They don’t just rely on color; they analyze stroke patterns and pressure by comparing signatures to authentic samples. This detailed approach helps you trust the autograph’s legitimacy, ensuring the signature’s authenticity beyond just the ink used.

    You won’t find any celebrity facing legal issues specifically over autograph ink. Celebrity signature styles focus more on uniqueness than ink color, and ink longevity matters mostly to collectors, not courts.

    Legal disputes revolve around forgery or authenticity, not whether the autograph’s in blue or black. So, you can trust that the ink choice doesn’t cause legal trouble, even though it might influence how well the signature lasts over time.

    Conclusion

    Now you know why celebrities steer clear of blue ink. It’s not just a style choice but a smart security move.

    Studies show that 85% of autograph forgeries involve blue ink because it’s easier to replicate and alter. So next time you get a signature, watch the ink color.

    Choosing black ink helps keep autographs genuine and valuable. It protects both fans and stars from forgery risks in today’s tech-savvy world.

  • Why Is HP Ink So Expensive Compared to Other Brands?

    Why Is HP Ink So Expensive Compared to Other Brands?

    You pay more for HP ink because the company sells affordable printers but sets high prices on cartridges using proprietary technology that blocks cheaper alternatives.

    HP cartridges have smart chips and firmware that prevent third-party refills, locking you into their costly ecosystem.

    They also invest heavily in advanced ink formulas and security, which raise production costs.

    If you want to understand how these strategies impact your ink expenses and explore ways to save, keep exploring what’s behind HP’s pricing.

    HP’s Razor Blade Model and HP Ink Prices

    high ink prices dominate

    Although HP sells its printers at low or sometimes even loss-making prices, you’ll quickly notice that their ink cartridges come with a hefty price tag. This approach is a classic example of the razor-and-blades business model. HP prices the printers attractively, then recoups profits through high ink costs. When you buy an HP printer, you’re fundamentally locked into purchasing their expensive cartridges repeatedly.

    You’ll find that HP’s ink costs remain markedly higher than many competitors because of this strategy. By controlling cartridge compatibility and incorporating proprietary technology, HP guarantees you can’t easily switch to cheaper third-party ink. This control limits competition and keeps prices elevated. So, while the initial printer price feels like a bargain, the ongoing expense of HP ink cartridges quickly adds up, reflecting the razor-and-blades model in full effect. Understanding this helps explain why HP’s ink costs stand out in the market.

    What Makes HP Ink Cartridges Unique and Expensive

    You’ll notice that HP ink cartridges really stand out because they use proprietary technology and advanced ink formulas. This is all designed to give you superior print quality. Plus, each cartridge comes with an embedded smart chip that keeps an eye on ink levels and ensures the cartridge is authentic. Because of these features, the cartridges are more complex to make, which is why they tend to be more expensive than generic options.

    Proprietary Cartridge Technology

    What makes HP ink cartridges stand out and cost more is their proprietary technology. Each cartridge contains embedded microchips that monitor ink levels and authenticate the cartridge to guarantee it’s genuine.

    These microchips increase manufacturing costs but also prevent you from using cheaper third-party cartridges. HP’s printers have firmware designed to disable non-HP cartridges, forcing you to buy their exclusive products.

    This closed system relies on advanced digital rights management and security features integrated into the cartridges, adding complexity and expense. The proprietary cartridge design, combined with precise hardware and software integration, limits competition and lets HP charge premium prices.

    Advanced Ink Formulation

    Because HP formulates its inks with precision, you get vibrant colors, fast drying times, and minimal clogging. This advanced ink formulation involves using micro-pigments and specialized additives that ensure consistent print quality on various media.

    HP’s proprietary ink formulas are designed to work seamlessly with their printers, preventing smudging and fading while maintaining top performance. The complexity of this ink technology requires strict quality controls and high-grade ingredients, which naturally drive up production costs.

    Furthermore, HP incorporates specialized binding agents and colorants to boost durability and color accuracy, making their ink cartridges unique. When you choose HP, you’re paying for more than just ink. You’re investing in advanced science that delivers reliable, high-quality prints every time.

    Embedded Smart Chip

    Although HP ink cartridges look simple on the outside, they hide sophisticated embedded smart chips that play an essential role in your printing experience. These smart chips communicate with your printer to monitor ink levels and verify cartridge authenticity, ensuring consistent print quality.

    However, they also prevent the use of third-party or refillable ink cartridges by locking you into HP’s ecosystem. This proprietary technology adds to manufacturing costs because each chip contains advanced microprocessors and firmware-based security features.

    While these smart chips offer benefits like real-time ink tracking, they also make HP cartridges more expensive compared to brands that allow refillable ink use. So, the embedded smart chip is a key reason HP ink costs more, balancing convenience and control with higher prices.

    How Smart Chips and Firmware Affect HP Ink Costs

    When you use HP printers, smart chips embedded in their ink cartridges actively communicate with the device to monitor ink levels and confirm authenticity. These smart chips play a key role in maintaining print quality and preventing the use of unauthorized cartridges.

    Firmware installed on the printer works hand in hand with these chips, regularly updating to detect and disable non-HP ink cartridges. This digital rights management approach guarantees you stick to HP’s ink supplies.

    However, this added technology isn’t free. The development and integration of smart chips, along with firmware encryption and updates, increase manufacturing complexity and costs.

    HP’s use of these features protects its ink sales by preventing third-party refills and counterfeit cartridges, but it also means you pay more for genuine HP ink. While smart chips and firmware guarantee security and compatibility, they directly impact the price, making HP ink noticeably more expensive than many other brands.

    How Research and Supply Factors Drive HP Ink Pricing

    research supply innovation costs

    As you explore why HP ink cartridges carry a premium price, it’s clear that extensive research and careful supply management play major roles. HP invests heavily in research to develop proprietary ink formulations and advanced cartridge technology, driving up production costs.

    Extensive research and precise supply management significantly contribute to the premium pricing of HP ink cartridges.

    The company’s focus on innovation means you’re paying for sophisticated features like real-time ink level monitoring and smart chips embedded in each cartridge.

    On the supply side, HP controls the supply chain tightly, limiting access to high-quality raw materials essential for their specialized inks. This restricted supply, combined with HP’s restrictions on third-party cartridges, reduces competition and keeps prices elevated.

    You also benefit from HP’s ability to guarantee consistent quality through this controlled supply, but it comes at a cost. Ultimately, the blend of intense research investment and a carefully managed supply chain directly influences why HP ink is priced higher than many alternatives.

    Comparing HP Ink Costs to Other Brands and Luxury Items

    You might be surprised to hear that HP ink actually costs more per ounce than luxury items like perfume or caviar. It’s pretty wild when you think about it! Now, when you look at HP ink prices compared to other brands, you’ll see their cartridges often come with a premium price tag because of their proprietary technology. So, it’s not just about the ink itself, but also the tech behind it. Let’s dive in and see how these costs really measure up against both competitors and fancy, high-end products.

    HP Ink Price Analysis

    Why does HP ink cost so much compared to other brands and even luxury items? When you look closely, HP ink cartridges like the HP 962 XL can cost over $29 per ounce, making them pricier than many luxury goods. The cost per pound hits about $471, which is more than 200 times the price of a pound of coffee.

    HP justifies this by using proprietary technology, smart chips, and digital rights management, which limit third-party cartridges. Plus, the advanced engineering and precise ink formulation add to the price.

    Here’s how HP ink stacks up:

    • Over $29 per ounce for HP ink cartridges
    • $471 per pound cost
    • Proprietary tech restricts alternatives
    • Smart chips and security features
    • Pricing rivals luxury goods despite small volumes

    Luxury Item Cost Comparison

    HP ink prices don’t just stand out among printer supplies; they often surpass many luxury goods in cost. When you compare HP ink cartridges to luxury items, the price gap is striking. A single ounce of HP ink XL can cost around $29.44, which is far more expensive than premium Scotch or steak.

    This pricing reflects the technological complexity and brand positioning HP uses, much like luxury items. Here’s how HP ink stacks up against some luxury goods:

    Item Cost per Ounce Comparison to HP Ink
    HP Ink XL $29.44 Baseline
    Scotch $2.50 10x cheaper
    Premium Steak $2.80 10.5x cheaper
    Caviar $119 4x more expensive
    Pure Gold $2,640 90x more expensive

    This shows the unique premium value HP ink cartridges hold.

    Ink Cost Versus Brands

    How do ink costs compare across different brands and luxury items? When you look at HP ink cartridges, their price stands out sharply due to strategic brand positioning and proprietary technology. HP charges around $29.44 per ounce for ink, which is far pricier than many competitors.

    HP XL black cartridge costs $54 for 1.83 ounces. The ink cost per pound is over $470, exceeding luxury caviar priced at $119 per ounce. Proprietary cartridges with microchips limit third-party options, and firmware restrictions increase production costs.

    Other brands often offer ink at half or a third of HP’s price. You pay a premium not just for ink but for HP’s advanced security and control over cartridge design, which keeps prices high compared to alternatives.

    Third-Party and Remanufactured HP Ink: Pros and Cons

    Although third-party and remanufactured ink cartridges can save you 30-70% compared to original HP cartridges, they come with trade-offs you should consider. Third-party ink and remanufactured ink often provide comparable print quality, but their performance might be less consistent, and the cartridges can have shorter lifespans.

    While you don’t have to worry about voiding your printer warranty thanks to the Magnuson-Moss Warranty Act, there’s still a risk. Some HP firmware updates may block third-party cartridges, causing compatibility issues or loss of functionality.

    To minimize risks, it’s best to buy from reputable suppliers like CompAndSave, who prioritize quality and safety. Choosing third-party or remanufactured ink can be a smart way to cut costs if you’re willing to accept occasional hiccups and stay informed about your printer’s firmware changes.

    Ultimately, weighing these pros and cons will help you decide if third-party or remanufactured ink fits your printing needs.

    Strategies to Reduce Your HP Ink Expenses

    save ink with smart choices

    If you want to lower your ink expenses without sacrificing print quality, several effective strategies can help. Managing the cost of ink doesn’t mean you have to compromise on your prints. By making smart choices, you can stretch your ink cartridges further and spend less overall.

    Lower ink costs without sacrificing quality by making smart choices and stretching your cartridges further.

    Here are some ways to reduce your HP ink expenses:

    Use high-yield or XL ink cartridges to get more prints per cartridge, lowering the cost per page. Subscribe to HP Instant Ink to receive cartridges regularly at a discounted rate. Print in draft mode and avoid using color when it’s unnecessary to extend cartridge life.

    Buy compatible or remanufactured cartridges from trusted suppliers to save money without losing quality. Keep an eye on your printing habits and reduce unnecessary prints to save ink.

    These strategies help you control the cost of ink while getting the most out of your ink cartridges.

    When to Switch to Refillable or Laser Printers

    Cutting ink costs by using high-yield cartridges or subscribing to HP Instant Ink can help, but at some point, you might find that switching to refillable ink tank or laser printers makes more financial sense.

    If you print frequently or in large volumes, the ongoing expense of HP’s ink cartridges can add up quickly. Refillable ink tank printers, like Epson EcoTank models, let you buy ink in bulk and refill tanks yourself, drastically lowering ink costs and eliminating the need for pricey proprietary cartridges.

    On the other hand, laser printers come with a higher upfront price but offer much lower per-page costs, especially for black-and-white printing. When the cumulative cost of buying OEM ink cartridges surpasses what you’d spend on a refillable or laser printer, it’s time to consider switching.

    This move can reduce your total cost of ownership and save you money in the long run.

    Understanding HP Printer Pricing vs. Ink Costs

    Because HP sells many printers at a loss, the company relies heavily on ink cartridge sales to turn a profit. That’s why you’ll find their ink costs considerably higher than most other brands. When you buy HP printer models, the upfront cost is often low, but the ink cartridges come with a premium price tag. This pricing strategy guarantees ongoing revenue from ink sales rather than hardware.

    Here’s what contributes to the pricing difference:

    • HP ink cartridges can cost up to $75 per ounce, far exceeding many alternatives.
    • Printer models often include advanced features increasing ink production costs.
    • Built-in microchips monitor ink levels, adding to cartridge expense.
    • HP designs cartridges specifically for their printers, limiting third-party options.
    • Ink cost per page remains higher due to integrated security and proprietary design.

    Understanding this balance helps you see why HP’s pricing approach prioritizes ink cartridge revenue over printer sales.

    Why HP’s Proprietary Tech Keeps Ink Prices High

    While HP offers convenience and reliable print quality, their proprietary technology plays a big role in maintaining ink prices high. HP uses advanced proprietary tech, including smart chips embedded in their cartridges, to monitor ink levels and authenticate the supplies.

    These smart chips prevent you from using third-party or refilled cartridges, forcing you to buy genuine HP ink. This digital rights management system and security measures not only increase manufacturing costs but also restrict compatibility with non-HP products.

    Because HP controls the cartridge design and firmware tightly, they maintain a monopoly over ink supplies, which lets them keep prices elevated. The complex engineering behind the cartridges ensures consistent print quality, but it also justifies the premium you pay.

    Frequently Asked Questions

    How Often Should I Replace My HP Ink Cartridges for Optimal Performance?

    You should replace your HP ink cartridges when print quality starts to decline or your printer alerts you about low ink levels. To maintain peak performance, don’t wait until the cartridge is completely empty. This helps with cartridge maintenance and protects your print head.

    Keeping an eye on ink lifespan and using high-yield cartridges can stretch replacement intervals. Also, printing in draft mode and using genuine HP ink can help you get the most out of each cartridge.

    Can HP Ink Cartridges Expire or Dry Out if Unused?

    Ink cartridges aren’t evergreen; they can expire or dry out if unused. Your HP ink cartridge lifespan depends on regular use because ink can thicken or clog the printhead over time.

    To keep unused ink preservation in check, you should print small test pages often. This keeps the ink flowing like a river, preventing it from drying inside the cartridge and maintaining print quality.

    Don’t let your ink sit idle too long!

    What Environmental Impacts Does HP Ink Production Have?

    HP ink production impacts the environment through energy-intensive processes and hazardous waste generation. You’re dealing with the use of sensitive raw materials that strain natural resources.

    While HP integrates advanced tech in cartridges, it adds to waste and recycling challenges. Luckily, HP offers recycling programs to help reduce landfill waste.

    To support sustainable practices, you can participate in these programs and choose eco-friendly disposal methods to lessen the overall environmental footprint.

    Are There HP Ink Subscription Services Available?

    When it comes to HP ink, you’ll find subscription plans that really take the cake. HP Instant Ink offers convenient refill options, delivering cartridges before you run dry.

    Starting at just $0.99 per month, these plans cater to different printing needs while saving you money. Plus, they handle recycling for you, making it easier to stay eco-friendly without lifting a finger.

    It’s a smart way to keep your printer stocked hassle-free.

    How Does HP Ink Quality Affect Photo Printing Results?

    HP ink quality directly impacts your photo printing results by ensuring excellent ink absorption and precise color accuracy. When you print photos, the ink soaks into the paper evenly, preventing smudges and fading.

    This means your images stay vibrant and true to life over time. Thanks to HP’s advanced pigments, your prints show richer colors and sharper details, giving you professional-quality photos every time you hit print.

    Conclusion

    You might think buying an HP printer means affordable printing, but surprise, it’s just the opposite. HP’s clever razor blade model hooks you with low printer prices, then hits you with pricey ink.

    Those smart chips and proprietary tech aren’t just fancy features; they’re your wallet’s worst enemy. So, if you love paying luxury prices for ink, stick with HP.

    Otherwise, maybe it’s time to rethink your printing game.

  • 10 Best Places to Recycle Ink Cartridges Near You

    10 Best Places to Recycle Ink Cartridges Near You

    You can recycle your ink cartridges easily at office supply stores like Staples, Office Depot, and Best Buy. They offer convenient drop-off bins and rewards.

    Electronics retailers such as MicroCenter also accept cartridges. Plus, many local government centers provide free recycling points.

    Manufacturer programs like HP Planet Partners offer mail-in options with prepaid labels.

    For businesses, bulk pickups make recycling simple and sustainable.

    Explore these options to find the most convenient and eco-friendly way to recycle near you.

    Why Recycling Ink Cartridges Matters

    recycle cartridges protect environment

    Recycling ink cartridges matters because it keeps harmful plastics and chemicals out of landfills and waterways. When you recycle your ink and toner cartridges, you prevent toxic substances from polluting the environment.

    Instead of tossing them in the trash, these cartridges can be properly processed to conserve valuable raw materials like plastic, aluminum, and precious metals. By doing this, you help reduce the need for new resources, which saves energy and lowers greenhouse gas emissions tied to manufacturing new cartridges.

    Moreover, recycled cartridges can be remanufactured or repurposed, giving them a second life and extending their environmental benefits. Participating in recycling programs supports sustainability efforts and promotes a circular economy where materials are reused rather than wasted.

    How to Prepare Your Ink Cartridges for Recycling

    Before you drop off your ink cartridges for recycling, you’ll want to prepare them properly to avoid leaks and guarantee they can be processed efficiently. Start by removing the inkjet cartridges from your printer and make sure they’re completely empty.

    Avoid shaking or opening them, as this could cause ink to spill or damage the cartridges. If the contacts or nozzles look dirty or clogged, gently clean them with a lint-free cloth to improve recycling quality.

    Next, place the cartridges into a plastic bag or protective container to prevent any ink spills during transport. Finally, check if the recycling program or retailer has specific preparation guidelines to follow.

    Office Supply Stores Accepting Ink Cartridge Recycling

    recycle ink cartridges conveniently

    You can easily recycle ink cartridges at major office supply stores like Office Depot, Staples, and Best Buy. They usually have convenient drop-off bins right near the checkout area. It’s pretty straightforward to do.

    Plus, some stores even offer rewards or incentives when you recycle your cartridges with them. So, it’s a win-win! Let’s take a look at where you can find these locations, how the recycling process works, and what kind of benefits you might earn along the way.

    Store Participation Locations

    Several major office supply stores accept used ink cartridges, making it easy for you to recycle responsibly. Stores like Office Depot, OfficeMax, and Staples provide convenient recycling stations where you can drop off your empty cartridges.

    MicroCenter also offers dedicated recycling stations, while Best Buy participates with no-cost recycling services at many locations. These stores often partner with local recycling programs to ensure cartridges are handled properly.

    This helps you reduce waste effortlessly.

    Store Recycling Service Availability
    Office Depot Ink cartridge drop-off Most nationwide locations
    Staples Free in-store recycling bins Select locations
    MicroCenter Dedicated recycling stations Multiple store locations

    Take advantage of these recycling stations to dispose of ink cartridges responsibly near you.

    Recycling Process Steps

    When dropping off your used ink cartridges at office supply stores like Office Depot or Staples, you won’t need to pre-register or make a purchase. Just bring them to the designated recycling bins or the register.

    The recycling process steps are simple: first, gather your empty cartridges from brands like HP, Canon, or Epson. Then, head to the store’s drop-off point where associates can help if needed. They guarantee cartridges are properly collected and prepared for recycling.

    Rewards And Incentives

    Recycling ink cartridges at office supply stores not only benefits the environment but can also earn you rewards and incentives. Stores like Office Depot, Staples, and OfficeMax offer free recycling services and often reward you for participating.

    When you recycle a certain number of cartridges, you might receive store discounts, gift cards, or loyalty points. These points can be redeemed for future purchases, making it easier to save on office supplies.

    Some retailers even provide coupons or discounts on ink replacements when you bring in used cartridges. Keep an eye out for special promotions that boost your rewards, giving you extra motivation to recycle regularly.

    Taking advantage of these incentives makes recycling both eco-friendly and rewarding.

    Electronics Retailers Offering Ink Cartridge Drop-Off

    retailers accept cartridge drop offs

    If you’re looking to recycle your used ink cartridges, major electronics retailers like Best Buy, Staples, and MicroCenter make it easy by accepting them at their store locations. You’ll find designated drop-off bins near checkout counters or customer service areas, so you can recycle cartridges effortlessly during your next visit.

    Staples and Best Buy participate in nationwide programs, accepting nearly all brands of ink cartridges for free, making it convenient no matter what printer you use. Moreover, Office Depot and OfficeMax offer in-store points specifically for ink cartridge recycling.

    Local Government and Community Ink Cartridge Recycling Centers

    Because many local governments prioritize sustainability, they provide convenient drop-off points for ink cartridge recycling at waste management facilities and community centers. You can easily find designated spots to recycle your used ink cartridges, helping you dispose of them responsibly.

    Many community recycling centers collaborate with environmental organizations to accept cartridges for free, which reduces landfill waste and supports eco-friendly practices. In cities like Kansas City, neighborhood recycling drop-off centers make it simple to recycle without going far.

    Community centers partner with environmental groups to offer free cartridge recycling, making it easy and eco-friendly.

    Plus, local governments often offer online directories or maps, so you can quickly locate the nearest ink cartridge recycling centers. By choosing to recycle at these municipal sites or community centers, you actively support your city’s sustainability initiatives and help lower environmental impact.

    Taking advantage of these local government and community recycling options ensures your ink cartridges don’t end up as harmful waste, making a positive difference in your community’s environmental health.

    Mail-In Recycling Options and Using Prepaid Shipping Labels

    While local centers offer great options for dropping off your used ink cartridges, you might find it more convenient to recycle from home through mail-in programs. Many of these programs provide a free prepaid shipping label, making it easy to send your empty cartridges directly to recycling centers without extra cost.

    You simply print the prepaid shipping label from the program’s website, package your cartridges securely in a box or envelope, and drop it off at the nearest UPS or USPS location.

    Keep in mind that mail-in options usually accept most inkjet cartridges but may restrict toner cartridges or certain brands. Using a prepaid shipping label saves you the hassle of finding a drop-off spot and guarantees your cartridges get recycled responsibly.

    This convenient option lets you contribute to sustainability efforts right from your doorstep, making cartridge recycling hassle-free and efficient.

    Ink Cartridge Manufacturer Recycling Programs

    When you’re ready to recycle your used ink cartridges, many manufacturers make it easy through dedicated programs designed to handle returns responsibly. Companies like HP and Canon offer popular recycling programs that encourage you to dispose of cartridges in an eco-friendly way. HP’s Planet Partners program alone has recycled over 5.8 billion cartridges worldwide since 2006.

    Canon lets you return cartridges at designated drop-off spots or via prepaid mail-in labels, making the process convenient.

    Other manufacturers, such as Epson and Brother, provide clear recycling instructions and specific drop-off points for their ink and toner cartridges. These recycling programs focus on remanufacturing or properly recycling cartridges to reduce waste and support a circular economy.

    Large Quantity Ink Cartridge Recycling for Businesses

    If your business deals with a large volume of ink cartridges, you’re in luck. You can take advantage of bulk pickup options and scheduled recycling services to make the whole process a lot easier.

    Working with certified recyclers doesn’t just simplify disposal—it also ensures you’re meeting all the necessary environmental regulations.

    Plus, by recycling in bulk, you’re not only managing waste more efficiently but also supporting sustainability in a meaningful way. It’s a win-win!

    Bulk Pickup Options

    Many recycling programs offer free bulk pickup services when you need to recycle large quantities of ink cartridges, typically over 76 toner or 1,000 ink cartridges. These bulk pickup options simplify the process by providing packaging supplies and pre-paid shipping labels, so you don’t have to worry about logistics.

    Companies like HP Planet Partners even offer scheduled pallet pickups, cutting down on the hassle of individual drop-offs. To use bulk pickup services, you’ll usually need to arrange in advance and follow specific packaging and quantity guidelines.

    Taking advantage of bulk pickup helps you manage large volumes efficiently while supporting environmental sustainability. It’s a smart, eco-friendly solution for businesses looking to recycle ink cartridges responsibly and with minimum effort.

    Scheduling Recycling Services

    Recycling over 1,000 ink cartridges? Scheduling recycling services can make the process seamless and cost-effective. Many retailers and recycling centers offer bulk services tailored for businesses like yours, including free pallet pickups and shipping labels.

    By coordinating with certified recycling providers, you can guarantee secure handling and environmental compliance. Scheduling recycling services in advance helps you streamline collection, reduce waste, and lower disposal costs. Plus, you’ll receive proper documentation for your environmental reporting needs.

    Proper planning is key. Set up regular pickups or on-demand services to keep your workspace clutter-free while meeting sustainability goals efficiently. Taking advantage of these services simplifies large quantity ink cartridge recycling, making your business’s eco-friendly efforts both practical and manageable.

    Business Recycling Benefits

    Coordinating bulk ink cartridge recycling services not only streamlines your disposal process but also reveals significant benefits for your business. By participating in recycling programs, you reduce waste and comply with environmental regulations effortlessly.

    Many programs offer free pickup or drop-off options when you recycle over 1,000 cartridges, making it easier to adopt sustainable practices. Recycling large quantities helps prevent harmful chemicals from contaminating soil and water.

    Plus, these initiatives can boost your corporate social responsibility profile and help you earn valuable sustainability certifications. You’ll likely see cost savings and may qualify for tax incentives tied to environmental efforts.

    Embracing business recycling benefits not only supports the planet but also enhances your company’s reputation and bottom line.

    How to Choose the Best Ink Cartridge Recycling Option Near You

    Choosing the best ink cartridge recycling option near you starts with knowing where to look and what to take into account. Start by checking local retailers like Office Depot, Staples, or Best Buy, which often accept cartridges for free recycling.

    You can also use recycling locators online or visit the manufacturer’s website to find certified drop-off points nearby. Before you drop off or mail your cartridges, verify that the program accepts your specific brand and model to avoid inconvenience.

    Look for programs that offer free mail-in options with pre-paid shipping labels, making recycling hassle-free. Furthermore, consider recycling options that reward you with incentives such as discounts or points for participating.

    Tips for Convenient and Responsible Ink Cartridge Recycling

    If you want to recycle ink cartridges without hassle, start by using local retail stores like Office Depot, Staples, Best Buy, or MicroCenter that accept them for free. These stores make recycling straightforward and accessible.

    You can also search online for nearby recycling centers or drop-off locations using dedicated databases or store-specific recycling programs. To save time, consider mail-in recycling programs that provide free prepaid shipping labels, letting you send cartridges right from home.

    Before dropping off your cartridges, confirm the store’s or program’s policies to guarantee they accept your specific cartridges and properly recycle them. Responsible recycling not only prevents environmental contamination but also supports sustainability efforts by reducing waste.

    Frequently Asked Questions

    Can Recycled Ink Cartridges Be Refilled and Reused?

    Yes, recycled ink cartridges often have a refill possibility, meaning you can refill and reuse them multiple times. You’ll find many stores and services offering refill kits or professional refilling options to extend your cartridge’s life.

    Just keep in mind, not all cartridges are suitable for refilling. Damaged ones may not work well afterward. By choosing to refill, you save money and help reduce plastic waste, making it a smart, eco-friendly choice.

    Are There Any Fees for Recycling Ink Cartridges at Drop-Off Locations?

    You won’t have to break the bank when recycling ink cartridges at most drop-off locations. Recycling fees are usually non-existent, so you can simply bring your used cartridges in without paying a dime.

    Places like Office Depot and Best Buy often offer free recycling services. Just keep an eye out though. Some specialized centers might charge fees for bulk or specific cartridge types. Always check ahead to avoid surprises!

    How Long Does the Ink Cartridge Recycling Process Take?

    The process duration for recycling ink cartridges usually takes a few days to a few weeks. If you use mail-in programs, expect about 7-14 business days after they receive your cartridge, plus shipping time.

    Drop-off locations often handle the process faster, sometimes immediately upon drop-off, then send cartridges for recycling. The disassembly, sorting, and material recovery phases typically add several days once your cartridge reaches the recycling facility.

    Can Ink Cartridges Be Recycled With Other Types of Electronic Waste?

    Sure, you can toss ink cartridges in with your other e-waste if you want to test the limits of recycling logic and watch the environmental impact sulk in the corner.

    In reality, ink cartridges need special handling because their plastics and chemicals don’t play nicely with typical electronics recycling.

    What Happens to Ink Cartridges After They Are Collected for Recycling?

    After you drop off your ink cartridges, they get sorted by type and brand to reduce environmental impact. Then, they’re disassembled, and plastics, metals, and other parts are shredded and cleaned.

    Some cartridges get refurbished for reuse, extending their life and cutting waste. Non-recyclable parts may be used for energy recovery or disposed of responsibly, ensuring minimal harm to the environment while promoting resource conservation.

    Conclusion

    Recycling ink cartridges might seem small, but it makes a huge difference. You save the environment while clearing clutter at home or work. Whether you drop off a single cartridge at a local store or send a bulk shipment through a manufacturer’s program, every effort counts.

    It’s simple, responsible, and rewarding. So, don’t wait. Turn those empty cartridges into a fresh start for the planet and your space today.

  • When Were Ink Pens Invented: A Historical Guide

    When Were Ink Pens Invented: A Historical Guide

    Ink pens trace back over 5,000 years to ancient civilizations like Mesopotamia and Egypt, where early humans used reeds and primitive brushes to apply ink. Reed pens appeared around 3200 BCE, allowing precise writing.

    Quill pens followed in medieval Europe for finer scripts.

    Metal nibs and self-filling mechanisms emerged by the 19th century, leading to today’s convenient ballpoint pens.

    If you explore further, you’ll uncover how these innovations shaped writing as we understand it.

    Early Writing Tools: From Etchings to Pens

    early tools enabled record keeping

    Although writing tools have evolved considerably, their origins trace back tens of thousands of years to primitive etchings and paintings on cave walls. You’d find early humans using sharp objects or primitive brushes to create pictographs on stone or clay tablets.

    These marks were the first known writing instruments, helping ancient civilizations like the Sumerians and Egyptians record information. Around 3400 BCE, the Mesopotamians invented the stylus, often made from reed or metal, to inscribe cuneiform on soft clay tablets.

    Early writing tools like the stylus enabled civilizations such as the Sumerians and Egyptians to record vital information.

    Meanwhile, ancient Egyptians developed early ink about 4,500 years ago, mixing soot, water, and binding agents. They applied this ink using reed pens, crafted from cut reed or bamboo with a slit at the tip.

    These reed pens became one of the first practical writing instruments and remained popular until the Middle Ages. Understanding these early tools shows how writing evolved from simple etchings into more sophisticated methods using ink and pens.

    The Impact of Reed Pens in Ancient Times

    You’ll find that reed pens, made from the stems of reed plants like *Juncus maritimus*, actually started with the ancient Egyptians way back around 3200 BCE. It’s pretty interesting how their simple yet effective design didn’t just control how ink flowed but also helped preserve culture by writing on papyrus. When you think about it, understanding these pens really gives you a glimpse into the craftsmanship and importance of early writing tools.

    Origins of Reed Pens

    Since ancient times, reed pens have shaped the way people recorded information and expressed creativity. Originating around 3000 BC in ancient Egypt, these pens were crafted by cutting reed stems to create a nib with a slit that controlled ink flow.

    When you use a reed pen, you connect with a tradition that enabled precise lines and beautiful calligraphy on papyrus scrolls. It supported both artistic expression and official documentation.

    Reed pens influenced writing tools long after, even in regions like India and Pakistan. They weren’t just tools; they were essential for communication and culture.

    Materials and Craftsmanship

    Because reed pens were crafted from natural materials like the stems of *Juncus maritimus*, their design demanded careful shaping and regular maintenance to guarantee smooth writing. You’d cut the reed to a fine point and create a slit at the tip, allowing ink flow through capillary action.

    This craftsmanship required precision, as the slit controlled how ink traveled onto the writing surface. Since reed pens wore down quickly, you’d need to sharpen or replace them often.

    Their natural composition made them easy to shape but limited their durability. Even today, artisans in India and Pakistan preserve this traditional craftsmanship, using reed pens for calligraphy.

    The materials and techniques behind reed pens influenced later pen designs, highlighting the importance of natural resources in the evolution of writing tools.

    Cultural Significance Ancient

    Though simple in design, reed pens had a profound impact on ancient civilizations by enabling the recording of history, culture, and administration. You can appreciate how these tools shaped early writing systems, like hieroglyphics, which preserved knowledge for generations.

    By using reed pens, ancient scribes:

    1. Created lasting records of treaties, religious texts, and daily life.
    2. Developed complex scripts that laid the foundation for modern writing.
    3. Maintained administrative control, ensuring societies functioned smoothly.

    Reed pens, crafted from papyrus stems, required skill and care, making them indispensable. Their role went beyond writing; they connected you to the past, allowing you to witness the birth of communication. When you consider their impact, you realize reed pens weren’t just tools, they were key to civilization’s progress.

    The Rise of Quill Pens in Medieval Europe

    You’ll notice quill pens were crafted from bird feathers, like those of geese and swans. They offered a precise and flexible tool for medieval writers. These pens really shaped the way manuscripts and official documents were created. Because of them, detailed calligraphy became possible. So, let’s explore how their unique characteristics influenced writing practices during this period.

    Quill Pen Characteristics

    When you look back at medieval Europe, quill pens stand out as the go-to writing tool starting around the 7th century. Crafted from bird feathers like goose or swan, these quill pens required skill to sharpen and trim the feather nibs just right. The angled cut created a slit that allowed ink flow to be smooth and controlled, perfect for detailed calligraphy and manuscripts.

    Here’s why quill pens captured your attention:

    1. Feather nibs offered flexibility and strength for precise writing.
    2. The slit design ensured consistent ink flow without blotting.
    3. They were essential for official documents and literary works for centuries.

    Understanding these characteristics helps you appreciate how quill pens shaped medieval writing culture.

    Medieval Writing Practices

    As quill pens rose to prominence in medieval Europe, they transformed how people wrote and recorded information. You’d find quills made from large bird feathers like geese or swans, carefully cured and shaped to hold ink.

    This tool replaced reed and stylus instruments, allowing for finer, more detailed writing in illuminated manuscripts and official records. Using a quill meant mastering the balance of ink flow and nib sharpness, making your medieval writing precise and elegant.

    Feather Type Usage in Medieval Writing Ink Compatibility
    Goose Most common quill source Suitable for various ink types
    Swan Preferred for fine scripts Holds ink well
    Turkey Durable, less common Works with thick ink
    Other birds Rarely used Limited ink flow

    The Rise of Steel-Point Pens in the 19th Century

    steel pens revolutionize writing

    Steel-point pens revolutionized writing in the 19th century, with Birmingham, England, becoming the center of their mass production by 1828. You’d find steel nibs rapidly replacing traditional quills because they were durable, affordable, and easy to mass-produce. Thanks to pioneers like John Mitchell, who began mass-producing steel nib dip pens in 1822, writing tools became more accessible than ever.

    In the 19th century, the rise of steel-point pens brought rustproof steel points that lasted longer and resisted wear. Elastic nibs offered flexible, smoother writing experiences. Plus, innovative mechanisms like Fölsch’s plunger and Parker’s self-filling pistons improved reliability.

    These advancements transformed how you write, making pens more practical and dependable for everyday use. The steel nib’s accessibility empowered more people to put pen to paper, marking a significant leap in writing technology during the 19th century.

    How Ink Pens Got Better Over Time

    You’ll notice that ink pens got better thanks to smarter ink flow designs, which made writing smoother and way more reliable. On top of that, advances in materials—like plastics and metals—helped pens last longer and become more affordable. And the filling mechanisms? They evolved too, so you didn’t have to stop writing to refill as often.

    Innovations in Ink Flow

    Though early ink pens required frequent dipping, inventors quickly tackled ink flow challenges to make writing smoother and more reliable. You’ll appreciate how the fountain pen evolved, especially with Lewis Waterman’s 1884 capillary feed system that regulated ink flow using grooves and vents.

    This harnessed capillary action to prevent blotting and skipping. Key innovations include:

    1. Self-filling mechanisms like pistons and cartridges boosted convenience and ensured steady ink delivery.
    2. The three-fissure feed system refined ink flow further, eliminating flooding.
    3. Later, László Bíró’s ballpoint pen revolutionized writing with a rotating ball, offering continuous, controlled ink flow and less smudging.

    These advances made it easier for you to write effortlessly without constant interruptions or messes.

    Advances in Pen Materials

    As writing tools evolved, advances in pen materials played a crucial role in improving your writing experience. Early pens used reed tips, but the introduction of metal nibs during the Roman Empire marked a significant upgrade, offering better durability and smoother ink flow.

    By the 19th century, rustproof steel points further enhanced reliability, so you could write longer without interruption. The ink reservoir also saw major improvements; simple containers gave way to more sophisticated designs that held more ink and prevented leaks.

    In the 20th century, plastic pens revolutionized this further by making pens lighter, more affordable, and more durable. These material innovations guaranteed your pen not only wrote better but lasted longer, making writing more convenient and enjoyable over time.

    Evolution of Filling Mechanisms

    While early ink pens like quills and reed pens required you to dip them manually into ink, inventors quickly sought ways to make refilling easier and less messy. The evolution of filling mechanisms transformed your writing experience.

    First, piston filling systems, patented in the 19th century, boosted ink capacity and simplified refills. Next came cartridge systems in the 20th century, which made ink replacement cleaner and more convenient, eliminating messy bottles.

    Finally, innovations like lever fillers and modern vacuum pumps further enhanced ink flow control and ease of use. Thanks to these advances, you can now enjoy uninterrupted writing without the hassle of constant dipping or spills, making ink pens more reliable and enjoyable than ever before.

    The Big Names Behind Your Favorite Pens

    If you’ve ever wondered who revolutionized the pens you use daily, several inventors and companies played essential roles in shaping their design and function. Lewis Edson Waterman stands out for inventing the modern self-inking fountain pen in 1884, which improved ink flow regulation and made writing smoother.

    Several inventors revolutionized pens, with Lewis Edson Waterman’s 1884 self-inking fountain pen leading smoother writing experiences.

    Then there’s John J. Loud, who patented the first ballpoint pen in 1888, laying the foundation for the ballpoint pen technology you rely on today. Walter A. Sheaffer took fountain pen design further by pioneering the lever-filling mechanism in 1908, making refilling easier and cleaner.

    The Parker Pen Company also contributed considerably with their Lucky Curve system in 1894, which cleverly prevented ink leakage and blotting. These innovators and brands have shaped your writing experience, blending functionality with reliability.

    When you pick up a pen, you’re holding a piece of history crafted by these big names, each improving how ink meets paper in their unique ways.

    How Ballpoint Ink Pens Changed Writing Forever

    revolutionized smooth portable writing

    The inventors behind fountain and self-inking pens laid the groundwork for writing technology, but it was the ballpoint pen that truly changed how you write every day. When László Bíró refined the ballpoint pen in the 1930s, he introduced a tiny rotating ball that controlled ink flow perfectly, making this writing instrument a game-changer.

    This innovation meant you could write smoothly without worrying about smudges or blotches. You could carry a durable pen that worked anywhere, anytime, without leaking. And you could enjoy faster, more consistent writing that felt effortless.

    Before this, ink pens often caused frustration with messy spills and uneven ink release. Thanks to Bíró’s design, the ballpoint pen became a reliable, quick-drying alternative to fountain pens, making writing accessible to everyone.

    This breakthrough transformed everyday writing, letting you focus on your words instead of your pen. The ballpoint pen’s impact is undeniable. It’s the writing instrument that forever changed how you put ink to paper.

    Common Modern Ink Pen Types and Features

    Though ink pens have evolved over centuries, you’ll find a variety of modern types designed to suit different writing styles and needs. The ballpoint pen remains popular, using a small rotating ball to dispense thick, oil-based ink that offers reliable ink flow and smudge-resistant lines.

    If you prefer smoother writing, rollerball pens use water-based liquid ink and a tiny ball for consistent, fluid strokes. Fountain pens stand out with their refillable internal reservoirs and nibs, drawing ink by capillary action, making them ideal for those who enjoy a classic writing experience.

    Felt-tip and gel pens use porous tips saturated with ink, creating bold, colorful, or artistic lines perfect for creative work. Each type offers unique ink flow characteristics and refill options, so you can pick the pen that best matches your style, whether you need precision, smoothness, or vibrant expression.

    What the Future Holds for Ink Pen Technology

    As ink pens continue evolving, you’ll see exciting innovations that blend traditional writing with cutting-edge technology. The future holds remarkable advancements that will change how you write and interact with your pen. Expect these key developments:

    1. Smart pen technology will digitize your handwritten notes instantly, making organization and sharing effortless.
    2. Eco-friendly ink pens crafted from biodegradable materials and refillable systems will help you reduce waste without sacrificing quality.
    3. IoT integration will connect your pen to other devices, enabling real-time data transfer and personalized writing experiences tailored just for you.

    Beyond these, adaptive inks that change color based on your environment or input, plus nanotech-enhanced durability and self-cleaning features, will make writing smoother and more engaging. By embracing these innovations, you’ll enjoy a seamless blend of tradition and technology that respects both your creativity and the planet.

    Why Fountain Pens Still Capture Our Hearts

    Even with digital tools dominating how you write, fountain pens still hold a special place in many hearts. When you pick up a fountain pen, you immediately notice the smooth ink flow that transforms writing into an art form. This isn’t just about putting words on paper. It’s about experiencing the craftsmanship behind each pen.

    The elegant design and precise engineering make every stroke feel deliberate and personal. You’ll appreciate how a fountain pen offers varied line widths, allowing your handwriting or calligraphy to express your unique style.

    Beyond functionality, these pens connect you to tradition, embodying sophistication and timelessness. Collectors and enthusiasts continue to celebrate their beauty and historical significance, ensuring that fountain pens remain both practical tools and cherished works of art. So, even in a digital age, the fountain pen’s charm and tactile pleasure keep it close to your heart.

    Frequently Asked Questions

    How Do Ink Pen Inks Differ Chemically Across Types?

    You’ll find ink composition varies widely across pen types. Fountain pen inks often use water-based dyes, offering vibrant colors but less ink longevity.

    Ballpoint inks rely on oil-based pigments mixed with wax for thicker consistency and longer-lasting marks. Gel inks blend water, pigments, and gelling agents, balancing opacity and smooth flow.

    Knowing dye vs. pigment helps you choose between brightness and durability, so pick ink based on your writing needs.

    What Are the Environmental Impacts of Disposable Pens?

    You know what they say: “Waste not, want not.” Disposable pens cause huge environmental harm by adding to plastic waste and carbon emissions.

    If you want to make a difference, switching to refillable pen benefits are huge. They reduce plastic waste markedly. Choosing eco friendly alternatives helps protect marine life and cuts down fossil fuel use.

    Can Ink Pens Be Safely Used on All Paper Types?

    You can’t safely use ink pens on all paper types because ink absorption varies with paper texture. Rough, porous papers cause ink bleed and feathering, ruining your work.

    Smooth, coated, or high-quality papers minimize ink bleed and give you sharp lines. To avoid surprises, always test your ink pen on a small area first. This way, you’ll know if the paper handles ink well without excessive absorption or bleeding.

    How Do Ink Pen Nib Sizes Affect Handwriting Styles?

    Ink pen nib sizes affect your handwriting styles by controlling ink flow and stroke variation. Larger nibs offer more ink flow and greater nib flexibility, letting you create bold, expressive strokes perfect for decorative writing.

    Smaller nibs restrict ink flow, giving you precise, delicate lines ideal for detailed work. By choosing the right nib size, you can adjust stroke weight and variation, making your handwriting more legible or artistic depending on what you want to achieve.

    What Maintenance Is Required for Vintage Fountain Pens?

    Keeping vintage fountain pens in tip-top shape is like tending a delicate garden. You’ll want to focus on regular nib cleaning to prevent ink buildup and guarantee smooth writing.

    Don’t forget proper pen storage. Always keep your pen upright and dry to avoid leaks. When it’s time for ink refilling, use the right solutions to protect internal parts.

    With these steps, your pen will write beautifully for years to come.

    Conclusion

    Isn’t it funny how something as simple as an ink pen has evolved alongside us, yet still holds a special place in our hands? From ancient reed pens to sleek ballpoints, each innovation happened just when we needed it most.

    As you pick up your pen today, remember you’re part of a long story, one where tradition and technology meet in the palm of your hand. Who knew ink could connect so many moments in history and your own?

  • What Is Sumi Ink and How Is It Made?

    What Is Sumi Ink and How Is It Made?

    Sumi ink is a traditional East Asian ink made by mixing soot, often from burning pine or lamp oil, with animal glue, then shaping it into solid sticks.

    You grind these sticks with water to create rich, deep blacks prized in calligraphy and painting.

    The soot source and aging affect its color and texture, giving your artwork unique tonal depth.

    If you want to understand how the materials and aging shape sumi ink’s expressive qualities, there’s plenty more to explore.

    What Is Sumi Ink?

    traditional ink from soot

    Although sumi ink might look simple at first, it’s a carefully crafted traditional East Asian ink made mainly from soot produced by burning pine branches or lamp oil. When you explore Japanese sumi ink, you’ll find it’s made by mixing soot with animal glue, sometimes incorporating vegetable oil or materials from animal skin to create a fine luster.

    This mixture hardens into an Ink Stick, which artists grind with water to produce liquid sumi, perfect for Japanese calligraphy and painting. The highest quality ink is crafted through a meticulous process, ensuring deep, rich blacks and subtle gradations.

    Whether you use solid sticks or ready-made liquid sumi, the ink’s composition delivers unique textures and tones. Making sumi ink involves more than just blending ingredients; it’s a traditional art form that’s been refined over centuries.

    Why the Soot Source Changes Your Sumi Ink

    The quality and character of sumi ink depend heavily on the type of soot used in its creation. The source of soot not only changes the ink’s color but also its texture and longevity. When you choose sumi ink, consider how the soot origin affects your art:

    1. Pine soot produces larger particles, giving the ink a bluish-black tone with a rich texture that absorbs light differently.
    2. Lamp oil soot creates finer particles, resulting in a smoother ink with a reddish-black hue that flows more evenly.
    3. Regional variations in soot cause unique aging behaviors, meaning your ink’s appearance can evolve over time.

    Understanding these differences helps you select sumi ink that matches your artistic vision and technique. The soot source directly influences how your strokes look and feel, so it’s essential to recognize this connection when exploring traditional sumi ink.

    Traditional Soot Collection and Preparation

    traditional soot collection process

    When you watch skilled craftsmen collect soot for sumi ink, you’ll notice they work in dim, candlelit rooms, using small brushes to gather fine particles from burning pine branches or natural materials in earthenware pots filled with vegetable oils like sesame or rapeseed.

    This soot forms from the combustion of pine resin, producing ultra-fine black particles that become the ink’s primary pigment. The process demands careful attention to maintain the soot’s purity and consistency, avoiding synthetic additives to preserve the ink’s traditional qualities.

    You’ll see the soot gently collected to guarantee it remains uncontaminated and uniform, which directly influences the final ink’s texture and depth. After collection, the soot undergoes preparation before it’s mixed with binding agents, marking the essential first step in crafting high-quality sumi ink.

    This traditional method highlights the importance of natural materials and meticulous technique in creating authentic sumi ink.

    Why Animal Glue Matters in Sumi Ink

    Because animal glue serves as the essential binder in sumi ink, it shapes both the ink’s texture and its behavior on paper. You’ll find that this traditional glue, made from animal skins or bones, holds the soot particles together, creating a smooth, solid ink that glides effortlessly under your brush. Without animal glue, the ink would crack or fail to adhere properly.

    Animal glue also influences how sumi ink ages, allowing colors to deepen and shift over time, adding emotional depth to your artwork. Here’s why animal glue matters to you:

    1. It prevents cracking, ensuring your brushstrokes stay fluid and consistent.
    2. It controls the ink’s aging, letting colors develop richer tones as you keep your work.
    3. It binds the ink firmly to surfaces, so your creations last longer and express more.

    You’ll see that animal glue isn’t just an ingredient; it’s the heart of sumi ink’s unique qualities.

    Kneading and Mixing the Sumi Ink Paste

    kneading ensures smooth consistency

    As you knead the soot with animal glue, or nikawa, you transform loose particles into a smooth, workable paste essential for sumi ink’s quality. This kneading process is done by skilled craftsmen who carefully mix by hand, removing air pockets and guaranteeing an even texture throughout.

    Maintaining precise moisture levels during kneading helps you achieve the ideal hardness and flexibility of the paste.

    Here’s a quick look at key aspects of kneading sumi ink:

    Aspect Purpose
    Removing Air Prevents bubbles, ensures smoothness
    Moisture Control Balances hardness and flexibility
    Even Texture Guarantees consistent ink flow

    Molding Sumi Ink and Adding Fragrance

    How do you transform the kneaded sumi ink paste into its final, solid form? You carefully pour the mixture into wooden molds, which shape the ink into traditional sticks. Before pouring, you add fragrance, often natural oils or herbs, to enrich the sensory experience, making each ink stick unique.

    These wooden molds may even be carved with symbols or characters, connecting you to the maker’s identity and the ink’s heritage.

    Wooden molds carved with symbols link you to the maker’s identity and the rich heritage of sumi ink.

    As you engage in this molding process, consider the emotional journey:

    1. Anticipation: watching the fragrant ink settle into the carved wooden molds.
    2. Connection: feeling the history embedded in the symbols on each mold.
    3. Pride: knowing you’re crafting a tool that artists and calligraphers will treasure.

    This step is essential in preserving sumi ink’s cultural and artistic value, capturing both form and fragrance before it solidifies into its timeless shape.

    The Drying and Aging Process of Sumi Ink

    Once you’ve molded the sumi ink sticks, you begin the essential drying and aging process, which can last anywhere from two months to five years. You dry the ink sticks layered with raw ash and air-dry them carefully, monitoring moisture at every stage to prevent cracking and guarantee even hardening.

    Some sticks get wrapped in straw and hung in small structures, letting them age slowly and naturally. This slow aging is critical because it allows the soot particles inside to undergo chemical and physical changes, enriching the color tones and improving the texture.

    Proper drying and aging give the sumi ink its characteristic luster and depth, qualities you won’t find in hastily made liquid ink. Without this patient process, the ink wouldn’t develop its unique balance of hardness and smoothness, indispensable for traditional calligraphy and painting. So, this phase is fundamental to transforming raw materials into high-quality sumi ink.

    Final Polishing and Marking of Sumi Sticks

    After patiently drying and aging the sumi sticks, you move on to the final polishing and marking stage. This step is where craftsmanship truly shines, as you carefully enhance both appearance and tactile feel. Polishing often involves using clam shells or fine abrasives to create a smooth, glossy surface that invites touch and admiration.

    Before the ink fully dries, you add traditional markings, Kanji characters, either pressed into the stick or painted with gold or ink. This adds cultural depth and uniqueness.

    Here’s what you focus on during this stage:

    1. Polishing with natural materials like clam shells to boost luster and smoothness.
    2. Impressing or painting Kanji to give each stick an authentic identity.
    3. Crafting custom boxes and labels that complement the sumi’s elegance and protect its quality.

    This final touch reflects the dedication and detail that define sumi ink production, making each stick a work of art.

    New vs. Aged Sumi Ink: Key Differences

    Although both new and aged sumi ink share the same origins, you’ll notice distinct differences in their appearance and texture. New sumi ink features smaller soot particles and delivers a uniform, intense black color that’s bold and sharp.

    In contrast, aged sumi ink reveals larger soot particles that create richer, more nuanced tones. As the animal glue weakens over time, it causes these particles to shift back to their original shapes, altering both color and texture.

    You’ll also find that aged sumi ink often develops a deeper, more complex hue, thanks to natural aging. Its texture becomes more viscous and may even show a slight gloss or luster after long periods.

    These differences result mainly from the natural deterioration of animal glue and physical changes in soot particles. Understanding these contrasts helps you appreciate the unique qualities each type of sumi ink brings to your artwork.

    Why Handmade Sumi Ink Is Valued by Artists

    You’ll really appreciate handmade sumi ink because of its rich craftsmanship and deep connection to tradition. What’s cool is that its unique aging process creates tonal variations you just don’t see in synthetic inks. Plus, the quality is top-notch, which makes every brushstroke pop and helps your art truly stand out.

    Craftsmanship and Tradition

    When you hold a handmade sumi ink stick, you’re touching centuries of artistry and tradition crafted with unparalleled care. The craftsmanship behind each stick shows patience and skill, passed down through generations.

    This traditional process involves selecting and burning pine branches with natural oils to create rich soot. Then, the soot is kneaded with animal glue, making sure the texture and consistency are just right.

    After that, the ink is left to dry and age over years, which enhances its depth and expressive qualities.

    Unique Aging Effects

    Because handmade sumi ink ages naturally, it develops richer, more nuanced colors that you won’t find in synthetic alternatives. As aged sumi ink oxidizes, the soot particles gradually shift back to their original shape and size, creating unique color variations and textures.

    The natural animal glue in the ink weakens over time, subtly changing how the ink fixes to paper and deepening its tonal range. This aging process gives the ink a depth and complexity that synthetic inks simply can’t match.

    When you use aged sumi ink, you’ll notice it produces delicate gradations and a sense of historical authenticity that skilled artists highly value. These unique aging effects make handmade sumi ink prized for both traditional and expressive artistic creations.

    Superior Ink Quality

    Although synthetic inks may offer convenience, handmade sumi ink stands out for its superior quality and richness, which artists deeply appreciate. When you use handmade sumi ink, you experience a depth and vibrancy that synthetic versions simply can’t match.

    Here’s why artists value it so highly:

    1. Natural materials like pine soot and animal glue create nuanced color variations and depth.
    2. Artisans carefully age the ink, enhancing its hues and smoothing its texture.
    3. The consistent texture and excellent flow of handmade sumi ink allow for precise, detailed brushwork.

    You’ll find that this authentic, durable black ink brings your artwork to life with a richness and control that synthetic inks struggle to offer. Choosing handmade sumi ink means embracing tradition and superior craftsmanship in every stroke.

    Frequently Asked Questions

    How Should Sumi Ink Be Stored for Best Preservation?

    To guarantee storage longevity, you should keep your sumi ink in a cool, dry place, away from direct sunlight and heat sources. Wrap the ink stick in paper or cloth to protect it from dust and humidity.

    Store it in a sealed container or box to minimize air exposure, which can cause deterioration. Regularly check the environment and maintain proper ventilation to preserve the ink’s quality and prevent mold growth over time.

    Can Sumi Ink Be Used With Modern Art Tools?

    You can use sumi ink with brushes, pens, and even airbrushes. Its modern compatibility is impressive. You’ll find it flows smoothly through fine brushes and calligraphy pens, adapting well to contemporary techniques.

    Just watch drying times and bleeding on different papers. You can dilute it with water or mix it with other mediums to suit your style. Experiment with fixatives to guarantee your work lasts on various modern surfaces.

    What Types of Brushes Work Best With Sumi Ink?

    For the best brush compatibility with sumi ink, you’ll want soft, flexible brushes made from natural animal hair like goat, horse, or wolf. These brushes hold ink well and offer smooth, expressive strokes.

    Use flat, wide brushes for broad sweeps and pointed brushes for fine details. Tapered tips give you control over line thickness and ink flow.

    Avoid synthetic brushes since natural hairs release sumi ink more evenly, enhancing your artwork.

    Is Sumi Ink Waterproof or Water-Soluble?

    Think of sumi ink like a river that can flow or freeze in place. It’s primarily water-soluble, so when you first apply it, it dances with water, letting you create soft gradients.

    Once it dries, it gains some water resistance, standing firm like ice, but don’t get too confident; a little moisture can still reactivate or smudge it. Some modern versions boost water resistance, but traditional sumi ink stays beautifully water-soluble.

    How Long Does Sumi Ink Last Once Opened?

    Once you open sumi ink, its lifespan depends on its chemical composition. Solid sumi ink, made from soot and animal glue, can last for many years if you store it properly in a cool, dry place.

    Liquid sumi ink contains preservatives but usually lasts only a year or two before it dries out or spoils. To keep your ink usable longer, make sure you seal it tightly and avoid contamination that can affect its chemical integrity.

    Conclusion

    You might think sumi ink is just black pigment, but it’s so much more. It’s a blend of soot, glue, and time-tested craftsmanship. While factory-made ink offers convenience, handmade sumi sticks carry the weight of tradition and subtlety in every stroke.

    You’ll notice how aged ink breathes life into your art, contrasting sharply with the flatness of new ink. Embracing sumi ink means choosing depth over ease, history over haste.

  • What Is Squid Ink Used for in Cooking?

    What Is Squid Ink Used for in Cooking?

    You use squid ink to add a bold, briny flavor and striking black color to dishes like pasta, risotto, and sauces, especially seafood recipes. It brings a unique umami depth that enhances natural marine flavors without overwhelming saltiness.

    When cooking with it, you’ll want to handle it carefully to avoid stains and balance its intensity with acidic or aromatic ingredients.

    If you keep exploring, you’ll discover how to prepare, pair, and substitute this versatile ingredient perfectly.

    What Is Squid Ink?

    squid ink culinary color

    Although you might not encounter it every day, squid ink plays a unique role in cooking. This natural black liquid comes from cephalopods like squids and cuttlefish, serving as their defense mechanism.

    You’ll find that squid ink contains melanin, enzymes, and amino acids, which give it its distinctive color and flavor. In culinary uses, it’s prized mainly for adding dramatic black hues to dishes, making pasta, risotto, and sauces visually striking.

    You can buy squid ink pre-made in jars or packets, or get it fresh straight from whole squid if you prefer. Its popularity spans Mediterranean and Japanese cuisines, where chefs use it to enhance both appearance and taste.

    How Squid Ink Adds Briny Flavor and Umami

    When you add squid ink to your cooking, it brings a briny flavor that captures the essence of the ocean without overwhelming your dish with saltiness. This distinct marine taste enhances the natural flavors of seafood, making your meals taste fresher and more vibrant.

    Squid ink’s umami compounds deepen the savory notes in sauces, risottos, and pasta, creating a rich and satisfying flavor profile. As the ink cooks, it develops a smooth, velvety texture that adds complexity without heaviness.

    You’ll also notice how its briny quality balances perfectly with acidic ingredients like lemon or wine, brightening the overall dish. By incorporating squid ink, you amplify the umami experience, giving your cooking a unique depth that’s hard to achieve with other ingredients.

    Using squid ink is a simple way to elevate your dishes, adding both subtle oceanic undertones and a powerful umami punch.

    seafood dishes with squid ink

    If you want to impress with bold flavors and striking visuals, squid ink is your secret weapon. It’s a star ingredient in dishes like arroz negro, a Spanish rice cooked in squid ink and topped with seafood.

    Squid ink pasta also stands out with its deep black color and rich umami taste that pairs perfectly with clams, shrimp, or mussels. You’ll find squid ink enhancing the briny, oceanic flavor in traditional seafood recipes such as chipirones en su tinta.

    Beyond main dishes, it’s used in sauces, risottos, and aioli to add depth and velvety texture.

    Here’s a quick look at popular squid ink dishes and their best pairings:

    Dish Best Pairings
    Arroz Negro Shrimp, clams, mussels
    Squid Ink Pasta Mussels, artichokes, shrimp
    Chipirones en su tinta Baby squid, seafood broth

    Squid ink brilliantly highlights the marine flavors in your seafood dishes.

    Squid Ink Substitutes and When to Use Them

    Because squid ink can be hard to find or expensive, knowing suitable substitutes helps you keep your recipes on track. Cuttlefish ink is the most popular substitute since it offers a similar deep color and a milder briny flavor, making it ideal for dishes where you want that authentic touch.

    If you can’t get fresh ink, dried or powdered squid or cuttlefish ink reconstituted with water or broth works well. Just remember to start with small amounts and adjust to taste, as intensity varies.

    In a pinch, black food coloring serves as a last-resort substitute. It provides color but lacks the distinct flavor squid ink brings.

    Whenever possible, use freshly harvested ink from squid or cuttlefish to capture the true essence. By selecting the right substitutes based on your recipe and availability, you guarantee your dishes maintain their signature look and taste.

    How to Make Squid Ink Pasta

    squid ink pasta preparation

    Squid ink adds a bold color and unique flavor that’s perfect for making pasta stand out. When you’re making homemade pasta with squid ink, start by mixing 1-2 teaspoons of ink per 250 grams of flour. Blend it well with eggs and flour until you get an even, dark black dough. Then knead it until smooth.

    Here’s how to proceed:

    Roll out the dough into thin sheets using a pasta machine or rolling pin. Cut the sheets into your preferred shapes like spaghetti or fettuccine. Cook the squid ink pasta in boiling salted water for 2-4 minutes, aiming for al dente. Serve with seafood sauces, lemon, or garlic to enhance the briny flavor.

    This method lets you create striking, flavorful homemade pasta that’s sure to impress at any meal.

    Squid Ink Risotto and Rice Recipes

    When you add squid ink to risotto or rice dishes, it brings a bold, briny flavor that really elevates the taste. You’ll want to mix the ink into the cooking broth carefully to get that deep color and oceanic aroma just right.

    Mastering this technique lets you control both the flavor intensity and the striking look of your dish. It’s a simple step that makes a big difference, turning an ordinary meal into something special.

    Flavor Profile Enhancement

    If you want to elevate your risottos and rice dishes, adding squid ink brings a unique briny and umami flavor that highlights the marine elements beautifully. Squid ink deepens the flavor profile of your dish, adding complexity without overpowering other ingredients.

    It lends a subtle salty depth that pairs perfectly with seafood, creating a rich, balanced taste. You’ll notice it also smooths the texture, making each bite velvety and satisfying.

    • Enhances marine flavors with briny, umami notes
    • Balances acidity from wine or tomato ingredients
    • Adds natural saltiness, reducing extra salt needed
    • Creates a smooth, velvety mouthfeel

    Using squid ink transforms simple rice dishes into memorable culinary experiences.

    Cooking Techniques

    Although incorporating squid ink into rice dishes requires some care, mastering the technique brings bold color and rich umami flavor to your cooking. When making squid ink risotto, you stir the ink into the broth to spread its flavor evenly.

    For rice recipes like arroz negro, simmer the rice in ink-infused stock without stirring initially, letting the color deepen naturally. Balancing squid ink’s intensity is key; use precise amounts to avoid overpowering the dish.

    The result is a striking black rice that pairs perfectly with seafood.

    Step Technique Tip
    1 Measure ink carefully Avoid too strong flavor
    2 Stir ink into broth (risotto) Even color distribution
    3 Simmer rice without stirring Deep, rich black color
    4 Add seafood toppings Complements umami
    5 Serve immediately Retain texture & taste

    Squid Ink Sauces to Boost Seafood

    How can you elevate your seafood dishes with a simple yet striking ingredient? Squid ink sauces are the answer. They add a rich, briny flavor that enhances the natural taste of seafood while providing a dramatic black color.

    Elevate seafood dishes with squid ink sauces for rich flavor and striking black color.

    When you simmer squid ink with garlic, onions, and tomatoes, you create a complex sauce that brings out the oceanic essence in your dishes. Whether you’re making seafood pasta or arroz negro, this sauce adds a savory umami punch with a subtle metallic hint.

    Try using squid ink sauces to:

    • Intensify the flavor of shellfish and fish
    • Add a bold visual contrast to your plate
    • Create unique condiments like black garlic aioli
    • Boost the natural taste of seafood without overpowering it

    Incorporating squid ink in your sauces is a simple way to make your seafood dishes unforgettable.

    How to Avoid Ink Stains While Cooking

    Squid ink sauces bring bold flavor and striking color to your seafood dishes, but handling the ink requires some care to keep your kitchen and clothes clean. To avoid ink stains, start by wearing gloves and an apron. This simple step protects your skin and clothing from accidental splashes.

    Use a dedicated, easily washable utensil or bowl to prevent staining other kitchen tools. Work over tiled or non-porous surfaces, which clean up quickly if ink spills.

    Add squid ink gradually to your dish, so you control its spread and reduce the chance of splatters. If any ink does get on surfaces or fabrics, clean it immediately with warm water and soap, since dried ink is much harder to remove.

    Taking these precautions will help you enjoy cooking with squid ink without worrying about stubborn ink stains ruining your kitchen or wardrobe.

    Tips for Cooking With Squid Ink

    When cooking with squid ink, start by using just a small amount, about one gram per 100 grams of ingredients, to balance its bold flavor and striking color. This helps you avoid overpowering your dish with its intense briny taste. Gradually incorporate squid ink into sauces, pasta, or rice so you can control the depth of flavor and the rich black hue.

    Here are some useful cooking tips to keep in mind:

    • Handle squid ink carefully with gloves to prevent stains on your skin and surfaces.
    • Pair squid ink with seafood, garlic, and saffron to boost its natural umami and oceanic notes.
    • Let dishes rest briefly after adding squid ink to allow flavors to meld smoothly.
    • Add squid ink gradually, tasting as you go, to achieve the perfect balance.

    Follow these squid ink cooking tips, and you’ll create dishes that impress both visually and in flavor.

    Easy Squid Ink Recipes to Try at Home

    Mastering the basics of cooking with squid ink sets you up perfectly to experiment with simple yet impressive recipes at home. Start by making squid ink pasta. Just add a small amount of ink to your dough for a dramatic black color and a subtle seafood flavor.

    You can also whip up a quick squid ink aioli by mixing the ink into mayonnaise with garlic and lemon juice. This creates a striking sauce that pairs beautifully with grilled seafood.

    For a heartier dish, try Spanish arroz negro, a flavorful rice dish where squid ink adds both color and a briny, umami depth. When incorporating squid ink, add it gradually to control the intensity and balance the flavors.

    These easy squid ink recipes let you enjoy the unique taste and visual appeal of seafood-inspired dishes without fuss. It makes your cooking both creative and delicious.

    Frequently Asked Questions

    Where Can I Buy Fresh Squid Ink?

    You can buy fresh squid ink at fish markets or seafood vendors, especially those specializing in cultural recipes from Mediterranean or Asian cuisines. Some specialty stores and Asian markets also carry it in sealed containers or with whole squid packages.

    When selecting fresh squid ink, look for intact ink sacs without any off-odor. Using fresh ink helps you master culinary techniques that bring authentic, rich flavors to your dishes.

    How Should Squid Ink Be Stored for Best Freshness?

    You should store squid ink in an airtight container, keeping it in a cool, dark place to preserve its flavor enhancement and color intensification. Once opened, refrigerate it and use within 2-4 weeks to maintain freshness.

    Avoid exposing it to sunlight or heat because that can degrade its quality. For longer storage, freeze small portions to lock in that rich flavor and deep color for your dishes.

    Is Squid Ink Safe for People With Seafood Allergies?

    Imagine walking a tightrope blindfolded. That’s how cautious you need to be with squid ink if you have seafood allergies. While it’s generally safe, squid ink comes from mollusks, so allergy management is essential.

    You should consult a healthcare pro and consider your dietary restrictions before trying it. Testing a tiny bit first or avoiding it entirely keeps you safe, preventing any unexpected allergic reactions that could throw you off balance.

    Can Squid Ink Be Frozen for Later Use?

    Yes, you can freeze squid ink for later use. Freezing helps preserve its flavor enhancement and color enrichment, so your dishes stay vibrant and tasty.

    Portion the ink into small airtight containers or ice cube trays before freezing to make thawing easier. When you’re ready, thaw it in the fridge or at room temperature, and it’ll retain its rich color and unique flavor just like fresh squid ink.

    What Is the Shelf Life of Bottled Squid Ink?

    Think of bottled squid ink as a treasure chest; you want to keep its shelf stability locked in tight. Typically, unopened bottles last up to four years if you store them in a cool, dry place.

    Once opened, refrigerate the ink and use it within a few months to keep its flavor fresh. For storage tips, always make certain the bottle is airtight and sterilized to extend its life and avoid spoilage signs like odor or mold.

    Conclusion

    Now that you know squid ink adds a briny, umami punch to your dishes, you’re ready to transform ordinary meals into oceanic masterpieces. Whether you’re whipping up squid ink pasta or a rich sauce, a little goes a long way, like a tsunami of flavor crashing onto your taste buds.

    Don’t worry about stains; with our tips, you’ll cook confidently and creatively. Plunge in and let squid ink elevate your seafood game to legendary status!

  • What Is Invisible Ink on iPhone and How to Use It

    What Is Invisible Ink on iPhone and How to Use It

    Invisible Ink on iPhone lets you send messages or photos that appear blurry until the recipient swipes to reveal them, adding a fun, playful privacy layer. You create these by holding the Send button in Messages, selecting Invisible Ink, and sending your hidden content.

    It works on iOS 10 or newer with iMessage enabled and keeps things private until someone taps the message.

    If you want to explore how to use it best and its limits, there’s plenty more to discover.

    What Is Invisible Ink and How It Works

    hidden messages require interaction

    How does Invisible Ink keep your messages private? With Invisible Ink, your messages stay hidden behind a blurry overlay until the recipient swipes to reveal them. When you send a message or image using this feature, Invisible Ink applies a special effect that obscures the content, so it’s not immediately visible.

    This means your messages remain private, as the hidden text or images won’t show up until the recipient actively interacts with them by swiping or tapping.

    Invisible Ink also uses encryption to ensure that only the intended person can decrypt and see your message once they swipe. You can use this effect for both text and photos, adding a fun element of surprise or privacy.

    iPhones and iOS Versions That Support Invisible Ink

    Although Invisible Ink adds a fun and private touch to your messages, you’ll need the right iPhone and iOS version to use it. Invisible Ink was introduced with iOS 10, so any iPhone model running iOS 10 or later supports this messaging effect.

    This means iPhone 5s and newer models can use Invisible Ink, as long as both sender and recipient have iMessage enabled on iOS 10+. If your device runs an earlier iOS version, Invisible Ink and other messaging effects won’t work.

    To help you quickly check your device compatibility, here’s a simple table:

    iPhone Models Supported iOS Versions
    iPhone 5s iOS 10 and later
    iPhone 6 / 6 Plus iOS 10 and later
    iPhone 7 / 7 Plus iOS 10 and later
    iPhone 8 / 8 Plus iOS 10 and later
    iPhone X and newer iOS 10 and later

    Make sure your iPhone’s iOS is up to date to enjoy Invisible Ink and other messaging effects fully.

    How to Create and Send Invisible Ink Messages

    send invisible ink message

    To create an invisible ink message, just start by typing your message in the Messages app. Then, tap and hold the Send button. You’ll see some effects pop up—go ahead and choose the Invisible Ink effect. After that, send it off. When your recipient gets the message, they’ll need to tap on it to reveal what you’ve hidden. It’s a fun way to keep your messages a little mysterious!

    Compose Your Message

    When you want to add a touch of mystery or privacy to your message, start by typing it in the Messages app and then press and hold the Send button. This action reveals the effects menu, where you can choose Invisible Ink to blur your message until the recipient taps it.

    You can use Invisible Ink for both text and images, adding a fun surprise element. Before sending, tap the Send button again to preview how the effect looks.

    Step Action
    1 Type your message or select an image
    2 Press and hold the Send button
    3 Select “Invisible Ink”
    4 Preview the effect
    5 Send your hidden message

    This simple process helps you compose and send messages with Invisible Ink easily.

    Select Invisible Ink

    If you want to send a message that stays hidden until tapped, just tap and hold the Send button in the Messages app and choose “Invisible Ink” from the effects menu. Here’s how to select Invisible Ink effectively:

    1. Tap and hold the Send button to open the effects menu.
    2. Select “Invisible Ink” from the bubble effects options.
    3. Type your message; it will appear blurred after sending.
    4. Preview the Invisible Ink effect by holding the Send button before actually sending to make certain it looks right.

    Send And Reveal

    Although it might seem simple, sending an Invisible Ink message adds a layer of surprise and privacy to your conversations. To create one, type your message in the Messages app, then tap and hold the Send button to open the effects menu.

    Select “Invisible Ink” to apply the effect. You can even preview how it looks before sending. When you send messages using Invisible Ink, the text or image appears blurred or blank to the recipient.

    To reveal the hidden content, they just need to tap or swipe over the message. This interaction uncovers the concealed message, adding a fun and private touch to your chats. Using Invisible Ink makes your messages more engaging while keeping sensitive info discreet until revealed.

    How to Reveal and Read Invisible Ink Messages

    tap to reveal message

    Since invisible ink messages appear blurred by default, you’ll need to tap on the message bubble within the chat to reveal its contents. This simple tap instantly clears the blur, showing the hidden message in black text. No extra steps or passwords are needed to decrypt the message once you tap it.

    Invisible ink messages stay blurred until you tap the bubble, revealing the hidden text instantly without any extra steps.

    The message stays visible until you choose to hide or delete it manually, as it won’t re-blur automatically.

    Here’s how to reveal and read invisible ink messages:

    1. Open the conversation containing the invisible ink message.
    2. Find the blurred message bubble.
    3. Tap on the bubble to instantly reveal the message.
    4. Read the now visible message in clear black text.

    Everyday Ways to Use Invisible Ink

    When you want to keep your messages private or add a playful twist, Invisible Ink on your iPhone offers a simple way to hide text or images until the recipient chooses to reveal them. You can use Invisible Ink to send secret messages that only the intended person can uncover by tapping.

    It’s perfect for sharing surprises or special announcements, letting the excitement build before the content is exposed. Invisible Ink also helps protect sensitive information in busy or shared environments, preventing accidental reveals.

    Beyond privacy, it adds fun to your conversations. Try hiding clues or hints in a game or puzzle within your message. Whether it’s a heartfelt note, a confidential detail, or a playful interaction, Invisible Ink lets you send your message with an extra layer of intrigue.

    This feature turns ordinary texts into engaging, interactive experiences you and your recipient will enjoy.

    Troubleshooting Common Invisible Ink Issues

    If you’re having trouble with Invisible Ink on your iPhone, start by confirming that both you and your recipient are using iPhones running iOS 10 or later, as older versions don’t support this feature. Next, ensure Messages is enabled and iMessage is active in Settings > Messages. Without this, Invisible Ink won’t work.

    Here are four quick troubleshooting tips:

    1. Check that Reduce Motion is turned off in Settings > Accessibility, since enabling it disables message effects like Invisible Ink.
    2. Confirm the recipient taps the message to reveal the hidden content; the effect only works with interaction.
    3. Restart your iPhone to clear temporary glitches affecting Invisible Ink.
    4. Update to the latest iOS version to fix any software bugs impacting Messages effects.

    Following these steps should resolve most Invisible Ink issues, letting you enjoy this fun messaging feature without interruptions.

    Invisible Ink Privacy Benefits and Limitations

    Although Invisible Ink adds a fun layer of privacy by hiding your messages or images until the recipient swipes to reveal them, it isn’t designed to provide complete security. It encrypts content, preventing casual eyes from reading your message, but anyone who swipes can see it.

    Also, Invisible Ink only works on iOS devices with iMessage, limiting privacy if your recipient uses non-Apple platforms. So, while it enhances privacy by requiring an intentional swipe, it doesn’t guarantee full security.

    Here’s a quick look at its privacy benefits and limitations:

    Feature Benefit Limitation
    Swipe to reveal Hides message until interaction Anyone can swipe to view
    Encryption Prevents casual viewing Not foolproof security
    iMessage exclusive Works within Apple ecosystem No privacy on non-iOS devices

    Use Invisible Ink knowing it’s a playful privacy tool, not a secure communication method.

    Tips for Using Invisible Ink Safely and Effectively

    To use Invisible Ink safely and effectively, you need to make sure both you and your recipient have iOS devices with iMessage enabled, as the feature won’t work otherwise. Invisible ink adds a layer of privacy but isn’t completely secure, so use it wisely.

    Here are some tips to help you get the most out of this fun feature:

    1. Only send invisible ink messages to trusted contacts since anyone with access to the device can reveal the message by tapping on it.
    2. Avoid sharing sensitive or confidential information through invisible ink to protect your privacy.
    3. Keep your iPhone updated to the latest iOS version to ensure the invisible ink feature works smoothly and securely.
    4. Use invisible ink for casual or playful conversations rather than for serious or important communication.

    Creative Ways to Make Invisible Ink Messages Fun

    You can totally turn your invisible ink messages into secret games by hiding clues or riddles for your friends to uncover. It’s like creating your own little mystery that they get to solve. And here’s a fun idea—try surprising someone with a hidden announcement or reveal that only shows up when they tap the message.

    Plus, adding personalized notes, like playful jokes or sweet love messages, makes your conversations way more fun and memorable. It’s a cool way to keep things interesting and show you care all at once!

    Secret Message Games

    When you want to add a playful twist to your messages, Invisible Ink lets you hide clues or hints that recipients reveal with a simple tap. Using Invisible Ink for secret messages transforms ordinary texting into an interactive game.

    Here’s how you can make your messaging effects fun and engaging:

    1. Send encrypted puzzles or riddles that require tapping to uncover answers.
    2. Create scavenger hunts by hiding important hints within Invisible Ink messages.
    3. Pair Invisible Ink with full-screen effects or animations to boost excitement.
    4. Mix Invisible Ink with emojis or handwritten notes for playful secret messages.

    Surprise Announcements Reveal

    How can you make surprise announcements even more memorable? Use Invisible Ink to send a message that stays hidden until the recipient swipes to reveal it. This adds suspense and fun, turning ordinary surprise announcements into interactive moments.

    Whether it’s a birthday, holiday, or special event, crafting your message with Invisible Ink keeps the recipient curious and engaged. You can even combine Invisible Ink with full-screen effects or animations to boost excitement when the secret is uncovered.

    Personalized Hidden Notes

    Although invisible ink is often used for simple surprise messages, it shines brightest when you personalize hidden notes with creative touches. By crafting personalized messages using invisible ink in the Notes app and sharing them via iMessage, you make your secret notes truly special.

    Here are four fun ways to enhance your hidden notes:

    1. Add emojis or custom handwriting to give your invisible ink messages a playful vibe.
    2. Use different colors and styles to make concealed messages visually engaging.
    3. Incorporate clues or puzzles within your hidden notes for an interactive reveal.
    4. Decorate with themed stickers or decorations to make personalized messages unique and memorable.

    These creative touches turn ordinary invisible ink notes into exciting personal surprises your friends will love.

    Enhancing Your Messaging Experience With Invisible Ink

    Why settle for ordinary messages when you can add a layer of fun and privacy with Invisible Ink? This iOS feature transforms your messaging experience by letting you send texts or images that stay hidden until the recipient swipes to reveal them.

    It’s perfect for sharing surprises, secrets, or sensitive info without worrying about prying eyes. To use Invisible Ink, just hold down the Send button in Messages, pick the effect, and send. This interactive element creates anticipation and keeps your conversations engaging.

    Here’s a quick look at how Invisible Ink enhances your messaging experience:

    Feature Benefit How to Use
    Hidden Content Adds privacy Swipe to reveal
    Interactive Effect Fun and suspenseful Select effect before send
    iOS Compatibility Available on iOS 10+ Use on iPhone with iMessage
    Easy Activation Simple to apply Hold Send button
    Secure Messaging Protects sensitive info Only shows on swipe

    Frequently Asked Questions

    Can Invisible Ink Messages Be Saved or Archived Automatically?

    No, invisible ink messages can’t be saved or archived automatically. You’ll find they’re stored with your regular messages, so message security depends on how you manage your overall chat history.

    If you’re worried about privacy concerns, remember that once you reveal an invisible ink message, it stays accessible until you delete it manually. For message retrieval, your best bet is backing up your iPhone via iCloud or iTunes, which saves all messages together.

    Does Invisible Ink Work With Group Chats on iMessage?

    Yes, Invisible Ink works in group chats while maintaining group chat privacy. When you send an Invisible Ink message, only the person who taps it will see the hidden content, so each recipient experiences a private reveal.

    You’ll get message delivery confirmation as usual, ensuring your message reached everyone. Plus, Invisible Ink supports emoji compatibility, letting you send hidden emojis too.

    Just remember, each member must tap their message to reveal it individually.

    Can Third-Party Apps Read Invisible Ink Messages?

    No, third-party apps can’t read Invisible Ink messages. Apple designed it to protect your privacy concerns by encrypting the content, so only the Messages app reveals the hidden text when you tap it. This limits message visibility strictly to the native iMessage interface, ensuring app compatibility stays within Apple’s ecosystem.

    If you use other chat apps, they won’t display or decrypt Invisible Ink, keeping your messages secure from outside access.

    Is There a Limit to the Length of Invisible Ink Messages?

    Think of Invisible Ink messages like a secret garden. There’s no hard fence on length, but you don’t want it to become a tangled jungle.

    You can send fairly long messages, but message encryption and notification settings work best with concise notes. Keeping your message customization tight guarantees smooth reveal and readability.

    Too lengthy, and the magic fades, making it harder for the recipient to uncover your hidden words quickly and clearly.

    Can Invisible Ink Be Used in Emails or Only in Messages?

    Invisible Ink can only be used in Messages, not in emails. If you try to send it via email, the digital concealment won’t work, and recipients will see the message plainly.

    For email privacy and message security, Invisible Ink isn’t supported because emails don’t handle this effect. So, to keep your messages hidden temporarily, stick to iMessage where Invisible Ink guarantees your texts stay secure within the iOS ecosystem.

    Conclusion

    Just when you thought texting couldn’t get more fun, Invisible Ink on your iPhone surprises you by hiding messages in plain sight. You might be chatting about secret plans or sending a playful note, all while keeping things private without extra apps.

    So next time you want to add a little mystery or protect your words, give Invisible Ink a try. You’ll discover how a simple swipe can turn your messages into a playful game of hide and seek.

  • What Is an Inkjet Printer and How to Use It

    What Is an Inkjet Printer and How to Use It

    An inkjet printer sprays tiny ink droplets through nozzles onto paper to create detailed, colorful images or text. To use it, you’ll install ink cartridges, load the right paper, and send your digital files to print.

    Running regular cleaning cycles helps keep prints sharp and prevents clogs.

    You’ll also want to align the print head for best results. Keep going to discover tips for choosing supplies and troubleshooting common issues for smooth printing.

    How to Set Up Your Inkjet Printer for the First Time

    set up inkjet printer properly

    Before you start printing, you’ll need to set up your inkjet printer properly. Begin by unboxing it, removing all packaging materials, and placing the printer on a flat, stable surface near a power outlet.

    Connect the power cord and turn on the printer to begin the initial configuration. Follow the prompts on the control panel or display screen to guide you through the setup process.

    Connect the power cord, turn on the printer, and follow the on-screen prompts to complete the initial setup.

    Next, install the ink cartridges by inserting them into their designated slots until they click securely into place. This guarantees proper ink flow during printing.

    Then, load the appropriate paper into the paper tray, adjusting the guides to fit the size correctly. Finally, run the printer’s built-in calibration or cleaning cycle to align the print head and optimize print quality.

    This essential calibration step helps prevent smudging or color misalignment, so your first prints come out crisp and clear. With these steps, your printer is ready for use.

    Get to Know Your Inkjet Printer’s Parts and How They Work

    Although inkjet printers may seem complex, understanding their main parts helps you use and maintain them better. The print head is central. It contains hundreds of nozzles that spray tiny ink droplets, about 50-60 microns, onto the paper to create your images. Ink cartridges store the liquid ink and supply it to the print head through precise channels and an ink reservoir for each color.

    The print head movement is controlled by a carriage driven by a belt and stepper motor. This setup allows the nozzles to accurately place ink droplets as it moves horizontally across the paper. Meanwhile, the paper feed mechanism advances the paper incrementally after each pass using rollers and a motor. This ensures smooth, continuous printing. By knowing how these parts work together, you can troubleshoot issues and keep your inkjet printer running efficiently.

    How to Choose the Right Inkjet Printer Cartridges and Paper

    matching cartridges and paper

    You’ll want to choose cartridges that match your printer model and have the right ink colors to get accurate results. It really makes a difference when you pick the right paper too—like using coated photo paper for images or plain paper for everyday documents. Plus, sticking with the recommended cartridges and paper helps keep your printer running smoothly and ensures your prints come out looking sharp.

    Cartridge Compatibility Tips

    When choosing inkjet printer cartridges and paper, ensuring compatibility with your specific printer model is essential to avoid damage and maintain print quality. Always check your printer’s manual or specs for the exact cartridge part numbers and supported paper types.

    Using cartridges from the recommended brand and model prevents clogging and color inconsistencies. Avoid mixing different brands or cartridge types unless explicitly supported.

    Select the right paper type, such as coated or specialty media, as specified by the manufacturer to get the best results. Regular cartridge replacement is critical to maintaining print clarity and extending your printer’s lifespan.

    Optimal Paper Selection

    How do you choose the right paper to get the best results from your inkjet printer? Start by considering the paper type and its compatibility with your inkjet cartridges. Coated papers, like glossy or semi-glossy photo paper, enhance print quality by offering higher resolution and sharper images.

    These surfaces boost ink reflectivity and color brightness, perfect for vibrant photo prints. Pay attention to paper weight, measured in gsm; heavier papers provide durability and a professional finish. Using high-quality inkjet cartridges with compatible papers prevents feathering and ensures sharp detail.

    Matte or satin finishes might suit specific inks better, so always check compatibility. Selecting the right combination of inkjet cartridges and paper type dramatically improves your prints, delivering crisp, vivid results every time.

    How Inkjet Printer Droplets Form and Create Images

    You’ll notice that inkjet printers create images by forming tiny droplets, using either thermal bubble or piezoelectric technology. With thermal bubbles, the printer rapidly vaporizes ink to push the droplets out. On the other hand, piezoelectric heads use pressure pulses generated by crystals changing shape. When you understand how these droplets mix colors so precisely, it’s easier to appreciate the sharp, vibrant prints you get.

    Thermal Bubble Formation

    Ever wondered what happens inside an inkjet printer to create those tiny droplets that form sharp images? It all starts with thermal bubble formation. Inside the printhead, a tiny heater pulse, lasting about one microsecond, rapidly heats the ink chamber.

    This causes a vapor bubble to form, expanding quickly and pushing a small ink droplet out of the nozzle. This droplet ejection sends ink toward the paper, creating the image you see.

    Once the vapor bubble collapses, it draws fresh ink into the chamber, ready for the next cycle. Thermal bubble technology uses hundreds of nozzles firing thousands of droplets per second, allowing your printer to produce high-resolution, photo-quality prints with droplets as small as 50 microns.

    This precise process is key to sharp, detailed images.

    Piezoelectric Droplet Ejection

    While thermal bubble technology relies on rapid heating to eject ink, piezoelectric droplet ejection takes a different approach by using crystalline materials that change shape when voltage is applied. This deformation creates pressure pulses inside the ink chamber, forcing precise ink droplets out of the nozzle.

    You’ll find that piezoelectric printheads excel at high-frequency firing, often exceeding 18 kHz, which supports fast, continuous printing. This method produces uniform ink droplets without needing volatile ink components, allowing a wider range of inks to be used.

    The direct conversion of voltage to mechanical movement in the piezoelectric element guarantees consistent droplet ejection, giving you high-quality prints. Piezoelectric droplet ejection offers a reliable and versatile way to form ink droplets and create sharp images.

    Color Mixing Process

    Because inkjet printers rely on tiny droplets measuring just 50-60 microns, they can create images with impressive resolution, often up to 1440×720 dpi. The color mixing process uses inkjet technology to spray precise amounts of cyan, magenta, yellow, and black ink droplets.

    These tiny ink droplets combine in specific patterns, allowing for exact color blending and creating smooth gradations. Each droplet’s placement and size are controlled by advanced software and mechanical precision, ensuring you get precise color reproduction.

    Tips for Getting the Best Print Quality From Your Inkjet Printer

    To get the best print quality from your inkjet printer, you’ll need to start with high-quality, coated photo paper that prevents ink feathering and produces sharp, vibrant images. Always print at the highest resolution your printer supports, often around 1440×720 dpi, to capture fine details.

    Regularly perform print head cleaning and print head alignment to verify consistent ink droplet placement and avoid clogs that degrade print quality. Using fresh ink cartridges designed for your specific inkjet technologies helps maintain color accuracy and prevents fading or bleeding.

    Don’t forget to select the correct color profile and calibration settings. This guarantees smooth gradations and true-to-life colors. By combining these steps, you’ll maximize your printer’s potential and achieve professional-quality prints every time.

    Simple Maintenance and Cleaning Tips for Your Inkjet Printer

    regular printer maintenance routine

    If you want your inkjet printer to deliver consistent, high-quality prints, maintaining and cleaning it regularly is essential. Start by running the printer’s automatic cleaning cycle often to prevent nozzles from clogging with dried ink, especially after days of inactivity.

    Gently wipe the printhead with a lint-free cloth dampened with distilled water or a specialized cleaning solution to remove any ink residue without damaging delicate parts. Keep your cartridges sealed and stored in a cool, dry place to avoid ink drying out and blocking nozzles.

    Don’t forget to clean the paper feed rollers with a damp cloth to ensure smooth paper movement and prevent jams. Use your printer’s software utilities to perform nozzle checks and carry out proper alignment. These steps help maintain print quality by preventing streaks and misaligned colors, guaranteeing your inkjet printer stays in top shape for every print job.

    Troubleshooting Common Inkjet Printer Problems

    If your prints come out streaky or some colors are missing, the ink cartridge could be the problem. It’s a good idea to check for clogs or see if the ink is running low. Paper feed issues, like jams or misfeeds, often happen when the paper isn’t loaded right or the rollers have gotten dirty. By taking care of these problems quickly, you can keep your printer working smoothly and avoid those frustrating delays.

    Ink Cartridge Issues

    When your inkjet printer starts producing faded prints or missing colors, the problem often lies with the ink cartridges. Clogging from dried ink can block nozzles, reducing print quality, but running the cleaning cycle usually clears this up.

    Leakage or low ink levels also cause poor prints, so check your cartridges regularly. If ink runs dry or leaks, cartridge replacement or refilling is necessary. Always use genuine or compatible cartridges to avoid errors.

    Improper installation or residue buildup can disrupt connectivity, so reseat the cartridges firmly to guarantee proper contact. Keeping an eye on ink levels through your printer’s indicator helps prevent unexpected issues.

    Addressing these common ink cartridge problems promptly ensures your inkjet printer maintains consistent, high-quality output.

    Paper Feed Problems

    Why does your inkjet printer sometimes fail to feed paper correctly? Paper feed problems often stem from jammed or misaligned rollers that block smooth paper movement.

    Debris or dust buildup on the rollers or inside the paper tray can also cause inconsistent feeding, leading to frustrating paper jams. Make sure you regularly clean these parts to prevent issues.

    Improper paper loading or using incompatible paper, like curled, thick, or damaged sheets, can further disrupt feeding and cause misalignment. Always check that your paper tray settings match the paper type and that the paper is properly loaded without obstructions.

    Addressing these factors helps keep your printer running smoothly and avoids frequent paper feed errors and jams.

    Comparing Inkjet Printers To Laser Printers: Which Is Right for You?

    Although both inkjet and laser printers serve essential printing needs, choosing the right one depends on your specific priorities. Inkjet printers shine when you want excellent color printing and high print quality, especially for photos and detailed images. They usually come with a lower initial cost, making them great for home or small business use focused on vibrant prints.

    Inkjet printers offer vibrant, high-quality color prints at a lower initial cost, ideal for homes and small businesses.

    However, their print speed tends to be slower, especially for large jobs.

    On the other hand, laser printers offer faster print speed and excel in high-volume document printing. They produce sharper text and handle black-and-white or color documents efficiently. While laser printers may cost more upfront, their ongoing expenses are often lower than those of inkjet printers.

    If you need quick, consistent output for heavy workloads, a laser printer fits better. Consider your printing volume, budget, and whether you prioritize color accuracy or speed to decide which printer suits you best.

    New Developments and Future Uses of Inkjet Printers

    Countless innovations are pushing inkjet printers beyond traditional paper printing. You can now explore UV-curing inks that let you print on plastics and metals, opening new doors for surface printing.

    DTF printers are revolutionizing textiles by printing durable designs directly on films, perfect for customized apparel. Plus, the rise of eco-friendly inks means you can support sustainable manufacturing without sacrificing quality.

    Here are three exciting developments shaping the future of inkjet printing:

    1. Bioprinting uses precise droplet control to deposit living cells, advancing medical research and tissue engineering.
    2. Integration with 3D printing and thermoplastic inks transforms inkjets into tools for manufacturing complex plastic and composite parts.
    3. UV DTF printers enable vibrant, long-lasting prints on various surfaces, expanding creative possibilities.

    How to Extend Your Inkjet Printer’s Lifespan and Save Money

    To keep your inkjet printer running smoothly and save money on repairs, you need to maintain it regularly and use the right supplies. Start by cleaning the printhead using your printer’s automatic cleaning functions or a manual kit to prevent nozzle clogs and maintain consistent print quality.

    Use high-quality, compatible ink and cartridges, avoiding expired or low-quality ones that can damage the printhead or disrupt ink flow. Always turn off the printer properly and keep the printhead capped when not in use to prevent ink from drying out.

    Select the appropriate paper type and printer settings for each job to reduce ink waste and minimize unnecessary cleaning cycles. Periodically perform printhead alignment and nozzle checks to spot and fix issues early.

    Frequently Asked Questions

    Can Inkjet Printers Print on Fabrics or Unconventional Materials?

    Yes, you can use inkjet printers for fabric printing, but you’ll need to take into account textile compatibility and material preparation carefully. Fabrics require special inks for proper dye absorption and ink adhesion to maintain color vibrancy. Without this, designs may fade or smudge.

    Complex designs are achievable, but you must prepare the fabric, often with coatings, to guarantee the ink bonds well. This way, you get durable, vivid prints on unconventional materials.

    Are Inkjet Printers Safe for Children to Use?

    Think of an inkjet printer as a colorful dragon, mostly harmless but needing care. For child safety, you should always supervise kids around it and teach safe handling to avoid ink toxicity.

    Keep ink cartridges locked away, follow age restrictions, and use protective equipment like gloves if handling ink. Regular printer maintenance keeps everything running smoothly and reduces risks.

    With these supervision tips, children can enjoy printing safely without worry.

    How Environmentally Friendly Are Inkjet Printers Compared to Other Types?

    Inkjet printers are more eco-friendly than many alternatives because they use eco-friendly inks that reduce harmful emissions. You’ll benefit from recycling programs that cut cartridge waste, and many models have green certifications reflecting sustainable manufacturing.

    Their lower energy consumption means you save power during printing. Overall, choosing an inkjet reduces your environmental impact by minimizing plastic waste and energy use, making it a smarter, greener option for everyday printing.

    What Software Is Best for Designing Prints for Inkjet Printers?

    You’ll want software offering excellent digital design tools and color management to get the best inkjet prints. Programs like Adobe Photoshop and Lightroom excel in photo enhancement and color calibration.

    Meanwhile, Adobe Illustrator and CorelDRAW provide powerful vector editing and layout templates. Make sure your chosen software supports high print resolution and has strong compatibility with your printer’s drivers for accurate, vibrant results every time.

    Can Inkjet Printers Be Used for 3D Printing Applications?

    You might imagine inkjet technology building layers like a sculptor, but traditional inkjet printers aren’t made for 3D printing. Instead, they focus on print resolution, color accuracy, and paper compatibility.

    If you want 3D effects, specialized inkjet-based 3D printers use advanced material jetting. Remember, regular inkjet maintenance, ink cartridge care, and printing speed tweaks won’t turn your standard printer into a 3D machine.

    Conclusion

    Using an inkjet printer is like painting with tiny droplets of ink, creating vibrant images right before your eyes. Once you set it up, understand its parts, and pick the right cartridges and paper, you’ll get great results every time.

    Keep an eye on print quality, troubleshoot issues promptly, and maintain your printer well to extend its life. With these tips, your inkjet printer will be a reliable tool, making printing easy and enjoyable.

  • How Does Dye Ink Work?

    How Does Dye Ink Work?

    You use dye ink because its soluble dyes dissolve in water or alcohol, allowing colors to soak smoothly into paper fibers. This creates bright, vibrant prints with sharp detail, especially on glossy or coated papers that control ink spread and enhance color vibrancy.

    Although colors appear luminous, they may fade faster due to less water resistance.

    How the carrier liquids flow and dry also affects print quality.

    If you want to understand the full impact on prints, there’s more to explore.

    What Is Dye Ink?

    vibrant smooth color blending

    What makes dye ink unique is its composition of soluble dyes dissolved in a liquid carrier, usually water or alcohol-based solutions. When you use dye ink, those soluble dyes allow for a broad color gamut, meaning you get access to a wide range of vibrant colors that really pop on your prints.

    This is why dye ink is a favorite in inkjet printers, especially when you need high-quality photo printing with bright, vivid results. Because the dyes dissolve completely into the liquid, the colors blend smoothly, letting you create subtle gradients and rich, transparent effects.

    When you select dye ink, you’re picking a formula designed to offer stunning color reproduction and smooth progressions, which is ideal for both photography and artistic projects. The unique molecular structure of the soluble dyes in dye ink ensures you get consistent, eye-catching prints every time.

    How Dye Ink Interacts With Paper Fibers

    When you apply dye ink, its molecules soak right into the paper’s fibers, blending smoothly with the surface. This absorption really influences how vibrant and sharp the colors look. It all depends on the paper’s texture and coating.

    Knowing how this interaction works can help you get a better handle on the final look of your prints. So, the next time you’re printing, keep in mind how the ink and paper are working together!

    Absorption Into Paper

    Although dye ink starts as a liquid, it quickly dissolves into the paper’s fibers, allowing color molecules to penetrate deeply. This absorption happens because the ink’s soluble dyes move through the paper’s porous structure by capillary action.

    As dye molecules spread, they bond with the paper fibers, ensuring the color stays vibrant and stable.

    Here’s how absorption works in three key steps:

    1. Ink lands on the paper surface and begins moving into its porous structure.
    2. Capillary action draws dye molecules deeper into the fibers.
    3. Dye molecules bond with paper fibers, locking in color.

    The paper’s porosity and surface treatment play essential roles, so choosing coated or high-quality paper helps optimize this process for clearer, sharper prints.

    Color Penetration Effects

    Because dye ink dissolves at a molecular level, it penetrates deeply into the microscopic pores of paper fibers, creating vibrant, translucent colors. You’ll notice that dye molecules diffuse through the paper’s structure, bonding with fibers rather than just sitting on the surface.

    The degree of penetration depends largely on the paper’s porosity. More absorbent papers allow the ink to infiltrate further. While this deep diffusion enhances color richness, it can also cause color bleed or feathering if the paper is too porous or low quality.

    Understanding how dye ink interacts with paper fibers helps you choose the right paper to balance sharpness and vibrancy. This way, you prevent unwanted spreading while maximizing the ink’s translucent effects through proper penetration.

    Why Dye Ink Creates Brighter, More Vibrant Colors

    brighter transparent saturated colors

    If you want your prints to really pop, dye ink delivers by dissolving completely in its liquid carrier. This allows light to pass through and reflect off the paper. This transparency creates vibrant colors with impressive saturation.

    Unlike pigment inks, dye molecules spread evenly, resulting in smooth color gradations and a broader color range. Here’s why dye ink creates brighter, more vibrant colors:

    1. Light interaction: Since dye is transparent, light penetrates and reflects, enhancing brightness and depth.
    2. Complete dissolution: Dye’s full dissolution guarantees uniform color dispersion, avoiding clumps that dull saturation.
    3. Vivid saturation: The molecular structure of dyes offers intense, luminous hues that pigment inks can’t match.

    How Soluble Dyes Affect Color and Longevity

    The vibrant colors you enjoy from dye inks come from soluble dyes that fully dissolve in their liquid base, creating a consistent and bright appearance. Because these dyes dissolve at the molecular level, dye-based inks deliver vivid, wide-ranging colors that really pop.

    However, this solubility also impacts color longevity. Soluble dyes are more vulnerable to environmental factors such as light and air, which can speed up fading and cause the colors to break down over time.

    Unlike pigment inks, dye-based inks don’t have solid particles that sit on the paper’s surface, so the colors don’t last as long or resist water as well. This means the vibrant hues you see initially may gradually lose their intensity as the soluble dyes migrate or degrade.

    Understanding how soluble dyes affect color and longevity helps you make informed choices about when and where to use dye-based inks for your printing needs.

    How Carrier Liquids Influence Ink Flow and Drying

    carrier liquids affect ink flow

    When you choose a dye ink, the carrier liquid plays a crucial role in how the ink flows and dries. Carrier liquids like water or alcohol dissolve the dye and affect ink flow and drying time by changing viscosity and evaporation rate. You’ll notice these key influences:

    1. Ink flow: Carrier liquids determine how smoothly the ink moves during printing. Thicker liquids slow flow, while thinner ones improve it.
    2. Drying time: Liquids with a fast evaporation rate, such as alcohol, speed up drying, minimizing smudging but sometimes reducing color vibrancy.
    3. Adhesion: The interaction between carrier liquids and the paper surface affects how well the dye adheres and whether the ink penetrates or sits on top.

    Dye Ink vs. Pigment Ink: Key Chemistry Differences

    Understanding how carrier liquids affect dye ink’s behavior sets the stage for comparing dye inks with pigment inks on a chemical level. Dye inks use dye molecules dissolved in a liquid carrier, so they penetrate paper fibers uniformly due to their solubility. This creates vibrant, transparent colors but makes dye inks more vulnerable to fading and water damage.

    In contrast, pigment inks contain tiny pigment particles suspended in the liquid. These particles don’t dissolve; instead, they rest on the paper’s surface, relying on strong surface adhesion. This difference means pigment inks produce opaque colors with superior fade resistance and durability.

    While dye molecules chemically bond with fibers, pigment particles physically adhere, offering greater longevity. Understanding these key chemistry differences helps you choose the right ink for your needs, balancing brilliance and permanence.

    Why Dye Ink Works Best on Glossy and Photo Papers

    You’ll notice dye ink works best on glossy and photo papers because these papers have smooth, coated surfaces. This coating controls how the ink absorbs and spreads. Because of that, the colors stay vivid and the details stay sharp since the ink doesn’t soak in too much. Knowing this little trick helps you get the most vibrant prints possible from your dye ink.

    Ink Absorption Dynamics

    Because dye ink relies on capillary action to spread evenly, the type of paper you use dramatically affects the final image quality. The interaction between the ink’s molecular structure and the paper’s surface determines absorption and drying speed.

    Glossy and photo papers have a smooth, coated surface that limits ink absorption, allowing colors to stay vibrant and sharp. In contrast, porous matte papers let ink penetrate deeper, which dims colors and prolongs drying.

    Here’s why this matters:

    1. Smooth surfaces reduce absorption, keeping dye ink on top for vivid hues.
    2. Porous surfaces absorb ink into fibers, causing duller colors.
    3. Faster drying occurs on less absorbent surfaces, preventing smudges.

    Choosing the right paper optimizes dye ink’s molecular diffusion and drying dynamics for crisp images.

    Glossy Paper Interaction

    How exactly does glossy paper enhance dye ink’s performance? Glossy paper features a special coating designed to optimize dye ink absorption. This smooth surface lets the ink soak in evenly without causing buildup, ensuring your prints show vibrant colors with sharp detail.

    The reflective coating on glossy paper not only absorbs dye ink well but also boosts its brightness, making colors pop more intensely. Because dye inks bond tightly with this coating, you get smooth gradients and seamless progressions that bring images to life.

    When you combine dye ink with glossy paper, the result is a shiny, high-contrast finish perfect for photos and detailed artwork. This interaction maximizes the strengths of dye ink, giving your prints a professional and polished look.

    Vivid Color Enhancement

    Glossy and photo papers don’t just enhance dye ink absorption. They also amplify its vivid color effects. When you print on these surfaces, dye ink’s molecular solubility and smooth bonding create stunning results.

    Here’s why you’ll see such vibrant prints:

    1. Dye ink penetrates evenly on glossy paper, boosting color vibrancy without bleeding.
    2. Its transparency allows light transmission through the ink, making colors look bright and luminous.
    3. The smooth surface limits ink absorption, increasing color saturation and sharpness.

    Thanks to the thin, reflective layer formed by dye ink on glossy and photo papers, your images pop with high saturation and contrast. This combination makes dye ink the perfect choice for vivid, eye-catching prints.

    Printer Technology and Dye Ink Print Quality

    When you choose a dye ink printer, you’re relying on tiny nozzles to spray liquid dye evenly across the paper. This creates vibrant colors with smooth gradations. The print quality depends heavily on the printer resolution, measured in dots per inch (DPI).

    Higher DPI means sharper images and better detail. Inkjet technology uses multiple color cartridges—cyan, magenta, yellow, and black—to expand the color gamut and enhance color reproduction. The paper type also affects how the dye ink absorbs, influencing the final clarity and vibrancy.

    Feature Impact on Print Quality Role in Dye Ink Printing
    Printer Resolution Sharpness & detail Higher DPI improves image crispness
    Inkjet Technology Precision ink placement Guarantees smooth color transitions
    Dye Ink Vibrant & smooth colors Dissolves uniformly on paper
    Color Reproduction Accuracy of hues Multiple cartridges expand gamut

    Understanding these elements helps you get the best from your dye ink printer.

    When and Why to Use Dye Ink

    Although dye ink may not offer the longest-lasting prints, you’ll want to choose it when vibrant, eye-catching colors are your priority. Its ability to deliver smooth gradients and bright hues makes it perfect for projects where color impact matters most.

    You’ll find dye ink especially useful when you need quick drying to speed up your workflow without smudging. Or when you want cost efficiency for printing large volumes or frequent jobs. It’s also great if you’re working on glossy or coated papers that boost color vibrancy and smooth application.

    Keep in mind, dye ink’s fade resistance is limited, so it suits short-term uses like marketing materials, photo printing, or crafts. Its excellent paper compatibility with coated surfaces ensures colors pop vividly.

    If your project demands brilliant colors, fast results, and budget-friendly printing, dye ink is a smart choice despite its trade-off in long-term durability.

    Tips to Maximize Color and Longevity With Dye Ink

    To get the most out of dye ink’s vibrant colors and quick drying properties, you’ll want to focus on how you prepare and handle your prints. Start by choosing high-quality paper compatible with dye inks to boost color absorption and prevent bleeding.

    After printing, apply a protective spray to increase water resistance and enhance fading resistance. Store your prints away from direct sunlight to preserve color longevity. Also, avoid excessive handling or exposure to moisture, which can cause smudging or color migration.

    Tip Benefit
    Use high-quality paper Vibrant colors, no bleeding
    Apply protective spray Water resistance, smudge-proof
    Store away from sunlight Prolonged color longevity
    Avoid moisture contact Prevents smudging, color shift

    Following these steps helps you maximize dye inks’ brilliance and maintain your prints’ beauty over time.

    Frequently Asked Questions

    Can Dye Ink Be Used on Fabrics or Non-Paper Materials?

    Yes, you can use dye ink for fabric application and other non-paper materials, but you’ll need to take into account material absorption and textile dyeing techniques. Without proper fixing agents or heat setting, the colorfastness will suffer, causing fading or bleeding.

    For the best results, choose textile-specific dye inks designed for fabrics. Otherwise, standard dye inks might not hold up well on non-paper surfaces, leading to smudging or washing out over time.

    How Should Dye Ink Cartridges Be Stored to Prevent Drying Out?

    You should store dye ink cartridges in a cool, stable storage environment to maintain the right temperature and avoid drying out. Use airtight sealing methods, like keeping cartridges in their original packaging or a sealed container, to control humidity and protect ink quality.

    Proper humidity control extends cartridge lifespan by preventing evaporation. Always avoid extreme temperatures and follow manufacturer guidelines to guarantee your dye ink stays fresh and ready for use.

    Are There Eco-Friendly or Non-Toxic Dye Ink Options Available?

    If you want your prints to dance with nature’s grace, you’ll find eco-friendly inks and non-toxic formulations ready to lead. You can choose biodegradable dyes and water-based alternatives that keep your art chemical free. These options let you create boldly without harming the planet.

    What Maintenance Is Required for Printers Using Dye Ink?

    You need regular printer cleaning to prevent ink drying and clogging, especially around the print head. Performing print head maintenance using manufacturer-approved cycles keeps ink flowing smoothly and extends ink longevity.

    Store cartridges properly to avoid evaporation. If you refill cartridges, do it carefully to maintain print quality.

    Running test prints helps catch blockages early. Also, keep your printer’s firmware updated to support proper maintenance and guarantee consistent results.

    Can Dye Ink Cause Printer Clogging or Damage Over Time?

    Yes, dye ink can cause printer clogging or damage over time if you’re not careful. Poor ink formulation or using low-quality dyes increases buildup in the nozzles, hurting your printer’s longevity.

    When dye ink dries or crystallizes, it blocks channels and leads to streaky prints. To protect your printer, you should use high-quality, manufacturer-recommended inks and perform regular cleaning cycles to maintain smooth ink flow.

    Conclusion

    You might think dye ink’s vibrant colors come with a simple magic wand, but no, it’s all about chemistry and clever design. Sure, dye ink gives you those brilliant hues on glossy paper, yet it’s ironic how its very brilliance can fade faster than you’d hope.

    So, if you want your prints to last as long as your enthusiasm, you’ll need to choose your paper, printer, and care wisely. Dye ink’s brilliance isn’t just luck; it’s a delicate balance you control.

  • What Does XL Mean on Ink Cartridges?

    What Does XL Mean on Ink Cartridges?

    When you see “XL” on ink cartridges, it means they hold more ink than standard ones without being larger in size. XL cartridges have bigger internal reservoirs, letting you print 2 to 3 times more pages before needing a replacement.

    This saves you money, reduces waste, and keeps your printing hassle-free. If you print often or in high volumes, XL is a smarter choice.

    Keep exploring to understand how this impacts cost, page yield, and environmental benefits.

    What Does “XL” Mean on Ink Cartridges?

    higher ink capacity more pages

    Although the “XL” label on ink cartridges might seem like just a size indicator, it actually means the cartridge holds 2-3 times more ink than a standard one. When you choose XL ink cartridges, you’re opting for a high-yield option designed to deliver a markedly increased page yield.

    This means you can print more pages before needing a replacement, which is especially helpful if you print frequently or in large volumes. The XL designation signals that the cartridge contains a larger ink reservoir while maintaining the same external size as standard cartridges, so it fits your printer without any issues.

    How XL Cartridges Hold More Ink

    You might be wondering how XL cartridges can hold more ink without actually getting bigger. Well, the secret lies in their internal design. They create larger chambers inside to store extra ink, all while keeping the same external size. So, what does that mean for you? It means you can print more pages without having to change cartridges as often. Pretty clever, right?

    Internal Ink Capacity

    How do XL ink cartridges hold more ink without looking bigger? The secret lies in their internal design. High yield cartridges like the XL variants feature larger internal ink chambers that increase ink capacity without changing the cartridge’s external size.

    This clever internal design allows for a considerably greater ink volume packed inside the same shell you’re used to. For example, an HP 61XL holds about 8.5 ml of ink, compared to just 3.5 ml in the standard HP 61.

    Same Size, More

    Because XL cartridges keep the same external size as standard ones, they fit perfectly into your printer without any adjustments. The secret lies inside. XL cartridges are engineered with larger internal chambers that hold more ink while maintaining their same size.

    This clever design lets you benefit from considerably more ink without swapping out your printer parts. With XL cartridges, you get a higher page yield, often 2 to 3 times more pages than standard cartridges.

    The microchip and nozzles remain identical, so you won’t notice any difference in installation or performance. Choosing XL cartridges means you print more efficiently and replace cartridges less often, all while using the same-sized cartridge your printer was built to accept.

    Comparing Ink Volumes: Standard vs. XL Cartridges

    higher capacity ink cartridges

    Although XL cartridges come with a higher upfront cost, they contain 2 to 3 times more ink than standard cartridges. This means you’ll print considerably more pages before needing a replacement.

    When comparing ink volumes, a standard HP 61 cartridge holds about 3.5 ml of ink, while the HP 61XL offers roughly 8.5 ml. Similarly, Canon’s XL cartridges store around 15 ml compared to 8 ml in their standard versions. This significant increase in ink volumes directly impacts page yield.

    Standard cartridges typically print between 150 to 200 pages, whereas XL cartridges can handle 400 to 600 pages on average. By choosing XL cartridges, you benefit from the larger ink capacity, which reduces how often you swap cartridges and lowers your overall printing interruptions.

    How XL Ink Cartridges Increase Page Yield

    You’ll notice XL ink cartridges hold two to three times more ink than standard ones. So, you can print a lot more pages before needing to replace them. This bigger ink volume directly boosts your page yield.

    It’s great if you print often because choosing XL means you won’t have to swap cartridges as frequently. Plus, that saves you time and effort in the long run.

    Ink Volume Comparison

    How much more ink does an XL cartridge hold compared to a standard one? XL cartridges typically contain 2 to 3 times more ink volume than standard cartridges.

    For instance, a standard Canon 545 cartridge holds about 8 ml of ink, while its XL counterpart contains roughly 15 ml, nearly doubling the ink volume. This increased ink capacity directly impacts page yield, allowing you to print between 400 and 600 pages with an XL cartridge, compared to just 150 to 200 pages using a standard cartridge.

    While page yield varies depending on printer brand and conditions, XL cartridges consistently provide more than twice the output. By choosing XL cartridges, you get a considerable increase in ink volume that markedly reduces how often you’ll need to replace cartridges during heavy printing tasks.

    Page Yield Benefits

    Why choose XL ink cartridges for your printing needs? XL cartridges boost your page yield considerably thanks to their larger ink capacity. This means you can print more pages before needing a replacement, saving time and effort.

    Here’s how XL cartridges improve your printing experience:

    1. They typically offer 2 to 3 times the page yield of standard cartridges.
    2. You can print 400-600 pages or more, compared to 150-200 pages with standard cartridges.
    3. Larger ink capacity means fewer cartridge changes, allowing uninterrupted printing.
    4. The cost per page drops, making high-volume printing more economical.

    Using XL cartridges is a smart move if you want to print more pages efficiently and reduce cartridge replacements.

    When to Choose XL vs. Standard Ink Cartridges

    choose cartridges based on volume

    Although both XL and standard ink cartridges serve the same basic function, choosing the right one depends largely on your monthly printing volume. If you print more than 150-200 pages per month, XL cartridges are the better choice. They offer 2-3 times the page yield of standard ink cartridges, making them ideal for high-frequency printing needs. This higher capacity means fewer cartridge replacements and less hassle.

    On the other hand, if your printing volume is low, typically under 50 pages monthly, standard cartridges suit you best. Using a standard cartridge helps prevent ink from drying out and reduces wastage, ensuring better print quality over time. Your decision should focus on matching the cartridge type to your estimated monthly page yield and printing needs. By doing so, you’ll optimize performance and avoid unnecessary expenses.

    How XL Cartridges Save You Money on Printing

    Since XL ink cartridges hold 2 to 3 times more ink than standard ones, you’ll print many more pages before needing a replacement. This higher page yield means you get more value and convenience from each cartridge.

    XL ink cartridges hold 2 to 3 times more ink, delivering greater value and convenience with every print.

    Although XL cartridges cost more upfront, they reduce your overall printing expenses by lowering the cost per page. Here’s how high yield ink cartridges save you money:

    1. Print hundreds of extra pages compared to standard cartridges.
    2. Cut down how often you buy replacements, saving time and effort.
    3. Enjoy a lower cost per page, making frequent printing more affordable.
    4. Benefit from long-term savings, especially if you print a lot.

    How XL Cartridges Help Reduce Environmental Waste

    When you choose XL ink cartridges, you cut down on how often you need to replace them, which means less packaging waste and fewer cartridges ending up in landfills. XL ink cartridges hold more ink than standard ones, so you make fewer cartridge replacements over time.

    This reduces the frequency of disposal and helps lower environmental waste considerably. High-yield cartridges also minimize the demand for manufacturing new cartridges, conserving natural resources and cutting down carbon emissions linked to production and transportation.

    By using fewer cartridges overall, you’re reducing the waste associated with recycling and disposal processes. Choosing XL ink cartridges promotes more sustainable printing habits by decreasing the total amount of materials consumed and discarded.

    In short, high-capacity cartridges help you play a direct role in lowering environmental waste while enjoying the convenience of longer-lasting ink.

    Key Factors to Check Before Buying XL Ink Cartridges

    Choosing XL ink cartridges not only helps reduce environmental waste but also requires careful consideration to get the best value. Before buying, you’ll want to focus on a few key factors to assure you make the right choice.

    Choosing XL ink cartridges reduces waste and ensures better value with thoughtful selection.

    1. Ink Volume: Check the actual ink volume listed, since “XL” means more ink but not necessarily a bigger cartridge.
    2. Page Yield: Compare the number of pages you can print with XL versus standard cartridges to judge cost-efficiency.
    3. Compatibility: Verify that the XL cartridge fits your specific printer model to avoid any printing issues.
    4. Cost-Efficiency: Consider your printing habits; if you print often, XL cartridges usually offer a lower cost per page despite a higher upfront price.

    How to Maximize Value From Your XL Ink Cartridges

    To get the most from your XL ink cartridges, you’ll want to focus on printing in large batches and monitoring your usage closely. XL cartridges are designed for high-volume printing and typically offer 2-3 times the page yield of standard cartridges. This translates into significant cost savings.

    By printing consistently in bulk, you reduce the frequency of replacements and maximize the value these cartridges provide. Keep an eye on your ink levels and print patterns to avoid waste and guarantee efficient use.

    Also, store any unused XL cartridges properly to maintain ink quality for future jobs. Using XL cartridges in busy home or office settings where printing demands are high assures you get the best cost per page. This approach not only saves money but also streamlines your printing routine, letting you focus on tasks without frequent interruptions for cartridge changes.

    Choosing the Right Ink Cartridge Size for Your Printing Needs

    Maximizing value from your XL ink cartridges starts with picking the right cartridge size for your printing habits. XL cartridges hold 2-3 times more ink than standard ones, offering a higher print yield, but choosing the right size depends on how often you print.

    To make the best choice, consider these factors:

    1. Assess your average monthly print volume to decide if you need standard or XL cartridges.
    2. Compare the ink capacity, measured in milliliters or pages, rather than relying solely on the XL label.
    3. Ensure the cartridge size is compatible with your printer model to avoid functionality issues.
    4. Match cartridge size to your printing needs to prevent ink wastage and maintain consistent print quality.

    Frequently Asked Questions

    Are XL Cartridges Compatible With All Printer Models?

    No, XL cartridges aren’t compatible with all printer models. You’ll need to check your printer’s specifications to avoid printing errors or damage.

    When managing printer maintenance, using the right cartridge is vital. XL versions often offer better cartridge pricing and more ink color options, making them cost-effective.

    Also, remember to participate in cartridge recycling programs to reduce waste and support the environment while keeping your printer running smoothly.

    Can XL Cartridges Dry Out Faster if Unused?

    No, XL cartridges don’t dry out faster just because they’re bigger. Ink drying mainly depends on how you store your unused cartridges and how often you use your printer.

    Poor storage conditions like heat, sunlight, or exposure to air can reduce ink longevity. To keep your ink fresh, store cartridges in a cool, dry place and use your printer regularly.

    That way, you’ll avoid ink drying regardless of cartridge size.

    Do XL Cartridges Affect Print Quality Compared to Standard Ones?

    No, XL cartridges don’t affect print quality compared to standard ones. You’ll get the same color consistency and ink saturation because both use identical ink formulations and nozzles.

    Ink longevity might improve since XL cartridges hold more ink, but evaporation rates aren’t markedly different if you store them properly. What really impacts print quality is how well you maintain your printer, not whether you choose XL or standard cartridges.

    How Should I Store XL Ink Cartridges Properly?

    You should store XL ink cartridges in a cool, dry place with proper ink handling to extend cartridge lifespan. Keep them upright and in their original packaging to avoid dust and leakage.

    Follow storage temperature tips by maintaining between 50°F and 77°F to prevent ink drying or clumping. Avoid humidity and direct sunlight to guarantee your ink cartridge storage maintains ink quality and functionality for peak printing results.

    Are There Any Warranty Differences for XL Cartridges?

    Wondering if warranty coverage differs for XL cartridges? Usually, it doesn’t. Manufacturers treat XL cartridges like standard ones in their return policies and manufacturer guarantees.

    You’ll find the same protection if defects occur, but extended warranty options rarely target XL specifically. Just remember, improper use or third-party refilling can void your warranty.

    Always check the exact terms to make sure your XL cartridge’s coverage matches your expectations.

    Conclusion

    Choosing XL ink cartridges means you’re opting for a smarter, more generous option that stretches your printing resources further. They gently nudge you toward fewer cartridge changes and less packaging waste, making your printing routine more convenient and eco-friendly.

    While they might ask a bit more upfront, the extended page yield quietly rewards your budget over time. So, next time you shop, consider XL as a subtle upgrade that keeps your printing smooth and thoughtful.