Cricut Infusible Ink works by infusing dye directly into compatible materials like polyester fabrics or coated surfaces when you apply heat and pressure.
At around 385°F to 400°F, the dye bonds with the fibers, creating vibrant, permanent designs that won’t peel or crack.
You’ll need to prepare your surface properly and mirror your design before cutting for the best results.
Keep going, and you’ll uncover tips for perfect application and caring for your projects.
What Is Cricut Infusible Ink?
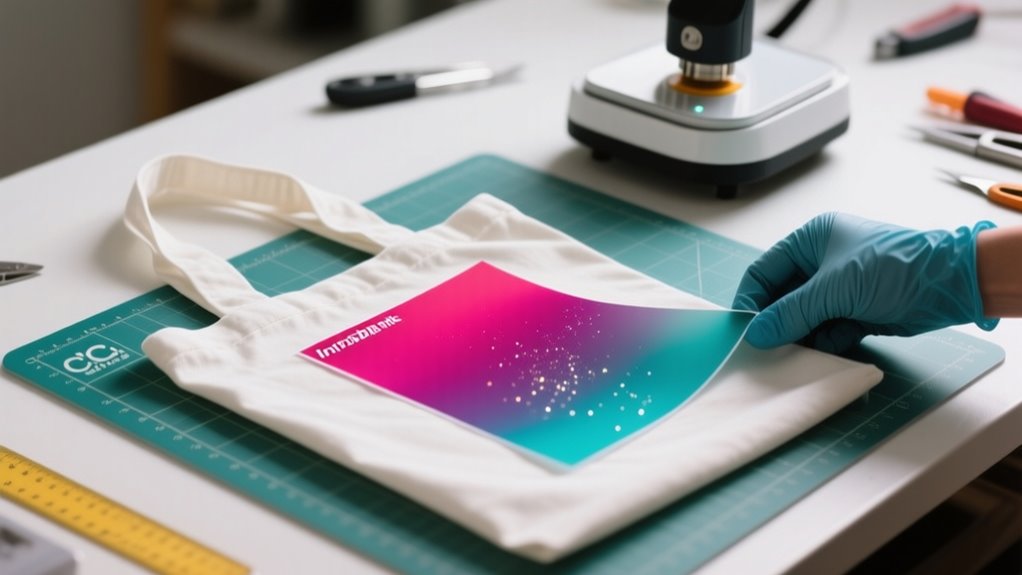
How exactly does Cricut Infusible Ink create such vibrant, lasting designs? Infusible Ink uses a unique heat infusion process that transfers dye-based colors directly into compatible surfaces. When you apply heat and pressure, the ink becomes part of the material’s fibers, making the design seamless, durable, and peel-proof. Unlike traditional vinyl or iron-on transfers, Infusible Ink doesn’t sit on top of the surface; it fuses within it.
To get the best results, you’ll need to work with compatible surfaces, typically polyester-rich fabrics or specially coated items. These materials allow the ink to bond properly during heat infusion. Keep in mind, Infusible Ink won’t work on 100% cotton or uncoated materials because the ink can’t infuse correctly.
The key is precise temperature and timing to ensure your design fully integrates, giving you vibrant, long-lasting results you’ll want to show off.
How Cricut Infusible Ink Works
Why does Cricut Infusible Ink produce such vibrant, lasting designs? It’s all about the unique heat transfer process. Instead of sitting on top of your project like traditional iron-on, Infusible Ink uses heat to infuse dye directly into compatible substrates.
Cricut Infusible Ink creates vibrant, lasting designs by infusing dye directly into your project with heat.
When you create your design with transfer sheets or pens and apply heat, usually between 385°F and 400°F, the ink activates and bonds with the material’s fibers or coating.
This infusion means the design becomes part of the substrate itself, resulting in a smooth, professional look without any peeling, cracking, or fading. Once cooled, your design is permanent, peel-proof, flake-proof, and washable.
You’ll notice the difference immediately: vibrant colors that last as long as the item does. Understanding this heat transfer method helps you appreciate why Infusible Ink delivers such stunning, durable results on the right compatible substrates.
Compatible Blanks for Cricut Infusible Ink
Since Cricut Infusible Ink relies on bonding with polyester fibers or coatings, you’ll need to use blanks specifically made for this process. Only compatible blanks with a polyester coating or high polyester content guarantee the ink infuses correctly, creating vibrant, long-lasting designs. Avoid 100% cotton unless it’s sublimation-compatible or has a polyester coating.
Here are four common types of compatible blanks:
- T-shirts and tote bags made from polyester or with a polyester coating
- Ceramic coasters with a special sublimation-compatible surface
- Pillow covers blended with polyester fibers
- Cork blanks designed for Infusible Ink use
Cricut offers a variety of blanks in these categories, so you can pick the perfect base for your project. Remember, proper preparation like cleaning and preheating these blanks is key to achieving the best results with Infusible Ink.
Designing Your Cricut Infusible Ink Project in Design Space
When you set up your canvas in Design Space, be sure to size your design so it fits your blank perfectly. It’s really important to get that just right. Also, don’t forget to mirror your design before cutting—that way, it transfers the right way onto your project. Finally, make sure to select “Infusible Ink Transfer Sheet” as your material to get the best cutting results.
Setting Up Canvas
Although it might seem straightforward, setting up your canvas correctly in Cricut Design Space is essential for a successful Infusible Ink project. You want your design to fit perfectly and transfer smoothly. Here’s how to do it:
- Open Design Space and select or create your design, making sure it fits within your blank surface dimensions.
- Resize and position your design on the canvas, leaving space around the edges to avoid cutting errors.
- Hit the “Make It” button and select “Infusible Ink Transfer Sheet” as your material.
- Save your project, connect your cutting machine, and get ready to cut or draw.
Mirroring Your Design
Because your design will transfer as a mirror image onto your project, you need to flip it horizontally in Cricut Design Space before cutting or drawing. When working with Infusible Ink transfer sheets or pens, always select the “Mirror” option in Design Space. This step flips your design so it prints correctly on the final product.
Mirroring is especially essential for designs with text or directional elements, ensuring they appear readable and properly oriented after transfer. If you skip this step, your design will be reversed, causing text and intricate details to look backward.
This mistake can lead to wasted materials and time since you’ll have to redo the cut or draw. So, always double-check and mirror your design in Design Space to achieve perfect results with your Cricut Infusible Ink projects.
Choosing Infusible Ink
As you design your Cricut Infusible Ink project in Design Space, you’ll want to carefully choose the right transfer sheet or pen based on your design style. Selecting the right Infusible Ink transfer method guarantees vibrant, lasting results on your compatible Cricut blanks. Here’s how to get started:
- Mirror your design in Cricut Design Space to ensure proper transfer.
- Choose between transfer sheets or Infusible Ink pens/markers depending on whether you want a cut or drawn design.
- Resize and position your artwork within the blank’s dimensions for a perfect fit.
- Use the recommended material settings to cut or draw, then weed excess material, leaving only your design on the liner.
Following these steps helps you create flawless, professional Infusible Ink projects every time.
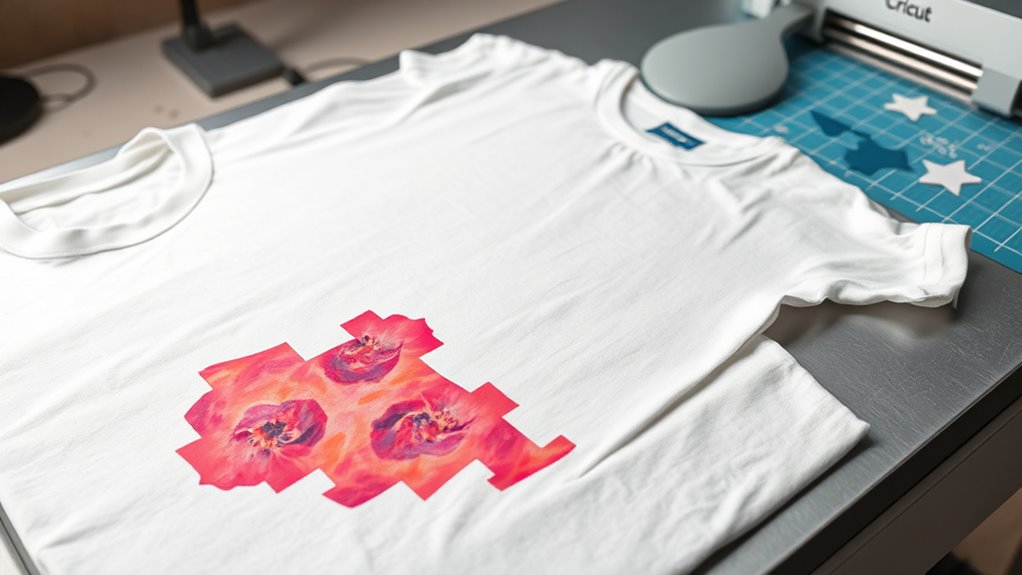
Cutting Infusible Ink Transfer Sheets: Best Practices
When cutting Infusible Ink transfer sheets, you’ll want to place the sheet face-up on the Standard Grip Mat with the liner side down to guarantee proper cutting. Use Design Space to create and mirror your design before you cut, ensuring the cut design has the correct orientation.
Select “Infusible Ink Transfer Sheet” as your material setting, then load the mat into your Cricut machine. After cutting, remove the design carefully, trim any excess material, and crack the cut lines lightly. This helps make weeding easier.
When you weed, remove all the negative space, leaving only your desired design on the liner, ready for transfer.
| Step | Tip |
|---|---|
| Placement | Sheet face-up, liner side down |
| Design Setup | Mirror design before cutting |
| Material Selection | Choose Infusible Ink Transfer Sheet |
| Post-Cut | Trim excess, crack cut lines |
| Weeding | Carefully remove negative space |
Preparing Your Blank for Infusible Ink Transfers
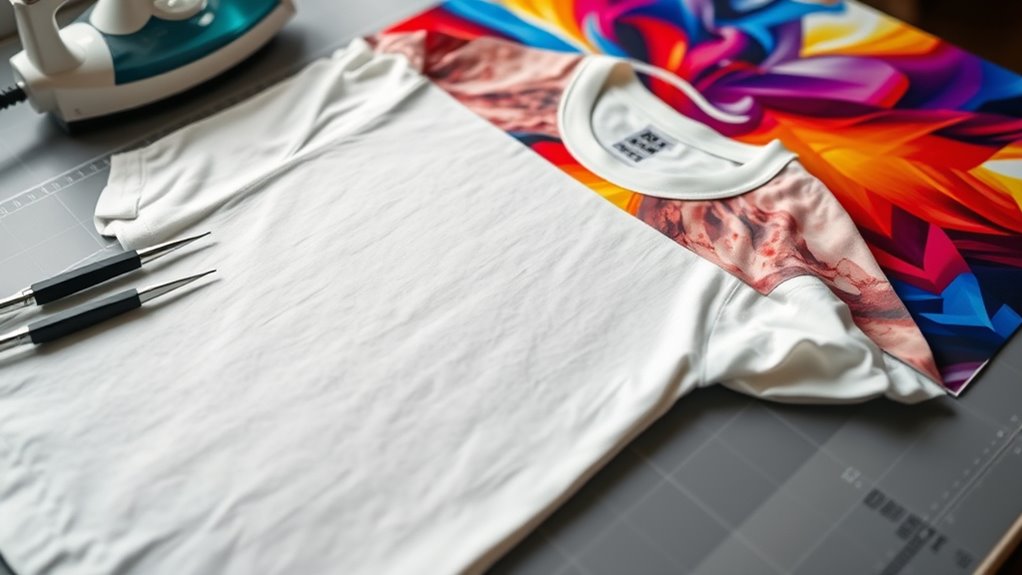
Before you start your Infusible Ink transfer, make sure your blank is clean and free of lint. You can use a lint roller or a clean cloth to get it just right.
Also, try placing some cardstock inside your blank. This little trick helps prevent the ink from bleeding through to the other side.
Cleaning And Lint Removal
How do you guarantee your blank is perfectly ready for an Infusible Ink transfer? Proper cleaning and lint removal are key. Start by wiping your blank with a lint-free cloth to eliminate surface debris, dust, and oils.
Follow these steps to prep your blank:
- Use a lint-free cloth or lint roller to remove dust and fibers.
- Check for and remove any surface debris that could affect adhesion.
- Make certain the blank is completely dry and free of lotions or oils.
- Give the surface one final once-over with a lint roller to pick up loose fibers.
Using Cardstock Inside
After you’ve thoroughly cleaned and prepped your blank, placing cardstock inside it helps guarantee your Infusible Ink transfer turns out flawless. The cardstock acts as a barrier, protecting the interior of your blank and ensuring the ink doesn’t bleed through to the backside.
It also promotes even heat distribution during the heat transfer process, which is essential for a smooth, vibrant design. Preheating the blank with the cardstock inside removes moisture and flattens wrinkles, setting the stage for a clean transfer.
For items like coasters or mugs, cardstock stabilizes the blank, preventing warping or uneven pressure while pressing. Always keep the cardstock inside as the blank cools completely after heat transfer; this maintains the shape and stability of your project.
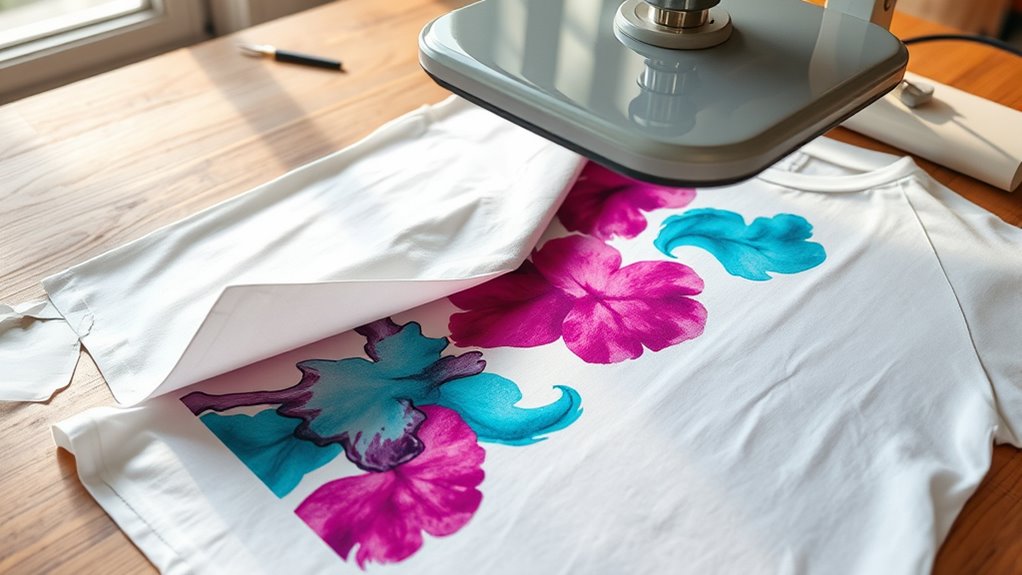
Applying Heat and Pressure for Perfect Infusion
When you apply the right heat and pressure, the ink from your Cricut Infusible Ink transfer sheet or pen embeds deeply into the fibers of your chosen blank. This infusion process requires precise control of both heat and pressure to guarantee vibrant, lasting results. Here’s how to get it right:
- Set your Cricut EasyPress or heat press to the recommended temperature, usually between 385°F and 400°F.
- Apply even pressure across the entire design area to ensure consistent heat transfer.
- Press for the specified time, generally around 60 seconds, to fully infuse the ink without damaging the material.
- Let the blank cool completely before peeling off the transfer sheet to avoid smudging or incomplete infusion.
Using Infusible Ink Pens and Markers for Custom Designs
Applying heat and pressure isn’t limited to transfer sheets. You can also create custom designs using Cricut Infusible Ink pens and markers. These pens let you draw or color directly onto special transfer sheets or laser paper.
When you use them with compatible Cricut machines, you can create intricate, personalized artwork that transfers beautifully through heat transfer. The ink infuses into the fibers of the material, producing vibrant, seamless, and durable designs.
Before pressing, remember to mirror your design, especially if it includes text or directional elements. After drawing, place the design face-down on your blank, then apply heat and pressure to infuse the ink.
| Step | Key Action |
|---|---|
| Draw or color | Create custom designs with Infusible Ink pens |
| Mirror design | Flip the image before pressing |
| Heat transfer | Apply heat and pressure to infuse the ink |
Special Tips for Hats, Baby Bodysuits, and Coasters
Although working with different materials can be tricky, you can achieve professional results on hats, baby bodysuits, and coasters by following a few key tips. Proper Infusible Ink transfer depends on secure application and precise heat pressing. Here’s how to get it right:
Master Infusible Ink transfers on hats, bodysuits, and coasters with secure application and precise heat pressing.
- For hats, secure the hat with the clasp, remove the insert, and fit it snugly on the hat form to guarantee an even transfer. Use heat resistant tape to keep your design from shifting.
- When working with baby bodysuits, place a Cricut EasyPress Mat inside to provide an even heat surface and prevent stretching. Secure your design with heat resistant tape for a smooth application.
- For coasters, position the design facing up and press at 400°F for 240 seconds without added pressure for maximum infusion.
- Always let your project cool completely before removing the transfer sheet to avoid smudging or incomplete transfer.
Following these steps guarantees a flawless Infusible Ink transfer on tricky surfaces.
Caring for and Troubleshooting Your Infusible Ink Projects
To keep your Infusible Ink projects looking fresh, always wash them in cold water with mild detergent. And try to skip fabric softeners or bleach—they can mess with your design.
Also, make sure you let the project cool completely before peeling off the transfer paper. This helps avoid any smudges or unwanted marks.
If your design looks faded or uneven, don’t worry. Just double-check your heat settings and how you prepped the surface. These are common things to look at when troubleshooting.
Cleaning And Maintenance
When you care for your Infusible Ink projects properly, their vibrant designs stay bright and intact for a long time. Proper cleaning and maintenance are key to preserving your creations. Follow these tips to keep your Infusible Ink projects looking fresh:
- Clean with warm water and mild detergent to avoid damaging the design.
- Avoid abrasive tools, steel wool, or colored cleaners that can harm the infused surface.
- Let projects cool completely before handling or washing to prevent smudging or ink transfer.
- Regularly check your heat press to ensure consistent heat application for successful results.
Also, store unused Infusible Ink sheets in a cool, dry place away from sunlight to maintain their quality. These simple steps will help your projects last and look their best.
Common Troubleshooting Tips
Proper care goes a long way in keeping your Infusible Ink projects vibrant, but sometimes issues still pop up. To guarantee a smooth transfer, always clean your blank surface thoroughly to remove dust, fibers, and oils before application.
Use the correct heat and time settings from Cricut’s Heat Guide to avoid incomplete or over-infused designs. During pressing, don’t slide or reposition your project, as this can cause uneven transfer or ghosting.
After heat application, allow your project to cool completely before handling to prevent smudging. Finally, when caring for your finished piece, avoid abrasive cleaners and fabric softeners to keep the ink vibrant and durable.
Following these tips will help you troubleshoot common problems and enjoy flawless Infusible Ink results every time.
Frequently Asked Questions
Can Cricut Infusible Ink Be Used on Cotton Fabrics?
You can’t use Cricut Infusible Ink on pure cotton fabrics if you want lasting design durability. Since it relies on fabric dyeing through heat transfer, it works best on polyester or poly-coated materials.
On cotton, the ink won’t properly bond, causing your design to peel or flake over time. For strong, vibrant results, stick to blanks with at least 60% polyester content to guarantee your design lasts.
How Long Does the Infusible Ink Design Last on Projects?
You’ll find that Cricut Infusible Ink designs boast impressive ink durability, lasting for at least 50+ washes when applied correctly. The heat resistance of the ink guarantees it fuses into the fabric fibers, preventing color fading even after repeated use and washing.
If you follow the recommended temperature, pressure, and cooling instructions, your design will stay vibrant and intact without peeling, cracking, or flaking. This helps maintain its original look for the long haul.
Is It Safe to Use Infusible Ink on Food Containers?
Think of infusible ink like a vibrant garden growing within fabric fibers, not a paint sitting on the surface. You shouldn’t use it on food containers because food safety is a top priority, and the ink isn’t tested for material compatibility with edible items.
While the design durability is impressive on non-food surfaces, using it on anything that touches food risks contamination. Stick to food-safe materials to keep your projects both beautiful and safe.
Can I Layer Multiple Infusible Ink Designs on One Blank?
You shouldn’t layer multiple Infusible Ink designs on one blank because layering techniques can cause color blending issues and affect design complexity. Since the ink infuses into the material, adding layers risks bleeding and muddled colors.
If you want to increase design complexity, try spacing separate designs carefully or test layering on scrap material first. Overall, one layer guarantees vibrant, clean results without compromising adhesion or color quality.
What Is the Difference Between Infusible Ink and Regular Vinyl?
The difference between Infusible Ink and regular vinyl lies in ink transfer and color longevity. With Infusible Ink, the design becomes part of the fabric fibers, giving you seamless, soft results and unmatched design precision.
Vinyl sits on top, which can feel raised and may peel or crack over time. While vinyl keeps its color intact unless damaged, Infusible Ink’s colors slightly fade but stay permanently embedded for long-lasting wear.
Conclusion
Just like a chef carefully blends ingredients to create the perfect dish, you’ll find Cricut Infusible Ink melts seamlessly into your fabric, making your designs part of the material itself.
Imagine a friend who once struggled with fading prints, now thrilled that their projects last wash after wash, vibrant and flawless.
With the right blanks, heat, and pressure, your creations won’t just look good; they’ll truly become one with your canvas. Keep experimenting, and watch your art come alive!
Leave a Reply