Category: Ink

  • Does Chase Ink Have Foreign Transaction Fees and How to Avoid Them

    Does Chase Ink Have Foreign Transaction Fees and How to Avoid Them

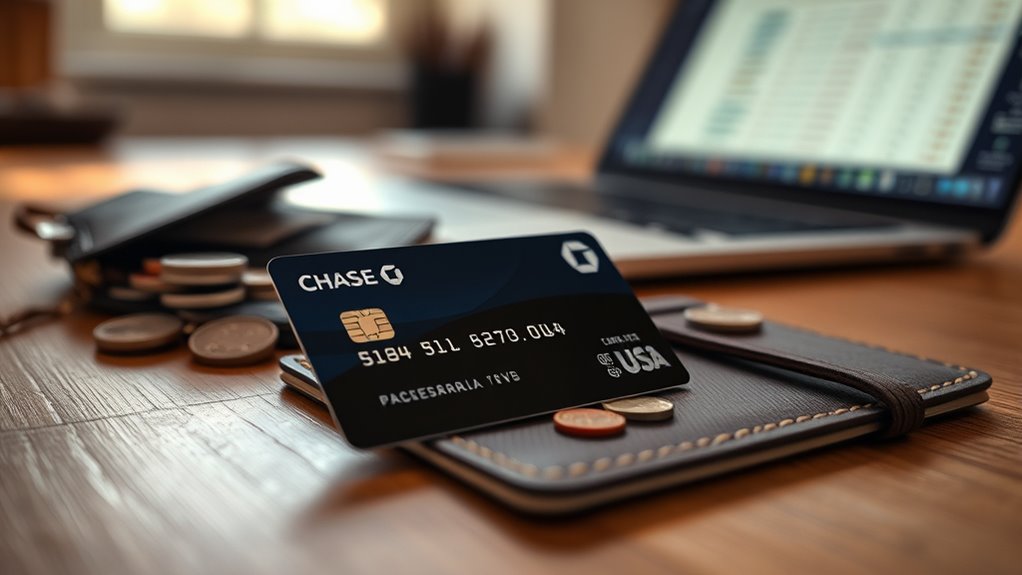
    Chase Ink cards usually charge a 3% foreign transaction fee on international purchases, except for Ink Business Preferred and Ink Business Premier, which waive these fees.

    To avoid extra costs, choose one of these no-foreign-fee cards and ask merchants to bill in U.S. dollars.

    You can also monitor your statements for incorrect charges and consider alternative payment methods like Wise Business accounts.

    Keep exploring to discover how to optimize rewards and manage overseas spending efficiently.

    What Are Foreign Transaction Fees on Chase Ink Cards

    foreign transaction fee details

    Although Chase Ink cards vary in their policies, most charge a foreign transaction fee of about 3% on purchases made in a foreign currency or with non-U.S. merchants. These foreign transaction fees apply automatically to international purchases, whether you’re traveling abroad or shopping online from overseas vendors.

    For example, if you use a Chase Ink Business Cash card for international transactions, expect a 3% fee added to your bill, calculated based on the U.S. dollar amount of the purchase. However, if you want to avoid these fees, consider cards like the Chase Ink Business Preferred or Ink Business Premier, which don’t charge foreign transaction fees. This makes them a better choice for frequent international purchases.

    Understanding how these fees work is essential to managing your expenses during international transactions and planning effective fee avoidance strategies. Always check your card’s terms to know if a 3% fee applies before making foreign currency purchases or dealing with non-U.S. merchants.

    How Foreign Transaction Fees Affect International Business Spending

    When you make international business purchases with a Chase Ink card that charges foreign transaction fees, those extra costs quickly add up and eat into your budget. These fees, usually around 3%, increase the total costs of your international business spending on credit cards.

    Whether you’re buying from foreign vendors online or making purchases abroad, these fees add to your expenses, reducing your profit margins. Over time, frequent international transactions with hidden or untracked fees can skew your expense reports, complicating budgeting and financial forecasting.

    Frequent international fees increase costs, skew reports, and complicate budgeting and financial forecasting.

    This makes managing your expenses more difficult and less transparent. To maintain tighter control over your costs and protect your profit margins, you need strong expense management practices that consider how foreign transaction fees affect your overall spending.

    Understanding the impact of these fees helps you plan better and avoid unexpected charges that drain your resources during international business activities.

    Which Chase Ink Cards Have No Foreign Transaction Fees

    no foreign transaction fees

    If you want to avoid extra costs on international purchases, choosing the right Chase Ink card matters. Not all Chase Ink cards have the same foreign transaction policy, so knowing which ones waive these fees can save you money. Specifically, the Chase Ink Business Preferred® and Chase Ink Business Premier® offer no foreign transaction fees, making them ideal for international business spending.

    Here’s a quick rundown:

    1. Chase Ink Business Preferred® – No foreign transaction fees, plus excellent travel rewards.
    2. Chase Ink Business Premier® – Also no foreign transaction fees, with strong Chase Ultimate Rewards points.
    3. Chase Ink Business Cash® – Charges a 3% foreign transaction fee on international purchases.
    4. Chase Ink Business Unlimited® – Also applies a 3% foreign transaction fee.

    Choosing a business credit card with no foreign transaction fees means you keep more of your money when traveling or making purchases abroad. Always check the latest terms to confirm the foreign transaction policy before applying.

    Choosing the Best Chase Ink Card for International Use

    Since international fees can quickly add up, choosing the right Chase Ink card is essential for minimizing costs abroad. When selecting a Chase Ink card for international use, focus on those with no foreign transaction fee, like the Ink Business Preferred and Ink Business Premier.

    These cards eliminate the typical 3% fee on international payments, which can save you money during business travel or overseas purchases. Using a card without foreign transaction fees also helps you maximize Chase Ultimate Rewards, boosting your rewards on every dollar spent abroad.

    On the other hand, the Ink Business Cash and Ink Business Unlimited carry a 3% fee, which can undermine your benefits if you travel frequently. Always verify current terms, as Chase Ink cards can update their policies.

    Comparing Rewards and Fees on Chase Ink Cards

    rewards and foreign fees

    When you’re looking at Chase Ink cards, it’s important to think about both the rewards and any foreign transaction fees. For example, the Ink Business Preferred gives you solid points and doesn’t tack on extra fees when you spend abroad. On the other hand, some cards come with a 3% foreign transaction fee, which can really cut into your cash back.

    Rewards Versus Fees

    Although Chase Ink cards offer valuable rewards, you should carefully weigh those benefits against foreign transaction fees when using your card abroad. Some Chase Ink cards charge a 3% fee on international purchases, which can cut into your cashback rewards and reduce overall reward value.

    Opting for cards with no foreign fee can enhance your travel and overseas shopping experience by avoiding extra costs. Here’s what to evaluate:

    1. Chase Ink Business Preferred and Ink Business Premier cards have no foreign transaction fees.
    2. Ink Business Cash and Ink Unlimited cards charge a 3% fee on international purchases.
    3. Rewards earned remain unchanged, but fees lower your net benefit.
    4. Choosing no-foreign-fee cards maximizes fee avoidance and reward value during international use.

    Card Options Comparison

    Understanding how foreign transaction fees impact your rewards is only part of the picture. When comparing Chase Ink cards, you’ll notice the Chase Ink Business Preferred and Chase Ink Business Premier stand out by waiving foreign transaction fees. This is a huge advantage for international spending and overseas transactions.

    The Preferred card offers 3X points on travel and business expenses, while the Premier rewards 2.5% cash back on purchases over $5,000. On the other hand, Ink Business Cash and Ink Business Unlimited charge a 3% fee on foreign transactions, which can add up quickly.

    When choosing between credit card options, focusing on fee waivers alongside rewards comparison helps you pick the best business credit cards for your global spending needs.

    Simple Ways to Avoid Foreign Transaction Fees With Chase Ink

    If you want to skip foreign transaction fees while using your Chase Ink card, choosing the right card is key. Cards like the Chase Ink Business Preferred and Ink Business Premier come with no foreign transaction fees, letting you make international purchases without added costs.

    Choosing the right Chase Ink card, like Business Preferred or Premier, helps you avoid foreign transaction fees.

    To avoid fees, you should also take these simple steps:

    1. Pick a Chase Ink card specifically labeled as having no foreign transaction fees.
    2. Ask merchants to bill you in U.S. dollars to prevent extra foreign transaction charges.
    3. Regularly check your statements and dispute foreign charges that look incorrect.
    4. Use Wise Business accounts for managing international payments with no foreign transaction fees.

    How to Manage Overseas Payments Without Paying Extra Fees

    Choosing the right Chase Ink card helps you avoid foreign transaction fees, but managing overseas payments effectively takes a bit more strategy. To avoid extra costs, always opt to pay vendors in U.S. dollars rather than foreign currency. This reduces foreign currency charges on your statements.

    Use your Chase Ink Business Preferred or Ink Business Premier cards for international payments, as they waive credit card fees on overseas payments. Separate domestic and international expenses by using different cards to simplify expense tracking and spot any unexpected charges quickly.

    Regularly review your credit card statements to catch foreign transaction fees you might miss. Moreover, consider alternative payment solutions like Wise Business accounts, which allow you to manage international payments without incurring foreign transaction fees.

    Benefits of Chase Ink No-Fee Cards for Frequent Travelers

    When you travel frequently for business, using Chase Ink no-fee cards can save you hundreds of dollars by eliminating foreign transaction fees. These cards are perfect for frequent travelers looking to make international purchases without the usual 3% surcharge. Plus, they help you manage travel expenses more cost-effectively while maximizing rewards.

    Here are the benefits you can count on:

    1. No foreign transaction fees: Save approximately $150 on $5,000 spent abroad.
    2. Rewards maximization: Earn points on all international purchases without extra costs.
    3. Seamless transactions: Enjoy smooth payments for travel expenses and online shopping worldwide.
    4. Simplified expense reporting: Track and manage international spend easily for your business.

    How Chase Ink No-Fee Cards Help Businesses Save Internationally

    Although international transactions often come with hidden fees, using Chase Ink no-fee cards lets your business avoid those extra charges and save around 3% on every purchase abroad. Chase Ink cards like the Business Preferred and Ink Business Premier don’t charge foreign transaction fees, which means your international spending won’t carry those costly add-ons. This helps you keep business savings intact while managing expenses across borders.

    You’ll also earn full reward points on international transactions, maximizing value from every dollar spent on cross-border payments. By switching to no-fee Chase Ink cards, you streamline expense management and prevent hidden costs from accumulating. These cards are perfect for businesses with frequent international transactions or travel needs, offering travel perks that enhance your global operations.

    Top Alternatives to Chase Ink for No-Fee International Spending

    If you want to avoid foreign transaction fees but prefer options beyond Chase Ink, several excellent alternatives can meet your business needs. These Chase Ink alternatives offer no foreign fees, making them perfect for international spending and cross-border transactions. Choosing cost-effective, no-fee cards helps you manage global transactions while maximizing rewards.

    Explore top no-foreign-fee alternatives to Chase Ink for rewarding, cost-effective international business spending.

    Here are four top options for no-fee international spending:

    1. Capital One Spark Miles A business credit card with no foreign transaction fees and strong travel rewards.
    2. Discover it Business Card Offers no foreign fees and cash-back rewards, ideal for global transactions.
    3. Wise Business Account Lets you hold funds in 40+ currencies with no foreign transaction fees.
    4. Ramp and Brex Corporate Cards Provide no foreign fees and simplify international expense management.

    These cards combine cost-effective features and rewards, making them smart choices for your business’s international spending.

    Frequently Asked Questions

    Can I Combine Chase Ink Cards to Maximize Fee-Free Spending?

    Yes, you can combine Chase Ink cards to maximize fee-free spending. By understanding each card’s features, spending limits, and eligibility criteria, you’ll optimize credit card rewards and take advantage of promotional offers.

    The application process is straightforward, and account management tools help track your expenses. Plus, partnership benefits and robust security measures keep your business safe.

    If you need help, Chase’s customer support is ready to assist you anytime.

    Are There Foreign ATM Withdrawal Fees With Chase Ink Cards?

    Yes, some Chase Ink cards charge ATM fees for foreign withdrawals, especially if you hit international limits or withdrawal restrictions. You’ll want to check fee disclosures carefully to avoid surprises.

    Using foreign ATM networks might also lead to currency exchange costs or transaction caps. To minimize fees, pick ATM locations wisely, time your withdrawals, and see if your card offers fee reimbursement.

    Always confirm your card’s specific policies before traveling abroad.

    How Does Chase Handle Currency Conversion Rates on Ink Cards?

    Every time you make an international purchase, Chase Ink uses the Visa or Mastercard mid-market exchange rate. This rate is often within a tiny fraction of the real currency exchange rate.

    This means you avoid hefty conversion fees and benefit from transparent currency conversion without hidden foreign transaction markups. While rate fluctuations happen, Chase guarantees fair foreign exchange rates.

    That helps you manage currency fees and global spending smoothly during your travels or international purchases.

    Do Chase Ink Cards Offer Travel Insurance for International Trips?

    Yes, Chase Ink cards offer solid travel insurance with international coverage to protect you on trips. You’ll get trip protection like trip cancellation, flight delay, and baggage loss benefits.

    They also provide emergency assistance and medical coverage if something unexpected happens abroad. These travel perks help streamline insurance claims, giving you peace of mind.

    Just remember to activate any required enrollment before you travel so all protections are in place.

    Can I Use Chase Ink Cards for International Online Subscriptions?

    Yes, you can use Chase Ink cards for international online subscriptions. Just keep an eye on international billing and service fees, especially with subscription payments outside the U.S.

    Managing recurring charges and billing cycles carefully helps avoid surprises. Using a digital wallet can boost payment security.

    Make sure you check your card’s terms and consider subscription management tools to handle your digital subscriptions smoothly and prevent unexpected fees on your online billing statements.

    Conclusion

    If you’re planning to spend abroad with your Chase Ink card, knowing which ones have no foreign transaction fees is key to avoiding surprise costs. Just like a trusty pocket watch guiding you through time, choosing the right card keeps your business spending smooth and fee-free.

    Opt for no-fee Chase Ink cards to save on international transactions and maximize rewards. Stay savvy, manage payments smartly, and keep your business thriving across borders without extra fees.

  • What Do Squid Have Ink For?

    What Do Squid Have Ink For?

    You have ink to protect yourself by quickly ejecting a dense, dark cloud that blocks a predator’s view and irritates its senses. This gives you a chance to escape.

    You control the ink’s shape and texture, like thick mucus or body-shaped smokescreens, to confuse and mislead attackers.

    This chemical and visual defense can even signal danger to other squid nearby.

    There’s a lot more to how your ink works and its surprising uses beyond defense.

    What Squid Ink Is Made Of

    complex melanin and enzymes

    Although squid ink might look simple, it’s actually a complex mixture dominated by melanin, the pigment that gives it its dark color and opacity. When you examine squid ink closely, you’ll find it packed with melanin, which provides that deep black or dark brown shade and helps block vision.

    Alongside melanin, the ink contains essential enzymes like tyrosinase, which play a role in melanin production and other chemical reactions within the ink. You’ll also find various amino acids such as glutamate, taurine, and alanine, which contribute to the ink’s chemical makeup and possibly its biological functions.

    These components combine to form a substance that’s both dense and effective. So, while melanin steals the spotlight, enzymes and amino acids quietly support the ink’s unique properties, making it more than just a simple liquid. Understanding this blend helps you appreciate how squid ink functions as a sophisticated natural tool.

    How Squid Ink Chemicals Affect Predators?

    When a squid releases its ink, it’s not just creating a cloud of darkness. The ink contains chemicals like tyrosinase that actually irritate predators and mess with their senses. This irritation can be pretty intense, making it hard for a predator to smell or track the squid.

    Because of this, the squid gets a crucial edge to make its escape. But it’s not only about blocking their view. The chemicals in the ink actively interfere with how predators perceive their surroundings, throwing them off even more. So, the squid’s ink is a clever defense that works on multiple sensory levels.

    Chemical Irritants in Ink

    Because squid ink contains chemicals like tyrosinase, dopamine, and L-DOPA, it can irritate a predator’s eyes and disrupt their sense of smell. These chemical irritants cause disorientation, giving the squid precious moments to escape.

    The enzymes and amino acids in the ink amplify this effect, working together with the dark cloud to overwhelm predators.

    Chemical Role in Ink
    Tyrosinase Eye irritation, disorientation
    Dopamine Chemical irritant, sensory disruption
    L-DOPA Sensory disruption
    Amino acids Enhance irritant properties
    Enzymes Increase chemical effects

    You’ll find that these components combine to create a powerful, multi-layered defense, making squid ink an effective chemical deterrent.

    Disruption of Predator Senses

    If you’ve ever wondered how squid manage to slip away from predators so effectively, their ink plays an essential role by disrupting the predators’ senses. When threatened, squid release ink from their ink sacs, creating a dense cloud that acts as both a visual smokescreen and a chemical barrier.

    The ink contains chemical irritants like tyrosinase that overwhelm and irritate predators’ chemosensory and olfactory systems, especially in fish and sharks. These irritants cause discomfort and sensory overload, reducing the predator’s ability to detect prey or continue pursuit.

    How Squid Use Ink To Escape Predators?

    ink cloud confuses predators

    Although predators can strike quickly, squid use a clever defense by ejecting ink from their ink sac through the siphon. This creates a dark cloud that blocks their attackers’ vision. This dark ink mixes with mucus, forming a thick plume you can see as a smokescreen underwater.

    It not only obscures vision but can also mimic squid tentacles or shapes, confusing predators. This gives the squid a chance to jet away and escape from predators rapidly. Some species even create pseudomorphs, ink clouds that look like their own body parts, to further distract foes.

    Defense Mechanism Description
    Ink Sac Source of dark ink ejection
    Ink Cloud Dark, thick, mucus-mixed plume
    Mimicry Ink shapes confuse predators
    Rapid Expulsion Quick release to escape threats
    Pseudomorphs Ink forms resembling squid body

    This smart use of ink greatly increases the squid’s chances of survival.

    How Squid Ink Signals Danger To Other Squid?

    Squid don’t just use ink to confuse predators. They also send clear danger signals to other squid nearby. When a squid senses predators, it releases ink not only as a smokescreen but also as a warning to its companions.

    This ink cloud carries chemical irritants that alert nearby squid to the lurking threat. You can think of it as a chemical and visual alarm, signaling others to stay alert and take immediate action.

    Types Of Ink Shapes Squid Create To Escape

    ink shapes deceive predators effectively

    When predators close in, these clever creatures release different ink shapes to throw off their attackers and make a swift getaway. Squids use ink shapes like clouds, pseudomorphs, ropes, and diffuse puffs as a defense mechanism.

    Large ink clouds act as smoke screens, giving you a quick visual distraction to slip away. Pseudomorphs are especially fascinating. They mimic the squid’s body shape and contain mucus to hold form longer, fooling predators into attacking a fake target.

    Ropes and long ink streams create physical barriers, obscuring your movement and making it harder for predators to track you. Each ink shape is carefully chosen based on the squid’s escape strategies and environmental conditions.

    Why Squid Ink Color And Texture Vary?

    Ink shapes like clouds and pseudomorphs serve different purposes, but the color and texture of the ink also play a big role in how effective these defenses are. You’ll notice squid ink color varies from black and brown to reddish and dark blue, depending largely on the species and the concentration of melanin and other chemicals.

    The ink texture changes too, ranging from thick, mucus-like pseudomorphs to more fluid clouds. This is influenced by the mucus content and how the ink is expelled. These differences in ink color and texture aren’t random; they’re adaptations shaped by the squid’s chemical composition to help camouflage, confuse predators, or mimic objects in the water.

    For example, variations in metal content and pigment concentration directly affect how the ink looks and behaves. This makes it a versatile tool for escape. Understanding these factors helps you appreciate the sophisticated defense mechanisms squid have evolved.

    How Squid Control Ink Release?

    You’ll find that squid control ink release by using muscles to squeeze their ink sac, pushing ink out quickly. Inside the sac, ink mixes with mucus to create a thick, manageable cloud. This combination helps squid direct their ink precisely when they need to escape.

    Ink Sac Anatomy

    Although it might seem like a simple defense, squid control their ink release with remarkable precision by contracting specialized muscles connected to their nervous system. The ink sac, a muscular pouch, stores the ink and plays a central role in ink ejection.

    When threatened, you can imagine the squid tightening these muscles, pushing ink from the sac into the rectum. From there, it moves toward the siphon, a muscular tube that lets the squid shoot ink out as a focused plume.

    This muscular control lets the squid time and aim the ink precisely, creating effective distractions. The coordination between the nervous system and the muscles around the ink sac and siphon allows quick, targeted ink ejection, helping the squid evade predators efficiently.

    Mucus-Ink Mixing

    The squid’s ability to release ink with precision relies on more than just muscular control. It also depends on how it mixes ink with mucus inside the ink sac. This mucus blends with the ink to create a thick, opaque suspension that disperses slowly in water, giving the squid control over its escape tactics.

    When you watch a squid release ink, it’s actually pumping this mucus-ink mixture from the ink sac through its rectum and out the siphon, using muscular contractions. This mix lets the squid control the size, shape, and density of the ink cloud, making it an effective visual and chemical distraction.

    Thanks to this clever mucus-ink blend, the squid can confuse predators and make a clean getaway.

    How Ink Helps Squid Hide And Confuse Predators

    When threatened, squid release a dark ink cloud that quickly blocks a predator’s view, giving them a chance to escape. This ink doesn’t just create a simple smokescreen; it can form shapes called pseudomorphs that look like the squid’s tentacles or other objects.

    These false targets confuse predators, making it harder for them to figure out where the squid actually is. You’ll notice squid can eject ink rapidly through their siphons, which helps them distract predators in an instant.

    Some species mix ink with mucus to create long ropes or diffuse puffs, adding another layer of disguise. This visual disruption, combined with the chemical signals in the ink, throws off predators’ senses, increasing the squid’s chances of slipping away unnoticed.

    Distinct Inking Strategies Among Squid Species

    You’ll notice that different squid species use their ink in unique ways. Some create shapes like puffs, others make ropes, and a few even form body-like shapes. It all depends on their environment and the predators they face. When you understand these distinct inking strategies, it really shows how squids adapt to survive.

    Species-Specific Ink Uses

    Although squid share the common ability to release ink, each species has developed unique inking strategies tailored to their environment and predators. When you observe squid ink, you’ll notice species-specific defense mechanisms at work.

    For example, some squids eject dense clouds to quickly hide, while others create pseudomorphs, ink shapes that mimic their body to confuse attackers. Certain species even produce luminous ink, adding a surprising twist to their defense.

    The ink’s composition, including mucus and particle size, varies to suit different habitats and threats. By using these species-specific tactics, squid maximize their chances of escape, showing how evolution has finely tuned their inking abilities.

    You can see how squid ink isn’t just a simple smokescreen but a sophisticated survival tool.

    Inking Behavior Variations

    Because each squid species faces different environments and predators, their inking behaviors have evolved distinct strategies. You’ll notice species variation in how squids release ink clouds: some, like the Australian giant squid, produce dense, large clouds to create a quick visual barrier, allowing a rapid escape.

    Others, such as the Caribbean reef squid, use subtler ink releases to communicate or signal nearby squid. Certain species, like the European common squid, take it further by creating pseudomorphs, ink shapes that mimic their body, to confuse predators and improve camouflage.

    The shape and size of these ink clouds or streams directly reflect each species’ ecological niche and predation pressures. Understanding these inking behavior differences reveals how squids adapt their defense tactics uniquely across species.

    Surprising Ways People Use Squid Ink

    When you think of squid ink, you might picture its use in cooking, but its applications go far beyond the kitchen. Squid ink is prized not only for culinary uses, adding rich umami flavor and striking black color to pasta and sauces, but also for its health benefits.

    Packed with antioxidants and antimicrobial compounds, it supports wellness and is even used in traditional medicine to improve blood circulation.

    Here are some surprising uses of squid ink:

    Use Type Description
    Culinary Uses Adds flavor and color to dishes worldwide
    Traditional Medicine Enhances blood circulation and fights microbes
    Historic Art & Writing Used as ink for drawing and writing in cultures

    Frequently Asked Questions

    Can Squid Ink Be Used for Medical Treatments?

    Yes, you can explore squid ink for medical treatments because it shows promising medicinal properties. Researchers focus on ink extraction methods to isolate bioactive compounds useful in biomedical applications.

    While clinical proof is limited, early studies highlight its potential to combat infections and cancer. If you follow ongoing research, you’ll see squid ink might become a valuable natural source for developing new drugs and supplements in the future.

    Is Squid Ink Safe for Human Consumption?

    You can think of squid ink as a dark treasure chest, safe and rich for your culinary applications. When you try dishes with squid ink, like pasta or sauces, you’re tapping into its nutritional benefits, melanin and amino acids that add flavor without harm.

    Ink harvesting guarantees it stays pure, and for most people, it’s perfectly safe. Just be cautious if you have shellfish allergies, as reactions might sneak in.

    How Long Does Squid Ink Remain Visible in Water?

    Squid ink remains visible in water for about 10 to 20 minutes, depending on conditions. You’ll notice the ink coloration starts strong but gradually fades as ink dispersal occurs.

    In calm water, you might see it up to 30 minutes, but water visibility decreases faster with currents and turbulence. Factors like temperature and salinity also affect how long you can spot that dark cloud before it fully diffuses into the surrounding water.

    Do All Squid Species Produce Ink?

    Not all squid species produce ink; about half of them lack ink sacs entirely. When you rely on camouflage techniques, you might not need ink for predator defense.

    The ink composition, mainly melanin, helps create a dark cloud to confuse attackers, but deep-sea squid and some juveniles skip this. So, whether you use ink depends on your species’ habitat and evolutionary needs, showing nature’s clever diversity in survival tactics.

    Has Squid Ink Been Used Historically in Art?

    Yes, squid ink has played a key role in historical art techniques. You’ll find that many ancient cultures mastered ink extraction methods to harvest this rich pigment. Its deep black color made it ideal for calligraphy and brush painting, especially in Mediterranean, Japanese, and Chinese traditions.

    When you use squid ink, you tap into its cultural significance, connecting with centuries of artists who valued its unique, lasting qualities in their work.

    Conclusion

    Next time you see a squid release ink, remember it can squirt up to 25 milliliters in one blast. That’s like a tiny black smoke grenade underwater! This clever defense not only confuses predators but also signals danger to other squid nearby.

    So, squid ink isn’t just a simple cloud; it’s a smart survival tool, helping these fascinating creatures slip away safely while keeping their friends alerted. Pretty impressive, right?

  • How to Understand the Difference Between Toner and Ink

    How to Understand the Difference Between Toner and Ink

    You’ll notice toner and ink differ mainly in printing methods and durability. Inkjet printers use quick-drying liquid ink, great for vibrant photos and detailed images, but ink can dry out and smudge.

    Toner, a dry powder used by laser printers, offers sharp, long-lasting text and fast printing speeds, ideal for heavy use. Toner cartridges last much longer and cost less per page over time.

    If you want to understand which suits your needs best, there’s more to explore about their uses and costs.

    How Ink and Toner Printing Technologies Differ

    inkjet vs laser printing

    Understanding the difference between ink and toner starts with how they print. Inkjet printers spray tiny droplets of liquid ink through microscopic nozzles, directly onto the paper. This water-based ink dries quickly, making it perfect for detailed images and vibrant photos.

    Inkjet printers use tiny droplets of water-based ink for vibrant photos and detailed images.

    On the other hand, laser printers use a laser to create an electrostatic image on a charged drum. Then, toner, a dry powder, is fused onto the paper with heat, resulting in sharp, crisp text.

    When you compare the two, ink cartridges generally print fewer pages, around 200-300, and need replacing more often. Toner cartridges, however, can handle thousands of pages and typically last much longer.

    Ink cartridges can also dry out or expire after about 18 months, while toner cartridges usually don’t have that problem. Both ink and toner have their unique printing technologies, so understanding these differences helps you make smarter choices for your printing needs.

    Which Printer Should You Choose: Inkjet or Laser?

    When you’re deciding between inkjet and laser printers, it really comes down to how you plan to use it—whether it’s for home or business—and the kind of print quality you want. Inkjet printers are great if you need detailed color photos because they handle those really well. On the other hand, laser printers tend to be faster and are better suited for printing a lot of text.

    You’ll also want to think about the costs involved. It’s not just the initial price of the printer but also the ongoing expenses like ink or toner. Depending on how much you print regularly, one might be more cost-effective than the other. So, taking a moment to consider your typical print volume can help you make the best choice.

    Home Versus Business Use

    Although both inkjet and laser printers serve your printing needs, choosing the right one depends largely on where and how you plan to use it. If you print occasionally at home, an inkjet printer fits best. It offers vibrant color and handles various paper types, perfect for photos and casual projects.

    Its lower initial cost makes it a smart choice for low to moderate print volumes. On the other hand, if you run a business requiring faster speeds and higher volume, a laser printer with toner provides durable, efficient output.

    Laser printers excel in sharp text and consistent print quality, making them ideal for professional environments. Ultimately, your decision hinges on balancing print volume, budget, and the type of documents you produce most often.

    Choosing between an inkjet and a laser printer isn’t just about speed or volume. It also comes down to the kind of print quality you need. Inkjet printers shine when producing vibrant, true-to-life images and photographs because they use liquid ink colors.

    If you’re aiming for high-quality photo prints, inkjets are your best bet. On the other hand, laser printers deliver sharper, crisper text and higher resolution, making them ideal for professional documents. They use toner to create precise, uniform images, perfect for detailed graphics and clear text.

    Keep in mind, inkjet print quality can suffer if cartridges dry out or nozzles clog, which might affect image detail. So, consider what you print most to choose the right printer for your needs.

    Cost And Volume Considerations

    Since your printing needs directly affect expenses, understanding the cost and volume differences between inkjet and laser printers is essential. Inkjet printers have a lower initial cost and cheaper cartridges, making them ideal if you print fewer than 1,000 pages monthly.

    However, ink cartridges only yield about 200-300 pages, so frequent replacements drive up long-term costs. On the other hand, laser printers come with higher upfront costs but shine when handling high-volume printing. Their toner cartridges can produce 2,000-3,000 pages at a lower cost per page, making them more economical if you print over 2,000 pages each month.

    Ultimately, choosing between inkjet and laser depends on your monthly print volume and how much you’re willing to spend on cartridges over time.

    Why Ink Is Best for Photos and Color Documents

    Why does ink perform better than toner when it comes to photos and color documents? When you use inkjet printers, you get vibrant, true-to-life color that’s hard to match. The liquid ink blends smoothly on paper, letting you capture subtle gradations and fine details that make photos stand out.

    Inkjet printers handle various photo paper types, producing high-resolution, glossy images with impressive richness and color accuracy. Plus, the water-based ink dries quickly, so you don’t have to worry about smudging your colorful prints.

    If you want professional-quality photographs or any detailed color documents, inkjet printers are your best bet. They’re specifically designed to bring out the depth and vibrancy in photos, ensuring every shade looks just right. So, for stunning color output and sharp photos, inkjet printers and their liquid ink give you superior results compared to toner.

    Why Toner Is Better for Text and High-Speed Printing

    sharp fast high volume printing

    When you need sharp, clear text, toner really comes through with superior print quality and precise detail. Plus, it helps your printer work faster, so it can handle high-volume jobs without slowing down. That means you get crisp documents quickly—perfect for busy offices or heavy printing tasks.

    Superior Text Clarity

    Although both toner and ink can produce printed text, toner delivers sharper, crisper results that stand out with higher resolution. Thanks to its fine powder and precise layering, toner prints maintain excellent sharpness, ensuring your documents look professional and easy to read.

    Plus, toner prints resist smudging and water damage, keeping text clear over time.

    Here’s a quick comparison to highlight why toner excels in text clarity:

    Feature Toner
    Text Sharpness High, precise edges
    Resolution Superior high resolution
    Durability Water- and smudge-resistant

    When you need clear, high-resolution text for important documents, toner is the better choice every time.

    Faster Print Speeds

    How quickly do you need your documents printed? If speed is a priority, toner-based laser printers have a clear advantage over inkjet printers. Laser printers can reach print speeds of up to 55 pages per minute, making them ideal for high-volume text printing.

    This speed comes from the dry toner powder that fuses onto paper instantly with heat, eliminating any drying time that inkjet printers require. Inkjet printers, on the other hand, deliver slower print speeds because their liquid ink needs time to dry. This can cause delays especially with large print jobs.

    How Ink and Toner Cartridge Types Affect Printer Performance

    Why does the type of ink or toner cartridge matter for your printer’s performance? Using the right cartridge directly affects print quality and reliability. OEM ink cartridges guarantee compatibility with your printer, ensuring consistent results. Compatible or remanufactured cartridges can save you money but may sometimes compromise print quality or cause issues.

    Choosing the right cartridge ensures print quality and reliability, with OEM options offering guaranteed compatibility.

    Ink cartridges usually print 200-300 pages before needing replacement, so you’ll replace them more often, which might impact performance over time.

    Toner cartridges, especially high-yield types, can print up to 10,000 pages, boosting productivity by reducing how often you change cartridges. Toner quality influences sharpness and resolution, which is essential for text-heavy documents.

    Ensuring proper cartridge compatibility with your printer model helps avoid smudging, streaks, or faded prints. In short, choosing the right ink or toner cartridge type helps maintain peak print quality and keeps your printer running smoothly.

    What Cartridge Yields Mean for Your Printing Budget

    cartridge yield impacts printing costs

    When you choose a cartridge, its yield directly impacts your printing budget by determining how many pages you can print before replacement. Cartridge yield measures the number of pages a cartridge produces, which influences your overall printing costs.

    Standard toner cartridges usually print 2,000–3,000 pages, but high-yield toner options can handle 10,000 pages or more, offering more value upfront. Ink cartridges, on the other hand, typically yield 200–300 pages, with high-yield ink reaching up to 1,000 pages.

    Although high-yield cartridges cost more initially, they lower your cost per page, making them smarter for frequent printing. Keep in mind that actual yields depend on your print coverage. Standard estimates assume about 5% coverage, so higher coverage reduces total yield.

    Why Businesses Prefer Toner for High-Volume Printing

    When you print a lot, toner really helps you save money because it lasts longer and lowers your cost per page. And it’s not just about saving cash—toner also speeds up your workflow with fast printing that keeps productivity high. On top of that, toner delivers sharp, durable prints that resist smudges and fading, which is perfect for professional documents. So, all in all, toner makes high-volume printing easier and more efficient for businesses.

    Cost Efficiency Over Time

    How can businesses save money on printing without sacrificing quality? Toner cartridges offer a lower cost per page compared to inkjet printers, especially for high-volume tasks. Despite higher upfront costs, toner’s longevity and durability cut expenses over time.

    You won’t worry about smudges or frequent replacements, which means fewer reprints and less waste.

    Feature Toner Cartridges Inkjet Printers
    Page Yield Up to 10,000 pages Few hundred pages
    Cost Per Page As low as 3 cents Higher
    Cartridge Storage Long shelf life, no drying Dries out quickly

    Choosing toner means you’ll see quicker returns on investment and consistent print quality without the hassle.

    Speed And Productivity

    Saving money on printing is important, but speed and productivity can make an even bigger impact on your business operations. Toner printers deliver impressive speed, producing up to 55 pages per minute, far faster than most inkjet models.

    This rapid output streamlines high-volume tasks like reports and business documents, letting you meet tight deadlines with ease. Toner cartridges also offer a high page yield, often exceeding 8,000 pages, so you won’t waste time on frequent replacements.

    Because toner fuses to paper with heat, your printer runs continuously without drying delays, maximizing productivity. By choosing toner, you guarantee consistent, professional-quality prints at a pace that keeps your workflow moving efficiently, making it the preferred option for businesses handling heavy printing demands.

    Although inkjet printers may suit casual use, businesses rely on toner for print durability and quality that withstand heavy handling and time. Toner produces high-quality prints that resist smudging, water, and fading, making them ideal for long-lasting documents.

    The precise layering of toner ensures sharper text and images, maintaining consistent quality even with frequent use. This durability supports high-volume printing demands, delivering professional results that stand the test of time.

    Feature Toner Advantage
    Print Durability Resists smudging, water, and fading
    Quality Sharper, crisper text and images
    Consistency Maintains quality over time
    Speed Up to 55 pages per minute
    Suitability Ideal for archival and professional use

    Comparing Environmental Impact and Cost Efficiency of Ink and Toner Printing

    When you compare ink and toner printing, you’ll find that toner cartridges offer better environmental benefits and cost efficiency. Toner cartridges produce less waste because they last longer, meaning you replace them less often. This reduces the overall environmental impact since fewer resources are used in manufacturing and less packaging waste is generated.

    Toner-based printers also consume less energy during operation, which lowers their greenhouse gas emissions compared to inkjet printers.

    Ink cartridges, on the other hand, require frequent replacements and often come with more packaging, increasing their environmental footprint. Over time, the cost of buying multiple ink cartridges adds up, making ink printing less economical.

    Furthermore, properly recycling and remanufacturing toner cartridges further reduce their environmental impact, making toner printing a greener and more cost-efficient choice for your printing needs.

    Cartridge Longevity and Replacement Tips for Ink and Toner

    Because toner cartridges last much longer than ink cartridges, you won’t need to replace them as often. Some high-yield toner cartridges can print up to 10,000 pages. Ink cartridges, on the other hand, usually require replacement after just 200-300 pages. This difference in cartridge longevity means you’ll spend less time swapping toner cartridges and more time printing efficiently.

    To maximize the shelf life of both ink and toner, store your replacement cartridges in a cool, dry place away from direct sunlight. Keep an eye on print quality. If you notice streaks or faded prints, it’s time to install new cartridges. Prompt replacement helps avoid damage and keeps your printer running smoothly.

    How to Maintain Your Printer for Best Results

    To keep your printer running smoothly and produce high-quality prints, you should regularly clean its printhead and internal parts. This prevents clogs that can degrade print quality and cause streaks or fading. Follow the manufacturer’s recommended maintenance cycles to guarantee thorough cleaning without damaging components.

    Replace cartridges promptly when you notice uneven color or streaks to avoid further print issues. Store ink and toner cartridges in a cool, dry place away from direct sunlight to keep them from drying out or deteriorating before use.

    Always monitor your cartridge levels and refill or replace them before they run completely empty. This prevents interruptions and maintains consistent performance. Regular maintenance not only improves print quality but also extends your printer’s lifespan and reduces costly repairs.

    Frequently Asked Questions

    Can I Refill Toner or Ink Cartridges Myself Safely?

    Yes, you can safely do DIY refilling for both toner and ink cartridges if you follow proper cartridge safety steps. Make sure to use quality refill kits and clean cartridges thoroughly to avoid leaks or clogs.

    Keep in mind that toner refilling is messier and needs extra caution. DIY refilling saves money compared to buying new cartridges, but always check your printer’s warranty because some manufacturers void it after refills.

    How Do Temperature and Humidity Affect Ink and Toner Storage?

    You might not realize that humidity over 70% can cause ink to clump or smudge, ruining prints. The humidity impact on both ink and toner means you need to prioritize temperature stability and follow proper storage guidelines.

    Keep cartridges in a cool, dry place to avoid drying out or damage from heat fluctuations. This way, your ink and toner stay reliable longer, preventing costly printing problems.

    Are There Health Risks Associated With Toner Powder or Ink Fumes?

    Yes, you should be aware of health concerns linked to toner powder and ink fumes. Toner powder contains fine particles that pose inhalation risks, especially if you’re exposed frequently or have asthma.

    Ink fumes might release VOCs, causing dizziness or irritation. To protect yourself, take exposure precautions like using printers in well-ventilated areas and maintaining equipment regularly.

    These steps help minimize any potential health risks effectively.

    What Should I Do if My Printer Shows a Cartridge Error?

    If your printer shows a cartridge error, start with cartridge troubleshooting by checking if the cartridge is properly installed and clicks into place. Inspect for damage or leaks.

    Use the printer reset steps via its maintenance software to clear error messages. Clean the cartridge contacts and chips to improve communication.

    If the error persists, replace the cartridge. These error message solutions usually fix the problem quickly and get your printer working again.

    Can Toner or Ink Cartridges Be Recycled or Reused?

    Yes, you can recycle and reuse both toner and ink cartridges. Cartridge recycling programs make eco-friendly disposal easy by offering collection bins at stores or mail-in options.

    Many manufacturers run reuse programs that clean, refill, and test cartridges to guarantee quality before resale. By participating, you help reduce landfill waste and conserve resources.

    Conclusion

    Understanding the difference between toner and ink can save you time and money. Did you know laser printers with toner can print up to 2,000 pages per cartridge, compared to just 200 pages for inkjet cartridges?

    This means toner is ideal if you print a lot, while ink is best for vibrant photos. Knowing these facts helps you choose the right printer and cartridges, ensuring high-quality results and better efficiency for your needs.

  • 10 Key Differences Between 65 and 65XL Ink Cartridges

    10 Key Differences Between 65 and 65XL Ink Cartridges

    You’ll find that HP 65XL cartridges hold three times more ink than standard HP 65s, but they print only about 2 to 2.5 times more pages due to printer ink management.

    XL cartridges cost more upfront but offer a lower cost per page, making them ideal for high-volume use.

    Both sizes fit the same printers and use pigmented black or dye-based color inks.

    You can also explore refilling and eco-friendly options.

    Keep going to uncover all the details that help you pick the best fit.

    Ink Capacity Differences Between HP 65 and 65XL Cartridges

    ink capacity and printing efficiency

    Although the HP 65XL cartridge holds about three times more ink than the standard 65, you won’t always get three times the number of prints. The 65 standard cartridge contains 2.5ML of ink, while the 65XL high capacity version offers 7.5ML.

    This increase in ink capacity means the 65XL cartridge is heavier and designed to last longer between replacements. However, the printer’s ink management strategies affect how efficiently this extra ink translates into printed pages. Because of this, the 65XL typically yields only about 2 to 2.5 times more prints, not a full three times.

    When you choose the 65XL, you’re investing in a cartridge with considerably more ink capacity, which can reduce how often you swap cartridges. Still, the actual print output depends on your printing habits and the content you print, so it’s important to balance ink capacity with your typical usage.

    Page Yield: How Many Prints Can You Expect From Each?

    You can expect the HP 65 standard cartridge to print around 100 to 120 pages in black and about 100 pages in color. This page yield suits light to moderate printing needs and keeps your Black Ink Cartridge replacement frequency manageable.

    On the other hand, the HP 65XL high-yield cartridge can produce roughly 300 pages for both black and color prints, offering about two to three times the capacity of the standard cartridge. While the XL cartridge holds more ink, your actual page yield might not always triple because printer ink management can vary.

    Factors like print density, color usage, and settings also influence how long each cartridge lasts. If you print often or in larger volumes, the 65XL’s extended page yield can save trips to restock cartridges.

    However, for occasional printing, the standard 65 cartridge’s page yield remains a practical choice, especially if you want to replace your Black Ink Cartridge less frequently without investing in high-capacity versions.

    Price Comparison: Cartridge Cost and Cost Per Page

    cost per page savings

    Two key factors to weigh when choosing between the HP 65 and 65XL cartridges are their upfront cost and cost per page. The standard HP 65 cartridge costs around $17.99, while the 65XL is priced at about $37.99. Although the XL cartridge holds roughly three times more ink, it also costs nearly three times as much upfront.

    When you look at the cost per page, the standard 65 cartridge yields about 100-120 pages at roughly $0.15 per page. In comparison, the 65XL produces about 300 pages, which brings the cost per page down to approximately $0.13. This means the XL offers a slightly better value if you print frequently.

    If your printing needs are moderate, the standard 65 cartridge’s lower upfront price and reasonable cost per page might be more economical for you. However, if you print in high volume, the 65XL’s cost per page advantage makes it a smarter choice.

    Physical Size and Printer Compatibility of HP 65 and 65XL

    Both the HP 65 and 65XL cartridges share the same physical size and shape, making them fully interchangeable in compatible printers. This means you won’t have to worry about different compartments or printer settings when switching between the two.

    The physical size remains consistent, so whether you choose the standard HP 65 or the high-capacity 65XL, they’ll fit perfectly in the same printer models, including popular HP DeskJet and Envy series.

    While the 65XL holds more ink and weighs slightly more, its physical footprint doesn’t change, ensuring seamless printer compatibility. This design lets you upgrade to the 65XL for longer print runs without any hassle related to size or fit.

    Ink Types and Color Options Explained

    ink types and capacity

    You’ll find that both the 65 and 65XL cartridges come in black and tri-color options. However, their ink types are a bit different—black uses pigmented ink, which is great for sharp text, while the color cartridges rely on dye-based ink to produce vibrant images.

    The XL versions hold more ink, so you can print longer without having to swap cartridges as often. Knowing these differences makes it easier to choose the right cartridge for your printing needs.

    Black And Color Ink

    Although HP 65 black cartridges use pigmented ink for sharp, smudge-free text, their color counterparts rely on dye-based ink to deliver vibrant photos and graphics. You’ll find black ink ideal for crisp documents, while color ink excels with images and graphics.

    The HP 65 black cartridge typically holds 2.5 ml of ink, but if you want a high page yield, the 65XL black cartridge offers about 3 ml. Color cartridges focus on vivid output, with similar or slightly varied ink volumes.

    • Black ink provides sharp, smudge-resistant text
    • Color ink uses dye for vibrant photos and graphics
    • Standard black cartridge holds 2.5 ml ink
    • 65XL black cartridge offers higher page yield with 3 ml
    • Color cartridges designed for vivid multi-color printing

    Standard Versus XL

    When you choose between the standard HP 65 and the 65XL cartridges, you’re deciding how much ink you want at your disposal. The standard cartridge holds 2.5ML of ink, while the XL packs 7.5ML, which is three times more ink for longer use.

    Both come in black and tri-color options, but the XL is designed for higher page yields, printing about 300 pages compared to the standard’s 100-120 pages. Although the physical size stays the same, the XL cartridges are heavier because of the extra ink.

    Keep in mind, XL cartridges usually cost about three times more than standard ones, which can impact cost efficiency. Choosing between standard and XL depends on how often you print and your budget priorities.

    Why XL Cartridges Don’t Print Triple the Pages?

    Even though HP 65XL cartridges are marketed as high-yield options, they rarely print three times the pages of standard 65 cartridges. You might expect triple the output, but in reality, the Black Ink Cartridge typically lasts about 2 to 2.5 times longer.

    HP 65XL cartridges often last only 2 to 2.5 times longer, not triple, as advertised.

    That’s because printers use internal algorithms to limit ink flow and maintain print quality, preventing a true tripling of pages. These controls also manage print and cleaning cycles, which consume ink regardless of cartridge size.

    Here’s why XL cartridges don’t print triple the pages:

    • Printers restrict ink usage from high-capacity cartridges
    • Print and cleaning routines consume a fixed amount of ink
    • Ink management algorithms prioritize quality over maximum yield
    • Standard printer settings limit ink flow from 65XL cartridges
    • Actual yield increase averages around double, not triple

    How Printers Manage and Limit HP 65/65XL Ink Usage

    Understanding why HP 65XL cartridges don’t print triple the pages leads us to how printers actively manage and limit ink usage from both 65 and 65XL cartridges. Printer management involves controlling ink flow and cleaning cycles to impose ink restrictions, which conserve ink but also prevent the XL cartridge’s full capacity from being used.

    This means your printer deliberately limits how much ink it pulls, capping the effective print yield to about 2-2.5 times that of a standard 65 cartridge. The printer’s firmware and software play a key role by restricting page counts or ink usage, encouraging you to stick with standard cartridges or avoid overusing XL versions.

    Some users modify cartridges to bypass these restrictions, but manufacturers design printer management systems to maintain control over ink consumption. So, even with a higher ink capacity, HP 65XL cartridges face practical limits because of these built-in ink restrictions and printer management strategies.

    Easy Ways to Extend Ink Life and Cartridge Capacity

    Although HP 65 and 65XL cartridges come with fixed ink capacities, you can take simple steps to stretch their life and get more prints per cartridge. By managing your printing habits and cartridge care, you’ll enjoy a higher page yield without constantly replacing cartridges. Refilling compatible cartridges is a smart way to extend usability while saving money. Adjusting print settings to draft mode also reduces ink consumption for everyday tasks.

    Extend your HP 65 or 65XL cartridge life by managing print habits and using draft mode to save ink.

    To maximize your cartridge’s efficiency, try these tips:

    • Refill cartridges with quality compatible ink to avoid frequent replacements
    • Print only necessary documents and lower print quality when possible
    • Use compatible or remanufactured cartridges designed for higher ink volume
    • Store unopened cartridges in a cool, dry environment to preserve ink quality
    • Avoid modifications like cutting internal walls unless confident, as they risk damage

    With these easy methods, you’ll get more value and longer life from your HP 65 or 65XL cartridges.

    Environmental Impact and Refilling Options for HP 65 Cartridges

    You can lower your environmental footprint by recycling or refilling HP 65 cartridges instead of just tossing them out. When you refill cartridges, you get to reuse them multiple times, which really helps cut down on plastic waste and manufacturing costs. Plus, by choosing refilled or remanufactured options, you’re actively reducing the carbon impact that comes with producing new cartridges. It’s a simple way to make a positive difference for the planet while still getting great print quality.

    Cartridge Recycling Benefits

    Why should you consider recycling or refilling your HP 65 cartridges? Recycling and refilling offer eco-friendly ways to reduce waste and protect the environment. By choosing these options, you help minimize plastic pollution and conserve resources. It’s a simple way to make a positive impact.

    Here are key benefits of recycling HP 65 cartridges:

    • Reduces plastic waste and keeps cartridges out of landfills
    • Conserves resources by lowering demand for new cartridge production
    • Ensures safe disposal of residual ink through certified programs
    • Offers cost-effective alternatives with refilling options
    • Provides incentives and discounts via recycling programs

    Refilling Process Overview

    Recycling HP 65 cartridges is a great start to reducing waste, but refilling takes eco-friendliness a step further by giving your cartridge a second life. Refilling ink cartridges means adding ink back into your existing cartridge using a refill kit or professional service.

    This process extends the cartridge’s usable life, cutting down on plastic waste. You might even modify cartridges internally or use refill bottles to boost ink capacity beyond the original design. To guarantee good print quality, you’ll need to clean the cartridge carefully and seal it properly to prevent leaks.

    While refilling is cost-effective and environmentally friendly, be aware it can sometimes cause printer recognition issues if not done correctly. Overall, refilling ink cartridges offers a practical, sustainable option for HP 65 users.

    Environmental Cost Reduction

    Although purchasing new cartridges is convenient, refilling HP 65 cartridges offers a practical way to reduce environmental waste by extending their lifespan. By choosing to refill, you actively contribute to environmental cost reduction and minimize plastic waste. Plus, reusing cartridges lowers the demand for new resources, making your printing habits more eco-friendly.

    Consider these benefits of refilling HP 65 cartridges:

    • Extends cartridge life, reducing landfill waste
    • Decreases plastic consumption and resource depletion
    • Allows multiple uses through refilling or sponge addition
    • Supports sustainable disposal and recycling practices
    • Provides access to third-party refilling and remanufacturing services

    How to Choose Between HP 65 and 65XL for Your Needs

    When deciding between the HP 65 and 65XL cartridges, you should focus on your printing volume and budget. If you print frequently, the HP 65XL offers higher page yields, up to 300 pages compared to the standard 65’s 100-120 pages. This makes it a cost-effective choice despite its higher upfront price.

    The cost per page is lower with the XL, providing better value if you need more ink regularly. On the other hand, if your printing needs are occasional or low-volume, the standard HP 65 cartridge saves you money by avoiding excess ink you won’t use.

    Both cartridges fit the same printers, so your decision mainly depends on how much you print and your willingness to invest upfront. Keep in mind, some printer models might limit the XL cartridge’s ink usage, which can affect its overall cost-effectiveness.

    Choose wisely based on your specific printing habits and budget constraints.

    Frequently Asked Questions

    Can I Use HP 65XL Cartridges in Printers Bought Outside My Country?

    Yes, you can use HP 65XL cartridges in printers bought outside your country, but you should watch for compatibility concerns. HP generally standardizes its printer and cartridge models worldwide, so international shipping won’t usually affect functionality.

    However, some regional firmware restrictions might cause issues. To avoid problems, make sure you buy the correct model number cartridge intended for your specific printer. Double-check compatibility prior to purchasing to ensure smooth use.

    Do HP 65 and 65XL Cartridges Have the Same Warranty Coverage?

    Yes, HP 65 and 65XL cartridges generally share the same warranty scope as long as you use genuine products properly. While both cartridges come with equal warranty coverage, 65XL offers greater cartridge longevity due to its higher ink volume.

    Just make sure you buy from authorized retailers and follow HP’s guidelines. Otherwise, you risk voiding the warranty regardless of which cartridge you choose.

    How Do HP 65XL Cartridges Affect Print Quality Compared to Standard 65?

    You’ll notice that HP 65XL cartridges can sometimes boost ink saturation, making colors appear a bit richer compared to standard 65 cartridges. However, print resolution usually stays consistent since it depends more on your printer settings than cartridge size.

    While the increased ink volume in 65XL helps with longer printing, it doesn’t drastically change clarity. Just keep an eye out for possible minor smudging if you push the cartridge to its limits.

    Are There Any Subscription Services for Automatic HP 65XL Cartridge Deliveries?

    Imagine you’re running low on ink just before an important project. Yes, there are ink subscription services offering automatic delivery of HP 65XL cartridges. For example, some third-party providers let you set your preferred frequency, so you never run out.

    These subscriptions often include discounts or free shipping, making it convenient and cost-effective. Just be sure to check if they supply genuine or compatible cartridges before signing up.

    Can Third-Party Ink Cartridges Replace HP 65 or 65XL Without Issues?

    You can use third-party ink cartridges to replace HP 65 or 65XL, but ink compatibility isn’t always guaranteed. Cartridge compatibility varies by brand and printer model, so you might face recognition issues or error messages.

    Some third-party options may not deliver the same print quality or page yield as genuine HP cartridges. It’s smart to check reviews and confirm cartridge compatibility before buying to avoid problems and guarantee smooth printing.

    Conclusion

    Choosing between the HP 65 and 65XL cartridges often comes down to your printing habits. Isn’t it funny how the bigger cartridge usually fits perfectly with bigger tasks?

    If you print a lot, the 65XL saves you trips to the store. The standard 65 suits occasional use. Either way, both cartridges share more than you might think, making your choice easier.

    So, pick what matches your needs and watch your prints come to life effortlessly!

  • How You Write Checks in Blue Ink Step-by-Step

    How You Write Checks in Blue Ink Step-by-Step

    To write checks in blue ink, first gather your checkbook and a reliable blue pen.

    Verify the check number matches your register to avoid duplicates.

    Clearly write the current date and the payee’s full name, then enter the payment amount both numerically and in words, drawing a line after to prevent changes.

    Add a memo if needed, sign consistently, and immediately record the details in your register.

    Keep your balance updated to stay organized and secure.

    There’s more to guarantee your checks are accurate and safe.

    Gather Your Checkbook and Blue Ink Pen

    use blue ink checks

    Where should you begin when writing a check in blue ink? First, gather your checkbook and a reliable blue ink pen. Using blue ink is essential because it helps your check stand out from copies and reduces the risk of fraud.

    Before you write, make sure your checkbook contains blank, unused checks so you can fill them out accurately. It’s important to verify the check’s authenticity by ensuring the printed check number matches the number on the top and bottom of the check.

    Also, collect all necessary information, like the payee’s full name and the payment amount, to avoid mistakes. Keep your checkbook and pen stored in a secure place to prevent theft or unauthorized use.

    Check Your Check Number Matches Your Records

    Before you write a check, always verify that its number matches the one recorded in your checkbook register. Check the printed check number at the top right corner and confirm it aligns with the last number recorded in your records. This helps prevent duplication and keeps your checkbook accurate.

    Matching check numbers lets you track which checks have cleared and spot any uncashed or missing checks. It also helps you catch fraud if an unfamiliar check number appears on your bank statement. Consistently verifying your check number ensures smooth reconciliation when reviewing your account.

    Step Action
    1 Locate check number on the check
    2 Compare with last recorded number
    3 Verify numbers match accurately
    4 Update checkbook register with info
    5 Review bank statement for checks

    This process keeps your records reliable and your finances secure.

    Write the Date on Your Check Clearly

    write the date clearly

    Make sure you write the current date accurately on your check to keep your records precise. It’s a good idea to use a clear format like MM/DD/YYYY or even spell out the full date to avoid any confusion.

    Also, try to write the date neatly in blue ink. This not only helps your check look professional but also adds a layer of security.

    Use Accurate Current Date

    How should you write the date on your check to guarantee it’s clear and accurate? Always use the current date in the top right corner, making sure it reflects the actual day you’re issuing the check. Use blue ink to prevent tampering and keep the date permanent. Writing the date clearly with legible handwriting is crucial for smooth check processing and bank recognition.

    Keep these check writing steps in mind to avoid errors:

    Write the full date using a consistent date format (e.g., MM/DD/YYYY). Avoid abbreviations or unclear handwriting. Double-check the date matches the current date exactly. Use blue ink for permanence and visibility.

    Format Date Clearly

    A clear date format on your check helps banks process it without delays or confusion. When you write the date, use blue ink to enhance check security and prevent tampering. Place the date clearly in the top right corner, making sure it’s legible and easy to spot.

    Stick to simple formats like MM/DD/YYYY or Month Day, Year for accurate record-keeping. Avoid cursive or overly decorative handwriting, as it can make the date hard to read and affect check formatting.

    Double-check the correct date before filling out the rest of the check details. By following these steps, you’ll maintain a professional look and help guarantee your check is processed smoothly and securely every time.

    Fill in the Payee’s Name on the Check

    When you fill in the payee’s name on the check, use blue ink to assure clarity and reduce the risk of fraud. Always write the payee’s full name on the “Pay to the order of” line to guarantee proper identification. Avoid abbreviations or nicknames; the check should clearly show the correct name of the person or organization.

    Before you sign or hand over the check, double-check the spelling of the payee’s name to prevent any issues. Keep the payee’s name neat and within the designated line to maintain a professional appearance. Using blue ink not only makes the name easier to read but also helps prevent alterations.

    Remember to:

    • Write the payee’s full name clearly
    • Use blue ink for legibility and security
    • Double-check spelling for accuracy
    • Keep the name within the line for neatness

    This attention to detail ensures your check is properly filled out and ready for safe handling.

    Enter the Payment Amount on the Check Numerically

    write amount accurately in blue

    After clearly filling in the payee’s name, you’ll move on to entering the payment amount numerically in the small box on the right side of the check. Start as close to the dollar sign as possible to prevent alterations.

    Always use blue ink to write the amount. It guarantees your check remains clear and secure. Be precise when you write the numerical dollar amount, including cents, so the bank processes your check without confusion.

    Make certain your handwriting is legible; unclear numbers can lead to rejected payments. When you write the check amount in numbers, double-check that it matches the amount you’ll write in words below.

    This match is essential for your check writing to be valid. Taking these steps helps you avoid errors and protects your financial transactions.

    Spell Out the Payment Amount in Words

    When you spell out the payment amount, write the dollars clearly in words and the cents as a fraction over 100. Make sure your handwriting is neat so the bank or payee won’t misread it.

    After you write the amount, draw a line to prevent anyone from adding extra numbers or words. This little step helps keep your payment secure.

    Writing Amount Clearly

    How exactly do you spell out the payment amount on a check to guarantee it’s clear and secure? When you write the check, you need to write the amount in words clearly using blue ink. Be sure to write out the dollar amount completely and include cents as a fraction over 100.

    Write the dollar amount on the line below “Pay to the order of,” filling the space without gaps. Then, draw a line after the amount to prevent tampering. Always match the written amount with the numeric amount, and record the payment in your check register.

    • Write the dollar amount legibly in blue ink
    • Spell out the dollar amount fully, including cents
    • Fill the entire line and draw a line afterward
    • Ensure the written amount matches the numeric amount exactly

    Using Fractions For Cents

    Why include cents as a fraction when spelling out the payment amount on a check? Writing cents as a fraction, like “50/100,” guarantees the check amount is precise and matches the amount in numbers.

    On the payee line, after you write in words the dollar amount, include the cents as a fraction to prevent any confusion or alteration. Always draw a line after the fraction to block anyone from adding extra digits.

    This step helps the bank verify the payment’s accuracy and avoid rejection. Don’t forget to use blue ink to fill out the check, including the date on the line. Then sign your name to complete the process securely and clearly.

    Preventing Alterations On Check

    Where do most check alterations happen? They usually occur in the section where you write the amount in words. To prevent alterations, always spell out the dollar amount fully, matching the numerical figure exactly.

    Use blue ink and legible handwriting to make forgery difficult. After writing the amount, draw a line through the remaining space to block anyone from adding extra words. Before you sign the check, double-check that the written amount corresponds precisely to the numbers.

    Here’s how to improve security when you write checks:

    • Spell out the full dollar amount and cents as a fraction
    • Use clear, legible handwriting in blue ink
    • Draw a line after the amount in words
    • Confirm the written amount matches the numerical figure

    Taking these steps will help you prevent alterations and protect your funds.

    Add a Memo to Specify the Payment Purpose

    Although the memo line is optional, you should use it to specify the payment’s purpose, like “Electric Bill” or “Rent.” This way, you and the recipient can easily track the transaction. When you write the memo on your check, use neat, black or blue ink to keep it legible and secure.

    Clear notes help clarify the payment purpose, reduce confusion, and simplify record-keeping. Adding details like invoice numbers can further streamline how you record the check.

    Here’s a quick guide to filling out the memo line:

    What to Write Why It Matters
    Rent Confirms monthly payment
    Electric Bill Identifies utility expense
    Invoice #12345 Links payment to specific invoice
    Loan Payment Clarifies loan repayment purpose

    Sign the Check Using Your Registered Signature

    Be sure to sign the check using the exact signature you registered with your bank. It’s important to keep your signature consistent to avoid any problems with fraud or the check being rejected. Also, always sign within the designated line so your check is properly validated.

    Signature Consistency Importance

    Why does signing your check with your registered signature matter? When you write your signature on the signature line, it must be consistent with what the bank has on file. This match ensures your payment gets proper authorization and prevents the check from being rejected due to a signature mismatch.

    A consistent signature helps verify your identity and reduces fraud risk, making the check-cashing process smooth and reliable.

    Keep these points in mind for signature consistency:

    • Always sign after filling out the check’s details completely
    • Use your exact registered signature every time
    • Avoid rushed or sloppy signatures that don’t match
    • Remember, a signature mismatch can cause delays or refusal

    Use Registered Signature

    Since your registered signature must match the one on file at your bank, you should always sign your check using your official cursive signature. When you write a check, make sure to sign the check only after filling in all details to authorize the payment properly.

    Use a consistent signature each time to avoid delays or rejection by the bank. Sign in the bottom right corner, ensuring your signature is clear and legible. This official signature not only confirms the check’s authenticity but also helps prevent fraud.

    Write Down Your Check Details in the Register

    When you write a check, you should immediately record the check number, date, payee, and amount in your check register to keep track of your payments accurately. This habit helps you avoid overdrafts and maintain financial clarity.

    Write down the exact date you issued the check, using either numerical or written format. Be sure to record the payee’s full name and the payment amount in both numerical and written forms in your register.

    Record the exact check date, payee’s full name, and payment amount in both numbers and words.

    Don’t forget to add a memo describing the check’s purpose. Also, subtract the check amount from your current account balance in the register to keep your available funds clear.

    In your check register, make sure to record:

    • Check number and exact date
    • Payee’s full name
    • Amount in numerical and written form
    • Memo or note explaining the payment

    Keep Your Checkbook Balance Up to Date

    After recording your check details in the register, make sure you keep your checkbook balance updated regularly. Each time you write a check or make a withdrawal, immediately subtract the amount from your current balance in the checkbook register. Don’t forget to include all deposits, ATM withdrawals, and any fees to maintain accuracy.

    Regularly record every transaction linked to your account number to get a clear picture of your finances. At least once a month, compare your checkbook register with your bank statement. This helps you spot any discrepancies or errors early on.

    If your recorded balance doesn’t match the bank’s records, review each entry carefully to find and correct mistakes. By keeping your checkbook balanced, you prevent overdrafts and ensure your account reflects all activity accurately. Staying diligent with these steps helps you balance your checking account effectively and avoid surprises.

    Frequently Asked Questions

    Can I Use Gel Blue Ink Pens for Writing Checks?

    Yes, you can use gel blue ink pens for writing checks because they meet check ink compatibility and pen color guidelines banks prefer. Their ink dries quickly, which helps reduce smudging issues.

    Gel pens also offer great durability and waterproof ink, helping prevent ink theft. Plus, using blue ink supports color coding systems, making record-keeping easier.

    What Should I Do if I Make a Mistake on a Check?

    If you make a mistake on a check, don’t try a check correction by erasing or altering. It risks ink smudging and reduces handwriting clarity, which can impact check authenticity.

    Instead, clearly mark the check cancellation by writing “VOID” across it. Keep this for your records to follow banking policies and prevent errors.

    Use a proper pen next time to avoid mistakes and help guarantee smooth transactions.

    Is It Safe to Write Checks in Blue Ink Instead of Black?

    You might be surprised, but yes, using blue ink for your checks is generally safe. Blue check ink color offers excellent contrast, aiding check fraud prevention and making alterations harder to disguise.

    Just remember check writing tips like clear signatures and proper check storage advice. Still, double-check your bank’s check printing guidelines, as some prefer black.

    If you mess up, follow check voiding procedures and cancellation processes to keep your finances secure.

    How Long Are Checks Valid After the Date Written?

    You should know that the typical check lifespan is about six months from the date written, which sets the check expiration period. Banks often follow expiration rules based on their policies and legal validity standards, so processing timeframe matters.

    To avoid issues, you need to respect financial deadlines and payment timing by cashing or depositing checks promptly. Some checks might have different expiration rules, so always check your bank’s specific policies for check validity.

    Can I Postdate a Check Written in Blue Ink?

    Of course, you *can* postdate a check written in blue ink because apparently, ink color is the ultimate gatekeeper of check safety! In reality, your ink choice doesn’t affect postdating checks or check clearance time.

    But remember, bank policies vary, so for check fraud prevention and smooth check recording methods, follow check writing etiquette. Writing check tips? Inform your payee about the postdate to avoid surprises and enhance your check’s security.

    Conclusion

    Writing checks in blue ink is like painting a clear path for your money to follow. By carefully filling each step, you steer your finances smoothly, avoiding bumps along the way.

    Keep your checkbook balanced like a tightrope walker, and your payments will dance right into place. With each check you write, you’re crafting a reliable bridge between you and your payee, solid, clear, and trustworthy.

    So grab your pen and show your money the way!

  • Can You Remove Ink From Clothes in 10 Easy Steps?

    Can You Remove Ink From Clothes in 10 Easy Steps?

    Yes, you can remove ink from clothes in 10 easy steps.

    First, identify the ink and fabric type, then gently blot fresh stains without rubbing.

    Test cleaning solutions on a hidden spot to avoid damage.

    Use dish soap and water or pre-treat with alcohol-based products.

    For stubborn marks, try acetone-based remover carefully.

    Wash following care labels and air dry to check results.

    You can repeat treatments if needed, and these steps will help you master the process effectively.

    Identify the Type of Ink and Fabric First

    identify ink and fabric

    Before you plunge into removing ink stains, you should first identify the type of ink and fabric you’re dealing with. Knowing the type of ink, whether water-based, oil-based, or permanent, helps you choose the most effective stain removal method. Permanent inks, like those in markers, resist removal more than water-based inks.

    Next, check the fabric type since delicate fabrics such as silk or wool need gentler treatments to avoid damage. Always consult the care label on your garment to confirm the stain removal method you plan to use won’t harm the fabric.

    Before applying any solution, test it on a hidden area of the fabric to see if it causes discoloration or damage. This quick test protects your clothing from worsening the stain or fabric harm.

    Identifying the correct ink and fabric type upfront sets you up for successful ink stain removal without risking your clothes.

    Blot Fresh Ink Stains Gently Without Rubbing

    When you catch an ink stain fresh, gently blotting it can prevent the ink from spreading or settling deeper into the fabric. Use a clean, absorbent cloth or paper towel to press lightly on the stain, allowing it to absorb excess ink without rubbing.

    Avoid any scrubbing or rubbing, as this only pushes the ink further into the fabric fibers or risks damaging delicate materials. For best results, start blotting from the outside edges of the stain and work your way inward to stop the ink from spreading.

    Be patient and repeat this gentle blotting process several times. Gradual absorption is more effective and safer for your fabric than aggressive attempts. By carefully blotting fresh ink stains, you give yourself a better chance of removing the stain completely later without causing lasting damage to your clothes.

    Test Cleaning Solutions on a Hidden Fabric Spot

    test fabric spot first

    Before you apply any cleaning solution, it’s a good idea to test it on a hidden spot of the fabric first. This helps you check if the color will stay put or if it might fade.

    Pick a safe solvent like rubbing alcohol or vinegar and dab a small amount on that hidden area. Then, just wait a few minutes. After that, rinse it off and take a close look to see if there’s any damage before you go ahead and treat the stain.

    Identify Fabric Colorfastness

    Although it might be tempting to apply ink removal solutions directly, you should always test them on a hidden area of your fabric first. This patch test helps you identify the fabric’s colorfastness and prevents unexpected damage.

    Use a clean, white cloth or cotton swab to apply a small amount of your chosen solution to an inconspicuous spot. Wait at least five minutes to observe any changes.

    Look for signs of color fading, bleeding, or fabric damage. If the fabric shows no adverse reaction, you can proceed confidently, knowing the solution is safe for the entire garment.

    Skipping this step risks ruining your clothing, so always prioritize this simple test before tackling visible ink stains.

    Choose Safe Cleaning Solvent

    After confirming your fabric’s colorfastness, the next step is to select a cleaning solvent that won’t harm your garment. Always test any cleaning solution on a hidden fabric spot first.

    Use a white cloth or cotton swab to apply a small amount of the cleaning solvent and watch closely for any discoloration or color transfer. Wait at least five minutes to ensure the fabric reacts well before proceeding with stain removal.

    For delicate fabrics like silk or wool, exercise extra caution, as even initial testing can cause damage. Record your test results and follow the manufacturer’s care guidelines to guarantee solvent safety.

    Perform Small Area Test

    When you test cleaning solutions, always choose a small, hidden area of the fabric to avoid visible damage. Apply a small amount of the cleaning solution using a cotton swab or soft cloth, dabbing gently to prevent spreading.

    Wait 5-10 minutes and observe the fabric for any reaction or discoloration. Make sure the fabric is completely dry before evaluating the results, as moisture can mask potential damage.

    This small area test helps you confirm that the cleaning solution won’t harm or fade your fabric before treating the visible ink stain. Document any reactions you notice during the test.

    Use Dish Soap and Water on Ink Stains

    dampen apply rub repeat

    You’ll want to start by dampening the ink stain with some water—this helps the dish soap soak into the fabric better. Next, go ahead and apply the dish soap, then gently rub the area to break down the oils and pigments in the ink. It’s a pretty simple and convenient method, but keep in mind, you might need to try it a few times before you see noticeable results.

    Dish Soap Application

    Although dish soap won’t always remove ink stains completely, applying it with water can help loosen ink particles from fabric fibers. This method works as an easy pre-treatment step, especially for water-based ink.

    To use dish soap effectively on fabric, follow these steps:

    1. Dampen the ink stains with water to soften the fabric.
    2. Gently rub a small amount of dish soap into the stain using a clean cloth or sponge.
    3. Rinse the area thoroughly with water and repeat if needed.

    Dish soap’s surfactants help break down oil-based inks too, making it a versatile option for stain removal. While it may require multiple applications for deeper stains, this approach is simple and safe for most fabrics, boosting your chances of removing ink stains before washing.

    Effectiveness On Ink

    Since dish soap and water can only partially break down ink components, they usually achieve a moderate 3 out of 5 effectiveness in fading ink stains. This method loosens ink particles, reducing discoloration but rarely fully removes stains.

    Its efficacy depends on the fabric type and ink composition, making repeated applications necessary. While dish soap is user-friendly, it’s less potent than an alcohol-based solvent for ink removal. Here’s a quick overview:

    Factor Rating (out of 5) Notes
    Ink Removal 3 Partial fading, not complete
    Ease of Use 4 Simple to apply
    Fabric Safety 4 Generally safe for most fabrics
    Stain Discoloration 3 Moderately effective
    Compared to Solvent 2 Less effective than alcohol-based

    Pre-Treat Ink Stains With Alcohol or Hand Sanitizer

    One effective way to tackle ink stains is by using alcohol-based products like hand sanitizer. Because hand sanitizer contains ethyl or isopropyl alcohol, it helps break down ink on fabric, making ink stain removal easier. Here’s how to pretreat your garment:

    Using hand sanitizer’s alcohol content effectively breaks down ink stains, simplifying removal from fabric.

    1. Test the hand sanitizer on a hidden spot of the fabric to avoid discoloration.
    2. Apply a generous amount of hand sanitizer directly to the ink stain and let it sit for a few minutes. This loosens ink particles.
    3. Blot the area gently with a clean cloth to lift the ink off the fabric.

    You might need to repeat these steps for tougher stains. Once done, wash the fabric in the hottest water safe for it. Using hand sanitizer as a pretreat is a simple and effective way to reduce ink stains before laundering.

    Use Isopropyl Alcohol for Stubborn Ink Marks

    When ink stains refuse to budge, you can rely on isopropyl alcohol to break them down effectively. This powerful stain remover dissolves ink quickly, making it ideal for stubborn ink marks on fabric.

    Start by testing isopropyl alcohol on a hidden area of the fabric to avoid discoloration. Then, apply it directly onto the ink stains using a cotton pad or cloth. Let it sit for a few minutes to penetrate the ink, loosening the stain.

    Afterward, gently blot the area to lift the ink without spreading it further. Avoid rubbing, which can damage the fabric or spread the stain. Once the ink starts to fade, rinse the treated spot with cold water to remove any leftover alcohol and ink residue.

    This step helps prevent the stain from setting permanently. Using isopropyl alcohol is a straightforward way to remove ink from clothes, especially when other stain removers fall short.

    Try Acetone-Based Nail Polish Remover Carefully

    If your ink stain resists other treatments, you can try acetone-based nail polish remover to break it down. This solvent works well on oil-based and permanent ink stains, but you need to be cautious to avoid fabric damage. Here’s how to use it safely:

    1. Test area first: Apply a small amount of acetone-based nail polish remover on an inconspicuous spot of the fabric to check for discoloration or damage.
    2. Apply gently: Dab the ink stains carefully with a cotton pad soaked in the remover. Avoid rubbing or spreading the stain.
    3. Rinse thoroughly: After treatment, rinse the fabric thoroughly with cold water to remove any leftover acetone and prevent further damage.

    Wash Clothes Following Care Label Instructions

    Before washing, make sure to check your garment’s care label. This helps you choose the right water temperature and cycle. Following these recommended settings not only protects your fabric but also makes it easier to get rid of ink stains. So, stick to these guidelines to keep your clothes looking their best.

    Follow Fabric Care

    Although tackling an ink stain feels urgent, you should always check your garment’s care label first. This helps you follow the recommended washing temperature and methods.

    Proper fabric care is essential for effective stain removal without damaging your clothes. Here’s what to keep in mind:

    1. Identify the fabric type and follow the care label’s washing temperature and detergent guidelines to avoid setting ink stains.
    2. Choose a treatment method compatible with the fabric. Avoid bleach or harsh chemicals unless the label permits them.
    3. After treating the stain, wash as directed and air dry to prevent heat from fixing any remaining ink.

    Following these steps guarantees you respect your fabric’s needs while maximizing ink stain removal success.

    Choose Correct Water Temperature

    After you’ve checked the fabric care label and chosen a treatment method, the next step is selecting the right water temperature for washing. Always follow the care label’s guidance to protect your clothes and optimize stain removal.

    Hot water works best on durable fabrics because it helps break down ink stains more effectively during the wash cycle. However, if you’re dealing with delicate fabrics, cold water is safer to prevent damage, even though it might be less effective on stubborn ink stains.

    For many fabrics, warm water strikes a balance, loosening ink without risking harm, as long as the care label permits it. Choosing the correct water temperature guarantees your garment stays intact while maximizing your chances of removing those pesky ink stains.

    Air Dry Clothes to Check Ink Stain Removal

    When you air dry your clothes after treating an ink stain, you give yourself a clear view of whether the stain is completely gone. Air drying is essential because applying heat too soon can set any leftover ink, making removal nearly impossible. By skipping the dryer, you protect your clothes and ensure your ink stain removal efforts worked.

    Here’s why you should air dry and check your clothes:

    1. Visual Inspection You can clearly see if the ink stain is fully removed before heat locks it in.
    2. Prevent Setting Heat from dryers can permanently embed residual ink in fabric.
    3. Safe Re-treatment If the stain remains, air drying lets you apply more removal treatments without damaging the clothes.

    Always air dry your clothes after ink stain treatment to check your progress and avoid heat that could ruin your stain removal results.

    Repeat Ink Stain Treatments If Needed

    If the ink stain doesn’t disappear after your first attempt, don’t worry. You can repeat the treatment to improve your chances of removal. Sometimes stubborn ink stains need multiple applications of a solvent like rubbing alcohol or hand sanitizer to break down the ink molecules fully.

    After applying the treatment, make sure to wash the fabric thoroughly and air dry it before checking the stain. This drying step helps you see if the ink has been removed or if you need another round. Allow the fabric to dry completely between treatments to avoid setting the stain further.

    Frequently Asked Questions

    Can Ink Stains Cause Permanent Damage to Certain Fabrics?

    Yes, ink stains can cause permanent damage depending on fabric type and stain severity. If the ink composition is permanent or oil-based, it sets quickly, especially if you delay cleaning.

    Drying time affects how deeply the ink penetrates fibers, reducing colorfastness. Using harsh cleaning tools or chemicals on delicate fabrics risks weakening or discoloring them.

    Are There Any Natural or Homemade Remedies for Ink Removal?

    Before smartphones, you’d try natural remedies like lemon juice or baking soda to tackle ink stains. You can whip up homemade solutions using plant-based cleaners like vinegar and cornstarch, offering eco-friendly methods that are gentle on your clothes.

    Non-toxic treatments like soaking fabric in milk or applying hydrogen peroxide work well, too. Always test these organic stain removal tricks on a small spot first to avoid any surprises.

    How Long Should I Wait Before Treating an Ink Stain?

    You shouldn’t wait long before starting stain removal. Treat the ink stain within minutes to prevent it from setting. Treatment timing is essential because different ink types bond quickly with fabric fibers.

    Consider fabric sensitivity when choosing cleaning solutions to avoid damage. Quick action improves stain prevention and makes removal easier. If immediate treatment isn’t possible, soak the fabric soon after to loosen the ink before it dries completely.

    Is It Safe to Use Bleach on Ink Stains?

    You might worry bleach risks will ruin your favorite clothes, and that’s valid. Using bleach on ink stains isn’t always safe because chemical reactions can cause color fading and dye damage, especially on colored or delicate fabrics.

    To protect fabric safety, test bleach on a hidden spot first and dilute it properly. Otherwise, stain persistence might tempt you to overuse bleach, which weakens fibers and worsens damage.

    Can Ink Stains Be Removed From Delicate Fabrics Like Silk?

    Yes, you can remove ink stains from delicate fabrics like silk, but you need to prioritize silk preservation. Use gentle cleaning methods that consider fabric compatibility, avoiding harsh solvents that harm dye stability.

    Blot the stain carefully with minimal solvent to protect textile care standards. Acting quickly helps with stain prevention, and testing on a hidden area guarantees your approach won’t damage the fabric.

    When unsure, rely on professional cleaning for best results.

    Conclusion

    Don’t let ink stains paint a permanent picture on your favorite clothes. With patience and these simple steps, you can wipe away those stubborn marks like a magician erasing a spell.

    Remember, every stain is just a challenge waiting for your clever touch. So roll up your sleeves, follow the steps, and watch your clothes transform back to their spotless selves, ready to shine, stain-free, and as good as new.

  • How You Can Recycle Paper With Ink Step by Step

    How You Can Recycle Paper With Ink Step by Step

    You can recycle inked paper by first gathering clean, grease-free sheets and removing stickers, staples, and other contaminants.

    Next, shred the paper and soak it in water until soft.

    Blend the soaked paper into a smooth pulp, then use chemical or physical methods to lift and remove the ink.

    After spreading the pulp evenly, press and dry it into new sheets.

    You can even add colors or textures to customize your paper.

    Keep exploring to reveal all the details for this process.

    Gather and Sort Inked Paper for Recycling

    sort clean remove recycle

    Before you begin recycling paper with ink, gather all your inked paper items like newspapers, magazines, and printed documents, making certain they’re free from food stains or grease. This step is vital because contamination can disrupt the recycling process.

    Next, separate the inked paper from other materials such as plastics or glass to avoid cross-contamination during sorting. Confirm your inked paper is dry and clean since moisture or dirt can interfere with the de-inking stage, where ink is removed to create high-quality recycled paper.

    Remove any staples or plastic coatings because they cause processing issues. Once everything is ready, place your sorted inked paper in designated recycling bins to streamline collection and transportation.

    Remove Stickers, Food Waste, and Non-Paper Contaminants

    Since stickers and food waste can seriously disrupt recycling, you need to remove them carefully from your paper. Start by peeling off any stickers, as their adhesive residues act as contaminants that hinder recycling quality.

    Next, scrape off all food waste and grease, because organic materials spoil the recycling batch and can damage equipment. Be sure to check for other non-paper contaminants like plastic, metal, or staples, and separate these items before recycling.

    Proper sorting of these contaminants prevents harm to sorting machinery and improves the overall quality of recycled paper. Moreover, flatten and dry your paper to avoid mold growth and make handling easier during processing.

    Shred Paper to Prepare for Pulping

    shred soak prepare fibers

    After removing stickers, food waste, and other contaminants, the next step is to shred your paper into small pieces. Shredding paper helps break down the fibers, making it easier to turn into pulp later. You can shred computer paper or any used paper, but avoid thick or large sheets to protect your tools.

    Once shredded, soak the paper in water overnight. Soaking softens the fibers and prepares them for pulping, improving the overall recycling process. When the paper is fully soaked, it becomes easier to blend or mash into a smooth pulp.

    Proper shredding and soaking are vital because they allow the paper fibers to separate and mix with water effectively. This preparation ensures that when you move on to pulping, the texture will be consistent and ready for the next recycling steps. By shredding and soaking correctly, you set a solid foundation for efficient paper recycling with ink.

    Mix Shredded Paper With Water to Create Pulp

    When you’re ready to create pulp, blend the soaked shredded paper with water until the mixture becomes smooth and consistent. Start by shredding used paper into small pieces, which helps the fibers break down more easily.

    Blend soaked shredded paper with water until smooth to create pulp, starting with small shredded pieces for easier fiber breakdown.

    After shredding, soak the shredded paper in water overnight. This soaking softens the fibers, making the pulping process much more effective.

    When blending, maintain a water-to-paper ratio of about 99:1 to get the right consistency for paper pulp. Use a blender or mix manually, making sure you break down all the paper fragments thoroughly.

    Keep blending until the mixture looks like a homogeneous pulp, free from clumps or large pieces. This smooth paper pulp is essential because it forms the base for creating new sheets of recycled paper.

    Remove Ink From Pulp Using De-Inking Methods

    ink removal and bleaching

    You’ll start by removing ink from the pulp using chemicals and air bubbles that lift the ink particles to the surface. After that, you can wash and bleach the pulp to brighten it up and get it ready for coloring. These steps help make sure your recycled paper looks clean and fresh when it’s reused.

    Chemical Ink Removal

    How does chemical ink removal work to reclaim clean paper fibers? Chemical de-inking uses surfactants and bleaching agents to dissolve and lift ink particles from the pulp.

    During flotation, air bubbles attach to these ink particles, carrying them to the surface for easy skimming and effective ink removal. Chemicals like hydrogen peroxide brighten the pulp after ink lifts, restoring its whiteness.

    You’ll need to maintain proper chemical concentrations and pH levels to protect the fibers while maximizing ink removal. After flotation, the pulp undergoes washing and filtering to remove leftover chemicals and ink residues.

    This careful process guarantees you reclaim clean, bright fibers ready for recycling, making chemical ink removal an essential step in transforming used paper back into quality pulp.

    Air Bubble Technique

    Although chemical treatments play a crucial role, the air bubble technique stands out by physically lifting ink particles from pulp using fine bubbles. This method introduces tiny air bubbles into the pulp, which attach to inked fibers.

    These bubbles create a frothy layer on the surface, enabling effective flotation and ink removal. You’ll see the ink particles float up, making it easier to skim them off. This approach enhances the de-inking process, resulting in cleaner, brighter recycled paper.

    You’ll appreciate how this technique:

    • Uses air bubbles to gently lift ink without harsh chemicals
    • Creates a visible froth signaling ink separation
    • Employs flotation to remove ink particles efficiently
    • Improves the overall quality of recycled pulp

    Bleaching And Coloring

    Why is bleaching an important step after removing ink from recycled pulp? After the de-inking process, the pulp often looks gray, especially if the original paper had heavy ink. Bleaching brightens this pulp, making it clean and ready for reuse.

    You can use bleaching chemicals like hydrogen peroxide or chlorine dioxide to achieve this. These chemicals help remove any residual ink and improve the pulp’s whiteness. Without bleaching, your recycled paper might look dull or uneven in color.

    Once bleaching is done, you can add coloring if you want a specific shade for your new paper products. This step guarantees the recycled paper is not only free of ink but also visually appealing and suitable for manufacturing.

    Bleaching and coloring complete the transformation after effective ink removal.

    Get Rid of Staples, Plastics, and Other Debris

    Before recycling, you’ll want to look out for staples, plastics, and other bits that might harm the equipment or mess up the pulp. It’s important to remove these carefully.

    Make sure to use safe methods so you don’t tear the sheets while pulling out non-paper materials. Getting rid of these contaminants is key to making clean, high-quality recycled paper.

    Identifying Non-Paper Contaminants

    When you start recycling paper, you need to carefully identify and remove non-paper contaminants like staples, plastic clips, and adhesives. This protects your machinery and guarantees a clean final product. Non-paper debris can clog equipment and reduce the quality of recycled paper.

    While small staples might be separated later, large or plastic staples must be taken out manually. Contaminants like tape, glue, or food residues can also harm the pulping process.

    Keep an eye out for:

    • Hidden staples embedded in paper stacks
    • Plastic clips that resist shredding
    • Sticky adhesives that trap fibers
    • Food or dirt residues contaminating sheets

    Removing these contaminants ensures smoother recycling and higher-quality paper every time.

    Safe Removal Techniques

    After spotting non-paper contaminants like staples, plastic clips, and adhesives, you’ll need to remove them carefully to protect your recycling equipment and guarantee clean paper fibers. Start by pulling out staples and metal clips to prevent damage and avoid contamination.

    Next, peel off plastic coatings or laminations, since plastics cause stains and interfere with ink removal during recycling. Use a brush or rinse off any food residue or grease to avoid contamination that hinders cleaning and processing.

    Remove adhesive labels, tape, rubber bands, and other foreign objects, as they require separate disposal or recycling. By thoroughly eliminating these debris, you confirm your recycled paper stays clean and free from stains, improving the quality of ink removal and overall recycling efficiency.

    Importance of Debris Filtering

    Why is filtering out staples, plastics, and other debris so crucial in paper recycling? Debris filtering plays a critical role in protecting machinery and improving product quality. Removing these contaminants guarantees a smooth recycling process and a more effective de-inking phase.

    If you skip this step, you risk damaged equipment and lower-quality pulp.

    Here’s why you must prioritize debris filtering:

    • Prevent costly machinery damage and downtime
    • Avoid contamination that ruins pulp quality
    • Enhance ink removal during de-inking
    • Minimize safety hazards for workers

    Filtering out non-paper debris keeps the recycling process efficient and safe, ensuring your recycled paper turns out clean and strong every time. Don’t overlook this essential step to make your recycling efforts truly effective.

    Spread and Dry Pulp Into Recycled Paper Sheets

    Once you spread the pulp onto a mold or screen, gently press it to remove excess water and guarantee an even layer. This step is vital for ensuring the recycled paper sheets dry uniformly and don’t develop weak spots.

    After pressing, carefully transfer the pulp to a drying surface, often by sandwiching it between layers of felt, to help it dry flat. The drying process usually takes about a day, during which the moisture evaporates and the sheets gain strength.

    Make sure the pulp is fully dried before moving on. Damp sheets risk mold growth and warping during storage. Once dried, you can peel your recycled paper sheets off the surface, revealing smooth, sturdy sheets ready for further use.

    Properly spreading and drying the pulp sets a strong foundation for quality recycled paper, making your effort worthwhile and sustainable.

    Press and Flatten Sheets for a Smooth Finish

    With your recycled paper sheets fully dried, the next step is to press and flatten them to achieve a smooth, professional finish. Pressing your sheets helps remove any leftover water and smooths out wrinkles, giving your paper a flat, polished look.

    To do this effectively, place a clean, absorbent cloth or felt layer between the sheets and your pressing tool to prevent sticking or tearing. Focus on applying gentle, even pressure to flatten the sheets without creating air bubbles or uneven spots.

    Once pressed, let your sheets sit under weight for several hours or overnight to maximize flatness and durability. This step makes your recycled paper easier to handle and ready for any craft or printing project.

    Remember, when you press and flatten your sheets, you’ll:

    • Eliminate wrinkles and rough textures
    • Improve paper strength and durability
    • Remove excess water for a crisp finish
    • Create smooth, flat surfaces that feel professional

    Customize Your Recycled Paper With Colors and Textures

    You can make your recycled paper truly stand out by adding vibrant colors during the pulping process. Just try mixing in some food coloring or scraps of colored paper to create unique hues. It’s a fun way to get creative!

    And if you want to add some texture, you can toss in materials like patterned fabric or small fibers. This gives your paper a distinctive feel that really sets it apart. Give it a go and see what cool results you come up with!

    Adding Vibrant Colors

    Although recycling paper provides a great base, adding vibrant colors brings your creation to life and lets you customize the look. You can mix food-safe dyes like Kool-Aid or commercial dyes into the pulp before forming sheets, giving your recycled paper bold hues.

    Incorporating colored paper scraps during pulping enhances brightness and variety, making each sheet unique. Choosing between liquid watercolor or dye powders affects color permanence and intensity.

    Remember, the water-to-pulp ratio and dye amount control how vivid your colors appear.

    Try these tips to make your recycled paper pop:

    • Mix inks and dyes thoroughly for even color distribution
    • Add scraps of colored paper for bursts of brightness
    • Experiment with dye powders for long-lasting vibrancy
    • Adjust pulp consistency to control color depth

    This way, your recycled paper will truly stand out!

    Incorporating Unique Textures

    When you add textured materials like patterned tights, ripped clothing, or natural elements such as rose petals to your pulp, you create unique surface designs that make each sheet truly one-of-a-kind. You can also embed decorative materials during pulp formation to enhance both the look and feel of your handmade paper.

    For a consistent texture, try embossing sheets or using old bookbinding presses, which add stylized patterns. Adjusting the pulp’s thickness or mixing in glue or starch boosts durability and texture.

    Don’t hesitate to experiment with colored scraps or dyes alongside these textured materials for personalized, vibrant results. By combining these techniques, you’ll transform your recycled paper into a tactile, visually striking creation that stands out with its unique textures and colors.

    Store and Use Your Handmade Recycled Paper

    After your handmade recycled paper dries completely, carefully peel it from the drying surface to avoid tearing. To keep your paper flat and smooth, press it in a heavy book or between layers of paper for several hours.

    Proper storage is essential to protect your recycled paper’s quality. Place your handmade paper in a dry, flat spot, ideally inside a folder or protective cover to prevent creases and damage. Avoid moisture, direct sunlight, and extreme temperatures, which can weaken the fibers and discolor your paper.

    When you store your recycled paper well, you can enjoy:

    • The satisfaction of preserving your eco-friendly creation
    • Using it for unique crafting projects and personalized cards
    • Impressing friends with its distinctive texture
    • Knowing you’ve contributed to reducing waste

    With careful storage, your handmade paper will stay beautiful and ready for use whenever inspiration strikes.

    Frequently Asked Questions

    Can All Types of Ink Be Removed During Recycling?

    Not all types of ink can be fully removed during recycling because ink removal challenges vary with ink type variations. Water-based inks come off easier, but UV and metallic inks often resist standard processes.

    You’ll face recycling process limitations, especially with coated papers that leave streaks. Keep environmental impact considerations in mind; some chemical treatments needed for tough inks can affect sustainability.

    Is Recycled Paper as Strong as New Paper?

    You know what they say: “You can’t make a silk purse out of a sow’s ear.” Recycled paper’s quality isn’t always as strong as new paper because fibers shorten with each recycling cycle.

    However, advanced recycling methods and effective ink removal help maintain decent strength. While it might be slightly weaker, recycled paper still offers huge eco benefits by reducing waste and conserving resources, making it a smart, sustainable choice.

    How Long Does the Recycling Process Take From Start to Finish?

    The recycling process usually takes about 1 to 2 weeks from start to finish. Paper contamination can slow the timeline since it complicates ink removal techniques, requiring extra steps. Your recycling facility’s processing efficiency also matters. A more efficient setup speeds things up.

    Shredding, pulping, and de-inking take a few days, while drying and pressing add another day or two. Transportation between sites adds more time, so the whole process varies based on these factors.

    Are There Environmental Benefits to Recycling Inked Paper?

    Think of recycling inked paper like planting a tree that cleans the air around you. Yes, there are huge environmental benefits! You’re cutting down pollution, conserving resources like water and trees, and reducing the environmental impact of paper production.

    This process lowers harmful chemical release and greenhouse gases, boosting ecological benefits. By recycling inked paper, you actively protect the planet and help create a cleaner, greener future for everyone.

    Can I Recycle Glossy or Coated Paper With Ink?

    You can recycle glossy paper and coated paper with ink, but it’s tricky. Recycling challenges arise because the coating traps ink, making ink removal harder. Many facilities won’t accept these papers unless they have specialized processes for de-inking.

    If your local program does take them, they often use extra chemical treatments to remove ink effectively. So, check with your recycler before tossing glossy or coated paper into the bin.

    Conclusion

    Now that you’ve learned how to recycle paper with ink step by step, you’re ready to turn trash into treasure. By following these simple steps, you’re not just saving materials, but also giving new life to old paper.

    Remember, every little bit helps. Don’t throw the baby out with the bathwater. Keep experimenting with colors and textures, and enjoy the satisfaction of creating your own recycled paper right at home!

  • How Do You Print White Ink on Black Paper Step by Step?

    How Do You Print White Ink on Black Paper Step by Step?

    To print white ink on black paper, first create your design with clearly defined white areas using software like Photoshop. Then export it as a transparent PNG.

    Use a specialized printer with white ink capabilities and set up the file in iColor ProRip. Activate white toner and select black paper settings.

    Load the black paper carefully in the bypass tray, print at high quality, and apply multiple passes if needed for opacity.

    Follow these steps, and you’ll discover how to refine and protect your striking prints.

    How to Print White Ink on Black Paper: Quick Overview

    white ink black paper printing

    Wondering how to print white ink on black paper? You’ll need a specialized printer equipped with white toner or white ink cartridges since standard printers can’t handle white ink.

    Start by preparing your design file with white areas clearly defined, usually in a PNG format with a transparent background. Then, use printer software like iColor ProRip to properly align and set up your file for printing on dark surfaces.

    When loading your black or dark paper, place it face down in the printer’s bypass tray to guarantee accurate printing. Keep in mind that achieving vibrant, opaque white ink coverage often requires multiple passes or specific printing techniques.

    Following these steps helps you get crisp, bright white prints on black paper, making your designs stand out strikingly.

    Choosing the Best Printer for White Ink on Black Paper

    Once you’ve prepared your design and understood the basics of printing white ink on black paper, the next step is selecting the right printer. Not all printers can print white ink; you’ll need specialized UV flatbed or UV LED printers like the Epson SureColor SC-V7000 or Canon Colorado M3.

    These models have integrated white ink channels that ensure high-opacity prints on dark surfaces. Regular laser or inkjet printers won’t work since they lack white ink capabilities. When choosing your printer, consider ink opacity, print quality, material compatibility, and maintenance demands.

    Printer Model Key Feature
    Epson SureColor SC-V7000 Integrated white ink channel
    Canon Colorado M3 UV LED with white ink
    Specialty White Toner Printers Thick pigment-based ink for opacity

    Picking the right printer ensures your white ink prints look vibrant and adhere well to black paper.

    Preparing Your Design Files and Exporting PNGs for White Ink Printing

    prepare save export print

    You’ll want to set up your design with clear white areas, using software like Photoshop or Silhouette Studio. When you’re ready to export, save your file as a PNG with a transparent background. This way, those white details stay intact. That’s what makes sure your design prints correctly when using white ink on black paper.

    Design Setup Essentials

    When preparing your design files for white ink printing on black paper, it’s essential to guarantee the areas meant for white ink are properly filled and formatted. Use design software like Silhouette Studio, filling those parts with solid black or white depending on your software’s capabilities. Confirm your PNG export keeps transparency intact to preserve white ink areas accurately.

    Here’s a quick checklist for your design setup:

    Step Tip
    Fill white ink areas Use solid black or white fills
    Background Set transparent for accurate prints
    Export format Choose PNG with transparency enabled
    Scale and position Match your print size precisely
    Import to print software Use programs like iColor ProRip

    Following these ensures your white ink prints perfectly on black paper.

    Exporting Transparent PNGs

    How exactly do you make sure your design files are ready for white ink printing on black paper? Start by creating your design with clearly defined white areas against a transparent background. When exporting, choose the PNG format and enable transparency to preserve these essential areas. This guarantees your white ink prints accurately on black paper.

    To prepare your transparent PNG for printing, follow these steps: Use “Save As” and select PNG with transparency enabled. Scale and position your design within the correct canvas size. Then, import the PNG into your printer software, like iColor ProRip, for proper setup.

    Setting Up iColor ProRip Software for White Ink Printing

    Before printing white ink on black paper, import your PNG design into the iColor ProRip software and navigate to the “UnderPrint” tab to activate white toner printing for dark substrates. This step guarantees your design’s white ink will appear vibrant and crisp on black paper.

    Next, adjust the image size and position using the “Modify” and “Scale” options to perfectly align your design on the paper. Then, set the material type to “Black Paper” to optimize the software’s printing parameters for dark cardstock.

    For the best print quality, choose either “Best” or “High” under the print quality settings. Finally, select the “Bypass Tray” as the material feed to correctly handle the black paper during printing.

    How to Load and Handle Black Paper for Best Results

    proper black paper loading techniques

    To get the best results, make sure you load the black paper with the correct orientation—usually printed side down, just like your printer recommends. It’s a small step, but it really makes a difference.

    Also, try using the bypass tray or manual feed slot. This helps prevent jams and keeps the paper nicely aligned.

    And don’t forget to handle the paper gently. Creases or any damage can mess with your print quality, so take your time with it.

    Paper Orientation Tips

    When you load black paper into your printer, make sure the printed side faces down in the bypass tray or designated feed area. Proper paper orientation is essential for achieving crisp white ink prints on black paper. Align the paper carefully along the guides to avoid skewed prints. Handle the paper on a flat, rigid surface to prevent bends or warps.

    Keep these tips in mind for smooth paper orientation:

    • Load only the recommended number of sheets to avoid jams
    • Select the correct paper size and type in your print settings
    • Position the paper flush against guides for even feeding

    Following these steps guarantees your black paper feeds correctly and your white ink prints with precision every time.

    Preventing Paper Damage

    Proper paper orientation sets the foundation, but preventing damage to your black paper during loading and handling plays a big role in achieving sharp white ink prints. Always use the bypass or manual feed tray to avoid jams and guarantee proper alignment.

    Handle black paper with gloves to prevent fingerprints and smudges, which can ruin your white ink’s clarity. Store the paper flat in a cool, dry place to avoid warping or curling that causes feeding issues.

    Before printing, remove dust or debris from the paper surface for smooth feeding and crisp results. Finally, adjust the paper guides snugly against the edges to prevent skewing or misalignment. These steps protect your paper and help your white ink prints look flawless every time.

    Step-by-Step Guide to Printing White Ink on Black Paper

    Although printing white ink on black paper might seem challenging, you can achieve sharp, opaque results by following a clear process. Start by creating your design in graphic software, making sure the white ink areas are precisely defined and saved as a PNG file with transparency.

    Next, use a specialized white toner printer like the Uninet iColor 560, loading white toner into the correct cartridge slot. Finally, import your PNG into the printer’s software, select black paper as your material, and adjust settings for high-quality output.

    Here’s a quick checklist to guide you:

    • Prepare a transparent PNG design with clear white ink areas
    • Load white toner into your specialized printer and choose black paper
    • Set print quality to high and feed black paper into the bypass tray

    Begin printing and review the output to ensure crisp, fully opaque white ink on your black paper.

    Tips for Getting Crisp, Opaque White Ink Coverage

    To achieve crisp, opaque white ink on black paper, you’ll want to focus on optimizing your printing process beyond just preparing your design and loading the right toner. Start by using a printer equipped with specialized white toner or white ink cartridges, which deliver more consistent, opaque coverage.

    Adjust your print settings to the highest quality and slowest speed to allow better ink application, preventing streaks or gaps. Applying multiple passes of white ink can considerably increase opacity and reduce translucency, giving you sharper results.

    Choose coated black paper or pre-treat your paper to enhance ink adhesion, helping the white ink appear more vibrant and defined. Always run a test print first to fine-tune how many passes and which settings work best with your specific printer and paper combination.

    Following these tips ensures your white ink prints stand out with clear, crisp, and solid coverage every time.

    Troubleshooting Coverage and Smudging Issues in White Ink Printing

    When you notice uneven coverage or smudging in your white ink prints, it’s often due to how the ink interacts with the paper and your printer settings. To fix this, start by checking your ink and substrate conditions. Increasing the number of white ink passes can improve coverage but also raises smudging risks because of thicker layers.

    Using high-quality, slow-drying white ink reduces smudging and sharpens coverage. Also, make sure your paper is dry and dust-free before printing to avoid inconsistencies.

    Here are three key troubleshooting tips to handle coverage and smudging issues:

    • Adjust print pressure and impression settings for uniform ink transfer and better coverage.
    • Use a post-print curing or drying process, like UV curing or heat drying, to minimize smudging.
    • Choose slower drying white ink formulations to enhance print clarity and reduce smudging.

    Following these steps will help you consistently achieve crisp white ink coverage without smudging.

    Protecting and Finishing Your White Ink Prints on Black Paper

    To keep your white ink prints sharp and smudge-free on black paper, you’ll want to use a clear protective sealant like a UV-resistant varnish. This helps lock in the ink and prevent any unwanted smudging.

    Once the ink is completely dry, you can apply a matte or gloss finish. Not only does this boost durability, but it also makes your design really pop and stand out.

    If you’re looking for extra protection, especially if your print will be handled a lot or exposed to moisture, laminating it is a great option. It adds a strong layer of defense that keeps your artwork looking fresh for longer.

    Sealants for White Ink

    How can you guarantee your white ink prints on black paper stay vibrant and smudge-free over time? Using the right sealants is key. Applying a clear sealant or varnish protects your print from smudging and environmental damage while enhancing durability.

    You can choose between matte or gloss finishes depending on your desired look. Gloss boosts vibrancy, while matte cuts glare. For prints exposed to sunlight, UV-resistant sealants help maintain the ink’s brightness and opacity.

    When selecting sealants, keep these points in mind:

    • Use sealants made specifically for paper or print projects to avoid peeling.
    • Opt for UV-resistant formulas if your print faces sunlight.
    • Pick a matte or gloss finish depending on whether you want reduced glare or a vibrant shine.

    Proper sealants ensure your white ink stays crisp and intact longer.

    Preventing Ink Smudging

    Although white ink on black paper looks striking, it’s essential to let the ink dry completely or use heat-setting tools before handling to prevent smudging. After drying, apply a clear protective coating like UV varnish or spray fixative to secure the print and minimize smudging or transfer.

    When handling your print, hold it by the edges or wear gloves to avoid disturbing the fresh white ink layer. Use a light, even press or weight to gently flatten the paper during drying, ensuring smooth, even ink adhesion.

    Finally, store your finished prints flat in a dust-free environment to protect them from accidental contact or environmental factors that could cause smudging or smearing. These steps keep your white ink prints sharp and clean.

    Enhancing Print Durability

    When you want your white ink prints on black paper to last, applying a clear protective coating like UV varnish or lamination can make a big difference. These coatings shield the print from scratches and fading, preserving its vibrant contrast. You can also heat-set the white ink using a heat press or oven to improve adhesion and resist smudging.

    To boost durability even more, consider adding tactile finishes. Try these methods to enhance print durability: use embossing or debossing over white ink for a physical barrier and texture. You can also apply a sealing spray designed for paper to prevent smudging.

    Another tip is to choose high-quality coated black paper that supports ink adhesion and longevity. These steps will protect your white ink prints and keep them looking sharp over time.

    Creative Ideas for Using White Ink on Black Paper

    Why settle for ordinary when you can make your designs pop with white ink on black paper? This striking contrast instantly grabs attention, perfect for invitations, posters, or art prints.

    Elevate your designs with bold white ink on black paper for instant, eye-catching impact.

    You can experiment with hand calligraphy to add an elegant, personal touch, or use digital printing with white toner for sharp, customizable designs. For a luxurious feel, try white foil stamping or engraving, which creates durable, high-end effects on black paper.

    Layering white ink or combining these techniques enhances opacity and adds texture, making your artwork even more dynamic. Don’t hesitate to plunge into methods like using digital printing as a base and finishing with hand calligraphy to achieve unique results.

    Whether you’re crafting bold typography or intricate illustrations, white ink on black paper offers endless creative possibilities that stand out with clarity and style. So, plunge into and transform your projects with this powerful, eye-catching combination.

    Frequently Asked Questions

    Can White Ink Printing Be Done on Colored Papers Other Than Black?

    Yes, you can print white ink on colored papers other than black, but you’ll need to take into account color compatibility. Dark shades like navy, deep green, or burgundy work best because white ink stands out on them.

    You’ll want to use specialized white toner or UV printers and adjust your design settings to get the right opacity. Testing samples helps guarantee your white ink looks vibrant and opaque on your chosen colored paper.

    How Long Does White Ink Typically Take to Dry on Black Paper?

    You might think white ink on black paper takes forever to dry, like waiting for paint to harden on the moon! But usually, the drying duration ranges from a few minutes to several hours, depending on ink thickness and type.

    If you layer it thick, expect up to 24 hours. Using fast-drying inks or heat-setting methods can shrink that time dramatically.

    Is White Ink Printing More Expensive Than Standard Color Printing?

    Yes, white ink printing is generally more expensive than standard color printing. When you do a cost comparison, you’ll see that white ink requires specialized inks and equipment, which drives up material and labor costs.

    Plus, the process often involves extra passes, increasing production time. So, expect white ink printing to cost 2 to 5 times more per unit than typical CMYK printing, depending on your project and method.

    Can I Use White Ink for Fabric Printing as Well?

    Think of white ink as a bright spotlight on fabric application. It makes designs pop on dark textiles.

    Yes, you can definitely use white ink for fabric printing. It’s specially formulated to be opaque, durable, and resistant to washing and stretching.

    Just remember to pre-treat the fabric or apply a base layer to boost opacity. Then cure it properly so your design stays vibrant and long-lasting.

    What Environmental Factors Affect White Ink Adhesion on Black Paper?

    You need to control humidity, temperature, and light exposure for white ink adhesion on black paper. Humidity over 60% can make the ink tacky, while too dry conditions prevent proper curing.

    Keep temperatures between 65°F and 75°F to avoid drying issues. Avoid direct sunlight or UV light during printing.

    Also, pay close attention to surface compatibility. Coated or embossed paper affects how well the ink bonds and cures on black paper.

    Conclusion

    Printing white ink on black paper can transform your designs like a moonbeam cutting through the night. By choosing the right printer, preparing your files carefully, and mastering settings in iColor ProRip, you’ll achieve crisp, vibrant results every time.

    Remember to handle your black paper with care and troubleshoot any smudging promptly. With these steps, your prints won’t just stand out—they’ll shine with professional clarity and creativity.

    Keep experimenting and watch your ideas glow!

  • Can Dry Cleaners Remove Ink Stains Step by Step

    Can Dry Cleaners Remove Ink Stains Step by Step

    Yes, dry cleaners can remove ink stains step by step by first evaluating your fabric and ink type, then performing spot tests to ensure safety.

    They use specialized solvents and equipment, applying tailored treatments to lift fresh or set stains.

    Delicate fabrics and heat-set marks get expert care with advanced techniques.

    While some stains may require multiple attempts, professionals increase the chances of successful removal.

    Keep exploring how these methods protect your clothes and boost stain removal success.

    How Dry Cleaners Assess Ink Stains and Fabrics

    assessing ink stain and fabric

    Before treating ink stains, dry cleaners carefully evaluate the type of ink and how long the stain has set to choose the right method. You’ll find that this initial fabric assessment is vital because different inks and stain ages require tailored stain treatment.

    Dry cleaners examine fabric fibers and overall fabric condition to determine if the garment can handle chemical treatments or if it needs gentler care. They also review the garment’s care instructions to guarantee fabric safety, especially for delicate or dry clean only items.

    To avoid damage, they perform a spot test using specific solvents on hidden areas of the fabric, confirming colorfastness before full stain removal begins. Moreover, they consider any previous home treatments you may have attempted, adjusting their approach accordingly.

    Common Ink Types and Removal Challenges

    You’ll find that some inks, like water-soluble ones, come off easier than oil-based or permanent inks. It really depends on how the ink bonds with the fabric and whether heat has set the stain, which can make removal tricky. Since ink formulas vary so much, dry cleaners often have to adjust their approach for each stain.

    Ink Types Overview

    Although ink stains can be frustrating, understanding the type of ink you’re dealing with is key to effective removal. Water-based inks, like fountain pen ink, dissolve easily in water, making stain treatment simpler during the dry cleaning process.

    Oil-based inks, such as permanent markers, resist solvents and require more advanced stain removal techniques due to their chemical permanence. Gel pen inks bond quickly to fabric fibers, often needing specialized solvents or repeated treatments for successful ink removal.

    Some inks may even deteriorate fabric over time, complicating treatment. Knowing these ink types helps you choose the right approach and increases the chance of a successful dry cleaning process. Your dry cleaner’s ability to tailor stain removal techniques depends largely on this understanding.

    Removal Difficulty Factors

    When you bring stained clothes to a dry cleaner, the type of ink and its characteristics heavily influence how easily the stain can be removed. Ink removal success depends on factors like ink composition, fabric type, and stain age.

    Water-based ink is generally easier to treat than permanent marker or gel pen ink, which resist solvents. The dry cleaning process faces added cleaning challenges with heat-set stains, as heat bonds ink tightly to fibers.

    Delicate fabrics complicate stain removal further, requiring careful handling.

    Key removal difficulty factors include:

    • Ink type: water-based ink vs. permanent marker
    • Stain age: fresh vs. old stains
    • Heat-set stains from machine drying
    • Fabric type, especially delicate fabrics like silk or velvet

    Understanding these helps you manage expectations during professional ink stain removal.

    Ink Behavior Variability

    Because different inks interact uniquely with fabric fibers, understanding their behavior is key to effective stain removal. Ink types like dye-based inks, oil-based inks, and permanent markers each present unique challenges.

    Permanent markers and heat-set stains show high stain resistance, as heat bonds ink deeper into fabric fibers. Oil-based inks, such as those from gel pens, often require solvent-based treatments, but solvent effectiveness varies depending on the ink formulation.

    Dye-based inks tend to be easier to treat but still demand prompt action. Furthermore, stain age plays a significant role. Older stains become more colorfast and harder to remove.

    When you grasp ink behavior variability, you can better anticipate removal challenges and choose the right approach for successful dry cleaning results.

    Preparing Garments for Professional Ink Removal

    Before you take your garment to the dry cleaner, check its care label to make certain dry cleaning is suitable for the fabric. This step is crucial, especially for delicate fabrics that may require special handling.

    Gently blot any excess ink with a clean white cloth. Avoid rubbing to prevent spreading. If the care label permits, you can pre-treat the stain with a small amount of dry cleaning solvent or stain remover to boost stain removal effectiveness.

    Always inform the professional cleaner about any home remedies you’ve tried. This way, they can select the best approach without risking damage.

    To prepare your garment effectively:

    • Confirm dry cleaning is recommended by the care label
    • Blot excess ink carefully, avoiding rubbing
    • Pre-treat stains only if fabric instructions allow
    • Transport the garment in a protective bag to prevent smudging

    Following these steps helps ensure your garment gets the best professional ink removal treatment.

    Specialized Solvents Used by Dry Cleaners

    eco friendly ink stain removal

    Although ink stains can be stubborn, dry cleaners use specialized solvents like perchloroethylene, hydrocarbon, and silicon-based alternatives to break down ink components effectively. These dry cleaning solvents excel in solvent penetration, targeting chemical bonds in ink for thorough removal without harming fibers.

    You’ll find perchloroethylene is great for many ink types, while hydrocarbon solvents offer gentler fiber treatment. Green solvents, such as silicon-based options, provide eco-friendly ink stain removal with effective spotting techniques.

    Solvent Type Key Feature
    Perchloroethylene Powerful ink dissolving
    Hydrocarbon solvents Gentle fiber treatment
    Silicon-based solvents Eco-friendly, green
    Spotting techniques Precise solvent application
    Solvent penetration Breaks chemical bonds

    Using these specialized solvents, dry cleaners maximize ink removal results, adapting to fabric and ink types for ideal care.

    Pre-Treatment Steps for Ink Stains

    Specialized solvents play a key role in tackling ink stains, but your initial actions can impact how well these treatments work. Before heading to professional dry cleaning, you should focus on effective pre-treatment to improve stain removal success.

    First, blot excess ink gently to prevent spreading. If the ink is still wet, rinse with cold water to dilute the stain and slow its set-in. Applying rubbing alcohol can help loosen fresh ink, but always test fabric on a hidden area to avoid discoloration risk, especially with delicate fabrics.

    Keep these pre-treatment tips in mind:

    • Blot excess ink without rubbing
    • Rinse with cold water if ink is fresh
    • Apply rubbing alcohol carefully after testing fabric
    • Inform your dry cleaner about any home treatments

    Professional Equipment Used in Ink Removal

    professional ink stain removal equipment

    Three key types of equipment play essential roles in professional ink stain removal: spotting agents, ultrasonic cleaning tanks, and pressurized steamers. You’ll find that spotting agents use specialized solvents tailored to break down ink without harming fabric fibers.

    Ultrasonic cleaning tanks employ high-frequency sound waves to loosen ink particles deeply embedded in textiles. Pressurized steamers then soften the ink residues, making it easier to remove them thoroughly.

    Dry cleaning machines utilize solvent calibration to optimize the process, ensuring effective ink removal while protecting delicate fabrics. Advanced facilities may also use laser-based systems, precisely targeting ink pigments for stubborn stains.

    Equipment Type Function
    Spotting Agents Apply specialized solvents
    Ultrasonic Cleaning Loosen ink from fabric fibers
    Pressurized Steamers Soften ink residues
    Laser-Based Systems Target ink pigments precisely

    This stain removal equipment works together to deliver professional results.

    Inspecting and Retreating Stubborn Ink Stains

    After using professional equipment to treat ink stains, dry cleaners carefully inspect the fabric to evaluate the stain’s type and age. This examining process helps determine the best approach for stubborn ink stains. They often perform a spot test using specialized solvents to check fabric safety and stain response before proceeding.

    Professional inspection and spot testing guide the effective treatment of stubborn ink stains on fabric.

    If the stain resists initial efforts, retreating with multiple treatments becomes necessary. Dry cleaners apply tailored spotting agents designed for specific ink chemistries and may vary solvents or techniques during retreatments.

    Key steps in managing stubborn ink stains include:

    • Conducting a spot test to ensure fabric safety and gauge stain response
    • Applying multiple treatments with appropriate spotting agents
    • Using different solvents when initial methods don’t fully remove the stain
    • Monitoring progress after each retreatment to decide on further action

    This careful balance of inspecting, retreating, and progress monitoring maximizes the chances of removing tough ink stains effectively.

    Handling Delicate Fabrics and Heat-Set Ink Stains

    When you’re dealing with delicate fabrics like silk, wool, or leather, removing ink stains requires extra care to avoid damage. These fabrics need gentle treatment, so professional cleaners use fabric-specific solvents and precise stain removal techniques tailored to their unique fibers.

    Heat-set ink stains, resulting from heat exposure like ironing or drying, pose a bigger challenge because they develop high stain resistance. To tackle these, cleaners often turn to advanced methods such as solvent injection or ultrasonic cleaning, which safely break down stubborn ink without harming the fabric.

    It’s vital you inform your dry cleaner about any previous home treatments or heat exposure to guarantee they choose the safest approach. By relying on expert knowledge and specialized processes, professional cleaners can effectively treat delicate fabrics and heat-set ink stains, minimizing risk while maximizing stain removal success.

    When Dry Cleaning Can’t Fully Remove Ink Stains

    Even with expert care, some ink stains resist complete removal through dry cleaning. When ink bonding occurs deeply within fabric fibers, especially on delicate fabrics, stain removal becomes challenging. Set stains, often caused by heat exposure or delays in treatment, further reduce dry cleaning’s effectiveness. Permanent inks like those in markers or printer ink tend to be stubborn stains that professional cleaners can only partially fade.

    You should keep in mind:

    • Old, dried ink stains often resist full removal due to deep ink bonding with fibers.
    • Heat from ironing or drying sets ink stains permanently, limiting dry cleaning options.
    • Delicate fabrics may not tolerate aggressive cleaning methods, restricting stain removal.
    • Multiple cleaning attempts might only lighten, not eliminate, persistent ink stains.

    Understanding these limitations can help you manage expectations when seeking dry cleaning for ink stains.

    Benefits of Choosing Professional Ink Removal

    Because professional dry cleaners use specialized equipment and solvents, they can tackle stubborn ink stains far more effectively than home methods. When you choose professional ink removal, experts perform a thorough assessment of both the ink type and fabric. This allows them to tailor the treatment precisely, guaranteeing safe and targeted stain removal.

    They use advanced treatments unavailable at home, improving your chances of successful removal, especially with old or deeply set stains. If your garment includes delicate or high-value fabrics, professionals handle them carefully, preventing damage that DIY methods might cause.

    Their specialized equipment ensures the ink is lifted without compromising the fabric’s integrity. By trusting professionals, you benefit from a higher likelihood of complete stain removal, saving your clothes and extending their lifespan.

    Frequently Asked Questions

    How Long Does the Ink Stain Removal Process Usually Take?

    The ink stain removal process usually takes 24 to 72 hours, depending on stain longevity, ink types, and fabric sensitivity. You’ll notice stain detection and pretreatment play key roles in how quickly they act.

    Drying methods and advanced cleaning techniques can extend timing, especially for stubborn stains. Cleaning costs may vary based on these factors. If you want the best results, seek professional advice to guarantee proper stain removal without damaging your fabric.

    Are There Any Risks of Color Fading During Ink Removal?

    Color fading can be a double-edged sword when tackling ink stains. You might face color loss or fabric discoloration, especially with delicate fabrics prone to dye transfer. Chemical risks from harsh solvents can cause stain persistence or even fabric damage.

    To guarantee cleaning safety, always request fading prevention measures and test a small area first. Be aware that improper treatment could lead to stain reappearance, so choose professional care wisely to protect your garment’s vibrancy.

    Can Dry Cleaners Remove Ink From Non-Clothing Items?

    Yes, dry cleaners can remove ink from non-clothing items using advanced ink removal techniques. You’ll want to provide stain identification tips and stain treatment history when you bring your item in.

    Professionals use specialized cleaning products and stain removal tools while keeping fabric safety in mind. Customer testimonials often praise their expertise.

    They’ll also advise you on stain prevention methods and drying process tips to protect your upholstery or curtains effectively.

    How Should I Store Stained Garments Before Professional Cleaning?

    To guarantee stain prevention, store your stained garments in breathable, air-tight containers or paper bags with proper labeling for stain detection. Avoid plastic bags to maintain ideal storage conditions and protect delicate fabrics.

    Lay garments flat or hang them on padded hangers, using protective coverings to prevent damage. Limit storage duration before professional stain treatment and follow pre-cleaning tips to keep fabrics intact. This careful garment storage helps preserve your items before cleaning.

    What Should I Do if the Stain Returns After Cleaning?

    If the stain returns after cleaning, track the ink reappearance carefully and assess the garment’s condition. Stain persistence means you’ll likely need repeat treatments, so avoid heat to prevent setting.

    Adjust your cleaning frequency and practice stain prevention to reduce risk. If the stain’s stubborn, consider professional advice instead of concealment. Proper stain tracking and garment assessment help you mitigate risks and guarantee the best approach to removing ink stains effectively.

    Conclusion

    Imagine your favorite shirt, its fabric like a blank canvas, suddenly marred by an ink stain. Dry cleaners act like skilled artists, carefully evaluating the stain and fabric, then applying specialized solvents and gentle treatments to restore your garment’s original beauty.

    While some stubborn stains may linger, entrusting professionals guarantees the best chance of revival. So, when ink threatens your wardrobe, don’t despair. Let the experts bring back that fresh, clean look you love.

  • How to Add Ink to Epson Printer in 7 Easy Steps

    How to Add Ink to Epson Printer in 7 Easy Steps

    To add ink to your Epson printer in 7 easy steps, start by turning off and unplugging it for safety.

    Open the printer cover to locate the correct ink tank, then carefully remove the tank’s cover.

    Keep your ink bottles upright, match colors, and refill without overfilling.

    Securely close the ink tank, lower the cover, and turn the printer on.

    Finally, run a cleaning and alignment cycle to guarantee smooth ink flow and print quality.

    Follow along for detailed tips on maintaining your printer.

    Prepare Your Epson Printer for Ink Replacement

    turn off open identify handle

    Before you add ink to your Epson printer, make sure to turn it off and unplug the power cord to keep yourself safe. This step is crucial for safety and prevents any accidental damage during the ink refill process.

    Once powered down, you’re ready to open the printer’s top cover or scanner bed to access the ink tanks. Wait for the printhead carriage to move to its rest position before you open any ink tank covers. This helps avoid any mechanical issues.

    Next, identify the correct ink tank to refill by matching the tank’s label color with your ink bottles. Keep your ink bottles upright and ready for a smooth, precise ink refill.

    Handling the ink tanks carefully ensures you avoid spills and maintain the printer’s performance. By following these safety and preparation steps, you set yourself up for a successful Epson ink tank refill without any hassle.

    Open the Printer Cover and Locate the Ink Cartridges or Tanks

    When you open the printer cover, make sure the printer is turned on so the ink cartridge carriage can move into position for easy access. On Epson printers with a scanner bed, lift the bed carefully to reveal the ink cartridge or ink tank compartment. This is usually located behind or beneath it.

    Once open, locate the specific cartridges or ink tanks by checking the color indicators or icons for easy identification. The compartment is designed to give you straightforward access to each ink tank or cartridge, allowing you to monitor the ink level clearly.

    Gently open the designated ink tank cover or cartridge door to avoid any damage or misalignment. By following these steps, you’ll quickly find the exact spot where the ink cartridges or tanks sit within your Epson printer, ensuring you’re ready for the next step in adding ink without hassle or confusion.

    Remove Old Epson Ink Cartridges Carefully

    handle cartridges with care

    Before you start removing the old Epson ink cartridges, make sure your printer is turned off and unplugged. This helps keep everything safe.

    When you’re ready, gently squeeze the tab on the cartridge and lift it straight out. Try not to touch the nozzles or electrical contacts—those are sensitive parts. It’s best to handle the cartridge by its edges, which also helps keep your hands clean and prevents any damage.

    Safe Cartridge Removal

    To remove old Epson ink cartridges safely, make sure you turn off and unplug your printer first. This step guarantees safe cartridge removal and prevents any electrical issues.

    Next, open the top cover gently to access the cartridges without forcing anything. To remove old ink cartridges, press down the cartridge tab carefully and lift the cartridge straight out.

    Handle cartridges carefully by holding them at the edges and avoid contact with nozzles to prevent damage or ink smudges. If you notice any ink spills around the cartridge area, clean ink spills immediately with a damp cloth to keep the printer clean.

    Following these steps helps maintain your printer’s performance and prepares it for new ink installation.

    Avoid Contact With Contacts

    Although removing Epson ink cartridges might seem straightforward, you should avoid touching the gold contacts and nozzles to prevent damage or ink contamination. When you remove cartridges, handle cartridges by their edges to keep your fingers away from the contact points.

    This simple step helps prevent damage and avoids leaving oils or dirt on the electrical contact areas. Carefully press down on the tab at the front to release the cartridge, then lift it straight out without touching the contacts.

    Wearing disposable gloves can also protect your hands from ink stains during cartridge removal. After removing cartridges, gently wipe any ink spills with a damp cloth, taking care not to touch the electrical contact areas.

    Following these tips guarantees effective damage prevention and keeps your printer functioning properly.

    Insert New Epson Ink Cartridges Step by Step

    Now that you’ve taken out the old cartridges, it’s time to get your new ones ready. Be sure to hold them by the sides and try not to touch the contacts. Once you’re ready, line up each cartridge carefully and press it firmly into its slot. After that, just close the cover securely, and you’re all set!

    Remove Old Cartridges

    How do you safely remove old cartridges without damaging your Epson printer? First, gently squeeze the tab on the old cartridge to release it, then lift it out carefully.

    Always handle cartridges by their sides, avoiding contact with the gold contacts and nozzles. This helps protect them from contamination or damage.

    Once removed, you’re ready to replace the old cartridges with new ones. When you install new cartridges, align each one with its designated slot, making sure the contacts and nozzles face down and fit properly.

    Push the cartridge in until it clicks securely, confirming it’s firmly installed. Properly handling and securing cartridges helps maintain your printer’s performance and guarantees smooth ink flow during printing.

    Prepare New Cartridges

    Before inserting new cartridges, carefully remove them from their packaging while holding them with the contacts facing downward to prevent damage. Next, open the cover of your Epson printer to access the cartridge slots.

    If your new ink cartridge has protective tape or an ink tank cap, remove it gently. Now, align the cartridge with its corresponding slot, matching color and model to ensure you’re using compatible ink cartridges.

    Wipe the ink contacts to remove any residue before installing ink. This helps maintain proper electrical connections. Remember, proper preparation helps the cartridge fit perfectly and function well once you securely install it.

    Step Action Tip
    1 Open the cover Use gentle force
    2 Remove ink tank cap Avoid spills
    3 Align the cartridge Match color and model
    4 Clean ink contacts Use a lint-free cloth

    Securely Install Cartridges

    Once you’ve prepped your new cartridges by removing packaging and aligning them correctly, the next step is to install them securely. Start by carefully inserting each cartridge into its corresponding slot, making sure to align the contacts and nozzles precisely.

    Push the cartridge firmly until you hear a click, indicating it has fit snugly and locked into place. This secure lock prevents the cartridge from moving or dislodging during printing.

    After all cartridges are installed, double-check each one is seated properly. Finally, close the printer cover securely. This action prompts the printer to recognize the new cartridges, enabling it to resume printing without errors.

    Following these steps helps guarantee your Epson printer functions smoothly with fresh ink cartridges.

    Secure Epson Ink Cartridges and Close Printer Cover

    After placing each ink cartridge into its slot, you’ll want to press down firmly until you hear a click, ensuring it’s securely installed. This click confirms the ink cartridges are properly seated, which is essential for your printer to recognize them.

    Press each ink cartridge firmly until you hear a click to ensure secure installation and proper printer recognition.

    Before closing the printer cover, check that the cartridge contacts and nozzles are clean and free of debris to avoid any printing issues.

    Next, gently lower the printer cover. Make sure it aligns properly with the cartridge slots to prevent damage and maintain a proper seal. Avoid forcing the cover closed, as this can harm delicate components.

    To secure your Epson ink cartridges and close the printer cover properly, follow these steps:

    1. Press down each cartridge until you hear the click, confirming it’s secure.
    2. Verify the cartridges are clean and properly seated.
    3. Align and gently close the printer cover until it clicks, ensuring a tight seal to prevent damage.

    Run Cleaning and Alignment to Keep Epson Ink Flowing Smoothly

    printer maintenance for quality

    Securing your Epson ink cartridges and closing the printer cover sets the stage for ideal printing performance. Next, run the cleaning cycle to clear any clogged nozzles in the print head. This step is essential because clogged nozzles can disrupt ink flow, causing streaks, faded areas, or smudging.

    Most Epson printers let you start the cleaning cycle directly from the control panel or software, making it easy to maintain print quality. After cleaning, perform print head alignment to optimize the position of the print head. Proper alignment prevents misaligned prints and ensures sharp, accurate images.

    These maintenance routines aren’t just for after ink replacement; doing them regularly prolongs the print head’s lifespan and keeps your prints consistently high-quality. By running both cleaning and alignment, you maintain smooth ink flow and avoid common print issues, guaranteeing your Epson printer delivers the best results every time you print.

    Troubleshoot Common Epson Ink Replacement Issues

    If you encounter problems while adding ink to your Epson printer, don’t worry. Most issues can be fixed quickly with a few simple checks. When refilling ink cartridges or topping up the ink tank, it’s essential to monitor ink levels and handle the process carefully to avoid printer damage or print quality issues.

    Encountering ink refill issues? Simple checks can quickly resolve them and protect your Epson printer’s performance.

    Here are three key troubleshooting tips:

    1. Check Ink Bottle and Ink Tank Caps: Ensure the ink bottle cap is removed correctly and matches the ink cartridges in Epson. Also, confirm that the ink tank cap is tightly closed to prevent leaks and air from entering the system.
    2. Resolve Ink Flow Problems: If ink doesn’t flow, lift and reinsert the ink bottle. Inspect the filling port for blockages and clean it gently with a damp cloth to maintain smooth ink flow.
    3. Prevent Print Quality Issues: Always use the correct ink in your Epson and avoid overfilling. This helps keep your printer running efficiently and guarantees top-quality prints.

    Frequently Asked Questions

    How Do I Recycle Used Epson Ink Cartridges Properly?

    To recycle your used Epson ink cartridges properly, you should follow Epson’s cartridge recycling programs and cartridge return policies. Locate authorized collection points or use prepaid mailing envelopes for cartridge return.

    This eco-friendly recycling supports sustainable practices by ensuring environmentally safe disposal and ink cartridge reuse. Participating in used ink collection helps prevent pollution and promotes cartridge recycling.

    This makes your ink cartridge disposal responsible and in line with Epson’s commitment to sustainability.

    Can I Use Third-Party Ink Cartridges in My Epson Printer?

    Yes, you can use third-party ink cartridges in your Epson printer, but be cautious. Compatible cartridges offer cost savings and brand alternatives, yet ink quality and ink color accuracy might not match original Epson ink.

    Cartridge compatibility depends on your model, so check carefully. Refillable cartridges are another option but may affect ink longevity.

    Always research to balance savings with potential risks to your printer and print results.

    How Long Does Epson Ink Typically Last After Opening?

    Think of your Epson ink as a delicate flower. Its vibrancy fades with time. Typically, the ink lifespan after opening is 6 to 12 months, but ink expiration happens sooner if you don’t mind ink drying or evaporation.

    Proper ink storage slows ink absorption by air, preserving ink quality and color. To keep your prints sharp, use ink refills within 3 to 6 months. This helps prevent clogs and dull hues.

    What Should I Do if My Epson Printer Still Shows Low Ink?

    If your Epson printer still shows low ink, start with an ink level reset through the printer settings. Check for ink sensor issues by cleaning the cartridge contacts and running cartridge cleaning cycles.

    Follow refill instructions carefully if you’re using refill kits, making sure to use compatible ink types. Sometimes, ink absorption affects sensors, so replace cartridges if needed.

    Finally, perform printer calibration to improve accuracy and print quality after cartridge replacement or refill.

    Are There Software Updates That Improve Ink Cartridge Performance?

    You might be surprised to learn that Epson regularly releases software updates that boost ink cartridge performance. These updates can improve ink compatibility, extend ink lifespan, and even help with cartridge reset issues.

    They fine-tune print quality and reduce problems like ink leakage or drying. Installing updates can also optimize ink storage management, delaying cartridge replacement. So, don’t skip them; they’re key to keeping your prints sharp and your cartridges lasting longer.

    Conclusion

    Now that you’ve mastered adding ink to your Epson printer, you’re basically an ink-replacement superhero! No more blurry prints or panicked searches for a technician. Just smooth, vibrant pages flowing effortlessly from your printer.

    With these simple steps, you’ve taken control, turning a once-daunting task into a breeze. So go ahead, print like a pro and watch your Epson come to life with every drop of fresh ink you add!