Category: Ink

  • What Does Ink Poisoning Feel Like?

    What Does Ink Poisoning Feel Like?

    If you’ve been exposed to ink, you’ll likely feel mild symptoms like skin staining or slight irritation without serious harm.

    If ink gets in your mouth or eyes, you might notice redness, burning, or mild soreness.

    Swallowing a small amount can cause nausea or stomach discomfort, while larger amounts might lead to dizziness or vomiting.

    Most ink exposures are low risk, but understanding how to care for and when to seek help can keep you safe.

    What Are the Symptoms of Ink Poisoning on Skin?

    temporary skin staining harmless

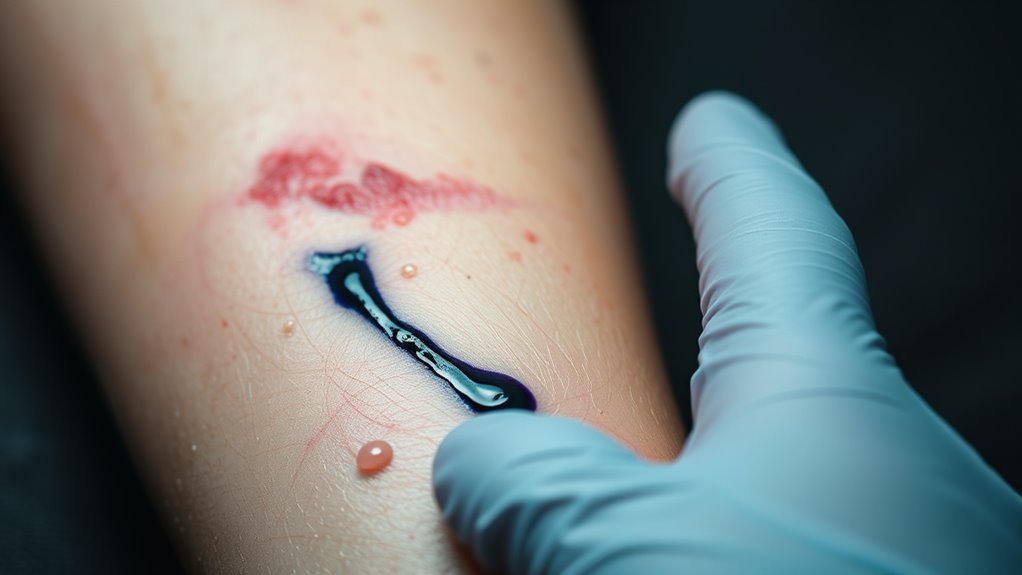
    Although ink on your skin might look concerning, it usually only causes temporary staining without any poisoning or lasting harm. When ink touches your skin, it may leave blue, black, or colored marks, but these are just surface stains.

    You won’t experience symptoms of ink poisoning from mere skin contact because the toxicity level is generally too low to cause harm. Unlike ingestion or deep wounds, ink on the skin doesn’t lead to pain, swelling, or other warning signs of poisoning.

    You should avoid harsh scrubbing or using strong chemical cleaners to remove the ink, as these can irritate or damage your skin. Instead, the stain will fade naturally over time without any medical treatment.

    How Ink Poisoning Affects the Mouth and Throat

    When ink enters your mouth or throat, it can cause temporary staining and irritation. Ink poisoning in these areas often leads to noticeable symptoms you can’t ignore. You might see white or colored patches on your oral tissues, which can look alarming but usually fade with time.

    Ink in your mouth can cause temporary stains and irritation, often showing as white or colored patches that fade.

    The irritation can make your mouth and throat feel sore or even give you a mild burning sensation. In some cases, swallowing a larger amount of ink might cause discomfort or nausea focused around your mouth.

    Here are common symptoms of ink poisoning affecting your mouth and throat:

    1. Temporary staining of the tongue, gums, and throat lining
    2. White or colored patches on mucous membranes
    3. Soreness or burning sensation causing irritation
    4. Mild localized discomfort or nausea

    Most symptoms resolve with rinsing and basic care, but if irritation sticks around, it’s a good idea to get checked by a doctor.

    Common Digestive Symptoms After Swallowing Ink

    swallowed ink causes mild symptoms

    If you swallow ink, you might feel a bit of stomach discomfort or even some nausea. It’s pretty common to experience these mild symptoms. Sometimes, this irritation can make you want to vomit as your body tries to get rid of the ink. Usually, these symptoms go away on their own and don’t cause any lasting problems. So, while it’s not the most pleasant experience, it generally isn’t something to worry about too much.

    Mild Gastrointestinal Irritation

    Because swallowing ink can irritate your digestive tract, you might feel nausea, slight stomach discomfort, or queasiness. These mild gastrointestinal irritation symptoms usually appear after ingestion but tend to be temporary and resolve without treatment.

    You might notice:

    1. Mild stomach cramps or discomfort
    2. A queasy feeling that comes and goes
    3. Slight nausea without vomiting
    4. Minor bloating or gas

    In most cases, these mild stomach symptoms from ink ingestion don’t require medical attention. Drinking plenty of water helps flush the ink through your system and eases irritation.

    Possible Nausea And Vomiting

    How does swallowing ink lead to nausea and vomiting? When you ingest ink, the chemicals can mildly irritate your gastrointestinal tract. This irritation triggers symptoms like nausea and sometimes vomiting.

    Usually, these symptoms are mild and stop on their own as your body clears the ink. However, if you swallow a large amount, the nausea might be stronger, and vomiting could occur more frequently. Keep an eye on your symptoms and seek medical help if vomiting persists or worsens.

    Symptom Description
    Nausea Feeling queasy or unsettled
    Vomiting Forceful expulsion of stomach contents
    Ingestion Swallowing ink accidentally
    Symptoms Mild digestive upset, usually self-limiting

    Temporary Stomach Discomfort

    What should you expect after swallowing a small amount of ink? Typically, you may experience mild symptoms of stomach upset due to ingestion. These effects are mostly temporary and affect your gastrointestinal system without causing serious illness.

    Here’s what you might notice:

    1. Slight discomfort or cramping in your abdomen
    2. Mild nausea that comes and goes
    3. Occasional feelings of bloating or fullness
    4. Temporary changes in bowel movements, like mild diarrhea

    Most of these symptoms resolve on their own without medical treatment. Drinking water can help ease your stomach upset. However, if your discomfort worsens or lasts longer than expected, it’s important to seek medical advice.

    Understanding these common digestive reactions can help you stay calm and manage temporary stomach discomfort after ink ingestion.

    Ink Exposure in the Eye: Symptoms and Treatment

    rinse eye seek help

    If ink gets in your eye, you’ll likely notice irritation, redness, and a burning sensation. These symptoms are common signs of ink exposure and mean you should act quickly. The best immediate treatment is rinsing with cool, clean water for at least 15 minutes. This helps flush out the ink and reduce eye irritation.

    Avoid rubbing your eye or trying to remove ink particles yourself because that can make things worse.

    If symptoms persist, pain increases, or your vision blurs after rinsing, seek medical attention promptly. Temporary staining of the white part of your eye may happen but usually doesn’t cause long-term harm.

    Symptom Recommended Action When to Seek Help
    Redness & burning Rinse with water 15 mins If pain worsens
    Irritation Avoid rubbing the eye If vision blurs
    Temporary staining Usually harmless If symptoms persist

    How to Safely Remove Ink From Your Skin

    After dealing with ink in your eye, you might notice ink stains on your skin that need attention. To safely remove ink from your skin, follow these steps carefully:

    1. Wash the stained area gently with warm water and mild soap. This helps break down the ink without harming your skin.
    2. Use a soft cloth or gentle scrubbing motion to lift the ink. Avoid harsh rubbing to prevent irritation.
    3. For stubborn ink stains, apply a small amount of petroleum jelly or baby oil. Let it sit briefly to loosen the ink, then wash again.
    4. Rinse thoroughly and pat your skin dry to remove all residue and avoid irritation.

    Avoid using harsh chemicals or alcohol-based cleaners on your skin, as they can cause damage or discomfort. By taking these simple steps, you’ll effectively remove ink from your skin while keeping it healthy and irritation-free.

    Why Pen and Marker Ink Is Generally Safe

    You don’t really need to worry much about pen and marker ink since they’re made with low toxicity levels. Most inks have safe ingredients like water and dyes, which usually pose minimal health risks. So, if you accidentally get some on your skin or even swallow a tiny bit, it generally won’t cause any harm.

    Low Toxicity Levels

    Although ink might seem harmful at first glance, most pen and marker inks are actually formulated to be non-toxic and safe for skin contact or accidental ingestion. You don’t need to worry about serious poisoning from everyday use. Here’s why:

    1. Most inks are non-toxic, designed with safety in mind.
    2. Accidental ingestion of small amounts usually causes only minor symptoms.
    3. Skin contact with these inks rarely results in any harmful effects.
    4. Consumer safety guidelines classify pen inks as minimally toxic or non-poisonous.

    Minimal Health Risks

    Since pen and marker inks are made with non-toxic ingredients, they pose minimal health risks during everyday use. You can handle them or accidentally ingest small amounts without much worry because these inks typically contain water-based dyes or mild solvents designed to be safe.

    If you swallow a bit of ink, you’ll likely experience only minor symptoms like temporary stomach upset or mild staining. Regulatory agencies classify most pen inks as non-poisonous, so casual exposure rarely leads to serious issues.

    While mild poisoning is possible if large quantities are consumed, this is extremely uncommon due to the low toxicity of modern inks. Overall, pen and marker inks are formulated to keep you safe during normal use, making health risks minimal and manageable.

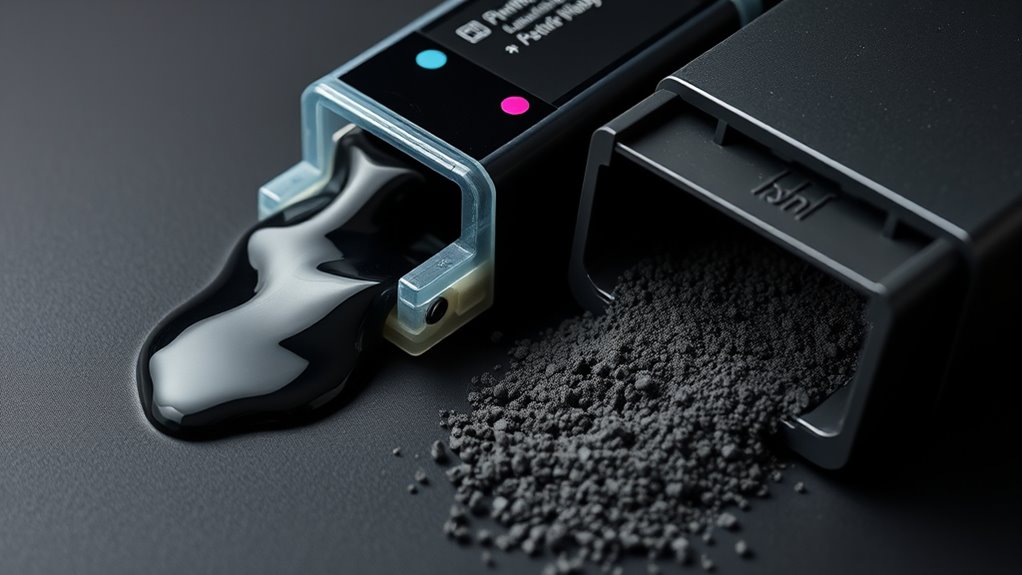
    How Large Amounts of Ink Can Cause Serious Symptoms

    When you ingest large amounts of ink, your body can react with serious symptoms beyond mild nausea or vomiting. Ink poisoning from significant ingestion can cause more than just discomfort. You might experience:

    1. Severe abdominal pain due to irritation or chemical burns in your gastrointestinal lining.
    2. Dizziness or confusion as toxins affect your nervous system.
    3. Persistent vomiting and diarrhea that lead to dehydration.
    4. Potential systemic toxicity, especially if the ink comes from printer cartridges or stamp pads containing harmful chemicals.

    These serious symptoms signal that the ink has moved beyond your stomach and is affecting other organs. Because of the risks involved with ingesting large amounts of ink, it’s vital to seek immediate medical attention. Early intervention can prevent severe complications and help your body recover safely.

    Special Risks of Tattoo Ink: Allergies and Infections

    If you’re considering a tattoo, it’s important to understand that tattoo ink carries unique risks, especially related to allergies and infections. An allergic reaction to pigments like yellow, green, or blue can cause red, itchy, swollen skin.

    Sometimes, your immune response might trigger hypersensitivity or allergic dermatitis months or years after the tattoo. Contaminated ink poses another risk, as bacteria or fungi can cause infections that may need antibiotics or medical treatment.

    Since the FDA hasn’t approved pigments for skin injection, risks from unsterile contamination increase. To lower these risks, choosing inks from reputable sources and ensuring sterile equipment and hygiene are crucial.

    Risk Type Cause Symptoms
    Allergic Reaction Pigment sensitivity Redness, itching, swelling
    Infection Contaminated ink Pain, pus, fever
    Delayed Reaction Immune response Dermatitis months/years later
    Contamination Unsterile equipment Bacterial or fungal infection

    Immediate Steps to Take After Ink Exposure or Ingestion

    Although ink exposure or ingestion can be alarming, you can take immediate actions to minimize harm and discomfort. Acting quickly helps reduce irritation and potential health risks. Here’s what you should do right after ink exposure or ingestion:

    Immediate action after ink exposure reduces irritation and health risks, helping to minimize harm and discomfort.

    1. If ink gets into your eyes, perform a thorough eye rinse with cool, running water for at least 15 minutes to flush out contaminants.
    2. For ink on your skin, gently wash the affected area using soap and water. Avoid harsh scrubbing or chemicals that could worsen irritation.
    3. If you’ve ingested ink, don’t induce vomiting. Instead, drink a few sips of water to dilute it and ease any discomfort.
    4. Always seek medical attention if you experience persistent irritation, difficulty breathing, or if a large amount of ink was swallowed. Contact poison control or healthcare providers promptly for guidance.

    Taking these steps can help you manage ink exposure safely and effectively.

    When Should You See a Doctor for Ink Poisoning?

    How do you know when ink exposure requires medical attention? You should see a doctor immediately if you suspect you’ve ingested a large amount of ink or if you experience symptoms like vomiting, abdominal pain, or difficulty breathing.

    Persistent eye irritation, blurred vision, or discomfort that doesn’t improve after rinsing with water also means you need medical attention. If you notice symptoms such as nausea or dizziness after ink ingestion, or if you’re unsure about how much ink you swallowed, it’s best to consult a healthcare professional.

    Ink poisoning symptoms that worsen or don’t improve within a few hours require prompt evaluation at a healthcare facility. Remember, exposure to printer cartridges, stamp pads, or industrial inks can be more dangerous, so contact a medical professional immediately in these cases.

    Don’t delay. Early medical attention can prevent complications and ensure proper treatment for ink poisoning.

    Frequently Asked Questions

    Can Ink Poisoning Affect My Long-Term Health?

    Ink poisoning rarely affects your long-term health if you experience minimal ink absorption from common pens or markers. Symptom severity usually stays low, so you won’t need aggressive treatment options.

    However, with repeated exposure to hazardous inks, you might face skin sensitivities or respiratory issues. To protect yourself, focus on preventive measures like avoiding prolonged contact and using regulated inks.

    If symptoms worsen, seek medical advice promptly.

    Are Certain Ink Colors More Toxic Than Others?

    No, certain ink colors aren’t inherently more toxic than others. Ink toxicity mainly depends on the chemical composition, not the color itself.

    While some brightly pigmented inks might cause irritation or allergic reactions, their color safety doesn’t guarantee higher health risks. You should focus on the ink’s formulation and brand, as commercially available inks are usually tested for safety.

    How Does Ink Poisoning Differ Between Adults and Children?

    You’ll notice that ink absorption affects children and adults differently due to age sensitivity. Kids absorb ink more quickly, making symptoms more severe. They often experience nausea or irritability.

    Adults, with larger bodies, usually show milder symptoms or none at all. Because of this, medical treatment is more urgent for children to prevent complications.

    Can Ink Poisoning Cause Allergic Reactions Aside From Skin Irritation?

    You might think ink allergy only causes skin irritation, but it can trigger a broader immune response. If you have skin sensitivity, you may also experience allergic symptoms like swelling, hives, or even respiratory issues such as coughing.

    Your immune system can react beyond just the skin, especially if you’re sensitive or have pre-existing allergies. So, ink exposure can definitely cause more than simple skin irritation.

    Is Ink Poisoning Contagious or Transferable to Others?

    No, ink poisoning isn’t contagious or transferable to others. You won’t catch it through close contact or exposure because it involves chemical ingestion or skin contact, not an infection.

    While ink transfer can happen on shared surfaces or hands, it doesn’t spread poisoning itself. Just wash your hands after handling ink to avoid accidental ingestion, but don’t worry about passing ink poisoning to someone else through casual interaction or touching.

    Conclusion

    So, if you ever think ink poisoning feels like a fun adventure, think again. It’s more like an uninvited guest crashing your body’s party. From itchy skin and stomach troubles to eye irritation, ink’s not the harmless splash of color you might hope for.

    Sure, it’s just ink, but don’t let that fool you. When in doubt, clean up and call a doctor because your body definitely prefers a drama-free day.

  • What Color Ink Should You Use for Legal Documents?

    What Color Ink Should You Use for Legal Documents?

    You should use blue or black ink for legal documents to guarantee they’re clear, authentic, and accepted.

    Blue ink helps distinguish originals from copies and prevents fraud, especially for signatures.

    Black ink is standard for government forms and court submissions because it scans well and meets official requirements.

    Avoid red, green, or light-colored inks since they can cause issues or rejections.

    If you want to understand when to use each color and avoid costly mistakes, keep exploring the details.

    ink color ensures document authenticity

    Why does the color of ink matter when signing legal documents? The ink color plays an essential role in distinguishing original signatures from photocopies, which helps verify authenticity.

    Ink color is key to differentiating original signatures from photocopies, ensuring authenticity and trustworthiness.

    When you use the right ink color, like blue or black, legal documents scan and reproduce clearly, guaranteeing that everything remains legible. This clarity is vital because it prevents confusion or disputes about the document’s validity.

    Many institutions and jurisdictions actually have specific guidelines favoring these ink colors for official paperwork. By sticking to consistent ink colors, you make it easier for everyone involved to process, archive, and preserve the documents long-term.

    Choosing the appropriate ink color isn’t just about aesthetics. It safeguards your documents’ integrity and helps avoid unnecessary complications down the line. So, when signing legal documents, paying attention to ink color ensures your signature stands out as an original and keeps your paperwork compliant with common standards.

    When to Use Blue Ink for Signatures

    When should you opt for blue ink when signing legal documents? You should choose blue ink for signatures when you want to clearly distinguish the original document from photocopies. Blue ink is harder to replicate with standard copying methods, reducing the risk of forgery.

    Many notaries and legal professionals recommend blue ink to ensure authenticity and make verification easier. Furthermore, numerous institutions and courts specifically require blue ink signatures to speed up processing.

    Blue ink also tends to resist fading and smudging better than lighter ink colors, preserving the integrity of your signed documents over time.

    Reason for Using Blue Ink Benefit
    Distinguishes original documents Easy to identify originals
    Reduces forgery risk Harder to copy accurately
    Recommended by legal experts Ensures authenticity
    Preferred by institutions Streamlines processing

    Using blue ink for signatures is a smart choice whenever you want to ensure your legal documents are both authentic and durable.

    When Black Ink Is the Best Choice

    black ink ensures document legitimacy

    How do you guarantee your legal documents are accepted without hassle? Using black ink is your safest bet. Black ink produces clear, high-contrast scans and photocopies, which government agencies and courts often require for official filings. This ensures your documents meet authenticity standards and avoid rejection.

    When submitting legal papers electronically or through digital archives, black ink prevents compatibility issues, making your documents easier to process. Moreover, black ink maintains its permanency and readability over time, which is crucial for legal record-keeping.

    Many legal forms specifically ask for black ink to ensure consistent processing and reduce errors. By choosing black ink, you align with most legal institutions’ expectations, safeguarding the validity and longevity of your documents.

    You’ll want to avoid ink colors like red, purple, and green because they often cause problems when scanning or copying. Also, light or metallic inks don’t reproduce well, which can make your documents look unprofessional or even lead to them being rejected. So, sticking to standard ink colors is the best way to make sure your legal papers look professional and stay clear.

    Problematic Ink Colors

    Why should you steer clear of certain ink colors in legal documents? Using red ink or purple ink can cause problems. Red ink is often reserved for corrections and alerts, making it inappropriate for official use.

    Purple ink, on the other hand, scans poorly, increasing the chance of resubmissions. Other colors like green, light, or metallic inks also fail to reproduce clearly. This can jeopardize the legibility and validity of your documents.

    Ink Color Reason to Avoid
    Red Ink Reserved for corrections, unclear
    Purple Ink Poor scan quality, readability issues
    Green Ink Doesn’t copy or scan well
    Light-colored Low visibility, hard to reproduce
    Metallic/Shiny Poor scan quality, reduces clarity

    Avoid these inks to ensure your legal papers stay clear and valid.

    Scanning And Copying Issues

    When copying or scanning legal documents, which ink colors cause the most trouble? Red, purple, green, light shades, and metallic inks often lead to poor readability in copies and scans.

    Red ink, commonly used for corrections, doesn’t reproduce accurately during copying, causing confusion. Purple and green inks tend to fade or distort when scanned, making the text unclear.

    Light-colored inks are especially problematic because they appear faint or disappear entirely in digital copies. Metallic and gel inks create poor scan quality and are unsuitable for official papers.

    To guarantee your documents remain clear and legible after scanning or copying, avoid using these problematic ink colors. Stick to darker, standard inks that maintain clarity in both physical and digital reproductions.

    Professional Document Standards

    Which ink colors should you avoid to guarantee your legal and business documents meet professional standards? Steer clear of red, purple, and green inks because they don’t reproduce well when scanned or copied. Red ink often appears as corrections or alerts, which can confuse the document’s intent.

    Purple and green inks reduce clarity, increasing the chance your papers might be rejected or need resubmission. Avoid light shades and metallic or glitter inks as well since they’re hard to read and scan poorly.

    To assure professionalism, stick with black or blue ink. Both offer high visibility and scan cleanly, meeting official requirements. Using these standard colors helps keep your documents clear, legible, and acceptable in any legal or business setting.

    How Ink Color Affects Authenticity and Fraud Prevention

    You’ll want to pick an ink color that helps prove your document’s originality and makes it easier to spot copies. For example, blue ink really stands out on photocopies. That’s a big help when it comes to preventing fraud and keeping signature verification clear. So, choosing the right color can actually make a big difference in protecting your legal papers.

    Ink Color And Originals

    Although legal documents often come in black print, using blue ink for signatures helps you distinguish originals from photocopies. Blue ink stands out against black text, making it easier for you and others to identify the original document quickly.

    Since blue ink is harder to replicate exactly in copies, it adds a layer of protection by making forgeries more noticeable. While not legally required, blue ink has become the preferred choice in many legal settings because it enhances the visibility and authenticity of signatures.

    When you sign with blue ink, you’re helping guarantee the integrity of the original document. This makes it simpler for officials to verify its legitimacy without confusion over whether it’s a copy or the actual signed document.

    Fraud Detection Benefits

    Because blue ink stands out against black text, it makes spotting original signatures much easier, helping you quickly identify authentic documents. When you use blue ink, you gain a vital fraud detection advantage since photocopies usually reproduce black ink, not blue. This contrast lets you immediately distinguish originals from copies.

    Blue ink’s unique shade and texture are hard to replicate precisely, deterring forgery and unauthorized alterations. Financial institutions and legal professionals prefer blue ink because it visually confirms authenticity and highlights any tampering attempts.

    Signature Verification Clarity

    When verifying signatures on legal documents, choosing the right ink color plays a crucial role in confirming authenticity and preventing fraud. Using blue ink enhances signature visibility against black print, making it easier for you to verify authenticity. Blue ink also helps distinguish original documents from photocopies, reducing fraud risks.

    On the other hand, black ink is preferred for official records because it reproduces clearly in scans and photocopies, supporting accurate verification. The contrast that blue or black ink provides against printed text improves the clarity of signature verification, making it straightforward for you to spot any alterations.

    Many legal processes require specific ink colors to guarantee signatures remain distinguishable and authentic during audits or legal reviews, protecting both you and the document’s integrity.

    Government and Immigration Ink Color Preferences

    If you’re submitting forms to USCIS or similar government agencies, using black ink is essential. These agencies prefer black ink because it guarantees clear, high-contrast scans, which are vital for digital processing and record-keeping.

    Using blue ink may cause scanning issues that can lead to delays or even rejection of your documents. While some jurisdictions might accept blue ink, it’s best to follow the specific guidelines provided by each government agency to avoid complications.

    Ignoring these preferences, especially the requirement for black ink, can mean your forms will be rejected, forcing you to resubmit and delaying your application. To make certain your legal documents are accepted without issue, always opt for black ink when dealing with government agencies and immigration forms.

    This simple step helps keep the process smooth and prevents unnecessary setbacks in your legal or immigration matters.

    black ink for legal documents

    Although ink color rules can differ widely, most states and institutions require black ink for legal documents to guarantee clarity and uniformity. You’ll find that black ink is often the safest choice to avoid rejection or delays. However, some jurisdictions allow or even prefer blue ink for signatures to help distinguish original documents from copies.

    Here are some key points to keep in mind:

    Many states mandate black ink for forms and contracts to ensure legibility and proper scanning. Certain agencies, like USCIS, strongly recommend black ink on immigration and government forms.

    Black ink is often required for forms and contracts to ensure clarity and successful scanning.

    Some courts and notaries accept blue ink for signatures, but black ink remains the standard for the rest of the document.

    Following these rules helps you stay compliant with state and institutional requirements and guarantees your legal papers are accepted without issue. Always check the specific guidelines for your document type and jurisdiction before signing.

    Selecting the right ink color and pen type plays a significant role in guaranteeing your legal documents are both professional and compliant. For legal signings, blue ink is often preferred because it helps distinguish original documents from photocopies, reducing the risk of fraud.

    Black ink is widely used for official government and court documents due to its clarity and compatibility with scanning and archiving systems. When choosing a pen, opt for a high-quality rollerball or fountain pen filled with either blue ink or black ink.

    These pens provide smooth writing, a professional appearance, and long-lasting, legible signatures. Avoid red or purple ink, as they tend to scan poorly and may appear informal or unprofessional.

    Tips for Notaries and Signers to Ensure Ink Color Compliance

    You should always check the ink color requirements for each legal document—it’s usually blue or black. It’s a good idea to carry both pen colors with you, so you’re prepared no matter what. Plus, notaries need to make sure they note the ink color in their journal when required to keep everything compliant. This way, there are no surprises, and the paperwork stays official.

    Ink Color Requirements

    When preparing legal documents, notaries and signers need to verify any specific ink color requirements outlined in the instructions or guidelines. Using the right ink color is essential to guarantee your documents are accepted and processed smoothly. Blue and black inks are the most commonly accepted colors, with blue often used to highlight original signatures.

    Some jurisdictions or agencies may specifically require black ink for better clarity and scanability. To avoid delays or rejections, always check the guidelines before signing.

    Here are key tips to keep in mind:

    • Confirm ink color preferences stated in the document instructions.
    • Use blue or black ink, carrying both pens if needed.
    • Follow jurisdictional rules to meet institutional standards efficiently.

    Choosing the correct ink color prevents complications with your legal documents.

    Pen Choices for Notaries

    Although ink color requirements can vary by jurisdiction or document type, notaries should always carry both black and blue pens to meet any specifications on the spot. Using blue ink for signatures is often preferred because it helps distinguish original documents from copies.

    Before signing, always verify the ink color instructions from your client, institution, or official guidelines. Avoid gel pens or unusual ink colors, as they might smudge or fail to scan clearly in official records.

    To guarantee consistent, professional notarizations, consider dedicating a high-quality fountain pen filled with permanent, dark ink. This pen choice guarantees reliability and compliance, helping you maintain the integrity of legal documents every time you notarize.

    What Happens If You Use the Wrong Ink Color?

    If a legal document is signed with the wrong ink color, such as red instead of the standard black or blue, it risks being rejected or deemed invalid. Many institutions require black ink because it provides the best contrast, and ink tends to copy clearly on photocopies and scans. Using non-standard colors can raise doubts about the document’s authenticity and delay processing.

    Using red ink instead of standard black or blue risks rejection and delays due to poor contrast and authenticity concerns.

    Here’s what you might face if you use the wrong ink color:

    • Document rejection or invalidation by courts or agencies
    • Delays due to re-signing or re-issuing paperwork
    • Difficulty in scanning or archiving because of poor contrast

    To avoid these issues, always stick to black ink or blue ink when signing legal documents. Black ink ensures your signature is clear, official, and easily reproducible, saving you time and preventing costly hassles.

    Frequently Asked Questions

    You generally shouldn’t use gel pens for legal document signatures because their pen durability isn’t reliable enough. Gel ink often has a longer ink drying time, which increases the risk of smudging or fading. This can compromise the document’s integrity.

    Instead, choose pens with permanent ink that dries quickly and resists tampering, like ballpoint or fountain pens. That way, you guarantee your signature stays clear and legally valid over time.

    Does Ink Color Affect Document Scanning or Copying Quality?

    Yes, ink color does affect document scanning and copying quality. You want to use dark, durable ink to guarantee ink durability and maintain document authenticity.

    Black ink offers the best contrast and reproduces clearly on scans and copies, keeping your legal documents legible. Lighter or unusual colors can fade or distort, compromising authenticity.

    Are Colored Inks Like Green or Purple Ever Acceptable?

    You might think green or purple ink adds a personal touch, but in legal documents, they rarely work. Ink color symbolism matters here. Blue and black signal professionalism and trustworthiness, while green or purple can cause doubts.

    Plus, ink durability plays a big role. Colored inks often fade or bleed, risking your document’s clarity. So, to keep your papers accepted and respected, stick with black or blue ink every time.

    Blue ink typically lasts 10 to 20 years before ink fading becomes noticeable, especially if you use standard ballpoint pens. If you want your documents to stand the test of time, choose archival quality blue ink designed to resist UV light, water, and chemicals.

    With proper storage in cool, dark, and dry conditions, you can extend the ink’s lifespan, sometimes preserving legibility for over 50 years. So, pick your ink wisely and store documents carefully.

    Can Digital Signatures Require Specific Ink Colors for Printing?

    Yes, digital signature standards can include ink color regulations when you print documents. While digital signatures themselves don’t need ink, printed versions often must follow specific ink color rules set by authorities or organizations.

    You’ll usually use black ink for clarity, but some places require blue ink to distinguish original signatures. Always check the ink color regulations tied to your document to guarantee your printed digital signature meets all standards.

    Conclusion

    Choosing the right ink color for your legal documents isn’t just a small detail—it’s the key that opens trust and authenticity. When you pick blue or black ink, you’re painting a clear path through potential confusion and fraud.

    Avoid the wrong hues, and you’ll keep your paperwork standing strong like a fortress. So, grab your pen wisely, because every stroke you make writes your credibility into history’s ledger.

  • Is Pen Ink Toxic to Dogs and How to Handle It Safely

    Is Pen Ink Toxic to Dogs and How to Handle It Safely

    Pen ink is usually non-toxic to dogs in small amounts, but swallowing pen parts can cause serious problems like intestinal blockages.

    If your dog gets ink on their mouth or paws, rinse gently and offer water to help dilute it.

    Watch for symptoms like vomiting or lethargy, and avoid inducing vomiting unless instructed by a vet.

    Prompt attention is key, especially if your dog ate plastic pieces.

    You’ll find useful tips on managing and preventing this issue ahead.

    Is Pen Ink Toxic to Dogs? What Happens After Ingestion

    pen ink ingestion risks

    Wondering if pen ink is harmful to your dog? Most ballpoint pen inks are considered non-toxic in small amounts, so if your furry friend licks or chews a pen, it’s usually not cause for panic.

    However, pet owners should know that larger amounts of pen ink can cause gastrointestinal upset. You might notice staining on your dog’s tongue, throat, or fur, but this typically doesn’t lead to serious illness.

    That said, the bigger concern is the plastic casing of the pen. If your dog swallows the plastic parts, it can cause an intestinal obstruction, which is a serious health risk.

    If you suspect your pet has ingested a pen, keep an eye on their behavior. Prompt veterinary assessment is important, especially if you notice any unusual symptoms. Understanding these risks helps you act quickly and protect your dog’s health.

    Symptoms of Pen Ink and Plastic Ingestion in Dogs

    After your dog has ingested pen ink or plastic parts from a pen, you’ll want to watch for certain symptoms that can indicate how their body is reacting. Signs of ink ingestion often include drooling, vomiting, and a decreased appetite.

    Monitor your dog for drooling, vomiting, or appetite loss after ingesting pen ink or plastic parts.

    While ink is usually not toxic in small amounts, larger quantities can upset your dog’s stomach. You might also notice stained tongues or fur, which, although alarming, don’t usually mean poisoning.

    On the other hand, swallowing plastic parts poses a greater risk. Plastic can cause intestinal blockages, which are more serious and may lead to symptoms like vomiting, abdominal pain, or lethargy. These signs suggest your dog is in distress and requires prompt attention.

    Keep an eye out for any unusual behavior or discomfort after ink or plastic ingestion, as early recognition of symptoms can help ensure your dog stays safe and healthy.

    What to Do Immediately After Your Dog Eats Ink or a Pen

    rinse monitor hydrate seek help

    If your dog eats ink or a pen, the first thing you should do is gently rinse their mouth and paws to get rid of any leftover ink. After that, keep a close watch on them for any signs like drooling or vomiting. Make sure they always have fresh water to drink—it helps flush out any toxins. And if you notice anything unusual or if they seem off, don’t hesitate to call your vet right away.

    Immediate Cleaning Steps

    Although it can be alarming when your dog eats ink or a pen, you should start by gently rinsing their mouth and paws with mild soap and water to remove any ink residue. This step helps reduce further ingestion or skin irritation.

    Next, provide fresh water to encourage hydration and help dilute any remaining ink in their system. Carefully observe symptoms such as drooling, vomiting, or unusual behavior, as these may indicate distress.

    Avoid inducing vomiting unless your veterinarian specifically advises it, since it can cause more harm. If you notice any signs of illness or are uncertain about how much ink your dog ingested, contact your veterinarian immediately for professional guidance.

    Acting quickly and calmly is key to your dog’s safety.

    Monitoring For Symptoms

    When your dog swallows ink or a pen, you’ll want to watch them closely for signs of distress like vomiting, diarrhea, or loss of appetite during the first few hours. Check for behavioral changes such as lethargy, excessive drooling, or difficulty breathing, which could mean toxicity or a blockage.

    Gently rinse your pet’s mouth and paws with water to remove any remaining ink or debris and prevent further ingestion. Make certain your pet has access to fresh water to stay hydrated, which also helps dilute any harmful substances.

    If you notice abnormal symptoms or aren’t sure how much ink was ingested, contact your veterinarian right away. They may monitor your pet’s blood pressure and other essential signs to ensure safety and provide appropriate care.

    How to Clean Ink Off Your Dog Safely

    To clean ink off your dog safely, start by using mild soap and water. You’ll want to avoid harsh chemicals or alcohol-based products since they can irritate your pup’s skin.

    Once you’ve gently cleaned the area, make sure to rinse and dry it thoroughly. This helps prevent any leftover ink from causing irritation or your dog from accidentally ingesting it.

    After you’re done, keep an eye on your dog for any skin reactions or unusual behavior—just to be on the safe side. If anything seems off, it’s a good idea to check in with your vet.

    Safe Cleaning Methods

    Since ink can irritate your dog’s skin and mouth, you’ll want to clean it off gently using mild soap and water. Focus on areas with ink stains, such as fur, paws, and around the mouth. Apply gentle cleaning to prevent causing skin irritation.

    Avoid harsh chemicals or solvents, as they can worsen irritation or harm your dog’s eyes. Rinse thoroughly to remove all soap and ink residues, preventing further skin discomfort.

    After washing, dry your dog completely to stop moisture from causing irritation or discomfort. Keep an eye on your dog for any signs of skin irritation or if they’ve ingested ink.

    If you notice any unusual symptoms, contact your veterinarian promptly to ensure your dog’s safety and comfort.

    Suitable Cleaning Products

    Cleaning ink off your dog requires choosing products that won’t harm their skin or health. For safe cleaning, stick to mild soap and water as your primary cleaning products. Gently wash the ink-stained fur and paws to remove the ink without causing irritation.

    Avoid harsh chemicals or solvents since they could irritate your dog’s sensitive skin or be toxic if ingested. After washing, rinse thoroughly to remove all soap and ink residue. Dry your dog completely to prevent skin irritation or further staining.

    Monitoring Post-Cleaning

    How should you keep an eye on your dog after removing ink? Start by monitoring your dog closely for any signs of distress, such as drooling, vomiting, or unusual behavior. These could indicate irritation or ink ingestion.

    Make sure your dog drinks plenty of water to help flush out any leftover ink and stay hydrated. Avoid harsh chemicals or vigorous scrubbing during cleaning because that can make skin irritation worse.

    If you notice persistent discomfort or think your dog might have ingested ink during cleaning, contact your veterinarian right away. Careful post-cleaning monitoring keeps your dog safe and helps you respond quickly if any problems come up.

    Staying attentive after cleaning is key to preventing complications from pen ink exposure.

    When to Call a Vet After Pen or Ink Ingestion

    If your dog swallows pen ink or parts of a pen, you should contact your veterinarian immediately, especially if they start vomiting, drooling, or acting lethargic. Pen ink ingestion can cause toxicity or blockages, so prompt veterinary care is vital.

    Contact your vet immediately if your dog swallows pen ink or parts, especially with vomiting or lethargy.

    You should call your vet right away if your dog shows signs of vomiting, excessive drooling, or lethargy after pen ink ingestion. Also, if they have difficulty breathing or show signs of abdominal pain, don’t wait.

    If they swallowed a pen or a large amount of ink, the risk of obstruction or poisoning goes up, so it’s important to get professional help quickly. Even if your dog seems fine, it’s a good idea to consult your vet for monitoring and advice.

    Always have your veterinarian’s contact information on hand so you can act swiftly in case of pen or ink ingestion. Early intervention can prevent serious health issues and keep your dog safe.

    How Vets Treat Pen and Plastic Blockages

    x ray and endoscopy removal

    When your dog swallows pen parts or plastic, vets usually start by taking X-rays and doing ultrasounds to find where the blockage is. Then, they often try to remove the objects using an endoscopy, which is less invasive. If that doesn’t work, surgery might be necessary to safely take out the blockage and repair any damage.

    Diagnostic Procedures Overview

    Wondering how veterinarians locate and treat pen ink or plastic blockages in your dog’s digestive system? They rely on diagnostic imaging to pinpoint the object’s location and assess any gastrointestinal obstruction. Common approaches include:

    X-rays and ultrasounds help identify the presence and position of foreign bodies. Endoscopy uses a flexible tube with a camera to view and sometimes remove objects from the stomach.

    If the object has passed into the intestines, surgery may be required to extract it safely. Early detection via these methods improves treatment success and lowers complication risks.

    Non-Surgical Removal Methods

    Although surgery is sometimes necessary, veterinarians often use non-surgical methods like endoscopy to remove pen ink or plastic blockages from your dog’s stomach. Endoscopy is a minimally invasive procedure where a flexible tube with a camera and specialized tools is inserted through your dog’s mouth to locate and perform foreign object removal.

    This technique allows vets to extract the blockage quickly, usually under sedation or general anesthesia, which helps reduce recovery time compared to surgery. Endoscopy works best when the blockage is caught early and still in the stomach or upper gastrointestinal tract.

    If the object has moved beyond that, vets might need to explore other treatments. Using endoscopy, you can avoid more invasive procedures while effectively treating your dog’s blockage.

    Surgical Intervention Necessity

    How do veterinarians handle severe blockages caused by pen ink or plastic in your dog’s digestive system? When plastic ingestion leads to a gastrointestinal obstruction, surgical intervention is often necessary. Vets perform surgery to carefully remove the blockage, especially if the plastic is large or deeply lodged.

    Here’s what you can expect during this process:

    • Prompt surgery improves success and reduces complications.
    • Surgeons extract the plastic and repair any damaged tissue.
    • Postoperative care includes pain management and infection monitoring.
    • Hospitalization allows close observation during recovery.

    If your dog swallows plastic or pen parts causing a blockage, early veterinary care is crucial. Timely surgical intervention can restore normal digestion and prevent serious health issues.

    Common Risks From Plastic Parts of Pens

    What happens if your dog swallows the plastic parts of a pen? These plastic parts can cause serious problems, especially if they lead to a gastrointestinal obstruction. When swallowed, the plastic pieces might get stuck in your dog’s stomach or intestines, blocking the normal flow of food and fluids.

    This blockage can cause pain, vomiting, and even damage to the digestive tract. Since plastic parts are often indigestible, they rarely break down inside your dog’s system and may need surgical removal to avoid further complications.

    While small pieces might pass through naturally, larger or oddly shaped fragments pose a higher risk. If you suspect your dog has ingested any part of a pen, don’t wait. Seek veterinary attention immediately. Prompt care is essential to prevent these obstructions from becoming life-threatening.

    Understanding these risks helps you act quickly to protect your dog’s health.

    Preventing Pen and Ink Ingestion in Dogs

    Since ingesting plastic parts of pens can lead to serious health issues for your dog, taking steps to prevent pen and ink ingestion is key. You want to keep pens and inked items away from your dog’s reach. This simple action reduces the risk of accidental swallowing.

    Preventing access to these products also means creating a safe environment where your dog isn’t tempted to chew on pens.

    Here are some practical tips for preventing pen and ink ingestion:

    • Store pens securely in drawers or containers your dog can’t open.
    • Provide plenty of dog-friendly toys to satisfy their chewing needs.
    • Supervise your dog closely in areas where pens or ink products are present.
    • Educate everyone in your household about the risks and ensure they put pens away properly.

    What to Do If You’re Unsure Whether Your Dog Ate a Pen

    If you suspect your dog might have swallowed a pen or its parts, don’t wait to take action. Even though small amounts of ink from a ballpoint pen are unlikely to be toxic, the plastic components can cause harm or blockages.

    Contact your veterinarian immediately if you’re unsure about the ingestion. While waiting for professional advice, monitor your dog closely for symptoms like vomiting, diarrhea, or loss of appetite, which could indicate gastrointestinal distress.

    Keep an eye on any abnormal behavior and be ready to seek prompt veterinary evaluation if needed. Early intervention is key to preventing complications.

    Keeping Your Dog Safe: Tips for Pen Owners

    Although pens may seem harmless, they can pose serious risks to your dog if left within reach. Ballpoint pens and ink pens, often used daily, contain ink that may be toxic or cause choking if chewed or swallowed. To keep your dog safe, you should:

    Store all pens in secure containers out of your dog’s reach to prevent accidental ingestion. Supervise your dog when you’re using stationery to stop them from chewing on pens.

    Regularly check your environment for any pens left lying around that could be hazardous. Educate family members and visitors about the dangers so everyone helps maintain a safe space.

    Frequently Asked Questions

    Can Pen Ink Cause Long-Term Health Problems in Dogs?

    You generally won’t see long-term health problems from pen ink in dogs unless they ingest large amounts repeatedly. Ink poisoning is rare with typical ballpoint ink, but you should watch for toxic symptoms like vomiting or diarrhea.

    Digestive issues can occur if your dog swallows a lot, so keep an eye on them and contact your vet if symptoms persist. Quick action helps prevent serious complications.

    Are Certain Types of Pen Ink More Toxic Than Others?

    Yes, certain types of pen ink are more toxic than others. You should know that ink composition directly affects toxicity levels; solvent-based and permanent inks often contain harmful chemicals like xylene or toluene, increasing risk to your dog. Water-based inks usually pose less danger.

    To keep your pet safe, follow pet safety guidelines by avoiding exposure and contacting a vet if ingestion occurs. Always store pens out of your dog’s reach.

    Can Puppies Be More Affected by Pen Ink Than Adult Dogs?

    Think of a puppy like a sponge soaking up ink risks. Yes, puppies can be more affected by pen ink than adult dogs. Their puppy ink sensitivity means their young dog absorption rates are higher, making them vulnerable.

    Juvenile toxicity risks arise because their bodies can’t process toxins as efficiently. So, you should keep pens away and watch for any signs of distress to keep your little one safe and sound.

    Is It Safe to Give My Dog Water After Ink Ingestion?

    Yes, it’s safe and important to offer your dog water after ink ingestion to support hydration. Encouraging water intake helps dilute the ink and soothes the gastrointestinal tract.

    Use safe drinking practices by providing fresh, clean water but don’t compel your dog to drink if they’re vomiting or distressed. Keep an eye on their condition, and always consult your vet for guidance to ensure your dog’s health and safety.

    Can Pen Ink Cause Allergic Reactions in Dogs?

    Pen ink rarely causes allergic reactions in dogs, but you should watch for allergic symptoms like itching, redness, or swelling after ink ingestion risks. If your dog’s skin or fur contacts ink, use safe removal methods like gentle washing with mild soap and water.

    Always monitor your dog closely, and if you notice any unusual signs, consult your vet promptly to guarantee your pet stays healthy and comfortable.

    Conclusion

    You might think a little pen ink is harmless, but what if it’s not? Even small amounts can cause unexpected problems for your dog. Don’t wait to see symptoms. Taking quick action could make all the difference.

    If you’re ever unsure whether your dog swallowed ink or pen parts, trust your instincts and call your vet immediately. Your dog’s safety depends on what you do next, so stay alert and prepared.

  • Is Ink Made From Squid or Other Sources?

    Is Ink Made From Squid or Other Sources?

    You might think ink only comes from squid, but it’s made by several marine animals like cuttlefish, octopuses, and even sea haares.

    Squid ink is known for its dark color and smooth texture, thanks to melanin and special enzymes.

    Different creatures produce ink with unique colors and chemical makeup that serve defense and communication.

    If you want to understand how these inks vary and why humans value them, there’s plenty more to explore.

    What Is Squid Ink And How Is It Made?

    squid ink defense mechanism

    Although you might know squid ink as a mysterious dark fluid, it’s actually produced in specialized sacs inside the squid’s body. These sacs are packed with melanin, enzymes, amino acids, and metals. They serve as reservoirs where the squid stores this unique mixture.

    When threatened, the squid releases the ink through its siphon, mixing the melanin-rich pigment with mucus from the funnel organ. This combination helps create a dense, cloud-like smokescreen in the water. You can think of squid ink as a clever defense mechanism because it distracts predators by obscuring the squid’s escape route.

    The melanin gives the ink its characteristic dark color, but other chemical components like enzymes and neurotransmitters help maintain its consistency and effectiveness. The entire process allows the squid to protect itself quickly and efficiently. So, squid ink is far more than just a pigment; it’s a sophisticated biological tool designed for survival.

    Which Cephalopods Produce Squid Ink: And Why?

    When you observe cephalopods in the wild, you’ll notice that many, including various squid species like Loligo vulgaris, produce ink as a key defense strategy. Squid ink primarily comes from these squids, which have evolved specialized ink production to escape predators by creating visual and chemical distractions.

    Besides squids, other cephalopods such as cuttlefish and octopuses also produce ink, though their ink’s color and composition vary depending on their ecological needs. Nautiluses, however, don’t produce ink; they rely on their shell coloration for defense instead.

    This diversity in ink production among cephalopods highlights how essential ink is as a defense mechanism. By releasing ink, these animals effectively confuse or deter attackers, giving them a chance to flee.

    How Does Squid Ink Differ From Octopus And Cuttlefish Ink?

    color and composition differences

    You’ll notice that squid ink usually has a bluish-black color. On the other hand, octopus and cuttlefish inks tend to be darker and more brownish. Each type of ink has its own unique composition, which affects its texture and color. This also influences how the ink is used, whether in cooking or art. Knowing these differences helps you appreciate why each cephalopod’s ink serves distinct purposes.

    Ink Composition Differences

    Ink from squid, octopus, and cuttlefish differs noticeably in composition, affecting its color, texture, and function. When you examine the ink composition, squid ink primarily contains melanin, enzymes like tyrosinase, and amino acids, giving it a distinct chemical profile.

    Cuttlefish ink, or sepia, stands out with a higher mucus content and varied metal concentrations, making it less viscous than octopus ink. Octopus ink tends to be darker and thicker, thanks to unique proteins and pigments that set its chemical profile apart from the others.

    These differences in cephalopod ink composition influence not only their physical properties but also their biological roles. Understanding these nuances helps you appreciate how each species produces ink tailored to its needs.

    Color And Usage Variations

    Although all three cephalopods produce ink as a defense mechanism, squid, octopus, and cuttlefish inks differ remarkably in color and texture, which affects their uses. Squid ink is known for its dark ink, rich in melanin, creating dense ink clouds that disperse quickly to confuse predators.

    Octopus ink, often brownish or reddish, contains more mucus, forming pseudomorphs that mimic the octopus’s shape. Cuttlefish ink, called sepia, has a deep reddish-brown hue and a velvety texture, thanks to its unique chemical composition.

    This richness makes cuttlefish ink popular in artistic applications, unlike the thinner squid ink. Understanding these color and texture variations helps you appreciate how each cephalopod adapts its ink for survival and how humans utilize these natural materials differently.

    What Chemicals Make Squid Ink Unique?

    Because squid ink contains a blend of melanin, enzymes like tyrosinase, neurotransmitters such as dopamine, and trace metals including cadmium and copper, its chemical makeup stands out from other natural inks. You’ll find melanin giving the ink its dark color, while enzymes and amino acids like glutamate and taurine add complexity. Trace metals influence its density and physical traits.

    Here’s a quick look at what makes squid ink unique:

    Component Role Examples
    Melanin Provides dark pigmentation Present in skin and hair
    Enzymes Catalyze reactions Tyrosinase
    Amino Acids Chemical diversity Glutamate, taurine
    Trace Metals Affect physical properties Cadmium, copper, lead

    This unique combination of organic compounds and metals creates a chemical profile unlike most other inks.

    How Does Squid Ink Composition Affect Its Color And Texture?

    chemical influence on ink

    When you look closely at squid ink, its color and texture reveal a complex interplay of chemical components. The dark pigment primarily comes from melanin, forming tiny particles that suspend in the liquid. These melanin particles vary in size and distribution, directly affecting the ink’s viscosity and how thick or fluid it feels.

    Besides melanin, the chemical composition includes metal ions like copper and cadmium, which influence the ink’s shade and opacity. The amount of mucus and polysaccharides mixed in also changes the texture, making the ink more viscous or runny.

    Different squid species produce ink with unique chemical profiles, causing variations in color intensity and consistency. So, when you observe squid ink, you’re actually seeing a dynamic balance of pigment, metals, and organic compounds that define its distinctive look and feel.

    This chemical complexity is why squid ink’s color ranges from deep black to dark brown and why its texture can shift from watery to thick.

    Which Marine Animals Besides Cephalopods Produce Ink?

    You might not know this, but some marine mollusks besides cephalopods produce ink too. For example, sea hares use ink as a defense mechanism. And it’s not just them—other creatures like the gastropod Navanax and certain marine worms also release ink or pigment-rich mucus to escape predators. So, let’s dive in and explore these fascinating ink sources beyond the usual squid and octopus.

    Ink-Producing Marine Molluscs

    Although cephalopods are the most famous ink producers in the marine world, you might be surprised to learn that other molluscs like sea hares also release ink. These marine molluscs use ink primarily for defense, employing melanin-rich secretions to deter predators.

    Here are some ink-producing marine molluscs besides cephalopods:

    1. Sea hares release a dark, ink-like mucus that combines pigments, chemicals, and mucus.
    2. Some gastropod snails eject dark mucus or ink to confuse attackers.
    3. The ink contains melanin, creating both visual smokescreens and chemical deterrents.
    4. These secretions help marine molluscs camouflage or escape threats in their environment.

    Sea Hares’ Ink Defense

    How do sea hares defend themselves in the ocean’s dangerous environment? They release sea hare ink, a dark purple or black substance, quickly when threatened. This ink acts as both a visual distraction and a chemical deterrent, helping sea hares avoid predators in their marine environment.

    Unlike cephalopods, their ink contains mucus that forms a protective cloud or pseudomorph, confusing attackers. The pigment aplysioviolin in sea hare ink also offers antioxidant properties, adding to its effectiveness.

    Feature Description
    Ink Color Dark purple or black
    Defense Mechanism Visual distraction and chemical deterrent
    Ink Composition Contains mucus and aplysioviolin
    Release Speed Rapid release upon threat
    Marine Role Protects sea hares in their environment

    Other Aquatic Ink Sources

    While cephalopods are the most famous ink producers in the ocean, several other marine animals also release ink or ink-like substances to defend themselves. You might be surprised to learn that various marine mollusks and other species use ink secretion as a defense mechanism, though their chemical composition often differs from cephalopod ink.

    Here are some notable examples:

    1. Sea hares, a type of marine mollusk, secrete melanin-rich ink mixed with mucus to confuse predators.
    2. Certain gastropod mollusks, like some sea slugs, produce ink-like secretions for protection.
    3. Spiny oysters release ink-like substances during stress or attacks.
    4. Some sea cucumbers emit defensive secretions resembling ink.

    Each uses ink or similar chemicals to deter threats, showcasing diverse defense strategies beyond cephalopods.

    Why Is Squid Ink Preferred For Cooking And Art?

    Because squid ink contains a high level of melanin, it delivers a rich, deep black color that stands out in both cooking and art. When you use squid ink, its dark color gives your dishes and artworks a striking visual appeal that’s hard to match.

    Squid ink’s rich melanin provides a bold black hue, enhancing the visual impact of both food and art.

    Chefs especially appreciate squid ink for culinary uses like pasta and sauces, where its smooth, velvety texture enhances flavor and presentation. Artists rely on squid ink because it produces consistent, vibrant pigmentation essential for lasting impressions.

    Compared to other marine inks, squid ink’s chemical consistency makes it more reliable, so you can trust it to perform well every time. Plus, squid ink comes from widely harvested species, making it a practical, sustainable choice.

    Whether you’re cooking or creating art, squid ink’s unique qualities let you produce bold, memorable results that few other inks can match.

    How Have Human Uses Of Squid Ink Evolved Over Time?

    When did squid ink first capture human interest beyond the ocean? Its historical use dates back to ancient civilizations where it was prized for writing, art, and even cosmetics. Over time, the ways you use squid ink have evolved considerably. Here’s a quick look at its journey:

    1. Ancient times: Used in manuscripts, art, and cosmetics by various cultures.
    2. 19th and early 20th centuries: Valued by European and Japanese artists for ink drawings and calligraphy.
    3. Modern culinary applications: Now a popular ingredient in dishes like ink pasta and sauces, appreciated for flavor and natural coloring.
    4. Emerging uses: Scientific research explores potential medicinal benefits, expanding your understanding of squid ink beyond traditional artistic and culinary uses.

    What Are The Biological And Ecological Roles Of Cephalopod Ink?

    Although you might mostly associate cephalopod ink with artistic or culinary uses, it plays essential biological and ecological roles in the animals’ survival. Cephalopod ink acts primarily as a defense mechanism, released from specialized ink sacs when predators threaten.

    This ink creates both a visual smokescreen and a chemical distraction, confusing predators and allowing the cephalopod to escape. The ink contains compounds like tyrosinase and amino acids that irritate or disable predators’ chemosensory systems, reducing their ability to track the cephalopod.

    Furthermore, cephalopod ink often forms pseudomorphs, blobs that mimic the animal’s shape, which further mislead attackers. Beyond defense, the ink serves as a chemical alarm signal, warning nearby cephalopods of danger in their environment.

    This dual function of cephalopod ink highlights its vital role not only in individual survival but also in maintaining the ecological balance within their communities.

    Can Ink Come From Non-Cephalopod Sources?

    Where else can ink come from besides cephalopods? While cephalopod ink, like that from squid or cuttlefish, has historically inspired ink production, many non-cephalopod sources now contribute to ink manufacturing.

    You’ll find that modern inks mostly rely on synthetic inks, created for durability and consistency. However, natural non-cephalopod sources also exist and are gaining attention:

    1. Certain marine mollusks, such as sea hares, produce ink chemically distinct from cephalopod ink but serve similar defensive roles.
    2. Plant-based ingredients offer ethical, sustainable alternatives to animal-derived inks.
    3. Synthetic inks dominate commercial printing and art due to their stability and ease of production.
    4. Emerging research explores bacteria and fungi as sources of bio-ink, useful in biotechnology and medical applications.

    Frequently Asked Questions

    How Is Squid Ink Harvested Sustainably?

    You can harvest squid ink sustainably by following eco friendly harvesting methods that prioritize marine conservation efforts. You’ll focus on squid population management by limiting catch numbers and using sustainable fishing practices to avoid overfishing.

    Breeding squids in aquaculture also helps reduce pressure on wild stocks. By respecting seasonal regulations and carefully extracting ink sacs, you support healthy squid populations and guarantee ink availability without harming the marine ecosystem.

    Does Squid Ink Have Any Nutritional Benefits?

    You’ll find squid ink offers some nutritional benefits, mainly from its antioxidants and amino acids. When you use it in culinary applications, it not only enhances flavor but also adds unique coloring properties to your dishes.

    Chefs often include it in gourmet recipes for that rich, briny taste and dramatic black hue. While the nutritional impact is modest, it definitely elevates both the taste and appearance of your meals.

    Can Squid Ink Cause Allergic Reactions?

    Yes, squid ink can cause allergic reactions, especially if you have seafood allergies. Since it comes from a mollusk, your immune system might react to proteins in the ink, leading to symptoms like itching or swelling.

    If you have ink sensitivity or a history of shellfish allergies, you should be cautious. Your immune responses could be triggered, so checking labels and avoiding squid ink products is a smart move to stay safe.

    How Long Does Squid Ink Last When Stored?

    Squid ink’s shelf life depends on storage conditions and preservation methods. In the fridge, it lasts 2-3 months sealed, but once opened, use it within 1-2 weeks to maintain freshness.

    Freezing extends shelf life up to 6 months or more without quality loss. Always store squid ink in a sealed, dark container to prevent spoilage. Freshness indicators include a sour smell or discoloration, signaling it’s time to discard.

    Is Squid Ink Used in Traditional Medicines?

    You might imagine squid ink as a magical elixir, and in traditional medicines, it’s treated almost like that! Beyond its culinary uses, it holds cultural significance, especially in Mediterranean and Asian regions.

    The ink extraction process is careful, preserving its potent qualities. Regional variations shape how it’s used, sometimes topically, sometimes ingested to tap into its antimicrobial and anti-inflammatory powers, making it a fascinating blend of food and healing tradition.

    Conclusion

    Now that you know squid ink isn’t just from squids but also from other cephalopods, you see its unique chemistry and uses shine through. Whether in cooking or art, its rich color and texture set it apart.

    Remember, “Don’t judge a book by its cover.” This ink’s true value lies beneath the surface. So next time you encounter squid ink, appreciate its fascinating biological role and diverse origins beyond just the squid.

  • Are Ink and Toner the Same?

    Are Ink and Toner the Same?

    Ink and toner aren’t the same. They’re designed for different types of printers and use distinct materials.

    Ink cartridges hold liquid dyes or pigments for precise color and photo printing.

    Toner cartridges contain powder that’s fused to paper with heat. This makes them ideal for sharp, high-volume text.

    Ink can dry out and clog, but toner lasts longer and costs less per page.

    If you want to understand their uses, costs, and environmental impacts better, keep exploring the differences.

    What’s Inside Ink and Toner Cartridges?

    liquid ink versus toner

    Although both ink and toner cartridges serve the same purpose of printing, they contain very different materials. Ink cartridges hold liquid ink, which is a blend of dyes or pigments suspended in solvents and carriers. This liquid ink is sprayed through tiny nozzles onto the paper, where it’s absorbed.

    You should know that liquid ink can dry out or clog the printhead if you don’t use your printer regularly. On the other hand, toner cartridges contain toner particles made of plastic-based polyester powder mixed with additives for color and stability.

    These fine particles are static-charged and fused to the paper with heat, rather than absorbed like liquid ink. So, while both cartridges look similar, the contents inside—liquid ink versus powdered toner particles—are fundamentally different, affecting how they behave and how you need to maintain your printer.

    Understanding these differences helps you choose the right cartridge for your printing needs.

    How Inkjet and Laser Printers Use Ink and Toner Differently

    You’ll notice inkjet printers spray tiny droplets of liquid ink right onto the paper. On the other hand, laser printers use a laser to transfer powdered toner through an electrostatic process. Ink and toner actually play pretty different roles when it comes to how these printers create images and text. Knowing these differences can really help you pick the right printer for what you need.

    Inkjet Printing Mechanism

    When you use an inkjet printer, it sprays tiny liquid ink droplets through microscopic nozzles directly onto the paper. This creates images and text with precision. The inkjet printing process relies on liquid ink stored in cartridges, which can dry out or clog over time.

    Unlike toner, liquid ink is absorbed or vaporized by the paper. This offers vibrant color but means you need to maintain the printer carefully.

    Feature Inkjet Printing
    Ink Type Liquid ink
    Delivery Method Sprayed through nozzles
    Cartridge Composition Separate black and color cartridges
    Maintenance Prone to drying and clogging

    Understanding this helps you appreciate how the inkjet printing process differs fundamentally from toner-based printing.

    Laser Printing Process

    How exactly do laser printers differ from inkjet printers in handling ink and toner? Unlike inkjet printers that spray liquid ink droplets onto paper, laser printers use a laser beam to form an electrostatic image on a charged drum.

    Toner, a fine powdered polyester, is attracted to this image and then fused to the paper using heat. This thermal process melts the toner particles, bonding them firmly to the paper’s surface.

    In contrast, inkjet printing relies on liquid ink soaking into paper fibers and drying naturally. Because laser printing uses toner and heat, it typically delivers faster print speeds and handles higher-volume jobs more efficiently than inkjet printing’s spray method.

    Ink Versus Toner Roles

    Although both inkjet and laser printers produce images on paper, they use ink and toner in fundamentally different ways that affect print quality, speed, and maintenance. Inkjet printers rely on ink cartridges filled with liquid ink, which spray tiny droplets directly onto the paper through nozzles.

    This method excels at detailed images and color accuracy but requires regular use to prevent ink from drying out or clogging the printheads. In contrast, laser printers use toner cartridges containing fine powder. The toner is electrostatically transferred onto a drum and then fused to the paper with heat, allowing for sharper text and faster, high-volume printing.

    Toner lasts longer and demands less maintenance, making it ideal if you prioritize durability and efficiency over photographic quality.

    Core Differences In Ink and Toner Cartridge Design and Use

    You’ll notice that ink cartridges use liquid ink, which is sprayed through tiny nozzles. On the other hand, toner cartridges rely on powdered toner that gets fused to the paper with heat. Each cartridge is designed to support its unique printing process, which affects how often you need to replace them and the kind of output you get. Understanding these differences can really help you pick the right cartridge for your printing needs.

    Cartridge Composition Differences

    Because ink and toner cartridges rely on different materials and mechanisms, their designs vary markedly. Ink cartridges contain liquid ink made from dyes or pigments and feature a reservoir and printhead that sprays ink through nozzles.

    Toner cartridges, however, hold fine polyester powder and include a drum, toner hopper, and fuser components to transfer and fuse toner onto paper using heat. You’ll notice ink cartridges usually have a smaller capacity, printing around 200-300 pages, while toner cartridges can handle 2,000-10,000 pages.

    Ink cartridges are more prone to drying out and clogging, making them less durable. Toner cartridges resist environmental factors better, lasting longer and requiring less frequent replacement.

    Understanding these cartridge composition differences helps you choose the right option for your printing needs.

    Printing Mechanism Roles

    When you print documents, the way ink and toner cartridges apply their materials to paper differs considerably. Ink cartridges use a printing mechanism that sprays liquid ink through tiny nozzles directly onto the paper. This requires precise control, and the ink can dry out or clog, needing regular maintenance.

    Toner cartridges, on the other hand, rely on a dry powder transferred via static electricity onto a photoreceptive drum. The drum then fuses the toner to the paper with heat. This printing mechanism is more stable, with toner remaining dry and durable until printing.

    Inkjet cartridges focus on accuracy in liquid placement, while toner cartridges emphasize efficiency and longevity in powder transfer. Their printing mechanisms are fundamentally different in design and function.

    Usage and Application

    Although ink and toner cartridges serve the same purpose of transferring images and text onto paper, their designs and applications suit different printing needs. You’ll find ink cartridges use liquid ink sprayed through tiny nozzles, ideal for detailed color and photo prints. Toner cartridges, on the other hand, hold fine powder fused onto paper with heat, perfect for high-volume text.

    Here’s what you should know about their usage:

    1. Ink cartridges excel in vibrant, high-detail color printing but can clog or dry out.
    2. Toner cartridges handle large print jobs quickly and avoid drying issues.
    3. Ink cartridges are smaller and designed for precision; toner cartridges are bulkier with a drum and fusing unit for electrostatic transfer.

    Choosing the right cartridge depends on your printing volume and quality needs.

    Ink Advantages for Home and Photo Printing

    If you want vibrant, true-to-life colors and fine details in your home or photo prints, inkjet printers deliver unmatched quality. The liquid ink they use allows for smooth blending and sharp, intricate details, making it perfect for high-resolution photos.

    You’ll find specialized photo ink cartridges designed to enhance color accuracy and add depth to your images, boosting overall print quality. Inkjet printers also handle various paper types, including glossy and photo paper, letting you choose the best medium for your prints.

    Although ink cartridges may need frequent replacement, they’re essential if you want rich, detailed, and colorful results at home. Using ink, especially photo ink, guarantees your prints capture the subtle shades and nuances that toner-based printers often miss.

    Toner Benefits for High-Volume and Text Printing

    cost effective high volume printing

    When you print a lot of documents, toner really saves you money because it lasts longer and lowers your cost per page. Plus, you get sharp, professional-quality text every time. That’s perfect for business or official use. So, with toner, you’re getting both efficiency and clarity, making it the smart choice for high-volume, text-heavy printing.

    Cost Efficiency Advantages

    How can you save money on high-volume printing? Choosing toner cartridges tailored to your printing needs is a smart move. Though toner cartridges cost more upfront, they offer a much lower cost per page than ink, making them ideal for large workloads.

    Here’s why toner is cost-efficient:

    1. Toner cartridges print up to 8,000 to 10,000 pages, reducing frequent replacements.
    2. The cost per page averages around 6 cents, considerably less than ink’s 20 cents.
    3. Toner prints are durable, resisting smudges and water, so you avoid costly reprints.

    Superior Text Quality

    Because you need sharp, professional text for your documents, toner stands out as the best choice. Toner delivers crisp, high-resolution results that make your text documents look clean and polished.

    Laser printers using toner can print quickly, up to 55 pages per minute, so you won’t waste time when handling high-volume tasks. The toner particles bond firmly to the paper, producing smudge-resistant and water-resistant text that stays sharp over time.

    This precise layering guarantees minimal pixelation or blurring, giving you consistent, high-quality prints. Plus, toner cartridges offer a higher page yield, often up to 10,000 pages, which supports your large printing needs without frequent replacements.

    When you want superior text quality, toner clearly outperforms ink for all your important documents.

    How Ink and Toner Cartridge Types Impact Printer Performance and Cost

    Although ink and toner cartridges serve the same purpose, they impact your printer’s performance and costs quite differently. Choosing the right cartridge affects print quality, speed, and long-term expenses. Here’s how ink and toner cartridge types influence your printing experience:

    1. Print Volume and Cost Efficiency: Ink cartridges typically print 200-300 pages, while toner cartridges can handle 2,000-10,000 pages. Toner’s higher page yield makes it more cost-effective for heavy use despite a higher upfront price.
    2. Print Quality: Ink cartridges excel at detailed color images and photos, perfect for vibrant prints. Toner cartridges produce sharp, professional text, ideal for documents.
    3. Cartridge Options and Quality: OEM ink cartridges often cost more but offer warranties, whereas remanufactured cartridges cost less but vary in quality. Toner cartridges generally last longer, reducing replacement frequency and operational costs.

    Understanding these differences helps you balance performance and budget based on your printing needs.

    When to Replace Ink and Toner (And How to Do It Right)

    replace cartridges when needed

    Knowing the differences in print quality and lifespan between ink and toner cartridges helps you spot when it’s time for a replacement. You should replace ink cartridges once you notice faded or streaky prints or when your printer signals low ink levels.

    For toner cartridges, swap them out when text appears faint or streaked, or when you get a low toner warning. Always follow the manufacturer’s instructions to replace cartridges properly, which prevents damage and ensures smooth installation.

    Handle cartridges with care and use the right tools to avoid spills and extend their lifespan. Before installing replacements, store cartridges in a cool, dry place and check their expiration dates to maintain peak performance.

    How Printer Components Affect Ink and Toner Performance

    When you rely on your printer for crisp, clear prints, the condition of key components like the printhead in inkjet models and the drum in laser printers plays an essential role in how well ink and toner perform. These print components work together to guarantee that ink or toner is applied accurately and adheres properly to the paper.

    Here’s how printer components affect performance:

    1. Printhead: In inkjet printers, a clean and undamaged printhead ensures even ink distribution. Clogged nozzles can cause streaks or faded areas.
    2. Drum and Transfer Belts: In laser printers, the drum transfers toner to paper. If it’s worn or dirty, print quality suffers with uneven toner coverage.
    3. Fuser: The fuser unit melts toner onto the paper. A faulty fuser leads to smudged prints or toner that flakes off easily.

    Maintaining these parts by cleaning or replacing them as needed keeps your prints sharp, vibrant, and durable.

    Environmental Impact of Ink vs Toner

    Because toner cartridges last longer and yield more pages, they generally have a smaller environmental footprint than ink cartridges. You’ll find that toner cartridges produce less waste since they need replacing less often, which reduces the overall environmental impact. Plus, manufacturing toner cartridges consumes fewer resources and emits fewer greenhouse gases compared to ink cartridges.

    Ink cartridges often dry out if you don’t use them regularly, leading to wasted materials and increased disposal concerns. On the other hand, toner cartridges are highly recyclable, with up to 97% of their parts being reusable, making them a greener choice. Choosing high-yield toner cartridges also cuts down on replacement frequency, further lowering waste and environmental harm.

    Choosing the Right Printer Based on Ink or Toner Needs

    Since your printing needs vary widely, choosing the right printer depends on how often you print and what types of documents you create. Inkjet printers use liquid ink, perfect for vibrant color images and occasional use. Toner-based laser printers use powder toner, ideal for high-volume, sharp text printing.

    To pick the right printer, consider these factors:

    1. Printing volume: If you print occasionally, an inkjet printer with ink cartridges suits you. For heavy printing, a toner printer saves money with longer-lasting cartridges.
    2. Document type: Choose inkjet for photo-quality color prints. Opt for toner printers if you mostly print text documents.
    3. Cost efficiency: Ink cartridges cost less upfront but need frequent replacement. Toner cartridges have a higher page yield, making them more economical over time.

    Knowing your printing habits helps you select a printer that meets your needs without overspending on ink or toner.

    Frequently Asked Questions

    Can I Refill Ink and Toner Cartridges at Home Safely?

    You can refill ink and toner cartridges at home, but you need to follow strict safety precautions. Ink cartridge refill methods are simpler but require careful handling to avoid leaks or clogs.

    Toner refills are more complex and risky due to toner dust hazards. While home refills save money compared to buying new cartridges, improper refilling can damage your printer or void its warranty.

    Consider professional services for safer, reliable results.

    Do Ink and Toner Cartridges Have Expiration Dates?

    Think of ink cartridges as delicate flowers. They come with expiration dates because their ink composition can dry out or clog, affecting cartridge durability.

    Toner cartridges, made with a powdery toner formulation, are like sturdy stones. They don’t usually have strict expiration dates but work best within a year.

    If you store both properly, away from heat and moisture, you’ll keep their performance blooming longer, ensuring crisp prints every time.

    How Should I Store Unused Ink and Toner Cartridges?

    For cartridge storage tips, keep your unused ink cartridges sealed in their original packaging. Store them horizontally in a cool, dry place between 50°F and 77°F. This helps with ink preservation by preventing drying or leaking.

    Toner shelf life lasts longer if you avoid extreme temperatures and keep cartridges away from direct sunlight. Regularly check both ink and toner cartridges for damage before use to guarantee they perform at their best.

    Are Third-Party Ink and Toner Cartridges Reliable?

    Yes, third-party ink and toner cartridges can be reliable if you focus on cartridge quality and brand reputation. You’ll often find significant cost savings compared to OEM cartridges, but quality varies widely.

    Choosing reputable brands helps guarantee consistent performance and reduces risks like leaks or printer malfunctions. Always compare costs carefully, and check reviews or warranties to make sure you get the best balance between price and reliability for your printer.

    Can Ink or Toner Cause Allergies or Skin Irritation?

    Yes, ink or toner can cause allergies or skin irritation. If you have chemical sensitivities, exposure to these substances may trigger skin reactions like dermatitis.

    Allergy causes include the dyes, chemicals, and volatile organic compounds in ink and toner. You might also experience respiratory irritation from inhaling toner particles.

    To protect yourself, wear gloves and work in a well-ventilated space, minimizing contact and reducing allergy risks effectively.

    Conclusion

    Now that you know the key differences between ink and toner, which one will truly fit your printing needs? Whether you’re after vibrant photos or high-volume text, the choice you make can change everything, from quality to cost and even the environment.

    Don’t rush your decision. Understanding these nuances could save you time and money in the long run.

    Ready to discover which cartridge will transform your printing experience?

  • 5 Easy Ways to Watch Ink Master in 7026

    5 Easy Ways to Watch Ink Master in 7026

    You can easily watch Ink Master in 7026 by choosing a Paramount Plus subscription that fits your needs, from the Essential plan at $8.99/month to Premium plans with 4K and immersive sound.

    If you don’t want to pay, Pluto TV offers free, ad-supported streaming with no subscription.

    You can also buy or rent episodes from services like Apple TV or Amazon.

    For the best experience, stream in 4K with a compatible device and high-speed internet.

    Explore these options to find what works best for you.

    Compare Subscription Plans to Watch Ink Master

    compare streaming plan options

    When choosing how to watch Ink Master, comparing subscription plans helps you find the best balance of cost and quality. Subscription plans vary across streaming services like Paramount Plus, Apple TV, Amazon Channel, and Roku Premium Channel, offering different video quality and features to fit your needs.

    For example, the Standard plan costs $8.99/month and streams in 1080p with no ads, providing a solid, ad-free viewing experience. If you want crisper visuals, the Premium plan upgrades you to 4K HDR and immersive sound for a higher price. The Premium + plan delivers the highest video and audio quality if you want the ultimate Ink Master experience.

    You can also choose between ad-supported or ad-free options depending on your preference and budget. For offline watching, digital downloads are available through Amazon Video, Apple TV Store, and Fandango At Home, letting you enjoy episodes anytime without relying on internet connections.

    Watch Ink Master on Paramount Plus Subscription Plans

    Although several streaming options exist, Paramount Plus stands out for watching Ink Master due to its range of subscription plans tailored to different viewing preferences. You can choose from Essential, Premium, or Ultimate plans, each offering unique benefits for streaming the show.

    The Essential plan delivers standard 1080p quality, perfect if you want solid high-quality viewing without extra frills. If you’re after the best experience, the Premium plan offers 4K + HDR streaming with immersive sound, making every tattoo detail pop.

    All Paramount Plus subscription plans provide ad-free streaming of Ink Master, so you won’t face interruptions during intense competitions. The Premium and Ultimate options enhance this by delivering premium, ad-free content with the highest resolution.

    Paramount Plus ensures ad-free Ink Master streaming, with Premium and Ultimate plans offering the highest resolution and premium content.

    With costs ranging from $8.99 to $26.99 per month, you can pick a plan that fits your budget while enjoying seamless, high-quality Ink Master streaming on Paramount Plus.

    Stream Ink Master for Free With Ads on Pluto TV

    free ink master streaming

    If you want to watch Ink Master without paying, Pluto TV lets you stream the show for free with ads. You can catch episodes on a dedicated channel that broadcasts Ink Master in real-time, so you never miss a moment.

    This ads-supported platform offers free streaming without any subscription, making it a budget-friendly way to enjoy the series. Plus, Pluto TV works across multiple devices, including smart TVs and mobile devices, letting you watch Ink Master wherever you are.

    Feature Description Benefit
    Platform Pluto TV Free streaming with ads
    Availability Dedicated Ink Master channel Real-time episode viewing
    Cost $0 No subscription required
    Device Support Smart TVs, mobile devices Watch anytime, anywhere

    With Pluto TV, you get convenient, free access to Ink Master episodes, supported by ads that keep the service running smoothly.

    How to Buy or Rent Ink Master Episodes

    Because you want flexible access to Ink Master episodes, buying or renting them through various digital platforms gives you that option. You can purchase individual episodes or entire seasons, then download them for offline viewing. Rental options let you stream episodes temporarily without a long-term commitment.

    Here’s how to buy or rent Ink Master episodes:

    1. Use digital platforms like Apple TV Store, Amazon Video, or Fandango At Home to purchase or download episodes directly.
    2. Explore streaming services such as Paramount Plus, Apple TV Channel, Amazon Channel, and Roku Premium Channel for convenient purchase or rental options.
    3. Choose your preferred video quality, whether it’s SD, HD, or 4K, based on availability and price.

    How to Get the Best Video Quality When Watching Ink Master

    stream in 4k hdr quality

    To get the best video quality when watching Ink Master, you need to choose streaming platforms that support 4K and HDR, like Paramount Plus Premium plans. These options deliver sharp visuals and vibrant colors, enhancing your viewing experience.

    Make sure your device supports 4K and HDR playback so you can fully enjoy the upgraded video quality. Streaming in 4K requires a reliable, high-speed internet connection to prevent buffering and maintain smooth playback.

    Opt for a Paramount Plus Premium subscription to access immersive sound features like spatial audio alongside top-tier video quality. For added convenience, download episodes in the highest available quality for offline viewing, ensuring you get clear, crisp visuals anytime, anywhere.

    Frequently Asked Questions

    What Is the Total Number of Ink Master Seasons Available?

    You’ll find a total of 15 Ink Master seasons available, each packed with season highlights and intense tattoo challenges. Throughout the series, the judges panel critiques contestant progress, while audience voting often influences outcomes.

    Every season overview reveals a unique episode count and thrilling twists leading to the series finale. Whether you’re following the evolving artist styles or dramatic eliminations, these seasons showcase the best of tattoo artistry and competition excitement.

    Are There Any Special Behind-The-Scenes Ink Master Episodes?

    Think of Ink Master as a locked treasure chest. While there aren’t special behind-the-scenes episodes to open it fully, you’ll find glimpses inside. Tattoo artist interviews, contestant spotlights, and tattoo design insights surface in promos and featurettes.

    You might catch behind-the-scenes footage, secret tattoo techniques, makeup and costume reveals, filming location tours, and guest appearances scattered across social media or special content. But no exclusive dedicated episodes exist yet.

    Can I Watch Ink Master With Subtitles or Closed Captions?

    Yes, you can watch Ink Master with subtitles and closed captions on many streaming platforms. Just check the language settings or accessibility features before starting.

    These services often include translation options and audio descriptions, which enhance the experience. You’ll also find caption customization to suit your preferences.

    This support is especially helpful for the hearing impaired, making sure you don’t miss any details while enjoying the show.

    Is Ink Master Suitable for All Age Groups?

    Ink Master isn’t suitable for all age groups due to its mature themes and rating considerations. While it offers teen-friendly content, it contains intense scenes that require parental guidance.

    It’s not ideal for family viewing with young kids, as there are age restrictions and no kid-safe episodes. You should consider age appropriateness carefully before watching, especially if younger viewers are involved, to guarantee everyone’s comfortable with the content.

    Are There Any Ink Master Spin-Off Shows to Watch?

    Picture intense battles side by side with heartfelt redemption stories. That’s what Ink Master spin-offs offer. You’ll find alternative tattoo shows like Ink Master: Angels, where mentorship shines, and Grudge Match, featuring fierce related ink competitions.

    Immerse yourself in tattoo artist documentaries, celebrity ink appearances, or even tattoo removal stories. These series also cover tattoo convention coverage, tattoo history documentaries, and tattoo art tutorials. They give you a full spectrum beyond the main Ink Master.

    Conclusion

    Now that you know the best ways to watch Ink Master in 7026, imagine settling into your favorite cozy spot, screen glowing with vibrant ink battles. Whether you’re streaming ad-free on Paramount Plus, catching free episodes on Pluto TV, or renting the latest season, you’ve got options that fit your vibe.

    So grab your snacks, get comfy, and immerse yourself in the colorful world of tattoo artistry. Every detail is sharp, and every moment is thrilling.

  • How to Send Pictures With Invisible Ink in 10 Easy Steps

    How to Send Pictures With Invisible Ink in 10 Easy Steps

    To send pictures with Invisible Ink, open your Messages app and choose a contact. Select or snap a photo, then tap and hold the blue send button to reveal sending effects.

    Swipe to select Invisible Ink and tap send to share your photo hidden behind a shimmering blur. The recipient taps the image to reveal it briefly before it re-blurs.

    Make sure your device supports this feature for the best experience. You can explore tips and tricks to master it even further.

    Open the Messages App and Select a Contact

    open message and select contact

    Wondering how to start sending pictures with Invisible Ink? The first step is to open the Messages app on your iPhone or iOS device. You can either start a new conversation or select an existing chat.

    To begin sending pictures with Invisible Ink, open the Messages app and choose a new or existing conversation.

    To do this, tap the contact’s name or profile picture to open the chat window. This makes it easy to send your photo directly to the right person. Once you’ve selected your contact, you’re ready to begin the process of sending your picture with a special effect like Invisible Ink.

    Remember, choosing the correct contact guarantees your message reaches the intended recipient without confusion. By opening Messages and selecting the right contact, you set the foundation for sending your picture securely and creatively.

    This step is vital before you move on to selecting or taking a photo to send with Invisible Ink.

    Choose or Take a Photo to Send With Invisible Ink

    Once you’ve opened a conversation in Messages, tap the camera icon or the App Store icon next to the text field to either choose an existing photo or take a new one. You can browse your photo library to select the perfect image or snap a fresh picture using the camera.

    After you choose a photo or capture it, review it to make sure it’s exactly what you want to send. At this point, you’ll tap the blue send arrow, but don’t send it just yet if you want the invisible ink effect.

    Instead, you’ll prepare to send with effects, which includes invisible ink, to keep your photo hidden until the recipient reveals it. This step guarantees your image stays private and adds a fun, mysterious touch to your message.

    Choosing or taking the right photo is key before moving on to applying invisible ink, so pick carefully for the best impact.

    Tap and Hold Send Button to Access Invisible Ink Effects

    tap hold for invisible ink

    To add invisible ink to your photo, just tap and hold the blue send button to open up the effects menu. If your iPhone supports 3D Touch, you can press firmly to preview and select the invisible ink effect even more easily. Once you find the effect you like, you can preview it before sending your hidden message. It’s a fun way to keep things a little more private!

    Accessing Effects Menu

    If you want to send a picture with the invisible ink effect, start by tapping and holding the blue send arrow in the Messages app after selecting or composing your photo. Hold the send button firmly for a moment, and the effects menu will appear as an overlay on your screen.

    This menu offers various message effects, allowing you to preview each by swiping through them. To send a message with invisible ink, simply tap the “Invisible Ink” option in the effects menu.

    After selecting it, tap the blue send arrow again to deliver your photo with the invisible ink effect. Accessing the effects menu this way ensures your pictures remain hidden until the recipient swipes to reveal them.

    Using 3D Touch

    Tapping and holding the send button opens up the effects menu, but on devices with 3D Touch, you can press firmly on the send arrow to reveal the same options. This gives you the ability to send pictures with invisible ink quickly and smoothly.

    If you’re a freelance writer sharing sensitive images, this feature is essential. Here’s how to use it:

    1. Select the photo you want to send.
    2. Press firmly on the send arrow (3D Touch).
    3. Try turning your finger slightly until the effects menu appears.
    4. Choose “Invisible Ink” and tap the blue send button.

    The recipient will see a blurred image they tap to reveal. It’s perfect for sending private content discreetly.

    Previewing Message Effects

    Whenever you want to see how your message or photo will look with invisible ink before sending it, simply tap and hold the blue send arrow in the Messages app. This action opens an effects menu where you can preview the invisible ink effect, allowing you to experience the message encryption firsthand.

    By holding down the send button, you get an interactive glimpse of all available effects, including invisible ink, without sending the message immediately. This step honors the invisible ink history of secretive, hidden communication while enhancing your creative messaging options.

    Previewing message effects helps ensure your text or photo appears exactly as you want, blending privacy with fun. It’s a smart, hands-on way to perfect your secretive, encrypted messages before sharing them.

    Select the Invisible Ink Effect for Your Photo

    add secret photo effect

    How do you add the Invisible Ink effect to your photo before sending it? It’s simple and adds a layer of message privacy to your messages. Follow these Invisible Ink tips to customize your effects quickly:

    1. After choosing your photo in the Messages app, tap the blue send arrow and hold it down to open the effects interface.
    2. Swipe left or right to browse through the options until you find “Invisible Ink.”
    3. Tap “Invisible Ink” to apply the effect, which covers your photo with a secret layer that the recipient must tap to reveal.
    4. Finally, tap the blue send arrow again to send your photo with the Invisible Ink effect attached.

    This effects customization ensures your photo stays hidden until the recipient chooses to view it, enhancing your message privacy every time you send a picture.

    Preview Your Photo With the Invisible Ink Effect

    Once you apply the Invisible Ink effect to your photo, you can preview exactly how it will look before sending it. To do this, tap and hold the blue send arrow in Messages after selecting your photo.

    When you choose the effect, your image appears blurred or obscured, letting you see how it’ll look to the recipient. You can also press and hold the effect icon during selection to view the preview.

    This preview is essential because it confirms that your photo is properly set with the invisible ink effect, ensuring invisible ink privacy. By using this messaging app feature, you avoid sending photos that aren’t fully obscured, maintaining the surprise and confidentiality you want.

    Incorporating this step into your photo editing tips will help you confidently send hidden images, knowing the effect works just as intended.

    Send the Photo With Invisible Ink to Your Contact

    To send your photo with invisible ink, start by selecting your image. Then, tap and hold the blue send arrow. You’ll see a bunch of effects to swipe through—go ahead and choose “invisible ink” to add that cool blur. Once you’ve picked it, just tap the send arrow again and your hidden photo will be on its way to your contact. Easy, right?

    Selecting Invisible Ink Effect

    Wondering how to add a fun twist to your photo messages? Invisible ink customization lets you enhance privacy and security while sharing images. Here’s how to select the invisible ink effect before sending:

    1. Open the Messages app and choose or compose the photo you want to share.
    2. Tap and hold the blue send arrow above the keyboard to open the message effects menu.
    3. Swipe through the effects until you find “Invisible Ink,” then tap to apply it to your photo.
    4. Tap the blue send arrow again to send your photo with the invisible ink effect enabled.

    This simple process guarantees your photo stays hidden until your contact reveals it, adding a layer of privacy and a playful surprise.

    Sending The Hidden Photo

    After choosing the invisible ink effect, you’re ready to send your hidden photo. Open the Messages app, select or compose the photo you want to share, then tap and hold the blue send arrow above the keyboard. This brings up the effects interface, where you swipe through options and select “Invisible Ink.”

    Tap the blue send arrow again to send your photo, which will appear blurred to the recipient at first. This method enhances invisible ink privacy by ensuring the image remains concealed until tapped.

    The recipient must tap the photo to reveal it temporarily before it automatically blurs again. Keep in mind, device feature limitations may affect how the effect appears, but invisible ink remains a fun way to create creative photo messages that add a layer of surprise.

    How Recipients Reveal Invisible Ink Photos

    How do you reveal a photo sent with invisible ink? When you receive one, the image will appear blurred and covered by a shimmering effect, keeping it hidden. To see the content, you simply tap on the photo. This action temporarily reveals the image for a few seconds before it automatically gets hidden again.

    Photos sent with invisible ink appear blurred and shimmering until you tap to reveal them briefly.

    You can tap repeatedly to view the photo as long as the message is active, maintaining privacy and discretion.

    Here’s how to reveal invisible ink photos properly:

    1. Tap the blurred photo once to uncover the image briefly.
    2. View the photo while it’s visible, appreciating its creative uses.
    3. Respect invisible ink etiquette by not revealing the photo without consent.
    4. Tap again to hide the image, keeping privacy considerations intact.

    This interactive process ensures you control when and how you see the hidden photo, making invisible ink a fun, secure way to share sensitive images.

    Troubleshoot Invisible Ink Effects

    If your invisible ink effects aren’t showing up, first check that both your device and the recipient’s are running iOS 10 or later. It’s important because the feature only works on those versions or newer.

    Also, take a look at your accessibility settings and make sure “Reduce Motion” is turned off. When it’s on, it can block the effects from appearing.

    And lastly, double-check that you’re pressing and holding the send button properly to activate the invisible ink feature. Doing these things should help get your effects working again.

    Common Effects Issues

    When invisible ink effects don’t activate as expected, it’s often due to settings or device limitations that you can quickly check. For effective invisible ink troubleshooting, follow these steps:

    1. Confirm both sender and recipient use iOS 10 or later; effects won’t show across incompatible versions.
    2. Disable “Reduce Motion” in Accessibility settings to fix common effect activation issues.
    3. Verify your device supports 3D Touch or Haptic Touch, as older models may not display invisible ink properly.
    4. Restart the Messages app or your device to resolve glitches blocking the effect.

    Accessibility Settings Impact

    Why might your invisible ink effects fail to appear as intended? One common reason involves accessibility features on your device, especially motion settings. If you’ve enabled “Reduce Motion” under Settings > Accessibility > Motion, it can limit or disable visual effects like invisible ink in messages.

    This setting is designed to minimize animations but can unintentionally impact how your effects display. To fix this, try turning off “Reduce Motion” and see if the invisible ink works properly.

    Keep in mind that device compatibility also matters. Some older iPhone models or devices with specific accessibility configurations might not fully support these effects. Adjusting your accessibility settings is a quick, effective way to troubleshoot invisible ink issues and enjoy your messages as intended.

    Device Compatibility Checks

    How can you guarantee your invisible ink messages display correctly across devices? It starts with checking device compatibility and meeting essential requirements. Follow these steps:

    1. Verify that both you and the recipient use iPhones with 3D Touch hardware, like the iPhone 6s or later, since older models may not support invisible ink.
    2. Ensure both devices run iOS 10 or later by installing the latest software updates.
    3. Confirm that accessibility settings, such as “Reduce Motion,” are turned off to avoid interference with the effect.
    4. Understand that if the recipient’s device doesn’t meet these compatibility requirements, invisible ink messages will appear as regular text or images.

    Check Device Compatibility for Invisible Ink

    Since Invisible Ink effects require specific software and hardware, you’ll need to guarantee both your device and the recipient’s device run iOS 10 or later to send and view these messages properly. Device compatibility is essential because devices without iOS 10 or newer can’t send or display Invisible Ink messages.

    Also, the feature works best on iPhones that support 3D Touch or hold gestures, mainly iPhone 6s and newer models. If the recipient’s device isn’t compatible, the Invisible Ink effect won’t appear, and the message will show normally.

    Here’s a quick reference table to check your device compatibility:

    Device Model Minimum iOS Version Invisible Ink Support
    iPhone 6s & newer iOS 10+ Yes
    iPhone 6 & older Below iOS 10 No
    iPad (various) iOS 10+ Limited

    Keeping your iOS updated guarantees smooth use of Invisible Ink and maximizes device compatibility.

    Use Invisible Ink Photos Creatively and Securely

    When you send a photo with Invisible Ink, it stays hidden until the recipient taps it. This adds a layer of privacy and surprise to your messages. This feature lets you blend creative privacy with surprise sharing, perfect for discreet communication. Here’s how to use Invisible Ink photos effectively:

    1. Choose moments worth keeping private but fun to reveal, like a surprise gift or a personal joke.
    2. Remind your recipient to tap the photo to unlock the image, ensuring the experience stays interactive and secure.
    3. Use Invisible Ink when sharing sensitive images so they’re shielded from unintended viewers until intentionally revealed.
    4. Experiment with timing. Send photos during conversations when surprise adds to the impact, enhancing your message’s creativity.

    Frequently Asked Questions

    Does Invisible Ink Work on All Messaging Platforms?

    Invisible ink security only works within Apple’s iMessage, so it doesn’t function on all messaging platforms. You can’t rely on it across SMS, MMS, or third-party apps since those lack compatibility for this feature.

    While it adds a cool photo editing feature to hide images, only iOS users with compatible devices can reveal those hidden pics. So if you want invisible ink’s full effect, you’ve got to stick with iMessage.

    Can Invisible Ink Photos Be Saved by the Recipient?

    Imagine you receive an invisible ink photo from a friend. You can’t save it automatically, but you can take a screenshot to preserve it.

    Invisible ink longevity depends on the message thread, as photos remain accessible but aren’t saved permanently. Since ink transparency levels vary, the best storage methods are manual, like screenshots or saving the image after revealing it, because the recipient controls whether the photo gets stored.

    Is There a Limit on the Size of Photos Sent With Invisible Ink?

    There isn’t a strict size limit on photos sent with invisible ink, but high photo resolution can affect delivery time. You’ll want to use image compression to reduce file size, especially for large or high-res images.

    Stick to common file formats like JPEG or PNG to guarantee compatibility. If your invisible ink photo is too large, it might take longer to send or fail, so resizing or compressing helps keep things smooth.

    Does Invisible Ink Affect Photo Quality After Sending?

    You might worry invisible ink compromises photo visibility, but it doesn’t affect image quality at all. The ink durability only controls how the photo appears initially, keeping message security intact without altering the original picture.

    When your recipient taps to reveal the photo, they see it exactly as you sent it, clear and sharp. So, you can trust invisible ink adds privacy without sacrificing the photo’s quality or clarity.

    Can Invisible Ink Be Used in Group Messages?

    Yes, you can use invisible ink in group messages, but keep group message privacy in mind. Each participant needs to tap the image to reveal it, respecting photo sharing etiquette by ensuring everyone’s comfortable with it.

    Conclusion

    Now that you know how to send pictures with invisible ink, you can add a fun, secretive twist to your messages. Did you know that 70% of people feel more excited receiving hidden messages?

    Using invisible ink not only keeps your photos private but also makes sharing moments more playful and engaging. So go ahead, surprise your friends with mysterious images they’ll love revealing. It’s a simple way to make your conversations more memorable and secure.

  • How to Replace Printer Ink in 10 Easy Steps

    How to Replace Printer Ink in 10 Easy Steps

    To replace your printer ink in 10 easy steps, first pick a compatible cartridge and power on your printer.

    Open the access door and identify the cartridge to replace.

    Remove the empty cartridge carefully, then unpack the new one without touching the nozzles.

    Insert it firmly until it clicks, close the cover, and let the printer initialize.

    Calibrate and run a test print for best results.

    If you want to master each step and troubleshoot common issues, you’re in the right place.

    Choose a Compatible Replacement Cartridge for Your Printer

    verify model before purchasing

    Before you buy a replacement cartridge, make sure you verify the model number either in your printer’s manual or on your current cartridge. This verification is essential to guarantee you get a compatible cartridge that works seamlessly with your printer.

    Look for manufacturer-approved or high-quality third-party cartridges designed specifically for your printer model. Packaging often includes compatibility stickers or labels listing supported printer models. Use these to confirm the match.

    Also, double-check whether you need an ink or toner cartridge, depending on your printer’s requirements. Avoid generic or incompatible cartridges; they might seem like a bargain but can cause print quality issues or even damage your printer.

    Taking these steps during model verification saves you from frustration and wasted money. It assures your printer functions smoothly with the right replacement cartridge.

    Power On and Open the Printer Cartridge Access Door

    Once you’ve chosen the right replacement cartridge, power on your printer by pressing the power button, usually found on the front or top panel. Wait patiently as the printer completes its startup and initializes the ink cartridges. This step guarantees the print carriage moves to the correct spot for easy access.

    Power on your printer and wait for startup to position the print carriage for easy cartridge access.

    Next, locate and open the access door or cover that grants you entry to the ink cartridges. Depending on your printer model, this access door may be on the front or top. Opening it carefully will allow the print carriage to slide into position, making cartridge replacement straightforward.

    If you’re unsure where to find the access door, check your printer’s user manual or follow on-screen prompts. Keeping the printer powered on while you open the access door is essential since it activates the cartridge carriage, preventing any manual handling that could cause damage.

    Now you’re ready to proceed to the cartridge replacement step.

    Identify Which Cartridge Needs Replacement

    check ink levels regularly

    How do you know which ink cartridge needs replacing? Start by checking your printer’s display panel or software for any warning messages about low or empty cartridges. These alerts make cartridge replacement straightforward.

    Next, monitor the ink levels shown on your printer’s control panel or through its software interface to identify any cartridge running low. Also, examine print quality closely: faded, streaky, or incomplete images on test pages or color samples often point to a cartridge that’s near empty.

    Don’t forget to inspect the cartridges themselves. Look for visible damage, ink leakage, or dried ink on the nozzles, as these issues also signal the need for replacement. Ultimately, consult your printer’s user manual to understand specific color codes and cartridge replacement alerts tailored to your model.

    Remove the Empty Cartridge Safely

    Now that you’ve found the empty cartridge, it’s time to take it out safely. First, turn on your printer and open the access door. Then, gently free the cartridge by pressing down or releasing the latch. Just be careful not to touch the nozzles or electrical contacts as you lift the cartridge out.

    Identifying The Empty Cartridge

    Where do you start when your printer runs out of ink? First, turn on your printer and open the cartridge access door to locate the cartridges inside. To identify the empty cartridge, check your printer’s display or software alerts. These usually show print levels and indicate which cartridge needs replacing. Once you know which cartridge is empty, you’re ready for the next step.

    Here’s how to identify the empty cartridge quickly:

    Open the cartridge access door carefully.

    Use the printer’s display or software to check print levels.

    Look for alerts that specify the empty cartridge.

    Safe Cartridge Removal

    Before removing the empty cartridge, make sure your printer is turned on and the access cover is open so you can easily reach the cartridge.

    For safe cartridge removal, gently press or lift the latch holding the empty cartridge in place. Grasp the cartridge with care by its sides, avoiding contact with the electrical contacts and nozzles to prevent damage.

    Slowly and evenly pull the cartridge out, keeping it level to stop ink from drying or leaking inside the printer. Handling the cartridge carefully during removal helps maintain the printer’s performance.

    Once removed, dispose of the empty cartridge according to manufacturer or local regulations. Following these steps ensures a smooth cartridge removal and prepares you for installing a new ink cartridge properly.

    Unpack the New Cartridge Without Touching Nozzles

    handle cartridge carefully during unpacking

    When you unpack the new cartridge, make sure to hold it by the sides so you don’t touch the nozzles or electrical contacts. And don’t take off the protective tape until you’re ready to install it. This tape keeps the ink fresh and stops clogs from forming. So, handling the cartridge carefully really helps make sure your prints come out clean and clear.

    Handle Cartridge Carefully

    How should you handle a new ink cartridge to guarantee it works properly? When unpacking, avoid touching the nozzles and electrical contacts to keep the ink flowing well and maintain a good electrical connection. Handle the cartridge gently and correctly to prevent damage or leaks.

    Keep these tips in mind when handling your new cartridge:

    Hold the cartridge by its sides or edges to avoid getting oils or dirt on the nozzles or electrical contacts.

    Keep the cartridge upright while unpacking to stop ink from spilling.

    Store the cartridge in a clean, dry place away from sunlight if you’re not installing it right away.

    Avoid Contact With Nozzles

    Since the nozzles are delicate and easily clogged, you should remove the new cartridge from its packaging without touching them. Always handle the cartridge by its sides or edges to avoid contact with the nozzles and copper contacts.

    Touching these parts can transfer oils or dirt, causing printing problems or damaging the print head. If needed, use gloves or a lint-free cloth to keep the nozzles clean while you handle the cartridge.

    Avoid any direct contact with the nozzles throughout the installation process. Following the manufacturer’s instructions guarantees the nozzles remain free from contaminants and function properly.

    Taking these precautions helps maintain print quality and prolongs your printer’s life.

    Insert the New Cartridge Correctly and Securely

    To insert the new cartridge correctly and securely, you’ll need to align it carefully with the printer’s markings and guides. Proper cartridge installation ensures your printer works smoothly and helps avoid damage.

    Follow these key steps for success:

    • Align nozzles and electrical contacts precisely with the print head to guarantee proper connection.
    • Insert the cartridge firmly into its slot until you hear a click, confirming secure seating.
    • Avoid tilting or forcing the cartridge to prevent misalignment or internal damage.

    Make sure the cartridge orientation matches the printer’s guides and marks exactly. This attention to detail keeps the ink flowing correctly and maintains print quality. Properly seating the cartridge minimizes errors and keeps your printer running efficiently. By handling the cartridge carefully during installation, you protect both your device and your prints.

    Close the Cover and Let the Printer Initialize

    After you finish installing the cartridge, close the printer cover securely to trigger the initialization process. When you close the cover, the printer automatically begins to initialize and recognize the new cartridge.

    This recognize process involves the printer performing internal checks to verify the cartridge is installed correctly. It’s essential not to open the cover or disturb the printer while it’s initializing, as this could cause errors or prevent the process from completing.

    Initialization usually takes just a few moments, during which the printer confirms the cartridge is ready for use. Once the printer finishes this process, it may display a message indicating it’s ready to print.

    Calibrate and Align the New Cartridge for Best Quality

    Once you install a new cartridge, you’ll want to run your printer’s calibration or alignment function to guarantee the print head is positioned correctly. This step is crucial for maintaining top print quality and avoiding issues like streaks or color misalignment.

    You can access the calibration and alignment options through your printer’s software or control panel, following the on-screen prompts for a smooth process.

    To ensure the best results, keep these tips in mind:

    Use the printer’s built-in calibration tool to align the print head precisely.

    Perform calibration regularly after replacing cartridges to maintain consistent print quality.

    Check your printer’s manual for model-specific alignment instructions.

    Run a Test Print to Confirm Proper Installation

    Although replacing the cartridge is a crucial step, you should run a test print to confirm the installation worked correctly. Use your printer’s menu or software to initiate a test print, which helps verify proper installation by checking ink flow and color accuracy.

    Examine the print closely for sharp lines, consistent colors, and the absence of streaks, smudges, or faded areas. These details indicate good print quality and that the cartridge is seated and aligned correctly.

    If the test print reveals any issues, double-check the cartridge position to confirm it’s properly installed. The results also guide you on whether a cleaning cycle or repositioning is needed.

    Regularly running test prints after each cartridge replacement ensures your printer maintains excellent print quality and functions smoothly. This simple step saves time and frustration by confirming everything works as it should before you start printing important documents.

    Troubleshoot Common Cartridge Installation Issues

    If you encounter error messages or notice poor print quality after installing a new cartridge, start by ensuring it’s properly aligned and fully seated. Incorrect cartridge installation often triggers error messages or printing issues. Check that the cartridge model matches your printer to avoid compatibility problems.

    To troubleshoot common cartridge installation issues, inspect the electrical contacts and print nozzles for dirt or smudges, as these can cause installation errors. Restart your printer to clear any error messages and help the device recognize the new cartridge. If the printer still fails to detect the cartridge properly, perform a reset or calibration.

    Frequently Asked Questions

    How Often Should I Replace My Printer Ink Cartridges?

    You should replace your ink cartridges based on their lifespan and your printing habits. If you print frequently, expect to replace ink more often.

    Regular cartridge monitoring through your printer software helps you track ink levels and decide when to replace them. Don’t wait for poor print quality. Replacing cartridges promptly ensures consistent results and prevents damage.

    Adjust your replacement timing depending on how much you print and the cartridge capacity.

    Can I Use Third-Party Ink Cartridges Safely?

    You can use third-party ink, but it’s like walking a tightrope over a pit of lava—risky! Cartridge compatibility isn’t guaranteed, so you might face ink quality problems like streaks or color issues.

    Plus, many manufacturers warn that using third-party ink can void your warranty. If you decide to go this route, choose high-quality, ISO-certified cartridges and check reviews carefully to avoid costly damage and maintain decent print results.

    What Should I Do With Empty Cartridges?

    You should never toss empty cartridges in the trash. Instead, practice cartridge recycling by returning them to the manufacturer or using third-party programs.

    Store your used cartridges in a sealed bag to prevent ink leaks before recycling. Explore eco-friendly alternatives like refilling cartridges or using recycled ones.

    Proper ink disposal methods help protect the environment and reduce waste, so make sure you follow local guidelines and support sustainable practices.

    Why Is My Printer Not Recognizing the New Cartridge?

    Don’t think your printer’s broken just yet. It’s often a compatibility issue. Even if your cartridge labeling looks right, it might not match your model perfectly.

    Improper cartridge storage can cause ink drying, which blocks recognition. Make sure you install it firmly, check for dust on contacts, and verify the cartridge’s compatibility.

    These simple steps can fix most recognition problems and get your printer working again quickly.

    How Can I Extend the Life of My Ink Cartridges?

    To extend your ink cartridges’ life, always use high-quality ink to prevent clogs and fading. Store cartridges properly in a cool, dry place away from sunlight to avoid ink drying.

    Regularly calibrate your printer to guarantee efficient ink use and reduce waste. Also, print consistently to keep ink flowing smoothly, preventing drying and blockages.

    These steps help you get the most from each cartridge without compromising print quality.

    Conclusion

    Replacing your printer ink isn’t as tricky as it seems. It’s as easy as pie when you follow these steps.

    By choosing the right cartridge, handling it carefully, and letting your printer do its magic, you’ll keep your prints sharp and vibrant.

    Remember, a little patience and care go a long way. So, next time your ink runs dry, you’ll be ready to tackle the task like a pro, no sweat!

  • How to Replace Ink in HP Printer in 7 Easy Steps

    How to Replace Ink in HP Printer in 7 Easy Steps

    To replace ink in your HP printer, first find the right cartridge by matching your model number and cartridge type.

    Power on the printer and open the access door, waiting for the cartridge carriage to center.

    Gently remove the old cartridge without touching contacts.

    Prepare your new cartridge by removing protective tape, then insert it securely.

    Close the access door and wait for the printer to recognize it.

    Finally, print a test page to check quality, and if needed, troubleshoot common issues for smooth printing.

    Find the Right Ink Cartridge for Your HP Printer

    check printer model compatibility

    Before you buy a new ink cartridge, start by checking your HP printer’s model number. It’s usually on the front, back, or bottom of the device. This model number is essential because it helps you find the exact compatible ink cartridge for your printer.

    Next, consult your printer’s user manual or visit the official HP website to identify which cartridges work with your model. You can also look at the part numbers on your current cartridges, like HP 63 or HP 65, to match replacements precisely.

    Make sure you choose genuine HP ink cartridges to guarantee the best print quality and protect your printer’s warranty. Also, confirm whether your printer requires color, black, or multipack cartridges before making a purchase.

    Power On the Printer and Open the Access Door

    First, make sure your HP printer is powered on to avoid any errors. Then, gently open the ink cartridge access door, which is usually located at the front or top.

    Wait for the carriage to move to the center and stop before you go any further. This way, you won’t accidentally interrupt anything.

    Powering On Printer

    Although your HP printer may seem ready to use at a glance, you’ll need to plug it into a power source and press the power button to turn it on. Powering on the printer properly guarantees it completes its startup process and is ready for the next steps.

    Depending on your HP printer model, the display will indicate when it’s fully powered on and idle. Avoid opening any access doors or covers while the printer is busy with printing or maintenance tasks.

    Once the printer is on and idle, you can carefully open the access door or ink cartridge cover to access the ink cartridges. Following these steps will help you safely and effectively prepare your printer to replace the ink.

    Opening Cartridge Door

    How do you safely access the ink cartridges in your HP printer? First, make sure your printer is powered on to avoid errors. Then, carefully open the ink cartridge access door without forcing it, using the designated latch or handle. Wait for the cartridge to move to the center and stop before handling.

    Follow these steps to open the cartridge door correctly:

    1. Locate the ink cartridge access door, usually at the front or top of the printer.
    2. Gently open the ink cartridge access door to reveal the cartridges.
    3. Wait for the cartridge to release and stop moving before proceeding.

    Remove the Old Ink Cartridge Without Damaging Contacts

    handle cartridges with care

    When you press down gently on the old ink cartridge, it releases from its slot, allowing you to pull it out without force. To remove the old ink cartridge in an HP printer safely, avoid touching the electrical contacts or nozzles. These parts are sensitive and can affect print quality if damaged or contaminated.

    Use a lint-free cloth or gloves if needed to handle the cartridge. Lift it straight out carefully to prevent ink spills and avoid contact with the printer’s interior components. Make sure the cartridge fully releases before pulling it out to avoid breaking any clips or damaging the printer.

    Step Action Tip
    1 Press down on cartridge Release it without force
    2 Avoid touching contacts Protect electrical contacts
    3 Use gloves or lint-free cloth Prevent contamination
    4 Lift cartridge straight out Avoid ink spills
    5 Confirm release before removal Prevent printer damage

    Get Your New HP Ink Cartridge Ready to Install

    Before you install your new HP ink cartridge, double-check that it’s compatible with your printer model. Take your time unpacking the cartridge, and make sure to remove all the protective tapes and caps. Just be careful not to touch the contacts.

    Also, give the cartridge a quick look over to see if there’s any damage or leaks. This way, you’ll help ensure your printing goes smoothly.

    Verify Cartridge Compatibility

    Where do you start to assure your new HP ink cartridge will work with your printer? First, you need to verify cartridge compatibility carefully to avoid installation issues or damage.

    Follow these steps:

    1. Check your HP printer’s model number and compare it with the new ink cartridge packaging to ensure it matches.
    2. Refer to your printer’s user manual or HP’s official website to confirm which HP printer ink cartridges are compatible.
    3. Examine your current cartridges for part numbers and make sure your new ink cartridge has the same numbers or approved alternatives.

    Inspect Cartridge Packaging

    How do you guarantee your new HP ink cartridge is ready for installation? First, carefully inspect the cartridges’ packaging for any signs of damage or leaks before opening. Damaged packaging can indicate compromised ink quality.

    Keep the cartridge sealed until you’re ready to install it to prevent ink drying or contamination. When you open the packaging, look for any protective tape or plastic covers on the cartridge’s contacts and nozzles. Removing them as instructed ensures proper function.

    Also, double-check that the cartridge model matches your printer to avoid compatibility issues. Until installation, store unopened cartridges in a cool, dry place away from direct sunlight. Taking these steps will help keep your new HP ink cartridge in peak condition for a smooth replacement process.

    Prepare Cartridge For Installation

    Once you’ve confirmed your new HP ink cartridge is undamaged and matches your printer, it’s time to prepare it for installation. Follow these steps to get your new ink cartridges ready:

    1. Remove the protective plastic or tape from the cartridge carefully. This step is essential to avoid any blockages or malfunctions during printing.
    2. Handle the cartridge by its edges, steering clear of the nozzles and electrical contacts to prevent damage.
    3. Make sure you have the correct ink by matching the cartridge’s color and model number with the designated slot in the printer.

    Insert the New HP Ink Cartridge Securely

    Why does inserting the new HP ink cartridge securely matter? If the cartridge isn’t seated properly, your printer may fail to recognize it, leading to printing errors or poor print quality.

    To insert your cartridge securely, align it straight with the correct slot, matching the color-coded or labeled position. Gently push the cartridge in until you hear it snap firmly into place. This sound confirms the cartridge is locked in and the electrical contacts are properly connected.

    Avoid forcing the cartridge; if it resists, carefully remove and try again to prevent damaging the contacts. Ensuring a secure insert not only protects the cartridge but also guarantees smooth communication between the cartridge and printer, so your prints come out crisp and clear every time.

    Take your time with this step to avoid issues down the road and keep your HP printer running efficiently.

    Close the Access Door and Let the Printer Recognize the Cartridge

    close door wait confirm

    After you finish installing the cartridge, close the access door firmly so your printer can recognize the new ink. This step is vital for the printer to complete the printer initialization and confirm the cartridge installation. Here’s what you should do next:

    Close the access door firmly after installing the cartridge to ensure your printer recognizes and initializes the new ink properly.

    1. Close the access door firmly to guarantee the printer can detect the cartridge. Don’t open it immediately after closing, as recognition takes a few moments.
    2. Wait for the printer to recognize the cartridge. Look for a message or a light indicator confirming the successful installation.
    3. If the cartridge isn’t recognized, double-check that you properly installed the new ink and that the access door is fully closed. Re-seat the cartridge if needed and try again.

    Once recognized, some HP models perform an automatic printer initialization or alignment to optimize performance. Following these steps ensures your printer is ready for the next stage.

    Although you’ve just installed new ink cartridges, printing a test page helps confirm they’re seated correctly and that your printer delivers the best quality. To print a test page, use your printer’s control panel or connected device and find the option under the maintenance or tools menu. This step verifies that your HP ink cartridges are recognized and functioning properly.

    If the test page shows streaks, faded areas, or missing colors, you’ll need to troubleshoot. Run the printer’s cleaning or alignment utility to fix print quality issues. Also, check ink levels, clean print heads, or update the printer firmware if problems persist.

    Issue Cause Solution
    Streaks on print Dirty print heads Run cleaning utility
    Missing colors Low ink or misalignment Check ink levels, align cartridge
    Faded print Improper cartridge seating Re-seat HP ink cartridges
    Printer not recognizing Firmware issue Update printer firmware

    Frequently Asked Questions

    Can I Use Third-Party Ink Cartridges in My HP Printer?

    Yes, you can use third-party ink cartridges in your HP printer, but you need to check cartridge compatibility carefully. While third-party ink often costs less, ink quality can vary, sometimes causing streaks or poor color output.

    Make sure to buy from reputable sellers to avoid damage. Weigh the cost comparison against potential risks like voiding your warranty or poor print results before deciding.

    How Do I Store Unused Ink Cartridges Properly?

    To guarantee proper ink cartridge storage, keep unused cartridges in a cool, dry place away from sunlight. For unused ink preservation, store them upright in their original packaging or sealed plastic bags to protect nozzles and contacts.

    Practice proper ink handling by touching only the plastic exterior. Avoid extreme temperatures to extend cartridge shelf life. These steps help maintain your cartridges’ quality and prevent ink from drying out or leaking.

    What Should I Do if the Printer Shows an Ink Cartridge Error?

    If your printer shows an ink cartridge error, start with error code troubleshooting to identify the issue. Check the ink levels to guarantee cartridges aren’t empty.

    Try cartridge resetting by removing and reinserting them firmly to clear recognition problems. Clean the contacts if needed.

    If errors persist, perform a cartridge replacement using genuine HP cartridges to avoid compatibility issues. Updating your printer firmware can also help resolve persistent errors.

    How Long Does an Ink Cartridge Typically Last Once Installed?

    An ink cartridge lifespan typically ranges between 200 to 300 pages for standard cartridges, while high-yield ones last up to 1,000 pages. Your ink consumption rate depends on what you print. Color and graphics use more ink than text, which affects how often you need to refill.

    Cartridge durability also plays a role since some cartridges hold ink better over time. Keep an eye on your printer’s software to manage when you’ll need to replace or refill cartridges.

    Are There Environmental Benefits to Recycling Ink Cartridges?

    Yes, recycling ink cartridges greatly reduces environmental impact by keeping plastic waste out of landfills and preventing harmful chemicals from polluting soil and water. When you participate in recycling programs, you support sustainability initiatives that conserve natural resources and lower carbon footprints.

    Proper cartridge disposal through these programs ensures manufacturers like HP can reuse materials, making your eco-friendly actions part of a larger effort to protect the planet and reduce waste.

    Conclusion

    Replacing your HP ink cartridge is like tuning a musical instrument. Each step guarantees your printer plays the perfect note.

    By choosing the right cartridge, handling it with care, and following the simple steps, you’ll keep your printer running smoothly. Don’t forget to print a test page to confirm everything’s in harmony.

    With a little practice, swapping ink becomes second nature. This keeps your prints vibrant and your creativity flowing effortlessly.

  • How to Remove Ink Stains From Your Dryer Quickly

    How to Remove Ink Stains From Your Dryer Quickly

    To quickly remove ink stains from your dryer, first unplug it and wipe away loose debris.

    Mix dish soap with warm water, then use a cloth or sponge to gently scrub the stained drum.

    For tough spots, try a damp Magic Eraser carefully, or apply rubbing alcohol before scrubbing.

    After cleaning, run an empty dry cycle with a towel to clear residues.

    If you want to explore safer chemical options and thorough stain removal tips, there’s a lot more to discover.

    Prepare Your Dryer for Ink Stain Removal

    unplug clean protect prepare

    Before you begin removing ink stains from your dryer, make sure to unplug it for safety. This step is essential to avoid any electrical hazards while cleaning. Once unplugged, open the dryer door and carefully remove any lint or debris from the drum and paddles using a clean cloth. This prevents interference during the stain removal process.

    Unplug your dryer and clear lint from the drum to ensure safe, effective ink stain removal.

    If you plan to use chemical cleaners later, wear gloves and protective gear to protect your skin from irritation.

    Next, gather your cleaning supplies, including dish soap, warm water, and a clean towel. Having everything ready makes the process smoother and faster.

    Before applying any cleaning solutions, wipe the dryer drum with a damp clean cloth dipped in water to remove loose dirt. After cleaning, ensure the dryer is completely dry before you load wet clothes to avoid new stains forming.

    Proper preparation sets the stage for effective ink stain removal.

    Clean Ink Using Dish Soap and Warm Water

    Once your dryer is prepped and dry, you can tackle the ink stains using a simple mixture of dish soap and warm water. Start by mixing a few drops of dish soap, such as Dawn, into warm water to create an effective cleaning solution.

    Dip a clean cloth or sponge into the soapy water, then gently wipe the dryer drum and paddles to lift away the ink stains. Be thorough but gentle to avoid damaging the dryer surfaces.

    Afterward, use a damp, clean towel to wipe away any remaining soap and ink residue. Make sure the dryer is completely dry before loading any wet clothes to prevent the ink from transferring or setting further.

    If you notice stubborn ink stains still lingering, just repeat this cleaning process as needed. This method is a quick and straightforward way to remove ink stains and keep your dryer clean without harsh chemicals.

    Remove Tough Ink Stains With a Magic Eraser

    use wet magic eraser carefully

    If you’re dealing with tough ink stains, a Magic Eraser can be your best tool. Just make sure you pick the right one and use it carefully. First, always wet the eraser before you start. It’s a good idea to test it on a hidden spot too, so you don’t accidentally damage your dryer’s finish. After you’ve scrubbed gently, don’t forget to wipe the drum clean to get rid of any leftover residue.

    Choosing The Right Eraser

    Although many cleaning tools can tackle ink stains, a Magic Eraser stands out for its effectiveness on dryer surfaces. This melamine foam eraser acts as a gentle abrasive, making ink stain removal easier without harsh chemicals.

    Before using it, dampen the Magic Eraser with water to boost its cleaning power and protect your dryer from scratches. Always test it first on a hidden spot to ensure it won’t damage or discolor your dryer’s finish.

    When tackling stains, use light, circular motions to avoid excessive wear. After you’re done, wipe the area with a clean, damp cloth to remove any residue and prevent streaking.

    Choosing the right eraser like a Magic Eraser makes ink stain removal quick and efficient.

    Using Magic Eraser Safely

    When you use a Magic Eraser to remove tough ink stains from your dryer, it’s important to handle it carefully to protect your appliance’s surface. Dampen the Magic Eraser with water before scrubbing to avoid scratching, and test it on a small, hidden spot first.

    Avoid using it on plastic, rubber, or painted areas to prevent damage. After cleaning, wipe the area with a damp cloth to remove residue and keep your dryer clean.

    Step Tip
    Dampen Magic Eraser Prevent surface scratches
    Test on small area Check for damage before cleaning
    Wipe after use Remove residue and streaks

    Post-Cleaning Drum Care

    After you’ve used a Magic Eraser to lift tough ink stains from your dryer’s drum, make sure to wipe the area with a damp cloth to remove any leftover residue. This step is essential because the Magic Eraser can leave behind tiny particles that might affect your clothes.

    Once you’ve cleaned the drum, let it air dry completely before loading your laundry. This prevents any remaining moisture or ink residue from transferring onto your clothes.

    Remember, always dampen the Magic Eraser before use to avoid scratching the drum surface. If you haven’t already, test the Magic Eraser on a small, hidden spot of the drum to ensure it won’t damage the finish.

    Proper post-cleaning drum care keeps your dryer stain-free and ready for use.

    How to Use Bleach Safely to Remove Ink Stains

    bleach safety and stain removal

    Because bleach can effectively break down ink stains, you’ll want to handle it carefully to protect yourself and your dryer. First, unplug the dryer to guarantee safety and prevent electrical hazards. Mix a 1:1 solution of bleach and warm water, then soak a clean cloth in it.

    Place the bleach-soaked cloth inside the dryer and run it for about 20 minutes to break down the ink stains. Wear gloves and assure proper ventilation to avoid skin irritation.

    After bleaching, run the dryer on an empty cycle with plain water to rinse out any residual bleach and prevent stain transfer.

    Step Action Safety Tip
    Prepare Solution Mix bleach and warm water 1:1 Wear gloves
    Apply & Run Dryer Soak cloth, run 20 minutes Unplug dryer first
    Rinse Cycle Run empty cycle with water Ventilate area properly

    Pick Safe Chemical Cleaners for Ink Stains

    When you’re picking out chemical cleaners for ink stains, it’s a good idea to go for nonflammable products like Goo Gone to keep things safe. Always make sure to follow the manufacturer’s safety instructions carefully so you don’t end up with skin irritation or breathing in fumes.

    Also, remember to test the cleaner on a hidden spot first to see how it reacts. And keep it away from heating elements—that way, you can avoid any fire hazards.

    Choose Nonflammable Products

    How can you safely tackle ink stains in your dryer without risking fire hazards? Start by choosing nonflammable chemical cleaners like Goo Gone or specialized stain removers designed for this purpose. Always check product labels to confirm they’re nonflammable and safe for use around heat sources.

    Before applying, test the cleaner on a small, hidden area inside the dryer drum to avoid damage or discoloration. Make sure you avoid using any chemical cleaner near the dryer’s heating element, as this increases fire risk.

    Follow Safety Instructions

    Although tackling ink stains quickly is important, you should always follow safety instructions when using chemical cleaners. First, pick only those labeled safe for appliances and non-flammable, especially near your dryer’s heating elements. Always read and adhere to the manufacturer’s safety instructions to avoid accidents or damage.

    Before applying, test the cleaner on a small, hidden area of the drum to check for any adverse reactions or discoloration. Avoid harsh solvents like acetone or bleach around electrical parts to reduce fire risk. Wear protective gloves and guarantee proper ventilation to protect your health.

    Wipe and Rinse Your Dryer After Ink Removal

    Why should you wipe and rinse your dryer immediately after removing ink stains? Doing so guarantees you eliminate any leftover ink and cleaning agents that could cause new stains or damage your clothes.

    Start by thoroughly wiping the dryer drum and paddles with a damp, clean towel. Use a soft cloth or sponge to gently clean all interior surfaces, especially corners and crevices where residue tends to linger.

    Next, rinse the drum with fresh water to remove any soap or chemical remnants. This step is vital to prevent buildup and avoid transferring residues to future laundry loads.

    After wiping and rinsing, let the dryer air dry completely before using it again. This helps prevent moisture or odors from developing.

    Regularly wiping and rinsing after ink removal not only keeps your dryer clean but also prolongs its lifespan by stopping residue accumulation. Taking these simple steps keeps your dryer in top shape and your clothes looking their best.

    Run a Dry Cycle to Clear Ink and Cleaner Residue

    Before you start the dry cycle, make sure your dryer is unplugged for safety. Then, set it to the highest heat setting. Run it empty for about 20 to 30 minutes to burn off any remaining ink and cleaner residue. Once it’s done, let the dryer cool completely before using it again. This will help avoid transferring stains to your clothes.

    Preparing Dryer For Cycle

    How can you effectively remove ink and cleaner residue lingering inside your dryer? First, unplug your dryer to avoid any electrical hazards before starting.

    Next, set the dryer to the highest temperature recommended by the manufacturer, as heat helps loosen ink stains and cleaning residue inside the drum. Close the dryer door firmly to contain any fumes released during the cycle.

    Running a dry cycle at this setting will burn off or break down stubborn ink and cleaning residue, making it easier to clean. Once the cycle finishes, open the door and wipe the drum with a damp cloth to remove any remaining traces.

    Following these preparation steps will ensure your dryer is ready to clear ink stains effectively and safely.

    Selecting Appropriate Cycle

    When should you run a dry cycle to tackle ink stains inside your dryer? You should run it right after applying any cleaning agents like hand sanitizer to break down ink residue. Use the highest heat setting your dryer allows to loosen stains effectively.

    Adding a clean, dry towel helps absorb ink as it lifts away. Once done, let the dryer air dry completely before using it again to avoid transferring ink to your clothes.

    Step Action
    1 Select highest heat setting
    2 Add clean, dry towel inside drum
    3 Run empty dry cycle
    4 Allow dryer drum to air dry completely
    5 Load clothes only after drum is dry

    This process clears ink and cleaner residue efficiently.

    Post-Cycle Dryer Cleaning

    Although you’ve finished applying cleaning agents to tackle the ink stains, you’ll want to run a dry cycle afterward to evaporate any remaining residue and loosened ink particles. Before starting, make sure your dryer is completely empty and unplugged to avoid electrical hazards.

    Select the longest and hottest dry cycle available to guarantee thorough cleaning and drying. You can add a damp cloth or towel during the cycle to help absorb leftover ink or cleaning agents.

    Once the dry cycle finishes, wipe down the interior with a clean, damp cloth to remove any remaining stains or residues. This post-cycle dryer cleaning step is essential to keep your dryer free of ink and guarantee it operates safely and effectively.

    Steps to Remove Persistent Ink Stains From Your Dryer

    Since persistent ink stains can be tough to remove, you’ll want to start by unplugging the dryer and wiping away any loose ink with a dry cloth or paper towel.

    Next, apply rubbing alcohol or a commercial ink remover to a cloth and gently clean the stained areas inside the drum.

    For stubborn spots, use a Magic Eraser or a damp sponge with dish soap to scrub the surface.

    After cleaning, rinse the drum thoroughly with a damp cloth to remove any residue.

    Finally, run the dryer on an empty cycle with a damp towel to *guarantee* all ink and cleaning agents are gone.

    Step Tool/Material Purpose
    Wipe Loose Ink Dry Cloth/Paper Towel Remove loose ink stains
    Apply Cleaner Rubbing Alcohol/Ink Remover Dissolve ink stains
    Scrub Stubborn Spots Magic Eraser/Dish Soap Deep clean persistent stains

    Prevent Ink Stains When Using Your Dryer Again

    To prevent ink stains from reappearing in your dryer, make sure you thoroughly clean the drum and remove any ink residue before adding new clothes. Wipe the dryer drum with a damp cloth to catch any leftover ink particles that might transfer onto your laundry.

    For a deeper clean, run an empty cycle with a bleach-soaked towel; this disinfects the drum and helps eliminate stubborn ink stains. Don’t forget to regularly inspect and clean both the dryer drum and lint filter to avoid ink buildup.

    Also, always dry clothes on the appropriate heat setting and avoid overloading the dryer. Overloading increases friction, which can spread ink stains or set them permanently.

    Quick Tips to Remove Gum and Crayon With Ink Stains

    When gum or crayon mixes with ink stains in your dryer, removing the residue quickly can prevent further damage. Start by softening gum or crayon with a hair dryer on low, then wipe away with paper towels or a putty knife.

    Alternatively, use ice cubes to harden the residue, making it easier to scrape off without spreading ink stains. Applying Goo Gone gently breaks down sticky or waxy substances; follow with dish soap and water for a clean finish.

    Always unplug your dryer before cleaning and test cleaners on a small spot.

    Residue Type Softening Method Removal Tool
    Gum Hair dryer (low heat) Putty knife/paper towel
    Crayon Hair dryer or ice cubes Scraper/wipe
    Sticky wax Goo Gone Dish soap + water
    Ink stains Targeted cleaning agents Gentle scrubbing

    These quick tips help you tackle gum and crayon while removing ink, keeping your dryer spotless.

    Frequently Asked Questions

    Can Ink Stains Damage My Dryer’s Motor or Internal Parts?

    Ink stains themselves won’t directly damage your dryer’s motor or internal parts, but certain ink stain types can cause trouble if left untreated. Ink residue might seep into vents or sensors, leading to blockages that affect performance.

    If you skip proper dryer maintenance, corrosion or short circuits could develop over time. So, it’s crucial to clean ink stains promptly and maintain your dryer regularly to keep it running smoothly and prevent internal damage.

    Is It Safe to Use Ink Stain Removers on All Dryer Drum Materials?

    It’s not safe to use all ink stain removers on every dryer drum material. You need to think about dryer material compatibility to prevent damage.

    Stainless steel drums tolerate most cleaners, but painted or plastic surfaces can discolor or degrade. Always check ink stain removal safety by testing a small area first and avoid harsh chemicals or abrasives.

    This way, you protect your dryer’s finish while effectively removing stains.

    How Long Should I Wait Before Using the Dryer After Cleaning Ink Stains?

    You should wait at least 1 to 2 hours after removing ink stains before using your dryer. This guarantees any cleaning residue or moisture has dried completely, preventing it from transferring to your clothes.

    Don’t forget to check for dryer lint buildup during your cleaning frequency routine, as it can trap residues. Letting the drum air dry thoroughly keeps your laundry safe and your dryer running efficiently.

    Can Ink Stains Cause Unpleasant Odors in My Dryer?

    Yes, ink stains can definitely cause unpleasant ink odor in your dryer. When the stain persistence is high, the ink’s chemicals react with heat, releasing foul smells that stick around.

    If you don’t clean the ink thoroughly, this odor can embed in the drum and lint trap, making your dryer smell bad and even transferring to your clothes. So, tackling those stains quickly helps prevent lasting ink odor problems.

    Are There Any Natural Alternatives to Chemical Cleaners for Ink Stains?

    Yes, you can rely on DIY remedies like white distilled vinegar as natural solutions for ink stains. Vinegar effectively breaks down ink residues and neutralizes odors without harsh chemicals.

    Just mix vinegar with water, apply it using a cloth or sponge, and gently scrub the stained area. For tougher stains, soak a cloth in vinegar and let it sit on the spot.

    These natural solutions keep your dryer clean and eco-friendly.

    Conclusion

    Now that you’ve tackled those unwelcome ink surprises, your dryer can shine like new again. With careful steps and a little patience, you’ve given your appliance a gentle makeover, erasing the marks life left behind.

    Just remember, a bit of prevention goes a long way. Treat your dryer kindly, and it’ll reward you with spotless performance. Keep these tips handy, and next time ink tries to crash the party, you’ll know exactly how to send it packing.