Category: Ink

  • How to Remove Ink From Hands Quickly

    How to Remove Ink From Hands Quickly

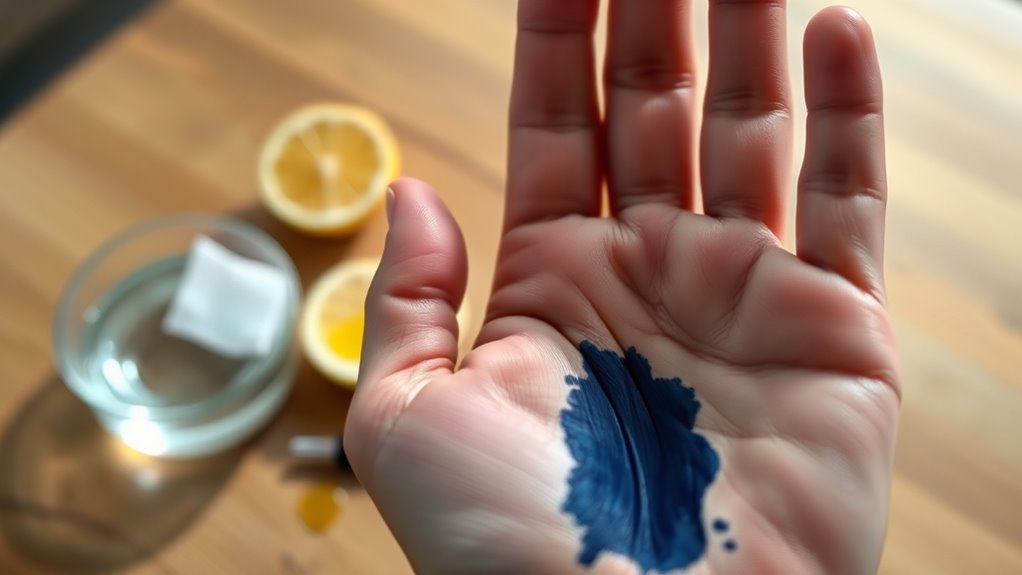
    To quickly remove ink from your hands, start by washing thoroughly with warm water and soap while gently scrubbing, especially around nails and between fingers.

    If the stain persists, apply rubbing alcohol with a cotton ball in circular motions, then wash again.

    For a natural option, try a scrub made of sugar or salt mixed with olive oil.

    Always moisturize afterward to protect your skin.

    Keep these tips handy, and you’ll find even more helpful ways to tackle stubborn ink stains.

    Why Ink Stains Cling to Your Skin

    ink bonds deeply penetrates skin

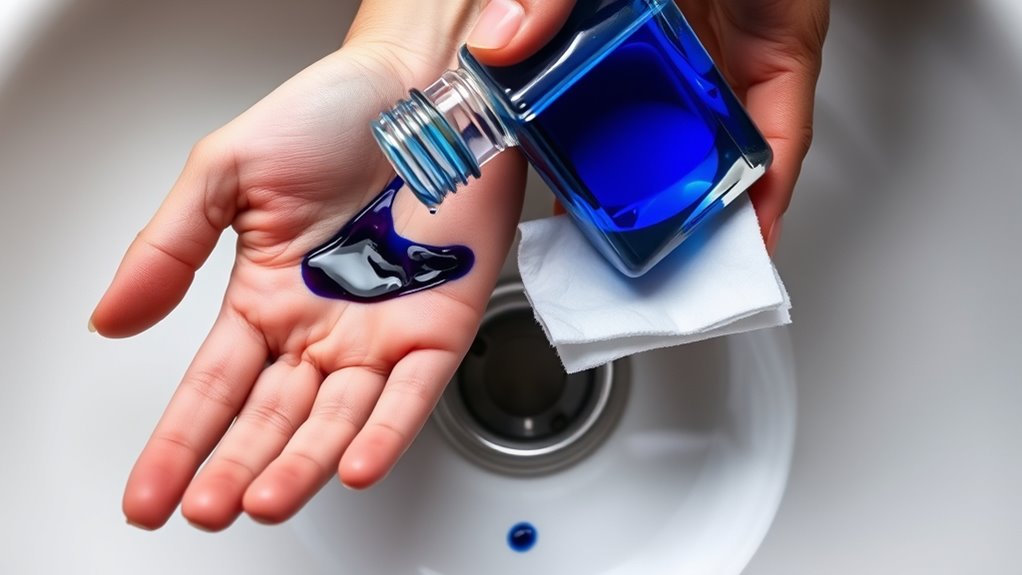
    Although you might think washing your hands would easily remove ink, the dyes and pigments in ink actually penetrate your skin’s surface, making stains stubborn. Ink stains cling because their chemical composition allows them to bind deeply and firmly to your skin layers.

    These pigments are designed to be water-resistant and long-lasting, so they don’t just sit on top; they embed themselves within your skin cells. The binding agents in ink contribute to how strongly the stain adheres, making it tough to scrub off with regular washing.

    Because ink pigments penetrate past the outermost layer, simple rinsing often won’t cut it. Understanding why ink stains cling helps you realize that removing them requires more than just soap and water.

    The persistent nature of these stains comes down to the ink’s ability to latch onto your skin chemically and physically, which is why they remain visible and tricky to erase even after multiple washes.

    Quickly Wash Ink Off Your Hands With Soap

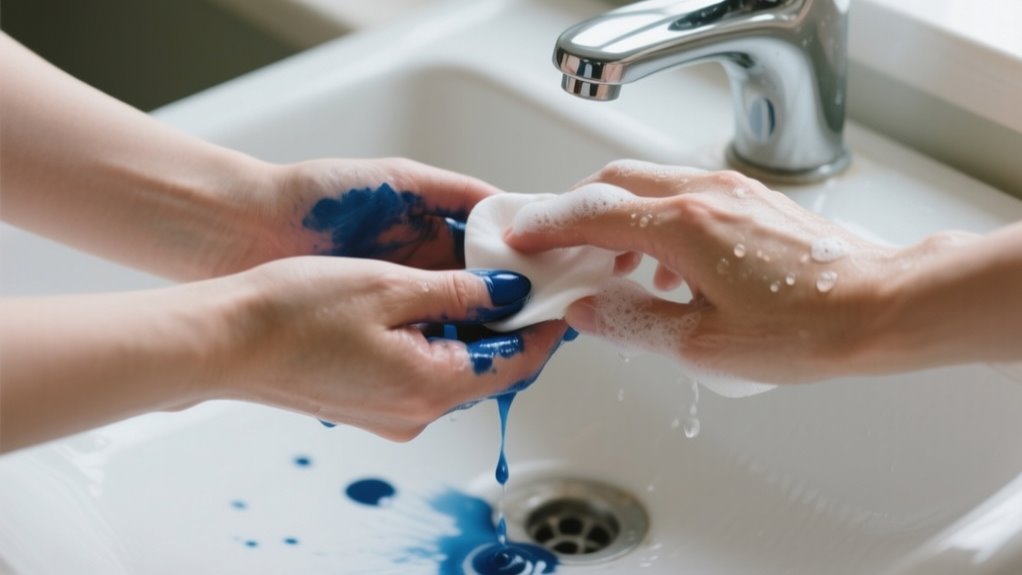
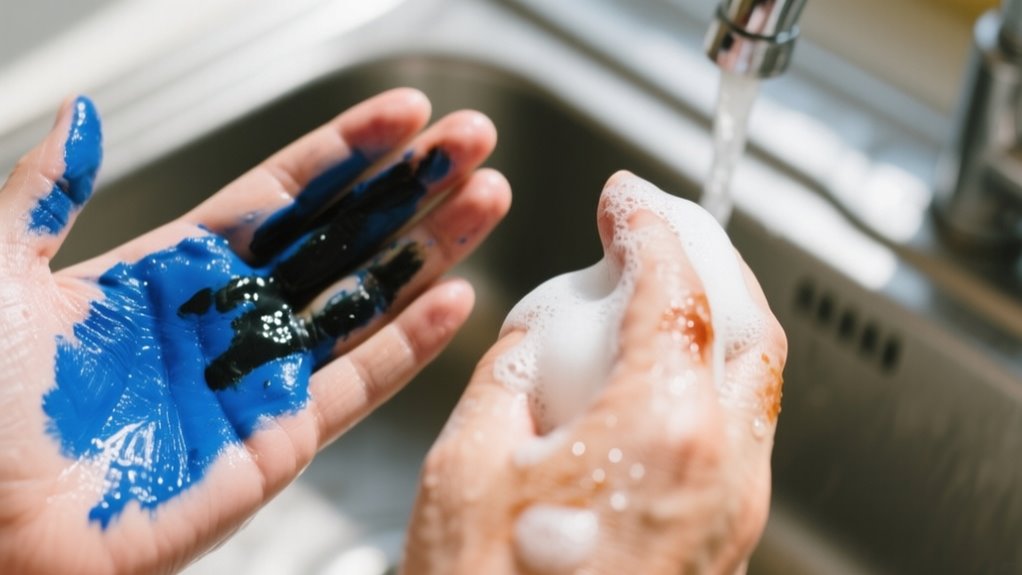
    If you catch the ink on your hands early, washing with warm water and plenty of soap can stop the stain from setting in. Start by applying a generous amount of dish soap, which breaks down ink pigments effectively.

    Rub the stained spots thoroughly, focusing on areas around your nails and between your fingers where ink loves to hide. Use warm water to help dissolve the ink as you scrub.

    Don’t hesitate to repeat the process if some ink remains; persistence pays off.

    Here’s a quick guide to washing ink off your hands:

    Step Action Tip
    1 Wet hands with warm water Warm water loosens ink
    2 Apply plenty of soap Dish soap works best
    3 Rub stained areas thoroughly Focus on nails and fingers
    4 Rinse and repeat if needed Ink may require multiple washes

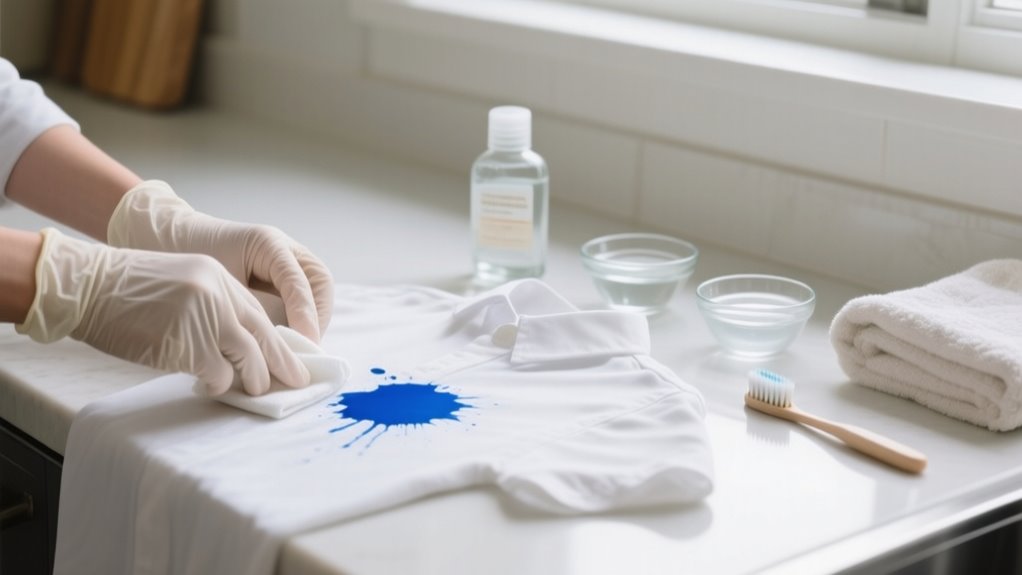
    How to Use Rubbing Alcohol for Stubborn Ink Stains

    rubbing alcohol removes ink

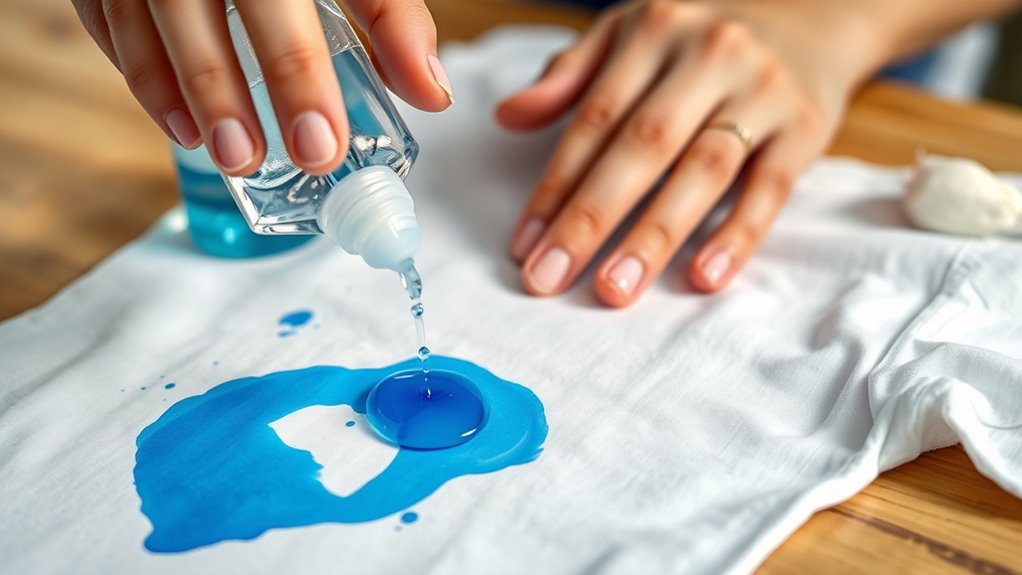
    When soap and water don’t quite do the trick, rubbing alcohol can tackle stubborn ink stains on your hands effectively. Start by soaking a cotton ball or pad in rubbing alcohol. Gently apply it to the ink-stained area, rubbing in circular motions to break down the ink pigments.

    This method helps loosen the ink without harsh scrubbing. Afterward, wash your hands with soap and water to remove the ink residue and reduce any irritation. If the stain persists, you can repeat the process, but make sure to rinse your hands thoroughly between applications.

    Since rubbing alcohol can dry out your skin, especially if it’s sensitive, use it sparingly and consider moisturizing afterward. This simple technique offers a quick and practical solution for those stubborn ink marks that just won’t wash away with soap alone.

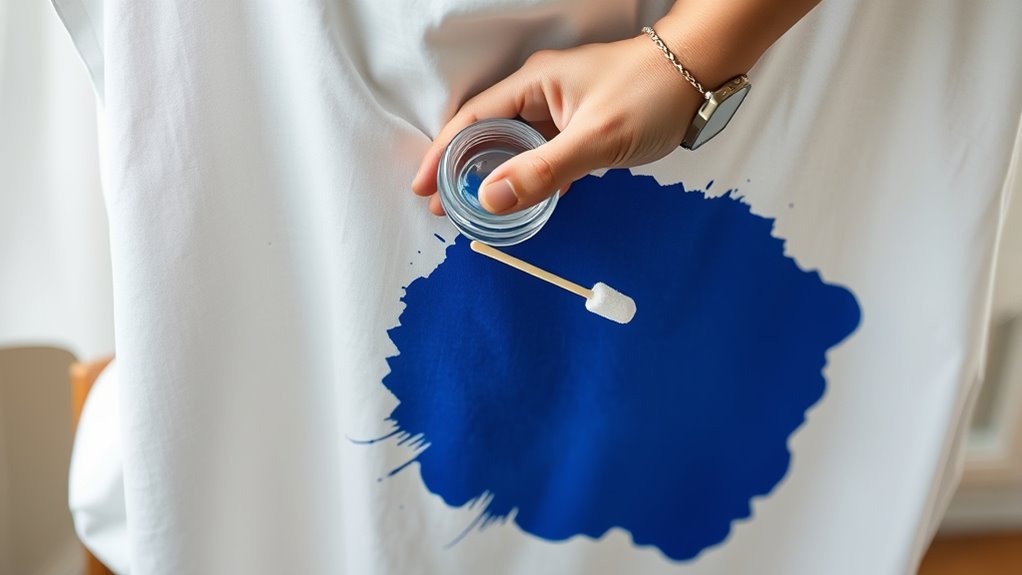
    Natural Scrubs to Gently Remove Ink Stains

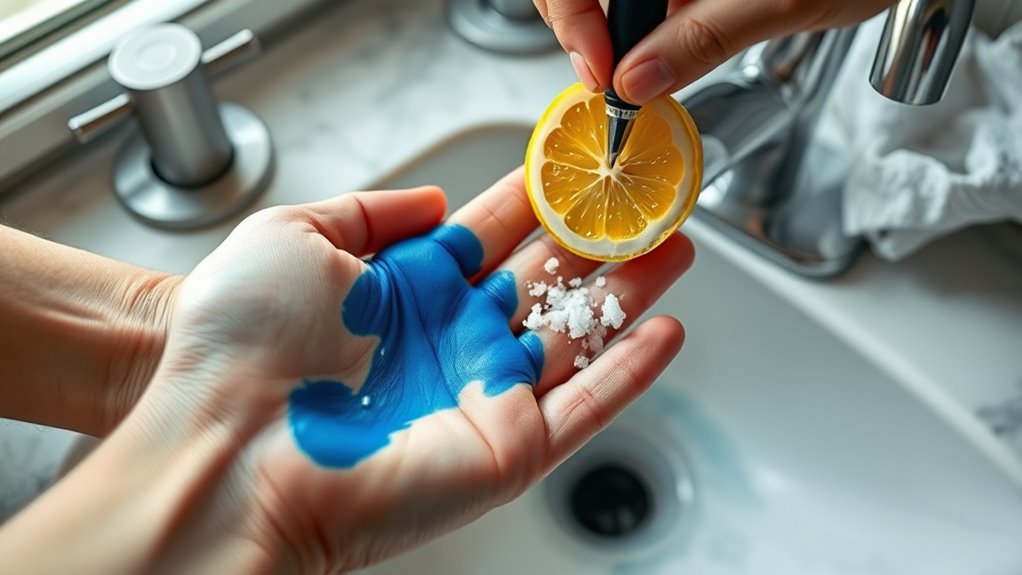
    Since harsh chemicals can irritate your skin, natural scrubs offer a gentle and effective way to remove ink stains from your hands. You can make a simple scrub by mixing sugar or salt with olive oil, which exfoliates your skin gently while lifting ink particles from the surface.

    Another option is combining lemon juice with salt; this natural abrasive works well to break down the ink without causing damage. When you massage these natural scrubs onto your hands, you increase blood flow and help dislodge ink trapped in your skin.

    Make sure to rub gently to avoid irritation while still effectively reducing stains. After scrubbing, rinse your hands thoroughly to wash away loosened ink residue, leaving your skin cleaner and less stained. Using natural scrubs this way not only removes ink but also nourishes your skin without the harsh effects of chemical-based removers.

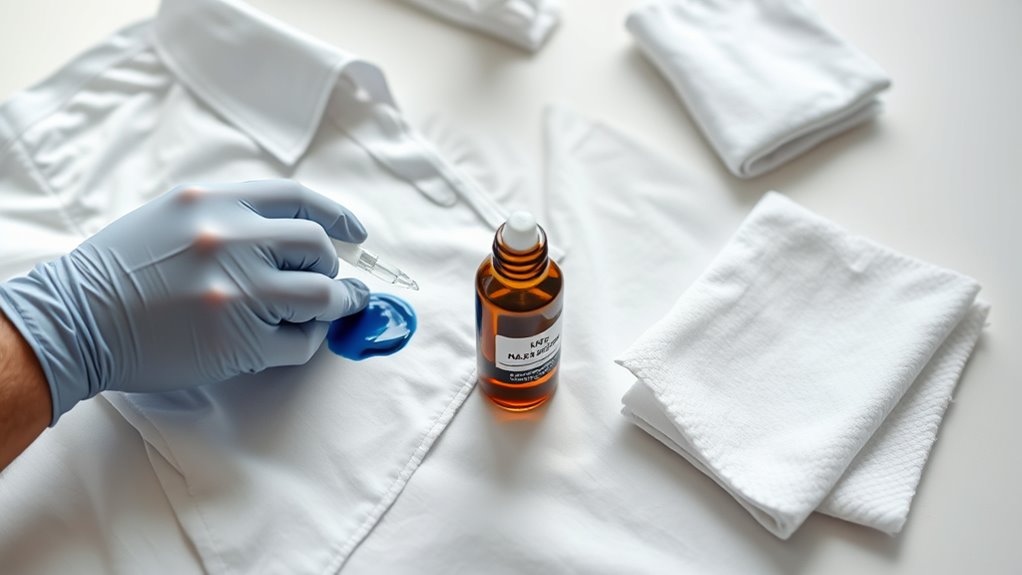
    When to Try Professional Ink Removers for Tough Stains

    use professional ink removers

    Natural scrubs can handle many ink stains gently, but some marks cling stubbornly despite your best efforts. When natural and household methods don’t fully erase those tough stains, it’s time to try professional ink removers.

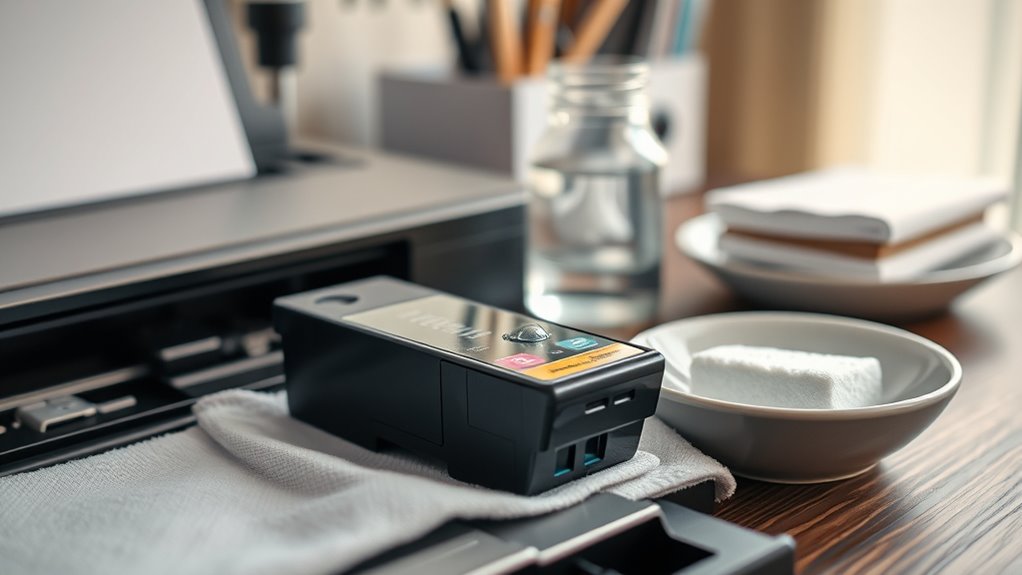
    Products like INKO Special use abrasive microspheres that break down deeply embedded ink pigments while being gentle on your skin. These removers are specially formulated to respect your skin’s natural balance, reducing irritation risks compared to harsh chemicals you might find at home.

    If you’re unsure which product suits your stubborn stain, consulting a skincare or industrial hygiene professional can help you choose the safest and most effective option. By opting for professional ink removers, you guarantee a more efficient stain removal process without compromising your skin’s health.

    How to Protect Your Skin While Removing Ink Stains

    If you want to protect your skin while removing ink stains, it’s best to stick with gentle methods like soap and water or oil-based solutions. These are much kinder than harsh chemicals that can irritate your skin. Also, don’t forget to wear gloves when you’re handling ink—it really helps minimize direct contact and keeps those stubborn stains off your hands. Once you’ve finished cleaning, a little moisturizer goes a long way in keeping your skin hydrated and healthy. So, taking these simple steps can make a big difference!

    Skin-Friendly Removal Techniques

    When removing ink from your hands, you’ll want to choose methods that protect your skin rather than harm it. Opt for skin-friendly removal techniques like gentle methods using soap and water or natural remedies such as olive oil. These minimize irritation while effectively lifting ink stains.

    Avoid harsh scrubbing or aggressive substances that can cause dryness and redness. You can also try professional solutions like INKO Special, designed to remove ink while respecting your skin’s health.

    To further protect and nourish your skin, look for products containing skin-conditioning ingredients like silk-derived sericin. After removing the ink, always follow up with a good moisturizer to maintain your skin’s barrier and prevent dryness.

    This approach keeps your hands clean and healthy.

    Avoiding Harsh Chemicals

    Although it might be tempting to reach for strong chemicals or scrub hard to remove ink stains, doing so can seriously damage your skin. Harsh chemicals and abrasive scrubbing can cause irritation, dryness, or even burns. Instead, protect your skin by following these tips:

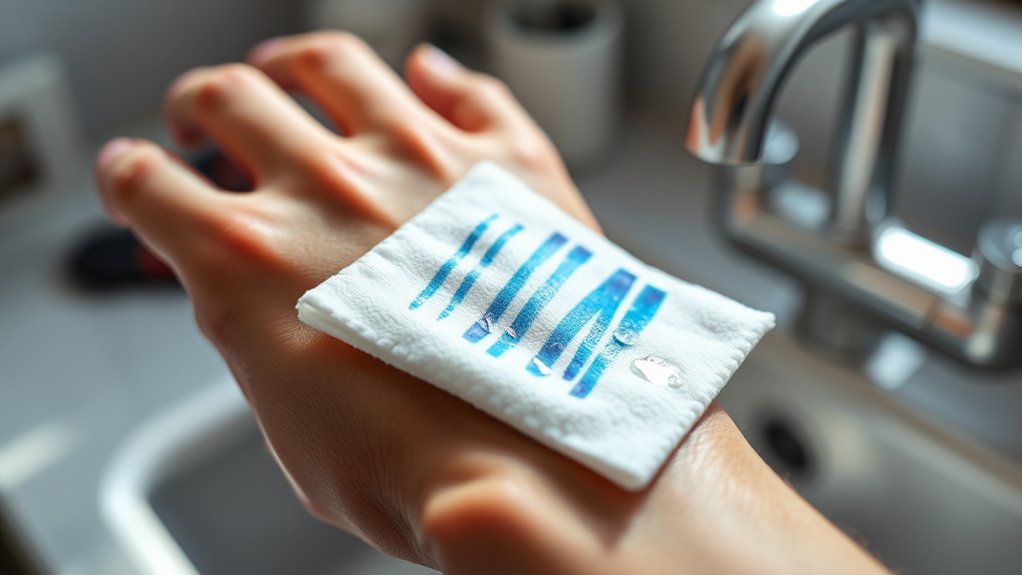
    Avoid harsh chemicals and opt for gentle, natural remedies like lemon juice or olive oil. Use blotting paper or tissue to absorb excess ink immediately after contact. Wash your hands promptly with soap and water to reduce ink penetration.

    Wear gloves during ink handling or refilling to prevent direct skin contact. Be gentle when removing ink and avoid scrubbing hard to protect your skin’s barrier.

    Taking these steps helps you remove ink safely without compromising your skin’s health.

    Protective Measures During Cleaning

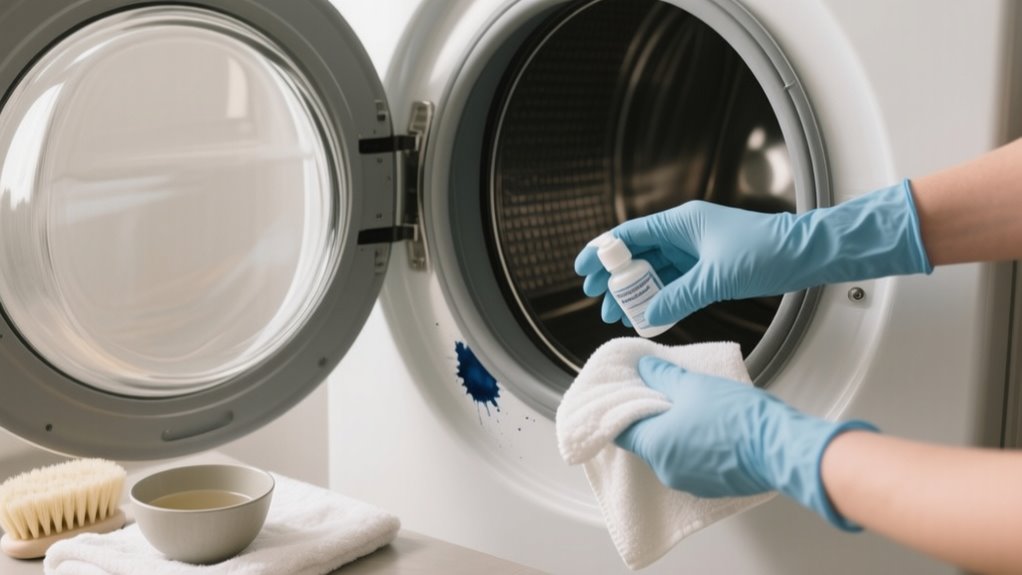
    Since ink removal can involve exposure to chemicals or repeated washing, you should take steps to protect your skin throughout the process. Start by applying a thick moisturizer or barrier cream to create a protective barrier before cleaning.

    Wearing gloves also helps prevent direct contact with solvents, reducing irritation or dermatitis risk. Choose gentle, natural ink removal methods to avoid excessive dryness or redness.

    Be sure to avoid aggressive scrubbing and work in a well-ventilated area to maintain your skin’s barrier and minimize damage. After removing the ink, rinse your hands thoroughly with water to wash away any leftover chemicals.

    These protective measures will help keep your skin healthy while effectively removing ink stains.

    What to Do If Ink Stains Irritate Your Skin

    If ink irritates your skin, start by washing the area thoroughly with soap and warm water to remove as much ink as possible. Removing ink promptly helps reduce skin irritation and prevents further damage to the stained area.

    If you experience discomfort after getting ink on your skin, follow these steps to help reduce irritation:

    • Apply a gentle, natural moisturizer or aloe vera gel to soothe the skin.
    • Avoid scratching or rubbing the irritated area to prevent worsening inflammation.
    • Use a mild antihistamine cream if you notice persistent itching or signs of an allergic reaction.
    • Keep the stained area clean and dry to promote healing.
    • Seek medical advice if irritation worsens, persists, or develops into a rash or dermatitis.

    Taking quick action when dealing with ink on your skin can minimize discomfort and support faster recovery from skin irritation.

    How to Care for Your Skin After Removing Ink Stains

    Once you’ve removed the ink, be sure to moisturize your skin with a soothing lotion. This helps keep it hydrated and can calm any irritation you might have. Try to avoid harsh scrubbing, too—gentle products are best for protecting your skin’s natural barrier. By taking these simple steps, you’ll help prevent dryness down the line and keep your hands feeling healthy.

    Moisturizing After Ink Removal

    Although removing ink from your hands can leave your skin feeling dry and irritated, applying a moisturizing lotion or cream right afterward helps restore hydration and soothe any discomfort. Moisturizing is essential to prevent dryness and maintain your skin’s natural barrier.

    To care for your skin effectively after ink removal, remember to:

    • Use moisturizers enriched with sericin or glycerin for added nourishment
    • Avoid harsh soaps or alcohol-based products without following up with moisturizer
    • Apply lotion immediately after washing to lock in moisture
    • Keep your skin hydrated regularly to improve elasticity
    • Choose gentle, fragrance-free creams to minimize irritation

    Soothing Irritated Skin

    Because ink removal can leave your skin irritated and sensitive, you should rinse your hands with lukewarm water and apply a gentle, fragrance-free moisturizer right away to soothe discomfort and support healing. Choose a moisturizer containing soothing ingredients like aloe vera or sericin to help reduce redness and promote skin repair.

    Avoid harsh scrubbing or using aggressive chemicals after ink removal, as this can worsen irritation. If your skin feels inflamed, applying a cool compress can ease redness and calm discomfort effectively.

    Regularly moisturizing keeps your skin hydrated and resilient during recovery. By treating your skin gently and consistently using a proper moisturizer, you’ll support healing and prevent further irritation, ensuring your hands feel comfortable and healthy after removing ink stains.

    Preventing Future Irritation

    To prevent future irritation after removing ink stains, you should wash your hands thoroughly with gentle soap and water to eliminate any leftover chemicals. Then, take care of your skin by following these tips:

    Apply a moisturizing lotion with soothing ingredients like aloe vera or sericin to restore hydration. Avoid harsh scrubbing or abrasive tools that can dry or damage your skin.

    Wear gloves when handling ink in the future to reduce direct contact. Also, monitor your skin regularly for redness, itching, or other signs of irritation.

    If any irritation persists or worsens over time, consult a dermatologist.

    Tips to Avoid Ink Stains on Your Hands

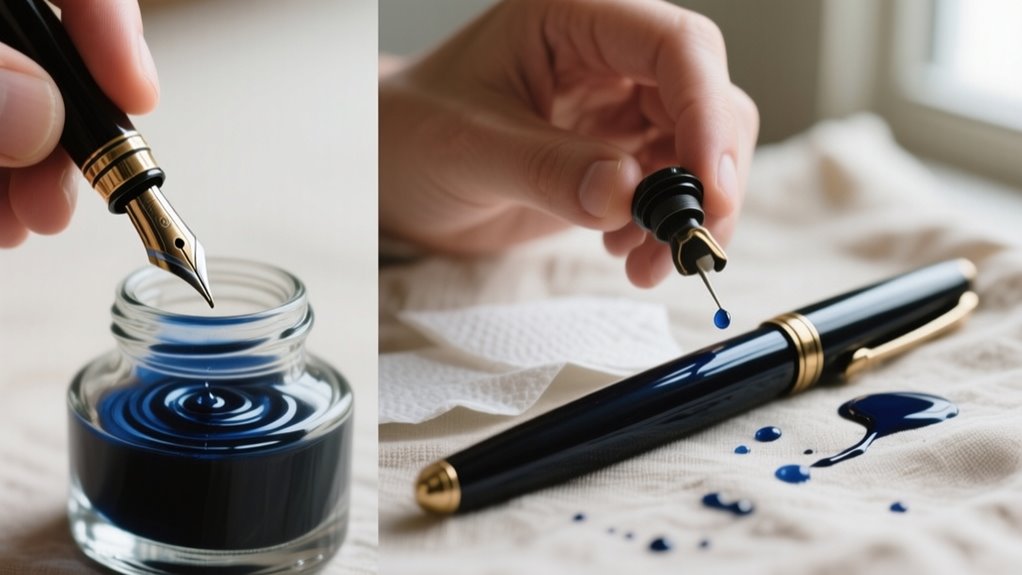
    When you want to keep your hands clean while working with ink, taking simple precautions can make a big difference. To avoid an ink stain, use blotting paper immediately after writing to absorb excess pen ink. This prevents ink from spreading and reduces the need to remove ink later.

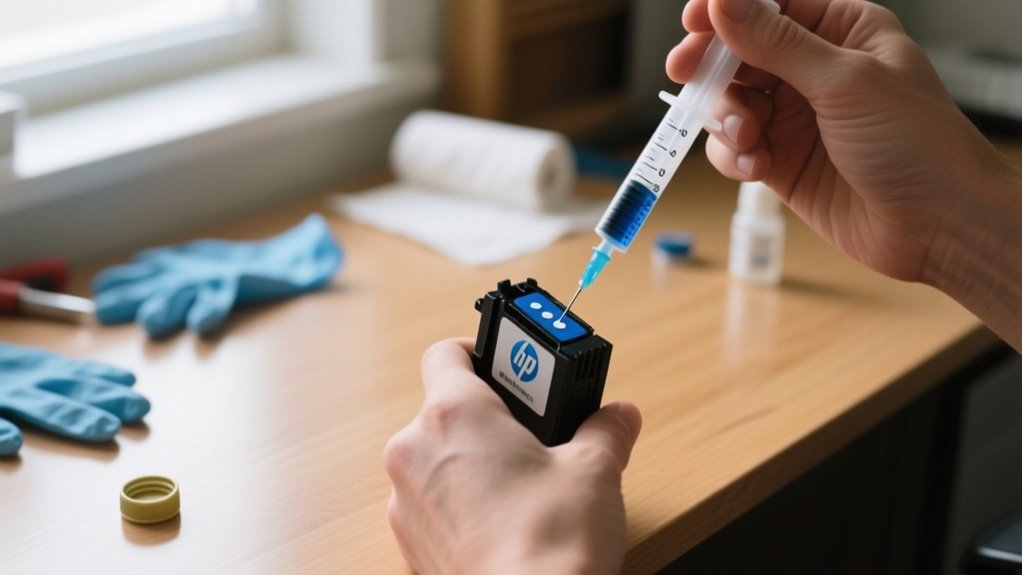
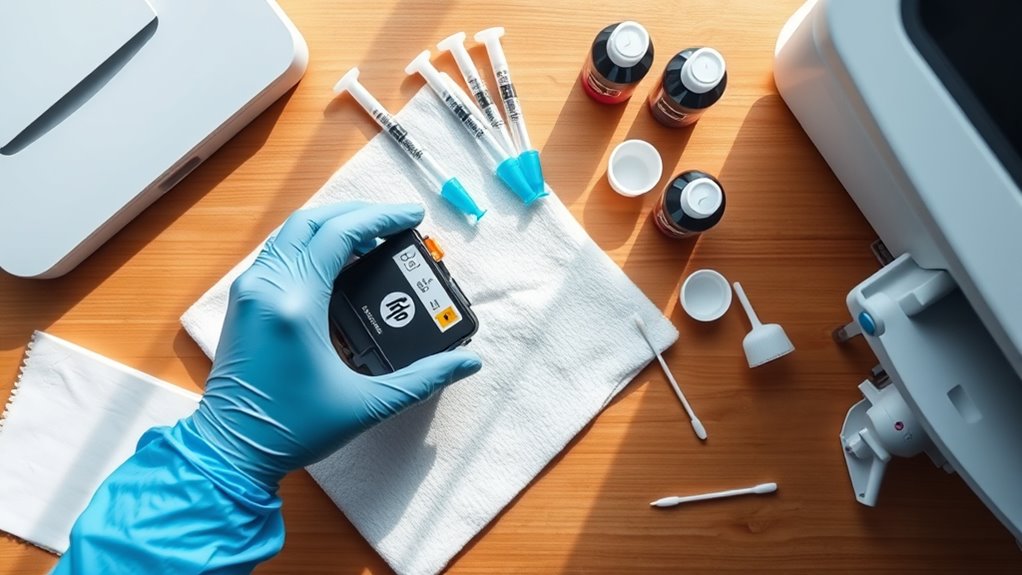
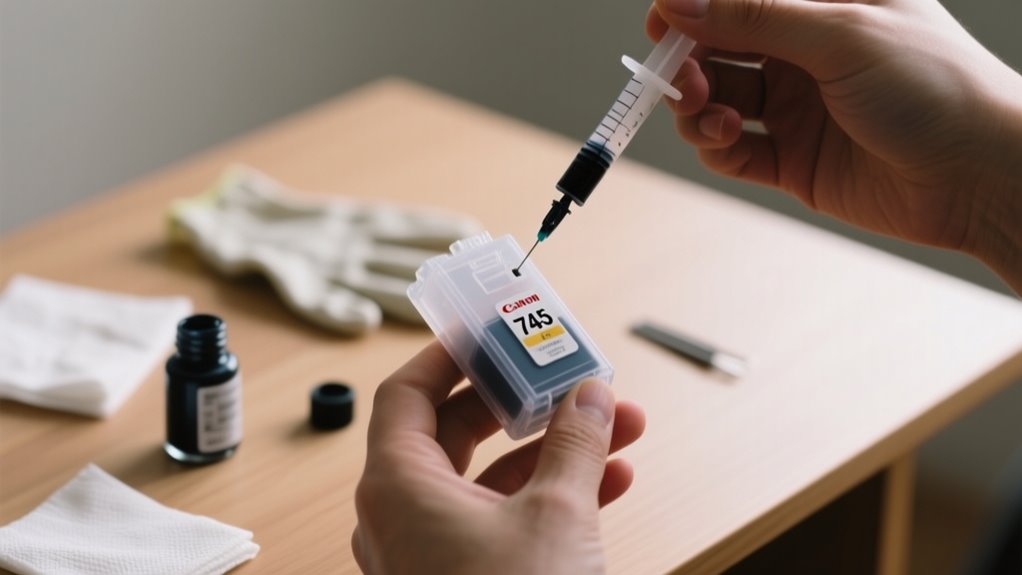
    Wearing gloves during refilling or handling ink creates a protective barrier, keeping your skin free from stains. You should also hold pens away from the nib or tip to minimize accidental leaks onto your hands.

    Adjusting your grip and writing angle, especially if you’re left-handed, helps reduce smearing and ink transfer. Furthermore, using a rocker blotter quickly soaks up extra ink, preventing smudges while you write.

    These cleaning methods not only save you time but also keep your hands looking clean and free from stubborn ink stains. Taking these steps will help you maintain ink-free hands effortlessly.

    Best Practices for Keeping Your Hands Ink-Free

    You can keep your hands ink-free by taking some simple preventive measures. For example, using blotting paper to absorb excess ink right away really helps.

    Also, wearing gloves while handling ink is an easy way to protect your skin from stains. It’s a quick step that makes a big difference.

    Plus, adjusting your grip and cleaning your hands promptly can minimize ink contact and prevent smudging. These little habits add up to keeping your hands clean.

    Preventive Measures

    How can you keep your hands free of ink stains during your work? Taking preventive measures is key to avoiding stubborn ink marks. Start by using blotting paper to absorb excess ink immediately after writing. This stops smudges and skin contact.

    Here are five effective tips to keep your hands ink-free:

    • Use blotting paper right after writing to soak up extra ink.
    • Hold the pen away from the nib and adjust your grip to reduce ink transfer.
    • Employ a rocker blotter to press excess ink off paper quickly.
    • Clean your hands and nails regularly during ink work to prevent buildup.
    • Consider wearing gloves during ink refilling to protect your skin.

    Protective Tools

    Although ink stains can be stubborn, using protective tools makes it much easier to keep your hands clean. Wearing gloves is one of the most effective protective tools; it creates a barrier that prevents direct ink contact.

    Moreover, using blotting paper right after writing absorbs excess ink, stopping it from spreading to your fingers. Adjust your grip to keep the pen’s nib away from your skin, reducing accidental smudges.

    Employing a rocker blotter while working further controls ink smudges, minimizing cleanup. By consistently using these protective tools and handling techniques, you’ll reduce ink stains and save time on removal.

    Incorporating them into your routine helps maintain ink-free hands and makes your writing experience cleaner and more enjoyable.

    Frequently Asked Questions

    Can Ink Stains on Hands Be Removed With Toothpaste?

    Yes, you can remove ink stains on your hands with toothpaste, but don’t believe the full Toothpaste Myth. It’s not a miracle cure. Toothpaste contains mild abrasives that help scrub away light ink stains when you rub it gently.

    Whitening toothpaste with baking soda works better, but it might not tackle stubborn inks. Rinse well afterward to avoid dryness. So, toothpaste helps, but it’s not foolproof for every ink stain.

    How Long Does It Take for Ink Stains to Fade Naturally?

    Like waiting for a telegram to arrive, ink stain duration varies. It usually takes anywhere from a few hours to several days for ink stains to fade naturally.

    Water-based inks typically disappear within 24 to 48 hours, while oil-based inks might linger longer. You’ve got to keep your hands clean and moisturized to speed up skin renewal, which helps shorten the stain duration and gets your hands back to normal faster.

    Are There Specific Ink Types That Are Harder to Remove?

    Yes, certain ink types are definitely harder to remove because of their ink chemistry. Industrial inks with deep-penetrating pigments, oil-based, and solvent-based inks stick more stubbornly to your skin.

    Permanent markers and pigment inks use chemical binders or resins that bond strongly, making removal tougher. The longer the ink sits, the more those chemical interactions set in. So, you’ll want specialized removers for these tougher ink types.

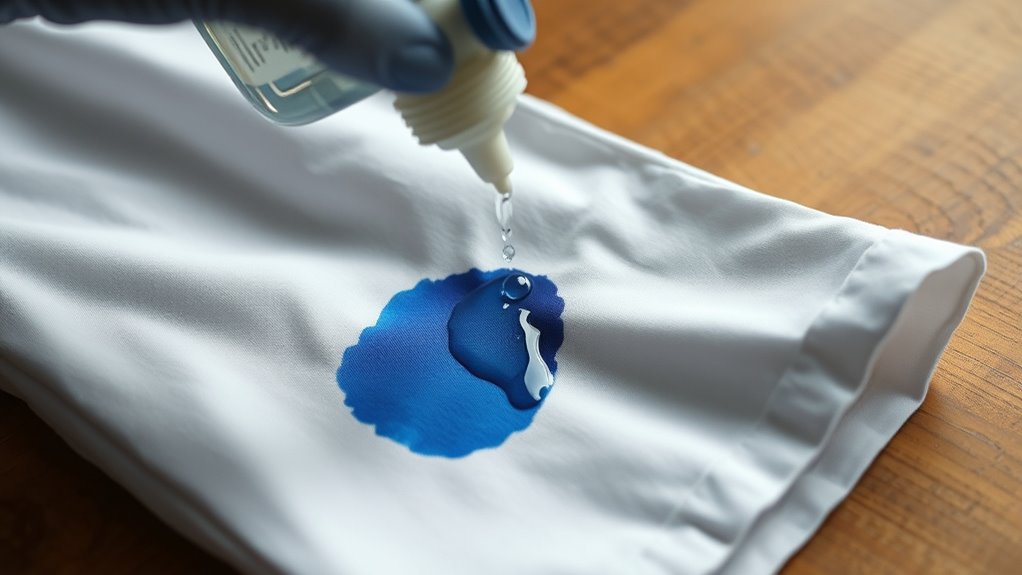
    Can Hand Sanitizer Help Remove Ink Stains?

    Absolutely, hand sanitizer can help remove ink stains! Think of it as a tiny chemical reaction hero. Its alcohol content dissolves the ink pigments faster than soap alone.

    When you apply sanitizer, it breaks down the ink’s hold on your skin, making it easier to rub off. So, next time ink smudges your hands, grab that sanitizer and watch the chemical reaction work its magic for quick removal.

    Is It Safe to Use Nail Polish Remover on Skin Ink Stains?

    You can use nail polish remover to get rid of ink stains, but you need to prioritize chemical safety. Acetone in nail polish remover can irritate and dry out your skin, so don’t overuse it.

    Always do a patch test first to check for reactions. After using it, wash your hands thoroughly and apply moisturizer to protect your skin barrier.

    For safer options, try soap and water or gentler removers instead.

    Conclusion

    Now that you know how to tackle ink stains quickly and gently, why let a little ink ruin your day? With simple soap washing, rubbing alcohol for stubborn spots, and natural scrubs, you can keep your hands clean without harsh damage.

    Remember to care for your skin afterward and avoid future stains with smart habits. Isn’t it easier to enjoy your work when your hands stay ink-free and comfortable?

  • How to Remove Gel Ink From Clothes in 7 Easy Steps

    How to Remove Gel Ink From Clothes in 7 Easy Steps

    To remove gel ink from clothes, act quickly before the stain sets. Start by applying alcohol-based hand sanitizer to loosen the ink, then blot gently and rinse with cold water.

    If needed, use Clorox 2™ or specialized removers for stubborn spots. Check the stain after treatments and avoid machine drying until it’s fully gone.

    For whites, use diluted bleach carefully. Following these steps boosts stain removal success and keeps your fabric safe.

    Keep going to explore detailed tips and precautions.

    How to Recognize Gel Ink Stains on Clothes

    vibrant glossy textured stains

    Although gel ink stains can be tricky to spot at first, you’ll notice they stand out because of their vibrant colors and glossy, slightly raised texture. When gel ink lands on your clothes, it often forms thick, textured marks that feel different from water-based ink stains.

    Gel ink stains stand out with vibrant colors and a glossy, raised texture unlike typical water-based ink marks.

    You might see bright blues, reds, or darker shades depending on the pen, making the stain more noticeable. Gel ink stains resist water and don’t wash out easily with regular laundry.

    If you touch the stain lightly, you might even feel a smudged or smooth area, revealing its gel-like nature. Since gel ink sets quickly, especially with pressure or heat, these stains tend to be localized rather than widespread.

    Recognizing these unique traits on your clothes helps you identify a gel ink stain accurately and prepares you for the right removal methods.

    Why Acting Quickly Removes Gel Ink Better

    When you act quickly on a gel ink stain, you stop the ink from settling deep into the fabric fibers. This makes it much easier to remove. Prompt action guarantees the gel stain hasn’t dried or bonded tightly with the fabric, which can complicate stain removal.

    Here’s why you should always act quickly:

    • Prevents the gel ink from drying and becoming stubborn
    • Stops the stain from penetrating deeper into fibers
    • Reduces the chance of ink setting due to heat from washing or drying
    • Increases the likelihood of fully removing the stain in one treatment
    • Minimizes damage to the fabric by avoiding harsh repeated cleaning

    Pre-Treat Gel Ink Stains With Hand Sanitizer

    apply sanitizer blot rinse

    If you want to tackle gel ink stains effectively, start by applying an alcohol-based hand sanitizer directly onto the stain. The sanitizer helps break up the gel ink particles, making them easier to remove. Allow it to sit for a few minutes to loosen the ink.

    Then, gently blot the area with a clean cloth or paper towel. Avoid rubbing to prevent spreading the stain. For better penetration, use a cotton ball soaked in hand sanitizer to dab the stain.

    Finally, rinse the treated area with cold water before washing the garment.

    Step Action Purpose
    1. Apply sanitizer Generously on gel ink stain Breaks down ink particles
    2. Let sit Wait a few minutes Loosens gel ink
    3. Blot stain Use cloth/paper towel Lifts excess ink & sanitizer
    4. Dab with cotton ball Soaked in hand sanitizer Ensures deeper penetration
    5. Rinse with cold water Before washing Prepares fabric for cleaning

    Pre-treating with hand sanitizer is a simple, effective first step.

    Use Clorox 2™ and Specialized Removers for Tough Gel Ink

    You’ll want to apply Clorox 2™ directly to the stain and let it sit for about 10 minutes without letting it dry. If you’re dealing with tougher gel ink spots, don’t worry—just repeat this process or try using specialized removers to up your chances of getting it out. After that, make sure to follow up with a hot wash that’s safe for your fabric. Then, air dry it so you can see if the stain is really gone.

    Clorox 2™ Application Tips

    Although gel ink stains can be stubborn, applying Clorox 2™ directly with the cap lets you target the affected area effectively. For best gel ink removal, follow these Clorox 2 stain pretreatment tips:

    • Apply Clorox 2™ straight from the cap onto the stain for precise coverage.
    • Gently rub the product into the fabric to boost penetration.
    • Set a timer and let it sit for exactly 10 minutes.
    • Prevent the solution from drying out to keep its stain-fighting action strong.
    • If the stain remains, repeat the pretreatment for better results.

    Choosing Specialized Removers

    When Clorox 2™ alone doesn’t fully lift stubborn gel ink stains, combining it with specialized removers can boost your results. Products like Lift-Off: Pen, Ink, and Marker Graffiti Remover are designed specifically to break down tough gel ink stains better than general household items.

    When using specialized removers, always follow product instructions carefully, paying close attention to application time and whether you need to rinse or soak the fabric before washing. Before treating your entire garment, test the remover on a small, hidden area to avoid any fabric damage.

    Enhancing Ink Removal

    If stubborn gel ink stains resist initial treatment, applying Clorox 2™ directly and letting it sit for 10 minutes can boost your chances of removal. This pretreatment allows the stain remover to penetrate deeply, breaking down tough gel ink.

    To enhance ink removal, try these tips:

    • Gently rub Clorox 2™ into the stain for better absorption
    • Repeat the pretreatment if the stain persists
    • Wash the fabric in the hottest water safe for it, adding Clorox 2™
    • Use specialized stain removers designed specifically for ink
    • Combine Clorox 2™ with these removers for a stronger effect

    Assess and Repeat Treatment Before Washing

    After your first treatment, take a close look at the stain to see if the gel ink is starting to lift. If you can still see the mark, don’t worry—just apply your chosen solution again. Keep repeating this process until the stain fades quite a bit before you wash it. This way, you’ll avoid setting the stain permanently.

    Evaluate Stain Progress

    Although you may feel tempted to wash the garment immediately, you should carefully evaluate the stain’s progress after each treatment. This step assures you don’t set the gel ink permanently by washing too soon.

    To effectively evaluate the stain, consider these points: use good lighting or a magnifying glass to closely inspect the stain. Check if any ink remains visible or has darkened after treatment.

    Avoid air drying until the stain is completely gone to prevent setting. Assess after each cleaning cycle to determine if further action is needed. Understand that stubborn gel ink stains may require multiple treatments before washing.

    Repeat If Necessary

    When the gel ink stain doesn’t disappear completely, you’ll want to apply your chosen stain remover again and gently dab the spot before washing. Assess the stain after each treatment, and if any ink remains, reapply the stain remover and let it sit for several minutes.

    Repeat this process as needed, especially for stubborn or older stains. Always check the stain before drying, since heat can set the ink permanently. Multiple treatments might be necessary, but patience will pay off.

    Step Action
    1 Apply stain remover
    2 Let it sit for a few minutes
    3 Gently dab the stain
    4 Assess stain progress
    5 Repeat if ink remains visible

    Machine Wash Clothes After Pretreatment

    effective gel ink removal

    How should you machine wash clothes to effectively remove gel ink stains after pretreatment? Once you’ve treated the gel ink stain with a suitable pretreatment, it’s time to use your washing machine wisely to boost ink removal. Follow these steps to get the best results during the wash cycle:

    Use the hottest water temperature safe for the fabric, as indicated on the care label. Add extra laundry detergent or a stain-fighting product like Clorox 2™ for Colors to enhance cleaning power.

    Run a full wash cycle to thoroughly rinse away ink residues and cleaning agents. Check the garment immediately after washing to see if the gel ink stain has faded or disappeared.

    Avoid machine drying at this stage. Air dry the clothes to prevent setting any leftover ink permanently.

    If the stain remains, repeat pretreatment and washing before drying. This approach guarantees you don’t lock in the stain with heat, giving you a greater chance of complete gel ink removal.

    Safely Use Bleach on White Clothes and Dry Properly

    Since gel ink stains can be stubborn, safely using bleach on white, bleach-safe clothes can make a big difference. Start by pre-treating the stain with an alcohol-based hand sanitizer to help loosen the ink. Then, soak the garment fully submerged in a solution of ¼ cup bleach per gallon of water for 5 minutes.

    After soaking, pour off the bleach solution to avoid over-bleaching or damaging the fabric. Next, wash the clothes in the hottest water allowed by the care label. Add 1/3 cup of bleach to the dispenser for effective stain removal.

    Once washed, air dry the clothes instead of using heat. Heat can set any remaining ink stain, making it harder to remove. After drying, inspect the garment carefully. If the stain remains, repeat the bleach soak and wash process before drying again.

    This method guarantees you safely remove gel ink while protecting your white clothes.

    Frequently Asked Questions

    Can Gel Ink Stains Be Removed From Delicate Fabrics Like Silk?

    Yes, you can remove gel ink stains from delicate fabrics like silk, but you need to approach silk stain removal with care due to fabric sensitivity. Use a gentle, alcohol-based solution for delicate cleaning, testing it on a hidden spot first. Avoid harsh chemicals that damage silk.

    Dab the stain gently without rubbing, and air dry afterward. Multiple mild treatments might be necessary to fully lift the gel ink without harming your fabric.

    Is It Safe to Use Rubbing Alcohol on All Clothing Types?

    You shouldn’t assume alcohol safety applies to all clothing types. It works best on sturdy fabrics like cotton or polyester but can damage delicate ones like silk or wool.

    Always check fabric compatibility before using rubbing alcohol, especially if the stain severity is low. Do a patch test first to avoid discoloration or weakening fibers.

    If in doubt, follow care labels or try gentler methods to protect your clothes.

    How Long Should I Soak Clothes With Gel Ink Stains?

    You should soak clothes with gel ink stains for about 10 to 15 minutes, depending on the stain duration and how deep the ink has penetrated. If the ink has just set, a shorter soaking time works well. But deeper stains might need up to 30 minutes.

    Avoid soaking longer because it can damage the fabric or fade colors. Always check the care label first. Then, rinse thoroughly after soaking to remove loosened ink and cleaning agents.

    Will Gel Ink Removal Methods Damage Printed Designs?

    Think of your printed design as a delicate painting, vulnerable to the wrong brushstrokes. Yes, gel ink removal methods can risk damage if ink penetration has gone deep or if the fabric isn’t colorfast.

    You’ll want to act cautiously, using gentle solvents and testing small areas first. Also, consider storage precautions. Keeping stained clothes away from heat before treatment helps preserve both the stain and your design’s vibrancy.

    Can Gel Ink Stains Be Removed After Multiple Washes?

    Yes, you can remove gel ink stains after multiple washes, but it’s trickier. You’ll need to use chemical solvents or strong DIY remedies like alcohol-based sanitizer to break down the ink. Don’t rely on washing alone. Pre-treat stains promptly to boost removal chances.

    To avoid this hassle, focus on stain prevention by treating ink spots immediately. If the stain’s stubborn, specialized products or professional cleaning might be your best bet.

    Conclusion

    Removing gel ink stains doesn’t have to be a hassle, especially when you act fast. Did you know that treating stains within the first 10 minutes can increase removal success by up to 90%?

    By following these simple steps, starting with hand sanitizer and ending with a proper wash, you’ll keep your clothes looking fresh and ink-free. Remember, quick action and the right products make all the difference in saving your favorite outfits.

  • How to Remove Blue Ink From Clothes in 7 Easy Steps

    How to Remove Blue Ink From Clothes in 7 Easy Steps

    To remove blue ink from clothes, act fast by blotting excess ink gently without rubbing.

    Test an alcohol-based solvent on a hidden spot, then apply it to break down the ink.

    Rinse the fabric with cold water from the back to loosen the stain.

    Pretreat with detergent or stain remover, then wash in the proper water temperature.

    Air dry and repeat if any ink remains.

    Keep following these steps carefully to fully restore your garment.

    Spot the Blue Ink Stain and Start Treatment Quickly

    act quickly blot stain

    When you spot a blue ink stain on your clothes, act quickly to blot the excess ink with a clean cloth or paper towel without rubbing. Rubbing can spread the stain or push it deeper into the fabric. Identifying the exact location of the blue ink stain early allows you to treat it promptly, increasing the chances of successful stain removal.

    Fresh ink is much easier to handle, so don’t wait for the ink to dry and set into the fabric. Carefully inspect the stained area to confirm your treatment process covers every part of the stain. Timing is vital. Starting treatment soon after the stain occurs considerably improves your chances of complete removal.

    Blot the Blue Ink Gently to Remove Excess Ink

    Although it might be tempting to rub the stain, gently blotting the blue ink with a clean paper towel or cloth is the best way to lift excess ink without spreading it further. Start by placing a clean, absorbent towel underneath the stained area to catch any ink that comes off during the blotting process.

    Use a fresh, dry clean towel each time you blot to avoid reapplying ink back onto the fabric. Remember to gently blot, don’t press too hard or rub, as this helps remove surface ink without pushing it deeper into the fibers.

    Repeat the blotting process several times until you see no more excess ink transferring onto the towel. This careful approach will prevent spreading the stain and protect the fabric from damage.

    Taking these steps ensures you remove as much blue ink as possible before moving on to further stain treatments.

    Test Solvent Safety and Apply Alcohol-Based Treatment

    test apply safely remove

    After you’ve gently blotted away as much excess ink as possible, the next step is to test an alcohol-based solvent on a hidden part of your fabric. This guarantees fabric safety and helps prevent fabric damage. Here’s how to test solvent safety and apply alcohol-based treatment effectively:

    1. Test inconspicuous area: Dab a small amount of rubbing alcohol or hand sanitizer on a hidden spot and wait 10 minutes to check for colorfastness or damage.
    2. Soak stain: If safe, saturate the ink stain with the alcohol-based solvent, ensuring it penetrates the fibers completely.
    3. Apply alcohol-based treatment: Let the solvent sit for 10-15 minutes to break down the blue ink.
    4. Avoid delicate fabrics: For silk or wool, always test first, as alcohol-based solvents may cause discoloration or damage.

    Following these steps helps you safely and effectively tackle blue ink stains without harming your clothes.

    Rinse Fabric With Cold Water to Loosen Blue Ink

    To prevent the blue ink from setting deeper into the fabric, you’ll want to rinse the stained area immediately with cold water. Doing this promptly helps dilute the ink and stops it from embedding further into the fibers.

    Hold the fabric under cold running water from the back of the stain. This technique pushes the ink out rather than driving it deeper into the fabric. Cold water is essential because hot water can cause the ink to set, making it much harder to remove later.

    As you rinse, you’ll notice the ink loosening and washing away, which considerably improves your chances of fully removing the stain. The quicker you act to rinse the fabric with cold water, the better the outcome will be in loosening the ink before it dries.

    This simple step is vital for managing blue ink stains effectively and preparing the fabric for any further treatment.

    Pretreat Blue Ink Stains With Detergent or Stain Remover

    pre treat stain thoroughly first

    Once you’ve rinsed the stain with cold water, you can move on to pretreating the fabric with detergent or a stain remover. This step is vital for effective stain removal of blue ink. Here’s how to pretreat properly:

    1. Apply a commercial stain remover or liquid laundry detergent directly onto the blue ink stain, ensuring full coverage.
    2. Give the fabric a gentle rub with your fingers or a soft brush to help break down the ink particles.
    3. Let the pretreated area sit for 5-10 minutes to loosen the stain before you wash.
    4. For stubborn stains, repeat the application of detergent or stain remover to boost effectiveness.

    Remember to test the stain remover on an inconspicuous area first to avoid damaging your fabric. Pretreating properly sets you up for a successful wash and helps keep your clothes ink-free.

    Wash Clothes in Proper Water Temperature for Blue Ink

    Although selecting the right water temperature depends on your fabric type, washing blue ink stains in hot water often breaks down water-based inks more effectively. Before tossing your garment into the laundry, check the fabric care label to avoid damage like shrinking or discoloration.

    For durable fabrics, using hot water (above 130°F) enhances stain removal, especially when combined with pretreatment using detergent or a stain remover. However, if you’re dealing with delicate materials, stick to cold or lukewarm water to prevent setting the stain further or harming the fabric.

    Choosing the proper water temperature maximizes the effectiveness of your stain removal efforts and helps dissolve the ink thoroughly. Remember, pairing pretreatment with the right water temperature can make a significant difference in removing stubborn blue ink from your clothes.

    Always tailor your approach based on fabric care instructions to keep your garments safe and clean.

    Air Dry and Repeat Treatment if Blue Ink Remains

    After you’ve treated your clothes, just let them air dry completely. This helps make sure you don’t accidentally set any leftover ink with heat. Once they’re dry, take a good look at the stain to see if it’s gone.

    If it’s still there, don’t worry! Sometimes stubborn stains need a few more rounds of treatment and air drying before they finally disappear. So, just repeat the process as needed until the ink is completely gone.

    Importance Of Air Drying

    Why should you always air dry your clothes after treating blue ink stains? Air drying clothes lets you check if the stain removal worked before heat sets the stain. Using a dryer too soon can set leftover ink, making it much harder to remove.

    Here’s why air drying is essential:

    1. It prevents heat from permanently setting any leftover ink.
    2. You can visually inspect the fabric for residual ink.
    3. It lets you repeat stain treatment if the ink remains.
    4. It protects delicate fabrics from heat damage.

    Monitoring Stain Removal Progress

    One essential step in removing blue ink stains is to air dry your garment completely before checking the results. Once dry, carefully inspect the stain to evaluate your stain removal progress.

    If you notice residual ink or stubborn stains, avoid using any heat setting like a dryer, as heat can permanently set the stain. Instead, repeat the process by applying pre-treatment again and washing the garment.

    Air drying after each treatment allows you to accurately assess whether the stain is fading or still present. This cycle of air drying and reapplying pre-treatment is vital for tackling tough ink stains effectively.

    When To Repeat Treatment

    If blue ink still stains your garment once it’s completely dry, you should repeat the treatment process to boost your chances of removal. Heat can set the stain, so always air dry before checking if the stain remains. For stubborn stains, multiple cycles may be necessary.

    Follow these steps to repeat treatment effectively:

    1. Thoroughly soak the stained area with your chosen solvent.
    2. Gently blot or scrub the stain to loosen the ink.
    3. Avoid using heat to dry, since it can heat set the stain.
    4. Air dry the garment completely before reassessing.

    Repeat these steps until the blue ink disappears. Being patient and careful during each repeat treatment helps prevent permanent damage and increases the likelihood of complete ink removal.

    Frequently Asked Questions

    Can Blue Ink Stains Be Removed From Delicate Fabrics Like Silk?

    Yes, you can remove blue ink stains from delicate fabrics like silk, but you’ve got to take fabric sensitivity and ink absorption carefully into account. Ink penetration often causes stain layering, making removal tricky.

    Since silk’s fabric dyeing can react poorly to harsh stain removal tools, you’ll want to use gentle methods compatible with the dye. If stain persistence is high, avoid aggressive treatments to protect the fabric and prevent damage.

    Is It Safe to Use Bleach on Blue Ink Stains?

    You might think bleach instantly removes blue ink stains, but it’s not that simple. Bleach’s chemical reactions can break down ink composition, yet stain penetration and fabric compatibility matter.

    Bleaching risks include fabric damage and discoloration, especially on delicate or colored materials. Stain persistence varies, so test first.

    Instead, try safer removal techniques and focus on stain prevention to protect your clothes. Bleach works best only on white, bleach-safe fabrics.

    How Long Should I Wait Before Treating a Dried Blue Ink Stain?

    You shouldn’t wait long before treating a dried blue ink stain because timing delay allows stain fixation and ink oxidation, making removal harder. Once the drying process completes, stain penetration deepens due to fabric absorption, reducing your treatment window.

    Ideally, treat the stain as soon as you notice it’s dried to prevent further stain set. If you must wait, avoid heat to slow fixation and improve your chances of successful removal later.

    Can Blue Ink Stains Be Removed Using Natural or Homemade Remedies?

    You might be surprised that over 60% of people trust natural remedies for stain removal. Yes, blue ink stains can be tackled using homemade solutions like white vinegar and baking soda.

    These eco friendly methods use plant based treatments and herbal extracts to gently break down ink. Organic stain removal through DIY cleaning offers chemical free techniques that are safer for you and the environment, though stubborn stains might need repeated efforts.

    Will Removing Blue Ink Affect the Color or Texture of My Clothes?

    Removing blue ink can affect your clothes’ color and fabric texture depending on the fabric type and material sensitivity. Older, set-in stains or intense ink might need stronger treatments, which can risk dye interaction and color fading.

    Delicate fabrics demand gentle methods to preserve color and avoid texture damage. Washing effects also matter because repeated cycles may weaken fibers.

    Always test a hidden spot first to see how your fabric reacts before fully treating the stain.

    Conclusion

    Now that you’ve tackled the blue ink stain step by step, your clothes can breathe easy again. Remember, acting fast is like catching a wave; you either ride it or miss the chance.

    Blot gently, test solvents, and treat with care to keep your fabric looking fresh. If the stain lingers, don’t lose heart. Repeat the process until the ink fades away, leaving your clothes spotless once more.

  • How to Refill HP Ink Cartridge in 7 Easy Steps

    How to Refill HP Ink Cartridge in 7 Easy Steps

    To refill your HP ink cartridge in 7 easy steps, first gather ink, syringes, and cleaning supplies, then prepare a clean workspace.

    Turn off and unplug your printer, remove the cartridge carefully, and locate the refill hole by peeling back labels.

    Fill a syringe with ink and inject it slowly to avoid bubbles.

    Seal the hole, clean any spills, reinstall the cartridge, and power on your printer.

    Follow these steps to save money, and you’ll also find tips to keep your prints flawless.

    Gather Tools and Prepare Workspace

    prepare tools and workspace

    Where should you begin when refilling your HP ink cartridge? First, gather all the necessary tools and materials to prepare for a smooth refilling process. Make certain you have compatible ink, syringes, seal tape or plugs, and a refill kit ready.

    Next, set up a clean, well-lit workspace covered with newspapers or paper towels to catch any ink spills. You’ll want this area to be free from dust and static to avoid contaminating your cartridge.

    For safety, wear gloves and safety glasses to protect your skin and eyes from ink stains and splashes. Keep your tools and materials organized and within easy reach so you won’t have to pause looking for something mid-refill.

    Turn Off Printer and Remove Cartridge

    First, go ahead and turn off your printer, then unplug it to make sure everything is safe while you’re taking out the cartridge. Next, open up the printer cover so you can get to the ink cartridge easily. After that, press the release latch and carefully pull the cartridge out—just be sure not to touch the nozzles or contacts.

    Power Down Printer

    Why should you power down your printer before removing the ink cartridge? Powering down and unplugging your printer guarantees safety and prevents damage during cartridge removal.

    Start by turning off the printer and unplugging it from the power source. Next, open the printer cover or access panel to access the cartridge slot.

    The ink cartridge will be positioned in the carriage and needs to be carefully ejected. Press the release latch or gently lift the cartridge out to avoid harming internal components.

    Wait at least 10 minutes after powering down before handling the cartridge, allowing residual ink to settle. This process protects you and your printer while preparing for a smooth cartridge replacement or refill.

    Safe Cartridge Removal

    How do you safely remove an ink cartridge from your printer? First, ensure your safety by turning off the printer and unplugging it from the power source.

    Next, open the printer cover carefully to access the ink cartridge. Locate the cartridge latch and gently press or release it to unlock the cartridge. Avoid touching the electrical contacts and nozzles during cartridge removal, as this can cause damage.

    Carefully lift the ink cartridge straight out of its slot. To prevent ink spills and protect the cartridge, place it on a clean surface or a paper towel. Following these steps ensures a smooth cartridge removal process while maintaining safety and preventing mess or damage to your printer components.

    Find the Refill Hole on Your Cartridge

    locate and access refill hole

    Where exactly is the refill hole on your HP ink cartridge? Typically, the refill hole is located on the top or side of the HP cartridge, sometimes hidden beneath a sticker or label. To identify its exact location, gently peel back any cover or label protecting the cartridge surface.

    Many HP cartridges come with a pre-drilled or factory-made puncture designed specifically for the refilling process. This small hole or vent lets you inject ink without damaging the cartridge.

    Some cartridges even have multiple refill holes for different color chambers, all drilled during manufacturing. If you don’t spot a visible hole, carefully use a sharp tool or needle to create or uncover it, but be cautious not to damage the internal parts.

    Taking time to locate and properly expose the refill hole guarantees a smooth and mess-free refilling process, keeping your cartridge functional and ready to print.

    Fill Syringe and Inject Ink Into HP Cartridge

    Once you’ve located the refill hole, fill your syringe with the correct amount of ink, usually about 4ml for standard cartridges or 10ml for high-yield ones. Carefully insert the needle into the hole to begin injecting.

    Inject the ink slowly and steadily to avoid air bubbles, which can disrupt printing quality. As you inject, monitor the ink level in the syringe and watch the cartridge’s sponge or chamber fill up.

    Inject ink slowly to prevent air bubbles and carefully watch the cartridge fill for optimal printing quality.

    Stop injecting once it’s adequately filled to prevent overfilling, which could cause leaks or damage. Take your time with this step-by-step process, ensuring the syringe needle stays aligned with the fill hole to minimize any disruption to the cartridge’s components.

    When finished, remove the syringe carefully to keep everything intact. At this point, you’ve successfully refilled the cartridge, and the next step will be to seal the fill hole and clean any excess ink to complete the refill process.

    Seal the Refill Hole and Clean Excess Ink

    seal clean wait inspect

    After injecting the ink, you’ll need to seal the refill hole to prevent leaks and keep air out. Use a sealing plug or strong tape to securely close the refill hole on your cartridge. Make sure the seal is tight enough to prevent leaks but not so tight that it blocks ink flow or damages the cartridge.

    Next, take a soft cloth or paper towel to clean any excess ink around the refill hole and cartridge surface. Removing these ink stains helps avoid smudges and keeps your workspace tidy.

    After sealing, let the ink settle for at least 30 minutes to prevent leaks during printing. Over time, regularly check the refill hole’s seal for any signs of ink leakage or drying out. If you notice any issues, don’t hesitate to reseal the hole promptly.

    Proper sealing and cleaning ensure your cartridge performs well and maintains consistent ink flow.

    Reinstall Cartridge and Power On Printer

    Before powering on your printer, carefully reinsert the refilled and sealed cartridge into its correct slot, making sure it clicks securely into place. This secure fit ensures the printer can properly recognize the cartridge during startup.

    Once the cartridge is reinstalled, close the printer cover or lid to allow the printer to detect the new cartridge and prepare for operation. Next, power on the printer by pressing the power button and wait patiently for the startup process to complete.

    Close the cover after reinstalling the cartridge, then power on the printer and wait for startup completion.

    Keep an eye on the indicator lights or display panel to confirm the cartridge is detected and functioning correctly. Proper recognition at this stage is crucial for ideal ink flow and print quality.

    After the printer powers on successfully, you’ll be ready to print a test page to verify everything works as expected. This step confirms the cartridge is properly reinstalled and the ink flow is consistent before you start your regular printing tasks.

    Test Print Your Cartridge and Fix Common Problems

    With the cartridge securely installed and your printer powered on, you can now verify its performance by running a test print. This step confirms proper ink flow and overall print quality after refilling. If you notice faded or uneven colors, run the printer’s cleaning cycle to clear any clogs affecting the print head.

    To troubleshoot common cartridge problems, follow these steps:

    1. Inspect the test print for color accuracy and streaks indicating poor ink delivery.
    2. Check the cartridge and paper for ink leaks or smudges, which can signal sealing issues or overfilling.
    3. If inconsistencies persist, reseal or replace the refill port to restore proper ink flow.

    Performing a print test regularly helps detect early issues, ensuring your cartridge maintains ideal performance and consistent print quality over time.

    Frequently Asked Questions

    How Many Times Can an HP Cartridge Be Refilled Safely?

    You can safely refill an HP cartridge about 3 to 5 times, depending on your refilling techniques and ink quality. Pay close attention to cartridge cleaning and ink compatibility to avoid clogs.

    Use reliable refill kit options and follow the refill process steps carefully. Manage refill frequency and cartridge storage to extend the cartridge’s life.

    Troubleshooting refills helps maintain performance. Remember, after several refills, cost comparison might favor buying a new cartridge to avoid damage.

    Does Refilling Affect Printer Warranty Coverage?

    Refilling usually won’t affect your printer warranty if you follow the right refill process using compatible ink and proper refilling tools. Avoid ink leakage by ensuring cartridge sealing and allowing adequate ink drying time.

    Using quality refill kits and mastering refill techniques helps prevent damage. However, frequent refilling or poor refilling can cause issues, which might void coverage if they lead to printer damage.

    Keep refilling costs low but prioritize care to protect your warranty.

    What Type of Ink Is Best for HP Cartridges?

    Wondering what ink type works best for your HP cartridges? You want inks with proven ink compatibility that maintain color accuracy and minimize ink drying time.

    Pigment-based inks are ideal. They extend cartridge lifespan and reduce refill frequency. Choosing high-quality refill kits ensures smooth refill procedures and proper ink storage, preventing clogs and leaks.

    Paying attention to the ink drying process also helps you avoid smudging and keeps prints crisp every time.

    Can Refilled Cartridges Cause Printer Damage?

    Yes, refilled cartridges can cause printer damage if you’re not careful. Cartridge leakage from overfilling or poor seals can harm print heads and lower print quality.

    Using incompatible ink or cheap refilling tools risks clogging and shortens cartridge lifespan. Frequent refilling also increases ink drying issues inside the cartridge.

    To save on ink costs safely, always use a reliable refill kit and make sure your ink is compatible to protect your printer.

    How to Dispose of Used Ink Cartridges Responsibly?

    You might think tossing used cartridges in the trash is easier, but responsible disposal methods are key to reducing environmental impact. Participate in ink cartridge recycling and cartridge recycling programs offered by HP or local centers to guarantee eco friendly waste handling.

    These waste management strategies support sustainable printing practices and hazardous waste handling. Following cartridge disposal tips helps you practice eco conscious printing, conserving resources and minimizing pollution.

    Conclusion

    Refilling your HP ink cartridge is like tending a small garden. Each step carefully nurtures your printer’s life. By gathering tools, injecting fresh ink, and sealing the refill hole, you’re watering a seed that will soon bloom with vibrant prints.

    Just as a gardener tests soil and adjusts care, you’ll test your cartridge and troubleshoot. With patience and care, your printer will flourish again, saving you money and reducing waste with every colorful page.

  • How to Refill Canon 745 Ink Cartridge in 10 Easy Steps

    How to Refill Canon 745 Ink Cartridge in 10 Easy Steps

    To refill your Canon 745 ink cartridge, first confirm it’s empty by checking ink levels or shaking it gently.

    Gather a compatible refill kit and turn off the printer before carefully removing the cartridge.

    Locate and prepare the refill and air vent holes, then slowly inject ink using a syringe without sealing the vent yet.

    Seal the holes securely, reinstall the cartridge, and test print.

    If you want to guarantee perfect results, there are helpful tips and troubleshooting advice you can explore next.

    Confirm Your Canon 745 Cartridge Is Empty

    verify cartridge ink level

    Before you begin refilling, you’ll want to verify that your Canon 745 cartridge is truly empty. Most printers display an “empty” message when the ink runs out, but sometimes this warning isn’t accurate.

    To confirm, gently shake the cartridge and listen for any ink movement inside. If you don’t hear anything, that’s a good sign the cartridge is empty. You can also remove the cartridge and check the ink level through the transparent part of the casing.

    Keep in mind that clogged nozzles or sensor errors might cause your printer to think the cartridge is empty when it still contains ink. Some Canon 745 cartridges have chips that track ink levels; these can sometimes be reset if the cartridge isn’t physically empty but shows as so.

    Gather Your Tools and Canon 745 Refill Kit

    Once you’ve confirmed your Canon 745 cartridge is empty, the next step is gathering the right tools and a compatible refill kit. Make sure your refill kit is specifically designed for the Canon 745 cartridge and includes the correct ink color to avoid print issues.

    Prepare a clean workspace by covering surfaces to prevent ink stains. Also, have all your materials within easy reach to keep the process smooth.

    Here’s what you’ll need:

    1. A Canon 745 refill kit with ink, syringe, and thumb drill
    2. Gloves to protect your hands
    3. A utility knife for opening cartridge seals
    4. Rubbing alcohol and clean cloths for cleaning spills and the cartridge

    Having these tools ready guarantees a quick, efficient refill while maintaining print quality. This preparation sets you up perfectly for the next step in safely removing your cartridge.

    Remove Your Canon 745 Cartridge Safely

    turn off open remove safely

    Before you start, make sure to power off and unplug your printer for safety. It’s a simple step, but really important to avoid any accidents. Next, gently open the cartridge access cover—take your time so you don’t accidentally cause any damage. Then, carefully press the latch and remove the Canon 745 cartridge, making sure not to touch the electrical contacts. This will help keep your cartridge in good shape.

    Power Off Printer

    To remove your Canon 745 ink cartridge safely, make sure you power off the printer and unplug it from the electrical outlet to avoid electrical shock and potential damage. Before handling the empty ink cartridge, follow the instructions carefully to prevent spills and damage. This Simple Guide helps you save money by refilling instead of buying new cartridges at office supply stores.

    1. Power off the printer completely to ensure safety.
    2. Wait for internal parts to cool down before removal.
    3. Handle ink cartridges by the edges, avoiding contact with nozzles.
    4. Use electrical tape to cover the small hole after refilling to keep the cartridge clean.

    Taking these steps ensures your printer cartridge works well and makes getting ink easy to clean and put back.

    Open Cartridge Access

    How do you safely access the Canon 745 cartridge inside your printer? First, make sure your printer is turned off and unplugged to avoid any electrical issues.

    Carefully open the printer cover to reveal the cartridge slots. Depending on your model, gently press down or lift the cartridge latch to release the Canon 745 cartridge.

    When you handle the cartridge, grasp it firmly by the sides, avoiding contact with the nozzles or electronic contacts to prevent damage. Use clean, dry hands or wear gloves to keep ink stains and contamination at bay.

    Once removed, place the Canon 745 cartridge on a clean, protected surface if you plan to refill or replace it later. This careful approach guarantees safe and efficient cartridge access.

    Gently Remove Cartridge

    Although you’ve already accessed the cartridge compartment, you’ll need to handle the Canon 745 cartridge with care as you remove it. Proper cartridge handling guarantees you avoid damage to both the cartridge and printer.

    Before removal, turn off and unplug your printer to prevent electrical issues. Follow these steps for safe cartridge handling:

    1. Open the printer cover gently, avoiding any force.
    2. Press down lightly on the cartridge to release its lock.
    3. Lift the cartridge straight out, keeping it level.
    4. Hold the cartridge by its edges, steering clear of nozzles and contacts.

    Using gloves or a clean cloth can help prevent ink stains on your hands. This careful approach protects your Canon 745 cartridge and maintains printing quality.

    Find and Prep the Refill Hole

    locate and puncture refill hole

    First, you’ll want to find the refill hole on your Canon 745 cartridge. It’s usually hidden under a label or sticker, so take a close look. Once you spot it, gently peel back or cut the covering to reveal the area.

    Next, get the surface ready by carefully puncturing the designated spot. Just be sure not to damage the cartridge while you’re doing this.

    Locating Refill Hole

    Where exactly do you find the refill hole on your Canon 745 ink cartridge? Hole identification is vital before you start refilling. Typically, the refill hole hides under a label or tape on the top or side of the cartridge.

    To locate it, first inspect the cartridge top and sides for any labels or tape. Then, use a utility knife or scalpel to gently peel back the covering without damaging the cartridge. Look for a small circle or dot marking the exact spot for drilling or puncturing.

    Also, check if there’s a plug or rubber stopper that needs removal or puncturing to access the refill port. Correct hole identification ensures a smooth refill process without leaks or damage.

    Preparing Hole Surface

    Once you’ve uncovered the refill hole, make certain the surrounding area is clean and free from dust, ink residue, or leftover adhesive. Proper hole preparation is essential for a smooth refill process.

    Carefully peel back the sticker or label covering the hole using a utility knife or sharp object, avoiding damage to the cartridge. If the label resists, gently lift it with tweezers or a flat tool to prevent tearing.

    After exposing the hole, clean the surface thoroughly to remove any debris. Finally, use a thumb drill or pin to puncture the refill hole precisely at the marked spot. This careful hole preparation ensures the ink flows correctly and prevents leaks during refilling your Canon 745 ink cartridge.

    Find and Keep the Air Vent Open

    Although it may be hidden under a label or tape, you need to locate the air vent on your Canon 745 ink cartridge before refilling. This vent is usually an L-shaped groove or small hole that regulates airflow, which is essential for smooth ink flow. Proper vent maintenance prevents vacuum formation that could block ink movement.

    To find and keep the air vent open, follow these steps:

    1. Gently peel back or remove the label covering the vent without damaging it.
    2. Identify the small hole or groove designed for air exchange.
    3. Ensure the vent remains unobstructed during the entire refill process.
    4. Avoid sealing the vent until the cartridge is fully used to prevent pressure buildup.

    Maintaining the vent open ensures consistent ink supply, avoids leaks, and prolongs cartridge life. Proper vent maintenance is key to efficient refilling and peak printing performance.

    Fill the Cartridge Slowly With Canon 745 Ink

    When you start refilling your Canon 745 ink cartridge, fill the syringe slowly to prevent overflow and assure precise ink delivery. Maintaining a steady ink flow ensures the sponge inside absorbs ink evenly without leaks or air bubbles.

    Inject ink gradually through the refill hole, pausing when the ink wells up to avoid excess pressure. Use gentle, controlled pressure on the syringe plunger to prevent sudden surges that could damage the cartridge or cause spillage.

    After filling, pause briefly to let the ink settle, then check the cartridge to avoid overfilling.

    Step Key Point
    Slow Injection Prevents overflow and spillage
    Controlled Pressure Maintains steady ink flow
    Pause & Settle Ensures even absorption

    Seal Canon 745 Refill and Vent Holes

    After you refill your Canon 745 cartridge, make sure to seal the refill holes with tape right away. This helps prevent any leaks or evaporation. Also, don’t forget the vent hole—it needs to be covered too. But here’s the trick: poke a tiny air hole in the tape over the vent. This little hole keeps the pressure balanced inside the cartridge. Just be sure all the seals are airtight so your ink flows smoothly and your printer performs at its best.

    Proper Refill Hole Sealing

    Since proper sealing prevents leaks and pressure loss, you need to carefully seal the refill hole with waterproof tape or a rubber plug. Using the right seal technique guarantees your Canon 745 cartridge performs flawlessly without ink spills.

    Follow these steps for effective sealing:

    1. Choose waterproof tape or a rubber plug to cover the refill hole securely.
    2. Poke a small vent hole through the seal to allow air to escape and prevent vacuum formation.
    3. Position the vent hole away from the ink refill area to avoid contamination or leaks.
    4. After sealing, check for airtightness by inspecting for any ink or air leaks.

    This seal technique maintains pressure and prevents ink drying, ensuring your cartridge works smoothly after refilling.

    Vent Hole Management

    Sealing the refill hole properly sets the stage for managing the vent hole on your Canon 745 cartridge. Vent sealing is essential to prevent unwanted ink flow and maintain the cartridge’s internal pressure.

    After refilling, poke a small vent hole through the tape covering the vent to let air in and avoid vacuum buildup. During the refill, keep the vent open temporarily so air can escape, but don’t forget to seal it afterward with tape.

    This controlled vent balances air pressure and ink flow, ensuring consistent printing without leaks or quality issues. Proper vent sealing keeps your cartridge airtight, prevents ink leakage, and maintains smooth ink delivery, making your refill process effective and mess-free.

    Reinstall the Cartridge and Secure It Correctly

    When you reinstall the Canon 745 ink cartridge, carefully align it with its designated slot so the contacts and nozzles fit perfectly. Proper cartridge alignment is crucial to ensure smooth printing and avoid errors.

    Follow these steps to secure the cartridge correctly:

    1. Match the color-coded labels on the cartridge with the corresponding slots in the printer.
    2. Gently press the cartridge into the slot until you hear a click, confirming it’s locked in place.
    3. Check that the cartridge sits flush with the printer’s carriage, preventing any misalignment.
    4. Verify the contacts and nozzles are oriented properly to maintain optimal ink flow.

    Taking these steps guarantees that the cartridge is installed securely and aligned precisely. This careful placement helps your printer recognize the cartridge and ensures consistent print quality without interruptions.

    Test Print the Cartridge

    After you’ve securely reinstalled the Canon 745 ink cartridge, the next step is to run a test print. This helps you verify that ink flows correctly and print quality is restored.

    Securely reinstall the Canon 745 ink cartridge, then run a test print to confirm proper ink flow and print quality.

    On your computer, open the printer’s properties and select the “Print Test Page” option to start. Before printing, double-check that the cartridge is properly installed and seated to avoid errors or incomplete prints.

    Once the test print finishes, examine the page carefully. Look for consistent color output, clear text, and ensure there are no streaks or missing sections.

    If the print looks good, you’ve successfully refilled the cartridge. If not, it may indicate the need for further cleaning or adjustments.

    Running a test print right after refilling guarantees your Canon 745 cartridge is ready for everyday printing without issues.

    Troubleshoot Common Canon 745 Cartridge Issues

    Although refilling your Canon 745 cartridge can restore its functionality, you might still encounter issues like false “ink out” errors or poor print quality. These problems often stem from sensor malfunctions or uneven ink distribution.

    To troubleshoot effectively, focus on the following steps:

    1. Perform Sensor Cleaning using an alcohol-dampened cloth to clear clogged or dirty sensors, which often cause false ink level readings.
    2. Check the cartridge seal after refilling to prevent ink leakage or air intake that disrupts printing.
    3. Run a printer cleaning cycle or reset the printer to improve ink flow and fix streaks or color inconsistencies.
    4. Verify even and sufficient ink refilling to avoid incomplete prints or streaks.

    Frequently Asked Questions

    How Long Does a Refilled Canon 745 Cartridge Typically Last?

    A refilled Canon 745 cartridge typically lasts for about 50 to 100 pages, which usually means 2 to 4 weeks with moderate printing. You’ll want to keep durability concerns in mind since refilled cartridges often print around 70-80% of what a new one does.

    If you handle and seal it properly, you can maximize its lifespan. Just remember, frequent use and ink quality also affect how long it lasts.

    Can I Use Third-Party Ink With Canon 745 Cartridges?

    Yes, you can use third-party ink with Canon 745 cartridges, but ink compatibility is essential. Not all third-party inks work well and may cause clogs or poor print quality.

    To avoid issues, choose reputable brands tested specifically for Canon 745. Keep in mind, using non-OEM ink might void your printer warranty. Always check reviews and product specs to confirm the ink matches your cartridge’s requirements for the best results.

    Is It Safe to Reuse a Canon 745 Cartridge Multiple Times?

    You can safely reuse your Canon 745 cartridge about 3 to 4 times before the cartridge’s durability starts to decline noticeably. Each refill slightly wears down internal components and sensors, which might cause print quality issues or errors.

    If you handle the cartridge carefully and follow proper refilling and cleaning steps, you’ll extend its lifespan. Just keep an eye on cartridge durability so you avoid leaks or damage to your printer.

    What Should I Do if My Printer Doesn’T Recognize the Refilled Cartridge?

    If your printer doesn’t recognize the refilled cartridge, start by checking for recognition issues. Wipe the cartridge chip clean with a lint-free cloth or alcohol wipe to remove ink residue.

    Use a resetter tool designed for Canon 745 to reset the chip’s memory. If that doesn’t work, try reinstalling the cartridge, power cycling the printer, or updating the printer’s firmware.

    Persistent issues might require replacing the chip or cartridge.

    How Do I Properly Dispose of Empty or Damaged Canon 745 Cartridges?

    You should properly dispose of empty or damaged Canon 745 cartridges by recycling them through authorized programs. This helps reduce environmental impact by preventing ink leakage and harmful waste.

    Many office supply stores offer free recycling, and some communities hold e-waste collection events. Avoid tossing cartridges in regular trash to protect the environment.

    Recycling may also earn you discounts or incentives, making it a responsible and beneficial choice.

    Conclusion

    Refilling your Canon 745 cartridge is easier than you think. Just when you thought you’d need a new one, you’ll find yourself saving money and reducing waste instead.

    By following these simple steps, you’ll quickly get back to printing sharp documents and vibrant photos. Isn’t it funny how a little patience and the right tools can turn an empty cartridge into a reliable workhorse again?

    Give it a try; you’ll be surprised how satisfying it feels!

  • How to Recycle Ink Cartridges in 7 Easy Steps

    How to Recycle Ink Cartridges in 7 Easy Steps

    To recycle your ink cartridge, first check if it’s eligible by verifying the brand and condition.

    Next, carefully remove it from your printer, avoiding contact with nozzles.

    Clean and inspect it for damage.

    Then, locate a free drop-off or request a prepaid mail label from the manufacturer.

    Package it securely, seal tightly, and address it properly.

    Finally, drop it off or mail it and track your shipment to confirm delivery.

    Keep going to discover helpful tips on every step.

    Check If Your Ink Cartridge Qualifies for Recycling

    check cartridge eligibility criteria

    How do you know if your ink cartridge qualifies for recycling? First, check if it’s compatible with the program by reviewing the manufacturer list or labels on the cartridge itself. Most original cartridges from brands like HP, Canon, Brother, and Lexmark are eligible for free recycling, but some third-party or refilled cartridges might not meet eligibility requirements.

    Also, make sure your cartridge isn’t damaged. Cracks, leaks, or other defects can disqualify it from the program. Pay attention to the specific guidelines of the recycling program, as they often specify acceptable cartridge shapes or whether they accept ink versus toner cartridges.

    Remove Your Ink Cartridge Carefully From the Printer

    Before you take out your ink cartridge, make sure to turn off and unplug your printer. This helps avoid any electrical issues. When you handle the cartridge, try to hold it gently by the edges—avoid touching the contacts or nozzles.

    Take your time when removing it. Carefully lift or push it out without forcing anything, so you don’t accidentally damage the cartridge or the printer.

    Power Off Printer

    Since safety is a priority, you should turn off your printer and unplug it before removing the ink cartridge. Ensuring the device is completely powered off and disconnected prevents electrical shock and protects your printer.

    Follow these steps to remove the cartridge safely:

    1. Power off your printer using the designated button.
    2. Unplug the printer from the power source to guarantee it’s disconnected.
    3. Open the printer’s access panel or cartridge door according to the manufacturer’s instructions.
    4. Handle the ink cartridge carefully by its sides to avoid touching electrical contacts or nozzles.

    Handle Cartridge Gently

    Once your printer is safely powered off and unplugged, you can begin removing the ink cartridge. Handle the cartridge gently by supporting it with both hands to avoid dropping.

    Remove it carefully, applying steady, gentle pressure to prevent damage to the delicate parts. Avoid touching the metal contacts or nozzles, as contact can cause contamination and affect performance.

    Supporting the cartridge while you remove it ensures you maintain control and reduces the risk of cracking or breaking it. Use the following table as a quick reminder of key steps:

    Step Action Tip
    1 Power off and unplug Ensure safety
    2 Support with both hands Maintain control
    3 Handle edges only Avoid contact with contacts
    4 Remove gently Prevent damage to cartridge

    Clean and Inspect the Ink Cartridge for Damage

    inspect clean and check

    Before recycling, it’s a good idea to check the cartridge for any cracks, leaks, or broken parts that might cause issues. You’ll want to make sure you remove any leftover ink carefully to avoid spills while handling it.

    Also, giving the exterior a good clean and taking a close look at the print head can really help ensure the cartridge is ready for recycling or even reuse.

    Checking Cartridge Integrity

    When you’re ready to recycle your ink cartridge, start by carefully inspecting it for any cracks, leaks, or damage that could affect its usability. A thorough cartridge inspection helps prevent issues during recycling or reuse. Follow these steps for an effective damage assessment:

    1. Check for physical damage such as cracks or breaks that might cause leaks.
    2. Inspect the nozzles and contacts to ensure they’re clean and free from dried ink or debris.
    3. Look closely for corrosion on metal contacts and electrical parts, which could impair function.
    4. Confirm there’s no residual ink leaking, as this could create messes during handling.

    If you find serious damage, label the cartridge for special disposal instead of recycling.

    Removing Residual Ink

    How do you safely remove leftover ink from your cartridge to prevent leaks during recycling? First, wear gloves as a key handling precaution to avoid staining your hands with residual ink. Next, gently wipe the cartridge with a lint-free cloth or paper towel to clean the cartridge surface and remove any excess ink.

    Inspect the cartridge carefully for damage such as cracks or leaks that could cause ink spillage during transport. If you notice persistent ink buildup, run a cleaning cycle on your printer or follow manufacturer-recommended ink removal methods to clear it out.

    Finally, ensure the cartridge is completely dry and free of residual ink before packing it for recycling. Thorough cleaning and inspection help prevent messes and protect the cartridge during recycling.

    Find Free Ink Cartridge Recycling Drop-Offs or Mail Labels

    Finding free ink cartridge recycling drop-off locations or obtaining prepaid mail labels is easier than you might think. Many retailers and manufacturers make recycling cartridges straightforward and convenient. To find the best option for you, follow these steps:

    1. Check local retailers like Staples, Best Buy, Target, and Walmart for free drop-off bins designed specifically for ink cartridges.
    2. Visit recycling centers or use online store locators provided by manufacturers to identify nearby drop-off locations.
    3. Request free prepaid mail labels or envelopes from cartridge manufacturers such as HP or Canon to send your cartridges directly from home.
    4. Utilize manufacturer websites to schedule mail-in recycling options or find scheduled collection events.

    Package, Seal, and Address Your Cartridge Correctly

    secure label and package properly

    Before sending your ink cartridge for recycling, make sure you package it securely to prevent leaks and damage during transit. Start by cleaning the cartridge thoroughly to avoid any ink spills. Use the original packaging if you have it; otherwise, choose a sturdy, leak-proof container to enclose the cartridge safely.

    Next, seal the package tightly with strong tape or closures to guarantee the cartridge won’t shift or fall out during shipping. Attach the prepaid shipping label clearly and prominently on the package to streamline its journey to the recycling facility.

    Before sealing the box completely, double-check that the address on the label is accurate and legible to avoid any delays or misdelivery. Taking these steps helps protect the cartridge, supports efficient recycling, and guarantees your package reaches the right destination without issues.

    Drop Off or Mail Your Ink Cartridge for Recycling

    Once your ink cartridge is packaged, sealed, and labeled correctly, you have two convenient options for recycling: dropping it off at designated retail locations or mailing it directly to a recycling center. To drop off your cartridges, visit stores like Staples, Office Depot, or Target, which have dedicated recycling bins.

    Recycle your ink cartridges easily by dropping them off at stores like Staples or mailing them directly to recycling centers.

    Alternatively, many recycling programs from manufacturers like HP and Canon let you mail your cartridges for free using prepaid shipping labels.

    Here’s how to proceed:

    1. Choose to drop off cartridges at a nearby store or opt to mail them to a recycling center.
    2. If mailing, securely pack your cartridges in a sturdy box or envelope.
    3. Remove print heads or circuit boards unless the program states otherwise.
    4. Attach the prepaid shipping label and send via FedEx or USPS with free shipping.

    Following these steps guarantees your recycling ink cartridges reach recycling centers safely and efficiently.

    Track Your Ink Cartridge Recycling Shipment

    Although you’ve already shipped your ink cartridges for recycling, you can stay informed by tracking their progress through the tracking number provided by the courier or the recycling program’s online portal. Use shipment tracking to monitor your cartridge’s journey, from departure to delivery confirmation.

    Most recycling programs send email notifications when your shipment is received and processed, giving you real-time updates on your shipment status.

    To get detailed courier updates, consider creating a free account with the recycling program. This lets you view extensive tracking information and ensures you don’t miss any shipment confirmation notices.

    Whether you use FedEx, USPS, or another carrier, the tracking number allows you to verify that your cartridges are safely en route and that the recycling process is successfully completed.

    Staying proactive with shipment tracking ensures peace of mind and helps support responsible recycling.

    Frequently Asked Questions

    Can Recycled Ink Cartridges Be Refilled and Reused?

    Yes, you can refill and reuse recycled ink cartridges. Cartridge refilling extends ink cartridge lifespan by restoring ink levels with proper refill techniques.

    Many reuse programs and refill stations provide compatible ink formulas to guarantee cartridge durability and print quality. By using these services, you’ll enjoy significant cost savings compared to buying new cartridges.

    Just remember to check for leaks and damages so your refilled cartridge works smoothly every time.

    Are There Environmental Benefits to Recycling Ink Cartridges?

    You might wonder if recycling ink cartridges truly offers environmental benefits, and it absolutely does. By adopting eco-friendly habits like recycling, you actively reduce pollution and manage waste more effectively.

    This practice conserves resources, lowers your carbon footprint, and promotes sustainability practices. The ecological benefits extend beyond just less landfill waste; it supports a circular economy, minimizing the environmental impact tied to producing new cartridges.

    Your small action contributes profoundly to resource conservation.

    How Long Does the Recycling Process Take for Ink Cartridges?

    The recycling timeline for ink cartridges usually takes 1 to 3 weeks. Your cartridge processing starts once recycling facilities receive them, which depends on shipping duration and collection methods.

    Dropping off cartridges at recycling centers might speed up collection, but processing time still varies. Mail-in programs usually take 7 to 14 days for full processing.

    Can I Recycle Empty Toner Cartridges the Same Way?

    You can’t recycle empty toner cartridges the same way as ink cartridges because they need special cartridge disposal. Toner cartridges are larger and often require drop-offs at specific recycling centers or manufacturer collection programs.

    To support eco-friendly practices and waste reduction, check your cartridge collection options for sustainable printing. Proper disposal reduces ink waste and lessens environmental impact, making your recycling efforts more effective and responsible.

    Do Manufacturers Offer Incentives for Returning Cartridges?

    Yes, many manufacturers offer incentive offers through their manufacturer programs and return policies. When you participate in cartridge collection or trade-in schemes, you can earn recycling rewards like discounts, cash-back, or points.

    These corporate partnerships support sustainability initiatives, encouraging you to return used cartridges responsibly. By joining these programs, you not only help the environment but also benefit from rewards designed to motivate ongoing cartridge recycling efforts.

    Conclusion

    Recycling your ink cartridges is like giving them a second chance to shine. By following these simple steps, you’re not just disposing of waste; you’re nurturing a cycle of renewal.

    Each carefully cleaned and sent-off cartridge is a small seed planted for a greener tomorrow. So, take a moment to send your cartridges on their journey and watch how your efforts quietly brighten the world around you.

  • How Do You Put Ink in a Fountain Pen in 7 Easy Steps?

    How Do You Put Ink in a Fountain Pen in 7 Easy Steps?

    To put ink in your fountain pen, first gather your pen, ink, and cleaning supplies. Identify your pen’s filling system—cartridge, converter, piston, or eyedropper.

    Clean the nib and section with warm water to avoid clogs.

    Fill the pen by inserting the cartridge or using the converter or piston to draw ink from the bottle.

    Reassemble the pen tightly, wipe off any ink, then test the ink flow on paper.

    Follow these steps, and you’ll write smoothly. Learn how to handle common issues and maintenance next.

    Gather Your Pen and Ink Supplies

    gather ink and filling tools

    Before you begin filling your fountain pen, make sure you’ve gathered all the necessary supplies. Start by collecting your fountain pen, verifying it’s clean and ready to fill.

    Depending on the fountain pen filling systems it supports, you’ll need to select your ink source carefully. If your pen uses an ink cartridge, have one on hand. Or if it relies on bottled ink, prepare a bottle and any tools like an eyedropper or syringe.

    Don’t forget a converter if your pen supports it, which allows you to draw ink directly from a bottle. Set up a clean workspace with paper towels or a cloth to catch any ink spills.

    Finally, check that all pen parts, especially the grip section and barrel, are properly assembled and sealed. Having everything ready ensures a smooth, mess-free process when you fill your fountain pen.

    Choose the Right Filling Method for Your Fountain Pen

    First, you’ll want to figure out what kind of filling system your pen uses—does it take cartridges, converters, or maybe a piston mechanism? Each one calls for a different way to fill it up. Then, check whether your pen uses standard cartridges or proprietary ones, so you know which ink will work. It’s also a good idea to weigh the pros and cons of each method—think about things like how easy it is to use versus how much ink it holds. That way, you can choose the option that fits your writing style perfectly.

    Filling System Types

    Choosing the right filling system for your fountain pen depends on your preferences for convenience, ink capacity, and ink variety. The most common filling mechanisms include cartridges, converters, piston fillers, vacuum fillers, and eyedropper systems.

    Cartridges offer quick, mess-free refills but limit your ink color options. Converters give you the flexibility to use a wide range of bottled inks, making them a popular choice.

    If you need a larger ink capacity, a piston filler is ideal. It draws ink directly into the pen’s barrel through a twisting mechanism. Vacuum fillers also hold a lot of ink but require a specific filling process.

    Eyedropper systems have the biggest capacity but need careful sealing to avoid leaks and don’t work with cartridges. Choose the one that fits your writing style and maintenance comfort.

    Ink Compatibility Options

    How do you know if your fountain pen will work well with a particular ink filling system? Start by checking your pen’s compatibility with cartridges, converters, or eyedropper setups.

    Standard international cartridges fit most pens designed for cartridge filling, but proprietary cartridges need specific brands. If you prefer bottled ink, use it with converters or eyedropper systems and choose inks formulated for fountain pens to avoid clogging.

    Avoid inks with heavy dyes or additives that can gum up the nib. Always follow the pen manufacturer’s recommendations for ink types and filling systems to maintain smooth ink flow and prevent damage.

    Also, consider ink viscosity and pigment content. Thicker or pigmented inks may demand specific filling systems or more frequent cleaning for ideal performance.

    Advantages And Disadvantages

    Understanding the types of ink filling systems helps you pick the best option for your fountain pen. If you want convenience, cartridges are easy to use but limit ink choices and might cost more over time.

    Using a converter, you get flexibility to refill from many bottled inks, though some converters don’t fit every pen brand. Piston fillers offer large capacities and simple refills but demand more maintenance and careful handling.

    Vacuum fillers hold lots of ink and refill quickly, yet their complex design suits luxury pens and requires careful operation. Eyedropper systems give the most ink and customization but risk leaks, needing proper sealing.

    Consider your priorities, whether ease, ink variety, or capacity, and your willingness to maintain the pen to choose the right filling method for your pen.

    Clean the Nib and Section Before Filling

    Before you fill your fountain pen, make sure to remove any old ink by flushing the nib and section with warm water. This helps prevent colors from mixing and keeps your pen working smoothly. Once everything is clean, be sure to dry it completely so you don’t dilute your fresh ink.

    Remove Old Ink

    Why should you remove old ink before refilling your fountain pen? Old ink can clog the nib and feed, affecting flow and color purity.

    To prevent this, disassemble the pen carefully, removing the grip section for full access. Flush the nib and section with lukewarm water using a bulb syringe or gentle stream to clear residual ink. This cleaning step ensures smooth writing and avoids mixing colors.

    Step Action Tip
    1 Disassemble pen Remove grip section gently
    2 Flush nib & feed Use lukewarm water
    3 Rinse internal parts Use bulb syringe if possible
    4 Dry completely Air dry or use soft cloth

    Avoid harsh chemicals; plain water works best.

    Use Warm Water

    How thoroughly do you clean your fountain pen’s nib and section before refilling? To keep your pen working smoothly, you should rinse these parts meticulously with warm water. Warm water helps dissolve any dried ink and prevents clogs that can disrupt ink flow.

    Make sure the water is lukewarm, not hot, to avoid damaging delicate components. After rinsing, gently shake or blot the nib and section to remove excess water. This step stops new ink from being diluted when you refill.

    Regularly cleaning your pen with warm water ensures consistent ink flow and extends the lifespan of your fountain pen. Taking this simple step before every refill keeps your writing experience smooth and hassle-free.

    Dry Completely

    Once you’ve rinsed the nib and section with warm water, make sure they’re completely dry before filling your pen. This step is essential to prevent ink dilution and leaks. After you rinse, use a soft cloth or paper towel to gently pat the nib and feed area dry.

    If needed, let the parts air-dry completely to guarantee no moisture remains.

    Here’s how to dry your nib and section properly:

    • Gently blot with a soft cloth or paper towel after rinsing
    • Avoid reassembling the pen while parts are still wet
    • Allow air-drying if any moisture lingers
    • Confirm all parts are dry completely before refilling

    How to Fill a Fountain Pen With Ink

    Wondering what it takes to fill your fountain pen with ink? Start by removing the cap and unscrewing the barrel from the grip section to expose the filling mechanism.

    If you’re using a cartridge pen, simply push a new cartridge firmly into the section until it punctures and ink begins to flow. For pens with a converter or piston filler, dip the nib and feed into the ink bottle. Then, operate the piston or twist the converter to draw ink into the reservoir.

    Be sure to wait a few moments so the ink saturates the feed properly. This guarantees smooth, consistent writing from the start. Whether you use a piston mechanism or cartridge, filling your fountain pen correctly is vital to avoid leaks and maintain ink flow.

    Following these steps will help you fill a fountain pen confidently and keep it ready for your next writing session.

    Reassemble and Wipe Your Fountain Pen

    reassemble wipe seal properly

    After filling your fountain pen, you’ll want to reassemble it by securely screwing the barrel or grip section back onto the nib unit to guarantee a tight seal. This step is essential to prevent leaks and ensure smooth ink flow when you start writing. Once reassembled, take a soft cloth or paper towel and gently wipe any excess ink from the nib, feed, and exterior surfaces. This keeps your pen clean and avoids unwanted smudges.

    Securely reassemble your fountain pen and gently wipe excess ink to prevent leaks and smudges.

    To properly reassemble and wipe your fountain pen:

    • Check all parts are tightly screwed together to maintain a proper seal.
    • Inspect the threads for any ink residue and wipe clean to prevent buildup.
    • Use a soft cloth to wipe off any visible ink on the nib and body.
    • Allow the ink to settle for a few minutes before using the pen.

    Try Writing to Test the Ink Flow

    With your fountain pen reassembled and cleaned, it’s time to see how the ink flows onto paper. Before you start writing, wait a few moments to let the ink travel from the feed to the nib. Then, gently scribble on a scrap piece of paper to test the ink flow. This simple test helps you check if the ink moves smoothly and consistently without skipping.

    If the ink doesn’t flow right away, try gently squeezing the cartridge or applying slight pressure to encourage movement. Also, ensure the nib and feed are clean and free of air bubbles, as these can block the ink flow and disrupt writing. To get a better sense of performance, test the pen on different types of paper. This will confirm the ink flows properly and the nib glides smoothly, giving you confidence that your fountain pen is ready to write beautifully.

    Troubleshoot Common Ink Filling Issues

    troubleshoot fountain pen filling

    If your fountain pen isn’t filling correctly, it’s usually due to a few common issues like improper disassembly, incompatible cartridges, or trapped air bubbles. To troubleshoot these problems, start by ensuring you’ve fully disassembled the pen and that you clean the nib thoroughly to prevent blockages affecting ink flow.

    Common fountain pen filling issues often stem from improper disassembly, incompatible cartridges, or trapped air bubbles.

    Next, verify that your ink cartridge or converter suits your specific filling system to avoid fitting problems. When using piston or eyedropper systems, give the ink time, about 15 minutes, to reach the feed and stabilize the ink flow. Also, be gentle and steady during filling to avoid trapping air bubbles in the reservoir.

    Here are quick tips to fix common ink filling issues:

    • Properly disassemble the pen and clean the nib before filling
    • Use compatible cartridges or converters for your filling system
    • Wait for ink to settle in piston or eyedropper systems
    • Apply gentle pressure to prevent air bubbles

    Following these steps will help maintain smooth ink flow and a reliable filling process.

    Frequently Asked Questions

    How Long Does Ink Typically Last in a Fountain Pen?

    Ink typically lasts anywhere from one to four weeks in your fountain pen, depending on your writing habits and nib size. If you use a larger capacity pen, ink longevity can stretch to several months.

    To reduce refill frequency, you’ll want to use high-quality inks that minimize ink evaporation. Also, sealing your pen properly and storing it upright helps keep the ink from drying out, extending how long it lasts between refills.

    Can I Mix Different Ink Brands or Colors Safely?

    Mixing different ink brands or colors isn’t always safe; it’s like combining oil with water or fire with ice. For ink compatibility, stick to inks from the same brand or similar formulas.

    When experimenting with color blending tips, test small amounts first to avoid clogs. Always follow ink cleaning methods thoroughly when switching inks, so your pen stays smooth and damage-free.

    This way, you protect your pen and enjoy vibrant writing.

    What Type of Ink Is Best for Fountain Pens?

    You’ll want to choose dye-based ink for the best results in your fountain pen. It offers vibrant ink color options and flows smoothly, helping with ink flow regulation so your nib doesn’t clog.

    When selecting, consider ink bottle types with easy-to-use designs for refill convenience. While pigment inks offer permanence, they can cause clogs, so stick with pH-balanced, water-based options for consistent performance and easier maintenance.

    How Do I Store a Fountain Pen When Not in Use?

    Imagine your fountain pen standing tall like a soldier, nib pointing upward, guarding its precious ink. When you’re done, store it this way to prevent leaks and keep ink flowing smoothly.

    Always cap it tightly to avoid drying out. Use pen cleaning tips regularly, especially if you switch ink color selection often.

    Keep your pen in a case away from heat or sunlight, and place your ink bottle storage somewhere stable and cool for best results.

    Are There Any Inks to Avoid Using in Fountain Pens?

    You should avoid inks that harm your pen’s ink compatibility, like India ink, permanent, or waterproof inks, since they clog and damage the feed. Cheap inks with fillers cause inconsistent flow, and expired or separated inks lead to blockages.

    Also, steer clear of heavily pigmented inks. They stain and need frequent cleaning. For ink cleaning tips, use fountain pen-friendly inks and explore various ink color options designed specifically for smooth performance.

    Conclusion

    Now that you’ve got ink in your fountain pen, you’re ready to hit the ground running. Just remember, practice makes perfect, so don’t be discouraged if it takes a few tries to get the flow just right.

    Keep your pen clean and filled, and soon writing with it will feel as natural as breathing. With these simple steps under your belt, you’ll be writing smoothly and confidently in no time.

  • How to Keep Printer Ink From Drying Out With 7 Simple Tips

    How to Keep Printer Ink From Drying Out With 7 Simple Tips

    To keep your printer ink from drying out, use your printer at least once a week to keep ink flowing and prevent clogs.

    Store cartridges in airtight containers with silica gel, away from heat and direct sunlight.

    Maintain a stable, cool environment around 65-70°F with moderate humidity.

    Run regular cleaning cycles and nozzle checks to avoid buildup.

    Wiping cartridge tops before reinserting helps too.

    If you want to avoid interruptions, there are simple maintenance steps that make all the difference.

    Why Printer Ink Cartridges Dry Out and What It Means

    cartridge drying and storage tips

    If you don’t use your printer regularly, the ink cartridges can dry out as the liquid ink evaporates or clogs the nozzles. When ink cartridges dry out, the liquid ink inside them diminishes, causing blockages that affect how well your printer works.

    This drying out process usually starts once cartridges are opened and exposed to air, typically lasting around six months before issues appear. Improper storage, like leaving cartridges in direct sunlight or high temperatures, speeds up evaporation and worsens drying out.

    Cartridge drying begins after opening, with issues appearing around six months, worsened by heat and sunlight exposure.

    If you’ve manually refilled your cartridges, they’re even more likely to dry out due to excess air introduced during refilling. When ink dries inside the printhead or nozzles, you’ll notice print quality problems. Think streaks, missing colors, or even print failure.

    To keep your printer working smoothly, focus on proper storage by keeping cartridges sealed and in cool, dark places. This helps maintain ink flow and prevents drying out from ruining your prints.

    How Often Should You Use Your Printer to Prevent Ink Cartridge Drying?

    To keep your printer’s ink from drying out, it’s a good idea to use it at least once a week. Just printing a small test page or a few documents regularly can really help prevent the ink from becoming stagnant or clogging up.

    If you go more than two weeks without printing, the ink might start to dry inside the cartridge, which can lead to poor print quality. So, a little regular use goes a long way in keeping things running smoothly!

    Weekly Printing Frequency

    Although it may seem inconvenient, printing at least once a week keeps your printer’s ink flowing smoothly and prevents the cartridges from drying out. Weekly printing supports printhead maintenance and reduces ink drying risks, boosting printer longevity.

    Skipping prints for weeks can cause clogs and damage.

    Here’s how printing frequency impacts your printer:

    Printing Frequency Ink Drying Risk Maintenance Needed
    Weekly Low Minimal
    Bi-weekly Moderate Moderate
    Monthly High Frequent
    Less than monthly Very High Intensive

    Stick to weekly printing to keep ink moist, avoid clogged nozzles, and extend your printer’s life. It’s a simple routine that saves you from costly repairs.

    Preventing Ink Stagnation

    Maintaining a regular printing schedule plays a big role in keeping your ink cartridges from drying out. To prevent ink stagnation, aim to print a few pages weekly or at least once every 7-10 days. Infrequent use beyond two weeks can cause ink to dry inside the nozzles and clog the printhead.

    Regular maintenance, like running test pages or printhead cleaning cycles, keeps the ink moist and the printhead clear. These simple steps distribute ink evenly, reducing the risk of dried ink buildup.

    Setting reminders to print periodically ensures you don’t forget and helps extend your cartridge’s lifespan. By staying consistent, you’ll avoid common issues caused by ink stagnation and protect your printer’s performance long-term.

    Store Ink Cartridges Properly to Prevent Drying

    store cartridges in airtight cool place

    To keep your ink cartridges fresh, try storing them in airtight containers or just use their original packaging along with silica gel packets. These help block air and moisture, which is key. Also, make sure to keep them in a cool, dry spot where the temperature stays steady, ideally between 65-70°F.

    It’s best to avoid exposing your cartridges to direct sunlight, heat, or really high humidity. All of that can cause the ink to dry out faster than you want. So, a little care in storage goes a long way in keeping your cartridges ready to use!

    Airtight Storage Methods

    If you want to keep your printer ink cartridges from drying out, sealing them airtight is essential. Airtight storage helps maintain moisture control, preventing drying and extending the life of your ink cartridges. Here’s how you can do it effectively:

    1. Store ink cartridges in their original packaging or wrap them tightly in plastic wrap or aluminum foil to block air and light exposure.
    2. Place cartridges inside ziplock bags or airtight containers with silica gel packets to absorb excess moisture.
    3. Avoid heat sources, direct sunlight, and heating vents to reduce ink evaporation.
    4. Keep cartridges in a cool, dry place with stable humidity to maintain optimal moisture levels.

    Using airtight storage methods ensures your ink won’t dry out, even during long periods of non-use. It’s a simple step that can save you money and hassle in the long run.

    Ideal Temperature Conditions

    Although storing your ink cartridges airtight is essential, controlling the temperature where you keep them plays an equally important role in preventing ink from drying out. The ideal temperature for ink cartridge storage is between 65-70°F.

    Keeping them in a cool, dry space helps maintain the ink’s moisture content, reducing evaporation. Avoid placing cartridges near heat sources like radiators, heating vents, or direct sunlight. Temperatures above 75°F can cause the ink to dry out faster, shortening cartridge life and harming print quality.

    Consistent room temperature is key since fluctuations can accelerate drying. By ensuring stable, moderate temperatures during storage, you’ll preserve your ink cartridges effectively and keep your prints looking sharp longer.

    Maintain Ideal Temperature and Humidity for Ink Cartridge Longevity

    Since ink cartridges are sensitive to environmental conditions, you should maintain your printer’s room temperature between 65-70°F and humidity levels around 40-60%. These settings help prevent ink drying and guarantee your cartridges last longer.

    Maintaining 65-70°F and 40-60% humidity preserves ink quality and extends cartridge life.

    To optimize storage and operation, follow these tips:

    1. Monitor humidity and temperature regularly with a hygrometer and thermometer to keep conditions stable.
    2. Avoid placing your printer in direct sunlight or near heat sources, which accelerate ink drying.
    3. Use a humidifier in dry rooms to maintain proper humidity and reduce static buildup that affects print quality.
    4. During long periods of inactivity, guarantee the environment remains consistent to prevent ink from evaporating inside cartridges.

    Tips to Keep Ink Cartridges Moist Between Prints

    maintain ink moisture regularly

    To keep your ink cartridges moist between prints, you should print a few pages regularly or run test pages to maintain ink flow and prevent clogs. This simple habit keeps the ink moving and helps prevent drying inside the cartridge nozzles.

    Before reinserting cartridges, wipe their tops gently with a damp cloth to remove dried ink and keep the cartridges moist. For longer storage, place ink cartridges in airtight containers or sealed plastic bags with silica gel packets to slow ink evaporation.

    Also, store your printer in a cool, moderately humid environment, ideally between 40-60% humidity, to prevent drying caused by heat or dryness. Avoid exposing cartridges to direct sunlight or heat sources, and always turn off your printer properly to preserve ink moisture.

    Following these tips ensures you protect your ink cartridges, maintain smooth ink flow, and prevent drying, saving you time and money on replacements.

    Run Printer Maintenance to Avoid Ink Clogs

    When you run your printer’s built-in head cleaning cycle regularly, you help prevent ink from drying and clogging the nozzles. Consistent printer maintenance is key to avoiding ink drying issues and ensuring smooth printing. To keep your printer in top shape, follow these steps:

    Running regular head cleaning cycles prevents ink clogs and keeps your printer running smoothly.

    1. Schedule regular cleaning cycles, especially if you don’t print often, to maintain ink flow.
    2. Use the nozzle check feature to detect any clogs early and run additional cleaning cycles if needed.
    3. Perform deep cleaning cycles when you notice persistent print quality problems caused by dried ink.
    4. Keep your printer in a stable environment with controlled temperature and humidity to support effective maintenance.

    What to Do If Your Ink Cartridge Starts to Dry Out

    Maintaining your printer regularly helps prevent ink from drying, but if you notice your ink cartridge starting to dry out despite your efforts, there are several steps you can take to fix the problem. First, run the printer’s built-in cleaning cycle multiple times to dissolve dried ink in the printhead and restore ink flow.

    If that doesn’t work, remove the cartridge and soak its printhead in warm water for a few minutes to rehydrate and loosen dried ink. After soaking, dry it carefully before reinstalling. You can also gently rub dried ink spots on the cartridge with a cotton swab dipped in warm water or isopropyl alcohol to clear buildup.

    Use the printer’s nozzle check and alignment functions regularly to detect and clear clogs caused by dried ink. If cleaning and soaking fail, replace the cartridge with a new one stored properly to guarantee consistent ink flow and avoid future issues.

    Frequently Asked Questions

    Can Expired Ink Cartridges Still Be Used Safely?

    Yes, you can often use expired ink cartridges safely if the ink hasn’t dried out. Proper ink preservation and storage techniques during the cartridge’s lifespan help prevent drying and thickening.

    To guarantee print quality, test the cartridge on a small job before important prints. Keep cartridges sealed and stored in a cool, dry place to extend their usability and reduce the risk of clogged nozzles or streaky prints.

    Does Printer Brand Affect Ink Drying Speed?

    Yes, printer brand does affect ink drying speed because different brands use unique ink formulations. When you focus on printer maintenance, you’ll notice premium brands often have quick-dry inks.

    Managing ink storage and controlling humidity levels also influence drying. Plus, your print frequency matters. Printing regularly helps keep ink fresh and prevents drying.

    Are Refillable Cartridges More Prone to Drying Out?

    Yes, refillable cartridges are more prone to drying out because their design often has larger ink compartments and gaps that increase air exposure. You’ll find that unlike OEM cartridges, refillables may lack airtight seals, letting ink evaporate faster.

    To prevent this, you need to focus on proper storage conditions and make sure the cartridge is sealed tightly after refilling. Otherwise, the increased air exposure will dry out your ink quickly.

    How Does Ink Composition Impact Drying Time?

    Ink composition is the heartbeat of the drying process. When you choose ink with fast solvent evaporation, it dries quicker but risks clogging your cartridge. Ink formulation balances this with pigment stability, ensuring colors last without drying out too fast.

    Water-based inks dry swiftly on paper but can evaporate inside cartridges if unused, while oil-based inks take their sweet time, staying moist longer. Understanding this helps you manage drying times effectively.

    Can Using Third-Party Ink Cause Drying Issues?

    Yes, using third-party ink can cause drying issues because it often lacks proper sealants and precise chemical balance, which affects ink maintenance. You might notice a shorter cartridge lifespan and quicker evaporation due to poor printer compatibility.

    To avoid problems, focus on proper ink storage and choose cartridges known for quality. This helps maintain consistent ink flow and extends your printer’s life, reducing the risk of drying and clogging.

    Conclusion

    Don’t let your printer ink dry out like a desert waiting for rain. By using your printer regularly, storing cartridges properly, and maintaining the right environment, you’ll keep your ink fresh and ready.

    A little care goes a long way in avoiding clogged nozzles and wasted ink. Follow these simple tips, and your printer will stay reliable, saving you time and frustration every time you hit print.

  • How to Get Pen Ink Out of a Dryer With Easy Steps

    How to Get Pen Ink Out of a Dryer With Easy Steps

    To get pen ink out of your dryer, first unplug it and remove any clothes for safety.

    Use rubbing alcohol on a cotton ball to gently dab the stains, letting it sit to break down ink.

    Wipe with a damp cloth, then scrub stubborn spots with a magic eraser soaked in warm soapy water.

    Dry the drum thoroughly and air it out before reuse.

    Following these simple steps will help restore your dryer, and there’s more detailed advice to make the process even easier.

    Unplug and Prepare Your Dryer for Cleaning

    unplug clear inspect focus

    Before you begin cleaning ink stains from your dryer, make sure you unplug it to avoid any risk of electrical shock. Safety comes first, so always unplug the dryer from the power outlet before doing any cleaning. Once unplugged, remove all clothing and items from inside the dryer drum. This gives you clear access to the areas you need to clean.

    Next, carefully inspect the dryer drum and the paddles inside for any visible ink stains or residue. Identifying the exact spots lets you focus your cleaning efforts where it’s needed most.

    Gather Supplies for Ink Removal

    Now that you’ve unplugged and prepped your dryer, it’s time to gather the supplies needed to tackle those ink stains effectively. Start by collecting rubbing alcohol, dish soap, and warm water. These form the core cleaning agents for breaking down pen ink stains.

    Grab a clean cloth or sponge to apply these solutions gently without damaging your dryer’s surfaces. You’ll also want cotton balls or a soft brush to reach small crevices where ink might have seeped in.

    For tougher, stubborn pen ink stains, keep a magic eraser handy. It provides a mild abrasive action that can lift ink without scratching.

    Don’t forget safety gear. Rubber gloves and protective eyewear will protect your skin and eyes from irritation.

    Finally, have a soft-bristle brush and a damp towel ready to clean the drum and paddles thoroughly after treating the stains. With these supplies on hand, you’re set to remove pen ink stains efficiently and safely.

    Empty the Dryer and Inspect for Ink Stains

    inspect drum for ink

    Once you’ve unplugged the dryer, empty all clothes and items from the drum so you can thoroughly inspect its interior surfaces. Take a close look inside, focusing on the drum and paddles for any visible ink stains or smudges.

    Ink stains can be subtle, so inspect carefully under good lighting to spot any marks or residue left behind. Pay attention to the extent and exact location of the ink stains, as this will help you decide the best way to clean them.

    Remember to avoid touching any electrical components and keep the dryer unplugged throughout this process to stay safe. By thoroughly inspecting the drum, you’ll know where the ink contamination is and can prepare for effective removal.

    This step guarantees you won’t miss any hidden ink spots that could cause further damage if left untreated.

    Use Rubbing Alcohol to Loosen Ink Stains

    First, grab a clean cotton ball and dampen it with some rubbing alcohol. Then, gently dab the ink stains to help loosen them up. It’s a good idea to test a small, hidden spot first, just to make sure there’s no damage or discoloration. If the stain is stubborn, go ahead and repeat the process. Let the alcohol sit for a few minutes before you wipe it away.

    Alcohol Application Techniques

    Although ink stains can be stubborn, using rubbing alcohol effectively loosens them from your dryer’s surface. To tackle the ink, start with these simple alcohol application techniques:

    Dampen a cotton ball or soft cloth with rubbing alcohol. Gently dab the alcohol onto the ink stain, covering it fully.

    Let the alcohol sit for a few minutes to break down the ink. Reapply alcohol as needed to keep the stain moist and aid removal.

    Use a clean cloth to blot away loosened ink and excess alcohol, avoiding smudges.

    Following these steps guarantees the ink softens and lifts without spreading. With patience and the right alcohol application, you’ll restore your dryer’s surface efficiently.

    Safety Precautions

    When handling rubbing alcohol to remove ink stains, you should always wear rubber gloves and protective eye gear to prevent irritation. These safety precautions protect your skin and eyes from harmful effects.

    Before applying rubbing alcohol, make sure your dryer is unplugged to avoid electrical hazards. Test a small, hidden area of the dryer drum first to ensure no surface damage or discoloration occurs.

    Use a cotton ball or soft cloth to gently dab the ink stain, preventing it from spreading. Work in a well-ventilated area to reduce inhaling fumes.

    Following these safety precautions and wearing protective gear will help you safely and effectively loosen ink stains without risking injury or damage to your dryer.

    Clean the Drum and Paddles With Soap and Magic Eraser

    safe ink removal method

    How exactly do you remove stubborn pen ink from your dryer’s drum and paddles without causing damage? The key is to use a magic eraser combined with mild soap and a clean cloth. Here’s how to tackle it effectively:

    Dampen a magic eraser or sponge with warm water mixed with a few drops of dish soap. Gently wipe the drum and paddles using light, circular motions to lift ink without scratching.

    Rinse your cleaning tool frequently with clean water to avoid spreading ink. After removing the ink, use a damp clean cloth to wipe away soap residue and prevent streaks.

    Focus on all interior surfaces, making sure you don’t miss any ink spots on the drum walls or paddles. This approach safely lifts ink stains and keeps your dryer’s finish intact, making your cleaning effective and damage-free.

    Rinse and Wipe the Dryer Drum Thoroughly

    After you finish scrubbing, grab a damp cloth with some soap and water to rinse the dryer drum thoroughly. This helps get rid of any leftover ink and cleaning residue. Be sure to wipe down the whole surface, and remember to rinse your cloth often so you don’t end up spreading the ink around.

    Once it’s all clean, dry the drum completely. Then, leave the dryer door open to let it air dry before you use it again.

    Soap and Water Cleaning

    Although ink stains can be stubborn, you can effectively remove them by dampening a clean cloth or sponge with warm, soapy water and wiping the entire dryer drum, including the paddles. Avoid using bleach, as it can damage the drum’s surface.

    Instead, make sure to follow these steps for a safe clean:

    • Mix warm water with a few drops of mild dish soap.
    • Dampen your cloth or sponge with the solution.
    • Wipe the entire inside of the drum thoroughly.
    • Rinse the cloth often to avoid spreading ink residue.
    • After cleaning, dry the drum completely with a dry towel.

    This thorough soap and water cleaning will loosen ink and prevent future stains without harming your dryer.

    Drying and Inspection

    Once you’ve finished scrubbing with soap and water, rinse the dryer drum thoroughly with clean water. This removes any leftover soap and loosened ink particles.

    Use a clean, damp cloth to wipe all surfaces, making sure no ink stains or soap remain. Then, dry the drum with a towel to prevent water spots.

    Leave the door open for several hours to air dry completely. Perform a careful inspection to confirm all ink stains are gone before using the dryer again.

    Step Action Purpose
    Rinse Use clean water Remove soap and ink residue
    Wipe Damp cloth Clean all drum surfaces
    Dry Dry towel Absorb moisture, prevent spots
    Air Dry & Inspect Leave door open, check drum Ensure ink stains are removed

    Dry the Dryer Drum Completely After Ink Removal

    To prevent new ink stains or mildew from forming, you’ll want to dry the dryer drum completely after cleaning. Any leftover moisture can cause problems, so make sure you remove it thoroughly. Here’s how to ensure the drum is dry:

    Wipe the entire drum with a clean, dry cloth to remove surface moisture. Then leave the dryer door open for several hours or overnight to let residual moisture evaporate. You can also use a hairdryer on a low or cool setting to dry any damp spots carefully.

    Feel the drum surface to check for any remaining dampness, or use a moisture meter for accuracy. Confirm the drum is completely dry and free of moisture before loading clothes again.

    Taking these steps helps avoid new ink stains and prevents mildew buildup, keeping your dryer fresh and ready for use.

    Alternative Methods for Tough Ink Stains

    If you’re dealing with stubborn ink stains, give a Magic Eraser a try and gently scrub the dryer drum. It works pretty well. For those tougher, deeper spots, you can soak a towel in a bleach and water solution. Then, just toss the towel in the dryer and run it until it’s dry. These methods are great for lifting tough stains without harming your appliance.

    Magic Eraser Use

    Although ink stains can be stubborn, a Magic Eraser by Mr. Clean offers an effective stain removal solution for your dryer. Its micro-abrasive texture lifts tough ink marks without harsh chemicals. To use it right, follow these steps:

    Dampen the magic eraser with water before use. Gently scrub the ink-stained area using light, circular motions. Test on a small, hidden spot to confirm no surface damage.

    Wipe the drum afterward with a damp cloth to remove residue. Repeat if necessary, but avoid excessive scrubbing to protect the dryer drum.

    This method provides a safe, practical approach to tackle ink stains, restoring your dryer’s clean appearance quickly and easily.

    Bleach Towel Treatment

    Wondering how to tackle tough ink stains that won’t budge with regular cleaning? Try the bleach towel treatment. Soak a clean towel in a mixture of equal parts warm water and bleach, then wring out the excess liquid before placing it inside the dryer drum.

    Run your dryer on a low heat setting for about 20 minutes, allowing the bleach-treated towel to break down those stubborn ink stains. After the cycle ends, remove the towel and wipe the drum with a damp cloth to clear away any leftover bleach and ink residue.

    Make sure to rinse the dryer thoroughly with fresh water to avoid bleach damage to future loads. Always wear protective gloves and work in a well-ventilated space to stay safe while handling bleach.

    Stay Safe When Using Chemical Cleaners

    When tackling pen ink stains in your dryer with chemical cleaners, you must unplug the appliance first to avoid electrical shock. Safety should be your top priority when handling these substances. Always wear protective gloves to shield your skin and consider safety goggles to protect your eyes from splashes.

    Always unplug your dryer and wear gloves to safely remove pen ink stains with chemical cleaners.

    Here are key safety tips to keep in mind:

    • Wear protective gloves and safety goggles to prevent irritation from chemical cleaners.
    • Keep children and pets away from the cleaning area to avoid accidental exposure.
    • Follow the manufacturer’s instructions carefully to prevent damage or fire hazards.
    • Use chemical cleaners in a well-ventilated space to avoid inhaling harmful fumes.
    • Always unplug the dryer before starting to ensure electrical safety.

    Prevent Future Ink Stains in Your Dryer

    To prevent ink stains from appearing in your dryer, you should regularly check your laundry for any ink-marked items before tossing them in. Removing ink-stained items beforehand stops ink from transferring onto other clothes and the dryer drum.

    Use protective covers or plastic bags on delicate or ink-prone fabrics to shield them during washing and drying. Creating a designated laundry area for ink-stained items helps contain potential spills and keeps your dryer safe.

    Always treat and wash ink-stained clothing promptly to minimize residual ink that could cause future stains. Furthermore, maintain a clean dryer drum by wiping it regularly with a damp cloth to remove any ink residues.

    This simple habit prevents buildup and keeps your dryer drum spotless. By following these steps, you’ll avoid frustrating ink stains and keep your dryer functioning smoothly.

    Frequently Asked Questions

    Can Ink Stains Damage My Dryer’s Heating Element?

    Yes, ink stains can damage your dryer’s heating element. When ink evaporates under heat, it can leave behind residues that corrode or build up on the element.

    This buildup can cause dryer damage by reducing efficiency or causing electrical shorts. If you don’t remove ink stains promptly, you risk overheating or permanent harm to the heating coils.

    Is It Safe to Use Bleach Instead of Rubbing Alcohol?

    Bleach safety should guide your stain-stripping strategy. While bleach can break down ink, it’s a risky chemical alternative compared to rubbing alcohol.

    You shouldn’t use bleach without diluting it carefully, since it might stain or damage your dryer’s surfaces and fabrics. Instead, choose gentle, tested options like rubbing alcohol for safer, swifter results.

    Always test a tiny, hidden spot first to ensure your cleaner won’t cause unintended harm.

    How Long Should the Dryer Stay Unplugged After Cleaning?

    You should keep your dryer unplugged for at least 1 to 2 hours after cleaning to guarantee thorough dryer maintenance and stain prevention. If you want to be extra cautious, leaving it unplugged overnight helps all moisture and cleaning residue evaporate completely.

    This prevents electrical hazards and avoids any leftover stains. Always double-check the interior is dry and residue-free before plugging it back in and using your dryer again.

    Will Ink Stains Affect My Clothes if Not Removed?

    Don’t let the ink stain removal slip through the cracks. If you don’t clean ink stains from your dryer, you’ll risk clothes damage. Ink residues can transfer onto your laundry, especially light-colored fabrics, causing stubborn stains that are tough to get out.

    Over time, these marks become permanent, ruining your clothes’ appearance. So, you’ve got to tackle ink stains promptly to keep your clothes looking fresh and stain-free.

    Can Professional Cleaning Services Remove Dryer Ink Stains?

    Yes, professional cleaning services can remove dryer ink stains effectively. They use advanced ink removal techniques and powerful cleaning solutions that outperform typical household products.

    You’ll benefit from their expertise in evaluating stain severity and choosing the best cleaning solution effectiveness to tackle even stubborn ink marks. This guarantees your dryer gets thoroughly cleaned, preventing ink transfer onto your clothes and restoring your dryer’s appearance without causing damage.

    Conclusion

    Now that you know how to get pen ink out of your dryer, you can tackle those stubborn stains with confidence. Did you know that nearly 30% of laundry mishaps involve ink or dye stains?

    By following these simple steps and using safe cleaning methods, you’ll keep your dryer looking fresh and functioning well. Plus, preventing future ink spills will save you time and hassle, so keep those pens far from your laundry area!

  • How Can You Get Pen Ink off Skin Fast?

    How Can You Get Pen Ink off Skin Fast?

    If you want to get pen ink off your skin fast, act quickly before it sets. Use a cotton ball soaked in rubbing alcohol or hand sanitizer, gently rubbing in circular motions to lift the ink.

    For a gentler option, try massaging natural oils like coconut or olive oil to break down the stain.

    Always rinse with soap and warm water, then moisturize to soothe your skin.

    Keep these tips in mind, and you’ll discover even more effective ink-removal techniques ahead.

    Why You Should Act Quickly to Remove Ink

    remove ink quickly early

    Because fresh ink hasn’t fully set into your skin, you should act quickly to remove it before it dries. When you act quickly, you stop the ink from penetrating deeper layers of your skin, making it easier to clean.

    Removing ink while it’s still fresh means you can use gentle methods, which help prevent damage and irritation that harsh chemicals might cause. The longer you wait, the more the ink stains your skin and even nearby clothing or surfaces.

    By starting the removal process promptly, you increase your chances of wiping away the ink completely without scrubbing too hard. So, when you notice fresh ink on your skin, don’t delay. Address it right away to avoid stubborn stains and skin damage.

    Acting fast is the key to keeping your skin clean and healthy while effectively removing fresh ink with minimal effort.

    How to Remove Ink From Skin Immediately

    If you catch ink on your skin right away, start by washing the area with soap and warm water to stop the ink from setting in. This initial step is essential for effective ink removal and stain prevention.

    Wash ink off immediately with soap and warm water to prevent stains and ensure easy removal.

    If the ink lingers, dab rubbing alcohol or hand sanitizer onto a cotton ball and gently apply it to the stain. This helps dissolve stubborn ink quickly.

    Next, use gentle scrubbing. Try a sugar scrub or a soft toothbrush to lift the ink naturally without harming your skin.

    For faster results, apply a small amount of oil-based remover like coconut or baby oil. It breaks down ink pigments effectively.

    Afterward, rinse your skin thoroughly with soap and water to remove any residue. Finally, moisturize the area to prevent skin irritation and dryness caused by cleaning agents.

    How to Identify the Type of Ink on Your Skin

    identify ink type quickly

    How can you quickly tell what kind of ink is on your skin? First, identify the ink type to choose the best ink removal method. Water-based ink usually washes off easily with soap and water.

    Alcohol-based ink, found in permanent markers, often needs solvents like rubbing alcohol. To figure this out, test a small area by applying a bit of water or alcohol. If the ink smears or dissolves with water, it’s water-based ink.

    If it only reacts to alcohol, it’s alcohol-based ink. Gel inks are more stubborn; they resist water and alcohol, requiring scrubbing or specialized removers. Knowing whether the ink is from a permanent marker, gel pen, or water-based pen helps you avoid ineffective treatments and skin irritation.

    How to Use Soap and Warm Water for Ink Removal

    As soon as you notice ink on your skin, go ahead and wash it with warm water and a mild soap. This helps stop the ink from setting in. It’s best to pick soaps that are gentle but still get the job done.

    You can use a soft cloth or a loofah to scrub the area gently, moving in circular motions. If the stain doesn’t come off right away, don’t worry—just repeat the process until your skin is clean. It usually takes a few tries, but you’ll get there!

    Immediate Hand Washing

    Though ink can quickly stain your skin, washing your hands immediately with soap and warm water prevents it from setting in. Immediate hand washing is essential for effective ink removal, especially with water-based ink.

    Use soap and water to gently scrub the stained area, which helps dissolve the ink before it dries. You can enhance ink removal by using a loofah or soft scrub brush to loosen ink particles without irritating your skin.

    Remember, the sooner you start hand washing, the easier it is to prevent ink setting. Repeat the process if needed to fully remove stubborn stains.

    • Act quickly for immediate cleaning
    • Use gentle scrubbing with soap and water
    • Focus on water-based ink removal
    • Prevent ink setting with prompt hand washing
    • Repeat washing for stubborn stains

    Effective Soap Types

    Once you’ve started washing away ink with soap and warm water, choosing the right soap can make a big difference in how effectively the stain lifts from your skin. Gentle soaps like dish soap or antibacterial hand soap break down ink pigments without irritating your skin. Apply soap directly on the ink spot and use gentle rubbing to boost ink removal. Warm water helps soften the ink, making the process more effective.

    Soap Type Benefits Usage Tips
    Dish Soap Breaks down ink pigments Apply directly, rub gently
    Antibacterial Soap Cleans and disinfects Use with warm water
    Gentle Hand Soap Mild on skin Good for sensitive skin

    Rinse thoroughly with warm water to remove all residues.

    Gentle Scrubbing Techniques

    When you use warm water and mild soap, gently scrubbing the ink-stained area helps break down the ink pigments more effectively. For ideal ink removal, adopt gentle scrubbing techniques that protect your skin while lifting ink.

    Use a soft cloth or loofah and move in circular motions to loosen ink particles without irritation. If you’re dealing with stubborn stains, try exfoliating by mixing a gentle sugar scrub with your mild soap. This combination helps remove dead skin cells and improves cleaning.

    Always rinse thoroughly afterward to wash away residual ink and soap, preventing dryness.

    • Use warm water and mild soap
    • Employ a soft cloth or gentle brush
    • Scrub in circular motions
    • Exfoliate stubborn stains with sugar scrub
    • Rinse completely to avoid irritation

    How to Use Rubbing Alcohol Safely on Ink Stains

    When you’re using rubbing alcohol to get rid of ink stains, start by soaking a cotton ball with it. Then, gently rub the stain in circular motions—this helps avoid damaging your skin. It’s always a good idea to test a small patch first to make sure you don’t have any irritation. After you’re done, be sure to rinse your skin thoroughly with soap and water. And don’t forget to apply some moisturizer afterward to keep your skin from drying out.

    Proper Application Techniques

    Although rubbing alcohol is effective at removing ink stains from your skin, you should always test it on a small patch first to avoid any adverse reactions. Once you confirm there’s no irritation, use gentle application to protect your skin.

    Dampen a cotton ball with rubbing alcohol and rub the stained area in circular motions. Avoid harsh scrubbing to prevent skin irritation while ensuring effective removal.

    Afterward, rinse thoroughly with warm water and apply a moisturizer to soothe and hydrate your skin.

    • Perform a patch test before full application
    • Use gentle application with light pressure
    • Apply rubbing alcohol using circular motions
    • Avoid aggressive rubbing to prevent skin irritation
    • Rinse well and follow up with a moisturizer

    Skin Protection Measures

    How can you safely remove pen ink using rubbing alcohol without harming your skin? Start by doing a patch test on a small area to check for any skin irritation, especially if you have sensitive skin.

    Use a cotton ball or soft cloth to gently dab the rubbing alcohol onto the ink stain. Avoid vigorous rubbing to prevent damage. Limit contact to 1-2 minutes, then wash the area thoroughly with a mild soap and water solution.

    Afterward, apply a moisturizer or aloe vera gel to soothe and hydrate your skin. This helps counteract dryness from the alcohol. Keep rubbing alcohol away from broken skin or sensitive areas like your eyes to avoid irritation or chemical burns.

    These skin protection measures guarantee gentle removal while keeping your skin safe.

    Managing Irritation Risks

    To minimize irritation risks while using rubbing alcohol on ink stains, you should apply it sparingly and carefully. Before starting, do a patch test on a small skin area to check for irritation or allergic reactions.

    Use gentle, circular motions with a cotton ball soaked in rubbing alcohol to remove the ink. Avoid harsh scrubbing that can damage your skin. Afterward, wash the area thoroughly with soap and water to remove any residual alcohol.

    Finally, moisturize the skin immediately to restore moisture and support skin health. Keep these tips in mind:

    • Perform a patch test before full application
    • Apply rubbing alcohol sparingly
    • Use gentle, circular rubbing motions
    • Wash skin thoroughly after use
    • Moisturize promptly to prevent dryness and irritation

    How Natural Oils and Scrubs Help Lift Ink Gently

    When you use natural oils like olive or coconut oil on ink-stained skin, they break down the ink pigments gently. This makes it easier for you to lift the ink without harsh chemicals. The oil loosens ink particles, and when you combine it with a scrubbing method using sugar, it provides gentle exfoliation that enhances ink removal.

    This approach is especially good for sensitive skin. It ensures skin safety and minimizes irritation. After scrubbing, rinsing with warm water and soap removes residual oil and ink effectively.

    Step Action Benefit
    1 Apply natural oil Breaks ink pigments gently
    2 Massage gently Loosens ink particles
    3 Add sugar for scrub Gentle exfoliation
    4 Scrub carefully Lifts ink from skin
    5 Rinse with soap & water Removes oil and ink

    Using natural oils and scrubs is a safe, effective method for ink removal without harsh chemicals.

    How Lemon Juice and Salt Remove Ink From Skin

    lemon salt ink removal

    If natural oils and scrubs don’t fully remove ink from your skin, lemon juice paired with salt offers a powerful alternative. Lemon juice’s natural acidity breaks down ink pigments, making ink removal more effective. When combined with salt, which acts as a gentle abrasive, the mixture exfoliates your skin and lifts ink stains efficiently.

    You can create a paste by mixing lemon juice and salt, then apply it directly to the inked area. Rubbing this paste onto your skin for a few minutes enhances ink removal through both chemical action and physical exfoliation. Afterward, rinse thoroughly with warm water to wash away all residue.

    Keep in mind:

    • Lemon juice’s acidity breaks down ink pigments
    • Salt exfoliates skin gently
    • The lemon juice and salt paste targets ink stains effectively
    • Rubbing the paste enhances exfoliation and ink removal
    • Rinse well to remove all ink and paste residues

    This method offers a natural, effective way to get ink off your skin fast.

    Picking the Best Dedicated Ink Removers for Skin

    When you’re picking an ink remover, it’s a good idea to go for non-toxic options like Amodex because they’re gentle on your skin. Just apply a small amount right onto the stain and rub it in gently—that usually works best.

    And don’t forget some safety tips: you might need to apply it a few times, and make sure to wash the area thoroughly afterward to avoid any irritation.

    Top Non-Toxic Products

    Although many products claim to remove ink from skin, choosing a non-toxic option guarantees you avoid irritation while effectively lifting stains. When selecting the best non-toxic stain remover, focus on safe ink remover formulas designed for gentle ink stain remover action.

    Here are some top skin-safe products for effective ink stain removal:

    • Amodex: a non-irritating ink remover formulated specifically for ink removal from skin
    • Goo Gone: breaks down ink pigments gently without harsh chemicals
    • Micellar water: lifts ink stains safely, ideal for frequent use
    • Gentle makeup removers: offer mild but effective ink removal
    • Alcohol-based wipes or hand sanitizers: effective but use cautiously to prevent dryness

    Application And Safety Tips

    Since ink removers designed for skin contain specialized ingredients, you should apply them carefully to avoid irritation and achieve the best results. Start by performing a patch test on a small skin area to check for any sensitivities or allergic reactions.

    Use a dedicated remover like Amodex, and apply it directly to dry skin. Gently work the remover into the ink-stained area, following the product’s instructions closely. This careful application helps prevent skin irritations.

    Afterward, wash the area with soap and water to remove any leftover chemicals. Finally, moisturize your skin to soothe and prevent dryness caused by the remover. Prioritizing these safety steps guarantees you effectively remove ink while protecting your skin from harm.

    Easy Ways to Prevent Ink Stains While Writing

    To keep ink stains off your skin while writing, you can take simple preventive steps that save time and hassle. Prevent ink transfer by choosing smudge-resistant pens that dry quickly. This reduces the risk of ink smudging on your hands. Write with care, holding the pen at an angle that minimizes contact between the nib and your skin to protect your skin from accidental stains. Quick cleaning is also key if ink gets on your skin. Having a damp cloth or wet wipe handy helps stop stains from setting.

    Here are easy ways to prevent ink stains while writing:

    • Wear gloves or apply barrier cream to protect skin from ink.
    • Use blotting paper or tissue to absorb excess ink immediately.
    • Hold your pen at a safe angle to prevent ink transfer.
    • Opt for quick-drying, smudge-resistant pens.
    • Keep cleaning materials nearby for quick cleaning of spills.

    Following these tips helps you write smoothly without worrying about ink stains.

    How to Care for Your Skin After Ink Removal

    Even with the best precautions, ink can still find its way onto your skin. After ink removal, it’s essential to follow proper skin care to avoid irritation and support repair. Start by gently washing the area with mild soap and lukewarm water to remove any leftover chemicals. Avoid scrubbing; a gentle approach helps prevent dryness and damage.

    Once clean, apply a fragrance-free, hypoallergenic moisturizer to provide hydration and soothe the skin. This post-removal step restores your skin’s natural barrier and promotes healing. Keep monitoring your skin for redness, swelling, or discomfort, as those signs may require medical advice.

    Regular moisturizing and maintaining cleanliness play vital roles in post-removal care. By treating your skin with gentle products and consistent hydration, you’ll help minimize irritation and encourage faster repair. This way, you keep your skin healthy after ink removal.

    Frequently Asked Questions

    Can Pen Ink Cause Allergic Reactions on the Skin?

    Yes, pen ink can cause an ink allergy, leading to skin irritation and contact dermatitis. When your skin experiences chemical exposure from certain inks, you risk sensitization, especially with repeated contact.

    You might notice allergic symptoms like redness, itching, or swelling, which are signs of hypersensitivity reactions. If you have sensitive skin, it’s important to watch for these signs and avoid prolonged exposure to prevent worsening allergic responses.

    Is It Safe to Use Makeup Remover on Ink Stains?

    Yes, makeup remover is generally safe and effective for ink stain removal, especially oil-based types that tackle stubborn ink well. You should consider your skin sensitivity and test a small area first.

    For quick stain removal, makeup remover works better than many natural methods but avoid waterproof formulas if irritation occurs. Commercial ink removers exist but can be harsh.

    Alternative cleaning solutions like micellar water also balance effectiveness and gentleness for safe use on skin.

    How Long Does Ink Typically Stay on Skin Without Removal?

    Ink residue typically stays on your skin anywhere from a few hours to several days, depending on skin absorption and the ink’s composition. Temporary markings like water-based ink fade faster, while oil-based ink lasts longer because it bonds more strongly with your skin barrier.

    Ink longevity varies with factors like skin type and activity. But natural ink fading happens as your skin exfoliates and renews, gradually clearing the stain.

    Are There Any Health Risks From Ink Absorption Through Skin?

    Did you know your skin’s permeability limits ink absorption to less than 1%? So, ink toxicity from pen ink chemicals is minimal through dermal absorption. Your skin barrier effectively blocks most chemical exposure, meaning pen ink rarely poses health risks.

    However, if you have sensitive or broken skin, the risk of irritation increases. Overall, typical ink exposure isn’t dangerous, but avoiding prolonged contact is smart to protect your skin.

    Can Ink Stains Transfer to Clothing From Stained Skin?

    Yes, ink transfer from stained skin to clothing happens often through surface transfer and dye transfer. When your skin has ink contamination, the ink can diffuse easily, causing stain migration onto your clothes.

    If the ink is fresh, clothing staining is more likely because the ink hasn’t dried or set. To avoid this, you should clean ink off your skin quickly to prevent further ink diffusion and reduce dye transfer risks.

    Conclusion

    Think of ink on your skin as a stubborn shadow. Acting quickly lets you chase it away before it lingers. Using soap, rubbing alcohol, or lemon juice is like shining a light that helps fade the mark.

    Choosing the right remover and caring for your skin afterward is like nurturing a garden after a storm. It ensures your skin stays healthy and vibrant. With these steps, you’ll keep your skin as clear and bright as a fresh canvas.