To refill your Canon 745 ink cartridge, first confirm it’s empty by checking ink levels or shaking it gently.
Gather a compatible refill kit and turn off the printer before carefully removing the cartridge.
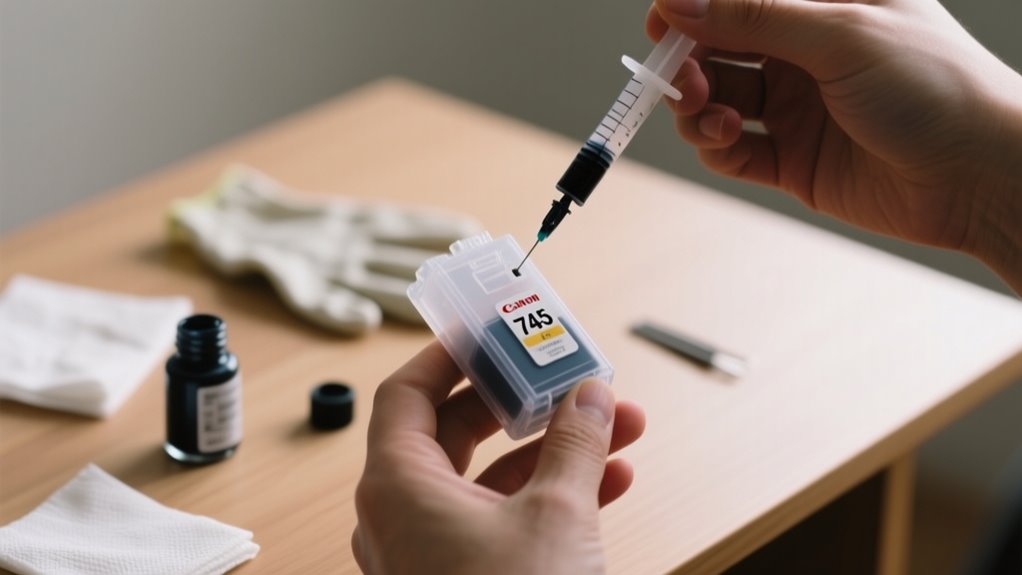
Locate and prepare the refill and air vent holes, then slowly inject ink using a syringe without sealing the vent yet.
Seal the holes securely, reinstall the cartridge, and test print.
If you want to guarantee perfect results, there are helpful tips and troubleshooting advice you can explore next.
Confirm Your Canon 745 Cartridge Is Empty
Before you begin refilling, you’ll want to verify that your Canon 745 cartridge is truly empty. Most printers display an “empty” message when the ink runs out, but sometimes this warning isn’t accurate.
To confirm, gently shake the cartridge and listen for any ink movement inside. If you don’t hear anything, that’s a good sign the cartridge is empty. You can also remove the cartridge and check the ink level through the transparent part of the casing.
Keep in mind that clogged nozzles or sensor errors might cause your printer to think the cartridge is empty when it still contains ink. Some Canon 745 cartridges have chips that track ink levels; these can sometimes be reset if the cartridge isn’t physically empty but shows as so.
Gather Your Tools and Canon 745 Refill Kit
Once you’ve confirmed your Canon 745 cartridge is empty, the next step is gathering the right tools and a compatible refill kit. Make sure your refill kit is specifically designed for the Canon 745 cartridge and includes the correct ink color to avoid print issues.
Prepare a clean workspace by covering surfaces to prevent ink stains. Also, have all your materials within easy reach to keep the process smooth.
Here’s what you’ll need:
- A Canon 745 refill kit with ink, syringe, and thumb drill
- Gloves to protect your hands
- A utility knife for opening cartridge seals
- Rubbing alcohol and clean cloths for cleaning spills and the cartridge
Having these tools ready guarantees a quick, efficient refill while maintaining print quality. This preparation sets you up perfectly for the next step in safely removing your cartridge.
Remove Your Canon 745 Cartridge Safely
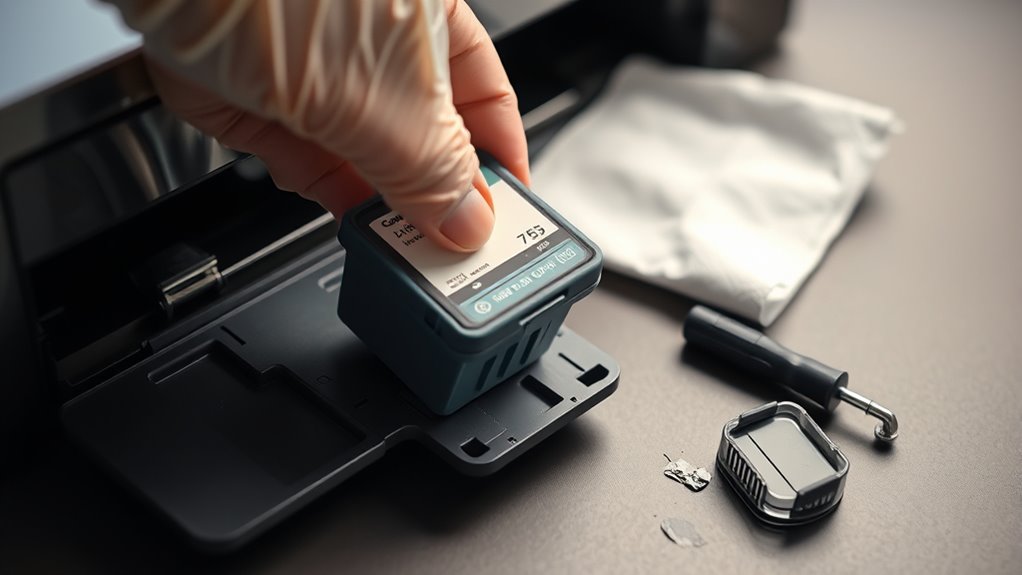
Before you start, make sure to power off and unplug your printer for safety. It’s a simple step, but really important to avoid any accidents. Next, gently open the cartridge access cover—take your time so you don’t accidentally cause any damage. Then, carefully press the latch and remove the Canon 745 cartridge, making sure not to touch the electrical contacts. This will help keep your cartridge in good shape.
Power Off Printer
To remove your Canon 745 ink cartridge safely, make sure you power off the printer and unplug it from the electrical outlet to avoid electrical shock and potential damage. Before handling the empty ink cartridge, follow the instructions carefully to prevent spills and damage. This Simple Guide helps you save money by refilling instead of buying new cartridges at office supply stores.
- Power off the printer completely to ensure safety.
- Wait for internal parts to cool down before removal.
- Handle ink cartridges by the edges, avoiding contact with nozzles.
- Use electrical tape to cover the small hole after refilling to keep the cartridge clean.
Taking these steps ensures your printer cartridge works well and makes getting ink easy to clean and put back.
Open Cartridge Access
How do you safely access the Canon 745 cartridge inside your printer? First, make sure your printer is turned off and unplugged to avoid any electrical issues.
Carefully open the printer cover to reveal the cartridge slots. Depending on your model, gently press down or lift the cartridge latch to release the Canon 745 cartridge.
When you handle the cartridge, grasp it firmly by the sides, avoiding contact with the nozzles or electronic contacts to prevent damage. Use clean, dry hands or wear gloves to keep ink stains and contamination at bay.
Once removed, place the Canon 745 cartridge on a clean, protected surface if you plan to refill or replace it later. This careful approach guarantees safe and efficient cartridge access.
Gently Remove Cartridge
Although you’ve already accessed the cartridge compartment, you’ll need to handle the Canon 745 cartridge with care as you remove it. Proper cartridge handling guarantees you avoid damage to both the cartridge and printer.
Before removal, turn off and unplug your printer to prevent electrical issues. Follow these steps for safe cartridge handling:
- Open the printer cover gently, avoiding any force.
- Press down lightly on the cartridge to release its lock.
- Lift the cartridge straight out, keeping it level.
- Hold the cartridge by its edges, steering clear of nozzles and contacts.
Using gloves or a clean cloth can help prevent ink stains on your hands. This careful approach protects your Canon 745 cartridge and maintains printing quality.
Find and Prep the Refill Hole
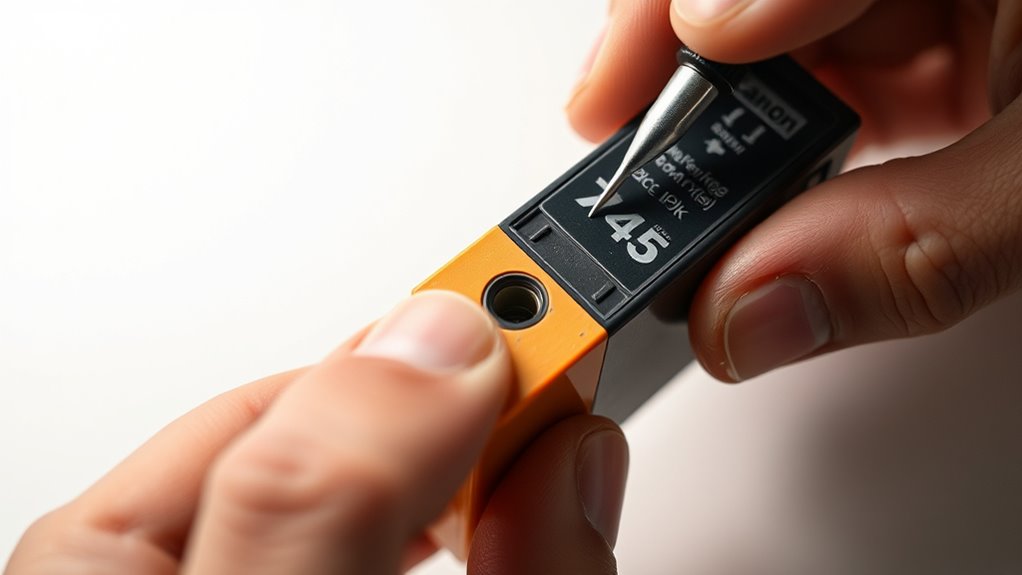
First, you’ll want to find the refill hole on your Canon 745 cartridge. It’s usually hidden under a label or sticker, so take a close look. Once you spot it, gently peel back or cut the covering to reveal the area.
Next, get the surface ready by carefully puncturing the designated spot. Just be sure not to damage the cartridge while you’re doing this.
Locating Refill Hole
Where exactly do you find the refill hole on your Canon 745 ink cartridge? Hole identification is vital before you start refilling. Typically, the refill hole hides under a label or tape on the top or side of the cartridge.
To locate it, first inspect the cartridge top and sides for any labels or tape. Then, use a utility knife or scalpel to gently peel back the covering without damaging the cartridge. Look for a small circle or dot marking the exact spot for drilling or puncturing.
Also, check if there’s a plug or rubber stopper that needs removal or puncturing to access the refill port. Correct hole identification ensures a smooth refill process without leaks or damage.
Preparing Hole Surface
Once you’ve uncovered the refill hole, make certain the surrounding area is clean and free from dust, ink residue, or leftover adhesive. Proper hole preparation is essential for a smooth refill process.
Carefully peel back the sticker or label covering the hole using a utility knife or sharp object, avoiding damage to the cartridge. If the label resists, gently lift it with tweezers or a flat tool to prevent tearing.
After exposing the hole, clean the surface thoroughly to remove any debris. Finally, use a thumb drill or pin to puncture the refill hole precisely at the marked spot. This careful hole preparation ensures the ink flows correctly and prevents leaks during refilling your Canon 745 ink cartridge.
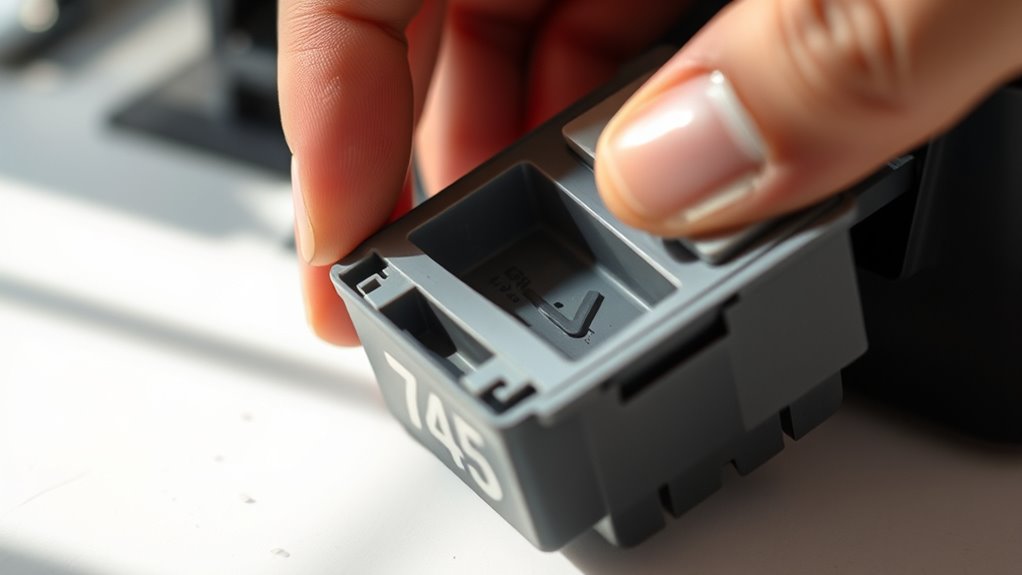
Find and Keep the Air Vent Open
Although it may be hidden under a label or tape, you need to locate the air vent on your Canon 745 ink cartridge before refilling. This vent is usually an L-shaped groove or small hole that regulates airflow, which is essential for smooth ink flow. Proper vent maintenance prevents vacuum formation that could block ink movement.
To find and keep the air vent open, follow these steps:
- Gently peel back or remove the label covering the vent without damaging it.
- Identify the small hole or groove designed for air exchange.
- Ensure the vent remains unobstructed during the entire refill process.
- Avoid sealing the vent until the cartridge is fully used to prevent pressure buildup.
Maintaining the vent open ensures consistent ink supply, avoids leaks, and prolongs cartridge life. Proper vent maintenance is key to efficient refilling and peak printing performance.
Fill the Cartridge Slowly With Canon 745 Ink
When you start refilling your Canon 745 ink cartridge, fill the syringe slowly to prevent overflow and assure precise ink delivery. Maintaining a steady ink flow ensures the sponge inside absorbs ink evenly without leaks or air bubbles.
Inject ink gradually through the refill hole, pausing when the ink wells up to avoid excess pressure. Use gentle, controlled pressure on the syringe plunger to prevent sudden surges that could damage the cartridge or cause spillage.
After filling, pause briefly to let the ink settle, then check the cartridge to avoid overfilling.
| Step | Key Point |
|---|---|
| Slow Injection | Prevents overflow and spillage |
| Controlled Pressure | Maintains steady ink flow |
| Pause & Settle | Ensures even absorption |
Seal Canon 745 Refill and Vent Holes
After you refill your Canon 745 cartridge, make sure to seal the refill holes with tape right away. This helps prevent any leaks or evaporation. Also, don’t forget the vent hole—it needs to be covered too. But here’s the trick: poke a tiny air hole in the tape over the vent. This little hole keeps the pressure balanced inside the cartridge. Just be sure all the seals are airtight so your ink flows smoothly and your printer performs at its best.
Proper Refill Hole Sealing
Since proper sealing prevents leaks and pressure loss, you need to carefully seal the refill hole with waterproof tape or a rubber plug. Using the right seal technique guarantees your Canon 745 cartridge performs flawlessly without ink spills.
Follow these steps for effective sealing:
- Choose waterproof tape or a rubber plug to cover the refill hole securely.
- Poke a small vent hole through the seal to allow air to escape and prevent vacuum formation.
- Position the vent hole away from the ink refill area to avoid contamination or leaks.
- After sealing, check for airtightness by inspecting for any ink or air leaks.
This seal technique maintains pressure and prevents ink drying, ensuring your cartridge works smoothly after refilling.
Vent Hole Management
Sealing the refill hole properly sets the stage for managing the vent hole on your Canon 745 cartridge. Vent sealing is essential to prevent unwanted ink flow and maintain the cartridge’s internal pressure.
After refilling, poke a small vent hole through the tape covering the vent to let air in and avoid vacuum buildup. During the refill, keep the vent open temporarily so air can escape, but don’t forget to seal it afterward with tape.
This controlled vent balances air pressure and ink flow, ensuring consistent printing without leaks or quality issues. Proper vent sealing keeps your cartridge airtight, prevents ink leakage, and maintains smooth ink delivery, making your refill process effective and mess-free.
Reinstall the Cartridge and Secure It Correctly
When you reinstall the Canon 745 ink cartridge, carefully align it with its designated slot so the contacts and nozzles fit perfectly. Proper cartridge alignment is crucial to ensure smooth printing and avoid errors.
Follow these steps to secure the cartridge correctly:
- Match the color-coded labels on the cartridge with the corresponding slots in the printer.
- Gently press the cartridge into the slot until you hear a click, confirming it’s locked in place.
- Check that the cartridge sits flush with the printer’s carriage, preventing any misalignment.
- Verify the contacts and nozzles are oriented properly to maintain optimal ink flow.
Taking these steps guarantees that the cartridge is installed securely and aligned precisely. This careful placement helps your printer recognize the cartridge and ensures consistent print quality without interruptions.
Test Print the Cartridge
After you’ve securely reinstalled the Canon 745 ink cartridge, the next step is to run a test print. This helps you verify that ink flows correctly and print quality is restored.
Securely reinstall the Canon 745 ink cartridge, then run a test print to confirm proper ink flow and print quality.
On your computer, open the printer’s properties and select the “Print Test Page” option to start. Before printing, double-check that the cartridge is properly installed and seated to avoid errors or incomplete prints.
Once the test print finishes, examine the page carefully. Look for consistent color output, clear text, and ensure there are no streaks or missing sections.
If the print looks good, you’ve successfully refilled the cartridge. If not, it may indicate the need for further cleaning or adjustments.
Running a test print right after refilling guarantees your Canon 745 cartridge is ready for everyday printing without issues.
Troubleshoot Common Canon 745 Cartridge Issues
Although refilling your Canon 745 cartridge can restore its functionality, you might still encounter issues like false “ink out” errors or poor print quality. These problems often stem from sensor malfunctions or uneven ink distribution.
To troubleshoot effectively, focus on the following steps:
- Perform Sensor Cleaning using an alcohol-dampened cloth to clear clogged or dirty sensors, which often cause false ink level readings.
- Check the cartridge seal after refilling to prevent ink leakage or air intake that disrupts printing.
- Run a printer cleaning cycle or reset the printer to improve ink flow and fix streaks or color inconsistencies.
- Verify even and sufficient ink refilling to avoid incomplete prints or streaks.
Frequently Asked Questions
How Long Does a Refilled Canon 745 Cartridge Typically Last?
A refilled Canon 745 cartridge typically lasts for about 50 to 100 pages, which usually means 2 to 4 weeks with moderate printing. You’ll want to keep durability concerns in mind since refilled cartridges often print around 70-80% of what a new one does.
If you handle and seal it properly, you can maximize its lifespan. Just remember, frequent use and ink quality also affect how long it lasts.
Can I Use Third-Party Ink With Canon 745 Cartridges?
Yes, you can use third-party ink with Canon 745 cartridges, but ink compatibility is essential. Not all third-party inks work well and may cause clogs or poor print quality.
To avoid issues, choose reputable brands tested specifically for Canon 745. Keep in mind, using non-OEM ink might void your printer warranty. Always check reviews and product specs to confirm the ink matches your cartridge’s requirements for the best results.
Is It Safe to Reuse a Canon 745 Cartridge Multiple Times?
You can safely reuse your Canon 745 cartridge about 3 to 4 times before the cartridge’s durability starts to decline noticeably. Each refill slightly wears down internal components and sensors, which might cause print quality issues or errors.
If you handle the cartridge carefully and follow proper refilling and cleaning steps, you’ll extend its lifespan. Just keep an eye on cartridge durability so you avoid leaks or damage to your printer.
What Should I Do if My Printer Doesn’T Recognize the Refilled Cartridge?
If your printer doesn’t recognize the refilled cartridge, start by checking for recognition issues. Wipe the cartridge chip clean with a lint-free cloth or alcohol wipe to remove ink residue.
Use a resetter tool designed for Canon 745 to reset the chip’s memory. If that doesn’t work, try reinstalling the cartridge, power cycling the printer, or updating the printer’s firmware.
Persistent issues might require replacing the chip or cartridge.
How Do I Properly Dispose of Empty or Damaged Canon 745 Cartridges?
You should properly dispose of empty or damaged Canon 745 cartridges by recycling them through authorized programs. This helps reduce environmental impact by preventing ink leakage and harmful waste.
Many office supply stores offer free recycling, and some communities hold e-waste collection events. Avoid tossing cartridges in regular trash to protect the environment.
Recycling may also earn you discounts or incentives, making it a responsible and beneficial choice.
Conclusion
Refilling your Canon 745 cartridge is easier than you think. Just when you thought you’d need a new one, you’ll find yourself saving money and reducing waste instead.
By following these simple steps, you’ll quickly get back to printing sharp documents and vibrant photos. Isn’t it funny how a little patience and the right tools can turn an empty cartridge into a reliable workhorse again?
Give it a try; you’ll be surprised how satisfying it feels!
Leave a Reply