To put ink in your fountain pen, first gather your pen, ink, and cleaning supplies. Identify your pen’s filling system—cartridge, converter, piston, or eyedropper.
Clean the nib and section with warm water to avoid clogs.
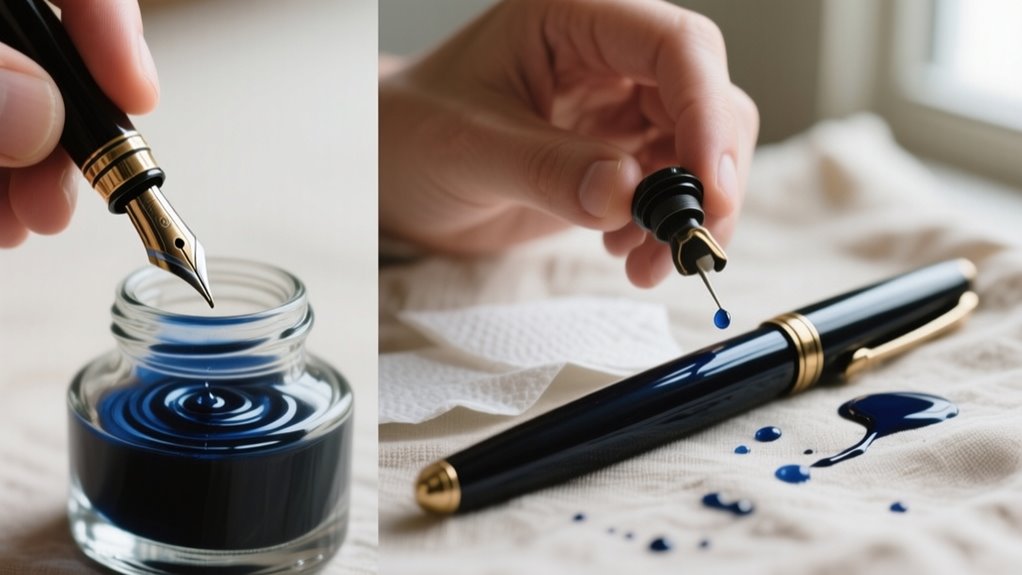
Fill the pen by inserting the cartridge or using the converter or piston to draw ink from the bottle.
Reassemble the pen tightly, wipe off any ink, then test the ink flow on paper.
Follow these steps, and you’ll write smoothly. Learn how to handle common issues and maintenance next.
Gather Your Pen and Ink Supplies
Before you begin filling your fountain pen, make sure you’ve gathered all the necessary supplies. Start by collecting your fountain pen, verifying it’s clean and ready to fill.
Depending on the fountain pen filling systems it supports, you’ll need to select your ink source carefully. If your pen uses an ink cartridge, have one on hand. Or if it relies on bottled ink, prepare a bottle and any tools like an eyedropper or syringe.
Don’t forget a converter if your pen supports it, which allows you to draw ink directly from a bottle. Set up a clean workspace with paper towels or a cloth to catch any ink spills.
Finally, check that all pen parts, especially the grip section and barrel, are properly assembled and sealed. Having everything ready ensures a smooth, mess-free process when you fill your fountain pen.
Choose the Right Filling Method for Your Fountain Pen
First, you’ll want to figure out what kind of filling system your pen uses—does it take cartridges, converters, or maybe a piston mechanism? Each one calls for a different way to fill it up. Then, check whether your pen uses standard cartridges or proprietary ones, so you know which ink will work. It’s also a good idea to weigh the pros and cons of each method—think about things like how easy it is to use versus how much ink it holds. That way, you can choose the option that fits your writing style perfectly.
Filling System Types
Choosing the right filling system for your fountain pen depends on your preferences for convenience, ink capacity, and ink variety. The most common filling mechanisms include cartridges, converters, piston fillers, vacuum fillers, and eyedropper systems.
Cartridges offer quick, mess-free refills but limit your ink color options. Converters give you the flexibility to use a wide range of bottled inks, making them a popular choice.
If you need a larger ink capacity, a piston filler is ideal. It draws ink directly into the pen’s barrel through a twisting mechanism. Vacuum fillers also hold a lot of ink but require a specific filling process.
Eyedropper systems have the biggest capacity but need careful sealing to avoid leaks and don’t work with cartridges. Choose the one that fits your writing style and maintenance comfort.
Ink Compatibility Options
How do you know if your fountain pen will work well with a particular ink filling system? Start by checking your pen’s compatibility with cartridges, converters, or eyedropper setups.
Standard international cartridges fit most pens designed for cartridge filling, but proprietary cartridges need specific brands. If you prefer bottled ink, use it with converters or eyedropper systems and choose inks formulated for fountain pens to avoid clogging.
Avoid inks with heavy dyes or additives that can gum up the nib. Always follow the pen manufacturer’s recommendations for ink types and filling systems to maintain smooth ink flow and prevent damage.
Also, consider ink viscosity and pigment content. Thicker or pigmented inks may demand specific filling systems or more frequent cleaning for ideal performance.
Advantages And Disadvantages
Understanding the types of ink filling systems helps you pick the best option for your fountain pen. If you want convenience, cartridges are easy to use but limit ink choices and might cost more over time.
Using a converter, you get flexibility to refill from many bottled inks, though some converters don’t fit every pen brand. Piston fillers offer large capacities and simple refills but demand more maintenance and careful handling.
Vacuum fillers hold lots of ink and refill quickly, yet their complex design suits luxury pens and requires careful operation. Eyedropper systems give the most ink and customization but risk leaks, needing proper sealing.
Consider your priorities, whether ease, ink variety, or capacity, and your willingness to maintain the pen to choose the right filling method for your pen.
Clean the Nib and Section Before Filling
Before you fill your fountain pen, make sure to remove any old ink by flushing the nib and section with warm water. This helps prevent colors from mixing and keeps your pen working smoothly. Once everything is clean, be sure to dry it completely so you don’t dilute your fresh ink.
Remove Old Ink
Why should you remove old ink before refilling your fountain pen? Old ink can clog the nib and feed, affecting flow and color purity.
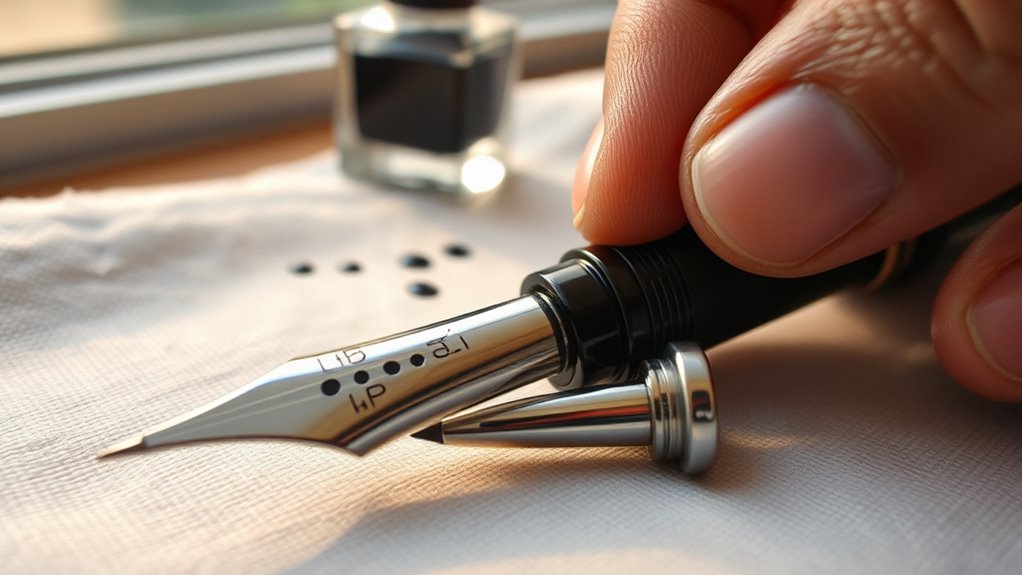
To prevent this, disassemble the pen carefully, removing the grip section for full access. Flush the nib and section with lukewarm water using a bulb syringe or gentle stream to clear residual ink. This cleaning step ensures smooth writing and avoids mixing colors.
| Step | Action | Tip |
|---|---|---|
| 1 | Disassemble pen | Remove grip section gently |
| 2 | Flush nib & feed | Use lukewarm water |
| 3 | Rinse internal parts | Use bulb syringe if possible |
| 4 | Dry completely | Air dry or use soft cloth |
Avoid harsh chemicals; plain water works best.
Use Warm Water
How thoroughly do you clean your fountain pen’s nib and section before refilling? To keep your pen working smoothly, you should rinse these parts meticulously with warm water. Warm water helps dissolve any dried ink and prevents clogs that can disrupt ink flow.
Make sure the water is lukewarm, not hot, to avoid damaging delicate components. After rinsing, gently shake or blot the nib and section to remove excess water. This step stops new ink from being diluted when you refill.
Regularly cleaning your pen with warm water ensures consistent ink flow and extends the lifespan of your fountain pen. Taking this simple step before every refill keeps your writing experience smooth and hassle-free.
Dry Completely
Once you’ve rinsed the nib and section with warm water, make sure they’re completely dry before filling your pen. This step is essential to prevent ink dilution and leaks. After you rinse, use a soft cloth or paper towel to gently pat the nib and feed area dry.
If needed, let the parts air-dry completely to guarantee no moisture remains.
Here’s how to dry your nib and section properly:
- Gently blot with a soft cloth or paper towel after rinsing
- Avoid reassembling the pen while parts are still wet
- Allow air-drying if any moisture lingers
- Confirm all parts are dry completely before refilling
How to Fill a Fountain Pen With Ink
Wondering what it takes to fill your fountain pen with ink? Start by removing the cap and unscrewing the barrel from the grip section to expose the filling mechanism.
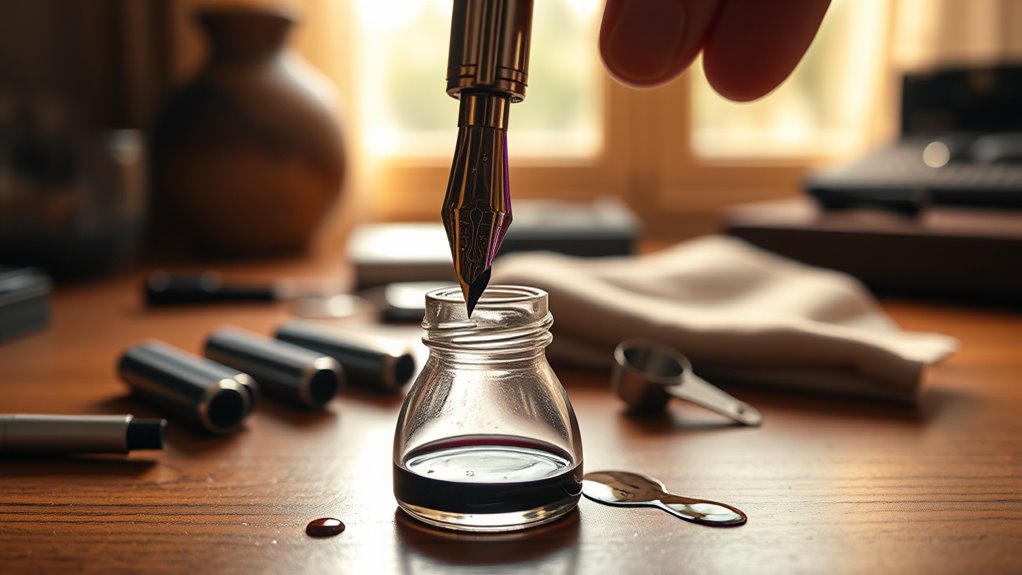
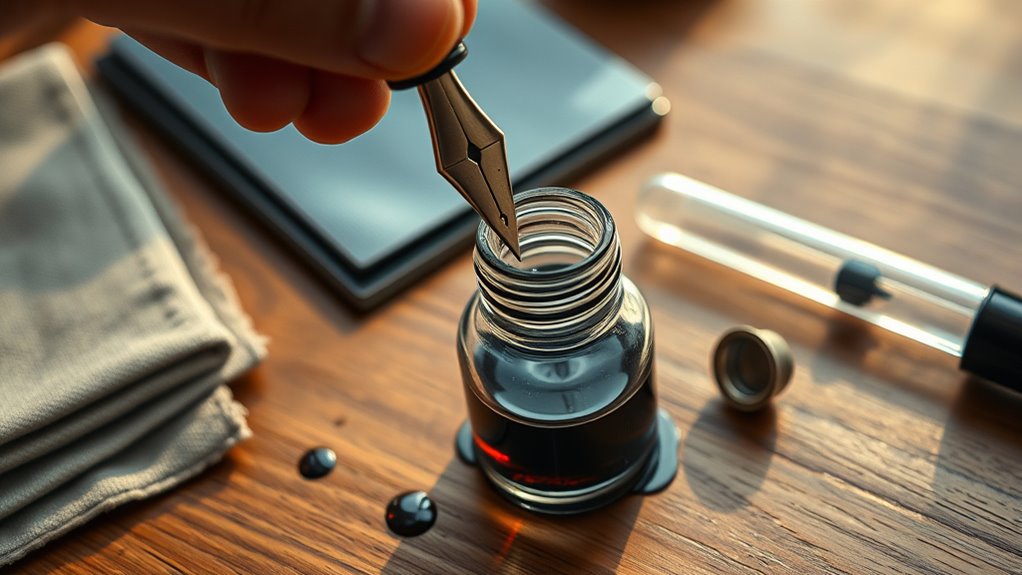
If you’re using a cartridge pen, simply push a new cartridge firmly into the section until it punctures and ink begins to flow. For pens with a converter or piston filler, dip the nib and feed into the ink bottle. Then, operate the piston or twist the converter to draw ink into the reservoir.
Be sure to wait a few moments so the ink saturates the feed properly. This guarantees smooth, consistent writing from the start. Whether you use a piston mechanism or cartridge, filling your fountain pen correctly is vital to avoid leaks and maintain ink flow.
Following these steps will help you fill a fountain pen confidently and keep it ready for your next writing session.
Reassemble and Wipe Your Fountain Pen
After filling your fountain pen, you’ll want to reassemble it by securely screwing the barrel or grip section back onto the nib unit to guarantee a tight seal. This step is essential to prevent leaks and ensure smooth ink flow when you start writing. Once reassembled, take a soft cloth or paper towel and gently wipe any excess ink from the nib, feed, and exterior surfaces. This keeps your pen clean and avoids unwanted smudges.
Securely reassemble your fountain pen and gently wipe excess ink to prevent leaks and smudges.
To properly reassemble and wipe your fountain pen:
- Check all parts are tightly screwed together to maintain a proper seal.
- Inspect the threads for any ink residue and wipe clean to prevent buildup.
- Use a soft cloth to wipe off any visible ink on the nib and body.
- Allow the ink to settle for a few minutes before using the pen.
Try Writing to Test the Ink Flow
With your fountain pen reassembled and cleaned, it’s time to see how the ink flows onto paper. Before you start writing, wait a few moments to let the ink travel from the feed to the nib. Then, gently scribble on a scrap piece of paper to test the ink flow. This simple test helps you check if the ink moves smoothly and consistently without skipping.
If the ink doesn’t flow right away, try gently squeezing the cartridge or applying slight pressure to encourage movement. Also, ensure the nib and feed are clean and free of air bubbles, as these can block the ink flow and disrupt writing. To get a better sense of performance, test the pen on different types of paper. This will confirm the ink flows properly and the nib glides smoothly, giving you confidence that your fountain pen is ready to write beautifully.
Troubleshoot Common Ink Filling Issues
If your fountain pen isn’t filling correctly, it’s usually due to a few common issues like improper disassembly, incompatible cartridges, or trapped air bubbles. To troubleshoot these problems, start by ensuring you’ve fully disassembled the pen and that you clean the nib thoroughly to prevent blockages affecting ink flow.
Common fountain pen filling issues often stem from improper disassembly, incompatible cartridges, or trapped air bubbles.
Next, verify that your ink cartridge or converter suits your specific filling system to avoid fitting problems. When using piston or eyedropper systems, give the ink time, about 15 minutes, to reach the feed and stabilize the ink flow. Also, be gentle and steady during filling to avoid trapping air bubbles in the reservoir.
Here are quick tips to fix common ink filling issues:
- Properly disassemble the pen and clean the nib before filling
- Use compatible cartridges or converters for your filling system
- Wait for ink to settle in piston or eyedropper systems
- Apply gentle pressure to prevent air bubbles
Following these steps will help maintain smooth ink flow and a reliable filling process.
Frequently Asked Questions
How Long Does Ink Typically Last in a Fountain Pen?
Ink typically lasts anywhere from one to four weeks in your fountain pen, depending on your writing habits and nib size. If you use a larger capacity pen, ink longevity can stretch to several months.
To reduce refill frequency, you’ll want to use high-quality inks that minimize ink evaporation. Also, sealing your pen properly and storing it upright helps keep the ink from drying out, extending how long it lasts between refills.
Can I Mix Different Ink Brands or Colors Safely?
Mixing different ink brands or colors isn’t always safe; it’s like combining oil with water or fire with ice. For ink compatibility, stick to inks from the same brand or similar formulas.
When experimenting with color blending tips, test small amounts first to avoid clogs. Always follow ink cleaning methods thoroughly when switching inks, so your pen stays smooth and damage-free.
This way, you protect your pen and enjoy vibrant writing.
What Type of Ink Is Best for Fountain Pens?
You’ll want to choose dye-based ink for the best results in your fountain pen. It offers vibrant ink color options and flows smoothly, helping with ink flow regulation so your nib doesn’t clog.
When selecting, consider ink bottle types with easy-to-use designs for refill convenience. While pigment inks offer permanence, they can cause clogs, so stick with pH-balanced, water-based options for consistent performance and easier maintenance.
How Do I Store a Fountain Pen When Not in Use?
Imagine your fountain pen standing tall like a soldier, nib pointing upward, guarding its precious ink. When you’re done, store it this way to prevent leaks and keep ink flowing smoothly.
Always cap it tightly to avoid drying out. Use pen cleaning tips regularly, especially if you switch ink color selection often.
Keep your pen in a case away from heat or sunlight, and place your ink bottle storage somewhere stable and cool for best results.
Are There Any Inks to Avoid Using in Fountain Pens?
You should avoid inks that harm your pen’s ink compatibility, like India ink, permanent, or waterproof inks, since they clog and damage the feed. Cheap inks with fillers cause inconsistent flow, and expired or separated inks lead to blockages.
Also, steer clear of heavily pigmented inks. They stain and need frequent cleaning. For ink cleaning tips, use fountain pen-friendly inks and explore various ink color options designed specifically for smooth performance.
Conclusion
Now that you’ve got ink in your fountain pen, you’re ready to hit the ground running. Just remember, practice makes perfect, so don’t be discouraged if it takes a few tries to get the flow just right.
Keep your pen clean and filled, and soon writing with it will feel as natural as breathing. With these simple steps under your belt, you’ll be writing smoothly and confidently in no time.
Leave a Reply