To replace your printer ink in 10 easy steps, first pick a compatible cartridge and power on your printer.
Open the access door and identify the cartridge to replace.
Remove the empty cartridge carefully, then unpack the new one without touching the nozzles.
Insert it firmly until it clicks, close the cover, and let the printer initialize.
Calibrate and run a test print for best results.
If you want to master each step and troubleshoot common issues, you’re in the right place.
Choose a Compatible Replacement Cartridge for Your Printer
Before you buy a replacement cartridge, make sure you verify the model number either in your printer’s manual or on your current cartridge. This verification is essential to guarantee you get a compatible cartridge that works seamlessly with your printer.
Look for manufacturer-approved or high-quality third-party cartridges designed specifically for your printer model. Packaging often includes compatibility stickers or labels listing supported printer models. Use these to confirm the match.
Also, double-check whether you need an ink or toner cartridge, depending on your printer’s requirements. Avoid generic or incompatible cartridges; they might seem like a bargain but can cause print quality issues or even damage your printer.
Taking these steps during model verification saves you from frustration and wasted money. It assures your printer functions smoothly with the right replacement cartridge.
Power On and Open the Printer Cartridge Access Door
Once you’ve chosen the right replacement cartridge, power on your printer by pressing the power button, usually found on the front or top panel. Wait patiently as the printer completes its startup and initializes the ink cartridges. This step guarantees the print carriage moves to the correct spot for easy access.
Power on your printer and wait for startup to position the print carriage for easy cartridge access.
Next, locate and open the access door or cover that grants you entry to the ink cartridges. Depending on your printer model, this access door may be on the front or top. Opening it carefully will allow the print carriage to slide into position, making cartridge replacement straightforward.
If you’re unsure where to find the access door, check your printer’s user manual or follow on-screen prompts. Keeping the printer powered on while you open the access door is essential since it activates the cartridge carriage, preventing any manual handling that could cause damage.
Now you’re ready to proceed to the cartridge replacement step.
Identify Which Cartridge Needs Replacement
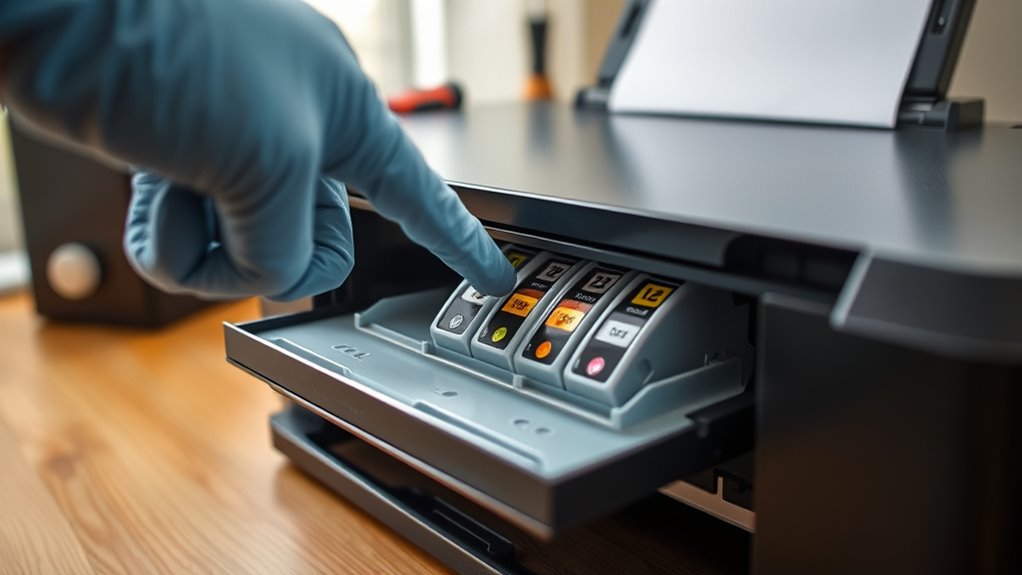
How do you know which ink cartridge needs replacing? Start by checking your printer’s display panel or software for any warning messages about low or empty cartridges. These alerts make cartridge replacement straightforward.
Next, monitor the ink levels shown on your printer’s control panel or through its software interface to identify any cartridge running low. Also, examine print quality closely: faded, streaky, or incomplete images on test pages or color samples often point to a cartridge that’s near empty.
Don’t forget to inspect the cartridges themselves. Look for visible damage, ink leakage, or dried ink on the nozzles, as these issues also signal the need for replacement. Ultimately, consult your printer’s user manual to understand specific color codes and cartridge replacement alerts tailored to your model.
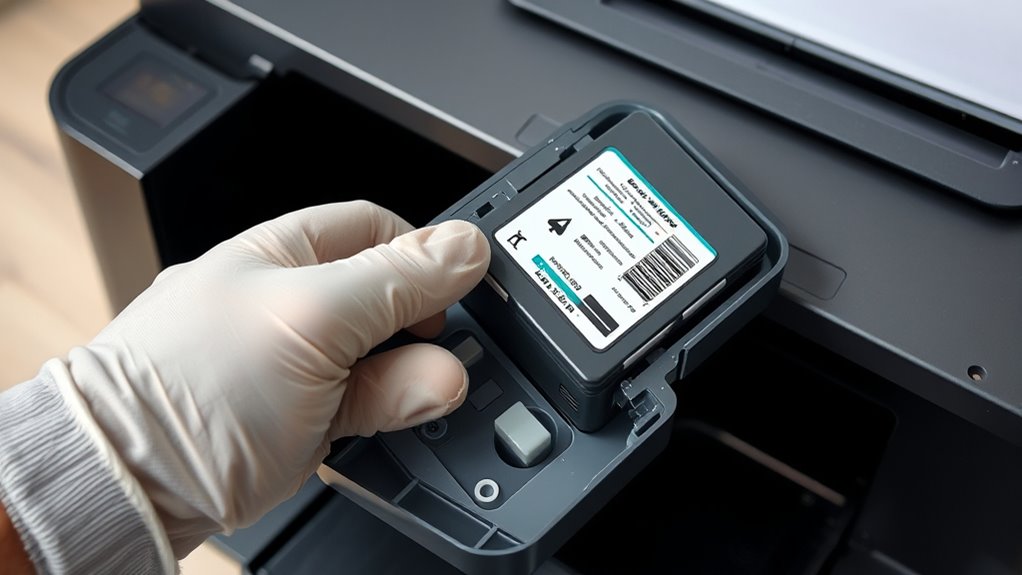
Remove the Empty Cartridge Safely
Now that you’ve found the empty cartridge, it’s time to take it out safely. First, turn on your printer and open the access door. Then, gently free the cartridge by pressing down or releasing the latch. Just be careful not to touch the nozzles or electrical contacts as you lift the cartridge out.
Identifying The Empty Cartridge
Where do you start when your printer runs out of ink? First, turn on your printer and open the cartridge access door to locate the cartridges inside. To identify the empty cartridge, check your printer’s display or software alerts. These usually show print levels and indicate which cartridge needs replacing. Once you know which cartridge is empty, you’re ready for the next step.
Here’s how to identify the empty cartridge quickly:
Open the cartridge access door carefully.
Use the printer’s display or software to check print levels.
Look for alerts that specify the empty cartridge.
Safe Cartridge Removal
Before removing the empty cartridge, make sure your printer is turned on and the access cover is open so you can easily reach the cartridge.
For safe cartridge removal, gently press or lift the latch holding the empty cartridge in place. Grasp the cartridge with care by its sides, avoiding contact with the electrical contacts and nozzles to prevent damage.
Slowly and evenly pull the cartridge out, keeping it level to stop ink from drying or leaking inside the printer. Handling the cartridge carefully during removal helps maintain the printer’s performance.
Once removed, dispose of the empty cartridge according to manufacturer or local regulations. Following these steps ensures a smooth cartridge removal and prepares you for installing a new ink cartridge properly.
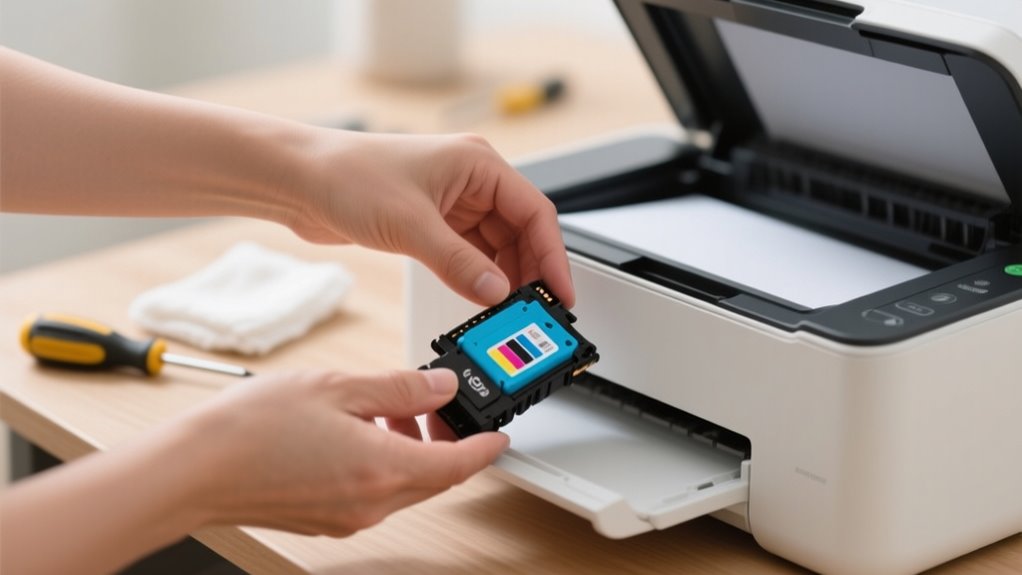
Unpack the New Cartridge Without Touching Nozzles
When you unpack the new cartridge, make sure to hold it by the sides so you don’t touch the nozzles or electrical contacts. And don’t take off the protective tape until you’re ready to install it. This tape keeps the ink fresh and stops clogs from forming. So, handling the cartridge carefully really helps make sure your prints come out clean and clear.
Handle Cartridge Carefully
How should you handle a new ink cartridge to guarantee it works properly? When unpacking, avoid touching the nozzles and electrical contacts to keep the ink flowing well and maintain a good electrical connection. Handle the cartridge gently and correctly to prevent damage or leaks.
Keep these tips in mind when handling your new cartridge:
Hold the cartridge by its sides or edges to avoid getting oils or dirt on the nozzles or electrical contacts.
Keep the cartridge upright while unpacking to stop ink from spilling.
Store the cartridge in a clean, dry place away from sunlight if you’re not installing it right away.
Avoid Contact With Nozzles
Since the nozzles are delicate and easily clogged, you should remove the new cartridge from its packaging without touching them. Always handle the cartridge by its sides or edges to avoid contact with the nozzles and copper contacts.
Touching these parts can transfer oils or dirt, causing printing problems or damaging the print head. If needed, use gloves or a lint-free cloth to keep the nozzles clean while you handle the cartridge.
Avoid any direct contact with the nozzles throughout the installation process. Following the manufacturer’s instructions guarantees the nozzles remain free from contaminants and function properly.
Taking these precautions helps maintain print quality and prolongs your printer’s life.
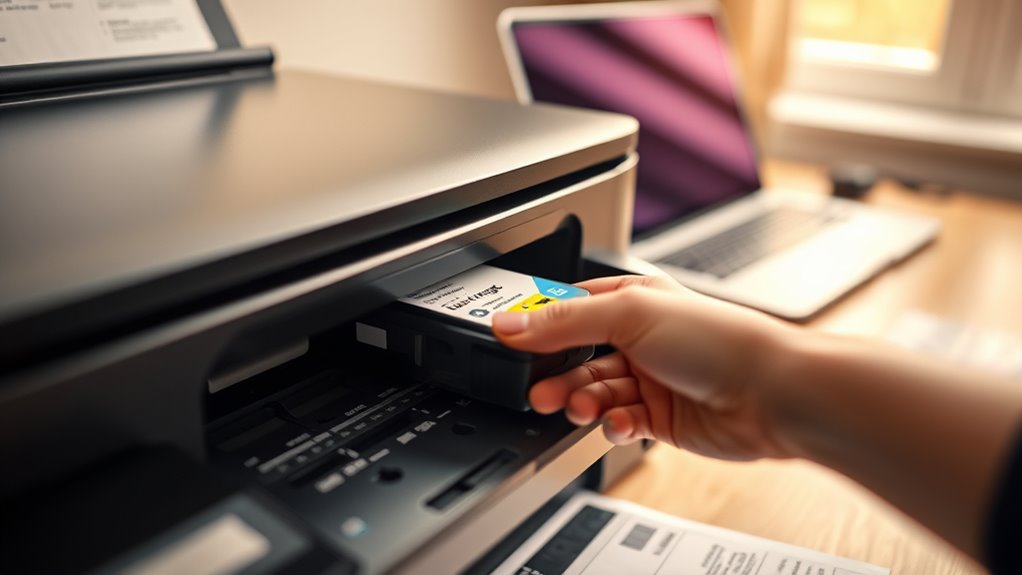
Insert the New Cartridge Correctly and Securely
To insert the new cartridge correctly and securely, you’ll need to align it carefully with the printer’s markings and guides. Proper cartridge installation ensures your printer works smoothly and helps avoid damage.
Follow these key steps for success:
- Align nozzles and electrical contacts precisely with the print head to guarantee proper connection.
- Insert the cartridge firmly into its slot until you hear a click, confirming secure seating.
- Avoid tilting or forcing the cartridge to prevent misalignment or internal damage.
Make sure the cartridge orientation matches the printer’s guides and marks exactly. This attention to detail keeps the ink flowing correctly and maintains print quality. Properly seating the cartridge minimizes errors and keeps your printer running efficiently. By handling the cartridge carefully during installation, you protect both your device and your prints.
Close the Cover and Let the Printer Initialize
After you finish installing the cartridge, close the printer cover securely to trigger the initialization process. When you close the cover, the printer automatically begins to initialize and recognize the new cartridge.
This recognize process involves the printer performing internal checks to verify the cartridge is installed correctly. It’s essential not to open the cover or disturb the printer while it’s initializing, as this could cause errors or prevent the process from completing.
Initialization usually takes just a few moments, during which the printer confirms the cartridge is ready for use. Once the printer finishes this process, it may display a message indicating it’s ready to print.
Calibrate and Align the New Cartridge for Best Quality
Once you install a new cartridge, you’ll want to run your printer’s calibration or alignment function to guarantee the print head is positioned correctly. This step is crucial for maintaining top print quality and avoiding issues like streaks or color misalignment.
You can access the calibration and alignment options through your printer’s software or control panel, following the on-screen prompts for a smooth process.
To ensure the best results, keep these tips in mind:
Use the printer’s built-in calibration tool to align the print head precisely.
Perform calibration regularly after replacing cartridges to maintain consistent print quality.
Check your printer’s manual for model-specific alignment instructions.
Run a Test Print to Confirm Proper Installation
Although replacing the cartridge is a crucial step, you should run a test print to confirm the installation worked correctly. Use your printer’s menu or software to initiate a test print, which helps verify proper installation by checking ink flow and color accuracy.
Examine the print closely for sharp lines, consistent colors, and the absence of streaks, smudges, or faded areas. These details indicate good print quality and that the cartridge is seated and aligned correctly.
If the test print reveals any issues, double-check the cartridge position to confirm it’s properly installed. The results also guide you on whether a cleaning cycle or repositioning is needed.
Regularly running test prints after each cartridge replacement ensures your printer maintains excellent print quality and functions smoothly. This simple step saves time and frustration by confirming everything works as it should before you start printing important documents.
Troubleshoot Common Cartridge Installation Issues
If you encounter error messages or notice poor print quality after installing a new cartridge, start by ensuring it’s properly aligned and fully seated. Incorrect cartridge installation often triggers error messages or printing issues. Check that the cartridge model matches your printer to avoid compatibility problems.
To troubleshoot common cartridge installation issues, inspect the electrical contacts and print nozzles for dirt or smudges, as these can cause installation errors. Restart your printer to clear any error messages and help the device recognize the new cartridge. If the printer still fails to detect the cartridge properly, perform a reset or calibration.
Frequently Asked Questions
How Often Should I Replace My Printer Ink Cartridges?
You should replace your ink cartridges based on their lifespan and your printing habits. If you print frequently, expect to replace ink more often.
Regular cartridge monitoring through your printer software helps you track ink levels and decide when to replace them. Don’t wait for poor print quality. Replacing cartridges promptly ensures consistent results and prevents damage.
Adjust your replacement timing depending on how much you print and the cartridge capacity.
Can I Use Third-Party Ink Cartridges Safely?
You can use third-party ink, but it’s like walking a tightrope over a pit of lava—risky! Cartridge compatibility isn’t guaranteed, so you might face ink quality problems like streaks or color issues.
Plus, many manufacturers warn that using third-party ink can void your warranty. If you decide to go this route, choose high-quality, ISO-certified cartridges and check reviews carefully to avoid costly damage and maintain decent print results.
What Should I Do With Empty Cartridges?
You should never toss empty cartridges in the trash. Instead, practice cartridge recycling by returning them to the manufacturer or using third-party programs.
Store your used cartridges in a sealed bag to prevent ink leaks before recycling. Explore eco-friendly alternatives like refilling cartridges or using recycled ones.
Proper ink disposal methods help protect the environment and reduce waste, so make sure you follow local guidelines and support sustainable practices.
Why Is My Printer Not Recognizing the New Cartridge?
Don’t think your printer’s broken just yet. It’s often a compatibility issue. Even if your cartridge labeling looks right, it might not match your model perfectly.
Improper cartridge storage can cause ink drying, which blocks recognition. Make sure you install it firmly, check for dust on contacts, and verify the cartridge’s compatibility.
These simple steps can fix most recognition problems and get your printer working again quickly.
How Can I Extend the Life of My Ink Cartridges?
To extend your ink cartridges’ life, always use high-quality ink to prevent clogs and fading. Store cartridges properly in a cool, dry place away from sunlight to avoid ink drying.
Regularly calibrate your printer to guarantee efficient ink use and reduce waste. Also, print consistently to keep ink flowing smoothly, preventing drying and blockages.
These steps help you get the most from each cartridge without compromising print quality.
Conclusion
Replacing your printer ink isn’t as tricky as it seems. It’s as easy as pie when you follow these steps.
By choosing the right cartridge, handling it carefully, and letting your printer do its magic, you’ll keep your prints sharp and vibrant.
Remember, a little patience and care go a long way. So, next time your ink runs dry, you’ll be ready to tackle the task like a pro, no sweat!
Leave a Reply