
To clean your HP ink cartridge in 7 easy steps, first turn off and unplug your printer. Then gather distilled water, gloves, and lint-free cloths.
Carefully remove the cartridge without touching contacts or nozzles. Gently clean nozzles and contacts with a damp cloth. Next, soak nozzles in warm distilled water for 5-10 minutes and air dry thoroughly.
Reinsert the cartridge securely and run a test print. Follow these steps, and you’ll easily restore crisp, clear prints while avoiding damage or spills.
More helpful tips are just ahead.
Gather Cleaning Supplies and Power Off Printer
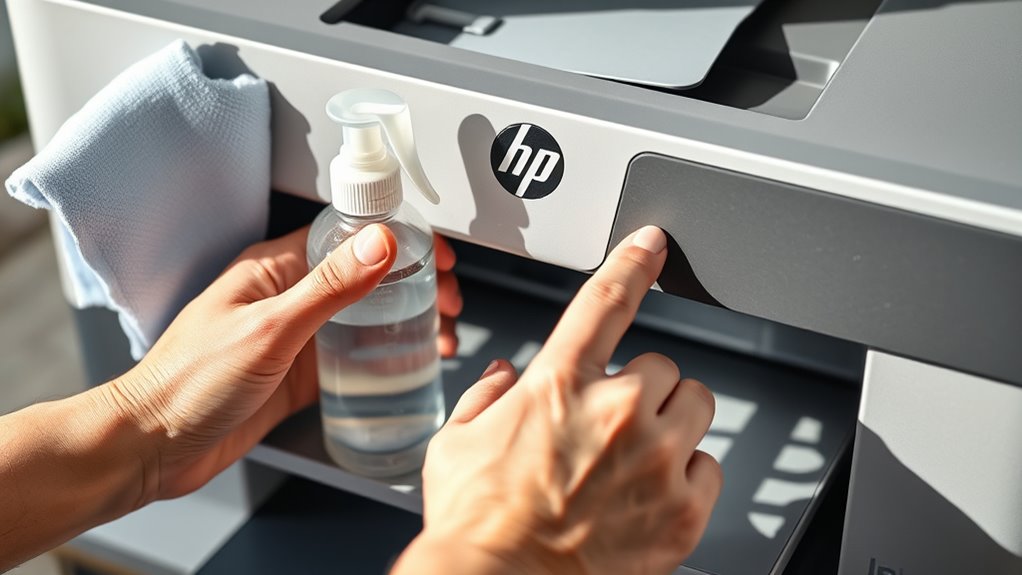
Before you begin cleaning your HP ink cartridge, turn off your printer and unplug it from the power outlet to guarantee safety. Power off your device completely to avoid any electrical hazards and to protect sensitive components during printer maintenance.
Next, gather all necessary supplies so you’re ready to clean the printhead and ink cartridges efficiently. You’ll need distilled water because it’s pure and won’t leave mineral deposits that could clog the nozzles.
Also, grab lint-free cloths and cotton swabs to gently wipe away dried ink without scratching delicate parts. Don’t forget to wear gloves to keep ink off your hands and prevent contamination of the cartridges.
Remove the HP Ink Cartridge Safely From the Printer
Once you’ve powered off and unplugged your printer, open the cover gently to access the ink cartridge compartment. Be careful not to use excessive force to expose the cartridge area properly.
To remove the HP ink cartridge safely, press down lightly on the cartridge or release any locking mechanism holding it in place. Hold the cartridge by its sides. Avoid touching the metal contacts or nozzles to prevent damage or ink leakage.
Then, lift the cartridge straight up and out of its slot, keeping it upright to avoid spills. Handling the cartridge with care protects both the ink and the printer’s internal components.
Following these steps guarantees you remove the cartridge safely without causing harm to your printer or creating a mess. With the cartridge now safely out, you’re ready for the next step in cleaning your HP ink cartridge effectively.
Clean HP Ink Cartridge Nozzles and Contacts Gently
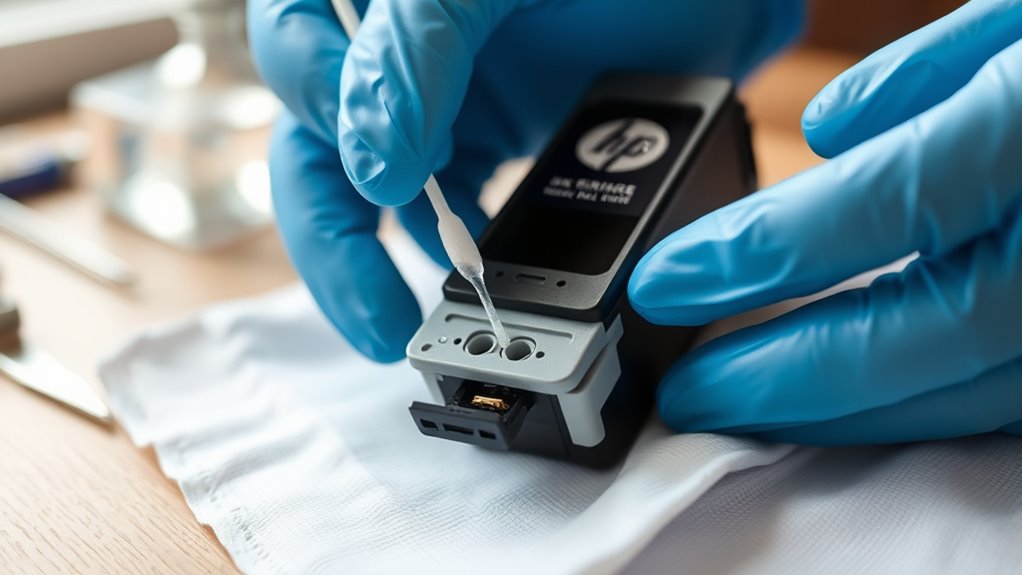
With the HP ink cartridge safely removed, you can now focus on cleaning the nozzles and contacts gently. Start by using a lint-free cloth dampened with distilled water to wipe the gold contact points carefully. Avoid abrasive materials that might scratch or damage them.
For the nozzles, use a soft, damp cloth to remove any dried ink or residue that could block ink flow. If you encounter stubborn dried ink on the nozzles or contacts, lightly moisten a cotton swab with distilled water or isopropyl alcohol and gently clean those areas.
Be careful not to touch the circuit strip or metal contacts directly to prevent damage or static discharge that can affect cartridge performance. After cleaning, let the cartridge dry completely for at least 15 minutes before reinserting it into your printer.
This step guarantees no moisture causes electrical issues during printing. Proper cleaning keeps your HP ink cartridge running smoothly and extends its lifespan.
Soak HP Ink Cartridge Nozzles to Loosen Dried Ink
Why soak the nozzles of your HP ink cartridge? Soaking helps dissolve dried ink clogging the nozzles, making it easier to flush out residue and restore proper ink flow.
To do this, submerge only the nozzle end of your HP ink cartridge in warm distilled water. Never immerse electrical contacts or other parts. Use lukewarm water to avoid damaging delicate components.
Let the nozzles soak for 5 to 10 minutes, giving the dried ink time to loosen effectively. After soaking, carefully remove the cartridge and gently blot the nozzles with a lint-free cloth.
Then, set the cartridge aside to air dry completely. This step is vital to prevent water from interfering with printing or causing damage.
Let the HP Ink Cartridge Dry Fully Before Reinstalling

How long should you wait before reinstalling your HP ink cartridge? You need to let the cartridge dry completely to avoid any damage or printing issues caused by residual moisture.
After cleaning, gently pat the cartridge dry with a lint-free cloth or paper towel, focusing on the nozzle and circuitry areas. Then, place the cartridge on a paper towel with the circuitry side facing up and let it air dry undisturbed for at least 15 minutes.
Gently dry your cartridge with a lint-free cloth, then air dry circuitry side up for at least 15 minutes.
Avoid using heat sources like hair dryers, as they can warp the cartridge or harm the delicate nozzles. Before reinstalling, press gently on the nozzles to check for any remaining moisture or ink.
If no liquid comes out and the cartridge feels firm, it’s dry and safe to reinstall. Taking these steps ensures the cartridge is completely dry, protecting your printer and maintaining print quality.
Reinstall the HP Ink Cartridge Securely Into the Printer
Before you reinstall the HP ink cartridge, make sure it’s completely dry and clean to prevent any damage to your printer. If the contact points on the cartridge look dirty or greasy, wipe them gently with a lint-free cloth before reinserting.
When you’re ready, place the HP ink cartridge into its correct slot in the printer. Press firmly until you hear a click, which means it’s securely seated. This step is essential to guarantee the cartridge is properly connected and will function without issues.
After the cartridge clicks into place, close the printer cover gently to avoid dislodging it. Make sure the cartridge remains properly seated inside the printer. Taking these care steps will help your printer recognize the cartridge and maintain smooth operation.
Run a Test Print and Repeat Cleaning If Needed
After you reinstall the cartridge, go ahead and print a test page from your printer’s maintenance menu. Take a close look at the print—if you notice any missing lines or streaks, it means the clogs are still there. If the print quality hasn’t improved, just run the cleaning cycle again. You can repeat this process up to three times to get the best results.
Print Test Page
Running a test print is a crucial step to check if your HP ink cartridges deliver the right color and clarity. After cleaning, print a test page directly from your printer’s control panel or software to evaluate the print quality.
If the test page shows faded, streaked, or missing lines, the ink flow might still be compromised. In that case, you’ll need to repeat the cleaning process and run another test cycle. This helps guarantee the nozzles are clear and the ink cartridges function properly.
Consistently printing a test page after each cleaning cycle allows you to monitor improvements and confirm that your ink cartridges are restored to ideal condition before moving on.
Repeat Cleaning Cycle
If your test print still shows streaks or faded areas, you’ll want to run the cleaning cycle again to clear any remaining blockages. After the initial cleaning, print a test page to check the print quality of your cartridges.
If imperfections persist, repeat the cleaning and test cycle up to three times. Give your printer a few minutes to rest between cycles. This helps the ink settle and prevents overuse.
Follow these steps to improve print quality:
- Run the cleaning cycle to flush clogged nozzles.
- Print a test page to evaluate the results.
- Repeat if needed, but don’t exceed three cycles without considering cartridge replacement.
This method guarantees you thoroughly clean your HP ink cartridges and maintain the best print quality.
Frequently Asked Questions
How Often Should I Clean My HP Ink Cartridge?
You should clean your HP ink cartridge every 3 to 6 months to maintain print quality and prevent ink from drying. If you print infrequently, running cleaning cycles after every 10-15 pages helps keep the nozzles clear.
Avoid over-cleaning because it wastes ink and reduces your cartridge’s lifespan. Pay attention to streaks or faded colors; that’s a sign it’s time to clean.
Following these maintenance tips balances how often you clean and helps extend your cartridge’s life effectively.
Can I Use Tap Water Instead of Distilled Water?
You shouldn’t use tap water instead of distilled water. Imagine trying to water a delicate orchid with salty seawater. Just like tap water’s minerals can clog your HP cartridge, harming ink flow and causing cartridge damage.
Distilled water guarantees a clean, debris-free cleaning process. It helps maintain printer compatibility and print quality.
Tap water may leave residues that block nozzles. So stick with distilled water to keep your printer running smoothly.
Will Cleaning the Cartridge Affect Printer Warranty?
Cleaning your HP ink cartridge following authorized cleaning procedures won’t affect your printer’s warranty. Manufacturer policies support routine maintenance like manual or automatic cleaning, minimizing warranty voiding risks.
However, if you use improper techniques or harsh chemicals, you risk damaging the cartridge. This can lead to repair costs and denied claims.
Always check service center advice and keep records of your cleaning steps to guarantee warranty implications stay favorable.
How Do I Know if My Cartridge Needs Cleaning?
You’ll know your cartridge needs cleaning if print quality drops with faded lines, streaks, or blotches. Ink clogging reduces cartridge lifespan, so regular cartridge maintenance is key.
If your printer shows low ink warnings but the cartridge looks full, it’s a sign to clean. Keeping cartridges clean helps with printer troubleshooting and extends their life, saving you money on replacements and ensuring consistent, crisp prints every time.
Can I Clean Cartridges From Other Printer Brands the Same Way?
Think of cleaning cartridges like caring for different breeds of pets. Each needs unique attention.
You can’t clean cartridges from other printer brands the same way because cartridge lifespan, cleaning frequency, and cartridge storage vary widely. Ink drying and printer compatibility affect how you approach maintenance.
Using the wrong method risks damage, shortening lifespan and forcing premature cartridge replacement. Always follow brand-specific instructions to keep your cartridges and printer running smoothly.
Conclusion
You might think cleaning your HP ink cartridge is just a messy hassle, but ironically, it’s the key to saving your printer and your sanity. Skipping these simple steps often leads to wasted ink, blurry prints, or costly replacements.
So, next time your printer acts up, don’t just blame technology. Take a moment, clean those nozzles, and watch your printer bounce back like magic. Sometimes, the messiest fixes bring the clearest results.
Leave a Reply