To quickly fix dry HP ink cartridges, start by running your printer’s automatic cleaning cycle to push ink through the nozzles.
If that doesn’t help, remove the cartridge and gently flick it downward to dislodge clogs.
You can also soak the printhead in warm distilled water for a few minutes and wipe it clean with a lint-free cloth.
Avoid harsh chemicals unless necessary, and always dry the printhead completely before reinstalling.
There’s more you can do to restore and maintain your cartridges effectively.
How to Quickly Fix Dry HP Ink Cartridges
If your HP ink cartridge has dried up, you can quickly restore it by running the printer’s automatic cleaning cycle to push ink through the nozzles. This printhead cleaning process often clears minor clogs caused by dry ink cartridges, improving ink flow restoration.
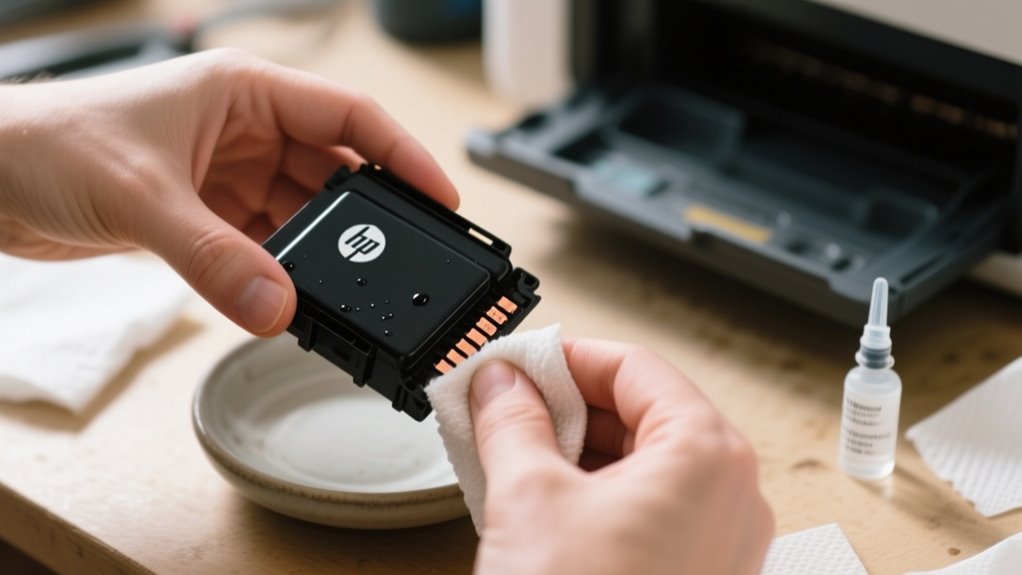
If that doesn’t work, remove the cartridge and gently wipe the printhead with a lint-free cloth dampened with warm distilled water. This helps dissolve dried ink and prevents damage during cartridge troubleshooting.
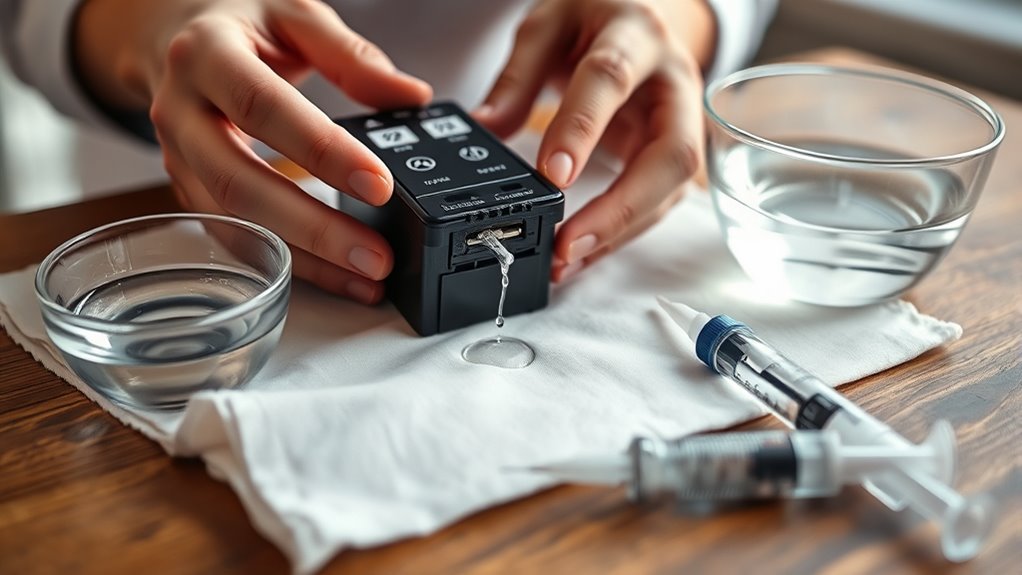
For tougher blockages, soak the printhead in warm distilled water for 5-10 minutes, then dry it thoroughly before reinstalling. You can also use a syringe to flush the nozzles with distilled water or a specialized cleaning solution to clear stubborn clogs.
Finally, flick the cartridge downward sharply to dislodge minor blockages and restart ink flow. Following these steps will get your dry ink cartridges back in action quickly and efficiently.
How to Identify a Dry HP Ink Cartridge: Signs and Symptoms
Knowing how to spot a dry HP ink cartridge can save you time and frustration when your prints start looking off. One common sign is faded printouts or missing lines, which often indicate dried ink blocking the nozzles.
Even if your cartridge feels full, you might notice no ink flow during printing. This usually points to a printhead clog. Another clue is when you shake the cartridge and hear ink sloshing but still get blank or incomplete prints. This means the nozzles are likely dried or blocked.
Furthermore, smudges, blotches, or skipped lines during printing suggest partial drying inside the nozzles. Early detection is key. If your documents show faint or missing lines, your cartridge’s nozzles might already be clogged.
What Causes HP Ink Cartridges to Dry Out Quickly
When you don’t use your HP printer regularly, the ink inside the cartridges tends to dry out and clog the nozzles, causing printing issues. This drying out happens faster when ink cartridges experience air exposure, especially if they’re not stored properly.
Improper storage, like keeping cartridges outside the printer or in containers that aren’t airtight, allows ink to evaporate quickly. Even leaving cartridges installed in the printer without regular use can lead to printhead clogging because the ink hardens over time.
Environmental factors also play a role. Low humidity speeds up drying out by pulling moisture from the ink. Furthermore, shutting down your printer without proper care can increase air exposure inside, accelerating ink evaporation.
Understanding these causes helps you prevent your HP ink cartridges from drying out quickly and avoids frustrating printhead clogging problems down the line.
How to Use HP’s Automatic Printhead Cleaning to Fix Dry Ink
Preventing ink from drying out is important, but if your HP ink cartridges have already clogged, you can use HP’s automatic printhead cleaning feature to fix the issue. This built-in automatic cleaning cycle flushes the printhead by using ink from your cartridges to clear out dried or clogged nozzles.
You can start the process through your printer’s control panel or HP software by selecting the printhead cleaning option and following the on-screen prompts. Keep in mind, this cleaning uses a small amount of ink, and you might need to run it more than once if the drying is severe.
To avoid frequent drying and clogging, it’s a good idea to run the automatic cleaning cycle at least once a week, especially if you don’t print often. Using this quick method regularly helps maintain smooth ink flow and keeps your HP ink cartridges performing at their best.
How to Manually Clean HP Ink Cartridges With Warm Distilled Water
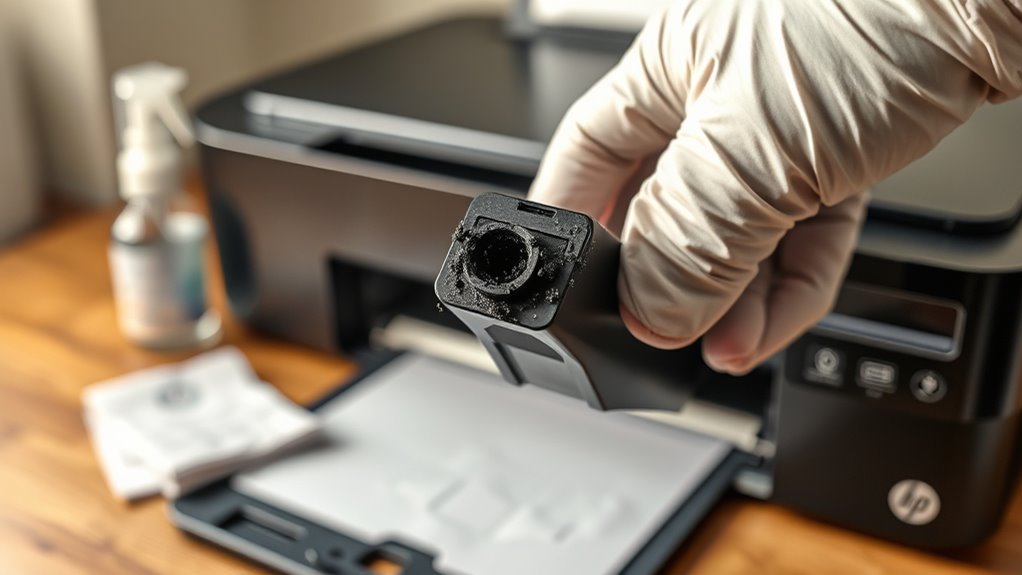
If your HP ink cartridges remain clogged after using the automatic cleaning cycle, you can manually clean them with warm distilled water to remove dried ink buildup. First, turn off your printer and carefully remove the cartridge.
Dampen a lint-free cloth or cotton swab with warm distilled water. Make sure it’s damp, not soaking wet. Gently wipe the nozzles and electrical contacts on the cartridge to clean off any dried ink residue. Be thorough but gentle to avoid damage.
After cleaning, let the cartridge air dry completely for 10 to 15 minutes. This step guarantees no moisture remains that could interfere with printing. Once dry, reinstall the cartridge into your printer.
Run a cleaning cycle or print a test page to check if ink flows properly. This manual cleaning method helps restore your cartridge’s performance without harsh chemicals, keeping your nozzles and contacts in good condition for consistent printing.
Easy Ways to Remove Stubborn Ink Clogs With Soap and Water
Although dried ink buildup can be tough to remove, using a mild mixture of dish soap and warm distilled water offers an effective way to clear stubborn clogs. For ink cartridge repair, mix a small amount of dish soap with warm distilled water.
Soak a lint-free cloth or cotton swab in the solution, then gently dab the printhead and nozzles. This soap and water method loosens dry ink without damaging delicate parts. Avoid harsh chemicals or excess moisture to prevent printhead cleaning issues.
Afterward, dry the printhead thoroughly before reinstalling. Repeat if needed, then run a cleaning cycle to restore ink flow.
| Step | Action | Tip |
|---|---|---|
| 1 | Mix soap and warm distilled water | Use mild dish soap only |
| 2 | Dab printhead with solution | Use lint-free cloth/swab |
| 3 | Dry printhead thoroughly | Soft cloth prevents damage |
| 4 | Run printer cleaning cycle | Repeat if stubborn ink clogs |
This simple approach tackles dry ink and stubborn ink clogs effectively.
When and How to Use Alcohol or Bleach Cleaners Safely
When soap and water don’t fully clear dried ink, you can turn to isopropyl alcohol to tackle tougher clogs. Use isopropyl alcohol with at least 70% concentration as your cleaning solution. Apply it sparingly with a lint-free cloth or cotton swab, focusing on the printhead while avoiding electrical contacts to prevent damage.
Bleach should be a last resort; never apply it directly. Instead, dilute bleach heavily, about 1 part bleach to 10 parts water, and use it cautiously on stubborn ink buildup only. After using either isopropyl alcohol or bleach, always rinse and dry the printhead thoroughly.
This guarantees no residue remains that could harm the cartridge or hinder ink flow. Remember, proper storage of your cartridges after cleaning helps maintain their condition and prevents future clogs. By following these safety tips, you’ll keep your HP ink cartridges functioning smoothly without risking damage from harsh chemicals.
Try These Quick Tricks to Restart Ink Flow in HP Ink Cartridges
You can often get the ink flowing again by gently wiping the printhead with a warm, damp cloth to clear away any dried ink. Also, try flicking the cartridge downward sharply a few times—it can help dislodge clogs and get the ink moving better. These quick and easy tricks can save you a lot of time and have your HP printer running smoothly in no time.
Gentle Printhead Cleaning
How can you quickly revive dried ink cartridges without harsh chemicals? Start by focusing on gentle printhead cleaning to restore ink flow effectively. Here’s what you can do:
- Remove the cartridge and gently wipe the printhead with a lint-free cloth dampened in warm water. This helps dissolve dried ink without damaging the cartridge.
- Use a soft brush dipped in warm water to carefully clean around the printhead, avoiding electrical contacts.
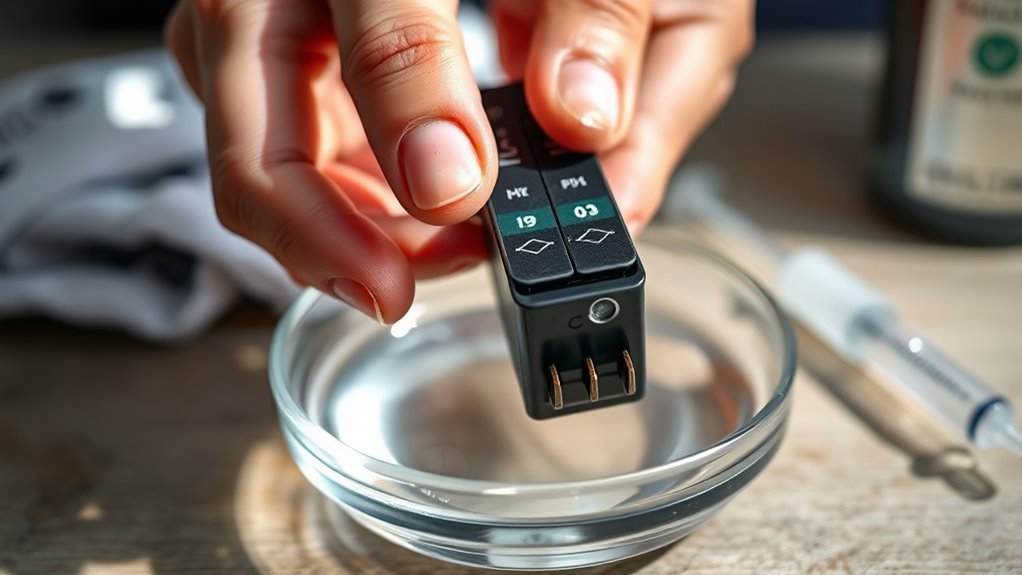
- Soak the printhead in warm water for 5-10 minutes if stubborn clogs persist. After soaking, dry it thoroughly before reinstalling.
These simple steps can clean your cartridge’s printhead and kickstart ink flow, saving you time and frustration without resorting to harsh chemicals.
Cartridge Flicking Technique
Although it may sound simple, flicking your HP ink cartridge can quickly restart ink flow by dislodging dried clogs in the nozzles. First, remove the ink cartridge from your printer to avoid damaging the printhead or internal parts.
Hold the cartridge firmly and flick it downward sharply several times. These quick, controlled flicks create enough force to dislodge dry ink blockages stuck inside the nozzles. Be careful not to use excessive force or flick side-to-side, as this can harm the cartridge or printhead.
After flicking, reinstall the cartridge and run a test print to check if the ink flow has improved. Repeating this flicking technique a few times often restores proper ink distribution, helping you fix dry ink issues fast and easily.
Best Practices to Prevent HP Ink Cartridge Drying and Clogs
To prevent your HP ink cartridges from drying out and clogging, make sure to print at least once a week to keep the ink flowing smoothly. When the ink cartridge dries, it can cause poor print quality or blockages. To prevent drying, follow these best practices:
Print weekly to keep your HP ink cartridges flowing and prevent drying or clogging.
- Store cartridges properly in airtight, upright containers within a cool, dry place. Proper storage limits exposure to air and humidity that accelerate drying.
- Use the printer’s automatic cleaning cycle weekly. This routine helps clean the printhead by dissolving minor clogs before they worsen.
- Always turn off your printer using the power button, not by unplugging it. This maintains sealed printhead conditions, reducing ink exposure to air.
When to Replace Your HP Ink Cartridge: Key Signs and Tips
When you notice persistent streaks, missing colors, or faded prints despite running cleaning cycles, it’s a clear sign your HP ink cartridge needs replacement. Print quality issues like these often indicate dried ink or clogging inside the cartridge that cleaning can’t fix.
If your cartridge feels unusually light or empty when you shake it, don’t rely solely on ink level indicators. They can be inaccurate. Replacing the cartridge promptly ensures you avoid further poor prints and potential damage to your printer.
Also, if the cartridge stops responding after multiple cleaning attempts or produces no ink at all, it’s time to replace it. Frequent clogging, inconsistent prints, and prolonged inactivity can cause dried ink buildup, signaling the cartridge’s end of life.
To maintain peak print quality, replace your HP ink cartridges as soon as you spot these signs. Acting quickly keeps your printer running smoothly and ensures every page looks sharp and vibrant.
Frequently Asked Questions
Can Dried HP Ink Cartridges Be Revived Without Cleaning Solutions?
Yes, you can revive dried HP ink cartridges without cleaning solutions by focusing on proper cartridge storage and refill techniques. Shaking or warming the cartridge gently helps loosen dried ink, which extends ink longevity.
Understanding ink formulation lets you handle cartridges better and reduces clogs. Participating in recycling programs encourages sustainable practices and allows you to reuse or properly dispose of cartridges.
These methods preserve your printer’s performance without harsh chemicals.
How Long Should I Wait Between Automatic Printhead Cleanings?
Think of printhead maintenance like giving your printer a quick breath between sprints. You should wait at least 30 minutes between automatic printhead cleanings to maintain proper ink flow and avoid nozzle blockage.
If you clean too often, you risk wasting ink and damaging print quality. For heavy use, space cleanings every 2 to 3 days. Remember, pacing your cleaning frequency keeps your printer running smoothly and your prints sharp.
Is It Safe to Use Third-Party Cartridges in HP Printers?
Using third-party cartridges in your HP printer can save you money, but you should weigh the third party compatibility and warranty implications carefully. These cartridges might not match HP’s brand authenticity and often come with ink quality concerns, which can affect print results or even damage your printer.
While cost saving benefits are tempting, using genuine HP cartridges guarantees better performance and keeps your warranty intact. Choose wisely to avoid issues.
Can Frequent Cleaning Damage My HP Printer’s Printhead?
Don’t throw the baby out with the bathwater. Yes, frequent cleaning can damage your HP printer’s printhead. Overdoing cleaning harms printhead longevity by causing nozzle damage and wasting ink.
Too much cleaning can wear down delicate parts, so balance cleaning frequency with actual need. To prevent ink buildup without risking damage, follow maintenance tips like using your printer regularly and running cleaning cycles only when print quality drops.
What Are the Environmental Impacts of Disposing Dried Ink Cartridges?
When you dispose of dried ink cartridges improperly, you contribute to environmental pollution and landfill waste. The toxins in ink, including heavy metals, can cause toxin leakage into soil and water, harming ecosystems.
Plus, the plastic and metals inside lead to resource depletion since they take centuries to break down. Recycling helps but poses challenges, so using refillable cartridges is a smarter way to reduce your environmental footprint.
Conclusion
If you’ve dealt with dry HP ink cartridges, you’re not alone. Studies show up to 30% of printer issues come from clogged or dried ink.
By regularly cleaning your cartridges and using preventive tips, you can save time and money while keeping your prints sharp. Remember, quick action often restores your cartridge’s life, so don’t wait until it’s completely dried out.
With these simple steps, you’ll keep your HP printer running smoothly and hassle-free.
Leave a Reply