To replace ink in your Epson printer, first find the correct cartridge by checking your model and cartridge numbers.
Turn on the printer, open the scanner or cartridge cover, and carefully remove the old cartridge.
Take the new cartridge, peel off protective tape, and insert it until it clicks.
Close the cover and wait for the printer to recognize the cartridge.
Run a test print to guarantee quality.
If you want to avoid common errors and get the best results, there’s more useful info ahead.
How to Find the Right Ink Cartridge for Your Epson Printer
How do you make sure you get the right ink cartridge for your Epson printer? First, identify your printer model by checking the label on the device or consulting your user manual. You can also visit Epson’s website to confirm which Epson ink cartridges fit your specific printer model.
To get the right Epson ink cartridge, first identify your printer model on the device label or user manual.
Next, examine your current ink cartridge labels for exact cartridge numbers. This helps you avoid buying incompatible ink cartridges. Your printer’s LCD screen or software often shows ink levels and notifies you when replacement cartridges are needed, displaying the correct cartridge model.
Remember, Epson offers various series like EcoTank and WorkForce, each requiring specific cartridges or refill types. When buying replacement cartridges, match the cartridge number exactly, like Epson 220XL or 252XL, to ensure compatibility.
If you prefer, compatible ink cartridges from trusted brands can work. But always verify they suit your Epson printer model for maximum performance.
Get Your Epson Printer Ready for Ink Replacement
First, turn on your Epson printer and wait for it to initialize. Once it’s ready, you can open the scanner bed or cartridge cover. It’s a good idea to double-check which ink cartridge needs replacing—just take a look at the printer’s display or your manual to be sure. After that, find the exact spot where the cartridge sits so you’re all set to remove and replace it safely.
Identify Correct Ink
Wondering which ink cartridge fits your Epson printer? Start by checking your printer model’s manual or online resources to identify the exact ink type you need.
Next, examine the label on your existing cartridges to find ink model numbers like Epson 220XL or the 252 series. These numbers help you identify the right cartridges easily.
Verify you choose either genuine Epson cartridges or compatible cartridges designed specifically for your printer model to avoid any issues. Also, confirm the ink color, whether black, cyan, magenta, or yellow, matches your current cartridges.
For example, the Epson Workforce WF-2750 uses Epson 220XL cartridges, simplifying your selection. Knowing the correct ink type and model numbers ensures your printer runs smoothly and prints beautifully.
Prepare Printer Properly
Now that you’ve identified the correct ink cartridges for your Epson printer, it’s important to prepare your printer properly before replacing them. First, turn on your printer and lift the scanner bed carefully to avoid damage. Then, open the cartridge cover to access the ink cartridges.
Before you start, unplug the printer if you need to guarantee safety while handling cartridges. When removing the old cartridge, squeeze the tab and lift it straight out. Avoid contact with the contacts or nozzles to prevent damage.
Prepare your new cartridge by removing its protective tape and gently shaking it four to five times for even ink flow. Finally, double-check the compatibility of the new cartridge with your printer model to ensure a smooth replacement process.
Locate Cartridge Position
Where exactly are the ink cartridges located in your Epson printer? To locate cartridges, first turn on your printer and gently lift the scanner bed. This lets you access the cartridge position inside the printer.
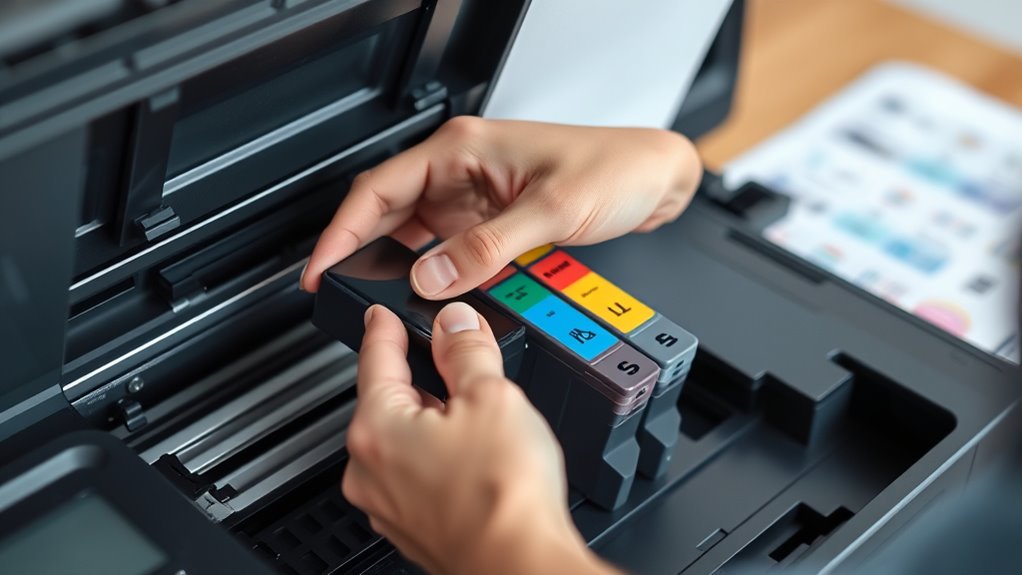
Next, open the cartridge cover or door, usually found behind or beneath the scanner bed. Inside, you’ll see a row of cartridges lined up straight at the back of the printer. Carefully identify color labels on each cartridge to confirm you replace the right one.
Be sure not to touch or move the printhead or any internal parts while you find the printhead and access ink cartridges. Knowing this cartridge location helps you smoothly proceed with ink replacement without causing damage or confusion.
Removing Old Epson Ink Cartridges Safely
How do you remove old Epson ink cartridges without causing damage or mess? First, turn on your printer and lift the scanner bed before opening the cartridge cover. This gives you safe access to the cartridges.
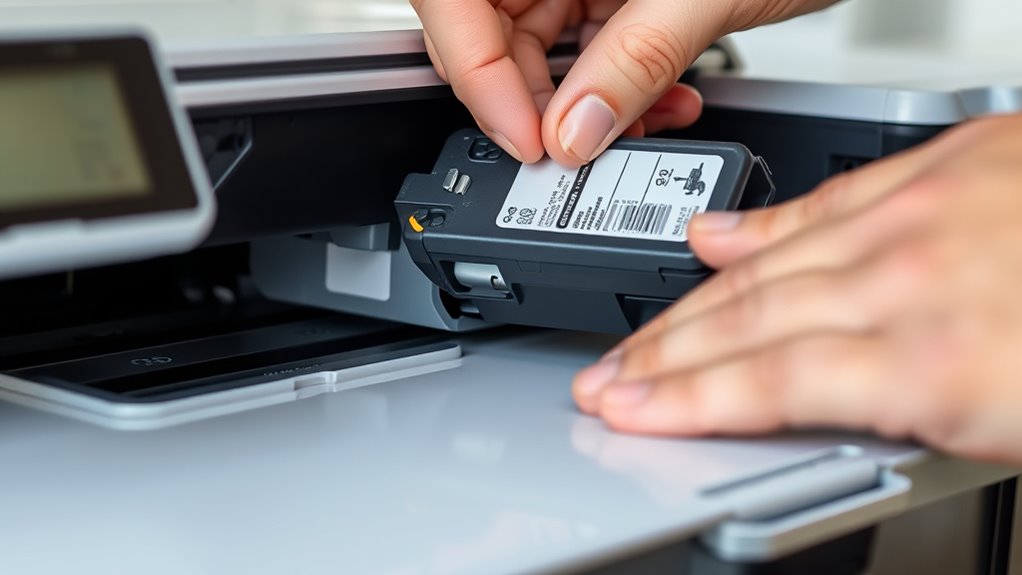
To remove the old cartridge, squeeze the tab firmly and lift it straight up. Be sure to handle the cartridge carefully to avoid any ink spills. Wear gloves if you want to protect your skin from ink stains.
Most importantly, don’t touch the gold contact points or nozzles on the cartridge. Touching these can cause contamination or electrical problems when you install the new cartridge.
Once removed, dispose of your old cartridges responsibly by following proper recycling guidelines or manufacturer instructions. Taking these careful steps ensures a smooth, mess-free cartridge removal process and keeps your printer in good working order.
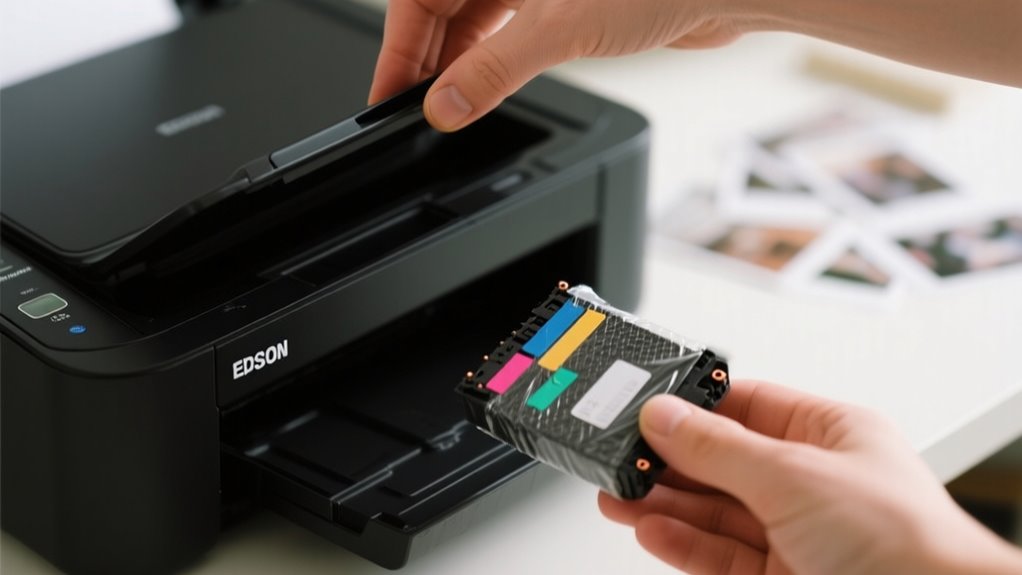
Installing New Epson Ink Cartridges
After safely removing your old Epson ink cartridges, you’re ready to install the new ones. Installing new ink cartridges on your Epson printer is straightforward if you follow these key steps:
- Remove the new ink cartridge from its packaging, handling it with the contacts facing downward. Avoid touching the green chip or nozzles to prevent damage.
- Peel off the yellow tape or protective cover to allow ink flow.
- Insert the cartridge into the correct slot, matching the color code, and press it firmly until it clicks into place.
- Close the scanner or cartridge cover. The Epson printer will perform ink recognition, and a confirmation message will show on the LCD screen. Press the designated button to start the priming process, which charges the new ink cartridge.
This cartridge installation ensures proper function and quality prints as you replace ink with ease.
How to Refill Ink Tanks on Epson EcoTank Printers
When you need to refill ink tanks on your Epson EcoTank printer, start by lifting the scanner bed and opening the ink tank cover to access the tanks. Carefully remove the cap from the ink bottle, then slowly pour the ink into the matching color tank without squeezing the bottle.
Be sure to fill each tank only up to the designated fill line to avoid overfilling. After refilling ink, securely replace the caps on the ink bottles to prevent leakage and contamination.
Once all tanks are refilled, close the ink tank cover and scanner bed. Following this, your Epson EcoTank will prompt you to complete the ink refill process.
Verify Epson Ink Cartridge Installation and Run a Test Print

After you’ve installed the new ink cartridges, take a look at the printer’s screen to see if it recognizes them. If everything looks good there, go ahead and run a test print from the control panel or your computer. This will help you make sure everything is working properly.
If the print quality seems off, don’t worry—just double-check that the cartridges are seated correctly. Once you’ve done that, try printing again. It usually does the trick!
Confirm Cartridge Recognition
Although installing new ink cartridges is straightforward, you’ll want to confirm your Epson printer recognizes them properly before printing. Proper ink recognition ensures your new cartridges work seamlessly and prevents printing issues.
Here’s how to confirm:
- Check the printer’s LCD screen for a confirmation message indicating successful recognition of new cartridges.
- Open the printer software on your computer and navigate to the maintenance or ink status section to verify accurate ink levels.
- If the printer doesn’t recognize the cartridges, remove and reinstall them, making sure they click securely into place.
- Use built-in diagnostic tools or alignment functions in the printer maintenance menu to confirm cartridges are properly recognized and aligned.
Following these steps guarantees your Epson printer is ready for peak performance with your new ink cartridges.
Perform Test Printing
How can you be certain your Epson ink cartridges are correctly installed? After replacing them, head to your printer’s LCD menu and select “Maintenance” or “Print Test Page” to verify installation.
Running a test print confirms the printer recognition of your new ink cartridges and helps you assess print quality. Make sure your printer is powered on and connected before starting to avoid errors.
Examine the print test page for consistent colors, sharp lines, and no streaks or missing sections. If you spot any issues, use these results to troubleshoot problems early.
Regularly performing test prints after ink replacement keeps your printer in top shape and ensures reliable performance every time you print.
Troubleshooting Common Epson Ink Cartridge Issues
When you encounter recognition errors like “Cartridge Not Recognized” or unexpected “Low Ink” warnings, these issues often stem from improper cartridge installation or firmware restrictions. To tackle these common Epson ink cartridge problems, try the following:
- Ensure proper cartridge installation to avoid cartridge installation errors that affect ink cartridge recognition.
- Clean gold contact points gently with a lint-free cloth to improve communication between the cartridge and printer.
- Check for firmware restrictions. Disable automatic updates if you use third-party cartridges, as updates may block their recognition.
- Access maintenance mode to reset ink counters and unlock cartridges stuck during replacement, preventing false low-ink warnings.
Frequently Asked Questions
How Long Does It Take for New Ink to Dry on Printed Pages?
The ink drying time on your printed pages usually depends on paper absorption rate, ink formulation, and environmental factors like humidity. If you use fast-drying ink with proper printer settings, your print quality improves, and drying speeds up.
Ink moisture level plays a role too. Heavier ink coverage takes longer. You can use ink drying techniques, like letting pages sit undisturbed, to reduce smudging. Adjusting paper type also helps speed up drying.
Can I Use Third-Party Ink Cartridges With My Epson Printer?
Yes, you can use third-party ink with your Epson printer, but you need to check cartridge compatibility carefully. Third-party ink offers cost savings and can reduce environmental impact by recycling cartridges.
However, brand differences affect ink quality, ink longevity, and print performance. The installation process is usually straightforward, but some cartridges may trigger errors.
Choose reputable brands to guarantee reliability and avoid issues while enjoying budget-friendly printing.
How Should I Store Unused Ink Cartridges to Prevent Drying Out?
Imagine your ink cartridges as delicate treasure chests. You need proper sealing and careful cartridge handling to protect them.
To guarantee ink longevity and cartridge preservation, store them upright in cool, dark places away from harsh environmental factors like sunlight and humidity. Keep cartridges in their original packaging to extend shelf life, and avoid leaving them uncapped to prevent drying.
These storage conditions are key to drying prevention and maintaining vibrant prints.
What Should I Do if My Printer Doesn’T Recognize the New Cartridge?
If your printer doesn’t recognize the new cartridge, first check cartridge compatibility to verify it matches your model. Confirm proper cartridge installation; a loose fit can affect ink absorption and print quality.
Perform a printer reset to refresh ink color matching and cartridge lifespan data. Clean contact points to prevent ink leaks and improve connection.
Finally, update or rollback firmware, as some updates block third-party cartridges, impacting recognition.
Is It Safe to Replace Ink Cartridges While the Printer Is Printing?
Would you risk ink leakage and poor ink color accuracy by replacing cartridges mid-print? It’s not safe to swap ink cartridges while the printer is printing because it can disrupt printer calibration and shorten cartridge lifespan. Always check cartridge compatibility first.
Instead, pause printing and consider using a refill station for eco-friendly refills. This careful refill process helps protect your printer and reduces environmental impact, ensuring smooth operation and quality prints.
Conclusion
Replacing ink in your Epson printer is easier than you think, especially when you’ve just run out right before an important print job. By finding the right cartridge, preparing your printer, safely swapping old ink for new, and running a test print, you’ll keep your printer humming smoothly.
And if you have an EcoTank model, refilling is just as simple. So, next time ink runs low, you’ll be ready without missing a beat!
Leave a Reply