To add ink to your stamper in 7 easy steps, first gather the right ink and supplies. Then clear your workspace and remove the ink pad carefully.
Apply ink evenly using a dropper or brush without over-saturating. Let it fully absorb, and reinsert the pad securely aligned.
Test your stamper on scrap paper to guarantee clear impressions.
Maintain ink quality for long-lasting use.
Follow these steps closely to keep your stamper performing perfectly and learn simple tips to extend its life.
How to Re-Ink Your Stamper: What You’ll Need
Wondering what you need to re-ink your stamper properly? First, get the right ink pad recommended by your stamp’s manufacturer. Using the correct ink type, oil-based for pre-inked stamps or water-based for self-inking models, is vital to avoid damage.
You’ll also want a clean cloth or paper towel handy to wipe away any excess ink and keep your stamp components tidy during the process. When it comes to applying the ink, a dropper or small brush helps you control how much you add, preventing overfilling.
Don’t forget to wear gloves to protect your hands from ink stains and maintain a clean workspace. Finally, make sure you have access to model-specific instructions or guides so you can re-ink your stamper accurately and safely.
Having these essentials ready will make re-inking straightforward and guarantee your stamper works perfectly every time.
Choose the Right Ink for Your Stamper
You’ll want to pick the right ink type based on your stamper and the surface you’ll be stamping on. So, always check your stamper’s compatibility first—that way, you avoid any damage and get the best results. Before you go all in with the ink, try testing a small amount to make sure you don’t end up with smudges or unwanted marks.
Ink Types Overview
Which ink suits your stamper best depends largely on the surface you’ll be stamping and the type of stamp you own. Different ink types deliver different results, so picking the right one is key.
For example, water-based ink is perfect for porous surfaces like paper and is budget-friendly, making it great for everyday use. If you’re using self-inking stamps, oily ink is your go-to since it keeps the stamp moist and prevents drying out.
For non-porous surfaces such as glass or metal, alcohol-based ink gives crisp, sharp impressions.
Here’s a quick overview:
- Water-based ink: ideal for porous surfaces and affordable
- Oily ink: designed for self-inking stamps, prevents drying
- Alcohol-based ink: best for smooth, non-porous surfaces like glass and metal
Always test your ink on a small area first!
Ink Compatibility Importance
How do you guarantee your stamper works smoothly and lasts longer? The key lies in ink compatibility. Choosing the right ink for your stamp pad is essential.
For example, oil-based inks work best with self-inking stamps, while water-based inks suit porous surfaces. Using incompatible ink can clog your stamper, cause smudging, or even damage its internal mechanisms over time.
Always check the manufacturer’s recommended ink type before refilling to maintain top performance. Mixing oil-based and water-based inks leads to uneven application and poor adhesion, reducing impression quality.
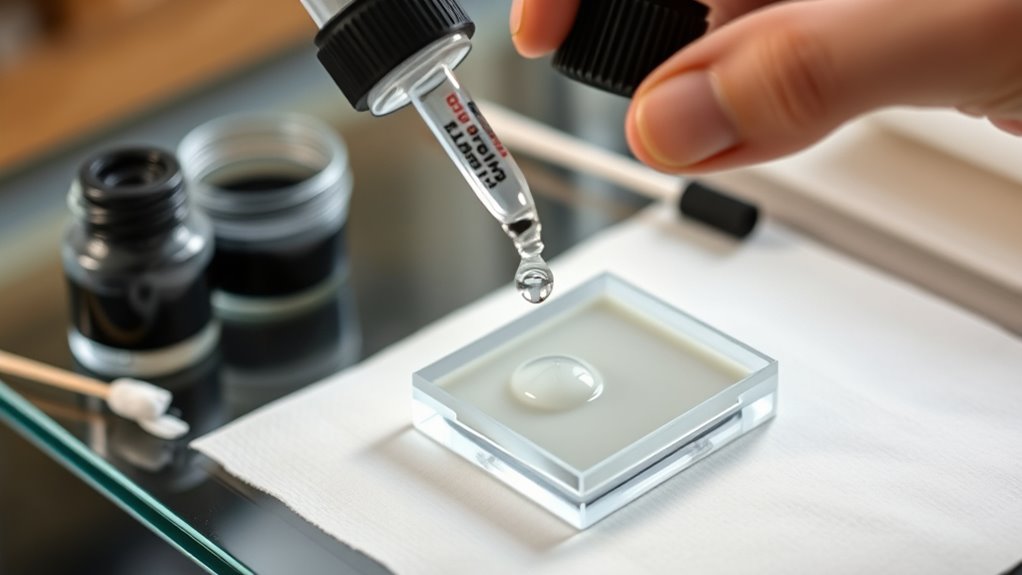
Testing Ink First
Why test ink before adding it to your stamper? Testing ink guarantees compatibility and prevents damage to your stamper. By checking ink first, you avoid smudging, poor impressions, or clogging.
Always follow the manufacturer’s guidelines to pick the right ink type, whether water-based, oil-based, or alcohol-based, for your stamper model.
When testing ink, keep these tips in mind:
- Test on a small, hidden spot or scrap paper to check compatibility.
- Use only one ink brand or type during testing to prevent clogging or uneven impressions.
- Make a quick test impression after applying ink to confirm clear, sharp images without smudges.
Prepare Your Workspace and Stamper for Ink Refilling
Before you start adding ink to your stamper, clear your workspace and cover surfaces with scrap paper to protect against stains. A tidy workspace helps prevent accidents and keeps your materials organized.
Gather all necessary supplies, including the right type of ink, cleaning tools, and any equipment specific to your stamper model. Remove the stamper from its storage or holder and place it on a clean, flat surface for easy access during refilling.
Make sure your hands are clean or wear gloves to avoid unwanted ink transfer and simplify cleanup afterward. Finally, consult the manufacturer’s instructions for your stamper to understand the proper steps for disassembly and ink refilling.
Preparing your workspace and stamper carefully ensures a smooth and mess-free ink refilling process.
How to Remove the Ink Pad or Cartridge
Before you remove the ink pad or cartridge, make sure you know which type your stamper uses. This will help you handle it the right way. Look around for release latches or clips, and when you find them, use gentle pressure so you don’t damage anything.
Taking your time and being careful during removal will make refilling or replacing the ink a lot easier in the end.
Identifying Ink Pad Types
How do you properly remove the ink pad or cartridge from your stamper? It depends on the type of ink pad or stamp you have. Understanding this helps you handle your stamper without causing damage.
Here’s how to identify different ink pad types:
Self-inking stamps usually have an ink pad you push down and slide out from the side or bottom. Pre-inked stamps often feature a compartment that releases by pressing a button or unlatching a cover. Stamps with sliding cartridges require you to lift or slide the cartridge out, following the manufacturer’s instructions.
Always consult your stamper’s manual to avoid mistakes when removing the ink pad or cartridge. This knowledge ensures you maintain your stamper’s performance effectively.
Safe Removal Techniques
Though removing the ink pad or cartridge may seem straightforward, you need to handle it carefully to avoid damage or spills. Start by gently pushing down the stamp to unlock the mechanism, or press side buttons on self-inking stamps.
Then, slide or lift the ink pad out following your model’s removal techniques. Always handle parts with clean hands or gloves to prevent contamination. Wipe away excess ink with a cloth before reinserting or replacing.
| Step | Action | Tip |
|---|---|---|
| Unlock | Push down or press buttons | Follow model-specific steps |
| Remove | Slide or lift ink pad | Be gentle to avoid spills |
| Clean | Wipe excess ink | Use a clean cloth or tissue |
Handling Cartridges Carefully
When you handle the ink cartridge carefully, you reduce the risk of damaging the stamper or causing messy spills. To remove the ink pad or cartridge, gently push down on the stamper to release it, then slide the cartridge out slowly. Use your fingers or a flat tool to lift it by the edges. Never apply too much force.
Always follow the manufacturer’s instructions for your specific model to avoid breaking clips or sliding parts.
Keep these tips in mind to handle the ink cartridge properly:
- Handle carefully by its edges to prevent smudges or contamination
- Place the cartridge on a paper towel to catch any ink drips
- Avoid touching the inked surface directly to maintain clean prints
These steps help keep your stamper in top shape.
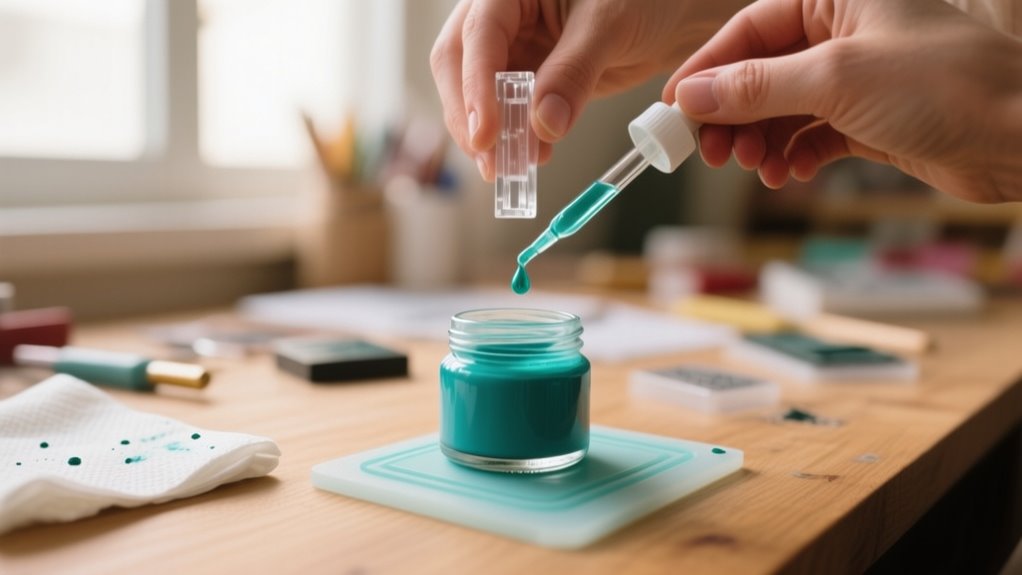
Apply Ink Evenly and Allow It to Absorb

Since even ink distribution is essential for clean impressions, you’ll want to apply a small, controlled amount of ink evenly across your stamper pad using a dropper or brush. Be careful to cover the entire surface without over-saturating, as too much ink can cause smudging or uneven prints.
After applying ink evenly, gently press the stamper on scrap paper several times. This helps spread the ink uniformly across the pad’s surface. Once you’ve done that, allow the ink to absorb fully into the pad.
Depending on your ink type and manufacturer’s instructions, this might take several minutes or even overnight. Make sure the ink has absorbed properly and that the pad is evenly coated before you start stamping. Taking these steps guarantees your stamper delivers clean, sharp impressions every time, avoiding blotchy or faint results caused by uneven ink distribution.
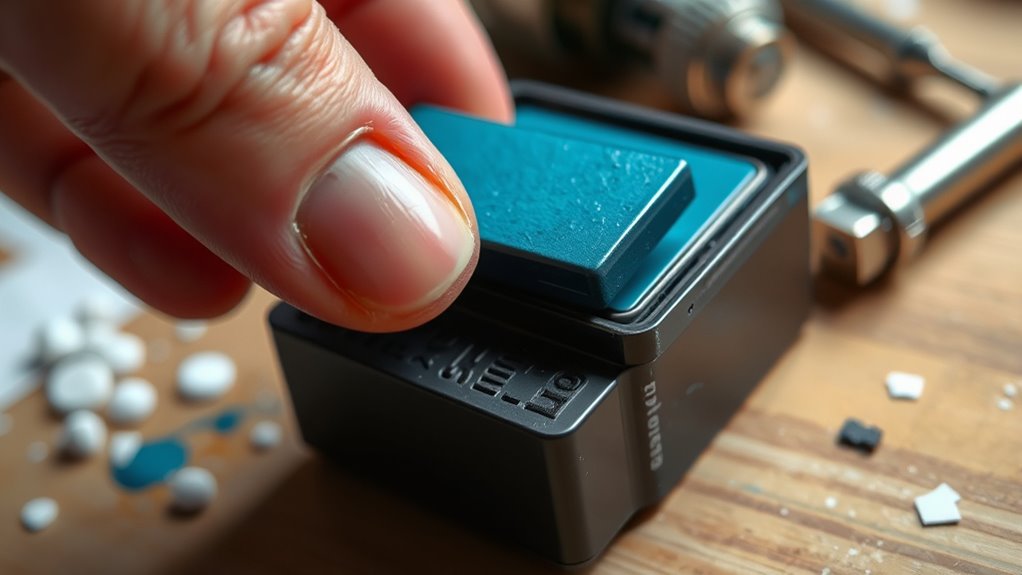
Reinsert the Ink Pad or Cartridge the Right Way
Before reinserting the ink pad or cartridge, make sure it’s completely dry to prevent smudges or uneven prints. Once dry, carefully slide the ink pad back into the stamper, making sure you properly align it with the designated slots or guides. Misalignment can cause improper ink transfer or damage your stamper.
To reinsert the ink pad or cartridge correctly:
- Check that the inked side is facing the stamping surface for effective ink transfer.
- Gently press the ink pad in until it sits flush and feels securely seated.
- Engage any locking mechanisms or clips to keep the ink pad firmly in place.
Following these steps helps maintain your stamper’s performance and extends the life of the ink pad. Proper alignment and secure seating prevent leaks and ensure crisp, clear impressions every time you stamp.
Test Your Stamper and Maintain Ink Quality
After reinserting your ink pad correctly, it’s a good idea to test your stamper on scrap paper. This helps you check the ink quality and impression clarity. You’ll see if the ink is evenly distributed or if you need to add more.
To keep the ink flow consistent, always use the recommended ink type for your stamper, whether oil based or water based. Regularly inspect the ink pad to make sure it’s saturated and free from dried layers. After re-inking, blot the stamp 2-3 times on scrap paper to avoid smudging.
Proper storage of ink and replacement pads also helps maintain freshness and performance. Here’s a quick emotional guide to help you test and maintain your stamper:
| Feeling | Action | Result |
|---|---|---|
| Frustrated | Test on scrap | Clear impression |
| Confident | Use right ink | Smooth stamping |
| Careful | Store properly | Long-lasting ink |
Frequently Asked Questions
How Long Does Ink Last Once Added to a Stamper?
Ink usually lasts several months once added to a stamper, but how long depends on factors like ink drying and stamp maintenance. If you store your stamper properly in a cool, dry place and clean it regularly, you’ll slow ink drying and keep your impressions crisp.
However, with frequent use, you might notice fading sooner. Keep an eye on your stamped images and re-ink as needed to maintain quality.
Can I Mix Different Ink Colors in One Stamper?
Sure, you *can* mix different ink colors in one stamper if you want your stamp to look like a toddler’s art project gone wrong. Color blending in stampers rarely works the way you imagine because of ink compatibility issues.
Different inks often clash or clog your stamper’s mechanism. If you crave neat, crisp impressions, stick to one color or clean thoroughly between colors. Otherwise, enjoy your muddy masterpiece!
Is It Safe to Use Alcohol-Based Inks With My Stamper?
You shouldn’t use alcohol-based inks with your stamper unless the manufacturer confirms it’s safe. These inks can cause poor ink absorption, leading to uneven prints and damage your stamper’s rubber or foam parts. This can reduce your stamp’s durability.
If you want sharp impressions, test the ink on a small area first. Otherwise, stick to water-based or oil-based inks to keep your stamper working well and lasting longer.
How Do I Clean My Stamper Without Damaging It?
You clean your stamper without damaging it by using a damp, soft cloth or cotton swab with mild soap and water, avoiding soaking the stamp. For stubborn ink, gently wipe with a bit of stamp cleaner or isopropyl alcohol.
This keeps your stamping techniques sharp and your ink color selection vibrant. Regular cleaning prevents ink buildup on the rubber or foam surface, ensuring crisp impressions and protecting your stamper’s internal mechanisms.
What Should I Do if My Stamper Smudges the Ink?
Did you know 75% of stamping errors happen due to poor ink pad maintenance? If your stamper smudges the ink, first check your stamping techniques. Press evenly and avoid over-inking.
Make certain your ink pad isn’t overfilled or dry, as this causes uneven ink transfer. Clean your stamper’s surface gently to remove excess ink or debris. Test on scrap paper to guarantee crisp impressions before stamping your final design.
Conclusion
So, you’ve just mastered adding ink to your stamper. Who knew it wasn’t as mysterious as a magic trick?
Now, instead of frantically buying a new one every time it runs dry, you’ve got the power to keep it going. It’s almost too easy, right? Just a few simple steps, and your stamper’s as good as new.
Who thought maintaining your stamper could be this satisfying? You’re basically a stamping pro now!
Leave a Reply