To add ink to your Epson printer in 7 easy steps, start by turning off and unplugging it for safety.
Open the printer cover to locate the correct ink tank, then carefully remove the tank’s cover.
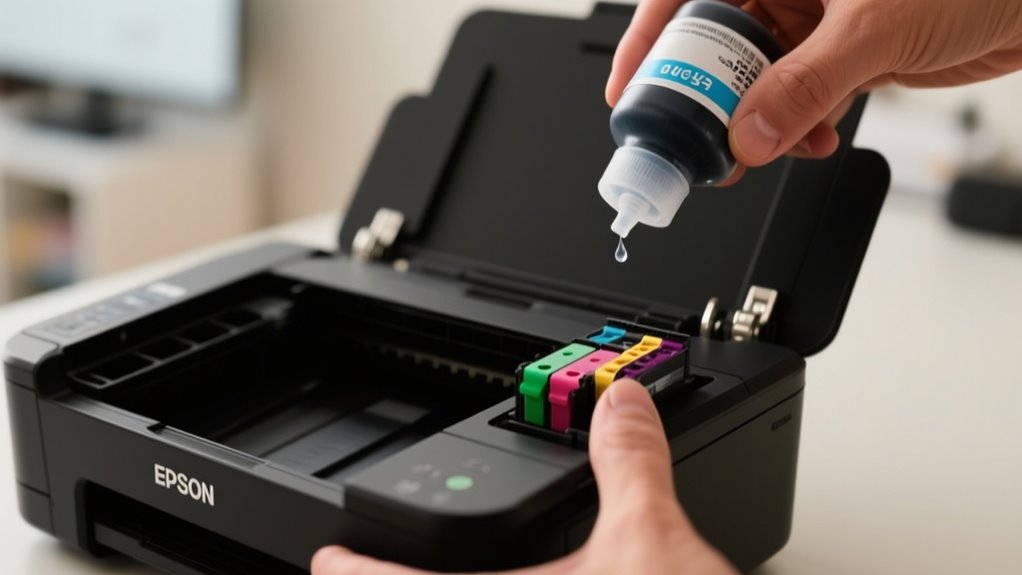
Keep your ink bottles upright, match colors, and refill without overfilling.
Securely close the ink tank, lower the cover, and turn the printer on.
Finally, run a cleaning and alignment cycle to guarantee smooth ink flow and print quality.
Follow along for detailed tips on maintaining your printer.
Prepare Your Epson Printer for Ink Replacement
Before you add ink to your Epson printer, make sure to turn it off and unplug the power cord to keep yourself safe. This step is crucial for safety and prevents any accidental damage during the ink refill process.
Once powered down, you’re ready to open the printer’s top cover or scanner bed to access the ink tanks. Wait for the printhead carriage to move to its rest position before you open any ink tank covers. This helps avoid any mechanical issues.
Next, identify the correct ink tank to refill by matching the tank’s label color with your ink bottles. Keep your ink bottles upright and ready for a smooth, precise ink refill.
Handling the ink tanks carefully ensures you avoid spills and maintain the printer’s performance. By following these safety and preparation steps, you set yourself up for a successful Epson ink tank refill without any hassle.
Open the Printer Cover and Locate the Ink Cartridges or Tanks
When you open the printer cover, make sure the printer is turned on so the ink cartridge carriage can move into position for easy access. On Epson printers with a scanner bed, lift the bed carefully to reveal the ink cartridge or ink tank compartment. This is usually located behind or beneath it.
Once open, locate the specific cartridges or ink tanks by checking the color indicators or icons for easy identification. The compartment is designed to give you straightforward access to each ink tank or cartridge, allowing you to monitor the ink level clearly.
Gently open the designated ink tank cover or cartridge door to avoid any damage or misalignment. By following these steps, you’ll quickly find the exact spot where the ink cartridges or tanks sit within your Epson printer, ensuring you’re ready for the next step in adding ink without hassle or confusion.
Remove Old Epson Ink Cartridges Carefully

Before you start removing the old Epson ink cartridges, make sure your printer is turned off and unplugged. This helps keep everything safe.
When you’re ready, gently squeeze the tab on the cartridge and lift it straight out. Try not to touch the nozzles or electrical contacts—those are sensitive parts. It’s best to handle the cartridge by its edges, which also helps keep your hands clean and prevents any damage.
Safe Cartridge Removal
To remove old Epson ink cartridges safely, make sure you turn off and unplug your printer first. This step guarantees safe cartridge removal and prevents any electrical issues.
Next, open the top cover gently to access the cartridges without forcing anything. To remove old ink cartridges, press down the cartridge tab carefully and lift the cartridge straight out.
Handle cartridges carefully by holding them at the edges and avoid contact with nozzles to prevent damage or ink smudges. If you notice any ink spills around the cartridge area, clean ink spills immediately with a damp cloth to keep the printer clean.
Following these steps helps maintain your printer’s performance and prepares it for new ink installation.
Avoid Contact With Contacts
Although removing Epson ink cartridges might seem straightforward, you should avoid touching the gold contacts and nozzles to prevent damage or ink contamination. When you remove cartridges, handle cartridges by their edges to keep your fingers away from the contact points.
This simple step helps prevent damage and avoids leaving oils or dirt on the electrical contact areas. Carefully press down on the tab at the front to release the cartridge, then lift it straight out without touching the contacts.
Wearing disposable gloves can also protect your hands from ink stains during cartridge removal. After removing cartridges, gently wipe any ink spills with a damp cloth, taking care not to touch the electrical contact areas.
Following these tips guarantees effective damage prevention and keeps your printer functioning properly.
Insert New Epson Ink Cartridges Step by Step
Now that you’ve taken out the old cartridges, it’s time to get your new ones ready. Be sure to hold them by the sides and try not to touch the contacts. Once you’re ready, line up each cartridge carefully and press it firmly into its slot. After that, just close the cover securely, and you’re all set!
Remove Old Cartridges
How do you safely remove old cartridges without damaging your Epson printer? First, gently squeeze the tab on the old cartridge to release it, then lift it out carefully.
Always handle cartridges by their sides, avoiding contact with the gold contacts and nozzles. This helps protect them from contamination or damage.
Once removed, you’re ready to replace the old cartridges with new ones. When you install new cartridges, align each one with its designated slot, making sure the contacts and nozzles face down and fit properly.
Push the cartridge in until it clicks securely, confirming it’s firmly installed. Properly handling and securing cartridges helps maintain your printer’s performance and guarantees smooth ink flow during printing.
Prepare New Cartridges
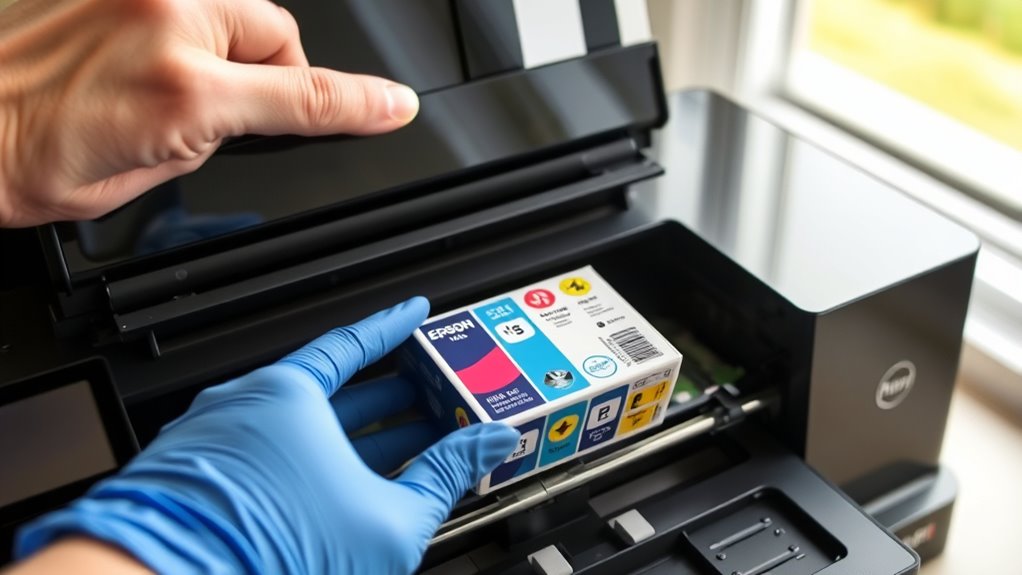
Before inserting new cartridges, carefully remove them from their packaging while holding them with the contacts facing downward to prevent damage. Next, open the cover of your Epson printer to access the cartridge slots.
If your new ink cartridge has protective tape or an ink tank cap, remove it gently. Now, align the cartridge with its corresponding slot, matching color and model to ensure you’re using compatible ink cartridges.
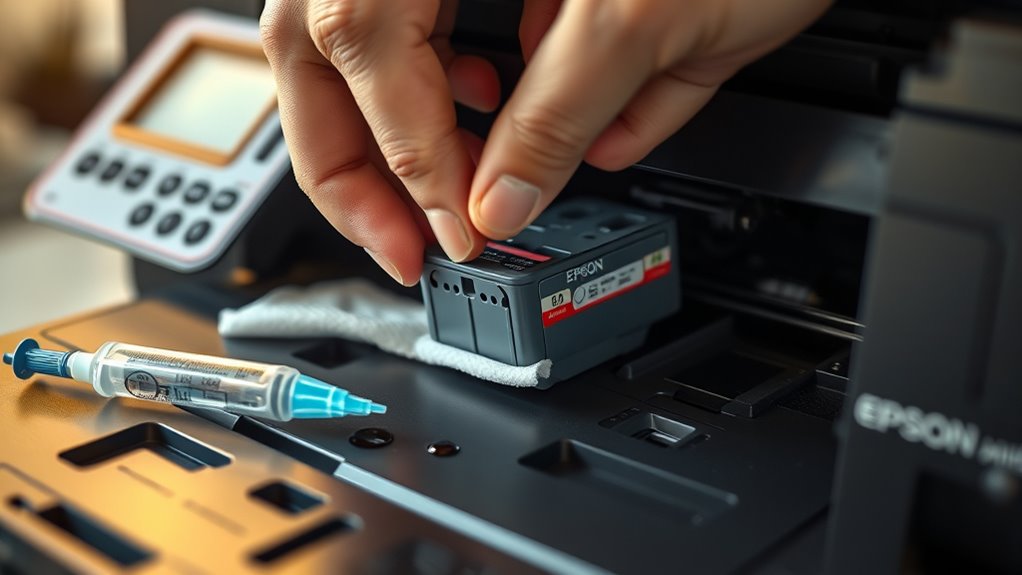
Wipe the ink contacts to remove any residue before installing ink. This helps maintain proper electrical connections. Remember, proper preparation helps the cartridge fit perfectly and function well once you securely install it.
| Step | Action | Tip |
|---|---|---|
| 1 | Open the cover | Use gentle force |
| 2 | Remove ink tank cap | Avoid spills |
| 3 | Align the cartridge | Match color and model |
| 4 | Clean ink contacts | Use a lint-free cloth |
Securely Install Cartridges
Once you’ve prepped your new cartridges by removing packaging and aligning them correctly, the next step is to install them securely. Start by carefully inserting each cartridge into its corresponding slot, making sure to align the contacts and nozzles precisely.
Push the cartridge firmly until you hear a click, indicating it has fit snugly and locked into place. This secure lock prevents the cartridge from moving or dislodging during printing.
After all cartridges are installed, double-check each one is seated properly. Finally, close the printer cover securely. This action prompts the printer to recognize the new cartridges, enabling it to resume printing without errors.
Following these steps helps guarantee your Epson printer functions smoothly with fresh ink cartridges.
Secure Epson Ink Cartridges and Close Printer Cover
After placing each ink cartridge into its slot, you’ll want to press down firmly until you hear a click, ensuring it’s securely installed. This click confirms the ink cartridges are properly seated, which is essential for your printer to recognize them.
Press each ink cartridge firmly until you hear a click to ensure secure installation and proper printer recognition.
Before closing the printer cover, check that the cartridge contacts and nozzles are clean and free of debris to avoid any printing issues.
Next, gently lower the printer cover. Make sure it aligns properly with the cartridge slots to prevent damage and maintain a proper seal. Avoid forcing the cover closed, as this can harm delicate components.
To secure your Epson ink cartridges and close the printer cover properly, follow these steps:
- Press down each cartridge until you hear the click, confirming it’s secure.
- Verify the cartridges are clean and properly seated.
- Align and gently close the printer cover until it clicks, ensuring a tight seal to prevent damage.
Run Cleaning and Alignment to Keep Epson Ink Flowing Smoothly
Securing your Epson ink cartridges and closing the printer cover sets the stage for ideal printing performance. Next, run the cleaning cycle to clear any clogged nozzles in the print head. This step is essential because clogged nozzles can disrupt ink flow, causing streaks, faded areas, or smudging.
Most Epson printers let you start the cleaning cycle directly from the control panel or software, making it easy to maintain print quality. After cleaning, perform print head alignment to optimize the position of the print head. Proper alignment prevents misaligned prints and ensures sharp, accurate images.
These maintenance routines aren’t just for after ink replacement; doing them regularly prolongs the print head’s lifespan and keeps your prints consistently high-quality. By running both cleaning and alignment, you maintain smooth ink flow and avoid common print issues, guaranteeing your Epson printer delivers the best results every time you print.
Troubleshoot Common Epson Ink Replacement Issues
If you encounter problems while adding ink to your Epson printer, don’t worry. Most issues can be fixed quickly with a few simple checks. When refilling ink cartridges or topping up the ink tank, it’s essential to monitor ink levels and handle the process carefully to avoid printer damage or print quality issues.
Encountering ink refill issues? Simple checks can quickly resolve them and protect your Epson printer’s performance.
Here are three key troubleshooting tips:
- Check Ink Bottle and Ink Tank Caps: Ensure the ink bottle cap is removed correctly and matches the ink cartridges in Epson. Also, confirm that the ink tank cap is tightly closed to prevent leaks and air from entering the system.
- Resolve Ink Flow Problems: If ink doesn’t flow, lift and reinsert the ink bottle. Inspect the filling port for blockages and clean it gently with a damp cloth to maintain smooth ink flow.
- Prevent Print Quality Issues: Always use the correct ink in your Epson and avoid overfilling. This helps keep your printer running efficiently and guarantees top-quality prints.
Frequently Asked Questions
How Do I Recycle Used Epson Ink Cartridges Properly?
To recycle your used Epson ink cartridges properly, you should follow Epson’s cartridge recycling programs and cartridge return policies. Locate authorized collection points or use prepaid mailing envelopes for cartridge return.
This eco-friendly recycling supports sustainable practices by ensuring environmentally safe disposal and ink cartridge reuse. Participating in used ink collection helps prevent pollution and promotes cartridge recycling.
This makes your ink cartridge disposal responsible and in line with Epson’s commitment to sustainability.
Can I Use Third-Party Ink Cartridges in My Epson Printer?
Yes, you can use third-party ink cartridges in your Epson printer, but be cautious. Compatible cartridges offer cost savings and brand alternatives, yet ink quality and ink color accuracy might not match original Epson ink.
Cartridge compatibility depends on your model, so check carefully. Refillable cartridges are another option but may affect ink longevity.
Always research to balance savings with potential risks to your printer and print results.
How Long Does Epson Ink Typically Last After Opening?
Think of your Epson ink as a delicate flower. Its vibrancy fades with time. Typically, the ink lifespan after opening is 6 to 12 months, but ink expiration happens sooner if you don’t mind ink drying or evaporation.
Proper ink storage slows ink absorption by air, preserving ink quality and color. To keep your prints sharp, use ink refills within 3 to 6 months. This helps prevent clogs and dull hues.
What Should I Do if My Epson Printer Still Shows Low Ink?
If your Epson printer still shows low ink, start with an ink level reset through the printer settings. Check for ink sensor issues by cleaning the cartridge contacts and running cartridge cleaning cycles.
Follow refill instructions carefully if you’re using refill kits, making sure to use compatible ink types. Sometimes, ink absorption affects sensors, so replace cartridges if needed.
Finally, perform printer calibration to improve accuracy and print quality after cartridge replacement or refill.
Are There Software Updates That Improve Ink Cartridge Performance?
You might be surprised to learn that Epson regularly releases software updates that boost ink cartridge performance. These updates can improve ink compatibility, extend ink lifespan, and even help with cartridge reset issues.
They fine-tune print quality and reduce problems like ink leakage or drying. Installing updates can also optimize ink storage management, delaying cartridge replacement. So, don’t skip them; they’re key to keeping your prints sharp and your cartridges lasting longer.
Conclusion
Now that you’ve mastered adding ink to your Epson printer, you’re basically an ink-replacement superhero! No more blurry prints or panicked searches for a technician. Just smooth, vibrant pages flowing effortlessly from your printer.
With these simple steps, you’ve taken control, turning a once-daunting task into a breeze. So go ahead, print like a pro and watch your Epson come to life with every drop of fresh ink you add!
Leave a Reply