To print white ink on black paper, first create your design with clearly defined white areas using software like Photoshop. Then export it as a transparent PNG.
Use a specialized printer with white ink capabilities and set up the file in iColor ProRip. Activate white toner and select black paper settings.
Load the black paper carefully in the bypass tray, print at high quality, and apply multiple passes if needed for opacity.
Follow these steps, and you’ll discover how to refine and protect your striking prints.
How to Print White Ink on Black Paper: Quick Overview

Wondering how to print white ink on black paper? You’ll need a specialized printer equipped with white toner or white ink cartridges since standard printers can’t handle white ink.
Start by preparing your design file with white areas clearly defined, usually in a PNG format with a transparent background. Then, use printer software like iColor ProRip to properly align and set up your file for printing on dark surfaces.
When loading your black or dark paper, place it face down in the printer’s bypass tray to guarantee accurate printing. Keep in mind that achieving vibrant, opaque white ink coverage often requires multiple passes or specific printing techniques.
Following these steps helps you get crisp, bright white prints on black paper, making your designs stand out strikingly.
Choosing the Best Printer for White Ink on Black Paper
Once you’ve prepared your design and understood the basics of printing white ink on black paper, the next step is selecting the right printer. Not all printers can print white ink; you’ll need specialized UV flatbed or UV LED printers like the Epson SureColor SC-V7000 or Canon Colorado M3.
These models have integrated white ink channels that ensure high-opacity prints on dark surfaces. Regular laser or inkjet printers won’t work since they lack white ink capabilities. When choosing your printer, consider ink opacity, print quality, material compatibility, and maintenance demands.
| Printer Model | Key Feature |
|---|---|
| Epson SureColor SC-V7000 | Integrated white ink channel |
| Canon Colorado M3 | UV LED with white ink |
| Specialty White Toner Printers | Thick pigment-based ink for opacity |
Picking the right printer ensures your white ink prints look vibrant and adhere well to black paper.
Preparing Your Design Files and Exporting PNGs for White Ink Printing
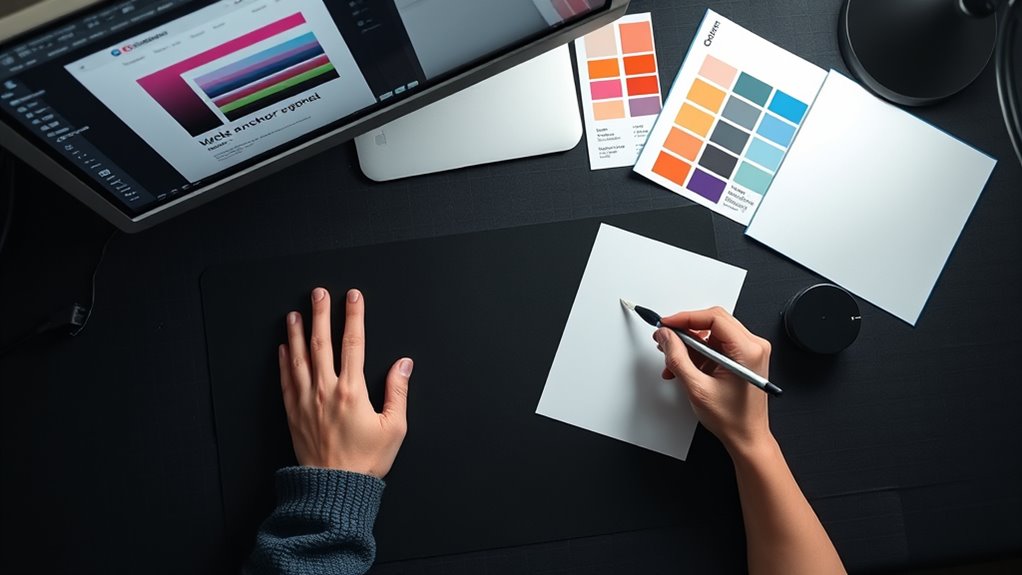
You’ll want to set up your design with clear white areas, using software like Photoshop or Silhouette Studio. When you’re ready to export, save your file as a PNG with a transparent background. This way, those white details stay intact. That’s what makes sure your design prints correctly when using white ink on black paper.
Design Setup Essentials
When preparing your design files for white ink printing on black paper, it’s essential to guarantee the areas meant for white ink are properly filled and formatted. Use design software like Silhouette Studio, filling those parts with solid black or white depending on your software’s capabilities. Confirm your PNG export keeps transparency intact to preserve white ink areas accurately.
Here’s a quick checklist for your design setup:
| Step | Tip |
|---|---|
| Fill white ink areas | Use solid black or white fills |
| Background | Set transparent for accurate prints |
| Export format | Choose PNG with transparency enabled |
| Scale and position | Match your print size precisely |
| Import to print software | Use programs like iColor ProRip |
Following these ensures your white ink prints perfectly on black paper.
Exporting Transparent PNGs
How exactly do you make sure your design files are ready for white ink printing on black paper? Start by creating your design with clearly defined white areas against a transparent background. When exporting, choose the PNG format and enable transparency to preserve these essential areas. This guarantees your white ink prints accurately on black paper.
To prepare your transparent PNG for printing, follow these steps: Use “Save As” and select PNG with transparency enabled. Scale and position your design within the correct canvas size. Then, import the PNG into your printer software, like iColor ProRip, for proper setup.
Setting Up iColor ProRip Software for White Ink Printing
Before printing white ink on black paper, import your PNG design into the iColor ProRip software and navigate to the “UnderPrint” tab to activate white toner printing for dark substrates. This step guarantees your design’s white ink will appear vibrant and crisp on black paper.
Next, adjust the image size and position using the “Modify” and “Scale” options to perfectly align your design on the paper. Then, set the material type to “Black Paper” to optimize the software’s printing parameters for dark cardstock.
For the best print quality, choose either “Best” or “High” under the print quality settings. Finally, select the “Bypass Tray” as the material feed to correctly handle the black paper during printing.
How to Load and Handle Black Paper for Best Results
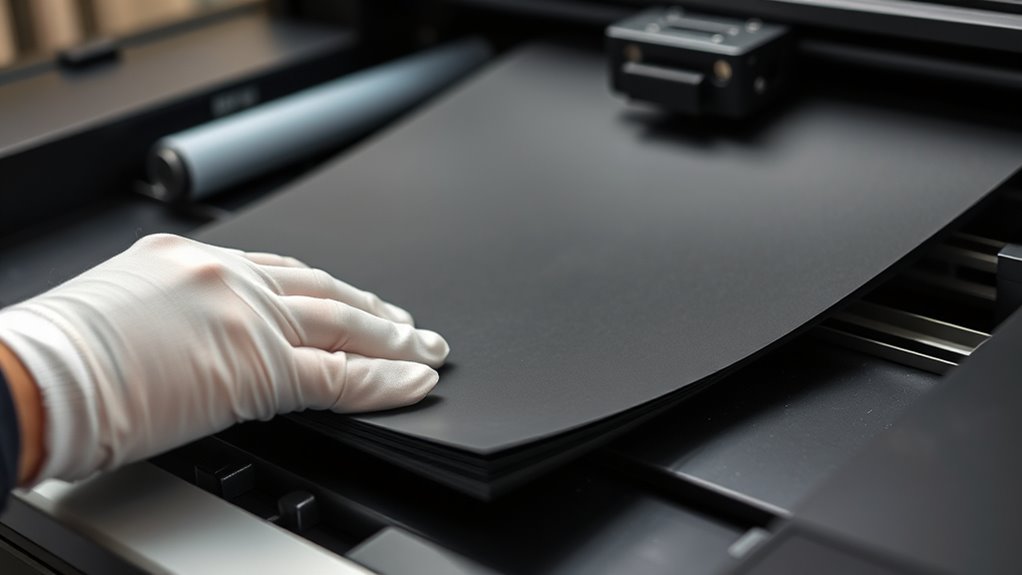
To get the best results, make sure you load the black paper with the correct orientation—usually printed side down, just like your printer recommends. It’s a small step, but it really makes a difference.
Also, try using the bypass tray or manual feed slot. This helps prevent jams and keeps the paper nicely aligned.
And don’t forget to handle the paper gently. Creases or any damage can mess with your print quality, so take your time with it.
Paper Orientation Tips
When you load black paper into your printer, make sure the printed side faces down in the bypass tray or designated feed area. Proper paper orientation is essential for achieving crisp white ink prints on black paper. Align the paper carefully along the guides to avoid skewed prints. Handle the paper on a flat, rigid surface to prevent bends or warps.
Keep these tips in mind for smooth paper orientation:
- Load only the recommended number of sheets to avoid jams
- Select the correct paper size and type in your print settings
- Position the paper flush against guides for even feeding
Following these steps guarantees your black paper feeds correctly and your white ink prints with precision every time.
Preventing Paper Damage
Proper paper orientation sets the foundation, but preventing damage to your black paper during loading and handling plays a big role in achieving sharp white ink prints. Always use the bypass or manual feed tray to avoid jams and guarantee proper alignment.
Handle black paper with gloves to prevent fingerprints and smudges, which can ruin your white ink’s clarity. Store the paper flat in a cool, dry place to avoid warping or curling that causes feeding issues.
Before printing, remove dust or debris from the paper surface for smooth feeding and crisp results. Finally, adjust the paper guides snugly against the edges to prevent skewing or misalignment. These steps protect your paper and help your white ink prints look flawless every time.
Step-by-Step Guide to Printing White Ink on Black Paper
Although printing white ink on black paper might seem challenging, you can achieve sharp, opaque results by following a clear process. Start by creating your design in graphic software, making sure the white ink areas are precisely defined and saved as a PNG file with transparency.
Next, use a specialized white toner printer like the Uninet iColor 560, loading white toner into the correct cartridge slot. Finally, import your PNG into the printer’s software, select black paper as your material, and adjust settings for high-quality output.
Here’s a quick checklist to guide you:
- Prepare a transparent PNG design with clear white ink areas
- Load white toner into your specialized printer and choose black paper
- Set print quality to high and feed black paper into the bypass tray
Begin printing and review the output to ensure crisp, fully opaque white ink on your black paper.
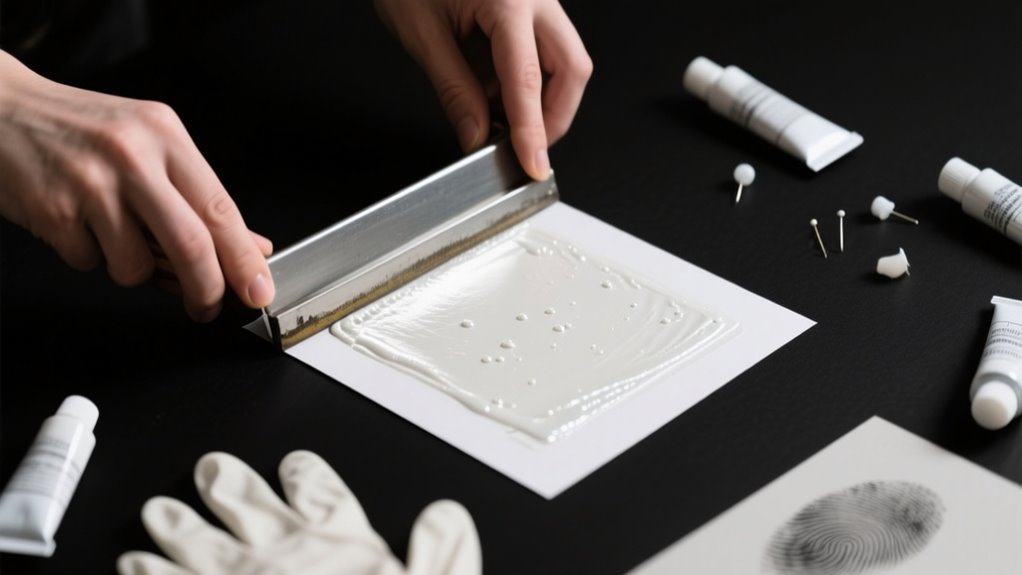
Tips for Getting Crisp, Opaque White Ink Coverage
To achieve crisp, opaque white ink on black paper, you’ll want to focus on optimizing your printing process beyond just preparing your design and loading the right toner. Start by using a printer equipped with specialized white toner or white ink cartridges, which deliver more consistent, opaque coverage.
Adjust your print settings to the highest quality and slowest speed to allow better ink application, preventing streaks or gaps. Applying multiple passes of white ink can considerably increase opacity and reduce translucency, giving you sharper results.
Choose coated black paper or pre-treat your paper to enhance ink adhesion, helping the white ink appear more vibrant and defined. Always run a test print first to fine-tune how many passes and which settings work best with your specific printer and paper combination.
Following these tips ensures your white ink prints stand out with clear, crisp, and solid coverage every time.
Troubleshooting Coverage and Smudging Issues in White Ink Printing
When you notice uneven coverage or smudging in your white ink prints, it’s often due to how the ink interacts with the paper and your printer settings. To fix this, start by checking your ink and substrate conditions. Increasing the number of white ink passes can improve coverage but also raises smudging risks because of thicker layers.
Using high-quality, slow-drying white ink reduces smudging and sharpens coverage. Also, make sure your paper is dry and dust-free before printing to avoid inconsistencies.
Here are three key troubleshooting tips to handle coverage and smudging issues:
- Adjust print pressure and impression settings for uniform ink transfer and better coverage.
- Use a post-print curing or drying process, like UV curing or heat drying, to minimize smudging.
- Choose slower drying white ink formulations to enhance print clarity and reduce smudging.
Following these steps will help you consistently achieve crisp white ink coverage without smudging.
Protecting and Finishing Your White Ink Prints on Black Paper
To keep your white ink prints sharp and smudge-free on black paper, you’ll want to use a clear protective sealant like a UV-resistant varnish. This helps lock in the ink and prevent any unwanted smudging.
Once the ink is completely dry, you can apply a matte or gloss finish. Not only does this boost durability, but it also makes your design really pop and stand out.
If you’re looking for extra protection, especially if your print will be handled a lot or exposed to moisture, laminating it is a great option. It adds a strong layer of defense that keeps your artwork looking fresh for longer.
Sealants for White Ink
How can you guarantee your white ink prints on black paper stay vibrant and smudge-free over time? Using the right sealants is key. Applying a clear sealant or varnish protects your print from smudging and environmental damage while enhancing durability.
You can choose between matte or gloss finishes depending on your desired look. Gloss boosts vibrancy, while matte cuts glare. For prints exposed to sunlight, UV-resistant sealants help maintain the ink’s brightness and opacity.
When selecting sealants, keep these points in mind:
- Use sealants made specifically for paper or print projects to avoid peeling.
- Opt for UV-resistant formulas if your print faces sunlight.
- Pick a matte or gloss finish depending on whether you want reduced glare or a vibrant shine.
Proper sealants ensure your white ink stays crisp and intact longer.
Preventing Ink Smudging
Although white ink on black paper looks striking, it’s essential to let the ink dry completely or use heat-setting tools before handling to prevent smudging. After drying, apply a clear protective coating like UV varnish or spray fixative to secure the print and minimize smudging or transfer.
When handling your print, hold it by the edges or wear gloves to avoid disturbing the fresh white ink layer. Use a light, even press or weight to gently flatten the paper during drying, ensuring smooth, even ink adhesion.
Finally, store your finished prints flat in a dust-free environment to protect them from accidental contact or environmental factors that could cause smudging or smearing. These steps keep your white ink prints sharp and clean.
Enhancing Print Durability
When you want your white ink prints on black paper to last, applying a clear protective coating like UV varnish or lamination can make a big difference. These coatings shield the print from scratches and fading, preserving its vibrant contrast. You can also heat-set the white ink using a heat press or oven to improve adhesion and resist smudging.
To boost durability even more, consider adding tactile finishes. Try these methods to enhance print durability: use embossing or debossing over white ink for a physical barrier and texture. You can also apply a sealing spray designed for paper to prevent smudging.
Another tip is to choose high-quality coated black paper that supports ink adhesion and longevity. These steps will protect your white ink prints and keep them looking sharp over time.
Creative Ideas for Using White Ink on Black Paper
Why settle for ordinary when you can make your designs pop with white ink on black paper? This striking contrast instantly grabs attention, perfect for invitations, posters, or art prints.
Elevate your designs with bold white ink on black paper for instant, eye-catching impact.
You can experiment with hand calligraphy to add an elegant, personal touch, or use digital printing with white toner for sharp, customizable designs. For a luxurious feel, try white foil stamping or engraving, which creates durable, high-end effects on black paper.
Layering white ink or combining these techniques enhances opacity and adds texture, making your artwork even more dynamic. Don’t hesitate to plunge into methods like using digital printing as a base and finishing with hand calligraphy to achieve unique results.
Whether you’re crafting bold typography or intricate illustrations, white ink on black paper offers endless creative possibilities that stand out with clarity and style. So, plunge into and transform your projects with this powerful, eye-catching combination.
Frequently Asked Questions
Can White Ink Printing Be Done on Colored Papers Other Than Black?
Yes, you can print white ink on colored papers other than black, but you’ll need to take into account color compatibility. Dark shades like navy, deep green, or burgundy work best because white ink stands out on them.
You’ll want to use specialized white toner or UV printers and adjust your design settings to get the right opacity. Testing samples helps guarantee your white ink looks vibrant and opaque on your chosen colored paper.
How Long Does White Ink Typically Take to Dry on Black Paper?
You might think white ink on black paper takes forever to dry, like waiting for paint to harden on the moon! But usually, the drying duration ranges from a few minutes to several hours, depending on ink thickness and type.
If you layer it thick, expect up to 24 hours. Using fast-drying inks or heat-setting methods can shrink that time dramatically.
Is White Ink Printing More Expensive Than Standard Color Printing?
Yes, white ink printing is generally more expensive than standard color printing. When you do a cost comparison, you’ll see that white ink requires specialized inks and equipment, which drives up material and labor costs.
Plus, the process often involves extra passes, increasing production time. So, expect white ink printing to cost 2 to 5 times more per unit than typical CMYK printing, depending on your project and method.
Can I Use White Ink for Fabric Printing as Well?
Think of white ink as a bright spotlight on fabric application. It makes designs pop on dark textiles.
Yes, you can definitely use white ink for fabric printing. It’s specially formulated to be opaque, durable, and resistant to washing and stretching.
Just remember to pre-treat the fabric or apply a base layer to boost opacity. Then cure it properly so your design stays vibrant and long-lasting.
What Environmental Factors Affect White Ink Adhesion on Black Paper?
You need to control humidity, temperature, and light exposure for white ink adhesion on black paper. Humidity over 60% can make the ink tacky, while too dry conditions prevent proper curing.
Keep temperatures between 65°F and 75°F to avoid drying issues. Avoid direct sunlight or UV light during printing.
Also, pay close attention to surface compatibility. Coated or embossed paper affects how well the ink bonds and cures on black paper.
Conclusion
Printing white ink on black paper can transform your designs like a moonbeam cutting through the night. By choosing the right printer, preparing your files carefully, and mastering settings in iColor ProRip, you’ll achieve crisp, vibrant results every time.
Remember to handle your black paper with care and troubleshoot any smudging promptly. With these steps, your prints won’t just stand out—they’ll shine with professional clarity and creativity.
Keep experimenting and watch your ideas glow!
Leave a Reply