Category: Ink

  • Do Fire Alarms Spray Ink to Prevent Theft?

    Do Fire Alarms Spray Ink to Prevent Theft?

    You don’t need to worry about fire alarms spraying ink to catch thieves; that’s a common myth.

    While some older systems had ink-coated handles or tamper dyes to mark pranksters, no fire alarm actively sprays ink when pulled.

    Instead, modern alarms rely on other security measures to prevent misuse.

    False alarm penalties and smarter detection methods are in place to keep everyone safe.

    If you want to understand how these measures really work, there’s more to uncover.

    Do Fire Alarms Actually Spray Ink When Pulled?

    fire alarms do not spray ink

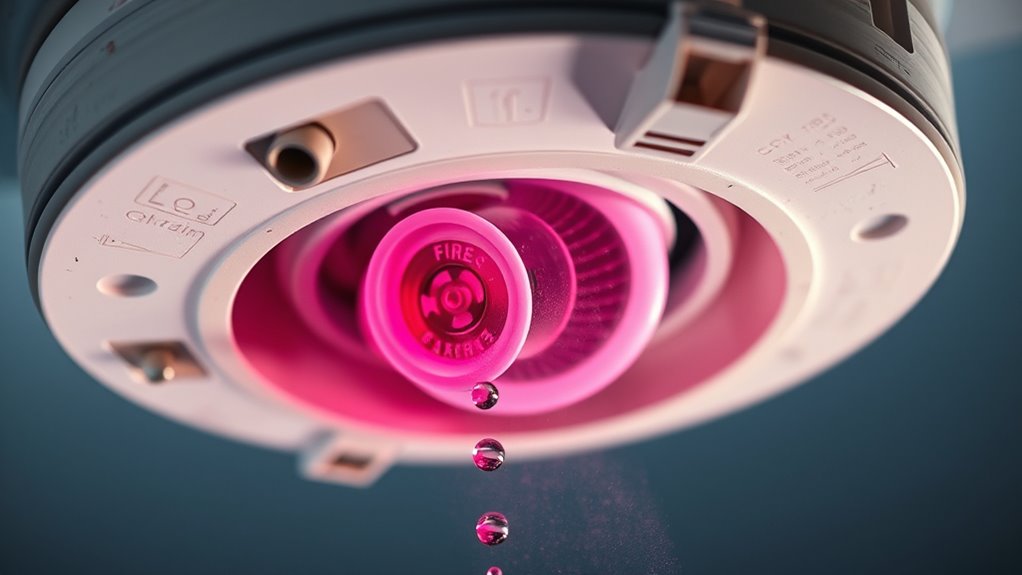
    Have you ever wondered if fire alarms actually spray ink when pulled? The truth is, fire alarms don’t spray ink at all. This idea is a myth without any real basis.

    While older fire alarm systems sometimes used tamper-dye or ink marks to help identify false alarms, they didn’t actively spray ink when triggered. Some pull stations might have ink or dye on their handles to stain your hands and discourage false alarms, but that’s a passive feature, not an automatic spray.

    Modern fire alarms don’t include any ink-spraying devices as a security measure. So, if you’re worried about getting ink on yourself from pulling a fire alarm, you can relax. The myth probably started as a way to scare people from causing false alarms, but in reality, fire alarms don’t spray ink when activated.

    Where Did the Fire Alarm Ink-Spraying Myth Originate?

    You might be curious about where the idea of fire alarms spraying ink actually began. Well, it likely started as a rumor that spread around schoolyards and turned into one of those urban legends designed to scare pranksters away. Sure, some fire alarms did have dyes inside to mark the handles, but they never really sprayed ink all over when someone pulled them. It’s one of those stories that sounds believable but just isn’t true.

    Origins of The Myth

    Although many believe fire alarms spray ink to catch pranksters, this idea likely started as a rumor meant to discourage false activations. You might find that the myth grew from early fire safety measures, where tamper-evident dyes or ink-like substances were used to show if equipment had been tampered with.

    Over time, these facts blurred into an urban legend, suggesting fire alarms actively marked offenders with ink. Some stories even claim that original fire alarm pull stations sprayed paint or ink, but no solid evidence supports this.

    Instead, the myth seems reinforced by exaggerated tales and fictional accounts aiming to warn you against misusing fire alarms. Understanding this helps you separate fact from fiction in fire safety discussions.

    Schoolyard Stories Spread

    When kids hear stories about fire alarms spraying ink, those schoolyard tales stick with them and spread quickly. You’ll find these schoolyard stories often portray pull stations as coated with ink to mark pranksters or thieves.

    These urban legends come from misunderstandings about security measures, like tamper-evident dyes used in other systems, not actual fire alarms. Despite no documented proof or official designs backing the ink-spray idea, the myth stays popular.

    You might hear it passed down as fact simply because it sounds plausible and warns against false alarms. These stories thrive in school environments, where rumors grow and facts blur, keeping the ink-spraying myth alive even though real fire safety technology doesn’t support it.

    Historical Ink Usage

    Many of the stories about fire alarms spraying ink trace back to early 20th-century fire alarm call boxes. In the 1930s, some of these historical devices used ink or dye to mark pranksters who triggered false alarms.

    You might hear tales of ink-spraying fire alarms as theft deterrents, but these are more folklore than fact. No credible evidence shows that fire alarms actively sprayed ink to prevent theft. Instead, early systems sometimes had ink-stained handles or detachable handcuffs to discourage misuse.

    Year Feature
    1930s Ink used to mark pranksters
    Early tech Detachable handcuffs
    Myth Ink spraying fire alarms
    Reality No active ink spraying

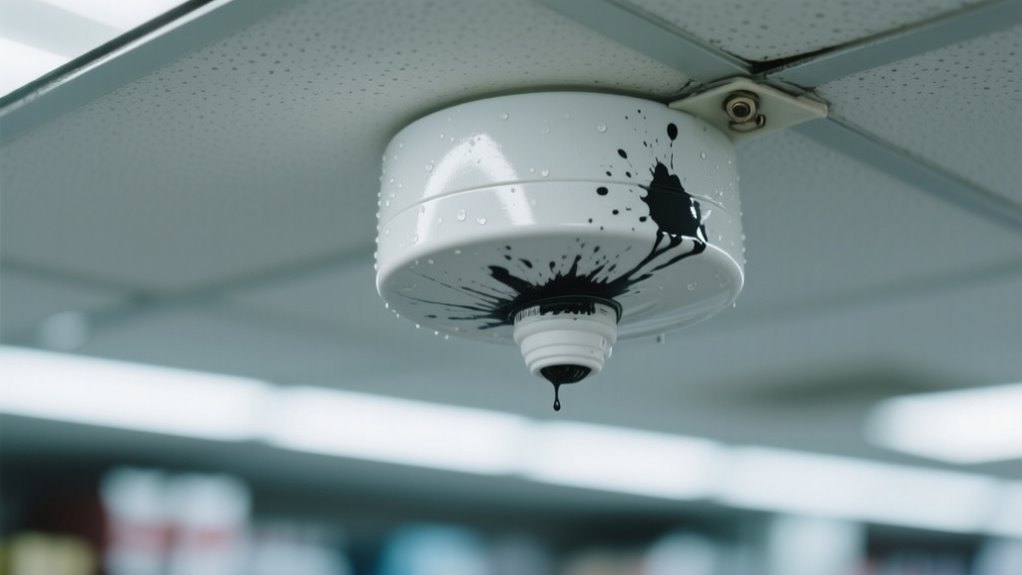
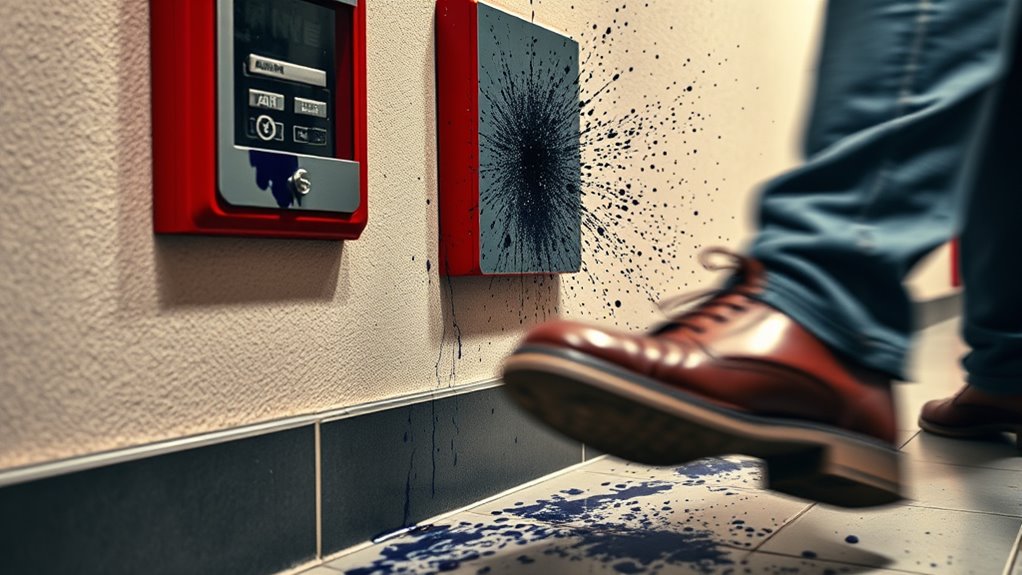
    How Ink or Paint Coatings Mark False Alarm Activators

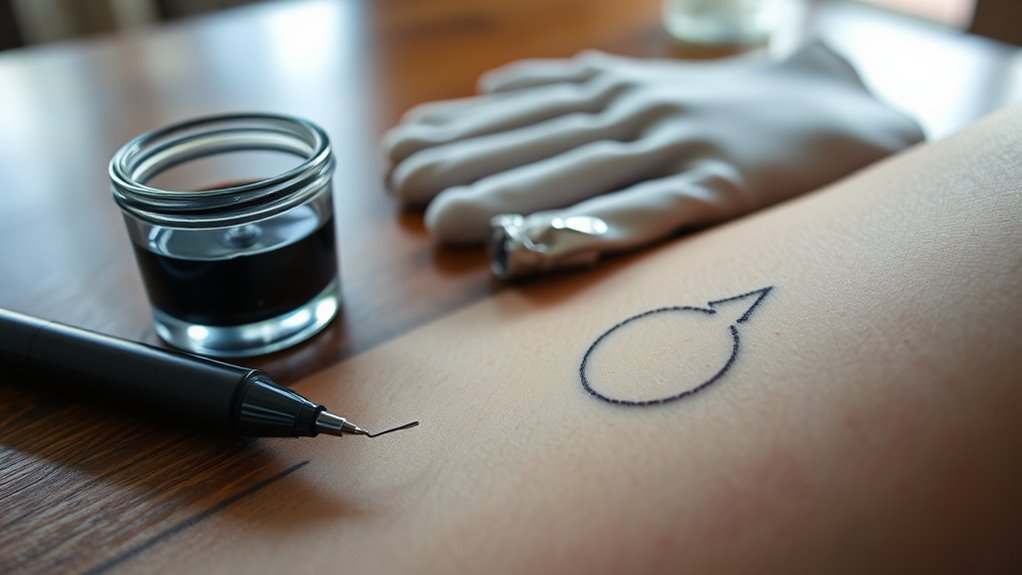
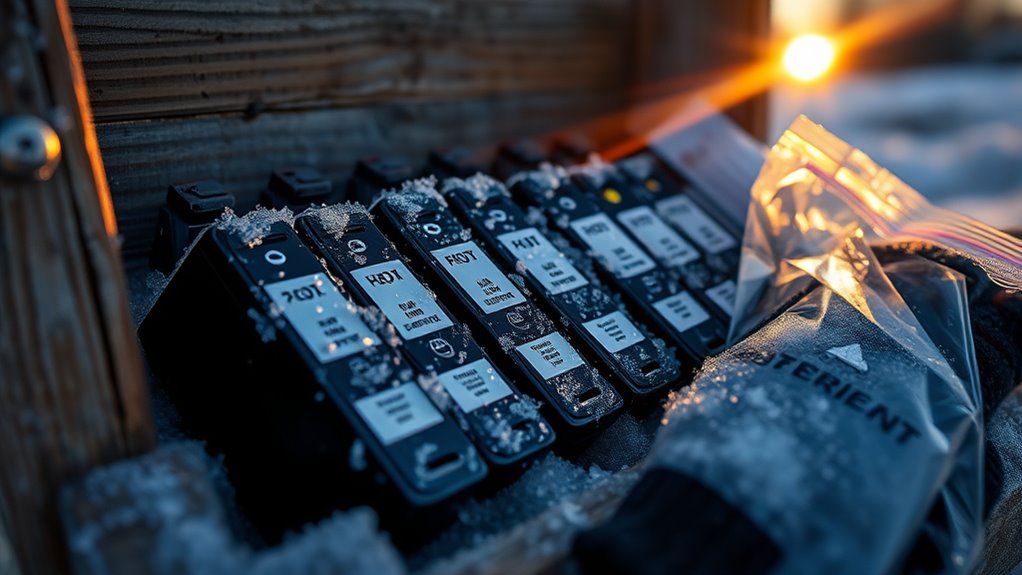
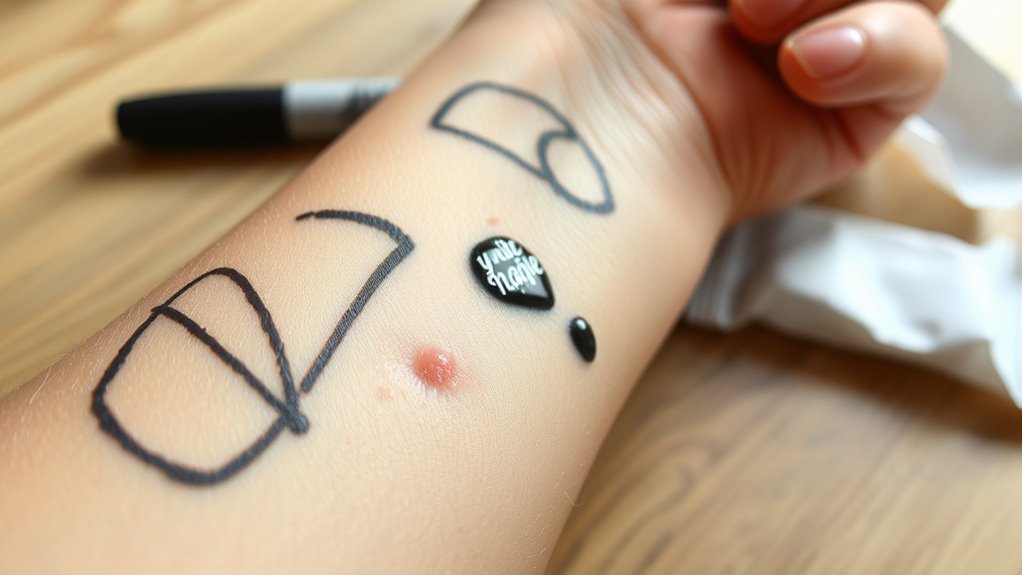
    If you ever see a fire alarm pull station with a colored coating on its handle, that’s ink or paint designed to mark pranksters. This coating isn’t sprayed or shot out during activation; instead, it’s a static layer applied to the handle’s surface.

    When someone pulls the alarm falsely, the paint transfers to their hands, making it easy to identify false alarm activators. This method acts as a clear deterrent, discouraging prank pulls by increasing the risk of being caught.

    The paint serves both as a visual and tactile marker, signaling to others and authorities that the person triggered the alarm maliciously. Unlike myths about ink being sprayed actively during false activations, these coatings stay put until someone touches them.

    Design Features That Prevent Fire Alarm Misuse

    tamper proof fire alarm features

    You’ll find that tamper dyes on fire alarms don’t spray ink like you might think. Instead, they actually stain hands to catch pranksters in the act. Some fire alarm designs even come with detachable handcuffs that physically prevent false pulls. So, let’s clear up some common myths about how ink staining works and why these features are effective at stopping misuse.

    Tamper Dye Usage

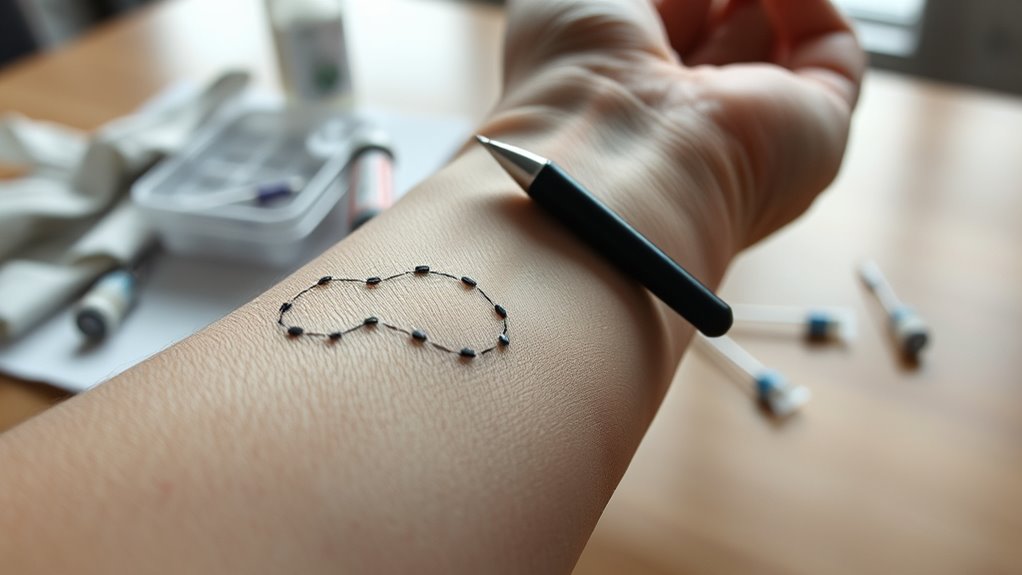
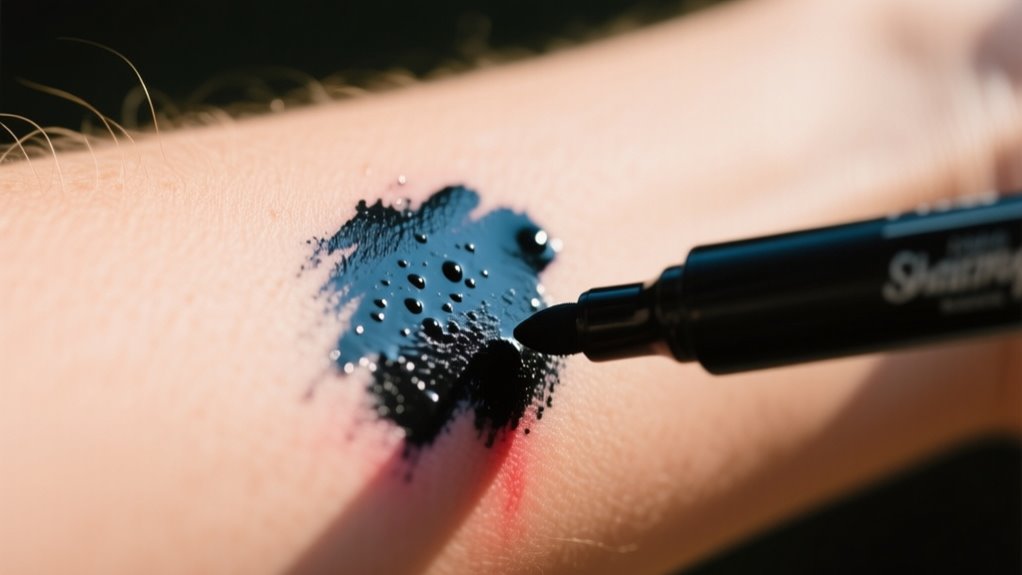
    Although fire alarms are essential for safety, some people misuse them as pranks or false alerts. To address this, many systems include tamper dye as a security feature. When someone triggers a false alarm, tamper dye marks their skin or clothing with a permanent or semi-permanent stain.

    This discreet method helps identify those responsible for false alarms without being physically intrusive. By using tamper dye, building managers and authorities can quickly pinpoint pranksters or individuals who intentionally abuse the alarm system. This discourages misuse and helps maintain the effectiveness of fire alarms.

    That way, fire alarms remain reliable for real emergencies. So, while they don’t spray ink in a dramatic fashion, tamper dye quietly protects against false alarms and enhances security.

    Detachable Handcuffs Purpose

    While tamper dye quietly marks those who trigger false alarms, another method takes a more physical approach to discourage misuse. Detachable handcuffs on fire alarm call boxes serve as a safety feature designed to restrain false activators temporarily. Here’s what you should know:

    1. They discourage prank calls by making false activation inconvenient.
    2. The handcuffs are detachable, so you can release yourself if genuinely using the alarm or mistakenly restrained.
    3. This design balances misuse prevention with user safety, avoiding permanent restraint.
    4. The restraints act as a non-permanent measure, ensuring you’re not trapped but deterred.

    Ink Staining Myths

    Since fire alarms serve a critical safety role, people often wonder if they include features like ink staining to catch pranksters. The truth is, many myths surround ink staining in fire alarms.

    While some pull stations have ink or paint on handles to mark those who misuse them, there’s no solid evidence that alarms actively spray ink. Instead, actual security measures rely on passive staining, applying ink or dye directly to the handle to discourage false alarms.

    These design features help identify individuals who tamper with alarms without causing damage or mess. So, while the idea of ink-squirting fire alarms sounds dramatic, it’s mostly a myth. The real focus is on simple, effective ink staining as a deterrent and security measure.

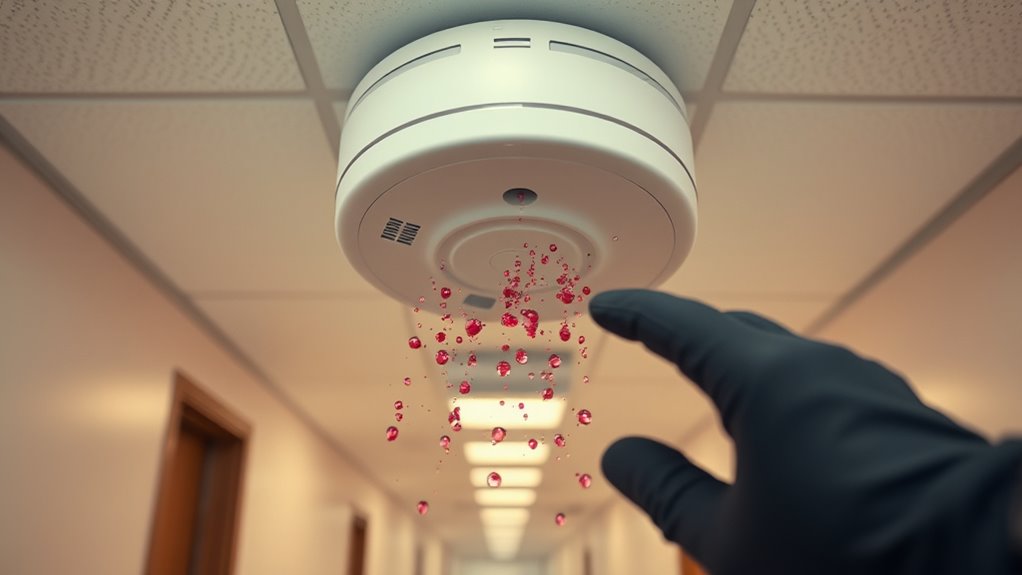
    How Tamper Dye Works in Modern Fire Alarms

    tamper detection with visible dye

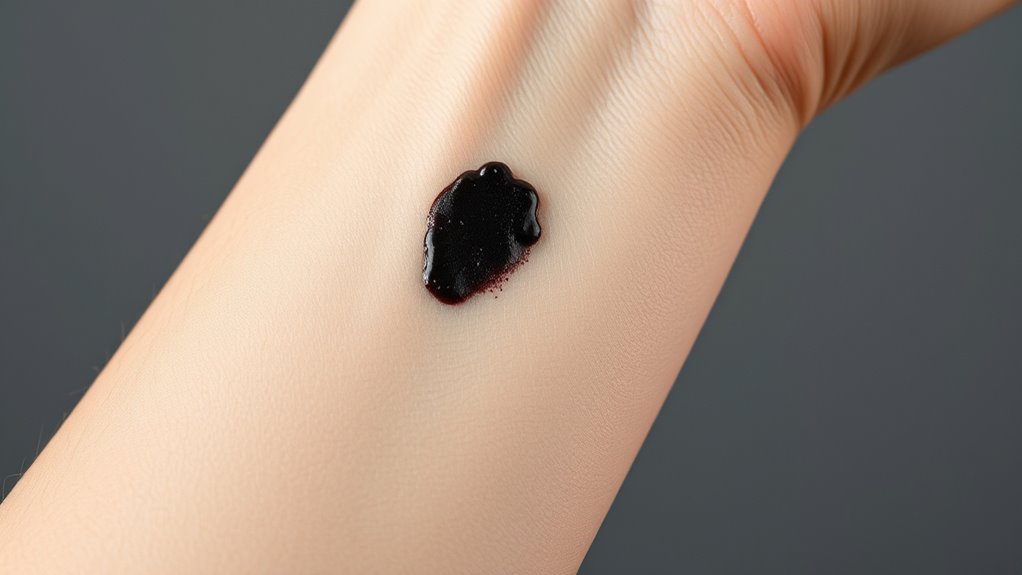
    When someone tries to tamper with a modern fire alarm, a special dye sprays onto their hands or clothes, leaving a visible stain. This tamper dye plays a vital role in reducing false alarms and ensuring quick detection of unauthorized interference. Here’s how it works:

    1. The dye is built into the fire alarm’s activation mechanism and releases only when the device is mishandled or tampered with.
    2. It leaves a permanent, non-toxic mark that’s tough to wash off, discouraging vandals from triggering false alarms.
    3. Under UV light, the stain becomes highly visible, helping authorities identify those responsible for tampering.
    4. The dye is weather-resistant, ensuring the mark remains even under harsh conditions.

    How Fire Departments Identify False Alarm Activators Without Ink?

    You might be curious about how fire departments catch false alarm activators without using ink. Well, they use a mix of tools like surveillance cameras, eyewitness accounts, and tamper-evident markings to spot the culprits. On top of that, legal penalties play a big role in keeping those false alarms under control. So, it’s really a combination of technology, observation, and the law working together to handle the problem.

    Ink-Free Identification Methods

    Although many fire alarm systems use ink to identify false activators, fire departments have developed several ink-free methods to catch pranksters. You can rely on these tamper-evident and monitoring techniques to pinpoint unauthorized triggers without messy stains.

    1. Tamper-evident stickers on pull stations reveal if someone tried to activate the alarm improperly.
    2. Infrared and electronic monitoring systems flag unusual activity, helping you spot false alarms quickly.
    3. Security cameras watch pull stations closely, letting you verify who triggered the alarm in real time.
    4. Unique serial numbers and access controls trace genuine activations, preventing misuse and ensuring accountability.

    With these ink-free methods, fire departments can effectively identify false alarm activators while keeping systems clean and secure.

    Tamper Dye And Marking

    Ink-free methods offer clean ways to identify false alarm activators, but fire departments also rely on tamper dye and marking to catch pranksters. Tamper dye is a viscous substance that sticks to skin or clothing when someone triggers a false alarm, making it easy to spot repeat offenders.

    Some fire alarm systems even have built-in dye packs or marking agents that activate upon pulling the alarm, leaving a visible stain. These methods help authorities quickly distinguish between genuine emergencies and deliberate false alarms without the mess of spray ink.

    Why Old Fire Alarm Boxes Had Detachable Handcuffs

    When pranksters repeatedly triggered false alarms, old fire alarm boxes included detachable handcuffs to deter such actions. You might wonder why handcuffs were part of a fire alarm system. Here’s the reasoning:

    1. The detachable handcuffs restrained individuals attempting to activate the fire alarm falsely.
    2. They made it harder for pranksters to trigger the alarm repeatedly, reducing disruptions.
    3. The handcuffs detached easily, so if you were wrongly detained or used the alarm legitimately, you could escape.
    4. This approach balanced discouraging false alarms with ensuring safety for real emergencies.

    While this method once helped manage misuse, it was eventually phased out as perceptions changed and new security measures emerged. So, the next time you see a fire alarm box, remember that it once had a surprising feature designed to stop false activations, detachable handcuffs.

    The old fire alarm boxes with detachable handcuffs aimed to discourage false alarms, but today, the consequences for pulling a false fire alarm are much more severe and legally enforced. If you trigger a false alarm, you could face serious legal consequences, including fines, criminal charges, or even jail time.

    Many places treat false fire alarms as misdemeanors or felonies, with penalties that vary widely—from hundreds of dollars in fines to several years behind bars. Repeat offenses often lead to harsher punishments, including increased fines and stricter legal actions.

    In some regions, falsely pulling a fire alarm can be charged as a class 4 felony, which carries significant criminal consequences. These laws exist to deter misuse of fire alarm systems, ensuring emergency responders can focus on real dangers without delay.

    Why It’s Important to Only Pull Fire Alarms in Emergencies

    Although fire alarms are designed to keep you safe, you should only pull them during genuine emergencies. Pulling a fire alarm without cause leads to false alarms that disrupt safety operations and waste emergency resources.

    When you misuse alarms, you put others at risk and face serious consequences. Here’s why responsible use matters:

    1. False alarms cause unnecessary evacuations, putting everyone through stress and confusion.
    2. Emergency responders get tied up with false calls, delaying help for real fires.
    3. Many areas impose fines or criminal charges to discourage pulling fire alarms without reason.
    4. Misusing alarms can lead to legal trouble, including fines and jail time.

    Summary: Preventing False Alarms and Staying Safe

    Since false alarms can cause serious disruption and delay emergency response, you should always use fire alarms responsibly and only in real emergencies. False alarms waste valuable time and resources, potentially putting lives at risk when responders are diverted from actual emergencies.

    To help prevent false alarms, some fire alarm pull stations use security measures like ink or dye coatings that mark the hands of anyone who activates them without cause. These markings serve as a deterrent, discouraging misuse and making it easier to identify false activators.

    However, fire alarms do not spray ink as a theft prevention method—that is a myth. The main goal of these security measures is to reduce false alarms, not to prevent theft. By understanding these facts and respecting the proper use of fire alarms, you contribute to a safer environment for everyone.

    Always remember, fire alarms are critical safety tools, not pranks or theft deterrents.

    Frequently Asked Questions

    Can Fire Alarms Detect Smoke or Heat Without Manual Activation?

    Yes, fire alarms can detect smoke or heat without manual activation. They rely on smoke sensitivity through ionization or photoelectric sensors to catch smoke particles early.

    Heat detection kicks in when temperatures rise quickly or hit a set threshold. While this automatic response helps prevent danger, it can sometimes cause false alarms if smoke or heat sources aren’t related to fire. So, your fire alarm works proactively to keep you safe.

    How Often Should Fire Alarms Be Tested for Functionality?

    You should test your fire alarm monthly to ensure proper functionality. Following fire alarm maintenance routines, press the test button or use a testing device to check the alarm’s sound and sensors.

    Don’t forget to monitor alarm battery life regularly, replacing batteries when needed. Furthermore, schedule annual professional inspections to follow proper testing procedures.

    This keeps your system reliable and helps prevent malfunctions or false alarms.

    Are There Wireless Fire Alarm Systems Available?

    Yes, you’ll find wireless fire alarm systems that make safety smarter and simpler. With wireless connectivity, you can connect detectors without messy wiring, ensuring installation ease even in tricky spaces.

    Just remember, battery life is vital. You’ll need to check batteries regularly to keep alerts reliable. These systems often sync with your smartphone, giving you real-time updates and control no matter where you are.

    It’s safety, upgraded and effortless.

    What Materials Are Fire Alarm Pull Stations Made From?

    Fire alarm pull stations are made from durable materials like metal, often steel or aluminum, and heavy-duty plastic. Their alarm design focuses on material durability to withstand frequent use and vandalism.

    Manufacturers use precise manufacturing processes to include metal levers, springs, and contacts inside for reliable activation. Protective coatings are also applied to prevent corrosion, ensuring the pull station functions well in various environments while maintaining strength and longevity.

    How Quickly Do Fire Alarms Alert Emergency Services?

    Think of fire alarms as your building’s lightning-fast messengers. When you keep up with fire alarm maintenance and invest in alarm system upgrades, you guarantee emergency response times stay lightning quick, often within minutes.

    These systems instantly alert emergency services the moment they detect danger, giving you peace of mind. So, by staying proactive, you help emergency responders act fast and keep everyone safe when seconds truly count.

    Conclusion

    You might be surprised to learn that false fire alarms account for nearly 40% of all fire department calls. While fire alarms don’t actually spray ink on you, many use tamper dyes or coatings to mark false activators, discouraging misuse.

    Remember, these systems are designed to protect lives, so only pull the alarm in real emergencies. Respecting this *guarantees* everyone safe and ensures help arrives when it’s truly needed.

  • How Do You Use Sublimation Ink for Regular Printing?

    How Do You Use Sublimation Ink for Regular Printing?

    You can use sublimation ink for regular printing by choosing coated or specially designed papers that prevent ink absorption and enhance color vibrancy.

    Adjust your printer settings to the highest quality and lower ink density to avoid bleeding and dullness.

    Keep prints fully dry before any handling to maintain sharpness.

    While results won’t match sublimation on polyester, this method works well for testing or creative projects.

    Discover more tips on optimizing print quality and paper choices ahead.

    How Does Sublimation Ink Differ From Regular Ink?

    sublimation bonds through heat

    Although both are types of ink, sublimation ink works very differently from regular ink. When you use sublimation ink, you’re working with a dye-based pigment that actually transforms from a solid directly into a gas under heat. This unique property allows the dye to bond permanently with polyester or specially coated surfaces during the heat transfer process.

    Sublimation ink transforms from solid to gas, bonding permanently with polyester or coated surfaces through heat.

    In contrast, regular ink stays liquid or dries on paper, adhering only to the paper fibers without any chemical bonding.

    Sublimation ink also tends to be more transparent and less vibrant on plain paper, so it doesn’t produce vivid colors unless it’s used on sublimation-compatible materials. Regular inkjet inks, on the other hand, aren’t heat-activated and won’t gasify, making them unsuitable for sublimation transfers.

    Plus, you’ll need specific printers and sublimation paper for sublimation ink, whereas regular ink works fine with standard printers and paper.

    Can You Use Sublimation Ink on Regular Paper?

    Also, regular paper doesn’t hold or release the ink properly during the transfer process. So, your final image won’t be as sharp or durable as you might hope. It’s definitely better to stick with sublimation paper if you want the best results.

    Ink Behavior On Paper

    When printing with sublimation ink on regular paper, expect dull colors and less sharp images because the paper absorbs the ink instead of allowing it to sit on the surface. Regular paper lacks the polymer coating that helps sublimation ink transfer effectively, so the ink gets trapped and reduces transfer quality.

    You’ll notice washed-out colors and potential bleeding at the edges. This makes regular paper suitable only for testing or layouts, not for final prints.

    Aspect Effect on Sublimation Ink
    Absorption Ink soaks into paper fibers
    Color Vibrancy Colors appear dull and washed out
    Image Sharpness Less defined, with possible bleeding
    Transfer Efficiency Reduced due to lack of coating

    Since sublimation ink interacts differently with regular paper compared to specialized sublimation paper, you’ll notice a considerable drop in print quality. Regular paper absorbs the ink, causing colors to appear dull and edges to bleed, reducing image clarity.

    Unlike sublimation paper, regular paper lacks a polymer coating, so the ink transfer during heat pressing is incomplete or faded. This means your prints won’t have the sharpness or vibrancy you expect from true sublimation transfers.

    While you can use sublimation ink on regular paper for testing designs or layouts, it’s not ideal for professional-quality results. If you want crisp, durable prints, sticking to specialized sublimation paper is essential, as regular paper compromises the overall print quality substantially.

    Best Papers for Sublimation Ink on Regular Paper

    optimal paper for vibrant sublimation

    When you’re using sublimation ink on regular paper, the kind of paper you pick really affects how the ink soaks in and how bright your prints turn out. For example, coated matte or semi-gloss photo papers tend to handle the ink way better than plain copy paper. This means you’ll get sharper images and more vibrant colors. So, knowing these differences can really help you choose the best paper for whatever printing project you have in mind.

    Paper Types Comparison

    How do you choose the best paper for sublimation ink if you’re using regular printing methods? Regular paper for sublimation often absorbs ink, causing dull, blurry images and color bleeding. To get sharp, vibrant results, you need the right Transfer Paper or high-quality inkjet paper with a smooth, coated surface.

    Here’s what to keep in mind:

    • Coated sublimation paper prevents ink absorption, preserving color brightness
    • Regular office paper leads to poor image quality and less durability
    • Inkjet Transfer Paper improves detail and vibrancy on polyester substrates
    • Specialized sublimation papers ensure sharper, longer-lasting prints
    • Compatibility with your substrate boosts final output quality

    Choosing the right paper makes all the difference when printing with sublimation ink on regular printers.

    Ink Absorption Effects

    Why does ink absorption matter so much when using sublimation ink on regular paper? Ink absorption directly affects how well your print will transfer. Regular paper tends to soak up sublimation ink into its fibers, causing the ink to bleed at the edges and dull your colors.

    This absorption reduces transfer efficiency, making your images less vibrant and less detailed. To combat this, the best papers for sublimation ink on regular paper have a smooth, coated surface that minimizes ink absorption.

    These specialized sublimation-compatible papers feature a polymer coating that keeps the ink on the surface, ensuring crisp, vibrant prints. Avoid standard copy paper if you want to maintain sharpness and color intensity in your sublimation projects.

    Although sublimation ink works best with specialized papers, you can still improve your print quality by choosing the right type of regular paper. Regular copy paper often absorbs ink too much, causing dull colors and blurry edges. Instead, opt for coated or glossy papers that help keep colors bright and sharp.

    Here’s what you should consider for better print quality with regular paper:

    • Use high-quality coated inkjet paper for dye-based inks
    • Avoid uncoated or standard copy paper
    • Choose glossy photo papers to reduce ink bleeding
    • Expect less vibrancy than sublimation-specific papers
    • Remember that paper choice directly affects transfer durability

    Printer Settings for Sublimation Ink on Regular Paper

    optimize sublimation print quality

    When you print with sublimation ink on regular paper, setting your printer to the highest quality or photo print mode guarantees the best results. Adjust your printer settings to match the regular paper type and size precisely. This guarantees the ink bonds correctly without smudging or misalignment.

    Use custom color profiles or manual color adjustments since sublimation ink reacts differently than standard ink. This helps you achieve accurate, vibrant colors. Disable any automatic color management in your print settings to avoid unwanted color shifts that can distort your design.

    Also, print at a resolution of 1200 DPI or higher to capture fine details and sharp edges. These printer settings optimize your output, making your sublimation prints on regular paper look professional and vivid. By carefully configuring these aspects, you ensure your sublimation ink performs its best on regular paper, delivering high-quality prints every time.

    How to Prevent Ink Bleeding and Color Dulling on Regular Paper

    To keep your colors bright and avoid ink bleeding, start by picking thick, smooth paper. It really makes a difference in how the ink soaks in. Also, tweaking your printer settings can do wonders—this helps sharpen your prints and stops too much ink from piling up. And don’t forget, letting your prints dry completely before you touch them is key to preventing smudges and keeping those colors popping.

    Managing Ink Absorption

    Why does sublimation ink often bleed and lose its vibrancy on regular paper? It’s because regular paper’s porous surface soaks up too much ink, causing excessive ink absorption that dulls colors and blurs details. To manage this, you need strategies that control how much ink the paper takes in.

    Try these tips to keep your prints sharp and vivid:

    • Use high-quality coated or gloss regular paper to reduce ink absorption.
    • Lower your printer’s ink density to avoid saturating the paper.
    • Allow prints to dry fully before any heat transfer to prevent smudging.
    • Apply a light spray of fixative or clear coating to seal the ink.
    • Avoid overloading the paper with heavy ink layers.

    Enhancing Print Sharpness

    Although sublimation ink isn’t designed for regular paper, you can still achieve sharp, vibrant prints by carefully controlling your materials and printer settings. To enhance print sharpness when you print with sublimation ink on regular paper, choose high-quality, smooth, uncoated sheets to minimize bleeding.

    Use lower ink density settings and ensure your printer is properly calibrated for sublimation ink. Allow your prints to dry fully before handling to preserve clarity and prevent smudging.

    Minimizing Color Bleeding

    When you print with sublimation ink on regular paper, minimizing color bleeding is essential to keep your designs crisp and vibrant. To prevent ink bleeding and color dulling, focus on these key steps:

    Choose high-quality, smooth, uncoated regular paper to reduce ink absorption. Lower ink density or color saturation settings to avoid excess ink causing bleeding.

    Allow ample drying time before handling prints to prevent smudging. Use fresh sublimation ink and calibrate your printer for consistent ink flow.

    Run test prints on scrap paper to fine-tune print speed, temperature, and pressure.

    Controlling Ink Costs When Printing With Sublimation Ink

    Since sublimation ink costs more than standard inkjet ink, you’ll want to control its use carefully to keep expenses down. Controlling ink costs during regular printing means limiting sublimation ink to occasional test prints or using a dedicated printer for sublimation tasks.

    Monitoring ink levels and print volume helps you avoid unnecessary waste. Also, choosing high-yield sublimation inks can lower your per-page cost when you must use them for non-sublimation prints.

    Here’s a quick guide to controlling ink costs:

    Strategy Action Benefit
    Dedicated Printers Use separate devices Prevents ink mixing, reduces waste
    Monitor Ink Levels Check frequently Avoids unexpected shortages
    Use High-yield Ink Select compatible inks Lowers cost per print

    Can You Convert Your Sublimation Printer Back to Regular Ink?

    Managing ink expenses might lead you to contemplate switching your sublimation printer back to regular ink for everyday printing tasks. You can convert your sublimation printer, but it’s not a quick switch. The process involves flushing out sublimation ink thoroughly and refilling the tanks gradually with standard ink, following your printer’s manufacturer instructions carefully.

    Epson EcoTank printers handle this conversion better, yet patience is key.

    Here’s what you should expect:

    Multiple cleaning cycles to prevent clogging or color mixing

    Gradual ink replacement over hours or days

    Possible initial color inconsistencies

    Risks of damaging the ink delivery system if tubing is mishandled

    The necessity to strictly follow manufacturer guidelines

    When to Use Sublimation Paper vs. Regular Paper

    Why should you choose sublimation paper over regular paper for your printing projects? Sublimation paper is specially coated with a polymer layer that prevents ink absorption, guaranteeing vibrant, sharp transfers. Regular paper soaks up ink, leading to dull colors and potential bleeding, which ruins your final product’s quality.

    Use sublimation paper when you want bright, durable prints on polyester or coated surfaces. This paper ensures efficient ink release and crisp images.

    Choose sublimation paper for vibrant, long-lasting prints with sharp details on polyester and coated materials.

    That said, regular paper isn’t useless. It’s cheaper and readily available, making it perfect for testing layouts or draft prints before committing to expensive sublimation paper. However, don’t rely on regular paper for final sublimation transfers since it causes incomplete ink release and blurry results.

    For the best outcome, match sublimation ink with sublimation paper. So, reserve regular paper for practice runs and stick with sublimation paper when quality truly matters in your printing projects.

    Maintaining Print Quality on Regular vs. Sublimation Paper

    Although both regular and sublimation paper can be used with sublimation ink, maintaining print quality depends largely on your paper choice. Using sublimation ink on sublimation paper guarantees vibrant, sharp prints thanks to its polymer coating that prevents ink absorption. In contrast, using regular paper causes ink to bleed and dull your images, leading to blurry and washed-out results.

    To keep your prints looking their best, consider these points:

    • Sublimation paper preserves color accuracy and sharpness
    • Regular paper absorbs ink, causing loss of detail
    • Thicker sublimation paper texture controls smudging
    • Using regular paper often results in uneven coloration
    • Matching sublimation ink with sublimation paper ensures crisp, vibrant transfers

    Choosing the right paper is vital when using sublimation ink. While regular paper might seem convenient, it compromises image clarity and vibrancy. So, sublimation paper is your best bet for quality prints.

    Printer Maintenance Tips for Sublimation Ink

    Since sublimation ink tends to dry quickly and clog the printer’s nozzles, you’ll need to clean the print head regularly using manufacturer-approved solutions. Proper printer maintenance helps avoid blockages and keeps your prints sharp.

    Use the printer’s maintenance utility for head alignments and nozzle checks, especially after installing sublimation ink. Avoid leaving ink in the printer unused for too long, as this increases clogging risks.

    When replacing or refilling ink tanks, follow instructions carefully to prevent air bubbles and ensure consistent flow. Running periodic test prints on standard paper helps you monitor color accuracy and print head health.

    Task Frequency Tips
    Print head cleaning Weekly or as needed Use approved cleaning solutions
    Nozzle checks After ink install Utilize printer’s maintenance tool
    Ink tank refill When low Avoid air bubbles, follow guidelines
    Test prints Monthly Check color accuracy and clogging

    Regular cleaning and maintenance keep your sublimation printer running smoothly.

    Frequently Asked Questions

    Can Sublimation Ink Be Used for Printing Photos on Fabric?

    Yes, you can use sublimation ink for printing photos on fabric, especially if you want vibrant fabric customization. You print your photo on sublimation paper, then use heat and pressure to perform dye transfer onto polyester-based fabrics.

    This process embeds the ink into the fibers, creating durable, high-resolution images that won’t fade or crack. Just remember, it works best on synthetic fabrics, not natural fibers like cotton.

    Is Sublimation Ink Safe for Children’s Crafts?

    Yes, sublimation ink is safe for children’s crafts when you use child-safe inks and non-toxic materials properly. You’ll want to work in a well-ventilated area and supervise kids closely to avoid inhaling fumes or direct contact with the liquid ink.

    Once the ink is heat-transferred and cured, it becomes non-toxic and durable. This makes it perfect for personalized, safe projects kids can enjoy without worry.

    How Long Does Sublimation Ink Last on Printed Materials?

    You can expect sublimation ink longevity to be impressive on the right materials, often lasting 5 to 10+ years. Its fading resistance is strong because the ink bonds permanently with polyester or coated surfaces.

    To maximize ink longevity, you’ll want to guarantee proper heat transfer and curing during printing. Also, regular cleaning and avoiding harsh chemicals will keep your prints vibrant and durable for a long time.

    Can Sublimation Ink Be Used With Inkjet Printers?

    You can’t fit a square peg in a round hole. Sublimation ink only works with inkjet printers that have compatibility for it.

    If your printer supports refillable cartridges or tanks designed for sublimation ink, you’re good to go. Using the right setup guarantees vibrant colors and excellent ink longevity on your prints.

    Otherwise, you risk clogging or damage. Always check your printer’s specs before diving in.

    What Are the Environmental Impacts of Sublimation Ink?

    You should know that sublimation ink raises environmental concerns mainly due to its chemical composition. The dyes and solvents can release harmful VOCs during manufacturing and use, potentially contaminating air and water.

    If you don’t dispose of the ink properly, it can leach chemicals into soil and ecosystems. To minimize impact, use eco-friendlier, water-based inks and recycle materials responsibly while optimizing energy use during printing.

    Conclusion

    Using sublimation ink on regular paper is like painting on a new canvas. You need the right tools and touch. By choosing the best paper, adjusting your printer settings, and preventing ink bleeding, you’ll bring your designs to life with vibrant colors.

    Remember, switching back to regular ink keeps your printer versatile. With a little care and maintenance, your prints will shine bright, just like a masterpiece fresh from the studio. Keep creating!

  • Can You Use Pen Ink for Stick and Poke?

    Can You Use Pen Ink for Stick and Poke?

    You shouldn’t use pen ink for stick and poke tattoos because it contains harmful chemicals that aren’t made for skin. These chemicals can cause infections, allergic reactions, or even chemical burns.

    Pen ink also fades quickly and looks blotchy, leading to poor tattoo quality.

    Instead, use proper tattoo ink that’s sterile, safe, and designed for skin.

    If you want to avoid risks and get better results, it helps to understand the best options and safety tips for DIY tattoos.

    Why Pen Ink Is Unsafe for Stick and Poke Tattoos

    pen ink causes health risks

    Although it might seem convenient, using pen ink for stick and poke tattoos poses serious risks. Pen ink isn’t designed for skin application, unlike tattoo inks, which are formulated with stable pigments and meet strict sterile standards.

    When you use pen ink, you expose yourself to toxic chemicals that can be absorbed through your skin, increasing the risk of allergic reactions and irritation. Because pen ink isn’t sterile, it also raises the chance of infections, which can lead to severe health complications.

    Furthermore, pen ink’s unpredictable chemical makeup can cause your tattoo to fade unevenly or discolor over time, ruining the design. Tattoo inks undergo rigorous testing to ensure safety and longevity, but pen ink lacks these essential qualities.

    Which Pen Ink Chemicals Can Harm Your Skin

    When you apply pen ink to your skin, you expose yourself to a mix of harmful chemicals like carbon black, azo dyes, and heavy metals such as lead and chromium. These toxic chemicals aren’t meant for skin contact and can cause serious skin irritation.

    Many pen inks also contain solvents like xylene, toluene, or alcohol, which can trigger allergic reactions or even chemical burns. The harmful dyes in pen ink aren’t regulated for safety on skin, so you don’t really know what you’re putting into your body.

    Pen ink solvents like xylene and toluene can cause allergic reactions and burns, with unregulated harmful dyes posing unknown risks.

    Some inks include plastic-based pigments that can inflame your skin or cause allergic dermatitis. Since pen ink ingredients are often proprietary or unlisted, it’s impossible to identify all the risks.

    Using pen ink for tattoos exposes your skin to a cocktail of toxic chemicals that can lead to painful irritation and other skin problems. It’s best to avoid pen ink to protect your skin’s health.

    Health Risks of Using Pen Ink for Tattoos

    pen ink poses health risks

    Because pen ink isn’t sterile or designed for skin, using it for tattoos puts you at high risk of infections and allergic reactions. Pen ink can introduce harmful bacteria, causing serious infection. It also contains toxic chemicals and heavy metals that may trigger allergic responses or skin irritation.

    These health risks can escalate to inflammation or chemical burns, especially if your tools aren’t sterile.

    Here’s a snapshot of the main health risks when using pen ink for tattoos:

    Health Risk Cause
    Infection Non-sterile ink introducing bacteria
    Allergic Reactions Toxic chemicals and metals
    Skin Irritation Chemical burns and inflammation
    Systemic Toxicity Absorption of harmful substances

    Using pen ink for stick and poke tattoos puts your skin safety in jeopardy. Avoid it to prevent these health risks and infection.

    How Pen Ink Affects Tattoo Longevity and Appearance

    Beyond health risks, using pen ink for stick and poke tattoos also impacts how your tattoo looks and lasts. Pen ink isn’t made for skin, so it fades quickly, often within just a few months. Since its pigments don’t penetrate deeply, the ink struggles to adhere properly, causing poor tattoo longevity.

    You’ll notice your design losing vibrancy and clarity much sooner than with proper tattoo ink. The inconsistent particle size in pen ink results in uneven lines and blotchy spots, making your tattoo appear less sharp and professional. Using pen ink as your ink for stick and poke means accepting a markedly shorter lifespan and lower quality overall.

    If you want your tattoo to maintain its appearance over time, relying on pen ink will only lead to disappointment. The way pen ink affects tattoo longevity and visual appeal makes it a poor choice for stick and poke tattoos.

    Why You Need Proper Tattoo Ink for Safe DIY Tattoos

    safe sterile tattoo ink

    You need proper tattoo ink because it’s sterile and safe for your skin. This helps reduce the risk of infections and allergic reactions.

    Using unsafe ink, like pen ink, can expose you to harmful chemicals and contaminants. So, it’s really important to choose approved tattoo ink to keep your DIY tattoo both safe and long-lasting.

    Importance Of Sterile Ink

    Although it might seem convenient to use pen ink for your stick and poke tattoo, choosing sterile, professional tattoo ink is essential for your safety. Sterile ink is specifically formulated to minimize the risk of infections and allergic reactions. Pen ink can easily cause these issues due to bacteria and pathogens.

    Proper tattoo ink uses safe pigments and carriers tested for health safety, ensuring your skin heals well without adverse reactions. Unlike pen ink, professional tattoo ink maintains consistent color and lasts longer, giving your tattoo a better appearance over time.

    Risks Of Unsafe Ink

    Choosing the right ink goes beyond just preventing infections. It directly impacts your safety and the quality of your tattoo. Using pen ink for stick and poke tattoos is risky because it’s not sterile and contains chemicals that can cause skin irritation or allergic reactions.

    Here’s why you should avoid unsafe ink:

    1. Pen ink isn’t designed for skin and may harbor bacteria, increasing infection risk.
    2. Its chemical makeup can lead to harmful reactions if it enters your bloodstream.
    3. Pen ink lacks proper pigments, causing tattoos to fade quickly or blur.

    To guarantee a safe DIY tattoo, always use sterile, approved tattoo ink. Your skin deserves ink that’s both safe and reliable.

    What’s in Safe, Professional Stick and Poke Tattoo Ink

    You’ll want to know what goes into safe, professional stick and poke tattoo ink before you start. These inks combine sterilized pigments with carriers like witch hazel to guarantee even application and reduce irritation.

    It’s pretty important to understand the types of ink and their safety because that way, you can pick the best option for your skin and design. Knowing what’s inside helps you feel confident about what you’re putting on your body.

    Components Of Tattoo Ink

    When you look closely at safe, professional stick and poke tattoo ink, you’ll find it contains stable pigments combined with carriers designed specifically for use on skin. These components work together to guarantee safety and quality. Here’s what you need to know:

    1. Pigments: These are metal, vegetable, or plastic-based powders that provide the color. They’re thoroughly tested to be safe and stable for long-term skin application.
    2. Carriers: These liquids, like water or alcohol, help disperse the pigments evenly and keep the ink compatible with your skin.
    3. Sterile formulation: Professional inks are sterile and free from harmful toxins to minimize allergic reactions and skin irritation.

    Understanding these components helps you see why professional tattoo ink is a safer choice than pen ink for stick and poke tattoos.

    Role Of Witch Hazel

    Although it might seem like a simple additive, witch hazel plays an essential role in safe, professional stick and poke tattoo ink. Derived from hamamelis water, witch hazel offers natural skin-soothing benefits that help reduce redness and irritation during and after tattooing.

    Its anti-inflammatory properties promote skin health, making the tattooing process more comfortable for you. Witch hazel acts as an astringent, tightening the skin to minimize bleeding and prevent ink rejection.

    Furthermore, it contains tannins that contribute to antiseptic effects, reducing the risk of infection. In high-quality inks, witch hazel helps disperse pigments evenly and maintain the ink’s stability, ensuring a consistent application.

    Using ink with witch hazel supports a safer, more effective stick and poke experience overall.

    Ink Types And Safety

    Since your skin reacts directly to what you apply, choosing the right ink is essential for stick and poke tattoos. Unlike pen ink, which contains unregulated chemicals and toxins, professional tattoo inks prioritize safety and permanence. Here are key points about safe ink types:

    Professional inks use sterile pigments made from metal, vegetable, or plastic-based powders combined with carriers like water or alcohol to guarantee proper dispersion.

    These inks undergo rigorous testing for biocompatibility and stability, minimizing allergic reactions and infections.

    Approved tattoo inks adhere to health standards designed for long-term skin placement, unlike pen ink that can cause adverse skin reactions and isn’t sterile.

    Always opt for sterile, professional ink types to assure your tattoo heals safely and lasts beautifully.

    How to Choose Safe Ink for Your DIY Tattoo

    Choosing safe ink for your DIY tattoo requires careful attention to the product’s ingredients and source. You should always select tattoo ink specifically labeled for skin use, as these are formulated to be sterile and non-toxic, minimizing infection risks.

    Avoid inks containing heavy metals or harmful chemicals, which are often found in regular pen inks and can cause adverse reactions. Make sure to buy from reputable suppliers or brands that provide clear ingredient lists and sterilization details.

    Check that the ink comes in a sealed, unopened container with a valid expiration date to guarantee it’s fresh and safe to apply. By focusing on sterile, non-toxic tattoo ink designed for skin, you protect yourself from complications and achieve better results.

    How to Handle and Store Tattoo Ink Safely

    To keep your tattoo ink safe and effective, make sure you store it in a cool, dark place. Always keep the cap tightly sealed to prevent any air or dust from getting in. When you need to transfer the ink, use sterile tools and put it into a clean container. This way, you’ll avoid any contamination. Following these simple steps will help maintain the ink’s quality, especially for your stick and poke tattoos.

    Proper Ink Storage

    When handling tattoo ink, you’ll want to store it in a cool, dark place away from sunlight and heat to keep its chemical makeup stable. Proper ink storage is essential for maintaining quality and safety. Follow these tips:

    1. Always seal the ink cap tightly after use to prevent contamination and evaporation.
    2. Avoid freezing the ink, as it causes pigments and carriers to separate, degrading the product.
    3. Use the ink before its expiration date, usually up to three years, to ensure it stays sterile and effective.

    Also, wipe excess ink with a sterile cloth rather than dipping the needle directly into the bottle. This helps keep your ink clean and safe for your stick and poke tattoos.

    Preventing Ink Contamination

    Although it’s tempting to dip your needle directly into the ink bottle, you should never do this to prevent contamination. Always transfer your tattoo ink into a small, sterile container using sterile tools and gloves.

    This step is essential for contamination prevention because re-dipping needles into the original ink bottle can introduce bacteria and pathogens. After each use, tightly seal the ink bottle and store it in a cool, dark place away from sunlight and heat to maintain its integrity.

    Proper ink storage reduces the risk of airborne particles contaminating your ink. Before each session, shake the ink bottle thoroughly to evenly disperse pigments and avoid sediment buildup.

    Following these guidelines helps keep your tattoo ink safe and hygienic for every stick and poke.

    Maintaining Ink Quality

    How can you guarantee your tattoo ink stays fresh and safe for every stick and poke session? Proper handling and storage are key to maintaining ink quality and preventing chemical degradation. Follow these steps:

    Store the ink bottle in a cool, dark place, away from sunlight to avoid chemical breakdown and preserve pigment integrity. Keep the ink bottle tightly sealed when not in use to maintain a sterile environment and prevent evaporation or contamination.

    Shake the ink bottle well before each use to ensure even pigment dispersion and consistent color.

    Avoid freezing the ink as it alters its properties. Also, always check the expiration date. Using ink within three years helps guarantee safety and maximum performance during your tattooing process.

    Safe Alternatives to Pen Ink for Temporary and DIY Tattoos

    Since pen ink isn’t designed for skin, you should opt for safer alternatives when creating temporary or DIY tattoos. Using pen ink risks irritation and infection, so try temporary tattoo markers instead. These markers use skin-safe ink formulated specifically for body art, providing vibrant colors that wash off easily with soap and water.

    Henna is another excellent option. It’s a natural dye that stains your skin temporarily, lasting from one to three weeks when applied properly.

    For longer-lasting designs, consider cosmetic tattoo inks used in semi-permanent makeup. These inks are sterile, approved for skin application, and can last several months.

    Whatever you choose, always pick products labeled as skin-safe or approved for cosmetic use to avoid allergic reactions and skin irritation. By steering clear of pen ink and using these safer alternatives, you’ll enjoy temporary tattoos without compromising your skin’s health.

    When to Seek Professional Tattoo Services Instead

    If you want a tattoo that’s safe, vibrant, and long-lasting, you should seek professional tattoo services instead of relying on DIY methods. Professional tattoo artists use sterile ink specifically formulated for skin, which guarantees your tattoo heals well and retains its color. Plus, licensed studios follow strict hygiene protocols, reducing the risk of infections or allergic reactions.

    Consider going professional when you want a tattoo that lasts and stays vibrant. Pen ink fades quickly and unevenly. You need a safe procedure with sterilized equipment and sterile ink, not homemade or potentially unsafe alternatives. Also, you want to avoid health risks associated with poor hygiene and unregulated practices.

    Choosing a professional tattoo not only guarantees better results but also ensures compliance with legal regulations and protects your health. Don’t compromise on quality or safety when it comes to your skin.

    Frequently Asked Questions

    Can Pen Ink Cause Stains on Clothing After Tattooing?

    Yes, pen ink can cause stains on clothing after tattooing because it easily transfers when wet or healing. You should consider pen ink safety since it’s not designed for skin and may irritate you.

    Stick and poke ink color options made specifically for tattoos offer better ink longevity and reduce staining risks. Using proper tattoo ink ensures your design lasts and keeps your clothes stain-free during the healing process.

    How Long Does Pen Ink Take to Fade on Skin?

    You’ll notice pen ink tattoos fade in about 2 to 6 months, with most disappearing around month 4. The ink longevity is limited because the skin fading process breaks down ink molecules quickly.

    Plus, ink color stability is poor since pen ink isn’t designed for skin, causing colors to lighten fast. So, if you want a temporary tattoo, pen ink offers a short-lived but fun option before it fades away.

    Is It Possible to Remove Pen Ink Tattoos at Home?

    Yes, you can try some home removal techniques for pen ink tattoos, like exfoliation or using tattoo removal creams, but these methods usually only lighten the ink. Ink removal methods at home may cause skin irritation or scarring if you’re too aggressive.

    For safer, more effective results, you should consider professional removal options like laser treatments or chemical removal, as they’re designed to target ink without damaging your skin.

    Can Pen Ink Tattoos Trigger Allergic Reactions Years Later?

    Think of your skin as a ticking time bomb when it comes to pen ink tattoos. Yes, you can experience ink allergy and delayed reactions years later because your skin’s sensitivity can change over time.

    The chemicals in pen ink might lie dormant, then suddenly trigger irritation or allergic symptoms long after application. So, even if you don’t notice anything at first, your body could surprise you with an unwelcome response down the road.

    Are There Specific Pen Brands People Use for Stick and Poke?

    You won’t find reliable pen brand recommendations for stick and poke tattoos because no pen ink is designed for safe skin use. If you’re thinking about ink consistency, keep in mind that pen inks vary widely and often contain harmful chemicals.

    For safety, it’s best to avoid pen inks altogether to prevent allergic reactions or skin irritation. Instead, use tattoo-specific ink to protect your skin and health during stick and poke sessions.

    Conclusion

    You might think using pen ink for stick and poke tattoos saves time and money, but it’s actually unsafe and risks infection or allergic reactions. Pen inks aren’t made for your skin and can cause lasting damage or fading.

    Instead, choose proper tattoo ink designed for DIY use to protect your health and get better results. When in doubt, seeking professional help guarantees your tattoo is safe and looks great for years to come.

  • How Do You Use Blue Ink on a Check Correctly?

    How Do You Use Blue Ink on a Check Correctly?

    To use blue ink on a check correctly, choose a dark, water-resistant pen with fine or medium points to guarantee clear, smudge-free writing.

    Always write all details and your signature within the designated spaces, especially signing on the bottom right corner.

    Avoid light or gel inks that fade or bleed, and never overwrite mistakes. Instead, void the check if needed.

    Using blue ink this way helps prevent fraud and speeds processing.

    Keep these tips in mind as you explore proper check-writing practices.

    Why Blue Ink Is Best for Writing Checks

    blue ink enhances security clarity

    Why should you choose blue ink when writing checks? Blue ink stands out clearly against the check’s background, making your signature and check endorsement easy to distinguish from photocopies or scans.

    When you write a check, using blue ink on the signature line increases security because it’s less common than black ink. This helps banks quickly verify authenticity and detect fraud or unauthorized alterations.

    This contrast also improves readability during check processing, reducing errors that might occur with faint or smudged writing. Banks often prefer or require blue ink since it prevents confusion with pencil or erasable ink, which can be altered or erased easily.

    How to Choose the Right Pen for Your Check

    When it comes to choosing a pen for your check, you’ll want to go with one that has blue, water-resistant ink. This helps keep your check clear and secure.

    Ballpoint pens with fine points are usually your best bet because they prevent smudging and bleeding.

    Also, it’s a good idea to avoid erasable ink since it can make your check vulnerable to alterations.

    Ink Color Importance

    How can choosing the right ink color affect the security and readability of your check? Using blue ink is your best bet. It creates a clear contrast against the check’s background, making your signature, endorsements, and written details easy to read.

    Blue ink also stands out when you write, helping banks’ security features detect any tampering or alterations. This is especially important for mobile deposit, where scanners rely on clear, bold ink for accuracy.

    Unlike red or purple, blue ink resists fading and smudging, ensuring your check remains legible over time. To protect your funds and speed up processing, always use a high-quality blue ink pen that produces dark, permanent lines.

    This simple choice enhances both security and readability on every check you handle.

    Choosing the right blue ink sets the stage, but selecting the proper pen makes all the difference in keeping your check clear and secure. When choosing pen types for writing your check, focus on clarity, accuracy, and security by picking a pen that complements your blue ink perfectly. Here’s what to look for:

    Archival-quality, water- and fade-resistant ink to keep your check legible over time. Smooth-flowing blue ink that writes evenly without skipping or blotting. Fine or medium point tips for precise, easy-to-read writing. True, vibrant blue ink shades that avoid confusion with black or faint colors.

    Avoid gel pens or quick-drying inks that can smudge or fade, compromising your check’s security and accuracy.

    Avoiding Ink Mistakes

    Although selecting blue ink is crucial, picking the right pen is just as important to avoid ink mistakes on your check. Choose a pen with oil-based or gel-based blue ink for consistent ink flow and smooth, legible writing.

    Opt for a fine or medium pen tip to produce clear characters without bleeding or blurring. To maintain check security, avoid ballpoint pens with low-quality ink that can smudge or fade over time.

    Before writing on your check, test the ink on scrap paper to verify it doesn’t skip or leak. Keep a dedicated blue ink pen solely for check writing to prevent accidental use of other inks.

    This careful pen selection helps you avoid smudging and ink mistakes, ensuring your check remains secure and easily readable.

    How to Write a Check Using Blue Ink

    When you write a check using blue ink, you’re making sure your information is clear, secure, and less likely to be tampered with. Blue ink really stands out compared to black or other colors, so it helps keep everything easy to read. Plus, using blue ink for the date, payee, amount, and signature makes your check look professional.

    Banks also prefer blue ink because it helps prevent fraud and reduces the chance your check will be rejected. So, sticking with blue ink is a smart move. Let’s dive into the benefits of blue ink and how you can use it properly when writing your checks.

    Benefits Of Blue Ink

    Because blue ink stands out clearly against the check’s background, you’ll find it easier to write amounts and signatures that banks can quickly process. Using blue ink on your check offers several key benefits:

    • Enhances security by making alterations and forgeries harder to execute
    • Creates a readable signature and figures that speed up check processing
    • Maintains the integrity of official documents during scanning and storage
    • Reduces the risk of rejection since many institutions prefer blue ink

    Choosing blue ink helps protect your check from tampering while ensuring your signature is clear and official. This color choice supports both security and readability, making your financial transactions smoother and more reliable.

    When you write with blue ink, you’re using a trusted method recognized by banks and financial institutions.

    Proper Blue Ink Usage

    To write a check correctly using blue ink, you should choose a dark, true blue pen that produces consistent, legible marks. Using blue ink for all check details like the date, payee, amount, and signature ensures your check meets banking security standards.

    Blue ink provides clear, distinguishable writing that’s harder to alter or erase. This helps enhance the authenticity and security of your check. Avoid mixing blue ink with other colors or using a light shade, as this can complicate check processing and verification.

    Always sign your check using blue ink to make your signature clear and tamper-proof. By keeping your writing uniform and legible, you help guarantee smooth processing and protect yourself against fraud.

    Where to Sign Your Check With Blue Ink

    sign in designated area

    Although it might seem simple, knowing exactly where to sign your check with blue ink is essential for guaranteeing your transaction goes smoothly. You need to sign your check in the designated signature area at the bottom right corner. This helps banks quickly verify your identity and process the payment without issues.

    Signing your check with blue ink in the bottom right corner ensures smooth, secure transactions and quick bank processing.

    Keep these points in mind when signing your check:

    • Use blue ink to make your signature stand out and prevent unauthorized alterations.
    • Sign within the signature line to ensure your signature is accepted during check processing.
    • Confirm your blue ink signature is dark and legible to meet bank authenticity requirements.
    • Avoid signing or endorsing the check in pencil, as it can be erased and compromises security.

    Following these guidelines helps maintain a clear and secure legible signature, avoiding delays or rejection when signing the back or front with blue ink.

    How to Endorse a Check Using Blue Ink

    When you endorse a check, it’s best to use blue ink to sign within the designated area. This makes sure your endorsement is clear and secure.

    Placing your signature and any instructions correctly helps prevent fraud and speeds up the processing time.

    Blue ink is preferred because it’s permanent, easy to verify, and meets bank security standards. So, sticking to blue ink is a smart choice when endorsing checks.

    Importance Of Blue Ink

    Why should you choose blue ink for endorsing a check? Blue ink plays a key role in the security and processing of your check endorsement. It ensures your signature stands out clearly, helping banks verify authenticity and maintain security features. Here’s why blue ink matters:

    It prevents alterations by making signatures harder to erase or modify. It also provides a sharp contrast against black printed text, improving processing accuracy. Banks often require blue or black ink to keep checks legally valid. Plus, blue ink signatures are less likely to be duplicated or forged compared to pencil or erasable ink.

    Using blue ink during endorsement not only protects your check but also speeds up verification. This ensures smooth, secure transactions every time you write a signature.

    Endorsement Placement Tips

    Choosing blue ink for your check endorsement helps protect against forgery and guarantees your signature stands out. When you endorse a check, always write in blue ink within the designated endorsement area on the check back.

    Proper positioning is essential. Sign within the box provided to avoid delays or rejection during check processing. Your signature should be clear, legible, and match the payee’s name exactly.

    If you need to add instructions like “For deposit only,” include them in blue ink as well, making sure everything stays within the endorsement area. Avoid signing outside the endorsement box, as improper endorsement placement can cause issues.

    Ink Security Benefits

    Although it might seem like a small detail, using blue ink to endorse your check considerably boosts its security. When you sign or make endorsements with blue ink, you enhance the overall fraud prevention and ease of check processing. Here’s why blue ink matters:

    It creates a clear contrast, improving legibility and helping banks verify your signature quickly. Blue ink resists alterations, making signatures harder to erase or tamper with.

    Banks prefer blue ink since it reduces confusion with photocopies or scanned images, increasing security. Using blue ink ensures your endorsements stand out against printed text, lowering the risk of check rejection or fraud.

    How Blue Ink Helps Prevent Check Fraud

    How exactly does blue ink help protect your checks from fraud? Blue ink stands out clearly against the check’s background, making it easier to spot alterations and forgery attempts. Because it’s less common than black ink, any tampering becomes more obvious.

    Blue ink also resists erasing or fading, which strengthens the security of your endorsement and signature. Banks favor blue ink for its role in verification, ensuring a permanent, legible record that’s hard to alter without detection.

    Using blue ink enhances your check’s overall fraud prevention by making unauthorized modifications difficult to conceal.

    Feature Benefit
    Blue Ink Color Clear contrast, easier to detect alterations
    Ink Resistance Hard to erase or alter
    Signature Improves legibility and verification
    Endorsement Secures authenticity, prevents forgery

    Choosing blue ink is a simple but effective step to safeguard your checks from fraud.

    Common Mistakes to Avoid When Writing Checks in Blue Ink

    avoid blue ink mistakes

    Using blue ink considerably enhances the security of your checks, but it’s important to avoid common mistakes that can undermine its effectiveness. When you write a check, choosing the right pen quality is vital to ensure correct writing and maintain check security.

    Here are some common mistakes to avoid when using blue ink:

    Using light or faded blue ink that’s hard to read or may be rejected by banks. Writing with gel or rollerball pens that smudge or bleed, reducing legibility. Writing over previous ink or making corrections, which can cause suspicion of alterations. Using non-permanent, erasable blue ink that can be tampered with after you sign the check or endorse a check.

    How to Fix Mistakes When Writing Checks in Blue Ink

    If you spot a mistake while writing a check in blue ink, don’t try to erase or fix it. Instead, draw a single line through the incorrect information and write VOID clearly across the check. This way, you void the check without tampering with the original writing, which helps prevent confusion or rejection.

    After that, securely discard the voided check. It’s always best to start a new check rather than attempt to correct errors on the original.

    Remember, once you sign the check, avoid corrections or changes altogether, as these can raise red flags for fraud and cause your check to be rejected.

    To minimize the need to redraft, review your check carefully before you sign or submit it. By following these steps, you ensure clarity and security in your blue ink checks, keeping your transactions smooth and trustworthy.

    Tips for Secure Blue Ink Signatures

    When you sign a check, choosing blue ink helps your signature stand out clearly and reduces the risk of alteration. Using blue ink enhances the clarity and authenticity of your signature, making it easier for banks to verify.

    Signing checks with blue ink improves signature clarity and reduces the risk of alteration.

    To guarantee your signature is secure and professional, keep these tips in mind:

    • Use smooth, consistent cursive or print when you sign to maintain clarity and prevent forgery.
    • Choose high-quality, waterproof blue ink to avoid smudging or fading over time.
    • Avoid black ink, as it can cause issues with check authenticity and fraud detection.
    • Always sign directly on the designated signature line of the check to ensure proper processing.

    Using Blue Ink for Mobile Check Deposits

    Signing your check with blue ink doesn’t just improve authenticity; it also plays a key role in mobile check deposits. When you endorse the back of your check, use blue ink to write your signature clearly and steadily. This prevents smudging or illegibility, ensuring the mobile deposit system captures a clean image.

    Below your signature, add the phrase “For mobile deposit only at [bank name]” in blue ink for extra security. Avoid black ink or pencil since many mobile deposit systems reject checks without blue ink endorsements.

    Make sure your entire endorsement, including your signature and the security phrase, fits neatly within the designated endorsement area. This careful use of blue ink helps your check deposit process smoothly and keeps your funds secure.

    Frequently Asked Questions

    Can Blue Ink Checks Be Used Internationally?

    Yes, you can use blue ink checks internationally, but you should first check international banking policies and foreign check regulations. Different countries have varying check color standards, so some might prefer black ink for cross-border payments.

    When dealing with foreign currency checks or overseas banking policies, following global banking practices is essential. Always verify with the recipient’s bank or consult international check templates to make certain your blue ink check meets their requirements.

    Does Blue Ink Affect Digital Check Scanning Accuracy?

    When you write with blue ink, your check’s readability improves like a bright lighthouse cutting through fog. The ink color boosts scanner compatibility because digital standards favor blue’s ink visibility and ink durability.

    This enhances printing quality on scanned checks, reducing errors and increasing check security. Using blue ink means your check stands out clearly, ensuring smoother digital processing and fewer rejections.

    Is Blue Ink Preferred for Business or Personal Checks?

    You’ll find blue ink preferred more for business checks due to its superior ink durability and ink security features, which reduce fraud risks. Its ink readability and ink compatibility with banking systems are excellent, making processing smoother.

    While personal checks can use other colors, blue ink’s ink drying time is quick enough to prevent smudging. Plus, its ink cost and ink availability make it a practical choice for most businesses.

    Can Blue Ink Fade Over Time on Checks?

    Imagine blue ink as a brave soldier battling time’s relentless storm. Yes, blue ink can fade over time on checks due to ink weathering and oxidation.

    Factors like sunlight and humidity challenge ink durability, causing ink discoloration and reduced ink stability. To protect ink longevity, you should choose fade-resistant, archival-quality ink for ink preservation.

    This way, your check’s details stay vivid, resisting ink fading and standing strong against the elements.

    Yes, some ink brands are specifically recommended for checks due to ink color preferences and ink durability. You’ll want to choose pens like Pilot G2, Bic Cristal, Parker, or Montblanc, which are praised in ink manufacturer reviews for their signature visibility and handwriting clarity.

    These brands support check security features and comply with ink color regulations. Following check writing tips, you’ll guarantee your writing stays clear, smudge-proof, and legally valid.

    Conclusion

    Using blue ink on your checks is like painting a clear, trustworthy signature on your financial canvas. It stands out against the usual black, adding a splash of authenticity that banks appreciate.

    By choosing the right pen and writing carefully, you guarantee your checks flow smoothly through the system. Avoid common pitfalls, and your blue ink will secure your transactions, turning every check into a confident, seamless stroke of financial art.

  • Can You Die From Ink Poisoning and How to Respond

    Can You Die From Ink Poisoning and How to Respond

    You’re unlikely to die from ink poisoning since everyday inks are usually low in toxicity, but swallowing large amounts, over 30 mL, can cause serious symptoms needing prompt care.

    If you ingest ink, rinse your mouth without inducing vomiting and seek medical help quickly.

    Watch for signs like vomiting or breathing trouble, and contact poison control for guidance.

    Taking proper precautions diminishes risks, and understanding how to respond guarantees you stay safe if exposure happens.

    What Is Ink Poisoning?

    ink ingestion can be toxic

    Although ink poisoning is uncommon, it happens when you ingest large amounts of ink containing toxic solvents, dyes, or pigments. Most everyday writing inks are minimally toxic in small amounts, so accidental ingestion usually doesn’t cause serious problems.

    However, inks used in tattooing or industrial settings may carry higher toxicity risks and lead to more severe symptoms.

    If you experience ink poisoning, symptoms often include nausea, vomiting, and abdominal pain, especially after swallowing a larger quantity. These signs indicate that the toxins in the ink are affecting your body and require immediate attention.

    Proper handling and storage of ink can help prevent accidental ingestion. If you suspect ink poisoning, don’t hesitate to treat it as a medical emergency, seeking prompt professional care to avoid complications.

    Understanding what ink poisoning involves helps you respond quickly and keep yourself or others safe.

    How Serious Is Ink Poisoning? Can It Cause Death?

    Ink poisoning from everyday writing inks is rarely serious and almost never fatal. That said, swallowing large amounts of industrial or unregulated inks can be risky. If that happens, it’s important to get medical help quickly. Knowing how serious the situation is and when to act can really keep you safe.

    Ink Poisoning Severity

    While swallowing a small amount of everyday writing ink is unlikely to harm you seriously, ingesting large quantities or industrial inks can pose significant health risks. The severity of ink poisoning depends largely on the type and amount ingested.

    Small doses typically cause mild symptoms like stomach upset or skin staining, rarely requiring medical attention. However, ingesting more than 30 mL of ink, especially industrial or unregulated types, can lead to more severe symptoms and complications.

    Although death from ink poisoning is extremely rare, it’s essential to seek prompt medical attention if you suspect significant ingestion. Early treatment reduces risks and helps manage symptoms effectively, preventing severe outcomes in most cases.

    Always treat ink ingestion seriously to guarantee your safety.

    Fatality Risks Overview

    Understanding the potential fatality risks from ink poisoning can help you respond appropriately if exposure occurs. Most everyday inks, like those in pens or markers, carry a very low toxicity risk and rarely cause serious harm when ingested in small amounts.

    However, ingesting large quantities, especially industrial or unregulated inks, can increase the fatality risk, though such cases are extremely rare. Consuming over 30 mL of ink might lead to toxic effects, but with prompt medical treatment, death is still unlikely.

    Ink poisoning deaths usually involve significant ingestion of toxic industrial inks or intentional poisoning. Overall, while ink ingestion should never be ignored, the chance of fatality remains very low, especially when you seek timely medical care.

    How Much Ink Is Dangerous to Swallow?

    swallowed ink poisoning risk

    Although swallowing a small amount of pen ink, usually less than 1.2 mL, rarely causes serious harm, ingesting larger quantities, especially over 30 mL, can be dangerous and requires prompt medical attention. The amount of ink you swallow plays an essential role in the risk of ink poisoning.

    Small doses, such as from ink cartridges containing up to 2.5 mL, generally lead to minor effects like mild stomach upset or staining rather than toxicity. However, swallowing ink in larger volumes increases the potential for harmful effects, largely depending on the ink’s chemical makeup.

    Since ink formulations vary, the toxicity level can differ, making it critical to assess how much ink has been ingested. If you or someone else swallows a significant amount of ink, don’t hesitate to seek medical help immediately, especially if symptoms arise. Early intervention can prevent complications related to ink poisoning and guarantee proper treatment.

    What Are the Common Signs of Ink Poisoning?

    How do you know if you’ve been poisoned by ink? After ingestion of a large amount, common symptoms of ink poisoning include nausea, vomiting, and abdominal pain.

    While skin staining or irritation might happen from contact, these usually aren’t signs of poisoning. If ink gets into your eyes, you might notice eye irritation, redness, or temporary staining of the white part.

    Sometimes, fever, chills, or skin rashes develop, indicating an allergic or infectious reaction related to ink exposure. It’s important to watch for persistent or severe symptoms like difficulty breathing or dizziness. These require immediate medical attention.

    Recognizing these signs early helps you respond appropriately to potential ink poisoning. Remember, mild irritation alone doesn’t necessarily mean poisoning, but any troubling symptoms following ink ingestion should never be ignored.

    What Should You Do Right After Swallowing Ink?

    rinse seek medical help

    If you swallow ink, start by rinsing your mouth thoroughly with water to help dilute the substance and ease irritation. This first aid step is vital to lessen the ink’s immediate effects.

    Avoid inducing vomiting unless a medical professional or poison control center specifically instructs you to do so, as this can sometimes worsen poisoning.

    Next, seek emergency medical assistance promptly, especially if you’ve swallowed a large amount of ink or if symptoms like nausea, abdominal pain, or difficulty breathing appear.

    Be ready to provide healthcare providers with the ink container or label to guarantee accurate identification of the substance involved. Monitor your condition closely and communicate any developing symptoms to medical responders.

    Acting quickly and calmly by following these steps will help reduce the risk of severe complications after swallowing ink and guarantee you get the appropriate medical care.

    How to Treat Ink on Your Skin and in Your Eyes

    When ink gets on your skin, it usually just leaves a temporary stain that washing with soap and water can easily remove. Skin irritation from ink is uncommon and doesn’t lead to poisoning, so gentle cleaning is your best first aid. Avoid harsh chemicals or alcohol on the skin, as they may worsen irritation.

    If needed, alcohol-based cleansers can help remove stubborn stains, but the ink will typically fade over time without health risks.

    If you get ink in your eye, rinse it thoroughly with cool water for at least 15 minutes to reduce irritation and prevent damage. Don’t use any chemicals or soaps in your eye.

    Persistent discomfort, redness, or blurred vision after rinsing means you should seek medical help immediately. Remember, proper first aid and staying informed with accurate health information can keep you safe and comfortable when dealing with ink exposure.

    When Is It Time to Get Emergency Medical Help?

    Although most ink exposures are harmless, you should seek emergency medical help immediately if you or someone else swallows large amounts of ink or shows serious symptoms like persistent vomiting, severe abdominal pain, or difficulty breathing. If over 30 mL of ink is ingested, call 911 or your local emergency number without delay.

    Emergency medical help is also vital if ink exposure causes ongoing eye or skin irritation, swelling, or other allergic reactions. Watch for signs of poisoning such as unconsciousness, seizures, or trouble swallowing or breathing. These require urgent care.

    In cases involving children or severe symptoms, don’t hesitate to seek medical attention. If you’re unsure whether the situation is critical, contact Poison Control at 1-800-222-1222 for guidance. Acting promptly can prevent complications and guarantee safety when dealing with potential ink poisoning.

    What Are the Risks of Tattoo Ink Poisoning and Infections?

    You should know that contaminated tattoo ink can lead to serious infections. Symptoms might include fever, pus, and swelling. If you spot any of these signs, it’s really important to get prompt treatment with antibiotics or see a medical professional to avoid complications. Also, using sterile equipment and choosing licensed tattoo artists can go a long way in reducing these risks.

    Tattoo Ink Contamination

    Because tattoo ink can harbor harmful bacteria, fungi, or other pathogens, using contaminated ink puts you at risk of serious infections. Tattoo ink contamination often results from poor sterilization or unhygienic practices. The FDA hasn’t approved many pigments used in tattoos, which increases the chance of allergic reactions and other health risks.

    While systemic toxicity is rare, infections from contaminated ink can cause swelling, fever, and pus.

    Consider these risks:

    • Bacterial or fungal infections from unsterilized ink
    • Allergic reactions to unapproved pigments
    • Health risks linked to unregulated tattoo supplies
    • Increased infection risk due to poor sterilization protocols

    Being aware of these dangers helps you protect your health when getting a tattoo.

    Infection Symptoms And Treatment

    How can you tell if a tattoo ink infection is developing? Watch for symptoms like redness, swelling, pus, and fever around the tattoo site. These signs suggest your body is fighting an infection, possibly from contaminated tattoo ink or unsterile application.

    Allergic reactions can mimic infections, causing inflammation, rash, and itching, so it’s important to distinguish between them. If you notice infection symptoms, seek medical attention promptly.

    Treatment often involves antibiotics to clear the bacteria, but severe cases might require surgical intervention. Ignoring these signs can lead to serious complications.

    Always report any adverse reactions to your healthcare provider to ensure proper treatment and prevent worsening conditions. Taking quick action can protect your health and keep your tattoo healing safely.

    How Can You Prevent Ink Poisoning at Home and Work?

    To prevent ink poisoning at home and work, it’s essential to store pens, ink bottles, and markers where children can’t reach or see them. Keeping these items out of sight reduces accidental ingestion risks, especially for young kids. You should also make sure ink caps are tightly closed when not in use to avoid spills and exposure. Practicing safety in both home and workplace environments helps protect everyone from harmful ink contact.

    Here are key steps to prevent ink poisoning:

    • Store ink products in secure, high places away from children.
    • Always close ink containers tightly after use.
    • Use inks only on intended surfaces, avoiding skin or mouth contact.
    • Work with proper ventilation and protective gloves when handling strong inks.

    How Can Poison Control Help With Ink Poisoning?

    Preventing ink poisoning is important, but accidents can still happen. When they do, poison control is your best resource for immediate, expert medical advice. They assess the toxicity of the ink involved by considering the type and amount of exposure, helping you understand the severity of the situation.

    Poison control professionals guide you through the necessary first aid steps, like rinsing eyes or skin, to reduce absorption and prevent further harm. They also advise whether you need urgent medical attention or if home care is sufficient.

    Frequently Asked Questions

    Can Ink Poisoning Cause Long-Term Health Problems?

    Yes, ink poisoning can cause long-term health problems if you’re repeatedly exposed to artificial dyes and chemicals. You might develop skin reactions or allergic sensitivities, especially with chronic chemical exposure.

    Inhalation risks from industrial inks can lead to respiratory issues over time. To protect yourself, avoid prolonged contact and seek medical advice if you notice persistent symptoms after exposure to ink or its fumes.

    Are Certain Types of Ink More Toxic Than Others?

    Did you know tattoo inks can cause allergic reactions in up to 10% of users? Yes, certain types of ink are more toxic than others because of their ink composition and ingredient variations.

    Industrial inks often have higher toxicity levels due to chemical hazards like solvents and heavy metals. These variations not only impact your health but also the environmental impact during disposal.

    Always check the ink’s source and ingredients before using it.

    Is It Safe to Use Home Remedies for Ink Ingestion?

    You shouldn’t rely on DIY remedies, natural treatments, herbal solutions, home cures, or alternative therapies for ink ingestion. These approaches can make things worse or delay proper care.

    Instead, you should contact poison control or emergency services right away. Professionals can provide the safest, most effective treatment. Trying home remedies without guidance puts you at risk, so skip the guesswork and get expert help immediately.

    Can Ink Poisoning Affect Children Differently Than Adults?

    You should know children absorb ink faster, making them 3 times more vulnerable to toxicity symptoms than adults. Their age vulnerability means ingestion risks are higher since their smaller bodies can’t process toxins well.

    You need to watch for signs like nausea or rash and act quickly. Taking protective measures, like keeping ink away from kids, helps prevent serious health issues and guarantees you respond properly if ingestion occurs.

    How Do Ink Ingredients Vary Between Brands and Impact Toxicity?

    Ink composition varies a lot between brands, causing chemical variations that impact toxicity. You’ll find some brands use safer, water-based inks, while others include toxic ingredients like harmful solvents or unregulated chemicals.

    These brand differences mean ingredient safety isn’t guaranteed across all products. When handling ink, you should always check the label and avoid exposure to inks with questionable or toxic ingredient lists to reduce health risks effectively.

    Conclusion

    Imagine ink as a dark river flowing through your body. Small amounts might cause little ripple, but too much can flood your system with harm. You don’t want to let that ink poison your life.

    If you swallow ink, act quickly: rinse your mouth, avoid panic, and seek help if symptoms worsen. Protect yourself by handling ink safely, and remember, poison control is your lifeline, ready to steer you back to calm waters.

  • Can You Die Eating Inked Paper?

    Can You Die Eating Inked Paper?

    You likely won’t die from eating inked paper, but you shouldn’t take it lightly. Small amounts are usually non-toxic, but choking is the biggest immediate danger since inked paper can block your airway.

    Chemicals in some inks, especially those with heavy metals, can cause long-term harm if ingested repeatedly. If you experience severe symptoms or chemical exposure, seek medical help.

    Keep going to better understand the risks and what steps to take if it happens.

    What Happens in Your Body When You Eat Inked Paper

    ink chemicals pass unchanged

    Although eating inked paper isn’t common, when you do, the chemicals in the ink mostly pass through your digestive system without being absorbed. When you swallow inked paper, the ink’s chemicals don’t break down or enter your bloodstream. Instead, they travel through your digestive system and exit your body with your stool.

    You might notice some irritation or staining in your mouth, throat, or digestive tract, but this usually isn’t serious if you only ingest a small amount. However, eating large quantities of inked paper can cause discomfort like nausea or vomiting due to chemical exposure or physical blockage.

    While the risk of serious toxicity is low, your body still sees these substances as foreign and works to remove them. So, while it’s not a good idea to eat inked paper, your digestive system generally handles small amounts without absorbing harmful chemicals.

    Is Inked Paper Poisonous or Toxic?

    You might not realize it, but the ink on paper actually contains chemicals that can be toxic if you consume too much. Usually, small amounts won’t cause serious harm, so there’s no need to panic if you accidentally chew on a bit of inked paper. However, if you eat it repeatedly or in large amounts, it could lead to symptoms like nausea or stomach irritation. So, understanding how toxic the ink can be and what health effects it might have helps explain why eating inked paper isn’t really safe.

    Ink Toxicity Levels

    While most inks used in newspapers and printing are made from non-toxic, soy- or vegetable-based dyes, they aren’t meant to be ingested. Ink toxicity mainly depends on the type of ink and the amount swallowed during accidental ingestion.

    Small amounts usually pose minimal risk since these inks contain low levels of harmful chemicals. However, some inks include trace heavy metals and solvents that can cause chemical poisoning if consumed in large quantities.

    The FDA approves these inks for external use only, highlighting potential dangers if ingested substantially. If you accidentally swallow inked paper, symptoms might include stomach upset or nausea, but serious poisoning is rare.

    Understanding ink toxicity helps you gauge the risk, but it’s best to avoid eating inked materials altogether.

    Health Effects Overview

    Even though most inked paper contains non-toxic pigments, swallowing it isn’t completely without risk. You might not face serious health issues from ingesting small amounts because most inks use non-poisonous dyes.

    However, consuming large quantities could expose you to chemical poisoning due to heavy metals, solvents, or toxic additives found in some inks. Eating inked paper can cause gastrointestinal irritation, nausea, or allergic reactions, but it’s rarely fatal unless you consume a significant amount.

    The risk increases if you ingest ink from printer cartridges or industrial inks, which contain harmful chemicals. Overall, while typical accidental ingestion of inked paper is unlikely to harm you severely, it’s best to avoid eating it to prevent any potential health effects.

    Why Choking Is the Biggest Danger of Inked Paper

    inked paper choking hazard

    Because inked paper can break into large, jagged pieces, it poses a serious choking hazard when swallowed. When you ingest chunks of inked paper that aren’t properly chewed, they can block your airway, leading to choking, a life-threatening emergency.

    This risk is especially high for children or anyone who accidentally swallows bigger fragments. Unlike chemical risks, choking from inked paper happens immediately and demands quick action to clear the blockage.

    Small pieces can lodge in your throat or esophagus, triggering sudden choking episodes. To protect yourself, avoid biting off large pieces of inked paper and make sure to chew thoroughly if you accidentally put any in your mouth.

    Taking these precautions considerably reduces the risk of choking, which remains the most immediate and dangerous threat from consuming inked paper. Staying cautious is key since choking can cause suffocation if not addressed promptly.

    What Ink Chemicals Can Do to Your Health Over Time

    If you keep ingesting inked paper, toxic chemicals like heavy metals and carcinogens can slowly build up in your body over time. These substances might lead to serious health problems, such as organ damage or a higher risk of cancer. It’s really important to understand how being exposed to these harmful ink components over the long term can affect your health.

    Chronic Ink Exposure

    When you expose yourself to ink chemicals repeatedly over time, you risk serious health problems that often go unnoticed at first. Chronic ink exposure can lead to chemical poisoning, causing neurological damage and cognitive impairments due to heavy metals and solvents present in the ink.

    Regularly ingesting or inhaling ink fumes increases your chances of kidney damage, hypertension, and respiratory issues. Toxic substances like cadmium and lead accumulate in your body tissues, potentially increasing cancer risks.

    Over time, persistent contact with these chemicals may disrupt your hormonal balance and impair liver function. Even though the symptoms might develop slowly, the long-term effects of chronic ink exposure are severe and shouldn’t be underestimated if you’re regularly consuming or coming into contact with inked paper.

    Toxic Ink Components

    Although ink might seem harmless at first glance, its chemical components can build up in your body over time and cause serious health problems. Toxic ink components like heavy metals, lead and cadmium, and volatile organic compounds don’t just vanish after ingestion.

    When you repeatedly ingest inked paper, these harmful substances accumulate, increasing your risk of neurological issues, kidney damage, and even cancer. Many inks contain dyes and solvents recognized by regulatory agencies as carcinogenic or hazardous, making chronic exposure particularly dangerous.

    Even small amounts of ingestion can lead to bioaccumulation, silently impacting your health. Understanding these risks helps you realize why eating inked paper isn’t just unpleasant—it’s a potential long-term health hazard you should avoid.

    Signs and Symptoms to Watch For After Swallowing Inked Paper

    watch for poisoning symptoms

    Since swallowing small amounts of inked paper usually doesn’t cause immediate problems, you might not notice any symptoms right away. However, you should still watch for signs of ink poisoning, especially if you ingested a larger quantity.

    Gastrointestinal discomfort, such as nausea, vomiting, abdominal pain, or diarrhea, is common and may develop within hours. These symptoms indicate your body is reacting to the ink’s chemicals.

    Besides digestive issues, keep an eye out for allergic reactions like swelling, rash, or difficulty swallowing. Although rare, ink can contain toxic substances like heavy metals that might cause more serious effects if absorbed in significant amounts.

    If you experience persistent discomfort, sudden weakness, or other unusual symptoms, monitor yourself closely. Recognizing these signs early helps you respond appropriately and avoid complications after swallowing inked paper.

    When to Seek Medical Help for Inked Paper Ingestion

    If you or someone else swallows a large amount of inked paper, or if there are severe symptoms like choking or persistent pain, it’s important to seek medical help right away. Don’t wait around if you notice things like vomiting, dizziness, or any unusual changes in the skin after swallowing inked paper.

    When you’re unsure what to do, especially if it involves children or exposure to industrial ink, it’s always better to get professional advice immediately. Better safe than sorry!

    Recognizing Severe Symptoms

    When you or someone else swallows inked paper, recognizing severe symptoms quickly can be lifesaving. Seek immediate medical help if you notice difficulty breathing, persistent vomiting, or severe abdominal pain.

    Symptoms like choking, gagging, or inability to swallow also require urgent evaluation. Avoid inducing vomiting unless a professional advises it, and don’t give food or liquids unless instructed.

    If ink or chemicals contact eyes or skin, prompt medical care is vital to prevent irritation or burns.

    Severe Symptom Action Needed Why It Matters
    Difficulty breathing Emergency medical help Risk of airway blockage
    Persistent vomiting Immediate care Prevents dehydration
    Severe abdominal pain Urgent evaluation Could indicate internal harm
    Ink in eyes or skin Prompt treatment Avoids chemical burns

    When To Call

    Although swallowing inked paper might seem harmless at first, you should seek medical help immediately if you notice signs like choking, difficulty breathing, or persistent abdominal pain. Knowing when to call is vital.

    Medical journals emphasize contacting emergency services or your local poison control center if the person vomits, becomes confused, or loses consciousness after ingestion. Also, reach out promptly if bleeding, severe nausea, chest pain, or inability to swallow occurs.

    Persistent irritation from ink-stained tissue warrants professional evaluation. Don’t hesitate to consult healthcare professionals if you’re unsure about the severity, especially with chemical exposure or large amounts.

    Timely action can prevent complications, so trust your instincts and act quickly when symptoms worsen or unusual signs appear.

    What to Do If You Swallow Inked Paper Accidentally

    Accidentally swallowing inked paper can be unsettling, but you should start by rinsing your mouth thoroughly with water to remove any leftover ink. Avoid inducing vomiting, as this might cause choking or further injury.

    Keep an eye out for symptoms like nausea, vomiting, abdominal pain, or trouble swallowing. If you notice any of these signs, seek medical attention promptly.

    Watch for nausea, vomiting, abdominal pain, or swallowing difficulties and seek medical help if symptoms appear.

    It’s also a good idea to contact your local poison control center or healthcare provider for advice tailored to the amount and type of ink ingested. In cases where severe symptoms arise, such as persistent pain or choking, don’t hesitate to seek emergency medical care immediately.

    Taking these steps will help you manage the situation safely and reduce any potential health risks linked to swallowing inked paper.

    Risks of Habitual Inked Paper Eating

    If you regularly eat inked paper, you expose yourself to harmful chemicals found in inks, dyes, and bleaching agents that can lead to poisoning. The risks of eating inked paper habitually go beyond occasional discomfort.

    You risk chemical poisoning from toxic substances in these materials, which can accumulate in your body over time. This buildup may cause serious organ damage and chronic health issues.

    Repeated ingestion can also irritate your gastrointestinal tract or cause blockages due to indigestible fibers, leading to abdominal pain and nausea. Moreover, habitual inked paper eating is often linked to pica, a psychological condition that requires medical attention.

    Ignoring these risks can worsen your health profoundly. If you find yourself frequently craving or consuming inked paper, it’s essential to seek professional help to address both the physical and mental aspects of this behavior.

    Understanding these risks helps you make safer choices and protect your well-being.

    Myths and Facts About Inked Paper Risks

    When you hear warnings about eating inked paper, it’s easy to assume the risks are severe or even fatal. However, the reality is more nuanced. Most inked paper, like newspapers and printed materials, uses non-toxic inks that pose little toxicity threat if ingested in small amounts.

    The real danger lies not in the ink itself but in physical risks such as choking or intestinal blockage. It’s a myth that inked paper is highly deadly. Toxicity depends on the ink’s chemical makeup and how much you consume.

    Regulatory bodies like the FDA ensure most inks are safe for incidental ingestion. That said, consuming large quantities or inks with heavy metals can increase health hazards, though death is still very rare.

    How Poison Control and Medical Experts Can Help

    A poison control center can be your first point of contact if you or someone else swallows inked paper or ink. Poison control experts provide 24/7 guidance, helping you decide if immediate medical attention is necessary.

    Medical professionals then assess the severity based on the ink type and amount ingested. They perform tests to detect toxins like heavy metals or solvents. They can recommend treatments from supportive care to stomach pumping, reducing risks of complications.

    Reporting these incidents also helps improve safety guidelines.

    Concern Emotion Action to Take
    “Is this dangerous?” Fear Call poison control now
    “Will it harm me?” Worry Seek medical evaluation
    “What if it gets worse?” Urgency Follow expert treatment

    Frequently Asked Questions

    Can Inked Paper Cause Allergic Reactions?

    Yes, inked paper can cause allergic reactions if you have an ink allergy or paper sensitivity. When you touch or accidentally ingest inked paper, the dyes and chemicals might trigger symptoms like itching, rash, or even respiratory issues.

    You should avoid handling inked paper if you know you’re sensitive because your body could react strongly. Always take precautions to minimize contact and watch for signs of irritation to stay safe.

    Is Inked Paper Harmful to Children or Pets?

    About 60% of children who ingest non-food items experience symptoms from paper toxicity. Yes, inked paper is harmful to children and pets because their bodies absorb the ink differently, increasing ink absorption risks.

    When they chew or swallow inked paper, toxic chemicals can enter their system, causing vomiting, diarrhea, or allergic reactions. You should always keep inked paper away from kids and pets to prevent serious health issues.

    Are Some Types of Inked Paper Safer Than Others?

    Yes, some types of inked paper are safer than others. Historical printing often used inks with heavy metals, which can be toxic if ingested.

    In contrast, artistic uses today typically employ soy-based or vegetable-based inks that are much safer. If you’re handling inked paper, especially for children or pets, look for papers printed with non-toxic, food-grade inks to minimize health risks and enjoy your art or collection safely.

    How Can I Safely Dispose of Inked Paper?

    Disposing of inked paper safely is like tucking in a secret. You want to prevent any unwanted spread. To reduce environmental impact, seal the paper in a plastic bag before tossing it.

    Check local recycling methods carefully, as not all facilities accept inked paper. Shred it to minimize ink leaching, and avoid burning since toxic fumes can release.

    For large amounts, use hazardous waste containers to keep chemicals contained and safe.

    Does Cooking Food in Newspaper Increase Ink Ingestion Risks?

    Yes, cooking food in newspaper definitely increases ink ingestion risks. Historical ink use involved toxic substances like heavy metals, which could leach into food when heated.

    While modern ink safety standards have improved, many newspapers still use dyes and chemicals that can transfer to your food, especially at high temperatures. To keep yourself safe, you shouldn’t cook or wrap food in newspaper, avoiding unnecessary exposure to harmful ink residues.

    Conclusion

    If you accidentally swallow inked paper, you probably won’t face serious harm. But it’s important to know that about 20% of reported ink ingestion cases involve mild to moderate symptoms like stomach upset.

    The real risk lies in choking or long-term exposure to toxic ink chemicals. So, if it happens, stay calm, watch for symptoms, and seek medical help if needed.

    Avoid making it a habit. Your health is worth it!

  • Can Printer Ink Freeze and How to Protect It in Cold Weather

    Can Printer Ink Freeze and How to Protect It in Cold Weather

    Yes, printer ink can freeze, especially water-based types, below 32°F (0°C). This can cause clumps, cartridge cracks, and print defects.

    To protect your ink, store cartridges in a cool, dark place above 35°F (1.5°C). Keep them sealed upright, and let them warm up for a few hours before use.

    Avoid using a cold printer immediately to prevent damage. If you want to keep your print quality sharp and avoid costly issues, there are a few essential steps you should know next.

    Does Printer Ink Freeze? What You Need to Know

    printer ink can freeze

    Although you might not realize it, printer ink can freeze when temperatures drop below 32°F (0°C), especially if it’s water-based. When ink freezes, the water inside expands, which can crack plastic cartridges and cause pigments or solvents to separate.

    This damage often ruins the ink, making it clumpy or changing its consistency, so it won’t print properly once thawed. Not all inks freeze at the same temperature, though. Aqueous-based inks are more vulnerable, while pigment-based and toner inks resist freezing better.

    To prevent ink from freezing, you need to focus on proper storage. Keeping your ink cartridges in temperature-controlled environments avoids exposure to freezing temperatures. If you plan to store ink in cold conditions, take precautions like insulating the cartridges or bringing them indoors.

    At What Temperature Does Printer Ink Become Unusable?

    You’ll find that printer ink usually becomes unusable around freezing temperatures, near 32°F (0°C). But keep in mind, this can vary depending on what the ink is made of.

    When it gets really cold, the ink can thicken, separate, or sometimes even cause the cartridge to crack. And that’s going to mess with your print quality for sure.

    Ink Freezing Temperature Range

    When does printer ink stop working due to cold? Printer ink generally freezes below 32°F (0°C), but the exact freezing temperature depends on its ingredients. Water-based inks freeze around 32°F, while inks with additives like glycerine freeze at lower temperatures.

    Once frozen, ink cartridges become thick or separated, making your ink unusable. To protect your ink in cold weather, store cartridges between 35°F and 95°F to maintain their liquid state and print quality.

    Ink Type Freezing Point (°F) Recommended Storage Temperature (°F)
    Water-based 32 35 – 95
    Specialty inks 25 – 31 35 – 95
    Additive-rich 20 – 30 35 – 95
    Standard cartridges 32 35 – 95
    Humectant-rich 28 – 32 35 – 95

    Effects Of Low Temperatures

    If temperatures dip below 32°F (0°C), your printer ink, especially water-based types, starts freezing. This can quickly make it unusable. Freezing causes the water in the ink to expand, putting pressure on your ink cartridges and often leading to cracks or leaks.

    This damage can be permanent, ruining both the ink and the cartridge. Even before freezing, when the temperature falls below 50°F (10°C), the ink’s viscosity increases. It becomes thicker and harder to flow properly during printing.

    This results in poor print quality and clogs. Most manufacturers suggest storing ink above 35°F (1.5°C) to avoid freezing and keep it usable. Once frozen and thawed, pigments and solvents can separate, further damaging the ink and potentially harming your printer’s performance.

    Thresholds For Ink Damage

    Although printer ink formulas vary, most water-based inks start becoming unusable once temperatures drop near freezing, around 0°C (32°F). The freezing point depends on the ink’s humectant and solvent mix, so some inks freeze slightly below 0°C.

    When ink freezes, pigment or dye can separate, cartridges may crack, and printheads might get damaged, causing permanent ink damage. Temperature thresholds are vital: storing ink below -15°C (5°F) drastically raises the risk of unusable ink and poor print quality.

    To avoid problems, keep your printer ink at a safe storage temperature above 10°C (50°F). By understanding these limits, you’ll protect your ink from cold weather and maintain smooth printing performance.

    How Freezing Ink Damages Cartridges and Printheads

    When ink freezes, the water inside expands, which can crack your cartridge’s plastic casing. And those cracks? They might cause leaks that damage your printhead and other parts of your printer. On top of that, frozen ink often clogs the nozzles, leading to poor print quality and potentially costly repairs. So, it’s definitely something you want to avoid!

    Cartridge Cracks From Expansion

    Because freezing causes ink to expand, you risk cracking the plastic cartridges and damaging the printheads inside your printer. Frozen ink expands inside the cartridge, creating pressure that can cause cracks or permanent deformation.

    These cracks lead to ink leaks, which not only waste ink but can also damage sensitive printer components and reduce print quality. The expansion from frozen ink puts stress on the cartridge walls, increasing the chances of nozzle failures and printhead damage.

    If you thaw a frozen cartridge too quickly or improperly, you may worsen the cracks or cause leaks to develop. To protect your printer, keep cartridges away from freezing temperatures and handle any frozen ink carefully to avoid cartridge cracks caused by expansion.

    Printhead Clogging Risks

    Cracks from frozen ink don’t just risk leaks; they can also cause serious printhead clogging. When freezing ink expands, it cracks cartridges, letting air in and disrupting ink flow.

    As the ink thaws, pigment separation and increased viscosity can clog nozzles, directly harming printhead performance. This blockage leads to poor print quality with streaks, smudges, or incomplete prints.

    Repeated freeze-thaw cycles only worsen the damage, weakening printhead components and making clogs more frequent. If you want to keep your printer running smoothly, avoiding freezing ink is essential.

    Protect your cartridges from cold temperatures to prevent printhead clogging and maintain consistent print quality over time.

    How to Store Ink Cartridges to Prevent Freezing in Winter

    store cartridges at stable temperatures

    To keep your ink cartridges from freezing during winter, store them in a cool, dark place where the temperature stays steady between 15°C and 30°C (59°F and 86°F). Avoid places like garages or basements where temperatures can dip below freezing, risking ink damage.

    Always keep cartridges sealed in their original packaging and store them upright to prevent leaks and exposure to moisture. Consistent temperature control helps maintain ink quality and prevents freezing.

    Keep cartridges sealed and upright to avoid leaks and moisture, ensuring ink quality and preventing freezing.

    Furthermore, maintain indoor humidity between 35% and 65% to reduce static electricity and protect the ink. When you bring cartridges inside from a colder environment, let them acclimate at room temperature for at least three hours before use.

    This gradual adjustment avoids condensation inside the cartridge, which could harm the ink or your printer. By following these storage tips, you’ll protect your ink cartridges from freezing and ensure they perform reliably throughout the winter months.

    What to Do If Your Ink Cartridge Has Frozen and Thawed

    Even with careful storage, ink cartridges can sometimes freeze and thaw, especially in harsh winter conditions. When dealing with frozen ink, it’s essential to manage the thawing process carefully to avoid damaging the cartridge or compromising print quality.

    Here’s what you should do if your ink cartridge has frozen and thawed:

    1. Allow the cartridge to thaw gradually at room temperature for at least 3 hours. Avoid direct heat sources, as high temperatures can harm the cartridge.
    2. After thawing, gently shake the cartridge to remix any separated pigments or solvents caused by the freezing.
    3. Inspect the cartridge carefully for any cracks or leaks from expansion during freezing before inserting it back into your printer.
    4. If you notice streaks or nozzle errors, run a cleaning cycle on your printer to restore peak performance.

    Following these steps guarantees your cartridge recovers safely from freezing and maintains print quality despite temperature fluctuations.

    Should You Keep Your Printer On During Cold Weather?

    avoid leaving printer on

    You might be wondering if keeping your printer on during cold weather can help prevent it from freezing. Well, it actually can cause condensation to build up when the device warms back up. And that moisture isn’t good news—it can damage the internal parts and mess with your print quality. So, before you start printing after your printer’s been in the cold, make sure to give it some time to warm up in a controlled environment. That way, you’ll keep everything running smoothly!

    Powering On Risks

    Although it might be tempting to power on your printer right after bringing it inside from the cold, doing so can cause serious damage. When ink freezes or your cold printer warms too quickly, condensation forms inside, harming internal parts.

    Before powering on, you need to let it adjust to the room’s temperature and humidity. Here’s why waiting matters:

    1. Powering on too soon can cause ink clumps or toner to clog nozzles.
    2. Cold printers can develop print defects like streaks or missing lines.
    3. Rapid temperature changes may lead to static buildup and mechanical failures.
    4. Waiting at least two hours prevents condensation and guarantees the best print quality.

    Always give your printer time to acclimate before powering on to avoid costly repairs.

    Printer Warm-Up Time

    Since cold temperatures can thicken ink and cause nozzle clogs, keeping your printer turned on during chilly weather helps maintain a steady internal temperature. This prevents these issues.

    If your printer has been in a cold environment, let it warm up for at least two hours before use to reach room temperature. Turning it off allows components to cool, which risks ink cartridge thickening and printhead damage.

    After warming up, run a test print or cleaning cycle to ensure smooth operation.

    Action Time Required Purpose
    Warm-up printer 2 hours Reach room temperature
    Test print 5 minutes Check print quality
    Cleaning cycle 10 minutes Prevent nozzle clogs

    Managing Condensation Effects

    Keeping your printer warm helps prevent ink thickening, but managing condensation inside the device is just as important during cold weather. Condensation can cause toner clumping and damage sensitive components. To protect your printer, follow these tips:

    1. Keep your printer on during cold spells to maintain stable temperature control and reduce condensation buildup.
    2. Avoid turning it off and on immediately after exposure to the cold; instead, let it acclimate for at least two hours indoors.
    3. Store your printer in a temperature-controlled environment to minimize rapid temperature changes that encourage condensation.
    4. Don’t use the printer while it’s still cold, as moisture and thickened ink may lead to nozzle errors and streaks.

    Proper storage and acclimation help extend your printer’s lifespan while preventing condensation issues.

    Is It Safe to Order and Ship Ink Supplies in Winter?

    When you order ink supplies in winter, you risk packages freezing if they’re left in cold, unheated places like trucks or mailboxes. Shipping ink during freezing temperatures can cause the ink inside cartridges to expand and potentially damage them.

    To protect your investment, look for proper packaging that insulates against cold. Choosing delivery options like indoor pickup or requiring signatures ensures your package doesn’t sit outside in the cold.

    If possible, schedule shipments during warmer days or opt for expedited, temperature-controlled shipping methods. Once your ink arrives, prioritize immediate ink storage in a warm, indoor environment to prevent any freezing-related harm.

    How to Spot Expired or Damaged Ink Cartridges

    After protecting your ink cartridges from freezing and cold damage, it’s important to know how to recognize when they’ve gone bad. Using expired ink or damaged cartridges can harm your printer and ruin print quality. Here’s how you can spot problems early:

    Protect your printer by learning to identify expired or damaged ink cartridges early.

    1. Check for discoloration, sediment buildup, or dried ink around the nozzles. These are signs of expired ink.
    2. Look closely for visible cracks, leaks, or broken seals. These indicate damage.
    3. Monitor ink flow. If it’s inconsistent or sluggish despite proper installation, the cartridge may be expired or damaged.
    4. Notice any drop in ink levels or incomplete ink delivery. This suggests the cartridge isn’t functioning properly.

    Also, always verify the expiration date on the cartridge packaging or label. Spotting these issues early helps maintain your printer’s performance and prevents wasted ink and poor print quality.

    Protecting Wide-Format Printer Ink During Cold Weather

    Although wide-format printer ink delivers vibrant, large-scale prints, it’s especially vulnerable to freezing at temperatures below -15°C (5°F). This can lead to container cracks and ink separation.

    To protect your ink supply, store cartridges in a warm room where temperatures stay between 15°C and 30°C (59°F to 86°F). Avoid exposing cartridges to freezing temperatures, whether in transit or storage, since this can compromise ink quality and printer performance.

    Before using cartridges after cold exposure, let them and your printer acclimate for at least two hours in a warm room. This helps prevent condensation and nozzle blockages.

    Scheduling deliveries during warmer months and using proper packaging also helps safeguard the ink supply from cold damage. Following manufacturer-recommended storage temperatures ensures your wide-format printer ink remains stable and ready for vibrant printing, even in winter’s chill.

    How Big Systems Helps Manage Ink and Prevent Winter Damage

    Managing printer ink during cold weather requires more than just proper storage. You need a partner who understands the challenges winter brings. Big Systems helps you manage ink and prevent winter damage with expert solutions catered to cold conditions.

    They guarantee your ink stays safe by focusing on:

    1. Using temperature-controlled transportation to protect ink during shipping and delivery.
    2. Advising on ideal storage environments with stable temperatures (15–30°C) and humidity (35–65%) to prevent freezing.
    3. Offering inventory management that includes rotating stock annually, so you avoid expired ink that’s more vulnerable to cold damage.
    4. Providing maintenance and repair services to quickly address any freezing or condensation issues inside your printer.

    Frequently Asked Questions

    Can Frozen Ink Affect Print Color Accuracy?

    Yes, frozen ink can seriously affect print color accuracy. When ink freezes, it changes the ink viscosity, disrupting smooth ink flow through the printer.

    This leads to inconsistent color consistency, causing your prints to look dull or faded. The pigment particles may separate, reducing overall print quality.

    To keep your prints sharp and vibrant, you’ll want to avoid freezing and guarantee your ink stays at a stable temperature.

    Are All Printer Brands Equally Vulnerable to Ink Freezing?

    No, not all printer brands are equally vulnerable to ink freezing. You’ll find that brand compatibility and ink formulation play big roles in how well your ink withstands cold. Some manufacturers use special inks with better freeze resistance, so following manufacturer guidelines is key.

    Also, your storage conditions matter a lot. Keeping cartridges in a controlled environment reduces freezing risk regardless of brand. Always check specific recommendations for your printer’s ink.

    How Long Does It Take for Ink to Freeze Outdoors?

    Think of your printer ink as a delicate flower in a winter garden. It wilts only when the cold lingers too long.

    Outdoors, ink storage faces temperature sensitivity. Depending on environmental factors like wind chill and how sealed your cartridge is, ink can freeze anywhere from 1 to several hours once it hits its freezing point just below 32°F.

    Can Ink Freezing Void My Printer Warranty?

    Yes, ink freezing can void your printer warranty. Manufacturers consider ink cartridge storage essential because ink formulation is temperature sensitive.

    If you don’t follow proper winter maintenance and store cartridges in freezing conditions, damage like cracks or clogs can occur. This user mishandling often leads to denied warranty claims, as most warranties exclude damage from extreme temperatures.

    To keep your warranty valid, store ink cartridges in a warm, controlled environment.

    Is It Better to Use Sealed or Opened Cartridges in Winter?

    You’re better off using sealed cartridges in winter because they offer superior ink sealing techniques that protect ink from freezing. Proper cartridge storage combined with temperature regulation keeps the ink stable and prevents clumping or drying out.

    For winter printing tips, always store unopened cartridges in a warm, controlled environment. This approach guarantees reliable print quality and minimizes risks associated with cold weather affecting your printer’s performance.

    Conclusion

    Now that you know how chilly weather can play tricks on your printer ink, you’re better equipped to keep your cartridges cozy and performing at their best. A little care goes a long way in preserving your ink’s liveliness through winter’s frosty whispers.

    So, don’t let the cold catch you off guard. Embrace these tips and keep your printing smooth and worry-free, no matter how brisk it gets outside.

  • How Can Ink Poisoning Happen From Sharpie on Skin?

    How Can Ink Poisoning Happen From Sharpie on Skin?

    You can get ink poisoning from a Sharpie if its solvents, like xylene or toluene, soak into your skin, especially through cuts or wounds.

    Prolonged or repeated contact increases the chance of these chemicals entering your bloodstream, which might cause irritation or more serious reactions.

    While brief contact is usually safe, damaged skin makes absorption easier and riskier.

    If you want to understand how to protect yourself and handle exposure safely, there’s more important information ahead.

    What Is Sharpie Ink Made Of And Is It Toxic On Skin?

    sharpie ink s brief skin contact

    Although Sharpie ink contains solvents like xylene or toluene along with resins and pigments to create permanent marks, it’s formulated to be non-toxic for brief skin contact. You’ll find that Sharpie ink’s ingredients are chosen to produce vibrant, long-lasting lines rather than to be safe for skin use.

    While it’s generally not toxic on skin during short exposure, the company doesn’t test or recommend these markers for direct skin application or body art. If you get Sharpie ink on your skin, it’s usually harmless, but extended or repeated contact can cause irritation.

    Some people with sensitive skin may experience allergic reactions due to certain ingredients in the ink. Keep in mind that Sharpie ink isn’t meant to be ingested or applied to broken skin, as that increases the risk of toxicity or irritation.

    How Can Sharpie Ink Cause Health Risks Or Reactions?

    If you come into frequent or prolonged contact with Sharpie ink, you might experience skin irritation or allergic reactions, especially if you have sensitive skin. While Sharpie ink is generally non-toxic, repeated exposure can lead to discomfort and sometimes more serious skin issues.

    Here’s how Sharpie ink might cause health risks or reactions:

    • Contains solvents like xylene that can dry out your skin, causing redness or dermatitis.
    • Minimal absorption occurs through intact skin, but open cuts can let chemicals enter your bloodstream.
    • Prolonged exposure may trigger allergic reactions or dermatitis in sensitive individuals.
    • Avoid unnecessary drawing on skin and wash ink off promptly to reduce risk.

    Being mindful of these factors helps you prevent skin irritation and allergic reactions from Sharpie ink, keeping your skin healthier and safer.

    Can Sharpie Ink Cause Skin Irritation Or Allergies?

    sharpie ink skin irritation

    You might notice some skin irritation or even an allergic reaction if Sharpie ink stays on your skin for too long, especially if your skin is sensitive or broken. Keep an eye out for redness, itching, or a rash—these could be signs that your skin is reacting.

    To avoid any sensitivity, it’s a good idea to wash the ink off as soon as you can and try not to let it sit on your skin for extended periods.

    Skin Irritation Risks

    While Sharpie ink is generally non-toxic and safe for most people, it can cause mild skin irritation or allergic reactions in some individuals. This is especially true with prolonged or repeated contact. If you have sensitive skin or pre-existing conditions, be cautious when using Sharpies on your skin. Here’s what you should know about skin irritation risks:

    Prolonged contact with Sharpie ink can lead to redness or mild skin irritation. Allergic reactions, though rare, may cause itching, swelling, or rash. Applying ink on broken or irritated skin increases the chance of irritation or allergic responses.

    People with allergies or dermatitis might experience heightened skin sensitivity to Sharpie ink. To minimize skin irritation risks, avoid excessive or repeated exposure and never apply Sharpie ink on damaged skin.

    Allergic Reaction Signs

    How can you tell if Sharpie ink is causing an allergic reaction? If you notice skin irritation like redness, swelling, or itching where the ink touched your skin, it’s a sign. Sharpie ink can trigger allergic reactions, especially if you have sensitive skin or allergies to certain dyes.

    Repeated exposure increases the risk, and severe reactions such as blistering or hives may occur.

    Symptom Description
    Redness Inflamed skin at contact site
    Itching Persistent urge to scratch
    Rash Raised, discolored skin patches
    Blistering/Hives Severe reaction with swelling

    If you spot these signs after using Sharpie ink, it’s likely an allergic reaction or skin irritation.

    Preventing Sharpie Sensitivity

    Recognizing allergic reactions to Sharpie ink is just the first step. Taking measures to prevent sensitivity can protect your skin from irritation or more severe allergic responses. Sharpie ink contains solvents like xylene that may trigger skin irritation or allergic reactions, especially with repeated contact.

    To minimize risks, follow these tips:

    • Avoid using Sharpie ink on broken or irritated skin to prevent worsening sensitivity.
    • Test a small skin area before extensive use to check for allergic reactions.
    • Limit prolonged exposure to Sharpie ink to reduce chances of dermatitis.
    • Wash skin promptly after contact to remove ink residues and reduce irritation.

    Is Drawing On Skin With Sharpies Risky?

    sharpie ink may cause irritation

    You might be wondering if drawing on your skin with Sharpies is risky. Well, the ink is generally safe and non-toxic, so a little doodling now and then isn’t usually a problem. But if you use them a lot or put Sharpie ink on broken skin, it could cause irritation or other health issues.

    Ink Safety On Skin

    Wondering if drawing on your skin with Sharpies is risky? Generally, Sharpie ink is non-toxic and designed for paper, making casual skin drawing low risk. When it comes to ink safety, here’s what you should know:

    Sharpie ink can temporarily stain your skin but doesn’t cause poisoning or lasting harm. Skin absorption is minimal unless you draw on open cuts or wounds, which increases chemical exposure risks.

    Prolonged or repeated use might irritate sensitive skin or cause allergic reactions. Avoid ingesting Sharpie ink or applying it heavily on broken skin to minimize potential health concerns.

    Potential Health Concerns

    Although Sharpie ink is non-toxic and safe for occasional skin use, drawing on your skin frequently or in large amounts can cause irritation or allergic reactions, especially if you have sensitive skin. Sharpie ink contains solvents like xylene, which, if absorbed through broken skin or open wounds, may pose health risks.

    While ink poisoning from typical skin contact is rare, ingesting large amounts or covering extensive skin areas increases the chance of chemical absorption and potential toxicity. You might experience skin irritation, redness, or itching after repeated exposure.

    To minimize risk, avoid applying Sharpie ink on damaged skin and limit frequent use. Overall, occasional use is generally safe, but being cautious about solvents and skin condition helps prevent unwanted health concerns linked to Sharpie ink.

    Best Practices For Use

    When using Sharpies on your skin, it’s important to remember that while the ink is non-toxic, frequent or prolonged application can lead to irritation or allergic reactions. This is especially true if you have sensitive skin. To minimize skin irritation and safely enjoy Sharpie ink, follow these best practices:

    Avoid drawing on broken or open skin to prevent ink absorption and potential health risks. Limit how often and how long you apply Sharpie ink to reduce allergic reactions.

    Wash off Sharpie ink promptly using soap and water to prevent staining and irritation. Don’t ingest Sharpie ink by biting or swallowing, as the solvents can be harmful in large amounts.

    What Happens If Sharpie Ink Gets On Broken Or Damaged Skin?

    If you get Sharpie ink on broken or damaged skin, it’s usually not a cause for serious concern since the ink is generally non-toxic. However, broken skin allows for easier chemical absorption, so you might absorb some solvents from the ink into your body.

    While small amounts are unlikely to cause harm, prolonged contact or large quantities increase the risk of irritation or minor reactions. To minimize the chance of chemical absorption and ink in your skin, you should clean the area promptly with soap and water.

    Factor What You Should Know
    Ink Toxicity Sharpie ink is generally non-toxic
    Broken Skin Absorbs chemicals more readily
    Chemical Absorption Increased risk with prolonged contact

    Taking quick action and keeping the wound clean helps prevent potential irritation or systemic effects, though these remain rare.

    What Symptoms Indicate A Reaction Or Poisoning From Sharpie Ink?

    Sharpie ink usually only causes temporary skin staining, but you should watch for signs like redness, irritation, or a rash that could indicate a reaction. Most people don’t experience serious issues from Sharpie ink on their skin, but if you notice any discomfort, it’s important to recognize potential skin reaction or poisoning symptoms early.

    Look out for these signs:

    • Persistent redness or swelling around the inked area
    • Itching or burning sensation indicating irritation
    • Development of a rash or blistering suggesting allergic dermatitis
    • Unusual sensitivity or pain at the contact site

    Serious poisoning symptoms from Sharpie ink on intact skin are extremely rare. However, if you have broken skin or prolonged exposure, the risk of a skin reaction increases. If you suspect any severe symptoms or your condition worsens, seek medical advice promptly to rule out complications.

    How To Clean Sharpie Ink Off Skin Safely

    If you happen to get Sharpie ink on your skin, just start by washing it gently with some soap and warm water. Sometimes that’s all it takes! But if the stain is a bit stubborn, you can try using rubbing alcohol or hand sanitizer. Just be careful not to use any harsh chemicals because they might irritate your skin.

    Once you’ve cleaned it off, don’t forget to moisturize. Keeping your skin healthy and preventing dryness is super important after using those kinds of products.

    Safe Removal Methods

    When you need to remove ink from your skin, start by washing the area gently with soap and warm water. This helps lift the stain without causing irritation. For safe removal of Sharpie ink, follow these tips:

    Use alcohol-based products like rubbing alcohol or hand sanitizer to break down ink pigments effectively. You can also apply acetone-based nail polish remover cautiously since it can cause skin irritation.

    Avoid abrasive scrubbing tools that might damage your skin while trying to remove the ink. After cleaning, moisturize the skin with lotion to soothe dryness or irritation caused during removal.

    Household Cleaning Solutions

    Although ink stains can be stubborn, you can safely remove Sharpie ink from your skin using common household items. Start by washing the area with soap and water to break down the ink’s pigments.

    If the stain lingers, dab some rubbing alcohol or hand sanitizer on a cloth and gently rub the spot; these household cleaning solutions dissolve ink effectively. You can also apply baby oil, petroleum jelly, or olive oil to loosen the stain without harsh scrubbing.

    Avoid using toxic or harsh chemicals like bleach or acetone because they can irritate or damage your skin. For persistent marks, try gently exfoliating with a soft scrub or a baking soda paste. These methods clean ink safely without risking skin harm.

    Skin Care Tips

    Since Sharpie ink is designed to be non-toxic and skin-safe, you can remove it effectively using simple methods. Even though the ink isn’t toxic, you should avoid getting ink in your eye because it can cause irritation. To clean Sharpie ink off your skin safely, try these tips:

    Wash the area with soap and warm water to remove most of the ink. Use rubbing alcohol or hand sanitizer to break down stubborn stains gently. Scrub with a soft cloth or gentle exfoliating scrub to lift ink without harming your skin. Avoid harsh solvents like acetone or bleach, as they can irritate or damage your skin.

    If any ink lingers, just apply moisturizer to soothe your skin and reduce staining safely.

    When To Seek Medical Help For Sharpie Ink Exposure?

    If Sharpie ink gets into your eyes or causes persistent redness and irritation, you should seek medical help immediately. While Sharpie ink on skin is generally harmless and only causes temporary staining, certain situations require prompt attention.

    If you notice an allergic skin rash or signs of infection after skin contact with the ink, contact a healthcare professional right away. Also, if you accidentally ingest a large amount of Sharpie ink or experience symptoms like nausea or dizziness, seek medical help promptly.

    Unusual symptoms such as difficulty breathing, swelling, or severe discomfort after exposure indicate a serious reaction, and you should get emergency care immediately. Most cases of Sharpie ink exposure resolve without complications, but knowing when to seek medical help guarantees your safety and well-being.

    Don’t hesitate to reach out to a doctor if you’re unsure about your symptoms following Sharpie ink contact.

    Are Sharpie Markers Safe For Children’s Skin?

    While Sharpie markers aren’t designed for use on skin, you might wonder if they’re safe for your child’s skin. Sharpie markers contain dyes and solvents that are generally non-toxic, but they’re not labeled as skin-safe products. The manufacturer clearly states these markers aren’t intended for skin use and haven’t undergone dermatological testing for skin safety.

    Sharpie markers contain non-toxic dyes but are not tested or labeled safe for use on skin.

    Here’s what you should know about Sharpie markers and toxic ink on kids’ skin:

    • Prolonged or frequent use may cause irritation or allergic reactions in sensitive children.
    • Accidental skin contact is usually harmless but repeated exposure increases risk.
    • Ingesting or large amounts of ink on skin could pose health risks, though rare.
    • It’s best to choose markers specifically designed for children’s skin to avoid potential issues.

    Understanding these points helps you weigh the risks when Sharpie markers touch your child’s skin and prioritize skin safety.

    How To Prevent Reactions Or Risks From Sharpie Ink On Skin

    To keep your child safe when Sharpie ink comes into contact with their skin, you’ll want to take simple but effective precautions. First, always choose non-toxic, water-based Sharpie markers designed to minimize skin reactions.

    Avoid drawing on open wounds, broken skin, or bug bites since damaged skin absorbs chemicals more easily. When your child has Sharpie ink on their skin, promptly wash with soap and water to remove the ink and reduce prolonged exposure that could cause irritation.

    Limit how often and how long your child’s skin is marked to further reduce the risk of allergic reactions or skin irritation. By selecting skin-safe, non-toxic markers and practicing good hygiene, you can safely enjoy creative activities without worrying about ink poisoning or adverse skin effects.

    Consistently following these steps helps guarantee your child’s skin stays healthy while using Sharpies.

    Frequently Asked Questions

    Can Sharpie Ink Transfer to Clothes or Bedding From Skin?

    Yes, Sharpie ink can transfer to your clothes or bedding from your skin. If the ink is still wet or your skin is sweaty, ink transfer becomes more likely, causing clothing contamination and bedding stains.

    Rubbing or friction makes it easier for the ink to spread. To avoid this, you should let the ink dry completely or cover the area with a barrier like clothing or a towel to prevent any unwanted stains on your fabrics.

    Does Sharpie Ink Stain Skin Permanently?

    No, Sharpie ink doesn’t stain your skin permanently. While the chemical composition allows ink absorption into the outer skin layers, it only causes temporary skin discoloration.

    Your skin naturally sheds cells, so the stain fades in a few days. If you want to speed up the process, you can use soap or alcohol-based cleansers to remove leftover ink.

    Permanent staining won’t happen because Sharpie ink isn’t designed to absorb deeply or alter your skin long-term.

    Are There Differences Between Sharpie Ink and Other Marker Inks?

    Yes, there are differences between Sharpie ink and other marker inks. You’ll find that Sharpie ink’s composition includes solvents like xylene, which increase its chemical toxicity compared to water-based markers. This affects ink absorption through your skin, potentially causing more irritation.

    Other markers might use dye-based or less toxic inks, making them safer for skin contact. So, always consider the ink composition and toxicity before using markers on skin.

    Can Sharpie Ink Affect Tattoos or Permanent Makeup?

    You might wonder if Sharpie ink affects tattoos or permanent makeup. The truth is, Sharpie ink’s chemical composition isn’t designed for skin absorption like professional tattoo ink.

    If you apply it over tattoos or makeup, it can cause skin reactions or irritate the area. Since Sharpie ink contains solvents and dyes not meant for deep skin layers, it could interfere with the original pigments.

    This might alter their appearance or cause unwanted skin issues.

    Is It Safe to Use Sharpie Ink for Temporary Body Art?

    It’s not safe to use Sharpie ink for temporary body art, even though it’s marketed as a non-toxic marker. Sharpie ink composition isn’t designed for prolonged skin contact, and temporary skin safety isn’t guaranteed.

    While brief use might not cause harm, repeated or large-area application can irritate your skin or trigger allergic reactions. For safe temporary body art, choose products specifically formulated and tested for skin use instead.

    Conclusion

    While Sharpie ink is generally safe on intact skin, about 5% of people may experience allergic reactions or irritation. You should avoid using Sharpies on broken skin, as toxins can enter the bloodstream more easily.

    If you notice redness, swelling, or discomfort, clean the area and consider medical help. To stay safe, always wash Sharpie ink off your skin promptly, especially when using it on children, to minimize any health risks or allergic reactions.

  • Why Use Erasable Ink for Writing?

    Why Use Erasable Ink for Writing?

    You’ll appreciate erasable ink because it lets you quickly fix mistakes without messy correction fluids, keeping your work neat and organized. It responds to heat, so rubbing or warming your notes makes errors vanish but still allows recovery if needed.

    Erasable ink supports smooth writing and boosts productivity by making edits easy and engaging. Perfect for drafts, notes, and creative tasks, it’s a flexible tool you’ll find handy.

    Keep exploring to discover more about its types, ideal uses, and tips.

    Why Erasable Ink Makes Writing Easier

    erasable ink simplifies corrections

    Because erasable ink responds to heat, you can easily fix mistakes without damaging your paper or leaving a mess. This means that when you spot an error, you don’t have to reach for correction fluids or tapes, which often slow you down and clutter your workspace.

    Erasable ink offers a smooth writing experience just like a regular pen, so you won’t sacrifice comfort or style while writing. The beauty lies in its ability to combine the fluidity of ink with the flexibility of making corrections, helping you maintain neatness effortlessly.

    Whether you’re drafting notes, jotting down ideas, or completing assignments, erasable ink lets you correct errors quickly and cleanly. You’ll appreciate how this ink simplifies the correction process and keeps your work looking polished, saving time and reducing frustration.

    Ultimately, erasable ink makes writing easier by blending smooth writing with the convenience of easy correction.

    How Erasable Ink Works

    You’ll find that erasable ink uses special microcapsules containing a leuco dye and other compounds that change color with temperature. This thermochromic ink sits right on the paper’s surface and reacts to heat.

    Ink Composition Explained

    How does erasable ink manage to disappear with just a little friction or heat? It’s all thanks to thermochromic compounds encapsulated in tiny microcapsules. When you rub or heat the ink, a reversible chemical reaction occurs: the dye separates from the developer, making the ink vanish.

    Unlike traditional ink, erasable ink stays on the paper’s surface, so it doesn’t soak in, which makes erasing easier.

    Component Role Effect
    Thermochromic Color-changing compound Changes color with heat
    Microcapsules Encapsulate ink Controls dye release
    Dye Pigment Provides color
    Developer Chemical partner Binds dye reversibly
    Paper Surface Writing base Holds ink on surface

    Thermochromic Ink Mechanism

    The magic behind erasable ink lies in its thermochromic properties, which respond to changes in temperature. Thermochromic ink contains microcapsules with leuco dyes and heat-sensitive agents that trigger a reversible color change.

    When you rub the ink, the friction produces heat around 60°C, causing the dye molecules to separate from the color developer. This reaction makes the ink transparent, simulating erasure.

    If the ink cools below -10°C, the molecules rebind, restoring the original color and making the writing visible again. This heat-sensitive, reversible color change happens because of a chemical equilibrium that shifts with temperature.

    Thanks to this mechanism, you can write, erase, and rewrite multiple times, making thermochromic ink a smart, reusable solution for everyday writing.

    Erasable Ink Types: Thermochromic vs. Surface

    color changing versus surface erasing

    Although both thermochromic and surface erasable inks allow you to correct mistakes, they work in fundamentally different ways. Thermochromic ink changes color with temperature shifts. When heated, it becomes transparent, effectively erasing your writing, and when cooled, the ink reappears.

    This ink contains microcapsules with leuco dyes that activate or deactivate based on heat. That means erasing is reversible through temperature control.

    In contrast, surface erasable ink sits on the paper’s surface and erases by physical removal. You simply rub the ink away using friction or pressure because this ink often contains rubber cement-like materials.

    Unlike thermochromic ink, surface erasable ink doesn’t rely on temperature changes but on mechanical erasing methods.

    Knowing these differences helps you choose the right erasable ink type for your needs, whether you prefer heat-sensitive corrections or physical erasing with a traditional eraser.

    Top Situations Ideal for Erasable Ink Pens

    Choosing the right type of erasable ink sets you up for smooth corrections, but knowing when to use these pens makes all the difference. Erasable pens shine when you’re drafting or revising notes, letting you fix mistakes quickly without cluttering your page.

    Selecting the right erasable ink ensures easy corrections and keeps your notes clean and organized.

    In educational settings, they’re perfect for solving math problems or practicing handwriting, where errors happen often and correcting them cleanly helps you learn better.

    You’ll also find erasable ink handy for preliminary sketches, design ideas, or creative writing drafts that need adjustments. When editing and proofreading documents, these pens let you remove mistakes easily before finalizing your work.

    Plus, if you’re into sewing or crochet, erasable pens are great for marking patterns temporarily. They erase once your project is done. Using erasable pens in these situations keeps your work neat and makes correcting mistakes a breeze.

    Situations to Avoid Using Erasable Ink Pens

    avoid for official documents

    You probably don’t want to use erasable ink pens for legal or financial documents. Since the ink can be altered or erased, it puts the validity of those important papers at risk. Also, it’s a good idea to avoid these pens in extreme temperature environments. Heat or cold can cause the ink to disappear or suddenly reappear, which can be pretty unpredictable. So, knowing when not to use erasable ink pens is just as important as knowing when to use them.

    Because erasable ink can be altered or erased, you shouldn’t use it for legal and financial documents. When dealing with legal documents or financial records, permanence and authenticity are vital. Using erasable ink compromises these standards and can cause serious issues.

    Here’s why you should avoid erasable ink for such documents:

    1. Legal and financial institutions often require permanent ink to prevent tampering and ensure document validity.
    2. Erasable ink’s vulnerability to friction and temperature can unintentionally erase or alter important information.
    3. Regulatory standards typically prohibit erasable ink for signing or recording official transactions to maintain integrity.

    Stick to permanent ink when handling legal documents or financial records to avoid disputes and guarantee your documents remain trustworthy.

    Extreme Temperature Environments

    How does extreme heat or freezing cold affect the ink in your erasable pen? Erasable ink reacts unpredictably in such conditions. High heat, like direct sunlight or hot machinery, can make the thermochromic ink fade or vanish entirely, compromising your writing’s visibility.

    On the flip side, freezing temperatures might cause the ink to reappear unexpectedly, risking confusion or unintended marks. Rapid temperature fluctuations are especially problematic. They can damage the ink’s reversible properties, leading to inconsistent erasing or sudden reappearance.

    Because of these issues, erasable ink isn’t reliable in environments with extreme temperatures. If you need durable, permanent writing, it’s best to avoid erasable ink pens when you expect significant temperature changes or harsh conditions.

    How Erasable Ink Enhances Note-Taking

    When taking notes, erasable ink lets you correct mistakes quickly, keeping your focus sharp and your work tidy. With erasable pens, you get a smooth writing experience that encourages fast, fluid note-taking without fear of errors. You can erase and rewrite effortlessly, which helps maintain clean, organized pages.

    Here’s how erasable ink enhances your note-taking:

    1. Correct mistakes instantly No need to cross out errors or start over; simply erase and fix them, saving time and reducing frustration.
    2. Keep notes neat and organized Erasing smudges and unwanted marks prevents clutter, making reviewing easier and more effective.
    3. Boost confidence and flexibility Knowing you can revise notes freely encourages active listening and better engagement during lectures or meetings.

    Using Erasable Ink for Creativity and Work

    Although mistakes can interrupt your flow, erasable ink lets you adjust your ideas quickly, making it perfect for creative brainstorming and professional work. When you use erasable pens, you can freely explore new concepts without fearing permanent errors.

    This flexibility encourages creative editing, allowing you to refine your work smoothly. The reversible thermochromic properties mean erasing mistakes doesn’t damage your paper, keeping your drafts clean and neat.

    You’ll also appreciate erasable ink’s range of colors, which helps visually organize your thoughts and enhance artistic projects. Whether you’re sketching designs or drafting documents, you can erase and reapply ink effortlessly, promoting innovation and precision.

    Erasable pens support iterative processes, making them indispensable for both creative and detailed work tasks. By integrating erasable ink into your routine, you’ll enjoy a seamless workflow that embraces change and continuous improvement.

    Tips for Getting the Most From Your Erasable Pens

    To get the best results from your erasable pens, you’ll want to apply consistent, moderate pressure while writing. It really helps keep your lines smooth and easy to erase later. Also, it’s a good idea to test your pen on a small, hidden spot of your paper first. That way, you can make sure it erases cleanly without causing any damage.

    Another thing to keep in mind is the type of paper you’re using. Choosing the right paper designed for erasable ink can make a big difference. It helps your writing erase more smoothly and keeps everything looking neat. So, a little extra care with pressure and paper choice goes a long way!

    Proper Pressure Application

    If you want your erasable ink to perform at its best, you need to apply consistent, moderate pressure while writing. This guarantees the ink adheres properly without smudging or skipping, letting you write smoothly and erase cleanly later.

    Too much pressure can cause uneven ink flow or damage the pen tip, reducing erasability. Here’s how to get it right:

    1. Use gentle, steady pressure to form uniform lines that are easy to erase.
    2. Test your pressure on a small area to find the ideal force for clear ink without damaging the paper.
    3. Avoid pressing too hard, as it can leave indentations and make erasing difficult.

    Paper Compatibility Testing

    When you want your erasable pen to perform flawlessly, you should test it on a small, hidden spot of your paper first. This helps verify the erasable ink erases cleanly without damaging the paper or leaving residual marks.

    Choose smooth, medium-weight paper designed for ink to avoid feathering, bleed-through, or uneven erasing. Steer clear of glossy or coated paper since its non-absorbent surface can prevent proper ink adhesion and make erasing less effective.

    Always check if your paper is compatible with your pen’s thermochromic or rubber cement-based erasable ink by reviewing manufacturer recommendations. After writing, do a trial erase to confirm the ink erases completely, leaving no ghosting or faint traces.

    This testing guarantees the best performance from both your ink and paper.

    Recovering Disappeared Erasable Ink

    Although erasable ink like FriXion disappears when exposed to heat, you can recover the vanished writing by exploiting its thermochromic properties. The key to recovering disappeared erasable ink lies in temperature manipulation, as the ink changes color reversibly with heat and cold.

    To recover erased erasable pen ink, follow these steps:

    1. Place the document with the erased writing in the freezer for a few hours. The cold reverses the heat effect, making the ink reappear.
    2. Remove the paper and check the recovered text carefully.
    3. Rewrite the recovered content with permanent ink to avoid future loss.

    Using erasable pens offers flexibility, but understanding how to recover disappeared erasable ink guarantees you don’t lose important notes. This simple freezer method is effective, especially when accidental erasure happens. It gives you a chance to restore your writing before it fades permanently.

    Choosing the Right Erasable Pen for Your Needs

    Knowing how to recover disappeared erasable ink helps, but choosing the right erasable pen guarantees you minimize the need for recovery in the first place. When selecting erasable pens, opt for those with thermochromic ink like Pilot FriXion, which erases cleanly through friction heat.

    Choosing erasable pens with thermochromic ink like Pilot FriXion ensures clean, heat-based erasing and fewer mistakes.

    Pay attention to tip sizes. Fine tips suit detailed notes, while broader tips work better for bold writing or editing. Also, consider the ink color and make sure it matches your specific needs.

    Compatibility with paper type is essential. Using the right paper prevents smudging and ensures smooth erasing. To avoid frustrating ink residue or incomplete erasing, stick with high-quality brands.

    If you’re environmentally conscious or want to save costs, choose pens that offer refillable ink options. By considering these factors, you’ll find a reliable erasable pen that fits your writing style and keeps your work neat and error-free from the start.

    Frequently Asked Questions

    Are Erasable Ink Pens Safe for Use on All Paper Types?

    Erasable ink pens aren’t safe for use on all paper types. You’ll find their paper compatibility varies since ink absorption differs with each paper’s texture and thickness.

    On thin or highly absorbent papers, the ink can bleed, reducing writing precision and making erasing tricky. To avoid damage, test the pen on a small spot first. If the paper’s too delicate, repeated erasing might tear or pill the surface.

    Can Erasable Ink Cause Allergic Reactions or Skin Irritation?

    Think of erasable ink as a sneaky chameleon, mostly harmless but sometimes causing a surprise reaction. Yes, it can cause allergic reactions or skin irritation if you’re sensitive to allergenic chemicals in the ink.

    If you have skin sensitivity, you should be cautious and avoid prolonged contact. Testing a small area before use helps you steer clear of unwanted dermatitis or irritation from these inks’ dyes and solvents.

    How Long Does Erasable Ink Typically Last Before Fading?

    Erasable ink typically lasts from several months up to a few years before fading, depending on ink longevity and fading factors. You can extend its life by using preservation techniques like storing your notes away from heat and sunlight, since exposure accelerates fading.

    Also, avoid excessive erasing and rewriting, which wears down the ink faster. Using high-quality pens and paper can help maintain your writing’s visibility longer.

    Is Erasable Ink Waterproof or Smudge-Resistant?

    Unfortunately, erasable ink isn’t waterproof, nor does it boast brilliant smudge resistance. Because the ink sits on the surface, it’s susceptible to smearing when it meets moisture or gets touched too soon.

    If you want writing with waterproof properties or solid smudge resistance, erasable ink won’t deliver. Instead, you’ll need to choose permanent ink to protect your work from water damage and unwanted smudging, ensuring lasting legibility.

    Can Erasable Ink Pens Be Refilled or Recycled?

    Yes, you can refill many erasable ink pens since they often offer refill options with replaceable ink cartridges. This helps you extend your pen’s life.

    For recycling, some brands have programs that encourage you to return used components. By using refillable ink cartridges, you support ink cartridge sustainability and reduce waste.

    Just make sure to follow local recycling guidelines when disposing of plastic parts or empty cartridges to minimize environmental impact.

    Conclusion

    Using erasable ink is like having a magic wand in your hand. It lets you write your story, erase mistakes, and rewrite with ease. Just as a painter can adjust their canvas, you can shape your words without fear.

    Embrace the freedom it offers, knowing every stroke can change. In writing and in life, erasable ink reminds you that errors aren’t the end. They’re just steps toward a clearer, brighter creation.

  • Why Did Chris Núñez Leave Ink Master?

    Why Did Chris Núñez Leave Ink Master?

    You’re probably wondering why Chris Núñez isn’t on *Ink Master* anymore. After Oliver Peck’s blackface controversy sparked outrage, the show faced cancellation and network rebranding from Spike to Paramount Network.

    This shift moved the focus away from the original format and judges like Núñez.

    When the series rebooted in 2022, it featured new hosts and a fresh panel, leaving Núñez out.

    If you want to understand how these changes affected him and the show’s future, there’s more to uncover.

    Chris Núñez’s Role on *Ink Master* Before Leaving

    judging skill mentorship expertise

    Although Chris Núñez eventually left *Ink Master*, he played a crucial role as a primary judge who evaluated contestants’ tattoo skills and creativity. As a tattoo artist known from *Miami Ink*, Chris Núñez brought valuable expertise to this long-running reality competition on Spike TV and later Paramount Network.

    Alongside fellow judges Dave Navarro and Oliver Peck, Judge Chris helped set the bar for technical skill and artistry, especially in styles like American traditional. You’d see him offering critical feedback and mentoring contestants, including newcomers like Ryan Ashley, pushing them to win the cash prize and earn the coveted title of Ink Master.

    Núñez’s presence was a constant through many seasons, shaping the show’s direction as a reality series and occasionally appearing as a guest judge on related reality TV programs like *Bar Rescue*. For fans watching *Ink Master* for the first time, Chris Núñez was a trusted voice who guaranteed tattoos met high standards before moving forward in the competition.

    Social Responsibility Controversies Behind *Ink Master* Cancellation

    You can’t ignore how Oliver Peck’s blackface scandal really shook *Ink Master* and ended up getting him removed from the show. Because of that controversy, Paramount Network started rethinking its programming choices as part of a bigger movement toward racial justice. When you see it that way, it makes more sense why *Ink Master* was canceled, even though it was pretty popular.

    Oliver Peck Blackface Scandal

    Why did Oliver Peck’s past behavior ignite such a firestorm that it affected *Ink Master*’s future? In January 2020, photos of Peck in blackface surfaced online, sparking widespread outrage.

    As a result, Paramount Network and Spike, which previously aired *Ink Master*, quickly distanced themselves from him. They removed Peck from the show to address serious social responsibility concerns and signal zero tolerance for racial insensitivity.

    Despite Peck’s public apology, the scandal deeply impacted his role and contributed to the eventual cancellation of *Ink Master*’s original run that same year. This controversy forced the network and the tattoo industry to confront ongoing racial issues, emphasizing the need for accountability.

    You can see how Peck’s actions weren’t just a personal mistake. They triggered broader changes that reshaped the show’s future.

    Paramount Network Programming Shift

    Programming Priorities Social Responsibility Focus
    Prestige Dramas Addressing Social Issues
    Reduced Reality Shows Response to Controversies
    Diverse Content Support for Racial Justice
    Brand Reputation Ethical Accountability

    You can see how Paramount’s shift wasn’t just about ratings but a commitment to responsible programming that reflects today’s values.

    Oliver Peck’s Blackface Controversy and *Ink Master* Cancellation

    peck s blackface controversy leads to ink master cancellation

    Although Oliver Peck had been a prominent figure on *Ink Master*, his career on the show abruptly ended in January 2020 when photos of him in blackface surfaced, sparking widespread outrage. You’ll find that these images, showing Peck wearing dark makeup, were met with swift criticism for being racially insensitive and offensive.

    In response to the backlash, Paramount Network moved quickly to distance itself from Peck, ultimately canceling *Ink Master*. This decision also reflected a broader wave of content censorship as networks reassessed their programming amid rising social justice movements.

    The controversy highlighted the importance of racial sensitivity in media, pushing the network to halt the show indefinitely. For you, as a viewer or fan, this marked a turning point where accountability and awareness took center stage in entertainment.

    The blackface incident not only ended Peck’s role but also forced *Ink Master* into a critical reevaluation of its future, aligning with evolving cultural standards.

    Paramount Network’s Rebranding and Impact on *Ink Master* Programming

    As Paramount Network rebranded from Spike TV in 2018, it shifted its focus toward prestige programming, which directly affected shows like *Ink Master*. This strategic pivot meant the network started scaling back reality competition series, including *Ink Master*, to align with its new identity.

    You’d notice that the show faced increased content censorship and tighter scrutiny as Paramount Network reevaluated its lineup. These changes weren’t just about tone; they influenced which shows stayed and which were cut. For *Ink Master*, this meant modifications to its format and ultimately an indefinite hiatus.

    The network’s shift away from long-running reality shows, combined with content censorship policies, dampened the creative freedom the show once enjoyed. This environment made it challenging for cast members like Chris Núñez to continue their roles.

    Ink Master*’s 2020 Hiatus and Cancellation Timeline

    show canceled due to social unrest

    When social controversies and network reevaluations intensified in early 2020, *Ink Master* went on an indefinite hiatus that left fans wondering about its future. The show, which had been a staple on Spike and later Paramount Network, faced mounting pressure amid social and racial justice protests.

    Paramount Network’s rebranding efforts included shifting away from reality programming, and *Ink Master*’s production was put on hold. By June 2020, the network officially canceled the series, citing these broader changes and ongoing Legal Challenges related to the social climate.

    This pause wasn’t just a break. It marked a significant turning point for the show and its cast, including Chris Núñez, who didn’t leave permanently but was directly impacted. Although *Ink Master* eventually rebooted on Paramount+ in 2022, the cancellation in 2020 disrupted the original series’ momentum, and Núñez did not return as a judge in the revival.

    The 2020 hiatus and cancellation underscore how external factors and Legal Challenges reshaped the show’s trajectory.

    Chris Núñez’s Response to *Ink Master* Cancellation

    The 2020 cancellation of *Ink Master* left many fans curious about how key figures like Chris Núñez reacted. Fascinatingly, Núñez hasn’t publicly addressed the cancellation or linked his exit to it. Instead, he’s remained involved with the franchise through related projects and appearances, showing no signs of distancing himself from the show’s legacy.

    The cancellation stemmed from network changes and controversies rather than Núñez’s decisions. You won’t find any official statements from him explaining the situation, which suggests he’s chosen to keep his response private or simply move forward without spotlighting the issue.

    Interestingly, Núñez has also been seen pursuing an unrelated hobby, focusing on creative outlets beyond tattooing and television. This hints that while *Ink Master* remains a significant part of his career, he’s exploring other passions quietly.

    Format and Cast Changes in *Ink Master* Post-Hiatus

    You’ll notice that *Ink Master* went through some big changes after its hiatus. New hosts and judges stepped in, bringing fresh energy to the show. The format evolved too, adjusting to fit the new vibe.

    Plus, the prize structure shifted to match this revamped style. All these changes really helped reshape the show’s identity, especially since Chris Núñez wasn’t part of it anymore.

    New Hosts And Judges

    Role Old Judge(s) New Judge(s)
    Host Chris Núñez Joel Madden
    Judge Chris Núñez, others Ryan Ashley, Ami James
    Style Focus Traditional Broader, Modern Styles

    You’ll notice the reboot prioritizes fresh viewpoints and variety in judging.

    Format Evolution And Prizes

    Although *Ink Master* kept its core tattoo competition spirit, the show revamped its format and prizes after the hiatus to engage a new generation of viewers. The reboot introduced significant judging changes, bringing back familiar faces like Ryan Ashley, Nikko Hurtado, and Ami James, while welcoming Joel Madden as host. These shifts aimed to refresh the show’s energy and appeal.

    Alongside cast updates, the competition format evolved with new challenges and modern production elements designed to test artists in innovative ways. The stakes rose too, with prizes like the $250,000 grand reward in Season 14 reflecting the show’s increased scale and ambition. This evolution marked a clear departure from earlier seasons and played a key role in the departure of original judges such as Chris Núñez.

    Network Shifts That Sidelined Original Judges Including Chris Núñez

    As Paramount Network shifted its focus from reality shows to scripted content, original judges like Chris Núñez found themselves increasingly sidelined. The network’s rebranding from Spike TV to Paramount Network brought a major judgment shift, prioritizing scripted series over tattoo competitions like *Ink Master*.

    This strategic pivot reduced airtime and support for the reality format Núñez helped define. Changes in network leadership further influenced programming choices, pushing original judges out of the spotlight.

    Furthermore, controversies involving other judges heightened the network’s concerns about its public image and social responsibility, accelerating the sidelining of familiar faces. You could see how the network’s desire to refresh its brand and explore new content formats didn’t align with keeping Núñez and his fellow original judges onboard.

    Ultimately, these network shifts created an environment where Núñez’s departure became inevitable, marking a turning point in the show’s evolution and signaling a clear break from its roots.

    Revival of *Ink Master* Without Núñez and New Hosts

    When *Ink Master* returned on Paramount+ in 2022, it did so with a fresh lineup that left Chris Núñez off the panel. This revival marked a clear break from the past, introducing new hosts and judges who brought different perspectives and expertise to the show.

    The host dynamics shifted notably, emphasizing fresh leadership to align with the updated format and the platform’s rebranding goals. Without Núñez’s longstanding presence, the show leaned into showcasing emerging talent and redefining its competition style.

    You’ll notice the new hosts actively engage with contestants in ways that contrast with Núñez’s earlier approach, highlighting a renewed energy intended to attract a broader audience. This change wasn’t just about swapping faces; it reflected a strategic move to reboot the franchise’s identity while addressing prior controversies and social responsibility concerns.

    What Chris Núñez Is Doing After Leaving *Ink Master*

    Since leaving *Ink Master*, Chris Núñez has jumped into some really exciting new projects. He’s been busy mentoring up-and-coming artists, which is pretty cool to see.

    You’ll also catch him creating fresh, innovative tattoo designs that show off his evolving style. Plus, he’s sharing his expertise at conventions and workshops all over, connecting with fans and fellow artists alike.

    All in all, Chris’s personal and professional growth keeps him influential well beyond the TV spotlight. It’s clear he’s just getting started.

    New Projects And Ventures

    Though Chris Núñez stepped away from *Ink Master*, he hasn’t slowed down. You’ll find him diving into creative collaborations with other artists and brands, expanding his influence beyond just tattooing. He’s focused on growing his personal tattoo business while mentoring emerging talents, sharing his expertise through workshops and educational content.

    Núñez also hosts and judges tattoo competitions and events outside the *Ink Master* spotlight, keeping his passion alive in new ways. If you follow him on social media, you’ll see him actively promoting his latest work and engaging with the tattoo community.

    These new projects and ventures show that Núñez continues to evolve, embracing fresh opportunities while staying deeply connected to the art and culture of tattooing.

    Industry Influence And Roles

    After leaving *Ink Master*, Chris Núñez has expanded his influence by actively engaging with the tattoo industry in new and dynamic ways. You’ll find him at major tattoo conventions, guest artist spots, and mentoring sessions worldwide, fostering the next generation of tattooists.

    He’s also launched innovative tattoo projects and collaborations that push artistic boundaries, contributing directly to the industry evolution. By focusing on his personal business and creative ventures, Núñez stays connected to the culture beyond the TV spotlight.

    His strong social media presence keeps you in the loop with his latest work and insights, making him a continuous force in shaping tattoo trends. Ultimately, Núñez leverages his experience to drive growth and innovation within the tattoo community.

    Personal And Professional Growth

    While expanding his tattoo studio, Chris Núñez has also focused on mentoring emerging artists. He helps them hone their craft and navigate the industry.

    He’s embraced creative freedom, allowing him to explore new ventures beyond tattooing. You’ll find him diversifying his professional portfolio by launching clothing and merchandise brands.

    Núñez also shares his expertise through guest appearances at global tattoo conventions, inspiring others to push boundaries. His commitment extends to charitable tattoo projects, using art to support communities.

    Here’s what he’s up to now:

    • Developing his personal brand via social media, engaging fans and promoting tattoo artistry
    • Expanding his clothing line to reflect his creative vision
    • Participating in conventions and charity events worldwide

    Chris Núñez’s post Ink Master journey highlights his dedication to growth and creative freedom.

    Frequently Asked Questions

    How Did Chris Núñez Start His Tattoo Career?

    You start your tattoo career like Chris Núñez did by apprenticing in a local shop, learning the craft hands-on. He focused on traditional American styles, honing his skills with precision and creativity.

    As your Career Evolution unfolds, you’ll gain recognition through word-of-mouth and conventions, just like Núñez did. Eventually, you might open your own studio and build a reputation for innovative designs, paving the way for bigger opportunities in the tattoo industry.

    What Other TV Shows Has Chris Núñez Appeared On?

    You’ve probably seen Chris Núñez on TV shows like “Tattoo Nightmares” and “LA Ink,” where he shares his tattoo expertise. His career shift led him to guest judge spots on “Ink Master” special episodes and seasons, showcasing his skills.

    You can also catch him on “Tattoo Age,” a documentary series about tattoo culture, and at industry panels or conventions broadcast online. Núñez’s diverse appearances highlight his influence beyond just one show.

    Did Chris Núñez Ever Win Any Awards for His Tattoos?

    You won’t find much award recognition for Chris Núñez’s tattoos because he hasn’t won major industry awards specifically for his tattoo work. Instead, you’ll notice his influence comes from his artistic skills and mentorship in the tattoo community.

    While he’s respected and well-known, especially from his role on Ink Master, his reputation isn’t built on formal awards but on his contributions and impact in tattoo art.

    What Is Chris Núñez’s Tattoo Style or Specialty?

    Imagine you’re getting a bold, colorful eagle tattoo with crisp lines and detailed shading. That’s Chris Núñez’s specialty. He’s known for mastering traditional and neo-traditional styles, blending classic Americana motifs with modern twists.

    His work shows Tattoo Evolution by combining clean line work and rich color palettes, making each piece both timeless and fresh. You’ll notice how he balances composition and storytelling, turning skin into vibrant art that honors tattoo history while pushing its boundaries.

    How Did Fans React to Chris Núñez Leaving Ink Master?

    You’d notice a strong fan backlash when Chris Núñez left Ink Master. Many fans felt his absence left a void, and they expressed disappointment across social media.

    You’d see people praising his expertise, saying the show lost credibility without him. While some fans hoped he’d return, others accepted the changes.

    Conclusion

    You might wonder why Chris Núñez stepped away from *Ink Master*. It wasn’t just about a judge leaving. His exit symbolized the ripple effect of controversies, network changes, and shifting priorities that reshaped the show’s identity.

    Like a tattoo fading over time, Núñez’s departure marks both an end and a new beginning. It reminds you that even the boldest ink can’t escape change. What comes next is a fresh canvas waiting to be filled.