Category: Ink

  • 5 Effective Solutions That Remove Ink Fast

    5 Effective Solutions That Remove Ink Fast

    You can quickly remove ink using isopropyl alcohol, which breaks down both water and oil-based inks effectively.

    Start gently with dish soap and water to loosen stains, especially on delicate surfaces.

    For tougher marks, try acetone nail polish remover cautiously, testing first to avoid damage.

    Vinegar and cornstarch can help, though they’re messier and less reliable.

    Avoid hairspray; it often spreads stains instead of removing them.

    Keep exploring to discover how these solutions work best for your needs.

    Why Isopropyl Alcohol Works Best for Ink Removal

    effective ink stain dissolver

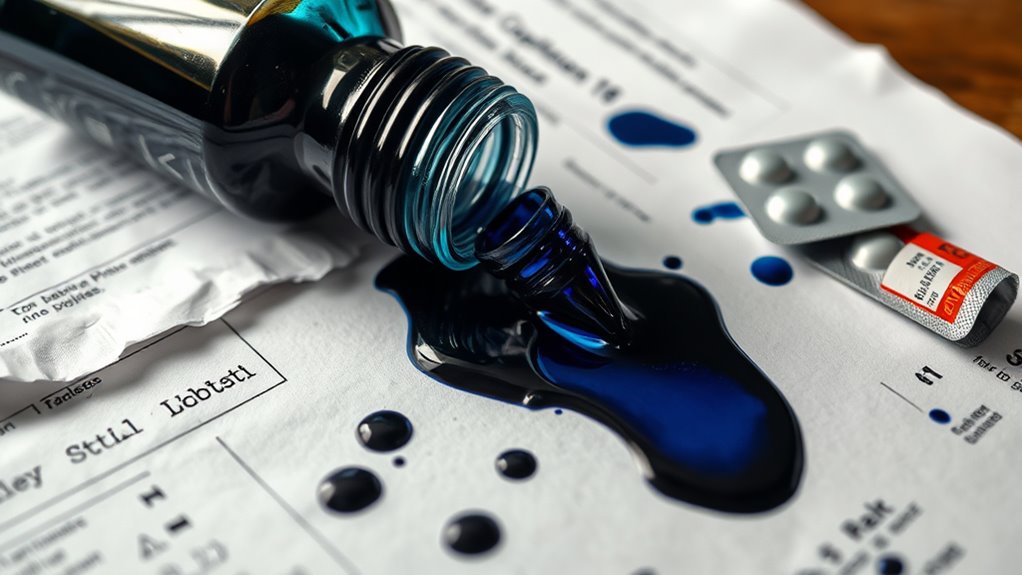
    Because isopropyl alcohol breaks down the organic compounds in ink, it effectively dissolves stains, making them easier for you to remove. As a powerful solvent, isopropyl alcohol targets both water-based ink and oil-based ink thanks to its unique chemical properties.

    When you apply it as a stain remover, especially on non-porous surfaces like glass, plastic, or metal, it penetrates ink residues and loosens them efficiently. For effective stain treatment, dab the area with a cotton pad moistened with isopropyl alcohol and be patient. Repeated applications often yield better results.

    Tests show it scores 4 out of 5 in ink removal effectiveness, nearly completely lifting stains after washing. Its ability to dissolve ink quickly makes isopropyl alcohol your go-to solution when dealing with stubborn marks. By acting fast and using it properly, you maximize your chances of removing ink without damaging the surface.

    Dish Soap and Water: A Gentle First Step for Ink Removal

    Although dish soap and water might not completely erase ink stains, they offer a gentle and accessible way to start the cleaning process. First, dampen the stained area with water to loosen the ink particles. Then, apply a small amount of dish soap onto a clean cloth and gently blot the ink stain. Avoid rubbing, as this can spread the ink further.

    Repeating this process several times can help fade the stain, especially if it’s not too stubborn. This method is beginner-friendly and scores high in ease of use, making it a great first attempt before moving to stronger solutions.

    While dish soap and water may only slightly remove the ink, they’re ideal for delicate surfaces where harsh chemicals aren’t suitable. So, when you want to clean an ink stain without risking damage, start with dish soap and water. It’s a simple, effective first step.

    Using Acetone Nail Polish Remover Safely for Ink Stains

    use with caution on sturdy fabrics

    If dish soap and water don’t quite do the trick, acetone-based nail polish remover can tackle fresh or light ink stains more effectively. Before you start, always perform a patch test on an inconspicuous area of the fabric to check for discoloration or damage.

    Use a cotton ball soaked lightly in acetone nail polish remover and dab gently onto the ink stain. Avoid rubbing, as that can spread the stain or harm the fabric. Acetone works well for stain removal on sturdy fabrics but steer clear of delicate fabrics since acetone can cause deterioration or unwanted discoloration.

    After treating the ink stain, rinse the area thoroughly with cool water to remove any residual acetone and protect the fabric’s integrity. Remember, acetone is powerful, so use it sparingly and carefully, focusing only on fresh ink stains or light marks for the best results without risking damage.

    Vinegar and Cornstarch for Ink Stain Removal: Messy but Helpful

    When you combine vinegar and cornstarch, you get a paste that can help lift ink stains from fabric. But it often hardens into uneven chunks instead of a smooth mixture.

    Combining vinegar and cornstarch creates a paste that lifts ink stains but often hardens unevenly.

    This homemade cleaning solution works by applying the paste to the stubborn stains on your clothing, letting it dry, and then peeling off the hardened residue. While it can remove some ink, the hardening process is inconsistent, making this method messy and often ineffective.

    The cornstarch tends to clump, preventing full penetration of the ink, which limits stain removal success. You’ll likely need multiple applications and a lot of patience to see any noticeable improvement.

    Because of these drawbacks, vinegar and cornstarch rank low among stain removal methods. They’re best saved as a last resort when other, more reliable solutions fail. Although this paste can be helpful, don’t expect it to replace more effective cleaning solutions for ink stain removal on clothing.

    Why Hairspray Fails at Ink Removal

    hairspray lacks ink solvents

    Even though many people reach for hairspray to tackle ink stains, you’ll often find it falls short because modern formulas contain much less alcohol than they used to. This significantly reduces the solvent effectiveness needed for ink removal. The low alcohol concentration means hairspray can’t properly break down the complex ink components, making ink dissolving incomplete at best.

    Here’s why hairspray fails at ink removal:

    1. Modern hairsprays have reduced alcohol concentration, weakening stain eradication.
    2. Instead of lifting ink stains, hairspray often causes stain spread, worsening the problem.
    3. Rinsing or blotting with hairspray doesn’t reliably remove ink, especially on porous surfaces.
    4. Hairspray lacks the concentrated solvents necessary for thorough ink dissolving.

    If you want effective ink removal, relying on hairspray won’t do the job. It simply doesn’t have the power to eradicate stains completely, especially on delicate or porous materials.

    Frequently Asked Questions

    Can Ink Stains Be Removed From Leather Using These Solutions?

    Yes, you can remove ink stains from leather using careful leather cleaning and DIY solutions like rubbing alcohol or vinegar-water mixtures. For quick cleaning and effective stain treatment, always test on a hidden spot first to guarantee fabric safety and color preservation.

    Use gentle spot treatment to avoid damaging leather care or reducing stain resistance. If stains persist, professional products or services help maintain your leather’s integrity while achieving thorough ink removal.

    How Soon After Ink Spills Should I Treat the Stain?

    You should treat an ink stain within the first few minutes. Did you know a fresh spill can start setting in under five minutes? Timing is really important here.

    Immediate action prevents the stain from setting and reduces how much it absorbs. Your quick response stops the stain from becoming permanent.

    If you delay, removal gets tougher and the stain becomes more permanent. How fast you react directly affects how urgent the treatment needs to be, so act fast to keep the stain from embedding deeply.

    Are There Any Risks of Color Fading With These Ink Removal Methods?

    Yes, you risk ink fade and color loss when treating stains, especially with harsh solvents that cause dye damage and fabric discoloration. If you’re not careful, surface deterioration and fabric weakening can happen, leading to color bleeding or stain recurrence.

    Sensitive materials need gentle methods to avoid these issues. Always test on a hidden spot first to prevent solution residue and protect your fabric’s vibrancy.

    Can These Solutions Be Used on Delicate Fabrics Like Silk?

    Yes, you can use some solutions on delicate fabrics like silk, but you must prioritize fabric safety. Since silk stain removal requires gentle cleaning, always do fabric testing on a hidden spot first to avoid damage.

    Because of material sensitivity and fragile textiles, follow fabric care instructions carefully. Use mild methods to guarantee stain prevention without harming the fabric. These cleaning tips help protect delicate fabrics while tackling stains effectively.

    What Should I Do if the Ink Stain Persists After Treatment?

    If the ink stain persists after treatment, don’t ignore it. Early stain detection is key. Adjust your cleaning schedule and use stronger cleaning tools or solvents suited for the ink types involved.

    Focus on fabric care to maintain fabric durability and color preservation. Combine stain removal tips like soaking or vinegar treatments, but always consider the stain resistance of the fabric.

    For stubborn stains, consult a professional to protect your fabric and guarantee effective stain prevention.

    Conclusion

    So, next time you’re battling stubborn ink, skip the hairspray. You’ll only end up smelling like a 90s rock concert with zero results. Instead, grab some isopropyl alcohol or gently start with dish soap and water.

    If you’re feeling bold, vinegar and cornstarch might turn your kitchen into a mini science experiment. Remember, ink hates these solutions almost as much as you hate waiting forever for stains to disappear. Who knew ink removal could be this dramatic?

  • What Is a Wet Ink Signature?

    What Is a Wet Ink Signature?

    A wet ink signature is a handwritten mark you make with a pen on a physical document, showing your intent and commitment. It’s often required for important papers like wills, deeds, and affidavits to guarantee legal authenticity and prevent fraud.

    While it can be slower and less convenient than electronic signatures, wet ink marks remain essential for certain official processes.

    If you want to understand how these signatures hold up legally and fit alongside digital options, keep exploring.

    Definition and Importance of Wet Ink Signatures

    traditional handwritten signature validity

    Although digital signatures have gained popularity, wet ink signatures remain essential because they provide a handwritten mark made with pen or ink directly on a physical document. When you use wet signatures, you’re relying on traditional signing methods that carry a strong sense of authenticity and trust.

    A handwritten signature created with ink on paper shows personal commitment and plays a vital role in establishing legal validity, especially for important documents like wills, deeds, and court affidavits. This physical document bearing your wet signature confirms your consent in a way that digital formats may not fully replicate.

    The term “wet” highlights that the ink is still fresh when applied, distinguishing it from electronic alternatives. By choosing wet signatures, you engage in a time-honored practice recognized by courts and institutions worldwide, ensuring your agreements hold up under scrutiny and are respected for their authenticity and reliability.

    How Wet Ink Signatures Are Created and Used

    When you sign a document by hand, you’re basically going through the traditional process that usually needs physical verification. You know, certain documents—like contracts and legal forms—often require your wet ink signature to make sure they’re authentic.

    Getting how these signatures are created and checked is pretty important because it helps guarantee your agreements are valid and secure. So, knowing the ins and outs can give you peace of mind when you’re signing important papers.

    Traditional Signing Process

    How do wet ink signatures come to life? The traditional signing process starts with printed paper documents that need your handwritten signature. You use a pen or other writing instrument to apply ink on paper, creating a physical signature.

    This ink must dry before the document is handled to avoid smudging. Often, in-person signing is required, especially for important or legally binding papers, guaranteeing authenticity and proper identity verification.

    Once signed, you might scan and send the document back or mail the original. Wet ink signatures remain a trusted method for verifying agreements because they provide a tangible, verifiable mark that digital alternatives can’t fully replicate.

    This hands-on approach guarantees the signer’s intent and commitment are unmistakably clear.

    Document Types Requiring Signatures

    Because certain documents demand the highest level of authenticity, you’ll often need to provide a wet ink signature on physical papers like wills, trusts, and property deeds. These legal documents require wet ink signatures to meet strict signature requirements and comply with regional laws.

    The signing process involves physically signing paper contracts or forms with a pen, ensuring the authenticity of the document. Many government and legal institutions still mandate wet ink signatures to validate transactions and prevent forgery.

    Often, these documents may include features like watermarks or embossed stamps to reinforce their legitimacy. So, when handling important legal documents, understanding when and why wet ink signatures are necessary helps you navigate the signing process properly and meet all authenticity standards.

    Physical Signature Verification

    Although digital signatures have become common, wet ink signatures still play a crucial role in verifying identity and authenticity. When you’re signing documents, a wet ink signature involves physically applying ink to paper, leaving a unique handwritten signature. Physical signature verification focuses on confirming signature authenticity by comparing the signature’s strokes, pressure, and style to known samples.

    Your physical presence might be required, especially when witnesses or notaries verify the signature. This ensures trust and legality in important agreements.

    • Manually signing with pen on paper
    • Ink dries to prevent smudging
    • Comparison of signature strokes and pressure
    • Witnesses or notaries attest to authenticity
    • Physical mark examined for verification

    Physical signature verification remains essential in many legal and official settings.

    You’ll find that wet ink signatures are legally required for important documents like wills, real estate deeds, and certain court filings. They’re essential because they help confirm identity and prevent fraud, especially in high-stakes or official situations.

    Knowing when and why these signatures matter can really help you navigate legal and procedural demands with confidence. It’s all about ensuring that the documents you’re dealing with are authentic and legally binding.

    When handling critical legal documents, you’ll often need a wet ink signature to guarantee authenticity and enforceability. Wet signatures remain essential to meet strict legal document requirements and confirm the legal validity of your agreements. They provide undeniable authenticity, especially in sensitive situations where electronic alternatives might fall short.

    Key instances where wet signatures are required include:

    • Wills, trusts, and powers of attorney to ensure enforceability
    • Court documents like affidavits and pleadings in many jurisdictions
    • Real estate deeds and mortgage agreements for legal validity
    • International treaties and cross-border certifications
    • Government and regulatory agency identity verifications and official documentation

    Essential Use Cases

    Because certain legal transactions demand the highest level of authenticity, wet ink signatures remain essential in many key scenarios. You’ll often find wet signatures required on physical documents like wills, trusts, and property deeds to meet strict legal requirements and guarantee enforceability.

    Adoption papers, divorce agreements, and eviction notices also demand them to confirm identity and intent. When you handle high-security transactions such as notarized affidavits, wet signatures provide traditional validation that digital methods can’t fully replicate.

    Insurance claims frequently rely on wet ink signatures to prevent fraud and secure the claimant’s consent. By using wet signatures in these cases, you uphold the necessary legal standards and authenticity that protect all parties involved in sensitive and binding agreements.

    Court and Procedural Mandates

    Why do courts still insist on wet ink signatures despite the rise of digital alternatives? It’s because wet signatures often fulfill strict legal requirements, ensuring document validity and authenticity in sensitive matters. Courts frequently reject documents not signed electronically when procedural mandates demand physical signatures.

    Here’s why wet signatures remain essential:

    • Court documents like affidavits and pleadings require wet signatures to prevent fraud.
    • Notarization typically mandates an inked signature to confirm identity.
    • Certain jurisdictions insist on wet signatures for wills and trusts.
    • Procedural rules often specify wet signatures on critical filings like motions.
    • Electronic signatures may lack acceptance in some courts unless explicitly authorized.

    Common Challenges of Collecting Wet Ink Signatures

    Although wet ink signatures remain a standard, you’ll often face delays caused by mailing times, courier schedules, and limited business hours. Collecting manual signatures involves coordination challenges, especially when multiple parties are remote or international.

    You also risk forgery, loss, or damage, which complicates document handling. Furthermore, the costs of printing, postage, and storage add up, making the process inefficient compared to digital options.

    Here’s a quick look at common challenges:

    Challenge Impact Cause
    Delays Slower processing Mailing and courier times
    Risk of Forgery Security concerns Physical document handling
    Higher Costs Increased expenses Printing and postage fees

    These factors contribute to inefficiency and administrative overhead, making wet ink signatures cumbersome in many situations.

    Comparison of Wet Ink and Electronic Signatures

    digital vs handwritten signatures

    When you need a signature, you can choose between traditional wet ink and modern electronic methods, each with distinct processes and legal standings. Wet signatures involve physically signing documents with pen and ink, while electronic signatures use digital marks or typed names completed online. Both hold legal weight, but certain documents still require wet ink signatures.

    Here’s a quick comparison:

    • Wet signatures require printing and physical delivery. Electronic signatures happen instantly online.
    • Electronic signatures often include security features like timestamps and encryption, which ink signatures lack.
    • Many laws, like ESIGN and eIDAS, recognize electronic signatures as legally valid.
    • Wet ink signatures remain mandatory for documents like wills and property deeds in some regions.
    • Digital signing offers convenience and speed, especially for remote transactions.

    Understanding these differences helps you pick the right method for your documents and legal needs.

    Verification Processes That Authenticate Wet Ink Signatures

    Since wet ink signatures carry legal and personal significance, verifying their authenticity requires careful examination. You’ll often start with signature comparison, matching the signature to known samples.

    Forensic analysis plays a vital role by examining stroke pressure, speed, and writing style patterns. Witness testimony can further support the authenticity by confirming the signer’s presence during signing.

    Moreover, security features like watermarked or embossed paper add layers of verification.

    Here’s a quick overview of key verification methods:

    Verification Method Purpose Key Elements
    Signature Comparison Assess similarity to known samples Handwriting style, stroke shape
    Forensic Analysis Analyze unique writing traits Pressure, speed, pen lifts
    Witness Testimony Confirm signer’s presence Eyewitness, signer’s intent

    Common Security Risks and How to Verify Wet Ink Signatures

    verify signatures with security

    Because wet ink signatures can be easily forged or altered, you need to be vigilant when verifying them to guarantee authenticity. Forgery and counterfeiting pose significant security risks, making thorough verification essential. To protect yourself, rely on multiple authentication methods.

    Here’s how you can verify wet ink signatures effectively:

    • Use signature comparison techniques to analyze stroke pressure, speed, and unique handwriting features.
    • Request notarization or witness signatures to add an official layer of security.
    • Examine the document for watermarked paper or special ink that deters counterfeiting.
    • Utilize automated signature verification software to detect inconsistencies against stored signature samples.
    • Check for any signs of alteration or irregularities that might indicate forgery.

    Tips for Managing Wet Ink Signatures in Business

    How can you effectively manage wet ink signatures in your business to guarantee security and compliance? Start by implementing strict signing protocols and training your staff on proper handling of physical signatures. This assures signature integrity and smooth signature verification.

    Next, establish a secure system for document management that prevents loss or damage of signed documents. Use tamper-evident features like watermarked paper or official seals to boost authenticity and support legal compliance.

    After collecting wet ink signatures, promptly digitize the documents to improve access, backup, and long-term record keeping. Clear procedures for collecting and documenting signatures also help maintain compliance and streamline audits.

    How to Verify Wet Ink Signature Authenticity

    You’ll want to start by comparing the signature to known samples. Take a close look at stroke patterns and spacing—they can tell you a lot about whether the signature is genuine. If there’s any doubt about who signed, witness testimony might help confirm the signer’s identity. Also, don’t forget to check for security features like watermarks or textured paper, which are designed to prevent forgery.

    Signature Comparison Techniques

    When verifying a wet ink signature, you’ll need to analyze unique handwriting traits like stroke pressure, speed, and letter formation. Signature comparison involves detailed signature analysis, often conducted by forensic document examiners who detect forgeries through magnification and side-by-side comparisons. You can also use digital tools that assess signature dynamics such as pen lifts, rhythm, and flow, making authenticity verification more accurate.

    Key signature comparison techniques include:

    • Examining stroke pressure and speed variations
    • Comparing letter formation and spacing
    • Analyzing signature dynamics like flow and rhythm
    • Using digital tools for precise measurement
    • Consulting forensic document examiners for expert insights

    These methods help you confidently differentiate genuine wet ink signatures from potential forgeries.

    Role of Witness Testimony

    Why does witness testimony matter in verifying a wet ink signature? Because it provides vital support in confirming the authenticity of signed documents. When a witness observes the signing process, their testimony can attest that the signature was made voluntarily by the claimed individual.

    This firsthand account enhances the credibility of the signature verification process, especially during legal disputes. Witness testimony often works alongside signature comparison techniques, where known samples are analyzed for consistency.

    Your ability to rely on someone familiar with the signer’s handwriting strengthens the case against forgery claims. Essentially, witness testimony adds a human element to signature verification, making it harder for fraudulent signatures to go unchallenged and ensuring the integrity of your signed documents.

    Security Features And Watermarks

    Alongside witness testimony, physical security features play a critical role in verifying wet ink signatures. You can rely on these elements to confirm a signature’s authenticity and prevent forgery.

    Watermarked paper is a key security feature, making document replication tough and boosting forgery prevention. Experts also analyze ink flow and stroke pressure for precise signature verification.

    To help you understand, here are some essential security features to look for:

    • Watermarks embedded in the paper
    • Consistent ink color without blotting or smudges
    • Unique pressure points and stroke patterns
    • Use of watermarked paper for added security
    • Comparison with witness signatures for validation

    These features work together to guarantee your wet ink signature is genuine and secure.

    How Wet Ink Signatures Will Fit Into the Digital Future

    Although digital signatures are becoming more common, wet ink signatures will still hold an essential place in the future, especially for documents that require a personal touch or legal weight. You’ll find that wet ink signatures maintain legal recognition and uphold document integrity, particularly in official or high-stakes transactions where authenticity matters most.

    As the digital future unfolds, hybrid models are emerging that combine wet ink signatures with electronic signatures to offer both personal authenticity and efficiency. Technological advancements like digital notarization and blockchain are set to enhance the security and verification of wet signatures within digital frameworks.

    While electronic signatures grow in popularity, you’ll notice wet ink signatures preserved for cultural, legal, or emotional reasons. This balance guarantees that even as technology evolves, the trusted value of a handwritten signature remains integral, fitting seamlessly into a modern, digitized world.

    Frequently Asked Questions

    Can a Wet Ink Signature Be Used on Digital Documents?

    Yes, you can use a wet ink signature on digital documents, but it’s not straightforward. You’ll need to sign a printed copy first, then scan or photograph it to create a digital image.

    While digital signatures offer online authentication and secure endorsement, wet ink provides handwritten approval. For legal use, electronic notarization and signature verification may still require the original paper document, so paperless signing isn’t always fully achievable with wet ink.

    How Long Should I Keep Documents With Wet Ink Signatures?

    You should keep documents with wet ink signatures according to legal requirements and document retention policies, typically between 3 to 7 years. Certain records like wills or real estate deeds may require permanent storage.

    Use proper storage methods to guarantee compliance standards are met. Digital conversion can help with space-saving, but always retain originals for the necessary expiration periods.

    Staying diligent with record keeping ensures you meet legal and regulatory obligations efficiently.

    Are Wet Ink Signatures Accepted Internationally?

    Like a passport crossing borders, wet ink signatures are widely accepted internationally but with some caveats. You’ll find that legal compliance varies by country, so signature verification and authentication remain essential.

    While digital certificates and electronic signatures gain ground, especially with biometric signing and remote notarization, many places still require wet signatures for certain documents. To stay safe, always check specific rules before relying solely on electronic methods.

    Can a Wet Ink Signature Be Forged Easily?

    You shouldn’t assume a wet ink signature can be forged easily, but signature duplication is possible with skill. To protect signature authenticity, forgery prevention relies on security features like watermarked paper and witness signatures.

    When verifying your signature, handwriting analysis plays a key role in spotting inconsistencies. You need to remember that legal implications arise if forgery happens, so thorough signature verification is vital to guarantee your documents remain secure and valid.

    What Tools Are Best for Creating a Clear Wet Ink Signature?

    For creating a clear wet ink signature, focus on pen selection first. Choose a high-quality gel or ballpoint pen with fine or medium points to guarantee signature consistency. Use dark ink for better signature authenticity and ink preservation.

    Pay attention to paper quality. It should be smooth to prevent ink bleeding. Keep your signature size moderate and practice signing techniques regularly. These steps help you maintain clarity and protect your signature’s integrity.

    Conclusion

    You rely on wet ink signatures for authenticity, trust, and legal assurance. You create them with pen and paper, you verify them through careful inspection, and you manage them with organized processes.

    You face challenges like forgery risks and storage hassles, but you also appreciate their undeniable value. As the digital world evolves, you’ll balance tradition with innovation, blending wet ink’s reliability with electronic convenience to secure your business’s future.

  • What Is UV Ink and How to Use It Effectively

    What Is UV Ink and How to Use It Effectively

    UV ink cures instantly when you expose it to UV light, turning from liquid to solid for sharp, durable prints. It contains monomers, oligomers, pigments, and photoinitiators that work together to create a tough surface film.

    To use it effectively, clean and prep your surface, apply ink evenly, and guarantee proper UV exposure around 395 nm for full curing.

    Following these steps helps you get vibrant colors and strong adhesion. There’s more to learn about optimizing your results.

    What Is UV Ink and How Does It Work

    instant curing with uv light

    UV ink transforms from liquid to solid instantly when exposed to UV light, thanks to a photochemical reaction you can count on for fast results. When you shine UV light on the ink, photoinitiators absorb the energy and create radicals that trigger polymerization.

    This process links monomers and oligomers into a solid polymer network, causing the ink to cure rapidly. Unlike traditional inks that dry by evaporation, UV ink cures to form a durable surface film immediately, resisting smudges and scratches.

    To guarantee effective curing, you’ll need a UV light source like LED or mercury lamps emitting around 395 nm. This precise wavelength activates the photoinitiators efficiently, speeding up the curing process. By understanding how UV ink reacts under UV light, you can control drying times and achieve sharp, high-quality prints that withstand handling and environmental wear.

    What’s Inside UV Ink? Key Components Explained

    Although the curing process might seem like magic, the secret lies in the carefully balanced ingredients inside the ink. UV ink contains monomers, oligomers, photoinitiators, pigments, and additives, each playing an essential role.

    Monomers act as the building blocks, controlling flexibility, hardness, and viscosity. They shape the cured film’s physical properties. Oligomers form the resin matrix, providing strength, adhesion, and durability once the ink cures.

    Photoinitiators are key. They absorb UV light and instantly trigger polymerization, converting liquid ink into a solid film. Pigments deliver the color, while additives fine-tune flow, surface finish, and resistance to wear or chemicals.

    Understanding these components helps you appreciate why UV ink cures so quickly and sticks so well to various surfaces. When the UV light hits, photoinitiators kickstart curing, linking monomers and oligomers into a tough, durable coating that’s ready almost immediately, letting you work efficiently without long drying times.

    Types of UV Ink and Their Best Uses

    uv ink types for specific surfaces

    When choosing ink for your project, understanding the different types available can make all the difference in achieving the desired finish and durability. UV inks come in various formulations, each designed for specific applications and surfaces.

    Knowing the types of UV ink helps you leverage UV curing technology to guarantee a durable print tailored to your needs.

    Type of UV Ink Best Use
    Hard UV Ink Rigid surfaces like glass and metal
    Soft UV Ink Flexible materials such as leather, PVC
    Clear Coat UV Ink Protective, glossy or matte finishes
    Low-Migration UV Ink Food, medicine, and children’s products
    Special Effect UV Ink Decorative finishes like metallic or glow

    Preparing Surfaces for UV Ink Printing

    Before printing, make sure you clean and dry the surface thoroughly to remove any dust, oils, or grease that could prevent the ink from sticking properly. Effective surface preparation is key to achieving strong adhesion with UV ink.

    For smooth, non-porous surfaces like glass or metal, a simple cleaning with alcohol or solvent usually suffices. However, if you’re working with porous materials, you’ll want to apply a primer or sealant to reduce porosity and improve ink bonding.

    Rough or textured surfaces may require additional treatment or coatings to guarantee even ink coverage and consistent results. Always test a small area first to check compatibility and adhesion before committing to full-scale printing.

    Proper cleaning and preparation not only enhance the quality of your UV ink print but also extend its durability. Taking these steps will help you get the most out of your UV printing projects.

    How to Choose the Right UV Ink

    choose compatible uv ink

    Choosing the right UV ink is essential to achieving vibrant, durable prints that adhere well to your chosen surface. First, make sure the UV ink matches your substrate type, whether hard, soft, or neutral, to ensure optimal adhesion and flexibility.

    Next, check that the UV curing wavelength (around 395 nm ± 5 nm) and power suit your printer’s UV light source for proper curing. Consider the finish you want, like gloss or matte, and opt for high-quality, OEM UV inks to maintain color accuracy and protect your printer.

    Finally, confirm the ink’s chemical makeup is compatible with your substrate and environment.

    Factor Consideration Why It Matters
    Substrate Type Hard, Soft, Neutral Ensures adhesion & flexibility
    Curing Wavelength ~395 nm ± 5 nm Proper UV curing
    Finish Gloss, Matte, Special Effects Desired appearance
    Ink Quality OEM vs Generic Color accuracy & printer warranty
    Chemical Compatibility Ink additives vs substrate material Durability & performance

    Applying and Curing UV Ink: Step-by-Step

    You’ll start by applying the UV ink evenly using the right printing equipment. This helps ensure the ink flows properly and has the right thickness. Then, you’ll cure the ink by exposing it to UV light at the correct wavelength and energy level. This step is key for the ink to fully polymerize. Once that’s done, it’s important to handle the printed items right after curing. Doing so keeps them smudge- and scratch-resistant.

    Ink Application Techniques

    When applying UV ink, ensure you spread it evenly across the substrate using the right printing method to achieve consistent coverage. Proper ink application techniques ensure smooth ink flow and prevent defects.

    Immediately after printing, expose the inked area to UV light with a wavelength near 395 nm and a power of at least 4 W/cm² to start curing. Maintain curing energy of 240 mJ/cm² per layer to secure full hardening and strong adhesion.

    Keep environmental conditions stable, with temperatures between 15–35 °C and humidity from 40–60%, to support uniform curing. Regularly perform test prints and monitor the process to avoid incomplete curing or tacky surfaces.

    UV Curing Process

    How do you guarantee your UV ink cures perfectly every time? Start by applying UV ink evenly with a compatible printer to ensure a uniform layer. This consistency is vital for effective UV curing.

    Next, expose the printed surface to UV light, using an LED or mercury vapor lamp at the recommended wavelength around 395 nm and an intensity of at least 4 W/cm². Each layer needs sufficient UV energy, typically at least 240 mJ/cm², to fully cure the ink.

    Make certain your curing system provides consistent, complete exposure to avoid smudging or peeling. Finally, verify the curing process by checking the ink’s hardness, appearance, and adhesion. It should be dry, scratch-resistant, and fully polymerized before handling or further processing.

    Troubleshooting Common UV Ink Problems

    Although UV ink offers vibrant and durable results, troubleshooting common problems like clogged printheads, poor adhesion, and curing inconsistencies is essential to keep your prints flawless. Clogged printheads often occur because white UV ink pigments settle, so you need a circulation system to keep them suspended.

    Adhesion issues and curing problems usually stem from improper storage. Avoid sunlight exposure and temperature swings to maintain ink quality. Insufficient curing energy or the wrong wavelength, ideally around 395 nm, can leave surfaces tacky or incompletely cured.

    Using incompatible or low-quality inks may cause color shifts, poor adhesion, and increase nozzle clogging over time. To prevent these issues, perform regular maintenance with nozzle checks and light cleanings. This keeps your printheads in peak condition and ensures consistent curing and adhesion.

    Benefits of UV Ink for Commercial Printing

    When you use UV ink, you’ll notice it dries almost instantly. This speeds up your production and cuts down wait times, which is a huge plus. Plus, its eco-friendly formula means you’re reducing harmful emissions while still keeping top-quality prints. So, all in all, these benefits make UV ink a smart choice for efficient and sustainable commercial printing.

    Instant Drying Advantages

    Why wait for ink to dry when UV ink cures instantly under UV light? With UV ink, the instant drying process means you can handle prints immediately, speeding up your production time.

    As the UV light cures the ink on contact, you avoid common printing issues like smudging, ghosting, or ink transfer, ensuring crisp, vibrant results every time. This instant drying advantage lets you run high-speed printing workflows, boosting efficiency and throughput.

    Plus, since UV ink cures without the need for lengthy drying or curing ovens, you save on energy and operational costs. Ultimately, using UV ink not only enhances your print quality but also streamlines your commercial printing process, making it faster and more reliable.

    Environmental Impact Benefits

    How much does the ink you use impact the environment? Choosing UV ink makes a big difference because it’s incredibly environmentally friendly. With up to 99.5% lower VOC emissions, UV ink reduces harmful fumes, keeping the air cleaner for everyone.

    The instant curing process consumes less energy than traditional drying methods, cutting down your carbon footprint. Since UV inks don’t contain solvents, they’re safer for operators and the environment alike.

    Plus, the quick curing time means less waste and fewer reprints, boosting your sustainability efforts. The durability of UV-printed products also means they last longer, reducing the need for frequent replacements.

    Proper Handling, Storage, and Maintenance of UV Ink

    Although UV ink offers vibrant and durable results, you’ll need to handle and store it carefully to preserve its quality. Store UV ink in a cool, dry place between 15-35°C, away from direct sunlight to prevent degradation. Always shake new cartridges for about two minutes before installation to keep the pigment suspended and avoid nozzle clogs.

    After use, keep ink containers sealed tightly to stop contamination and evaporation that can affect ink performance.

    For proper maintenance, regularly run test prints and nozzle checks to guarantee your printhead stays clear. Light cleaning routines help prevent blockages and maintain consistent curing during printing.

    Using a compatible UV printer and following the manufacturer’s maintenance guidelines will also contribute to the best print quality. By paying attention to these storage and maintenance tips, you’ll extend your UV ink’s life and enjoy sharp, reliable prints every time.

    Maximizing UV Ink Durability and Color

    To get the most out of your UV ink’s durability and color, start by focusing on improving adhesion and keeping fading at bay. It really makes a difference. You’ll also want to use the right curing techniques—think about the ideal UV light intensity and how long you expose the ink. When you nail these steps, your colors stay bright and your prints last longer.

    Enhancing Ink Adhesion

    When you want UV ink to last and look vibrant, preparing the surface properly is essential. Start by thoroughly cleaning and applying primers to improve adhesion and durability. Selecting the right UV ink formulation for your substrate, whether hard or soft, is key to achieving strong bonding.

    Don’t overlook curing parameters. Maintaining a UV light wavelength near 395 nm and energy levels of at least 240 mJ/cm² ensures complete polymerization, locking the ink firmly in place. Proper storage of inks between 15–35°C prevents pigment settling, preserving consistent adhesion qualities.

    You can also boost durability and visual impact by applying multiple ink layers or adding surface treatments like gloss or matte varnishes. With these steps, you’ll maximize UV ink adhesion and keep your prints looking sharp longer.

    Preventing Color Fading

    Building on strong adhesion techniques, safeguarding your UV ink from color fading guarantees your prints stay vibrant longer. To maximize color longevity, use UV ink formulated with high-quality, lightfast pigments that resist degradation over time.

    Applying a clear UV protective coating or varnish further shields colors from harmful UV exposure. Proper UV curing is essential. Make sure each layer receives enough UV light energy to create a fully cross-linked surface that withstands environmental wear.

    You should also store printed items in cool, low-light, and dry conditions to prevent premature fading caused by heat, humidity, and sunlight. Ultimately, maintain your UV printer regularly by using compatible inks and cleaning it properly. This helps preserve color consistency and avoid fading issues during repeated print cycles.

    Optimal Curing Techniques

    Although selecting high-quality UV ink is essential, you won’t achieve maximum durability and color vibrancy without proper curing techniques. To guarantee effective curing, use a UV light source emitting wavelengths around 395 nm ± 5 nm with at least 4 W/cm² power.

    Maintain UV energy levels of 240 mJ/cm² per layer to ensure full polymerization. A curing station with uniform light distribution prevents shadowed areas, especially on complex or large prints.

    Keep environmental conditions stable, with temperatures between 15–35 °C and humidity at 40–60%, to enhance consistency. Don’t forget to regularly calibrate and maintain your UV light equipment; consistent output is critical to avoid performance drops.

    Following these steps will maximize your UV ink’s durability and vibrant color, guaranteeing excellent results every time.

    Frequently Asked Questions

    Can UV Ink Be Safely Used for Food Packaging Applications?

    You can safely use UV ink for food packaging, but only if it meets strict food safety standards. You’ll need to verify thorough migration testing to confirm no harmful substances transfer to the food.

    Furthermore, using edible coatings can provide an extra barrier, improving safety. So, make sure your UV ink is specifically formulated and tested for food-contact applications before using it.

    How Does UV Ink Impact Environmental Sustainability Compared to Traditional Inks?

    UV ink impacts environmental sustainability by offering eco-friendly alternatives to traditional inks, as it uses less solvent and emits fewer volatile organic compounds. However, you’ll face recycling challenges since UV inks can hinder paper recyclability.

    While some biodegradable ink options exist, UV inks aren’t typically biodegradable. You should also consider environmental regulations that govern ink disposal and emissions to guarantee your use aligns with sustainability goals and legal requirements.

    What Safety Precautions Should Operators Take When Working With UV Curing Lights?

    Think of UV curing lights as tiny suns beaming intense rays. You’ve got to shield yourself with proper protective gear like goggles and gloves to avoid burns or eye damage.

    Make sure there is good ventilation to keep harmful fumes at bay. Stick to recommended exposure limits to prevent overexposure.

    Always know emergency procedures in case of accidents. Staying cautious lets you work safely while harnessing UV light’s power effectively.

    Can UV Ink Be Removed or Recycled After Printing?

    You can remove UV ink using specific UV ink removal methods like chemical solvents or abrasive cleaning techniques. But recycling UV ink is challenging because it’s cured and solid.

    When you want to clean surfaces, UV ink cleaning often involves specialized cleaners designed for cured inks. For disposal, you should follow UV ink disposal options that comply with environmental regulations. This way, you handle leftover ink responsibly without harming the environment.

    Are There Substrate Materials That UV Ink Cannot Adhere to at All?

    Back in the days of quills and parchment, adhesion challenges still plagued scribes, just like today, some substrates resist UV ink. You’ll find UV ink struggles on extremely smooth or oily surfaces where substrate compatibility is low.

    To overcome this, you’ll need proper surface preparation and sometimes tweak the ink formulation. Without prepping or adjusting, certain plastics or glass might reject UV ink altogether, making your print job a real headache.

    Conclusion

    When working with UV ink, remember that “practice makes perfect.” By understanding its components, choosing the right type, and preparing your surfaces properly, you’ll get vibrant, long-lasting results every time.

    Handle and store your ink with care to avoid common issues, and don’t forget to troubleshoot promptly when needed. With these tips, you’ll maximize durability and color, making your prints stand out and ensuring your projects shine bright.

    Keep experimenting and refining your technique!

  • What Is Remanufactured Ink and How to Use It

    What Is Remanufactured Ink and How to Use It

    Remanufactured ink comes from used OEM cartridges that are cleaned, repaired, refilled, and rigorously tested to guarantee quality and performance. You save up to 80% while helping reduce waste by choosing this eco-friendly option.

    To use it, handle the cartridge gently, install it carefully in your printer, and run a test print for best results.

    If you want to understand more about its benefits, compatibility, and care tips, there’s plenty to explore.

    What Is Remanufactured Ink? Definition And Basics

    cost effective eco friendly printing

    Although you might not realize it, remanufactured ink cartridges offer a smart way to save money and reduce waste. Remanufactured ink comes from previously used OEM ink cartridges that undergo thorough cartridge cleaning, inspection, and repair.

    Technicians replace damaged parts and refill them with high-quality ink before rigorous testing guarantees consistent print quality and page yield comparable to original cartridges. By choosing remanufactured ink cartridges, you support sustainability efforts by reducing landfill waste and promoting recycling programs.

    These cartridges provide significant cost savings, often up to 80% less than buying new OEM products, without sacrificing performance. You get reliable prints while helping the environment.

    Main Benefits Of Using Remanufactured Ink

    Choosing remanufactured ink cartridges brings more than just savings. It offers several key benefits that make them a smart choice for both your printer and the environment.

    You’ll enjoy up to 80% cost savings compared to OEM cartridges while maintaining excellent print quality. Thanks to a rigorous testing process, these cartridges deliver reliable page yield without compromising your printer warranty.

    By choosing remanufactured ink, you actively support environmental sustainability through recycling. You also help promote a circular economy by reducing landfill waste and lowering resource consumption.

    Benefit Description Impact
    Cost Savings Up to 80% cheaper than OEM cartridges Reduces printing expenses
    Print Quality Comparable to OEM after strict testing Sharp, consistent prints
    Environmental Impact Made from recycled OEM cartridges Supports recycling and sustainability
    Warranty Protection Often covered without voiding printer warranty Safe, worry-free usage

    Switching to remanufactured ink combines economy, reliability, and eco-friendliness in one smart choice.

    Where Do Remanufactured Ink Cartridges Come From?

    recycled cartridges undergo refurbishment

    When you recycle your used ink cartridges, they don’t just disappear. They become the foundation for remanufactured ink cartridges. Most remanufactured cartridges start as used OEM cartridges collected through recycling programs and community recycling efforts.

    Recycling organizations help gather these cartridges, making sure they don’t end up in landfills and support environmental sustainability.

    Recycling groups collect cartridges to prevent landfill waste and promote environmental sustainability.

    Once collected, each cartridge undergoes a thorough inspection to identify any damages or wear. Then, during the refurbishing process, cartridges are taken apart, cleaned, and repaired as needed.

    High-quality parts replace any faulty components to restore performance. After refilling with fresh ink, these cartridges are tested to meet standards comparable to new ones.

    Step-By-Step Remanufacturing Process For Ink Cartridges

    You’ll start by inspecting each cartridge carefully for damage and testing its electrical components to make sure everything works properly. After that, the old ink is fully drained, and the cartridge is cleaned thoroughly to get rid of any leftover residue. Then, you refill it with high-quality ink and replace any necessary parts so it’s ready for use again.

    Cartridge Inspection Steps

    How do remanufacturers guarantee each ink cartridge meets quality standards before refilling? They start with a detailed inspection process. First, you sort cartridges by brand and part number in a temperature-controlled environment to prevent damage.

    Then, conduct a thorough visual inspection to identify any physical damage or performance issues. Faulty cartridges get repaired or rejected to maintain quality control.

    Next, you clean cartridges using high-power systems to remove ink residue and contaminants effectively. After cleaning, cartridges are dried carefully.

    Before moving forward, you perform performance tests, including pressure checks and electrical testing, to ensure functionality. Finally, cartridges undergo rigorous final testing, such as page yield verification, confirming they meet OEM specifications.

    This thorough inspection and testing routine guarantees each cartridge is reliable and ready for refilling.

    Ink Refill Procedure

    After completing the inspection process, the cartridge moves on to the ink refill procedure. First, the cleaning process removes any residual ink, making certain the cartridge is spotless for reuse.

    Then, using a precise filling machine, technicians inject high-quality ink that matches OEM standards into the cartridge. If necessary, smart chips are replaced to guarantee proper communication with the printer.

    This careful refill procedure is essential for restoring remanufactured cartridges to peak performance. Once filled, each cartridge undergoes rigorous performance testing, including page yield and pressure checks, to confirm reliability.

    This thorough approach, combined with the initial cartridge inspection, ensures every remanufactured cartridge delivers consistent quality and helps you save money while reducing waste.

    How Does Remanufactured Ink Compare To OEM And Compatible Ink?

    cost effective recycled tested quality

    Although remanufactured ink comes from recycled OEM cartridges, it undergoes thorough cleaning, refilling, and testing to guarantee quality comparable to original products while saving you money. Thanks to this rigorous process, remanufactured ink delivers print quality and page yield close to OEM cartridges, making it a cost-effective option if you’re mindful of recycling and sustainability.

    On the other hand, compatible ink uses brand-new materials and parts, offering fresh components without reuse. This can appeal if you prioritize the newest technology at a lower price point.

    Both remanufactured and compatible inks, when properly tested, provide reliable performance similar to OEM ink. However, slight variability in remanufactured ink may occur due to the reuse process, though thorough testing minimizes this.

    Ultimately, choosing between remanufactured ink, OEM cartridges, and compatible ink depends on your preference for recycling, cost savings, and whether you want brand-new materials versus reprocessed ones.

    Will Remanufactured Ink Void My Printer Warranty?

    Choosing remanufactured ink can save you money and support sustainability, but you might wonder if it affects your printer warranty. Thanks to the Magnuson-Moss Warranty Act, using remanufactured cartridges won’t void your printer warranty.

    Manufacturers can’t demand you use only their brand-name cartridges to keep warranty protection. Quality remanufactured ink is tested to meet or exceed OEM standards, ensuring ink quality and printer compatibility.

    This means your printer support and warranty remain intact when you use reliable remanufactured cartridges.

    Aspect Details
    Warranty Protection Magnuson-Moss Act safeguards your rights
    Cartridge Compatibility Remanufactured cartridges meet OEM standards
    Ink Quality Tested to ensure no damage or warranty void
    Printer Support Unaffected when using quality remanufactured ink
    Warranty Status Using remanufactured ink does not void your warranty

    Do Remanufactured Ink Cartridges Leak More Than OEM Ones?

    You might worry that remanufactured ink cartridges leak more than OEM ones. But honestly, leaks usually happen because of rough handling or poor storage during transit.

    If you install cartridges carefully and avoid shaking them, you can prevent most leaks. Plus, reputable remanufacturers test their cartridges to make sure they meet high standards before shipping. So, it’s really about how the cartridges are treated, not just whether they’re remanufactured or OEM.

    Leak Causes Explained

    While some might worry that remanufactured ink cartridges are more prone to leaking, they actually leak at rates similar to OEM cartridges. Leaks mainly happen due to transit-related issues or improper handling during installation. Here’s what you should know about leak causes:

    1. Mishandling: Excessive shaking or rough handling can cause leaks in remanufactured cartridges.
    2. Installation errors: Incorrect installation often leads to leaks, regardless of cartridge type.
    3. Manufacturing controls: Remanufactured cartridges undergo pressure checks and sealing to guarantee reliability.
    4. Inspection and testing: Reputable remanufacturers perform strict testing to catch leaks before shipping.

    Leak Prevention Tips

    Although remanufactured ink cartridges don’t leak more than OEM ones, preventing leaks requires careful handling and proper storage. For effective leak prevention, avoid excessive shaking of remanufactured cartridges before installation, as this increases leak risk. Instead, handle them gently.

    Store cartridges in a cool, dry place to maintain their integrity and reduce potential leaks. Be mindful during installation to avoid damage that could cause leaks. Choosing remanufactured cartridges from reputable suppliers who conduct thorough testing ensures higher quality and lowers leak risk compared to low-quality options.

    Does Remanufactured Ink Deliver The Same Print Quality?

    When you choose remanufactured ink, you can expect print quality that matches original OEM cartridges. Remanufactured ink undergoes rigorous quality assurance to guarantee it delivers sharp text and vibrant images comparable to OEM ink.

    Here’s what you can rely on:

    1. Performance Testing: Each cartridge is tested for page yield and color accuracy, ensuring consistent print quality.
    2. Visual Assessment: Sharp text and vibrant images are verified through thorough visual inspections.
    3. Quality Assurance: Processes like pressure checks and cleaning maintain cartridge reliability throughout its life.
    4. User Feedback: Many users report no noticeable difference between remanufactured ink and OEM ink in print quality.

    Thanks to these measures, remanufactured ink provides print quality that’s comparable to OEM ink, letting you print confidently without sacrificing performance or clarity.

    How To Choose Remanufactured Ink Cartridges

    When you’re picking out remanufactured ink cartridges, a good first step is to check the vendor’s reputation and what customers are saying. It really helps to know you’re getting quality. You’ll also want to find a seller that offers warranties and dependable support if something goes wrong. That way, you can shop with confidence and steer clear of any potential headaches.

    Vendor Reputation Matters

    Since the quality of remanufactured ink cartridges can vary widely, you should prioritize vendors with a strong reputation. A solid vendor reputation guarantees you get reliable products backed by quality assurance.

    Here’s how to choose the right supplier:

    1. Check review platforms like BBB and look for vendors rated 4 stars or higher to ensure reliability.
    2. Read customer reviews to understand the consistency and performance of their remanufactured cartridges.
    3. Confirm they follow industry standards and have a transparent testing process for each cartridge.
    4. Verify their return policy to ensure hassle-free replacements if something goes wrong.

    Focusing on these factors helps you avoid low-quality products and guarantees better printing results.

    Warranty And Support

    Choosing a vendor with a solid reputation sets the stage for a worry-free experience, but it’s equally important to take into account the warranty and support they offer. Reliable remanufactured cartridges come with warranties covering defects or performance issues, often lasting from six months to two years.

    Thanks to legal protections like the Magnuson-Moss Warranty Act, using remanufactured ink won’t void your printer’s warranty. Look for vendors providing satisfaction guarantees and clear return or replacement policies.

    High-quality remanufacturers conduct rigorous testing, including page yield and leak checks, to ensure quality assurance. Checking vendor certification and customer support responsiveness helps you avoid problems and secure assistance when needed.

    Prioritizing warranty and support ensures you get dependable remanufactured cartridges backed by solid protection and service.

    How To Install Remanufactured Ink Cartridges For Best Performance

    Although installing remanufactured ink cartridges might seem straightforward, taking a few careful steps guarantees you get the best performance from your printer. Proper installation ensures ink distribution, cartridge recognition, and overall printer compatibility.

    Careful installation of remanufactured ink cartridges ensures optimal ink flow, recognition, and printer compatibility.

    Follow these steps for peak performance:

    1. Power on your printer and open the cartridge compartment. Remove the old cartridge carefully to avoid damage. Gently shake the remanufactured cartridge to evenly distribute the ink before installation.
    2. Firmly insert the remanufactured cartridge into the correct slot until it clicks, ensuring proper contact with the printer’s smart chip.
    3. Close the printer cover securely and run a test print or alignment process to confirm cartridge recognition and print quality.
    4. If errors occur or the cartridge isn’t recognized, remove and reinstall it. Perform a printer reset following the manufacturer’s instructions to resolve recognition issues.

    Following these steps will help you maximize the benefits of remanufactured cartridges and maintain excellent print quality.

    Frequently Asked Questions

    Can Remanufactured Ink Cartridges Be Recycled Again After Use?

    Yes, you can recycle remanufactured ink cartridges again after use. Following proper cartridge recycling guidelines supports eco-conscious printing and waste reduction efforts.

    By participating in local recycling programs, you help minimize environmental impact and promote sustainability efforts. Using approved disposal methods guarantees cartridges are disassembled and processed correctly, reinforcing eco-friendly practices.

    Your involvement in waste management not only conserves resources but also advances a circular economy for printing supplies.

    How Long Does Remanufactured Ink Last Compared to OEM Ink?

    Remanufactured ink lasts like a well-kept secret, holding up just as long as OEM ink when you mind storage conditions. Its shelf life can reach about two years sealed, and six months once opened.

    With proper care, ink quality, color consistency, and ink stability match OEM’s. Cartridge lifespan and print durability depend on ink formulation, affecting ink saturation and drying time.

    Are Remanufactured Cartridges Compatible With All Printer Models?

    Remanufactured cartridges aren’t compatible with all printer models due to brand differences and printer compatibility issues. You should check cartridge labeling carefully to match your printer’s model and ink color.

    Variations in the manufacturing process and product sourcing affect ink quality and cartridge storage life. Also, printer settings and warranty policies can impact performance.

    Always verify compatibility before buying to avoid problems and guarantee your printer runs smoothly.

    What Should I Do if a Remanufactured Cartridge Causes a Printer Error?

    If a remanufactured cartridge causes a printer error, don’t panic. Printer troubleshooting starts with simple steps. First, remove and reseat the cartridge to fix cartridge installation or ink flow issues.

    Check for protective tape, then run cartridge reset and maintenance tips like cleaning and alignment. If error codes or cartridge recognition problems persist, update your firmware and refer to error message troubleshooting guides.

    These steps improve print quality and resolve most glitches.

    Do Remanufactured Inks Have Any Environmental Certifications or Standards?

    Yes, remanufactured inks often meet green printing standards and carry eco-friendly certifications like GreenCircle and Nordic Ecolabelling. When you choose them, you support sustainable manufacturing and recycling initiatives that reduce environmental impact and carbon footprint.

    Many remanufacturers follow strict environmental policies, use biodegradable materials, and prioritize energy efficiency. Look for eco labeling programs to guarantee your ink aligns with your commitment to eco-conscious printing.

    Conclusion

    Think of remanufactured ink like a skilled gardener reviving a tired plant, breathing new life into something once used so it blossoms again with vibrant colors. By choosing remanufactured cartridges, you’re not just saving money; you’re nurturing the environment and giving your printer a fresh start.

    With the right care and installation, your prints will flourish beautifully, proving that renewal often brings the richest rewards.

  • How to Choose the Right Ink Color to Sign a Passport

    How to Choose the Right Ink Color to Sign a Passport

    You should always use black or blue ink when signing your passport because these colors create clear, legible signatures that last and pass official checks.

    Avoid red or unusual colors since they can cause scanning problems or rejection.

    Use a waterproof, quick-drying pen like a ballpoint or gel from trusted brands to prevent smudging.

    Signing neatly and consistently with the same ink color across documents helps maintain validation.

    Keep going to discover essential tips and common pitfalls to avoid.

    Why Black and Blue Ink Are the Best Choices for Passport Signatures

    durable clear signature ink

    When you sign your passport, choosing black or blue ink guarantees your signature stands out with clear, high-contrast marks that are easy to read and verify. Black ink, in particular, offers superior longevity and resists fading over time, assuring your signature remains legible for years.

    Signing your passport with black or blue ink ensures clear, long-lasting, and easily verifiable signatures.

    It’s widely accepted by government authorities because it creates distinct, official-looking signatures that photocopies and scans can’t easily replicate. Using black ink also provides waterproof and smudge-resistant qualities, so your signature stays intact even through handling and travel.

    This reliability makes black ink the preferred choice for many travelers aiming to meet passport signing requirements without any issues. By opting for black ink, you guarantee your signature maintains its clarity and authenticity, helping you avoid delays or complications during identity verification processes.

    In short, black ink combines durability and official acceptance, making it an excellent option whenever you need to sign your passport.

    Why to Avoid Red and Other Ink Colors on Passports

    You’ll want to avoid red ink because it often causes scanning problems and can make your signature hard to read. Plus, other colors like purple or green might not show up clearly on copies or scans, which can create verification issues. So, sticking to black or blue ink is your best bet to keep your passport legible and hassle-free.

    Red Ink Scanning Issues

    Although red ink might seem like a bold choice for signing your passport, it often causes scanning and photocopying problems that can lead to delays or rejections at border controls. Red ink frequently fails to reproduce accurately in digital scans, making automated systems misinterpret or reject your document.

    Its poor contrast also makes verification harder, and fading or smudging over time worsens readability.

    Issue Impact Result
    Poor digital reproduction Scanners misread signatures Possible rejection
    Low contrast Signature less legible Verification delays
    Fading or smudging Document authenticity compromised Increased scrutiny at borders

    Avoid red ink to guarantee smooth, hassle-free passport processing.

    Colors Affect Document Legibility

    Since passport processing relies heavily on clear, legible signatures, choosing the right ink color is essential. Avoid red ink because it often doesn’t scan well, leading to possible rejection.

    Other colors like purple, green, or light shades reduce visibility and make your signature hard to read or reproduce. Metallic and pastel inks also cause poor scan quality, which can compromise verification.

    Non-black or blue inks might fade or smudge over time, further decreasing legibility. Using the wrong ink color increases the risk of delays or outright rejection of your passport application due to non-compliance with official standards.

    To guarantee smooth processing, stick with black or blue ink that guarantees clear, durable signatures, maintaining the integrity of your passport documents.

    How Ink Color Affects Passport Authentication and Durability

    ink color impacts authenticity

    When you sign your passport, the ink color you choose plays a crucial role in how authorities authenticate your identity and how well your signature holds up over time. Black and blue inks are preferred because they offer clear contrast and reproduce well in scans. This makes verification smoother.

    Using permanent, waterproof ink ensures your signature resists smudging and fading, preserving its integrity. Non-standard colors like red or purple might cause delays as they complicate authentication and could raise security concerns.

    Ink Color Authentication Ease Durability
    Black High (standard color) High (permanent ink)
    Blue High (standard color) High (waterproof)
    Red Low (non-standard color) Low (fades faster)
    Purple Low (non-standard color) Moderate
    Green Low (rarely accepted) Low (smudges easily)

    Choose ink color wisely to avoid processing issues and maintain your passport’s security.

    Best Types of Pens for Signing Your Passport

    When it comes to signing your passport, picking the right pen is just as important as choosing the right ink color. You’ll want to go for a ballpoint or gel pen that has quick-drying, waterproof ink. This helps make sure your signature lasts and doesn’t smudge.

    Try to avoid markers or erasable pens because they can actually damage your passport or cause your signature to fade over time. So, sticking with a reliable ballpoint or gel pen is definitely the way to go!

    Although choosing the right pen might seem simple, selecting one with quick-drying, waterproof ink is essential to prevent smudging and guarantee your passport signature lasts. Among pen types, you’ll want options that combine smooth writing with ink durability.

    Here are the recommended pen types for signing your passport:

    1. Ballpoint pens: Known for quick-drying, waterproof ink that resists smudging.
    2. Gel pens: Like the Uni-ball Signo, offering smooth flow and permanence.
    3. Rollerball pens: Provide smooth writing and long-lasting ink ideal for official documents.
    4. Fountain pens: Use only if they have waterproof ink and produce clear, legible signatures.

    Avoid markers or pens with heavy ink flow to protect your passport pages from damage.

    Ink Durability Considerations

    Since your passport signature must remain clear and intact for years, choosing a pen with durable, waterproof ink is essential. You should opt for gel or ballpoint pens known for their excellent ink durability, ensuring your signature stays legible over time.

    Quick-drying ink is also vital to prevent smudging during signing. While fountain pens with high-quality, permanent ink can offer great durability, test them first to avoid any issues.

    Avoid erasable or non-permanent inks, as they can fade or be altered, risking your passport’s validity. Furthermore, select pens with fine tips, around 0.7mm or less, to produce clear, precise signatures that resist fading.

    Prioritizing ink durability helps maintain your passport’s authenticity throughout its lifespan.

    Where to Find Reliable Black and Blue Ink Pens for Passports

    reliable passport pen sources

    To guarantee your passport signature meets official standards, you’ll want to choose black or blue ink pens from reputable brands like Uni-ball, Pilot, and Pentel. These brands offer high-quality black ink that’s perfect for your passport application, ensuring your signature looks professional and lasts.

    When using black or blue pens, make sure the ink is quick-drying and waterproof to avoid smudges on your travel documents.

    Here’s where to find reliable pens for your Card Applications:

    1. Office supply stores. Browse aisles labeled for official use.
    2. Official stationery retailers. Specialty shops often stock Color Ink pens certified for legal documents.
    3. Trusted online platforms. Check user reviews and product descriptions for black color ink pens.
    4. Brand websites. Buy directly from Uni-ball, Pilot, or Pentel to guarantee authenticity.

    Use black ink pens with fine or medium tips for clear, precise signatures. Make sure you use black or blue pens suited for passports.

    Tips to Keep Your Passport Signature Clear and Smudge-Free

    Choosing the right pen is just the start; keeping your passport signature clear and smudge-free guarantees it stays legible and official. To avoid smudging, use a quick-drying ink like a ballpoint pen with water-resistant ink. This type dries fast and prevents accidental smears.

    Sign smoothly and continuously to avoid uneven lines or smudging caused by hesitation. Steer clear of gel or rollerball pens since their ink tends to take longer to dry and increases smudging risks.

    Make sure your hands are clean and dry before signing to prevent transferring oils or moisture that can blur the ink. Practicing your signature on a separate sheet helps you maintain steady, consistent strokes, reducing mistakes and smudging chances on the actual passport.

    What to Do If You Use the Wrong Ink Color on Your Passport

    If you realize you’ve signed your passport with the wrong ink color, don’t panic or try to fix it yourself. Using blue ink or any other incorrect color may cause your passport to be rejected or require correction. Instead, follow these steps:

    1. Contact the issuing authority immediately to ask about re-signing or replacing your passport.
    2. Avoid altering the signature yourself, as this can invalidate your document.
    3. Keep a clear record of your mistake. Take photos or save any related documentation.
    4. Follow the official guidance provided to resolve the issue properly.

    Why Waterproof and Quick-Drying Ink Matters for Passport Signatures

    Why does the type of ink you use for your passport signature matter so much? Choosing waterproof and quick-drying ink guarantees your signature stays clear and professional. Waterproof ink prevents smudging or fading if your passport gets wet. Quick-drying ink stops smears right after signing, which is crucial since you may handle your passport immediately.

    Here’s a quick comparison to visualize why these qualities matter:

    Feature Benefit
    Waterproof Keeps signature legible when wet
    Quick-Drying Prevents smudges during signing
    Permanent Ink Ensures long-term durability

    Using ink with both qualities protects your passport signature from environmental damage and frequent handling. Many official guidelines recommend this to keep your signature intact over time. So, when signing your passport, make sure the ink you choose is both waterproof and quick-drying to avoid problems later.

    How to Ensure Your Passport Signature Matches Other Official Documents

    Ensuring your passport signature aligns with other official documents helps avoid verification issues down the line. To keep your signature consistent and professional, follow these key steps:

    1. Use black ink or the same ink color found on your other official documents to maintain uniformity.
    2. Replicate the exact signature style you use on your driver’s license, social security card, and IDs.
    3. Avoid mixing ink colors or altering your signature’s size and style to prevent discrepancies.
    4. Double-check that your signature matches perfectly across all documents before signing your passport.

    Common Mistakes to Avoid When Signing Your Passport

    When signing your passport, you’ll want to avoid common mistakes that can lead to delays or rejection. First, never use red ink. Official documents usually don’t accept it, and this can cause your passport to be rejected.

    Also, avoid pens that smudge easily or aren’t waterproof. Your signature must remain clear over time. Using felt-tip markers or highlighters is a bad idea since they can damage the document or fade quickly.

    Make sure your signature matches the one on other official documents to prevent verification issues. Finally, always sign inside the designated signature box. Signing outside this area can invalidate your passport.

    Frequently Asked Questions

    Can I Use Gel Pens or Only Ballpoint Pens for Passport Signatures?

    You can use gel pens for passport signatures only if their ink compatibility meets official standards, meaning it’s permanent, dark, and dries quickly to avoid smudging. However, ballpoint pens are usually preferred because their ink dries faster and lasts longer.

    To be safe, check the issuing authority’s guidelines since many require ballpoint pens for consistency and durability. So, don’t just assume gel pens work; verify ink compatibility first.

    Is It Necessary to Sign the Passport in One Continuous Stroke?

    Yes, you should sign your passport in one continuous stroke to guarantee signature consistency. This helps your signature stay clear and uniform, reducing the risk of gaps or uneven lines that might make it look suspicious.

    When you sign smoothly in a single motion, your signature maintains its authenticity and is less likely to smudge or fade over time. Practicing this technique will keep your passport’s signature reliable and official.

    What Should I Do if My Signature Changes Over Time?

    If your signature changes over time, you should update your official documents to reflect your signature evolution. Keep a record of your original signature to track changes and guarantee authenticity.

    Practice your current signature regularly to maintain consistency. If the change is significant, notify relevant authorities to avoid verification issues.

    Staying proactive helps you prevent confusion and ensures your documents always match your true signature style.

    Can Minors Sign Their Own Passports With Colored Ink?

    No, minors can’t sign their own passports with colored ink. You need to use black or blue ink to guarantee color authenticity, as these colors are officially accepted for passport signatures.

    Using any other color won’t meet the passport authorities’ standards and could cause delays or rejection. Remember, a parent or guardian usually provides the signature for minors to keep everything official and compliant with regulations.

    Are Pencil Signatures Ever Acceptable on Passports?

    No, pencil signatures are never acceptable on passports. You need to use ink to guarantee your signature legibility is clear and permanent.

    Pencil marks can easily smudge, fade, or be erased, which compromises the document’s security and verification process. Always sign in black or blue ink to meet official requirements and avoid delays or rejection during passport processing or travel.

    Your signature has to be durable and easily readable.

    Conclusion

    Choosing the right ink color for your passport signature isn’t just about looks; it’s about security and longevity. You might think any pen works, but ironically, using black or blue ink is exactly what keeps your travel smooth and hassle-free.

    Coincidentally, these colors are also the easiest for officials to verify, making your life easier. So, stick to reliable black or blue pens, avoid red, and keep your passport valid and ready for every adventure.

  • Is Squid Ink Toxic and How Can You Safely Handle It?

    Is Squid Ink Toxic and How Can You Safely Handle It?

    Squid ink isn’t toxic when you use it in normal cooking amounts, but you should handle it carefully. Always keep it refrigerated in a sealed container and wear gloves with fresh ink to avoid skin irritation.

    People with shellfish allergies need to be cautious, as squid ink contains proteins that may trigger reactions. Proper handling and storage reduce risks, helping you enjoy its rich flavor safely.

    Keep exploring to understand all safety tips and allergy precautions.

    What Is Squid Ink? Definition and Culinary Uses

    squid ink culinary uses

    What exactly is squid ink, and why has it captured the attention of chefs worldwide? Squid ink is a dark, viscous fluid squids produce as a defense mechanism, stored in an ink sac. Beyond its natural role, it’s become popular in kitchens for its unique culinary uses.

    Squid ink, a dark fluid from squids, captivates chefs with its unique culinary uses and rich flavor.

    You’ll find squid ink used to flavor and color dishes like pasta, risotto, and seafood sauces, especially in Japanese and Mediterranean cuisines. Its rich, savory umami taste adds depth without overpowering other ingredients.

    Besides enhancing taste, squid ink serves as a natural food coloring, giving dishes an appealing black hue. It contains melanin, enzymes, polysaccharides, and trace metals, which not only contribute to its distinctive color but also may provide health benefits.

    When you cook with squid ink, you’re introducing a flavorful, visually striking ingredient that’s safe to eat in small quantities, making it a fascinating addition to your culinary repertoire.

    Is Squid Ink Toxic to Humans? Safety Overview

    You don’t need to worry about squid ink being toxic when you consume it in normal amounts—it’s generally safe and used widely in cooking. That said, if you have shellfish allergies, it’s a good idea to be cautious because allergic reactions can happen. Also, make sure to get your squid ink from reputable suppliers to keep any contamination risks to a minimum.

    Human Toxicity Risk

    Although squid ink is widely used in cooking, it poses little risk of toxicity to humans when consumed in typical culinary amounts. The presence of trace metals like cadmium and copper in squid ink is minimal and generally not harmful at these levels.

    However, proper handling is essential to prevent contamination from marine microorganisms or tissue remnants. While squid ink itself isn’t toxic, people with allergies should be cautious, as it may trigger reactions, especially in those sensitive to shellfish.

    Although no evidence suggests toxicity from regular use, excessive consumption or concentrated extracts haven’t been thoroughly studied, so it’s best to use squid ink moderately. By following good hygiene and handling practices, you can safely enjoy squid ink without worrying about toxicity risks.

    Allergy And Sensitivity

    While squid ink rarely causes toxicity, allergy and sensitivity remain important considerations for some people. If you have a shellfish allergy, you might be at risk for allergic reactions because of proteins in squid ink similar to those found in mollusks. To stay safe, keep these points in mind:

    1. Know your sensitivities. If you’re prone to allergic reactions, test a small amount first.
    2. Use proper handling. Fresh squid ink can carry marine microorganisms, so maintain hygiene to avoid irritation or infections.
    3. Consume in moderation. Trace metals like copper and cadmium are present but usually harmless at typical culinary doses.

    How Can Squid Ink Cause Allergic Reactions?

    shellfish allergy risk with squid ink

    If you’re allergic to shellfish, you might want to be careful with squid ink. That’s because it contains proteins similar to those found in shellfish. So, if you come into contact with it or eat something made with squid ink, you could have an allergic reaction.

    These reactions can show up in different ways — from hives and swelling to more serious problems like trouble breathing. Because of this, it’s really important to take precautions when handling or consuming squid ink to stay safe.

    Allergy Risks Overview

    How exactly can squid ink trigger allergic reactions? Squid ink contains proteins like tropomyosin, which can cause allergy symptoms, especially if you’re sensitive to shellfish.

    To stay safe, you should understand these key allergy risks:

    1. Cross-reactivity: If you’re allergic to shellfish, you might react to squid ink due to similar proteins, leading to hives, swelling, or even difficulty breathing.
    2. Skin contact: Handling fresh squid ink without gloves can cause skin irritation or allergic contact dermatitis in sensitive individuals.
    3. Respiratory and oral symptoms: In rare cases, inhaling or ingesting squid ink can trigger respiratory or oral allergy reactions.

    Being aware of these risks helps you handle and consume squid ink safely, minimizing the chances of allergic reactions.

    Shellfish Allergy Considerations

    Understanding the allergy risks of squid ink naturally leads to thinking about those with shellfish allergies, who face particular concerns. Squid ink contains proteins like tropomyosin, which can trigger allergic reactions because of cross-reactivity with similar proteins found in shellfish.

    If you have a shellfish allergy, even trace amounts of squid ink in food might cause reactions ranging from mild itching and swelling to severe anaphylaxis. Because of this risk, it’s essential to take safety precautions seriously.

    Avoid consuming squid ink or dishes containing it if you’re sensitive to shellfish. Being aware of cross-reactivity helps you protect yourself and avoid unexpected allergic reactions when handling or eating foods prepared with squid ink.

    Symptoms And Precautions

    Although squid ink is safe for most people, it can trigger allergic reactions in those with shellfish sensitivities due to shared proteins. If you have seafood allergies, you should be cautious when handling or consuming squid ink. Symptoms of allergic reactions may include itching, swelling, difficulty breathing, and skin irritation.

    To protect yourself, follow these handling precautions:

    1. Always wear gloves when handling fresh squid ink to prevent skin irritation or allergic responses.
    2. Avoid eating squid ink if you have known seafood allergies to reduce the risk of allergic reactions.
    3. Be mindful of potential contamination or improper handling, which could lead to gastrointestinal or allergic symptoms.

    Taking these steps helps guarantee your safety when dealing with squid ink.

    What Are the Health Risks of Eating Squid Ink?

    health risks of squid ink

    What risks might you face when eating squid ink? Generally, squid ink is safe in small culinary amounts, but you should be aware of some health risks. If you have shellfish allergies, you might experience allergic reactions, so it’s best to avoid it.

    Also, squid ink contains trace metals like cadmium and lead, which could accumulate if consumed excessively over time. Proper safe handling is essential to prevent contamination by marine microorganisms or tissue residues, which might cause other health issues.

    Health Risk Explanation
    Allergic Reactions Possible for those sensitive to shellfish
    Trace Metals Cadmium and lead present in small amounts
    Contamination Risk from improper handling and hygiene

    How to Source Safe Squid Ink for Cooking

    Where can you find squid ink that’s safe for cooking? To guarantee safety and quality, you need to source squid ink that’s food-grade and properly handled. Here’s how you can do it:

    Finding food-grade squid ink ensures safety and quality for your culinary creations.

    1. Buy from reputable suppliers or stores that guarantee food-grade squid ink. Look for clear labeling that confirms it’s safe for culinary use and free from harmful additives.
    2. Check packaging carefully. Opt for sealed bottles or pouches, which help prevent contamination and spoilage, ensuring the ink’s freshness.
    3. If you’re collecting fresh squid ink yourself, always wear gloves during handling and wash your hands thoroughly afterward to avoid irritation or contamination.

    How to Store Squid Ink Properly

    To keep your squid ink fresh, just store it in an airtight container in the fridge, making sure the temperature is at or below 40°F (4°C). It’s pretty important to keep an eye on the expiration date, too. Before you use it, give it a quick check for any off smells or weird discoloration—those are signs it might be time to toss it.

    If you want to keep it for longer, freezing small portions is a great way to go. This helps maintain its quality without having to thaw and refreeze it all the time, which can affect the flavor and texture. So, a little prep upfront can save you some hassle later!

    Ideal Storage Conditions

    Although squid ink is prized for its rich flavor and unique color, you need to store it carefully to keep it fresh and safe to use. Proper storage and refrigeration play a vital role in preventing spoilage and maintaining quality.

    Here are three ideal storage conditions to follow:

    1. Store squid ink in an airtight container and keep it refrigerated below 4°C (39°F) to inhibit bacterial growth.
    2. Avoid exposing the ink to direct sunlight or heat sources, which can degrade its color and bioactive compounds.
    3. For longer storage, freeze squid ink in small portions to preserve its flavor and quality without compromising freshness.

    Shelf Life Expectations

    You can expect squid ink to stay fresh for about one to two weeks when stored properly in the refrigerator inside an airtight container. Proper storage and refrigeration are essential to maximize its shelf life and guarantee safety.

    If you have unopened commercial squid ink, you can keep it in a cool, dark pantry until the expiration date on the package. To extend the shelf life even further, consider freezing small portions, which can preserve its quality for up to three to six months.

    Always inspect the ink before use. If you notice any foul odor, discoloration, or slimy texture, discard it immediately. Following these storage guidelines helps maintain squid ink’s freshness and safety for your culinary needs.

    How to Handle Squid Ink Safely in the Kitchen

    When handling squid ink in your kitchen, wearing gloves and washing your hands thoroughly afterward helps prevent skin irritation and staining. Safety is key during preparation to avoid contamination and preserve the ink’s quality. Follow these steps for proper handling:

    1. Use clean utensils and containers to prevent cross-contamination. Always prepare and store squid ink in sanitized equipment.
    2. Keep squid ink refrigerated and use it before the expiration date. Proper storage maintains freshness and reduces bacterial growth.
    3. Avoid direct contact with fresh squid ink from caught squid, as it may contain marine microorganisms or tissue remnants harmful to your health.

    Precautions for People With Shellfish Allergies Using Squid Ink

    Handling squid ink safely involves more than just preventing stains and contamination; it also requires awareness of potential allergic reactions. If you have shellfish allergies, you should know that squid ink comes from cephalopods like squid and octopus, which can trigger allergic reactions due to cross-reactivity between shellfish and cephalopod proteins.

    While squid ink is generally safe for most, those with shellfish allergies must take extra handling precautions. Always wear gloves when working with fresh squid ink and maintain good hygiene to minimize exposure. Since evidence on squid ink’s allergenic potential is limited, it’s wise to consult an allergist before using or consuming it.

    Stay alert for any symptoms like hives or swelling, as allergic reactions can vary. By following these precautions, you can reduce your risk and better manage your sensitivity when handling squid ink.

    What to Do If You Have an Adverse Reaction to Squid Ink

    If an allergic reaction to squid ink causes symptoms like itching, swelling, or difficulty breathing, seek medical help immediately. Prompt medical attention is essential to manage severe reactions and prevent complications.

    If you notice skin irritation while handling squid ink, stop use and wash the affected area thoroughly to reduce irritation.

    Here’s what you should do if you experience an adverse reaction:

    1. Discontinue consumption and avoid further handling of squid ink.
    2. Use antihistamines or medications prescribed by your healthcare provider to relieve mild allergic symptoms.
    3. Keep a detailed record of your symptoms and inform your doctor about any known allergies to shellfish or cephalopods.

    Being cautious during handling and preparation helps prevent contamination and reduces the risk of allergic reactions. Remember, timely action and proper care guarantee your safety when dealing with squid ink.

    Can Squid Ink Be Used Safely Outside Cooking?

    Although squid ink is primarily known for its culinary uses, you might wonder if it’s safe to use in other contexts. When considering squid ink outside cooking, safety remains a top concern. Proper handling is essential to avoid skin irritation or contamination, so wear gloves and keep the ink away from open wounds.

    Squid ink contains trace metals, but typical culinary amounts are safe. However, using it in larger quantities or in non-food applications increases risks. You should also be mindful of storage. Keeping squid ink refrigerated and sealed minimizes microbial contamination.

    If you plan to use squid ink for purposes like art or cosmetics, make sure it’s properly prepared or pasteurized to reduce bacteria. Finally, if you have shellfish allergies, it’s best to avoid squid ink altogether as it may trigger reactions.

    Frequently Asked Questions

    Can Squid Ink Be Used as a Natural Food Coloring?

    Yes, you can use squid ink as a natural dye in your cooking. It offers unique color variation, giving dishes a rich, deep black hue that stands out.

    Besides its culinary uses, squid ink holds cultural significance in many coastal cuisines, adding both flavor and visual appeal. When you incorporate it, you bring tradition and natural coloring into your recipes, enhancing taste and presentation naturally.

    Does Cooking Squid Ink Reduce Its Allergenic Potential?

    Think of cooking squid ink as trying to soften a shield. It can weaken some allergenic proteins but won’t break it entirely.

    Cooking might reduce allergenic potential by partially denaturing tropomyosin, yet allergy prevention isn’t guaranteed. Your immune response and cross-reactivity with other shellfish allergens can still trigger reactions.

    If you’re unsure, rely on allergy testing before trying squid ink, especially if you have known shellfish allergies. Stay cautious and protect yourself.

    How Long Does Squid Ink Retain Its Flavor After Opening?

    Squid ink’s shelf life after opening is about 1 to 2 weeks if you store it right. For best flavor preservation, keep it in an airtight container, away from air and light, and refrigerate consistently.

    Freezing can extend freshness up to 3 months but may slightly affect taste. Watch for freshness indicators like off smell or color changes to know when it’s gone bad.

    Following these storage tips keeps your squid ink tasty longer.

    Are There Vegan Alternatives to Squid Ink for Cooking?

    Imagine you’re making pasta and want that deep black color without using squid ink. You can turn to plant-based substitutes like black sesame paste or spirulina. These vegan food coloring options offer a rich hue and unique flavor while supporting ethical seafood options.

    Non-animal ink alternatives not only suit plant-based diets but also add nutritional value. So, you can enjoy vibrant dishes without compromising your values or taste.

    Can Squid Ink Stain Kitchen Surfaces Permanently?

    Yes, squid ink can stain kitchen surfaces permanently if you don’t act quickly. During kitchen cleanup, you should use surface protection like plastic wrap or silicone mats to prevent spills.

    If ink gets on surfaces, start stain removal immediately with soap and warm water. For stubborn stains, use commercial stain removers carefully.

    Following these cleaning tips will help you avoid lasting damage and keep your kitchen looking fresh.

    Conclusion

    Squid ink might seem mysterious or even risky, but when handled properly, it’s a safe and flavorful ingredient. While some worry about allergies or toxicity, the truth is that with the right precautions, you can enjoy its unique taste without fear.

    Don’t let caution turn into avoidance. Just respect its potential and source it wisely. In the kitchen, knowledge turns something seemingly dangerous into a delicious advantage.

  • Where Does Squid Ink and Poop Come From?

    Where Does Squid Ink and Poop Come From?

    You get squid ink and poop from two closely linked parts inside the squid’s body: the ink sac and the digestive system.

    The ink sac produces dark pigment mixed with mucus to create the ink. This ink exits through the rectum alongside some fecal matter.

    Poop forms in the rectum from undigested food and mucus. Sometimes it’s released with the ink during defense.

    Understanding these processes reveals how squids use their ink and waste for survival.

    How Is Squid Ink Produced Inside the Body?

    ink production in specialized organs

    Although you might not see it, squid ink forms inside specialized organs called ink sacs near the digestive system. Within these ink sacs lies an ink gland, which plays a vital role in producing the ink by synthesizing melanin and other chemicals.

    Squid ink is produced in ink sacs near the digestive system by specialized glands synthesizing melanin and other chemicals.

    Melanin is the pigment responsible for the dark color of the ink. The ink gland stores this melanin-rich mixture until the squid needs it for defense. When triggered, the squid contracts muscles surrounding the ink sacs, preparing to release the ink.

    The ink itself is a blend of melanin, enzymes, and mucus, creating a thick, dark cloud that can confuse predators. Pigment cells called chromatophores also activate during this process, influencing the squid’s coloration.

    All these components come together inside the ink sacs, where the ink gland works diligently to produce and store the squid’s famous defense mechanism until it’s time to use it.

    Where Does Squid Ink Exit From?

    Once the squid’s ink gland produces the dark, melanin-rich mixture inside the ink sac, the ink needs a way out of the body. The ink exits primarily through the squid’s digestive system, mixing with other intestinal contents before release. Here’s how it works:

    Ink flows from the ink sac, located near the digestive tract, into the rectum. It passes along with fecal matter and intestinal mucus, traveling through the anus. The squid expels this mixture rapidly, creating a cloud of ink in the water for defense.

    While wild squid ink often contains traces of poop, commercially harvested ink is collected directly from the ink sac to avoid contamination. This means you’re usually getting pure ink, separated from the digestive materials. So, the ink exits your squid through its digestive system’s final passage, the anus, alongside other intestinal substances.

    What Do the Ink Sac and Ink Gland Do?

    squid ink production and storage

    You’re about to learn how the ink sac and ink gland work together to protect squids from predators. So, here’s the deal: the ink gland produces melanin-rich ink, and the ink sac stores it until the squid needs to use it. When danger strikes, the ink sac releases the ink quickly. Understanding their roles helps you see how squids can create their famous cloud of ink in a flash.

    Ink Sac Function

    When a cephalopod feels threatened, it quickly contracts muscles around its ink sac to release a dark cloud of ink that confuses predators. The ink sac is a key organ in this defense mechanism, storing the ink before it’s expelled.

    Inside the ink sac, the ink gland produces melanin and other chemicals that give the ink its dark color. Here’s how the ink sac functions:

    1. It stores ink mixed with mucus, ready for immediate release.
    2. Muscles around the ink sac contract to eject ink rapidly through the funnel.
    3. This precise control allows the cephalopod to direct the ink cloud, creating a visual or chemical distraction.

    Together, the ink sac and ink gland enable a swift, effective escape from danger.

    Ink Gland Role

    Although the ink sac stores the ink, it’s the ink gland that actually produces the dark, melanin-rich fluid used for defense. When a squid senses danger, the ink gland’s cells spring into action, synthesizing melanin with the help of enzymes like tyrosinase.

    This melanin gives the ink its characteristic dark color, essential for the squid’s defense mechanism. The ink gland secretes this fluid into the ink sac, which then rapidly ejects it through the funnel. This quick release creates ink clouds or pseudomorphs, confusing predators and allowing the squid to escape.

    How Does Ink Mix With Mucus Before Release?

    You’ll notice that ink isn’t simply produced—it’s actually mixed with mucus inside the ink sac. This mucus works like a carrier, making the ink thicker and helping control how it spreads in the water. When you get how this mixing happens, it’s easier to understand how cephalopods manage to create those effective ink clouds whenever they feel threatened.

    Ink Production Process

    How exactly does squid ink combine with mucus before release? It all starts inside the ink sacs, where ink gland cells synthesize the dark pigment. Then, the ink mixes with mucus produced by the funnel organ, creating a thick, sticky solution.

    This combination helps the squid control the ink’s consistency and volume. Here’s how the process works:

    1. Ink gland cells produce the pigment within the ink sacs.
    2. Mucus from the funnel organ blends with the ink, forming a viscous mixture.
    3. The ink-mucus solution is stored until the squid needs to eject it for defense.

    This mix is then ready for rapid release, allowing the squid to form various shapes in the water, enhancing its escape tactics.

    Mucus Integration Mechanism

    Where does the ink meet the mucus before release? Inside the ink sac, the ink gland simultaneously releases melanin-rich ink and mucus. This mucus acts as a binder, mixing with the ink to form a thick, sticky ink-mucus mixture.

    You’ll find that this mixture stays cohesive and controllable, thanks to the mucus’s role in shaping and stabilizing the ink cloud. When the squid ejects this mixture, the precise combination allows for rapid, targeted defense responses.

    The mucus helps the ink remain suspended and effective for distraction or concealment. So, before the ink escapes into the water, it’s carefully blended with mucus inside the ink sac, ensuring it performs exactly as the squid needs it to during a quick escape.

    Does Squid Ink Contain Fecal Matter?

    squid ink is pure

    Although squid ink passes through the rectum near the intestine, it’s generally free of fecal matter when you get it for cooking because it’s harvested directly from the ink sac. When you consider squid ink and fecal matter, you should know:

    1. Squid ink is produced in a separate ink sac, so during ink extraction, it remains distinct from the digestive tract contents.
    2. While squids expel ink through the rectum, natural excretion may sometimes mix minor traces of fecal matter or mucus.
    3. Commercially harvested squid ink avoids contamination by collecting ink straight from the ink sac, not from ink released during defecation.

    Why Is Commercial Squid Ink Free From Poop?

    You might be wondering why commercial squid ink doesn’t contain any poop, especially since wild squid release both ink and waste through the same passage. Well, that’s because the ink is actually harvested directly from the ink sac, which is a completely separate organ from the digestive tract.

    They take great care to extract the ink without mixing it with anything else. On top of that, the ink goes through thorough cleaning and filtering during processing, so any chance of contamination with fecal matter is eliminated.

    Ink Sac Versus Digestive Tract

    Since commercial squid ink comes from the ink sac, a specialized organ separate from the digestive tract, you don’t have to worry about it containing any fecal matter. The ink sac stores and produces ink independently, ensuring the substance is a unique secretion, not mixed with digestive waste.

    Here’s why commercial ink stays pure:

    1. The ink sac is carefully harvested from euthanized squids, avoiding the digestive tract entirely.
    2. During processing, the ink is separated from other tissues and any potential contaminants.
    3. The final product is purified ink, safe and clean for culinary use.

    Because the ink sac functions apart from the digestive system, commercial squid ink remains free from poop, providing you with a pure, high-quality ingredient.

    Ink Extraction Process

    When commercial squid ink is harvested, producers carefully extract it from the ink sac, which is completely separate from the digestive tract. So, you don’t have to worry about any contamination. The ink sac stores pure ink, allowing the ink extraction process to isolate the ink without mixing it with fecal matter.

    During processing, the ink sac is emptied and cleaned thoroughly to prevent any fecal contamination. Unlike wild squids that may release ink mixed with traces of fecal material, commercial methods guarantee the ink you get is free from poop. By targeting the ink sac alone and avoiding the digestive tract, producers ensure that the squid ink you use is clean, pure, and safe for cooking or other uses.

    Absence Of Fecal Matter

    Although wild squids may release ink mixed with small amounts of fecal matter, commercial squid ink stays free from contamination because producers extract it directly from the ink sac, which is separate from the digestive system. This separation prevents fecal contamination right from the start.

    When you buy food-grade squid ink, it undergoes a careful process that guarantees purity. Here’s how they keep it clean:

    1. Producers harvest ink only from the ink sac, avoiding digestive tract contents.
    2. The ink sacs are thoroughly cleaned to remove any residual impurities.
    3. A purification process follows, eliminating traces of fecal matter and other contaminants.

    Thanks to these steps, commercial squid ink remains safe and free from fecal contamination, unlike the natural ink release in the wild.

    How Do Squids Control the Shape and Density of Squid Ink Clouds?

    To control the shape and density of their ink clouds, squids precisely adjust the amount of ink and mucus they expel through their funnel muscles. You’ll notice they vary the pressure and timing of ink expulsion, allowing them to create either dense, compact pseudomorphs or wide, diffuse clouds.

    These changes help shape ink clouds to mimic objects like tentacles, confusing potential threats. By modulating mucus content, squids alter the viscosity and longevity of the ink, making it either short-lived or long-lasting depending on their escape needs.

    The rapid contraction of funnel muscles propels ink mixed with mucus out of the ink sac, shaping the cloud’s final form. This precise muscular control gives squids remarkable flexibility in how they deploy their ink, letting them adapt quickly to different situations underwater.

    How Do Squids Use Ink and Poop to Defend Themselves?

    Because squids face constant threats from predators, they’ve developed a clever defense that involves ejecting a thick cloud of ink mixed with mucus and sometimes traces of fecal matter. This unique defense mechanism uses squid ink to create confusion and give the squid a chance to escape.

    Here’s how they use it:

    1. Squids rapidly pump ink from their ink sac through their rectum, releasing it as a dense, dark cloud.
    2. The ink cloud, combined with mucus, can mimic shapes like tentacles or jellyfish, misleading predators.
    3. Due to the ink sac’s proximity to the digestive system, small amounts of fecal matter may mix with the ink, adding to the cloud’s complexity.

    This combination creates a smoky, obscuring screen that disrupts the predator’s vision, letting you, the squid, slip away safely. It’s a remarkable example of nature’s clever defense mechanism using both ink and fecal matter.

    How Is Squid Poop Produced and Excreted?

    When squids digest their food, they form waste in their rectum, where squid poop takes shape from undigested materials. This process happens within the squid’s digestive system, where nutrients are absorbed, and the remaining waste starts to solidify.

    Squid poop is then excreted through the anus, which also serves as the exit point for ink from the nearby ink sac. Sometimes, squid poop mixes with ink during excretion, especially when the squid is stressed and releases a defensive cloud.

    Here’s a quick look at how squid poop production and excretion work:

    Aspect Details
    Location Rectum in the digestive system
    Composition Undigested food, mucus, sometimes mixed with ink
    Excretion Method Through the anus, sometimes alongside ink release

    Understanding this helps you see how squid poop is closely linked to their unique defense system.

    What’s the Difference Between Ink From Ink Sacs and Wild Ink Releases?

    Squid ink and poop often exit through the same passage, but the ink you see in a squid’s defense is quite different from the ink that might be released alongside waste. Ink from ink sacs is a concentrated, controlled secretion crafted specifically for defense. Wild ink releases can be a mix of ink, fecal contamination, and intestinal mucus expelled during natural excretion or escape.

    Here’s how they differ:

    1. Ink sacs store melanin-rich, consistent ink used for protection, free from fecal contamination.
    2. Wild ink releases are less controlled, often containing mixed bodily fluids, including traces of feces.
    3. Commercially harvested ink comes from ink sacs of dead cephalopods, ensuring purity for culinary use.

    Understanding these differences helps you appreciate why squid ink in cooking is clean and why wild releases vary in color and composition during a squid’s natural behaviors.

    Frequently Asked Questions

    Can Squid Ink Change Color Depending on the Squid Species?

    Yes, squid ink can change color depending on the squid species. You’ll notice ink composition variations, like melanin and other pigments, cause different hues from bluish-black to dark brown.

    Some squids even show bioluminescent behavior, producing ink that glows or shifts color with light angles. You can use these color differences for species identification, as each squid’s ink adapts uniquely to its environment and predator threats.

    How Long Can Squid Ink Remain Visible Underwater?

    You might think squid ink sticks around like a stubborn tattoo, but it usually lasts underwater from a few minutes up to an hour, depending on marine camouflage needs.

    Thanks to ink dispersal patterns, turbulent currents scatter it fast, while calm waters let it linger longer, perfect for underwater signaling.

    What Nutrients or Chemicals Are Found in Squid Ink?

    You’ll find that squid ink’s marine nutrition includes melanin, amino acids like taurine and glutamic acid, and enzymes such as tyrosinase. Its ink composition also contains metals like copper and lead, which impact its chemical properties.

    Plus, bioactive compounds like dopamine give it antimicrobial effects. Polysaccharides and proteins add to its viscosity, making squid ink a complex mix that plays an essential role in the squid’s defense and survival.

    Is Squid Ink Safe for All Marine Animals to Ingest?

    You might think squid ink is like a magical potion safe for every creature, but it’s not. Marine animal digestion varies, so some can’t handle the chemical irritants in ink.

    Ink dispersal mechanisms evolved to deter predators, meaning its ecological impact includes warning signals or toxicity. While a few species tolerate it, many experience distress or avoid inked prey altogether.

    How Has Squid Ink Been Used Historically in Art or Writing?

    You’ll find squid ink has rich historical uses in art and writing traditions. Artists and scribes used it for calligraphy, manuscripts, and decorative illustrations, valuing its deep black color and permanence.

    Its artistic applications extended to pigment for drawing, especially in ancient Mediterranean cultures. When you explore writing traditions, you’ll see squid ink was essential before modern inks emerged, even inspiring the term “sepia” from the cuttlefish pigment.

    Conclusion

    Now that you know squid ink isn’t mixed with poop but comes from a special sac inside, imagine the next time you see a dark cloud in the ocean. That mysterious swirl isn’t just ink; it’s a clever defense, shaped and released with precision.

    And just when you think you’ve figured out all their secrets, remember the squid’s ability to control this inky escape is as mesmerizing as the ocean itself. What other surprises could lie beneath?

  • 3 Benefits of Instant Ink Worth Considering

    3 Benefits of Instant Ink Worth Considering

    You’ll save money with HP Instant Ink by paying a low fixed monthly fee and rolling over unused pages. It simplifies your printing by automatically tracking ink levels and sending replacements before you run out, so you avoid last-minute store trips.

    Plus, it helps reduce waste with cartridge recycling and smart ink use. These benefits balance convenience, cost savings, and environmental care. Keep exploring to find out how it all works for you.

    What Is HP Instant Ink and How Does It Work?

    automatic ink delivery service

    How does HP Instant Ink simplify your printing needs? HP Instant Ink is a subscription service designed to streamline ink management for your printer. Instead of charging based on ink volume, it tracks the number of pages you print each month, making it easier to match your print volume with the right plan.

    The service automatically monitors your ink levels and orders replacement cartridges before you run out, ensuring uninterrupted printing.

    With HP Instant Ink, cartridges arrive directly at your door through timely ink delivery, often before your current supply finishes. This proactive approach eliminates last-minute trips to the store and prevents printing delays.

    You choose a plan based on pages, starting at 10 pages per month for $1.49, with options for higher print volumes. When you cancel, cartridges deactivate immediately, and you return used cartridges using prepaid envelopes.

    Save Money on Printing With HP Instant Ink

    Beyond simplifying ink management, HP Instant Ink helps you save money on printing. With a fixed monthly fee based on your pages per month, this subscription service often cuts ink costs considerably compared to buying cartridges individually.

    You can pay as little as $0.03 per page, much lower than the typical $0.08 per page with standard cartridges, offering clear cost savings for any print volume. The automatic ink delivery ensures you never run out, so you avoid emergency purchases that can drain your budget.

    Plus, unused pages roll over to the next month, maximizing value and improving your print economy. By choosing HP Instant Ink, you control your monthly printing expenses while enjoying steady savings.

    Whether you print a little or a lot, this smart subscription service keeps your ink supply steady and your costs predictable, helping you save money without sacrificing convenience or quality.

    Simplify Printing and Reduce Waste With HP Instant Ink

    smart sustainable ink delivery

    When you subscribe to HP Instant Ink, the service automatically tracks your ink levels and sends replacements before you run out. So, you won’t have to worry about managing cartridges yourself. This automatic ink delivery streamlines print management, saving you time and hassle.

    With flexible subscription plans based on pages printed, you only pay for what you need, making printing more convenient. HP Instant Ink’s ink level monitoring guarantees you avoid interruptions, while page rollover lets you carry unused pages forward, preventing waste.

    Beyond convenience, the program supports environmental sustainability through cartridge recycling and ink waste reduction efforts. You receive prepaid recycling envelopes to send back used cartridges, promoting waste minimization.

    Plus, by supplying more ink than traditional cartridges, HP helps reduce overstocking and unnecessary disposal. Overall, HP Instant Ink simplifies your printing experience while actively contributing to environmental care through smarter resource use and effective waste management.

    Frequently Asked Questions

    Can I Pause or Cancel My Instant Ink Subscription Anytime?

    You can cancel your Instant Ink subscription anytime with no penalty, thanks to HP’s flexible cancellation policy. While pausing isn’t officially offered, you can adjust your plan to manage usage.

    When you cancel, your service terminates immediately, stopping subscription renewal and billing. Keep in mind, unused pages might be lost based on the refund policy and contract terms.

    Manage everything easily through your online account for seamless account management.

    How Does Instant Ink Handle Printer Compatibility?

    Picture setting up your printer, only to face unexpected errors. Instant Ink handles compatibility by requiring you to check your printer model against HP’s approved list first.

    It often needs firmware updates and driver software installs to sync ink sensors and guarantee smooth wireless printing. If your device setup isn’t spot-on, you might hit connectivity issues or locked ink cartridges.

    Are There Any Limits on the Types of Documents I Can Print?

    You can print most file formats with Instant Ink, including images, PDFs, and text documents, without worrying about document security. However, print quality and color accuracy might vary based on your printer model, especially with large file sizes or high-res image printing.

    It supports various paper types and duplex printing, but font support depends on your device. Print speed generally stays consistent, though extremely complex files could slow it down a bit.

    What Happens if I Print More Pages Than My Plan Allows?

    Think of your print quota like Icarus’ wings; exceeding it risks a fall. If you print more pages than your plan allows, you’ll face overage charges for extra pages, usually billed per 20 pages.

    Your printer tracks ink usage and printing limits, so it may lock functions until you pay or upgrade subscription tiers. Monitor page tracking carefully to avoid surprises in billing cycles and guarantee smooth ink replacement without interruptions.

    Does Instant Ink Offer Customer Support for Technical Issues?

    Yes, Instant Ink offers customer support for technical issues through multiple support channels like phone, chat, and an online help desk. You’ll get assistance with printer troubleshooting, problem diagnosis, and software updates to guarantee smooth service.

    While support coverage aims for quick issue resolution, some users report variable service responsiveness. To get the best help, contact customer service directly for technical assistance with your Instant Ink plan.

    Conclusion

    With HP Instant Ink, you’re not just saving money, you’re making printing hassle-free and eco-friendly. Did you know that the program can reduce your ink waste by up to 70%? That means fewer cartridges in landfills and more cash in your pocket.

    By choosing Instant Ink, you’re simplifying your life, cutting costs, and helping the planet all at once. It’s a smart choice you won’t regret.

  • What Are the Deadly Risks of Ink Poisoning?

    What Are the Deadly Risks of Ink Poisoning?

    If you ingest large amounts of ink, especially industrial or unregulated types, you risk serious poisoning. This can cause organ damage, seizures, and breathing trouble.

    Contaminated tattoo inks may lead to infections or severe allergic reactions.

    While ink on your skin usually only causes temporary staining, consuming significant quantities or getting ink in wounds can be dangerous.

    Knowing how to recognize symptoms and when to seek emergency help is vital to protect your health and safety.

    What Is Ink Poisoning?

    ink poisoning from toxic exposure

    What happens when ink enters your body in harmful amounts? Ink poisoning occurs when toxic chemicals in certain inks get into your system, either through ingestion or skin exposure.

    While typical writing inks contain small amounts of dyes, solvents, and resins that have low toxicity when used properly, swallowing or absorbing larger quantities, especially from printer cartridges or industrial inks, can lead to serious risks.

    Typical inks are low in toxicity, but ingesting or absorbing large amounts, especially industrial types, poses serious risks.

    You might notice symptoms like nausea, vomiting, abdominal pain, or skin irritation. Skin staining is common but usually harmless unless accompanied by irritation.

    The severity of symptoms depends on how much ink you’re exposed to and the type of ink involved. Most everyday ink exposures are mild and rare, but you should remain cautious, as ink poisoning can escalate quickly if toxic substances enter your body in larger amounts.

    Recognizing these symptoms early helps you seek timely medical attention and avoid complications from toxicity.

    Ink Types That Pose the Highest Risks

    Because some inks contain more harmful chemicals than others, you should be especially cautious with certain types. Industrial inks top the list, as they often have high solvent content and toxic ingredients that increase poisoning risk and can cause chemical burns.

    Tattoo inks also carry dangers due to unregulated pigment chemicals that may trigger severe reactions if ingested or absorbed through the skin. Printer cartridge and stamp pad inks pose risks primarily because of the larger quantities you might accidentally swallow, containing hazardous solvents and dyes.

    Finally, art-grade inks with unapproved pigments or solvents can be unexpectedly toxic and cause serious harm if mishandled.

    Here are four ink types to watch out for:

    1. Industrial inks with high solvent content
    2. Tattoo inks containing unregulated pigment chemicals
    3. Printer and stamp pad inks with toxic ingredients
    4. Art-grade inks using hazardous dyes

    Being aware of these types helps you minimize ingestion risk and avoid dangerous exposure.

    How Much Ink Causes Serious Symptoms?

    large ink ingestion risks

    Although small ink amounts found in pens usually won’t harm you, ingesting over 30 mL (about one ounce) can lead to serious poisoning symptoms. Ink ingestion in these larger quantities increases the risk of toxic symptoms and serious effects.

    Most everyday inks contain minimal toxic substances, so small accidental exposures rarely cause harm. However, swallowing large quantities, like multiple ink cartridges or bottles, raises the chance of severe ink poisoning.

    The toxic symptoms typically correlate with the volume ingested; the more ink you swallow, the greater the risk. Industrial and art inks, which often have stronger chemical components, pose higher dangers when ingested in significant amounts.

    If you or someone else consumes a large quantity of ink, prompt medical attention is essential to manage potential serious effects. Understanding how much ink causes serious symptoms helps you assess risk and respond appropriately to incidents of ink ingestion.

    Common and Serious Symptoms of Ink Poisoning

    You might notice mild symptoms like nausea, vomiting, or stomach pain if you’ve been exposed to ink. But if you start having more serious signs—like trouble breathing, seizures, or a high fever—it’s really important to get medical help right away. Being able to tell the difference between common and serious symptoms can help keep you safe.

    Mild Ink Poisoning Signs

    When you come into contact with small amounts of common writing ink, you might notice temporary skin or tongue staining that doesn’t cause lasting harm. Mild ink poisoning signs often include minor symptoms that resolve quickly without treatment.

    You may experience mild irritation or stomach upset, but serious effects are rare. Here are some common mild ink poisoning symptoms to watch for:

    1. Temporary skin or tongue staining without lasting damage
    2. Mild stomach upset, like nausea or discomfort
    3. Minor irritation or dermatitis on the skin
    4. Occasional mild eye or mouth irritation

    These signs usually don’t require medical attention. But if symptoms persist or worsen, it’s a good idea to seek professional advice.

    Understanding these mild symptoms helps you respond appropriately without unnecessary alarm.

    Severe Symptoms To Watch

    If you experience severe symptoms after ink exposure, it’s crucial to recognize them quickly, as they may signal life-threatening conditions. Look out for difficulty breathing or signs of an allergic reaction, such as swelling of your face, throat, or tongue, which can block your airways.

    Seizures or loss of consciousness are critical warning signs that demand immediate medical help. Ingesting large amounts of industrial or unregulated ink can cause internal organ damage, affecting your liver or kidneys.

    Furthermore, symptoms like high fever, chills, severe abdominal pain, or vomiting blood indicate serious complications. Don’t ignore persistent or worsening signs. Seek emergency care right away to prevent fatal outcomes from severe ink poisoning.

    Why Ink on Skin Usually Isn’t Harmful

    inks are generally safe

    Although ink stains on your skin might look concerning, they rarely pose any real health risk. The ink you encounter from pens or markers is typically non-toxic and designed for incidental skin contact. When ink touches your skin, it mostly causes temporary staining rather than any poisoning or systemic health issues. Your body absorbs only tiny amounts, if any, making harmful effects from skin exposure highly unlikely.

    Here’s why ink on skin usually isn’t harmful:

    1. Ink formulations are generally safe and non-toxic for skin contact.
    2. The small quantity of ink on your skin doesn’t get absorbed into your bloodstream in dangerous amounts.
    3. Staining fades naturally over time without causing long-term skin damage.
    4. Serious health concerns are rare unless there’s an allergic reaction or exposure to hazardous chemicals.

    First Aid for Ink in Eyes and Open Wounds

    Since ink can cause irritation or infection when it gets into your eyes or open wounds, you should act quickly to minimize harm. If you get ink in your eye, immediately rinse with cool, clean water for at least 15 minutes. This helps flush out the ink and reduces irritation. Avoid using any chemicals or alcohol in the eye, as they can worsen the irritation or damage sensitive tissues.

    For ink in open wounds, gently clean the affected area with soap and water to prevent infection. Don’t scrub harshly, as this may cause more damage. If irritation persists, your vision blurs, or ink is deeply embedded in the wound, seek medical attention promptly.

    When in doubt or facing severe reactions, contact emergency services or a healthcare professional to guarantee proper treatment and avoid complications. Acting swiftly can make an essential difference in minimizing harm from ink exposure.

    Ink Poisoning Risks in Tattoos and Infections

    When you get a tattoo, the ink used can sometimes be contaminated with harmful bacteria or viruses. This can lead to infections, which is definitely something you want to avoid. Keep an eye out for symptoms like redness, swelling, fever, or pus. If you notice any of these signs, it’s important to get medical treatment right away.

    To lower your risk of serious problems from ink poisoning, make sure your tattoo artist uses sterile equipment and is properly licensed. Taking these precautions can really help keep you safe and healthy during the tattoo process.

    Tattoo Ink Contamination

    How can something as colorful as tattoo ink pose serious health risks? Tattoo ink contamination can introduce harmful bacteria, fungi, or viruses into your skin, leading to infections and allergic reactions. Since the FDA hasn’t approved pigments for cosmetic tattooing, unregulated inks increase these risks further. You could also face exposure to bloodborne diseases if the ink isn’t sterile.

    Here’s what you need to know:

    1. Contaminated ink can cause severe infections requiring medical treatment.
    2. Unlicensed tattoo inks often carry bacteria or viruses.
    3. Allergic reactions to unknown pigments are common.
    4. Poor hygiene during tattooing raises your risk of hepatitis B, hepatitis C, or HIV.

    Always verify your tattoo artist uses sterile, approved ink to protect your health.

    Infection Symptoms and Treatment

    If you notice redness, swelling, pain, or pus around your tattoo, these could be signs of an ink-related infection that needs immediate attention. Other symptoms may include fever and chills, which means the infection might be spreading.

    Such infections often happen because of contaminated ink or improper sterilization of tattoo equipment. Prompt treatment is really important. A healthcare provider will likely prescribe antibiotics to fight the infection.

    In severe cases, you might need hospitalization or even surgery to address complications. To reduce your risk, always choose licensed tattoo artists who follow strict sterilization protocols.

    Don’t ignore early symptoms; quick action ensures proper treatment and helps prevent deadly outcomes linked to ink poisoning.

    When to Get Emergency Help for Ink Exposure

    Because ink poisoning can escalate quickly, you should seek emergency medical help immediately after ingesting a large amount, especially over 30 mL, or if you experience severe symptoms like vomiting, difficulty breathing, or loss of consciousness. Prompt medical attention is vital to manage ink ingestion safely and prevent complications.

    Seek immediate emergency help after ingesting over 30 mL of ink or severe symptoms arise.

    You should call 911 or local emergency services if you notice:

    1. Persistent chest pain or severe allergic reactions
    2. Unresponsiveness or loss of consciousness
    3. Significant difficulty breathing or severe vomiting
    4. Uncertainty about the severity of symptoms after ink exposure

    If you’re unsure about the risks, contact poison control centers for guidance, especially when dealing with industrial or unregulated inks. Avoid inducing vomiting unless directed by a healthcare professional.

    For skin or eye contamination, rinse thoroughly with water and seek medical attention immediately. Always err on the side of caution. Early emergency help can be lifesaving in cases of ink poisoning.

    Treatment for Severe Ink Poisoning

    When severe ink poisoning occurs, medical professionals act quickly to provide treatments that reduce toxin absorption and stabilize your condition. They often administer activated charcoal if you’ve ingested ink recently, helping to limit the amount of toxin your body absorbs.

    In cases of substantial exposure, they may perform gastric lavage to remove ink from your stomach under strict medical supervision. Supportive care is essential, involving intravenous fluids and medications to manage symptoms and prevent complications.

    Since specific antidotes are rarely available, medical intervention focuses on relieving symptoms and protecting your organs from damage. Hospitalization allows close monitoring to detect any signs of organ damage early and adjust treatment accordingly.

    The goal is to minimize the toxin’s impact on your body while supporting critical functions until the ink is safely eliminated. Quick and effective treatment can notably improve your chances of recovery after severe ink poisoning.

    How to Prevent Ink Poisoning at Home and Work

    Although ink poisoning is uncommon, taking simple precautions at home and work can markedly reduce your risk. Preventing ingestion and minimizing ink exposure are key to avoiding serious health risks linked to toxic ink components. You can improve storage safety and handling by following these steps:

    Taking simple precautions at home and work significantly lowers the risk of ink poisoning and exposure.

    1. Store inks and ink products out of children’s reach and sight to prevent accidental ingestion.
    2. Always keep caps on pens, markers, and ink bottles when not in use to avoid spills and direct contact.
    3. Use inks only as intended without mixing or modifying them, reducing the chance of harmful reactions.
    4. Guarantee proper ventilation in areas where ink is used to limit inhalation of fumes.

    Additionally, dispose of unused or expired inks safely according to local guidelines to prevent environmental contamination and accidental poisoning. By staying vigilant and following these guidelines, you can effectively prevent ink poisoning risks at home and work.

    Frequently Asked Questions

    Can Ink Poisoning Affect Pets or Animals?

    Yes, ink poisoning can definitely affect pets or animals. When your pet accidentally ingests ink, it can lead to serious symptoms like vomiting, diarrhea, or lethargy.

    Toxic exposure from ink ingestion threatens animal safety, especially if the ink contains harmful solvents or dyes. You should act quickly and seek veterinary help to protect your pet from severe health risks linked to ink ingestion.

    Are Children More Vulnerable to Ink Poisoning?

    Imagine a small boat caught in a storm. That’s how a child’s body reacts to ink poisoning. Yes, children are more vulnerable due to accidental exposure and ingestion.

    Their tiny systems can’t handle toxins well and show symptoms quickly. You should take preventive measures like keeping pens away and knowing emergency response steps.

    Acting fast protects their fragile “boats” before the storm gets worse.

    Does Ink Poisoning Cause Long-Term Health Problems?

    You generally won’t face long-term effects from typical ink exposure since most inks have low toxicity. Chronic symptoms and delayed complications are rare unless you deal with industrial inks containing harmful chemicals regularly.

    In everyday use, health consequences and ongoing risks are minimal. However, if you’re repeatedly exposed to certain solvents or pigments, it’s wise to stay cautious and monitor for any unusual symptoms over time.

    Can Ink Poisoning Be Detected Through Blood Tests?

    Think of your bloodstream as a hidden river where toxic shadows reveal themselves. Yes, ink poisoning can be detected through blood tests, but only if the toxins have left clear trails.

    Blood analysis and medical testing use sophisticated diagnostic methods to spot poisoning indicators like heavy metals or solvents. However, minor ink exposure often leaves no trace.

    Are Natural or Organic Inks Safer Than Synthetic Ones?

    Natural or organic inks can be safer than synthetic ones because their chemical composition usually involves fewer harmful solvents and heavy metals, lowering toxicity levels. However, you should consider manufacturing processes and labeling standards carefully, as “natural” doesn’t always mean non-toxic.

    Also, natural inks often have a smaller environmental impact, but some may still cause irritation. So, always check ingredients and safety info before assuming they’re safer.

    Conclusion

    Ink poisoning can sneak up on you like a shadow in the night, silent but dangerous. While small ink exposure usually won’t harm you, certain types and amounts can cause serious symptoms or infections, especially with tattoos.

    Knowing when to seek emergency help and how to treat severe cases is essential. By staying informed and cautious at home or work, you can prevent ink poisoning and keep yourself safe from its hidden risks.

  • How to Determine if Ink Is an Element Compound or Mixture

    How to Determine if Ink Is an Element Compound or Mixture

    You can determine if ink is an element, compound, or mixture by separating its components using chromatography.

    Since ink contains pigments, solvents, additives, and resins combined physically, not chemically bonded, you’ll see multiple spots or bands on a chromatogram, proving it’s a mixture.

    Each component keeps its own properties and can be physically separated.

    If you discover single, uniform spots, it might be a pure compound.

    Explore these techniques to understand ink’s makeup better.

    What Ink Is Made Of And Why It Matters For Analysis

    ink composition and analysis

    Although ink often looks like a single substance, it’s actually a complex mixture of pigments, solvents, additives, and resins. Understanding the science behind ink’s composition is vital for accurate analysis, especially when you need to distinguish it from elements or compounds. Each component serves a specific purpose. Pigments provide color, solvents help with flow, additives improve performance, and resins bind everything together.

    When you analyze ink, techniques like chromatography can separate these components, revealing the unique mixture rather than a chemically bonded compound.

    Knowing what ink contains also matters for legal and forensic contexts, where privacy policy compliance in handling sensitive data is essential. Recognizing that ink is a mixture helps you appreciate its variability and complexity, which impacts how you approach testing and identification.

    Why Ink Is Usually A Mixture, Not An Element Or Compound

    You’ll notice that ink is made up of several substances, like pigments and solvents, all mixed together. These components aren’t chemically bonded, so they keep their own properties. Because of this kind of complex combination, ink is usually a mixture rather than just a single element or compound.

    Complex Composition Variety

    Because ink contains pigments, solvents, additives, and resins, it’s rarely a pure element or compound. When you analyze ink composition through chemical analysis, you’ll see it’s a complex mix. Mixture identification becomes clear because ink’s ingredients vary and can be separated physically. Unlike elements or compounds, ink shows diverse physical properties due to multiple substances combined.

    Here’s a simple breakdown:

    Component Role Example
    Pigments Color source Carbon black
    Solvents Dissolve pigments Water, alcohol
    Additives Enhance features Drying agents
    Resins Bind components Acrylic resin
    Variability Customizable mix Different formulas

    This variety confirms ink’s identity as a mixture, not a single element or compound.

    Multiple Substances Combined

    Ink combines multiple substances like pigments, solvents, additives, and resins, all physically mixed rather than chemically bonded. When you analyze ink composition, you’ll find it’s a mixture, not an element or compound, because its components maintain their individual properties.

    You can separate these substances through physical separation techniques like chromatography, confirming that ink is a mixture. Remember these key points about ink’s nature:

    • Contains multiple substances, not a single element
    • Components retain distinct identities
    • No chemical bonds link the substances
    • Physical separation methods effectively isolate components
    • Variability in composition supports mixture classification

    Understanding this helps you realize that ink’s complexity comes from combining several substances, making mixture analysis the best approach to study it.

    How Chromatography Reveals Ink’s True Composition

    analyzing ink composition effectively

    You’ll use chromatography to separate the different components in your ink based on how they interact with the stationary and mobile phases. It’s pretty fascinating because each component behaves differently, which helps in the separation process.

    By analyzing the spots on the chromatogram, you can figure out whether your ink is a mixture or just a pure substance. It’s like uncovering the hidden ingredients in your ink.

    Understanding the Rf values will also come in handy. These values help you identify each pigment or compound that’s present, making it easier to know exactly what’s in your ink.

    Chromatography Process Explained

    When you run a chromatography test, you separate the ink into its individual components based on how each substance moves through the paper or medium. This process relies heavily on ink dye properties and solvent selection criteria to guarantee proper separation. Using paper chromatography techniques, different pigments travel unique distances, forming distinct spots on the paper.

    Key steps include choosing a solvent that dissolves the ink effectively without damaging the paper. Then, apply a small ink sample near the paper’s base. Next, place the paper in the solvent, allowing it to move upward by capillary action.

    You observe how far each pigment travels relative to the solvent front. Finally, calculate Rf values to compare ink components.

    This method reveals whether ink is a mixture or a pure substance by showing multiple or single separated spots.

    Interpreting Chromatogram Results

    After running a chromatography test, interpreting the chromatogram results helps you understand the ink’s true makeup. If you see multiple colored spots or bands, it means the ink is a mixture of substances rather than a pure element or compound.

    A single, uniform spot suggests greater ink stability with less risk of color fading over time. Pay attention to the Rf values, which show the distance each pigment travels. Differences in these values reveal how the solvent separates components.

    If pigments have similar Rf values across samples, their compositions are alike. But if there’s variation, it signals complex mixtures. The number and diversity of pigments on the chromatogram directly reflect the ink’s complexity.

    This helps you figure out if the ink is an element, compound, or mixture based on how these factors affect ink stability and color fading.

    Common Ink Components You’ll Find In Chromatography

    Although ink may look uniform to the naked eye, chromatography reveals it as a complex blend of pigments, dyes, solvents, and additives. When you analyze ink color through chromatography, you’ll notice how solvent effects influence the separation of these components.

    The solvents dissolve the ink’s ingredients, allowing each pigment and dye to travel different distances on the chromatography paper. This separation helps you assess pigment stability and the overall composition of the ink.

    Common ink components you’ll find in chromatography include:

    • Organic and inorganic pigments with distinct Rf values
    • Various dyes contributing to the visible ink color
    • Solvents like water, alcohol, or acetone that enable separation
    • Additives such as surfactants and stabilizers (often invisible in chromatography)
    • Residual binders affecting pigment stability and ink performance

    Setting Up Paper Chromatography For Ink

    prepare draw apply separate

    First, cut your chromatography paper into a pointed strip. Then, draw a light horizontal line near the bottom—this will be the starting point for your ink samples. Next, place small drops of each ink on that line and let them dry completely.

    Once your ink spots are dry, set up your chromatography chamber with the solvent. Hang the strip so the solvent can travel up the paper, but make sure it doesn’t touch the ink spots. This way, the ink will separate properly as the solvent moves up.

    Preparing Chromatography Strips

    When you prepare chromatography strips, start by cutting the chromatography paper into pointed strips that will serve as the solid medium for separation. The quality of the paper impacts ink stability and separation accuracy.

    Next, draw a faint horizontal line about 2 cm from the bottom to mark where you’ll place the ink samples. Carefully dot different ink samples on this line and let them dry fully to prevent smudging. Remember, your solvent choice affects how well components separate later, so this step is crucial even now.

    Use high-quality chromatography paper for consistent results. Ensure ink dots are small and evenly spaced. Allow ink to dry completely to maintain ink stability. Choose solvent compatible with the ink and paper. Keep solvent level below ink spots to avoid dissolving them prematurely.

    Conducting The Chromatography Run

    Before you start the chromatography run, make sure your solvent level sits below the ink spots to prevent them from dissolving prematurely. Cut a strip of chromatography paper with a pointed end and draw a faint line about 2 cm from the bottom to mark the origin.

    Apply small drops of different ink samples on this line and let them dry completely. Next, fill your chromatography chamber with a small amount of solvent like water, alcohol, or acetone, carefully choosing one based on solvent selection principles.

    Hang the strip so the ink stays above the solvent, allowing capillary action to separate the ink components. Keep in mind chromatography limitations and ink aging effects. Older inks may not separate clearly, affecting your results.

    This setup helps you analyze whether the ink is an element, compound, or mixture.

    Interpreting Ink Chromatograms And Rf Values

    Although interpreting ink chromatograms might seem complex at first, you can quickly identify whether an ink sample is a mixture or a pure substance by examining the number of spots and their Rf values. Each pigment’s unique Rf value reflects pigment stability and solvent interactions, helping you understand color mixing in the ink.

    When you analyze a chromatogram, multiple spots mean the ink is a mixture of pigments. A single spot with a consistent Rf value usually indicates a pure compound.

    Comparing Rf values with known standards reveals similarities or differences in composition. Similar Rf values across samples suggest shared pigments or compounds.

    Variations in pigment stability and solvent interactions affect the Rf values you observe.

    What Happens When Ink Separates Into Colors

    Examining how ink separates into different colors during chromatography reveals important details about its composition. When you watch the ink color spread and divide into distinct bands, you’re seeing pigment diversity and dye components moving at different rates through the solvent.

    Each substance has its own Rf value, causing this separation. This pattern shows that the ink isn’t a single element or pure compound; instead, it’s a mixture of multiple compounds. If ink were pure, you’d see only one uniform spot without separation.

    By observing these separated colors, you can identify the specific pigments and dyes present, confirming the ink’s complexity. Understanding what happens when ink separates into colors helps you recognize the mixture’s nature and appreciate its varied chemical makeup.

    This separation is a clear sign that ink contains several substances combined, rather than just one, making chromatography a powerful tool in analyzing ink color and composition.

    Identifying Pure Compounds In Ink Samples

    When you analyze ink samples through chromatography, identifying pure compounds becomes straightforward by spotting single, uniform marks on the chromatogram. These marks reflect consistent Rf values tied to specific chemical bonding and solvent interactions. Pure compounds in ink produce one distinct color, indicating pigment stability throughout the process.

    To identify pure compounds, you should:

    • Look for single, well-defined spots without streaks or multiple colors
    • Confirm consistent Rf values matching known standards
    • Note the uniformity of pigment stability in the solvent system
    • Recognize that elements rarely appear as pure substances in ink
    • Understand that chemical bonding influences how compounds separate during chromatography

    Troubleshooting Ink Separation Issues In Chromatography

    If your chromatogram shows overlapping pigment bands or inconsistent Rf values across trials, you’re likely dealing with a mixture rather than a pure element or compound. To troubleshoot ink separation issues, first check your solvent quality and paper type. Poor choices here can cause smudging or incomplete separation.

    Also, verify you apply the ink sample correctly. Too much or too little can affect results. Remember, historical ink analysis often reveals complex mixtures, debunking common ink composition myths that suggest inks are simple substances.

    In legal ink testing, accuracy is vital, so consistent technique and proper materials are essential to distinguish mixtures from pure compounds. If pigments fail to separate and form a single spot, consider whether your solvent is appropriate or if the ink might indeed be a pure compound.

    Using Chromatography To Pick The Best Ink

    Although selecting the best ink might seem subjective, chromatography gives you a clear, scientific way to compare inks by breaking them down into their individual pigments. By analyzing the chromatogram, you can assess ink dye stability and pigment solubility. This helps you decide which ink suits your needs best.

    Pay close attention to solvent selection, as it affects how pigments separate.

    When using chromatography to pick the best ink, focus on:

    • Identifying multiple pigment bands to confirm a mixture’s complexity
    • Checking consistent Rf values to spot pure compounds or elements
    • Evaluating pigment solubility to ensure vibrant and stable colors
    • Observing ink dye stability over repeated tests for durability
    • Selecting solvents that optimize pigment separation without degrading the ink

    Frequently Asked Questions

    Can Chromatography Detect Counterfeit Ink in Documents?

    Yes, chromatography can detect counterfeit ink in documents by analyzing ink composition through chemical analysis. When you run chromatography, you separate the pigments and dyes, revealing unique patterns.

    Genuine inks usually produce consistent results, but counterfeit inks show irregular spots or unexpected profiles. By comparing these chromatograms, you enhance document security, spotting forgeries or adulterations effectively.

    This method helps you verify that the ink’s chemical makeup matches authentic samples.

    How Long Does a Chromatography Test for Ink Usually Take?

    A chromatography test for ink usually takes about 30 to 60 minutes. You’ll spend around 10-15 minutes preparing and drying your sample, then 10-20 minutes letting the solvent front travel up the paper.

    After that, analyzing the chromatogram and calculating Rf values takes another 5-10 minutes. Using chromatography techniques helps you achieve analytical accuracy while exploring ink composition, making your results reliable and detailed.

    What Safety Precautions Are Needed When Performing Ink Chromatography?

    Think of your workspace as a fragile garden. Protect it carefully. When doing ink chromatography, always wear safety gear like gloves and goggles to shield your skin and eyes.

    Practice cautious chemical handling to avoid spills or contact. Make sure your workspace ventilation is strong, ideally using a fume hood or open windows. Keep flammable solvents away from heat, and wash your hands thoroughly afterward to stay safe throughout the process.

    Can Ink From Pens and Markers Be Analyzed Using the Same Method?

    Yes, you can analyze pen ink and marker ink using the same method, like paper chromatography. Both types of ink composition include pigments and solvents that separate well in this process.

    While marker ink often has larger, more vibrant pigments, and pen ink contains finer pigments, chromatography helps you compare their Rf values easily. This way, you’ll see the differences and similarities in their ink composition effectively with one method.

    How Does Ink Aging Affect Chromatography Results?

    Ink aging affects chromatography results by altering ink chemical stability and causing pigment degradation. You’ll notice that as ink ages, the pigment degradation process leads to new compounds forming or original pigments breaking down. This shifts or adds spots on your chromatogram.

    When you perform aging effect analysis, older ink samples often produce less distinct or more diffuse patterns. So, it’s essential to compare fresh and aged inks for accurate interpretation.

    Conclusion

    Now that you know ink is usually a mixture, not just an element or compound, you can see why chromatography is key to uncovering its secrets. By separating ink into its components, you get a clear picture of what’s inside.

    Remember, “don’t judge a book by its cover” applies here. Ink may look simple, but it’s a complex blend. With these tools, you’re ready to analyze and even choose the best ink confidently.