Windows Ink lets you use your digital pen or stylus to take notes, draw, and annotate directly on your Windows device. You can open the Windows Ink Workspace from the pen icon in the taskbar.
There, apps like Sticky Notes, Sketchpad, and Screen Sketch help boost your creativity and productivity.
You can also customize your pen’s settings for comfort and precision. Keep exploring, and you’ll discover useful tips, troubleshooting help, and advanced features to get the most from Windows Ink.
What Is Windows Ink and Why Use It

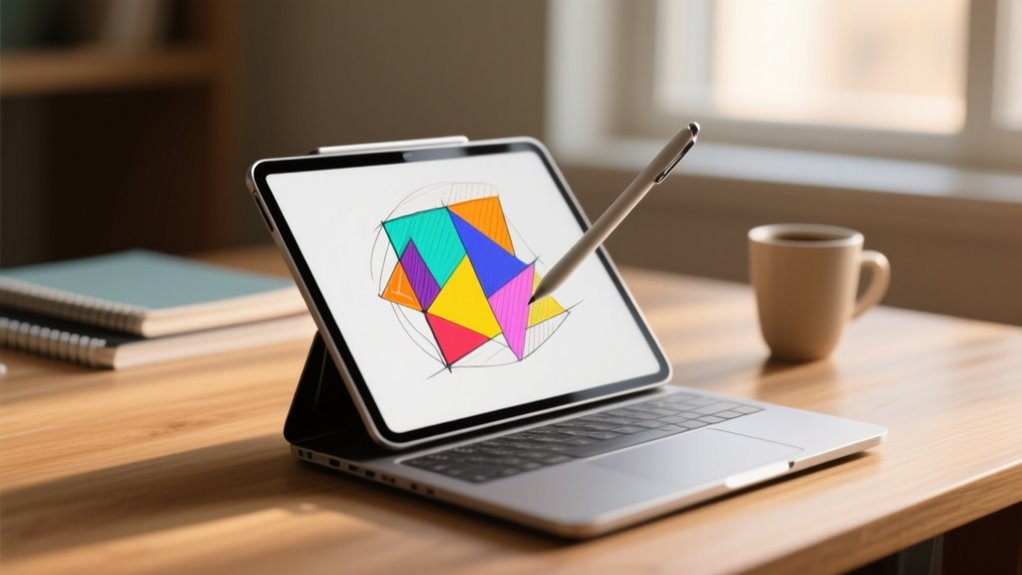
Although traditional penmanship has its charm, Windows Ink brings that natural writing and drawing experience to your digital Windows device. It makes it easier and faster to jot down notes, sketch ideas, or annotate screenshots. Windows Ink is a set of features designed specifically to enhance pen and stylus input, so you get a seamless, intuitive way to capture your thoughts or create art digitally.
When you use Windows Ink, you gain access to handy tools like Sticky Notes, Sketchpad, and Screen Sketch, all aimed at boosting your productivity and creativity. The Windows Ink Workspace icon on your taskbar lets you quickly open these tools and customize your pen settings. Whether you’re an artist, student, or professional, Windows Ink makes handwriting and drawing feel natural on your device. It turns simple pen input into a powerful digital experience.
Opening the Windows Ink Workspace in Windows 10 and 11
To get started with Windows Ink, you first need to open the Windows Ink Workspace. It’s designed to make pen input seamless on Windows 10 and 11. You can quickly launch the workspace by clicking the pen icon in the System tray or by using the shortcut button on a compatible stylus like the Surface Pen. If you want, customize this shortcut button through Pen settings under Settings > Devices > Pen & Windows Ink.
Here’s how to open and use Windows Ink Workspace:
- Click the pen icon in the notification area (System tray) to open the workspace sidebar.
- Use a pen or Surface Pen’s shortcut button to quickly launch Windows Ink.
- Ink makes it easy to access pen-enabled apps like Sticky Notes, Sketchpad, and Screen sketch.
- Use Sticky Notes to jot down ideas or reminders instantly.
- The workspace has been available since the Windows 10 Anniversary update, designed to enhance pen input efficiency.
Opening the workspace is your first step to getting the most out of pen input on Windows.
Exploring Windows Ink Apps: Sticky Notes, Sketchpad, and Screen Sketch

Curious about what you can do with Windows Ink? This feature includes core apps like Sticky Notes, Sketchpad, and Screen Sketch, all designed to boost your productivity and creativity with a pen-enabled device.
Sticky Notes lets you jot down quick reminders, and it smartly recognizes phone numbers, links, and even provides Bing insights for extra convenience. Sketchpad offers a simple digital canvas where you can draw using various pen styles and rulers, then save your artwork as images.
Screen Sketch allows you to capture your screen, annotate directly on the screenshot with drawing tools, and save or share your edits effortlessly. You’ll find all these apps neatly organized within the Windows Ink Workspace, making it easy to switch between them and use the right tool when inspiration strikes or tasks demand it.
Using these Windows Ink apps, you can enhance your note-taking, sketching, and screen annotation with just a few clicks.
Quickly Access Apps With the Windows Ink Pen Menu
You can quickly open pen-enabled apps like Sticky Notes and Sketchpad using the Windows Ink Pen Menu right from your system tray. Just enable the Pen Menu icon in your Taskbar settings, and you’ll get access to a customizable sidebar with your favorite shortcuts. This way, you can launch your go-to ink apps instantly without having to hunt through menus. It’s a simple trick that makes using your pen even more convenient!
Pen Menu Overview
Where can you quickly find your favorite pen-enabled apps on Windows? The Pen Menu in Windows Ink is your go-to spot for seamless pen accessibility. Located in the system tray, this menu lets you launch essential apps instantly. Just tap the Pen icon, and you’ll see a sidebar packed with your most-used tools.
Here’s what you can expect from the Pen Menu:
- Quick access to Sticky Notes, Sketchpad, and Screen Sketch
- Recent app shortcuts for easy multitasking
- Easy enabling or disabling via Taskbar settings
- Customizable shortcuts through Settings > Pen & Windows Ink
- Streamlined pen-based workflows for efficient note-taking and annotation
This menu keeps everything you need right at your fingertips, making pen use smoother than ever.
Customizing Pen Shortcuts
Although the Pen Menu already offers quick access to essential apps, customizing its shortcuts lets you tailor it to fit your workflow perfectly. With Pen customization, you can set up to four preferred apps or shortcuts for fast access.
To start, tap the pen icon in the system tray or use your stylus’s shortcut button to open the Pen Menu. Then, head to Settings > Devices > Pen & Windows Ink and select “Edit pen menu.” Here, you can add or remove app shortcuts like OneNote, Whiteboard, or the Snipping Tool to streamline your tasks.
This simple Pen customization boosts productivity by putting your most-used apps right at your fingertips, making your Windows Ink experience smoother and more efficient.
Accessing Ink Apps
When you need to quickly launch ink-enabled apps like Sticky Notes, Sketchpad, or Screen Sketch, the Windows Ink Workspace has you covered. You can open it by clicking the pen icon in the notification area or pressing a shortcut on compatible styluses.
The workspace appears as a sidebar on the right, offering easy access to your favorite pen tools and apps. For better Ink customization, you can edit the menu to add or remove shortcuts. This keeps your workflow smooth and efficient.
Here’s what you can do:
- Open Sticky Notes instantly
- Launch Sketchpad for quick drawing
- Use Screen Sketch for screenshots
- Customize which apps appear in the menu
- Access all pen tools in one streamlined interface
Customizing Your Pen Settings for Windows Ink
You can easily tailor your pen button actions to fit your workflow by assigning tap, double-tap, or long-press to specific tasks. And don’t forget to set your writing hand preference—it makes your experience feel more comfortable and natural. These simple adjustments really help you get the most out of Windows Ink.
Adjust Pen Button Actions
Since customizing your pen button actions can greatly speed up your workflow, Windows lets you assign specific functions to your stylus buttons through the Settings menu. You can easily adjust your pen button actions by going to Settings > Devices > Pen & Windows Ink.
Here’s what you can do to enhance your Pen Customization:
- Assign different functions to the top and side buttons (if your stylus supports it).
- Choose actions like opening apps, taking screenshots, or performing right-clicks.
- Select your preferred action from the drop-down menu next to each button setting.
- Streamline your workflow by setting quick access tools.
- Tailor the pen buttons to suit your everyday tasks.
These adjustments make your Windows Ink experience more efficient and personalized.
Set Writing Hand Preference
Although it might seem like a small detail, setting your writing hand preference in Windows Ink can considerably improve comfort and accuracy while using your pen. To customize this, head to Settings > Devices > Pen & Windows Ink, then select your preferred writing hand under “Writing hand.”
Choosing the correct writing hand helps Windows optimize pen input by adjusting stroke direction and palm rejection. This means the system better understands your natural writing style, whether you’re left- or right-handed.
How to Pair Your Digital Pen With Windows Ink Devices
Before you start using your digital pen with Windows Ink, you’ll need to pair it with your device via Bluetooth. The pairing process is straightforward and guarantees your pen communicates smoothly with your Windows PC or tablet.
Pair your digital pen via Bluetooth to ensure seamless communication with your Windows PC or tablet before using Windows Ink.
Here’s how to pair your digital pen:
- Enable Bluetooth on your Windows device by going to Settings > Bluetooth & devices.
- Put your pen into pairing mode, usually by holding a button or removing the battery cover.
- Click “Add device” in the Bluetooth settings to start searching.
- Select your pen from the list of available devices.
- Follow any on-screen prompts to complete the pairing process.
Once paired, open a Windows Ink app like Sticky Notes or Sketchpad to test your pen’s functionality. This quick setup gets you ready to enjoy Windows Ink’s full capabilities with your digital pen.
Managing Pen Batteries and Fixing Connection Issues
To keep your digital pen working smoothly, you’ll need to manage its batteries carefully and address any connection issues promptly. Battery management is essential. Most pens use rechargeable batteries or AAAA batteries, which you should replace as per the manufacturer’s instructions.
For example, with the Surface Pen, you pull the top end straight out to swap batteries, making sure to use the correct type. Regularly replacing or recharging the battery prevents connectivity problems and guarantees consistent performance.
If your pen isn’t connecting, first check that it’s in pairing mode, usually by holding a specific button for a few seconds. Then, re-pair it through Windows Bluetooth settings.
Also, verify the Bluetooth connection is active and free from interference. Low battery levels often cause connection drops, so maintaining proper battery management helps avoid frustrating disruptions.
Practical Tips for Drawing and Annotating With Windows Ink
You can start by exploring the drawing tools in Windows Ink, like Sketchpad’s pens and rulers, which help you create precise sketches. When you want to annotate, try using Screen Sketch—it’s great for marking up screenshots quickly and clearly. To get even better accuracy, customize your pen settings and turn on palm rejection. This makes your drawing sessions smoother and more controlled.
Drawing Tools Overview
Although it might seem simple, mastering Windows Ink’s drawing tools can transform how you create and annotate on your device. With Sketchpad and Screen Sketch, you can draw freely or annotate screenshots instantly using your stylus or finger.
The tools offer customizable pen settings to fit your style, including stroke thickness and color blending for smooth gradations. Pressure sensitivity and tilt recognition make your sketches feel natural, just like using real pen and paper.
Here’s what you’ll find:
- Sketchpad features rulers and precision pens for detailed drawings
- Screen Sketch lets you capture and mark up screenshots quickly
- Adjustable pen colors with seamless color blending effects
- Pressure and tilt sensitivity for realistic strokes
- Customizable button functions for faster workflow
These tools make digital drawing intuitive and efficient.
Annotation Techniques Explained
When you want to annotate quickly and with precision, Windows Ink offers versatile tools that adapt to your workflow. Using Screen Sketch, you can capture screenshots and immediately add notes or drawings with your pen or stylus.
The Sketchpad provides digital rulers and multiple pen styles, allowing you to create clean lines and shapes effortlessly. You can customize pen button functions to switch between tools quickly, streamlining your process.
Experiment with color blending by layering strokes in different hues and opacities, adding depth and clarity to your annotations. Saving your work is simple; you can embed stroke data within images for future edits or sharing. These techniques help you annotate efficiently while maintaining control and creativity in your projects.
Enhancing Sketch Precision
While mastering digital drawing takes practice, Windows Ink offers tools that help you enhance sketch precision effortlessly. You’ll find it easier to create detailed drawings and annotations with these practical tips:
Use the digital ruler and shape tools in Sketchpad for clean lines and perfect angles. Adjust pen sensitivity to control line thickness and opacity, improving the detail and flow.
Enable snap-to-grid or snap-to-shape features to align elements precisely. Practice steady hand movements and rely on the undo button to refine your work without stress.
Take advantage of color blending and styluses with tilt recognition on high-resolution screens to add depth and realism.
These features combine to make your sketches sharper and more professional.
Where to Find Advanced Windows Ink Features and Support
If you want to release the full potential of Windows Ink, you’ll find advanced features in the Windows Ink Workspace. It’s accessible from the system tray or via customizable shortcut buttons on compatible styluses.
Inside, apps like Sticky Notes, Sketchpad, and Screen Sketch offer enhanced inking tools. For deeper feature customization, head to Settings > Devices > Pen & Windows Ink. There, you can tailor your pen’s behavior to suit your workflow.
Developers can build or improve pen-enabled apps using Windows Ink APIs like InkCanvas and InkToolbar. Plus, Microsoft’s support resources, tutorials, and community forums provide valuable help and insights.
| Location | Feature | Purpose |
|---|---|---|
| Windows Ink Workspace | Sticky Notes | Quick note-taking |
| Windows Ink Workspace | Sketchpad | Freehand drawing |
| Windows Ink Workspace | Screen Sketch | Annotate screenshots |
| Settings > Pen & Ink | Feature customization | Adjust pen settings |
| Microsoft Support | Tutorials & Forums | Troubleshooting and learning |
How Windows Ink Boosts Productivity for Note-Taking and Creativity
Beyond exploring advanced features and settings, you’ll find that Windows Ink substantially enhances your productivity, especially for note-taking and creative tasks. It integrates smoothly into your daily routine, improving your creative workflow by letting you capture ideas and sketches quickly and naturally.
Here’s how Windows Ink boosts your productivity:
- Quick access to Sticky Notes and Sketchpad for jotting down ideas or drafting visuals instantly.
- Customizable pen settings allow you to tailor your tools for precise annotations and drawings.
- Palm rejection and pressure sensitivity make writing and sketching feel as natural as pen on paper.
- Screen capture with inking tools lets you annotate directly on screenshots for faster feedback.
- Visual organization of notes and sketches helps you manage information creatively and efficiently.
Frequently Asked Questions
Can Windows Ink Be Used With Non-Microsoft Digital Pens?
Yes, you can use Windows Ink with non-Microsoft digital pens, but pen compatibility varies. Your pen needs to support Wacom, AES, or Microsoft Pen Protocol standards and have proper Bluetooth pairing if wireless.
You might have to install specific drivers or software for full functionality. Keep in mind, accuracy and responsiveness depend on your pen’s hardware quality.
You can customize settings, but ultimate support hinges on your pen’s compatibility and drivers.
Is Windows Ink Compatible With Third-Party Drawing Software?
Think of Windows Ink as a key. You can access great features, but only if the door’s made for it. When it comes to third-party compatibility, not all drawing software fully supports Windows Ink’s capabilities like pressure sensitivity or tilt.
You’ll want to check if your favorite app explicitly integrates Windows Ink APIs to get the best experience. Otherwise, you might need to tweak settings or accept limited pen functionality.
How Does Windows Ink Handle Handwriting Recognition Accuracy?
Windows Ink boosts recognition precision by analyzing your pen strokes with advanced algorithms. You’ll get better results if you write clearly and consistently since the system adapts to your style over time.
Factors like pen pressure and stroke speed also affect accuracy, so writing smoothly helps. Plus, you can customize language settings to enhance precision.
Still, you might need to correct some text, especially in complex or critical cases.
Can I Export My Windows Ink Drawings to Other File Formats?
You know what they say: a picture is worth a thousand words. Yes, you can export your Windows Ink drawings to other file formats. Just use the app’s File Export options to save your sketches as PNG, JPEG, or even embed ink data in GIFs.
This way, you’re free to share or insert your drawings into documents easily, ensuring compatibility across different platforms and uses.
Does Windows Ink Support Multi-User Pen Input on One Device?
No, Windows Ink doesn’t support multi-user pen input on one device. It’s designed for single-user interaction, so you can’t have multiple people drawing simultaneously with different pens.
If you need multi-user support, you’ll have to look into specialized hardware or custom software solutions that allow concurrent pen input. Windows Ink focuses on individual use, so it won’t handle multi-user scenarios natively on the same device.
Conclusion
Now that you know what Windows Ink offers, why wouldn’t you take advantage of its powerful tools? Whether you’re jotting down quick notes, sketching ideas, or annotating screenshots, Windows Ink makes your workflow smoother and more creative.
With easy access, customizable settings, and handy apps, it’s designed to boost your productivity. So, are you ready to transform how you interact with your device and bring your ideas to life effortlessly?
Leave a Reply