To change ink on your Epson printer, first identify the correct cartridge for your model and power on the printer.
Open the cover and wait for the print head to stop moving.
Remove old cartridges carefully, then shake and unpack new ones without touching the chip.
Insert firmly until they click, close the cover, and start the ink charging.
Clean the print head afterward to maintain quality, and troubleshoot any issues to keep your printer running smoothly.
Keep going to learn helpful tips for longer cartridge life.
Identify the Right Ink Cartridge for Your Epson Printer
How do you find the right ink cartridge for your Epson printer? Start by checking your printer’s model number. This helps you determine the compatible ink cartridge series, such as Epson 220XL or 252.
Next, look closely at the labels and markings on your current cartridges to identify the specific model number and ink type. This guarantees you pick the correct cartridge that fits and works properly.
You can also consult your printer manual or official Epson resources online to verify compatible ink options for your model. Keep in mind, Epson printers may vary in cartridge design. Some use refillable ink tanks instead of traditional cartridges, so identifying your printer’s system is vital.
Always opt for original Epson ink cartridges or verified compatible ink to avoid performance issues. Steering clear of unverified third-party cartridges helps maintain print quality and printer longevity.
Power On and Prepare Your Epson Printer for Replacement
When should you power on your Epson printer to prepare it for ink replacement? You should power on your Epson printer at the very beginning of the process. This guarantees the printer is ready, and the print head will automatically move to the replacement position for easy access. Follow these steps to get started:
- Press the power button and wait until the power light stays steady, indicating the printer is fully powered on.
- Open the printer cover or lift the scanner unit carefully to reveal the ink cartridges.
- Watch for the print head’s movement as it shifts to the cartridge replacement position; this confirms the printer is ready.
- Avoid turning off or unplugging the printer during this phase to prevent misalignment or recognition errors.
Access Epson Print Head and Cartridge Holder
To access the Epson print head and cartridge holder, start by lifting the scanner unit carefully to expose the internal components. Make sure your printer is powered on so the print head can automatically move to the cartridge replacement position.
This is crucial because you shouldn’t try to move or touch the print head or the flat white cable inside, as it can cause damage. Once the print head stops moving and stays still, open the cover behind the scanner bed to reveal the cartridge holder and print head assembly.
This lets you safely access the print head for cartridge replacement without risking harm to the internal parts. By following these steps, you’ll be ready to proceed with the cartridge replacement confidently and efficiently, keeping your Epson printer in good working order.
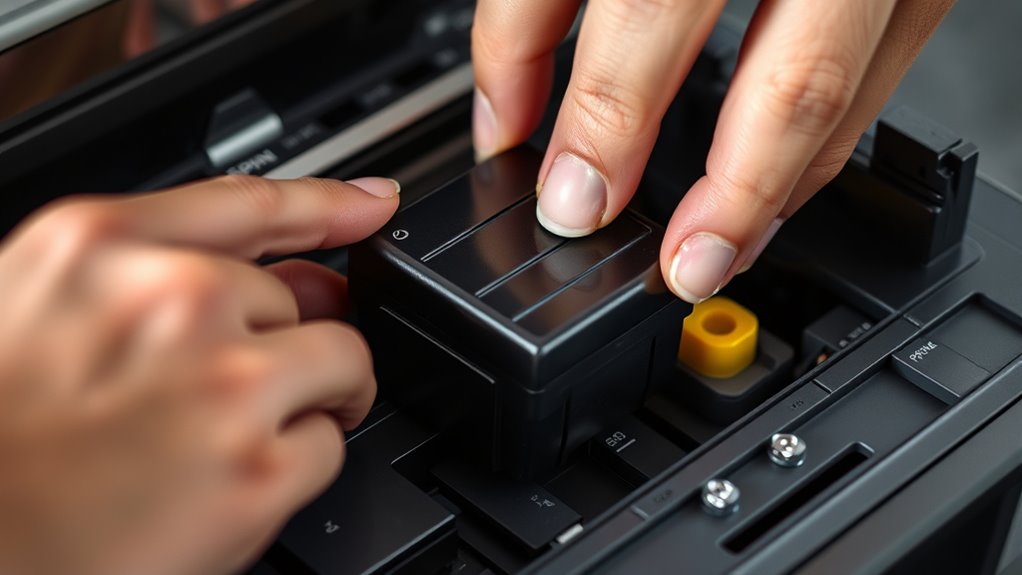
Remove Old Ink Cartridges Safely
Once the print head is in position, you’ll want to carefully squeeze the tab on the old ink cartridge and lift it straight up to remove it without causing any spills. When you remove the ink cartridges from your Epson printer, handle them gently to avoid ink leaks. Avoid touching the gold contact points or nozzles, as this can damage the cartridge or cause recognition problems later.
For safety and proper disposal, follow these steps:
- Wear gloves if you want to keep ink off your skin.
- Squeeze the tab and lift the cartridge straight up. Don’t wiggle it side to side.
- Place the used cartridges on a paper towel or in a container to catch any drips.
- Dispose of the old cartridges responsibly, following your local recycling guidelines.
Unpack and Prepare New Epson Ink Cartridges
Before you open the package, give the new Epson ink cartridge a gentle shake about four to five times. This helps mix the ink evenly inside.
When you take the cartridge out, handle it with care and try not to shake it anymore to avoid any spills. Also, make sure you don’t touch the green chip or contacts—this keeps the cartridge working just right.
Shake Cartridges Gently
Although it might seem simple, shaking your new Epson ink cartridges gently 4-5 times before opening guarantees the ink inside is evenly distributed. This step assures consistent ink flow and prevents air bubbles that might affect print quality. When you shake the cartridge, use a gentle, controlled motion to avoid damaging it.
Follow these steps to shake your new cartridge properly:
- Hold the cartridge upright.
- Shake gently 4-5 times to evenly distribute the ink.
- Avoid vigorous shaking to prevent leaks.
- Handle carefully to protect the contacts and avoid spillage.
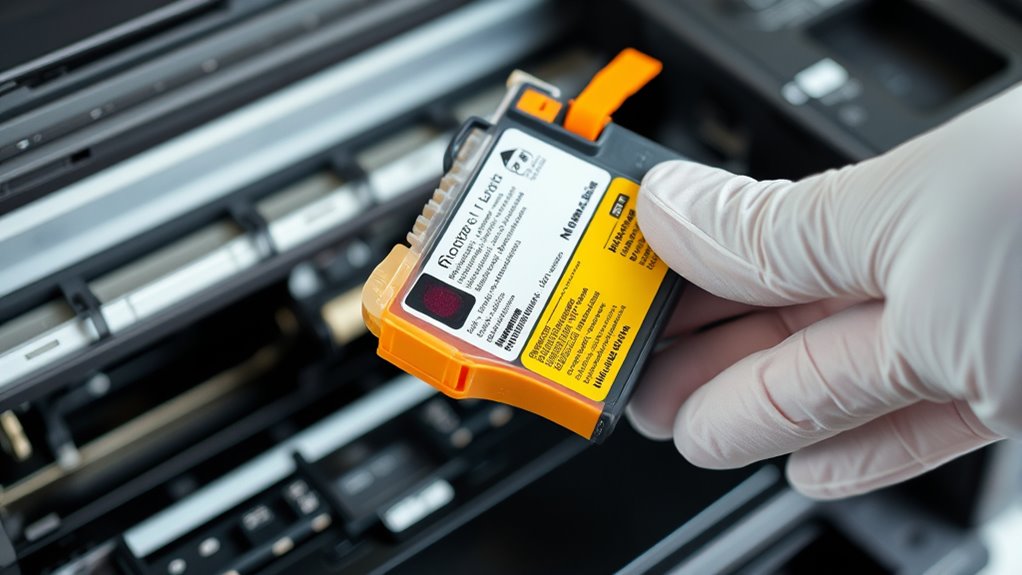
Remove Packaging Carefully
Three simple steps will help you remove the packaging of your new Epson ink cartridges safely. First, keep the cartridges in their original packaging until you’re ready to install, as this helps protect the ink and maintain cartridge reliability.
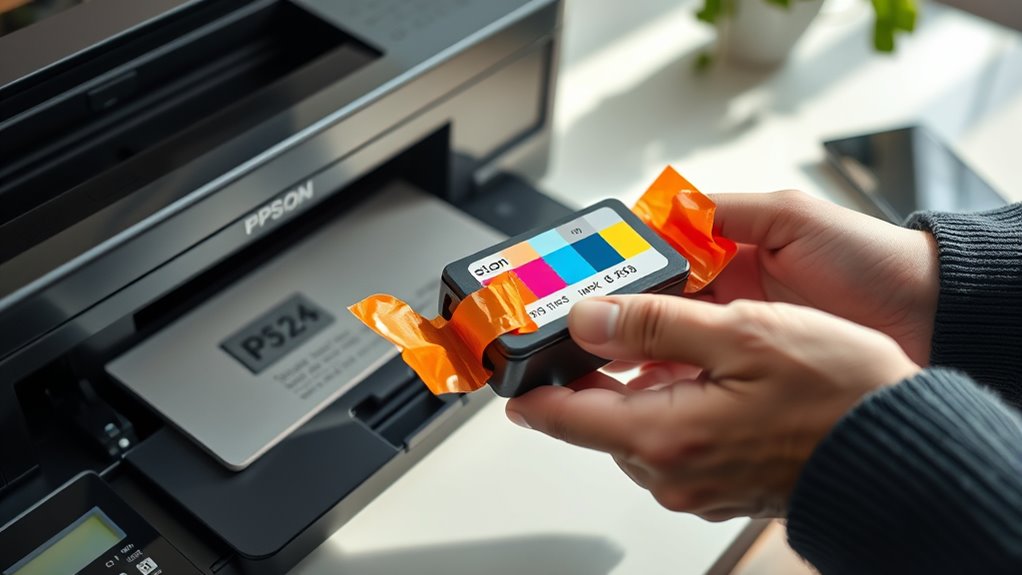
Next, carefully open the packaging without shaking or dropping the cartridge to prevent ink spills or damage. Finally, gently remove the yellow tape covering the cartridge’s ink outlet. Make sure to remove this tape completely, but avoid touching the nozzles or contacts to prevent contamination or print quality issues.
Avoid Touching Chips
Why should you avoid touching the green chip on your new Epson ink cartridge? Touching the chip can transfer oils or dirt, which may cause the printer to misread the cartridge. This can lead to installation errors or poor print quality.
To ensure a smooth cartridge installation, handle the cartridge carefully by its edges, avoiding the chip area altogether. Follow these tips to prevent damage:
- Hold the cartridge by the sides, never touch the green chip.
- Remove the yellow tape covering the contacts carefully without touching the chip.
- Keep the chip area clean and free from fingerprints or debris.
- Handle cartridges gently to maintain proper contact and reliable recognition.
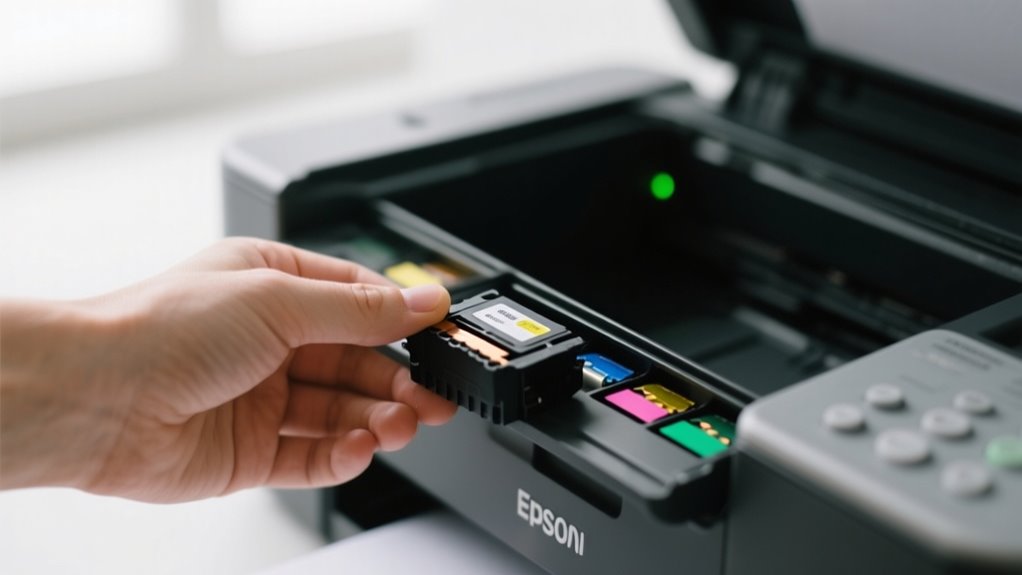
Install New Ink Cartridges Step-by-Step
Before installing the new ink cartridges, gently shake each one four to five times to help the ink flow properly. Next, carefully remove the cartridge from its packaging. Be sure to remove the yellow tape on the side without touching the green chip or nozzles to avoid damage.
Now, take the ink cartridge and insert it into the designated slot in your Epson printer. Push it firmly until it clicks into place, and make sure the cartridge is securely seated. Repeat this process for each cartridge you need to replace.
After installing all cartridges, close the scanner unit gently. This step guarantees everything is set for the printer to recognize the new ink cartridges. Remember, handling the cartridges carefully during installation prevents leaks or errors, keeping your printer functioning smoothly.
Following these steps will help you install the ink cartridges correctly and get your Epson printer ready for use.
Start the Ink Charging Process
Once you’ve installed the new cartridges, press the ink symbol button to start the ink charging process. This action will initiate the ink charging sequence specific to your printer model.
The printer automatically begins charging, which usually takes between 1.5 and 3 minutes. During this time, the power light may flash, and you’ll see the print head move to the correct position. Don’t turn off or unplug the printer while charging, as this can cause ink waste or errors.
Here’s what to expect:
- Press the ink symbol to initiate ink charging.
- Watch for the power light flashing during the process.
- Observe the print head moving to align ink flow.
- Wait until the power light stops flashing and stays steady.
Once the power light is steady, the ink levels are set, and your Epson printer is ready for use.
Clean the Print Head After Replacement
Although you’ve just replaced the ink cartridges, cleaning the print head is essential to prevent clogs and maintain sharp print quality. After you replace ink in your Epson printer, running a head cleaning cycle is the quickest way to perform print head cleaning.
Access this option through the maintenance menu or control panel. The cycle usually takes 2 to 5 minutes, and you might need to repeat it if print quality doesn’t improve. Regular print head cleaning after ink replacement guarantees proper ink flow and prolongs the print head’s lifespan.
If the automatic cleaning doesn’t fully resolve issues, you can clean the print head manually by gently wiping it with a lint-free cloth dampened with distilled water or isopropyl alcohol. Whether you use Epson ink cartridges or refilled ones, incorporating print head cleaning into your routine right after ink replacement helps keep your prints crisp and your printer running smoothly.
Troubleshoot Common Epson Ink Cartridge Issues
If your Epson printer isn’t recognizing the ink cartridge, first check to make sure it’s properly seated. Sometimes, just removing it and reinstalling it a few times can help the printer detect it correctly.
Also, take a moment to clean the gold contact points on both the cartridge and the printer. This can often fix communication issues between the two.
If you’re seeing ink level errors or warnings, don’t worry too much. You can usually bypass these by pressing “Proceed” on your printer. And if your print quality starts to look off, running a head cleaning cycle might do the trick.
Cartridge Recognition Problems
When your Epson printer doesn’t recognize an ink cartridge, it’s usually because the cartridge isn’t seated properly or the contacts are dirty. To fix cartridge recognition errors, start by ensuring the ink cartridge clicks firmly into place.
Next, clean the gold contact points on both the cartridge and inside the printer with a lint-free cloth. If the problem persists, remove and reinsert the cartridge several times, making sure it’s aligned correctly.
Avoid touching the chip or nozzles, as oils can cause recognition issues. Finally, if your Epson printer still rejects the cartridge, try resetting the ink counter or using a reset utility.
Follow these steps to solve common cartridge recognition problems:
- Firmly seat the cartridge until it clicks
- Clean contact points thoroughly
- Reinsert cartridge multiple times
- Reset the printer’s ink counter
Ink Level Errors
Cartridge recognition issues often lead to other printer alerts, such as ink level errors. These errors usually happen when your Epson printer senses an empty cartridge or low ink supply, triggering warnings on the screen.
To fix this, you can try replacing the Epson cartridge or resetting ink level indicators using printer software. Sometimes, dirty contacts on the cartridge or inside the printer cause false readings, so running a cleaning cycle or manually cleaning the contacts can help.
Keep in mind, firmware updates may block third-party cartridges, leading to persistent ink level errors even with full cartridges. If warnings continue, you might need to reset ink level counters with specialized tools.
Addressing these issues quickly ensures your printer accurately monitors ink supply and avoids unnecessary interruptions.
Maintain Ink Cartridges for Longer Printer Life
How often do you check your Epson printer’s ink levels? Keeping a close eye on ink cartridges helps you avoid running completely dry, which can damage the printhead. To maintain ink cartridges and extend your Epson printer’s life, follow these essential tips:
Regularly checking your Epson printer’s ink levels prevents damage and keeps your printer running smoothly.
- Regularly check ink levels through the LCD menu to know when to replace ink or refill ink cartridges promptly.
- Store ink cartridges in their original packaging or upright in sealed containers to keep the ink fresh.
- Use only recommended ink types for your Epson model to ensure print quality and cartridge longevity.
- Perform printhead cleaning and wipe contacts periodically to prevent clogs and maintain consistent ink flow.
Frequently Asked Questions
Can I Use Third-Party Ink Cartridges With My Epson Printer?
Yes, you can use third-party brands as compatible alternatives, but you should check cartridge compatibility with your Epson model first. These alternatives often offer better price comparison savings, sometimes up to 77%.
Keep in mind ink quality can vary, so read reviews before buying. Follow installation tips carefully to avoid errors, and be aware using third-party ink might raise warranty concerns. Always weigh cost savings against potential risks for your printer.
How Do I Recycle Used Epson Ink Cartridges?
Wondering how to handle your used Epson cartridges? You’re in luck. Epson’s cartridge recycling programs make eco-friendly disposal easy.
You can find designated recycling locations or use prepaid mailing labels for cartridge collection. Don’t just toss them. By participating in cartridge refurbishing and recycling programs, you reduce environmental impact considerably.
Check Epson’s website for detailed steps and help to follow local rules, ensuring your cartridges are responsibly recycled every time.
What Should I Do if My Epson Printer Shows a Paper Jam Error?
If your Epson printer shows a paper jam error, start by inspecting the printer tray and properly loading paper to avoid jams. Carefully clear jam errors by opening the cover and gently removing stuck paper, cleaning the paper path as needed.
Use quality paper within recommended specs to help with paper jam prevention. Also, troubleshoot the jam sensor by checking for debris or misaligned parts. Regularly cleaning and proper paper loading keep your printer running smoothly.
How Often Should I Update My Epson Printer’s Firmware?
You should update your Epson printer’s firmware only when necessary, like for security patches or fixing ink cartridge compatibility issues. Regularly check your printer ink levels and run ink quality testing to decide if updates might help.
Firmware updates can improve ink cartridge installation or replacing ink cartridges, but avoid unnecessary updates to prevent ink cartridge troubleshooting problems. Also, keep ink cartridge storage in mind to maintain performance between updates.
Can Ink Cartridges Expire if Unused for a Long Time?
Yes, ink cartridges can expire if unused for a long time. Ink expiration happens due to dye degradation and loss of ink stability inside the cartridge.
Even unopened cartridges have a limited shelf life, usually 1 to 2 years, depending on storage conditions. Proper storage in a cool, dark place and keeping cartridges upright helps maintain sealing and slows down ink breakdown.
Once the sealing is compromised, ink quality drops, causing print issues with unused cartridges.
Conclusion
Changing your Epson ink cartridge is straightforward when you follow the steps carefully. For instance, Sarah, a small business owner, avoided costly downtime by regularly replacing her cartridges and cleaning the print head. This routine ensured sharp prints every time.
By staying proactive and maintaining your cartridges, you’ll extend your printer’s life and keep your documents looking professional. So don’t hesitate. Keep your Epson running smoothly with these simple, effective steps.
Leave a Reply