To make ink step by step, start by selecting vibrant plant pigments like berries or bark, then clean and crush them.
Extract colors using water, alcohol, or oil to suit your needs.
Mix the pigments with natural binders such as gum arabic for smooth flow and durability.
Filter out impurities and test the ink’s consistency and color quality.
Store it in airtight containers to preserve it longer.
Keep going, and you’ll uncover tips for perfecting and maintaining your natural ink.
What Is Natural Ink and How It Works
Natural ink comes from pigments extracted directly from organic materials like flowers, leaves, and berries. When you immerse yourself in ink making with natural inks, you’re fundamentally capturing colors from nature.
Creating natural ink means drawing vibrant colors straight from the heart of flowers, leaves, and berries.
You extract pigments from various plant parts, bark, roots, or even kitchen scraps, and suspend these colorants in a liquid medium like water or oil. Then, you often add a natural binder such as gum arabic to help the pigment stick to your writing surface.
What’s fascinating is how natural inks behave over time; their colors can shift, fade, or deepen because of their organic makeup. This means your ink isn’t static. It’s alive, evolving with time.
The tannins and pigments in different plants influence both the hue and how long the ink lasts. So, when you make natural inks, you’re not just creating color. You’re embracing an alchemical process that connects you to nature’s ever-changing palette.
Choosing Natural Pigments and Dyes for Ink
When you’re picking natural pigments and dyes for your ink, it’s a good idea to focus on the right plant materials—things like berries, bark, or leaves. And don’t forget, the season when you harvest them can really change how intense or what shade the color turns out to be. So, you’ll want to extract the colors carefully to make sure you capture those unique organic hues each plant has to offer.
Selecting Plant Materials
Although selecting the right plant materials might seem simple, choosing those rich in pigments or tannins is key to making vibrant ink. You’ll want to pick berries, leaves, bark, flowers, or roots known for their strong color properties.
For example, grape skins yield purple hues, while onion skins offer warm orange-brown tones. Using edible plants like elderberries or blackberries ensures your ink is non-toxic.
To maximize pigment extraction, chop smaller plant pieces or skins to increase surface area before soaking, boiling, or fermenting them. Harvesting these materials at their peak, usually in July or August, guarantees the richest colors.
Seasonal Color Variations
How do the colors of plant-based inks change throughout the year? Seasonal color variations in natural pigments depend on when you harvest plants. Picking berries like elderberries or blackberries at peak ripeness in late summer yields vibrant, deep hues.
Temperature and sunlight shifts also affect pigment intensity and stability. Using freshly gathered, in-season plant parts guarantees your inks burst with richer, longer-lasting colors than dried or off-season materials.
Notice how these natural pigments evolve with the seasons, offering unique shades each time.
| Season | Plant Source | Color Emotion |
|---|---|---|
| Spring | Dandelions | Fresh, hopeful |
| Summer | Blackberries | Bold, vibrant |
| Late Summer | Elderberries | Deep, rich |
| Autumn | Oak Galls | Warm, earthy |
| Winter | Pine Needles | Cool, calming |
Organic Color Extraction
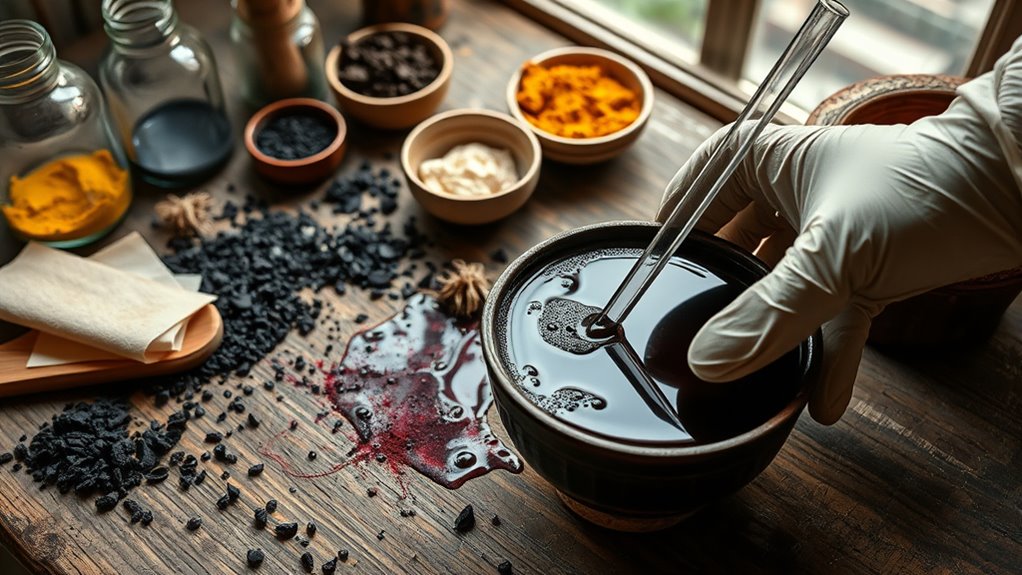
Since natural pigments come from various parts of plants, you’ll need to choose your sources carefully to get the colors you want. You can extract pigments from berries, flowers, bark, and roots by soaking, boiling, or fermenting them.
For deep, long-lasting colors, consider plants like oak galls or walnut husks, which contain tannins. Keep in mind that the color depends on the plant part you use. Skins, seeds, or bark each offer different hues and intensities.
During extraction, adjusting the pH with vinegar or baking soda can also change your dye’s shade. To get vibrant, high-quality natural pigments, harvest seasonal plants at their peak ripeness. This careful selection and extraction process guarantees your ink has rich, organic colors.
Preparing Plant Materials for Natural Ink Extraction
Before you start extracting natural ink, you’ll need to gather and ready the right plant materials, such as berries, flower petals, bark, or leaves. Begin by identifying suitable plant materials that offer rich pigments.
Once collected, wash them thoroughly to remove dirt, pesticides, and any impurities that could affect the ink’s quality. Next, chop or crush the plant parts into smaller pieces; this increases the surface area, allowing for more efficient pigment release during ink extraction.
You can use either fresh or dried plant materials depending on the color intensity and extraction technique you plan to use. Finally, prepare the plant materials for soaking, boiling, or fermenting, which are common methods to draw out the pigments effectively.
Proper preparation ensures you get the best color and consistency from your natural ink extraction process.
Picking the Best Solvent for Your Natural Ink
When you’re picking a solvent for your natural ink, water is a great choice because it extracts pigments safely and easily. Plus, it’s super accessible and gentle to work with.
If you want to keep those colors bright and vibrant, especially when you’re working with berries and roots, alcohol-based solvents do the trick really well. They help preserve that pop of color.
Now, if you’re after richer, longer-lasting inks, oil-based solvents like linseed oil are definitely your best bet. They give your ink a depth and durability that stands the test of time.
Water-Based Ink Benefits
Although many solvents exist for natural ink making, water stands out as the most accessible and effective choice for extracting pigments from plant materials. You’ll find water easy to use for mixing and filtering, making it perfect whether you’re a beginner or working on small-scale projects.
Water-based inks are non-toxic and environmentally friendly, so you can safely use them for art or writing without worry. When you use water, the drying time and flow of your ink improve, helping it adhere well to various surfaces.
Adding gum arabic to your water-based ink boosts its stability, flow, and gloss, ensuring smooth application and a polished finish. Choosing water with gum arabic truly enhances your natural ink’s quality and performance.
Oil-Based Ink Uses
If you want a durable, water-resistant ink with a rich finish, oil-based options are an excellent choice. Oil-based ink uses solvents like linseed oil, tung oil, or mineral spirits to dissolve pigments, guaranteeing smooth application and longevity.
Choosing the right solvent affects drying time, gloss, and flexibility, so pick one that suits your project’s needs. Natural solvents are ideal if you want an eco-friendly ink. Proper solvent selection also prevents pigment separation and clogging, maintaining ink quality.
Keep in mind that working with these solvents requires good ventilation due to VOC emissions.
- Linseed and tung oil for natural, slow-drying solvents
- Mineral spirits for faster drying and higher gloss
- Resistant to water and UV damage
- Ideal for fine art and printmaking
- Guarantee proper ventilation when handling solvents
Alcohol Extraction Effects
Picking the right solvent can make all the difference in your ink’s quality and performance. When you choose alcohol for extraction, you tap into its ability to quickly penetrate plant cell walls, pulling out vibrant pigments that water alone can’t dissolve.
Alcohol-based extraction often results in brighter, more saturated colors because it extracts both water-soluble and fat-soluble pigments. Plus, using alcohol helps preserve your ink’s color and prevents mold, extending its shelf life.
You’ll also save time, since alcohol extracts strong colors in just a few hours. Another benefit is that alcohol evaporates fast, so your ink dries quickly on paper, which is perfect for detailed calligraphy or art.
Extracting Plant Colors: Methods and Timing

When you extract colors from plants, you usually soak or boil parts like berries, leaves, or bark to release their pigments into a liquid form. Timing plays an essential role since many plants yield the most vibrant plant colors during late summer or early fall.
Extraction methods vary depending on the plant part: skins often require boiling or scalding, while leaves may only need soaking. You can adjust extraction time from minutes to days to achieve your desired color intensity.
Using heat, fermentation, or prolonged soaking breaks down cell walls, letting you capture richer hues.
- Harvest plants at peak pigment production seasons
- Soak leaves gently to preserve delicate colors
- Boil tougher materials like bark or skins for stronger extraction
- Extend soaking or ferment for deeper pigment release
- Monitor extraction duration closely to avoid color fading
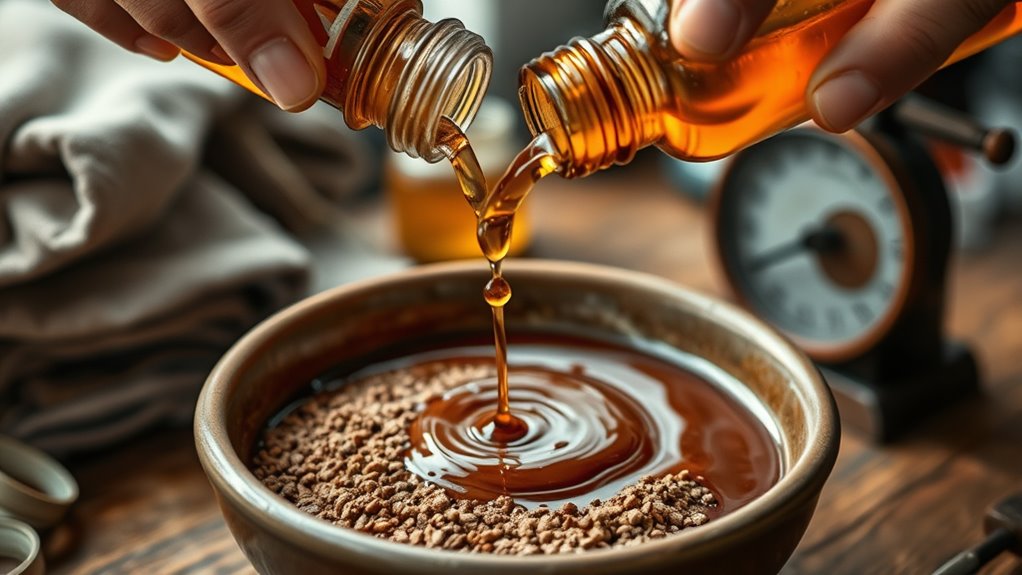
How to Add Binders for Stable Natural Ink
To keep your natural ink stable and smooth, you’ll want to add binders like gum arabic. These binders hold the pigment particles together and help the ink stick better to surfaces.
It’s a good idea to mix the binder thoroughly, usually by dissolving it in warm water first. This helps create an even texture and prevents your ink from fading over time.
You can also adjust the amount of binder depending on whether you want your ink to be thicker or more fluid. That way, you get the best results for whatever project you’re working on.
Purpose Of Binders
Although pigments give natural ink its color, binders play an essential role by acting as adhesives that hold those pigments together and help the ink stick properly to surfaces. When you add binders to natural ink, you guarantee the pigment particles don’t separate or settle, which keeps the ink consistent and extends its shelf life.
Proper mixing is key. You need to blend the binder thoroughly for a smooth, stable ink.
Here’s why binders matter:
- They improve adhesion to paper or fabric
- They prevent pigment settling over time
- They enhance the ink’s flow and gloss
- They stabilize the mixture for longer shelf life
- They control the ink’s consistency based on the amount used
Common Natural Binders
Binders play a vital role in keeping your ink stable, and choosing the right natural binder can make all the difference. Gum arabic, derived from acacia tree sap, is the most common natural binder you’ll use to thicken and stabilize homemade inks. Just a few drops improve flow, adhesion, and glossiness, making your ink more durable on paper.
Besides gum arabic, you can try other natural binders like egg yolk, gelatin, or honey in small amounts to enhance texture and stability. To use them, dissolve your chosen binder in warm water or liquid, then mix it thoroughly with your plant-based pigment or dye. Properly added natural binders help prevent pigment settling and mold growth, extending your ink’s shelf life.
Adding Binders Properly
How exactly should you add gum arabic to keep your natural ink smooth and stable? Start by dissolving gum arabic in warm water to guarantee it fully integrates, avoiding clumps. Then, gradually add this binder solution into your ink mixture while stirring continuously. This method keeps pigment particles evenly suspended, creating a durable, cohesive ink.
Remember, the right balance of binders impacts your ink’s flow and thickness.
- Dissolve gum arabic in warm water using a 1:4 to 1:6 ratio
- Add the binder slowly to prevent clumping
- Stir continuously for even dispersion
- Incorporate preservatives like wintergreen oil to extend shelf life
- Mix thoroughly until the binder is fully integrated
Following these steps helps you achieve stable, high-quality natural ink.
Mixing Ingredients for Smooth Natural Ink
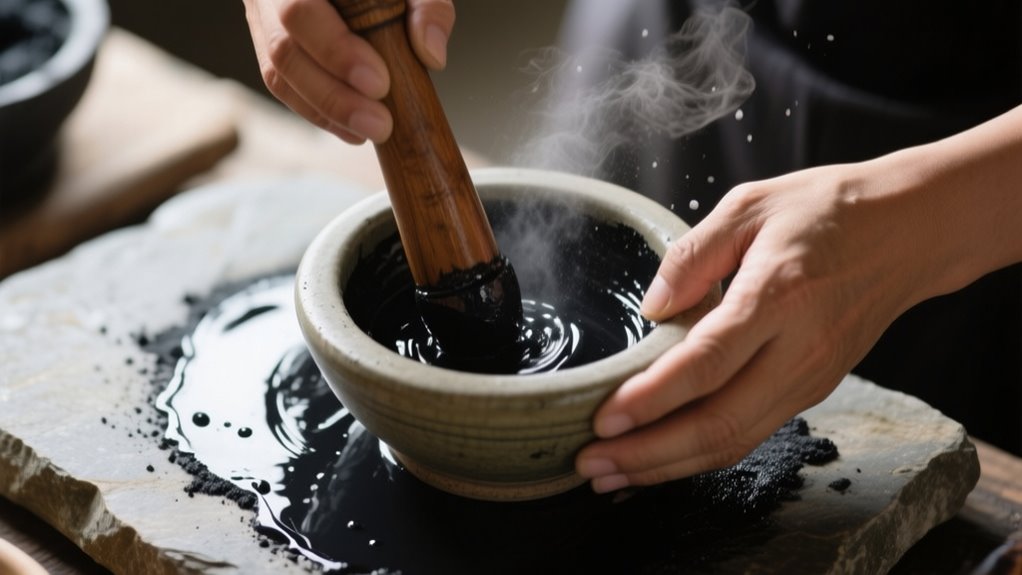
When you gently heat plant materials with water or oil, you’ll start to extract vibrant pigments without damaging their quality. This careful heating releases the color while preserving the natural vibrancy of your ingredients.
To enhance extraction, you’ll want to stir regularly and use a fork or muddler to crush the plant pieces, helping pigments escape from fibers. Avoid boiling to keep the pigment intact.
Here’s a quick guide on key steps for mixing your ingredients:
| Step | Action | Purpose |
|---|---|---|
| Heat | Gently warm mixture | Extract pigments without damage |
| Stir | Regular stirring | Prevent sticking, aid pigment release |
| Mash | Crush plant pieces | Increase extraction efficiency |
| Simmer | Concentrate liquid | Intensify color, adjust consistency |
Following these steps ensures your natural ink is smooth and richly colored, ready for the next stages of preparation.
Filtering Ink to Remove Impurities
Although you’ve carefully extracted vibrant pigments, filtering the ink is vital to remove any solid impurities that could clog your pens or affect the ink’s smoothness. Filtering involves passing the ink through a fine material like tissue paper or specialized filters to trap plant residues and other particles.
Filtering ink through fine materials removes solid impurities, ensuring smooth flow and vibrant, clog-free writing.
Before filtering, letting the mixture settle helps reduce sediment, making the process more efficient. Using multiple layers of tissue or dedicated filter paper ensures finer impurities are removed, resulting in a clearer, more consistent ink. Thorough filtering is essential for producing high-quality ink that performs well in detailed artwork or calligraphy.
To enhance the filtering process, consider these tips:
- Let the ink settle to separate heavier particles
- Use multiple tissue layers or filter papers
- Choose fine, specialized filters for better impurity removal
- Filter slowly to avoid disturbing sediments
- Regularly clean or replace filters to maintain efficiency
This careful filtering guarantees smooth ink free of impurities.
Testing Natural Ink Quality: Color, Viscosity, Performance
Once you’ve filtered your ink to remove impurities, the next step is to test its quality by examining color, viscosity, and performance. Start by observing the ink’s color consistency and vibrancy, checking how it changes before and after drying. This helps you assess lightfastness and permanence, which are vital for professional or archival use.
For viscosity, apply a small amount to a surface or use a viscometer to measure flow properties. You want the ink to flow smoothly without clogging your tools. Next, evaluate performance by testing adhesion, drying time, and resistance to smudging or fading.
Regularly check for sediment or microbial growth to guarantee particle suspension stability. These tests confirm your natural ink meets artistic and functional standards, giving you confidence in its quality before moving on to use or packaging.
Storing and Preserving Natural Ink for Longevity
How can you guarantee your natural ink stays vibrant and usable for a long time? Proper storage and preservation are essential to maintain its quality. You want to prevent spoilage, microbial growth, and color changes, ensuring your ink remains fresh and reliable whenever you need it.
Ensure your natural ink stays vibrant and fresh by preventing spoilage and preserving its quality properly.
To effectively preserve your natural ink, follow these tips:
- Store it in airtight containers and keep it in a cool, dark place to avoid exposure to light and air.
- Add natural preservatives like cloves, wintergreen oil, or a small amount of alcohol to extend shelf life.
- Refrigerate the ink to slow fermentation and mold development.
- Check regularly for mold, sediment, or changes in color and smell; filter or discard if necessary.
- Prepare and store ink in small batches to minimize waste and maintain freshness.
These simple steps will help you preserve your natural ink’s quality and usability over time.
Frequently Asked Questions
What Safety Precautions Are Needed When Making Natural Ink?
You need to prioritize chemical safety by wearing gloves, goggles, and a mask to protect yourself from harmful plant particles and allergens. Always source your ingredients carefully, ensuring they’re clean and safe.
Work in a well-ventilated area to avoid inhaling fumes or dust. Use sanitized equipment to prevent contamination, and store your ink in labeled, airtight containers away from children and pets to avoid accidental ingestion or misuse.
Can Natural Ink Be Used in All Types of Pens and Printers?
You can’t just pour natural ink into every pen or printer, like expecting every key to fit every lock. Historically, natural ink’s evolution shows it’s perfect for dip and brush pens, reflecting cultural significance in calligraphy and art.
But fountain pens and printers often clog or fade due to organic particles. Think of it as respecting tradition while adapting tools. You’ll need special care to use natural ink in modern devices.
How Long Does It Take for Natural Ink to Dry Completely?
The drying time for natural ink varies, but you can expect it to take anywhere from a few minutes to several hours. Environmental impact plays a role. Humidity and temperature affect how fast it dries.
If you’re using water-based inks on porous surfaces, it usually dries quicker, around 10 to 30 minutes. Thicker or oil-based inks need more time, sometimes overnight, especially if you apply heavy layers.
Are Natural Inks Environmentally Friendly Compared to Synthetic Inks?
Natural inks are eco-friendly alternatives that paint a greener picture than synthetic ones. You’ll find they have a lighter chemical impact since they use renewable plant materials and fewer toxic substances.
This means less pollution and waste, helping you reduce your carbon footprint. However, keep in mind that the environmental benefits depend on how responsibly those natural ingredients are sourced and what additives are included in the ink.
What Are Common Problems When Using Natural Ink and How to Fix Them?
You’ll often face ink consistency issues like sedimentation, causing uneven color. To fix this, shake and filter your ink before use.
Color stability can suffer from pH changes or light exposure, so store your ink in a cool, dark place to keep it vibrant longer.
Mold growth and drying cracks happen too, but adding antimicrobial agents and gum arabic improves preservation and flexibility, preventing those common problems.
Conclusion
You might think making ink is complicated, but it’s surprisingly simple when you use nature’s gifts. While synthetic inks flood the market with uniform colors, your natural ink carries unique hues and stories from plants you’ve carefully chosen and prepared.
By extracting, mixing, and filtering with care, you create not just ink, but a living connection to the earth. So, embrace the process. Your ink isn’t just made, it’s crafted.
Leave a Reply