To refill ink in your Trodat Printy 7913, first unlock the stamp by pressing the side buttons and lifting the top cover.
Remove the old ink pad gently, avoiding force.
Use the correct Trodat ink pad and insert it properly with the ink side down, pushing until it clicks into place.
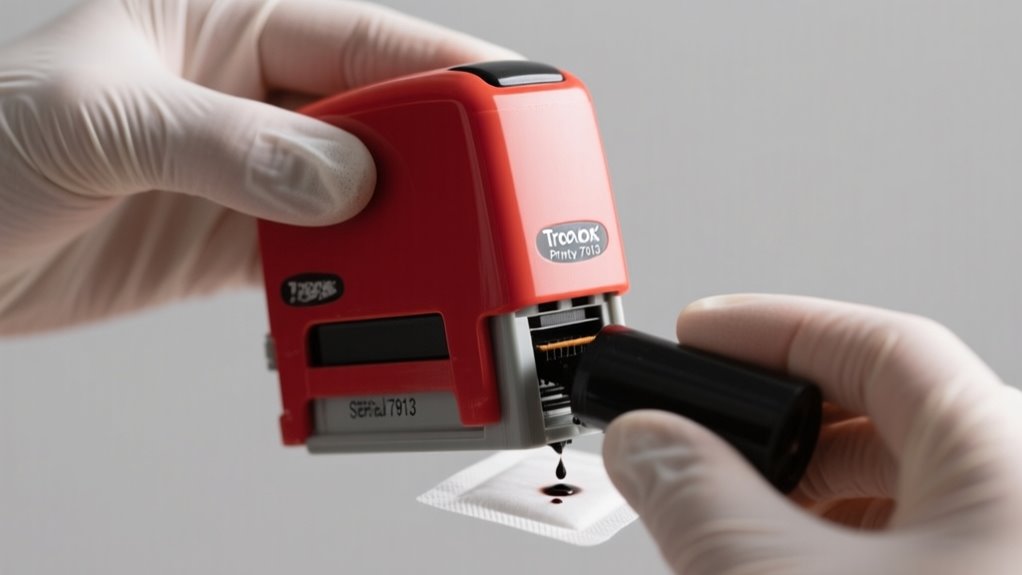
Add 3-4 drops of Trodat ink evenly, then test on scrap paper.
Secure the ink pad and maintain your stamp to guarantee smooth use.
Keep following for more detailed tips and tricks.
Locate and Access the Ink Pad Compartment on Your Trodat Printy 7913
Before you can refill the ink in your Trodat Printy 7913, you need to locate and access the ink pad compartment. The ink pad compartment is found beneath the stamp’s top cover.
To refill your Trodat Printy 7913, first find and open the ink pad compartment under the top cover.
To open it, press and hold the locking buttons on both sides of the stamp firmly. While holding the buttons, lift the top cover carefully to reveal the ink pad inside. Place your stamp on a flat surface before doing this to avoid any damage.
Once the compartment is open, you’ll see the ink pad resting in its designated slot. Gently lift or slide out the old ink pad without forcing it. Being cautious here ensures you don’t harm the stamp or the ink pad holder.
Now that you’ve accessed the ink pad compartment, you’re ready for the next steps to refill or replace the ink pad and keep your Trodat Printy 7913 stamping clearly.
Gather Supplies and Prepare Your Workspace for Ink Pad Replacement
Before you start, make sure you have the correct Trodat ink pad for the Printy 7913. You’ll also want some small tools like screwdrivers or tweezers on hand.
Next, set up a clean, flat workspace that’s free of dust—it’ll make the process much easier. Don’t forget to wear disposable gloves to keep your hands ink-free.
Finally, keep a scrap piece of paper nearby so you can test the stamp after you’ve finished refilling.
Essential Supplies Checklist
While gathering a new Trodat ink pad compatible with your Printy 7913 model, make sure you prepare a clean, flat workspace free from dust and debris to avoid contamination. Your necessary supplies checklist should include the new ink pad, gloves or paper towels to keep your hands clean, and a small cloth or extra paper towels for wiping up any ink spills.
Good lighting is also crucial so you can clearly see the ink pad and follow each step accurately. Having these items ready guarantees a smooth and mess-free ink pad replacement.
Workspace Setup Tips
Gathering your supplies is just the start; setting up your workspace correctly makes the ink pad replacement much easier and cleaner. Choose a clean, flat workspace with good lighting to improve visibility and ease handling small parts.
Protect your surface with newspaper or a disposable cover to avoid ink stains. Clear away clutter so you won’t lose any tiny components during the process. A well-organized workspace helps you focus and work efficiently.
Keep gloves or paper towels nearby to quickly manage any ink spills or safely handle the ink pad. This thoughtful setup guarantees a smooth, mess-free experience while replacing the ink pad in your Trodat Printy 7913.
Taking these steps will save time and prevent frustration during the refill process.
Safety Precautions
How can you guarantee a smooth and safe ink pad replacement for your Trodat Printy 7913? Start by following essential safety precautions. Always work on a clean, flat surface to avoid ink spills and assure accurate handling.
Wear disposable gloves to protect your skin from ink stains and keep things tidy. Gather all necessary supplies, including the replacement ink pad, before you begin to prevent interruptions.
Make certain your workspace is well-ventilated to minimize inhaling any ink fumes. Finally, cover surrounding areas with paper or cloth to protect surfaces from accidental drips.
Unlock Your Printy and Press Down Slightly to Access the Ink Pad
Before you can refill the ink pad, you’ll need to open your Trodat Printy 7913 by pressing it down about 5mm while holding both locking buttons on either side. This action releases the internal mechanism, allowing the stamp to move into a slightly lifted position.
Press down 5mm while holding both side buttons to unlock and lift your Trodat Printy 7913 for ink pad access.
Once you release the buttons, the stamp locks in place, with the die lifted just enough to reveal the ink pad inside. Make certain the stamp is correctly positioned so the die rests just off the surface, preventing any accidental stamping.
This careful unlocking and pressing step is essential for safely accessing the ink pad without damaging the stamp. Now that the ink pad is exposed, you’re ready for the next step of removing it safely to prepare for refilling.
Taking these steps guarantees your Trodat Printy 7913 stays in great working order while making the refilling process smooth and efficient.
Remove the Old Ink Pad Safely and Cleanly
First, open your Printy 7913 by pressing the locking buttons on both sides and gently lifting the top cover. Then, carefully remove the old ink pad—make sure to handle it only by the edges to avoid any ink spills. This way, you keep the process clean and safe before moving on to cleaning and refilling.
Unlocking The Printy
Though unlocking the Printy might seem tricky at first, you can easily remove the old ink pad by pressing the stamp down about 5mm to release the latch. To unlock the ink pad compartment, hold both locking buttons on either side of the stamp firmly.
This unlocking action disengages the pad, allowing you to access it safely. Be careful not to force anything to avoid damaging the internal parts. Once unlocked, take a moment to check and clean the area inside the stamp using a clean cloth or tissue to remove any residual ink or dust.
Proper unlocking and cleaning ensure a smooth ink pad replacement and help maintain your Trodat Printy 7913’s performance over time.
Removing The Ink Pad
Once you’ve opened the Printy 7913, gently push it down slightly to release the locking mechanism. Hold the sides of your Trodat self-inking stamp and carefully pull out the old ink pad. Doing this gently helps prevent damage to the stamp and avoids ink spills.
After removing the used ink pad, dispose of it properly to keep your workspace clean. Use a soft cloth or tissue to wipe away any remaining ink or dust inside the stamp housing. Ensuring the compartment is clean and free of lint will help your new ink pad fit perfectly and work efficiently.
Now, you’re ready to insert your new ink pad and continue using your Trodat stamp smoothly.
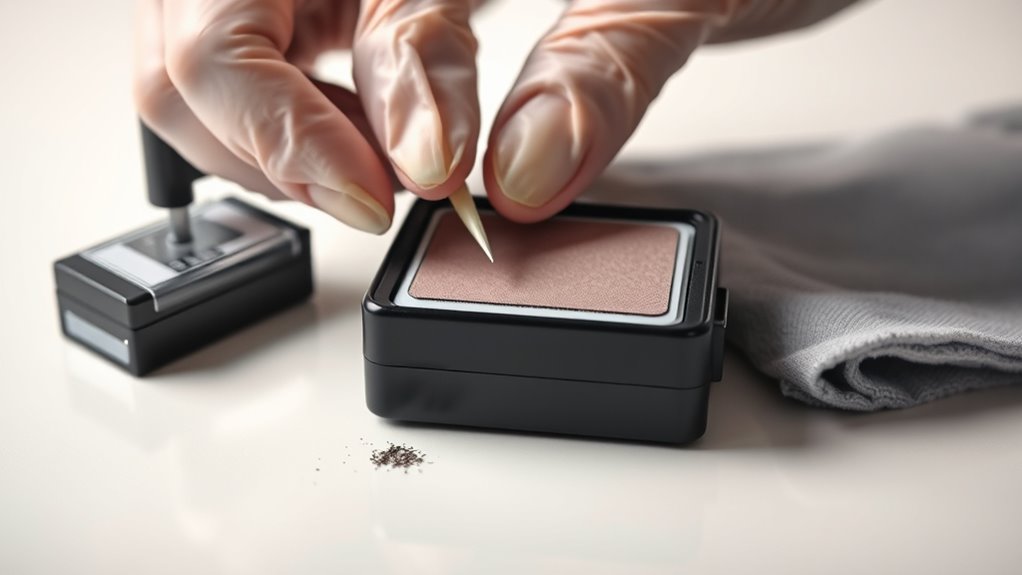
Choose the Right Replacement Ink Pad for Your Trodat Printy 7913
When replacing the ink pad in your Trodat Printy 7913, make certain you pick one that’s specifically designed for this model to guarantee a perfect fit and smooth operation. Using genuine Trodat replacement ink pads is essential to maintain your stamp’s peak performance and avoid damage.
Always check the size and shape of the ink pad to match the Printy 7913’s designated ink compartment precisely. Avoid generic or incompatible pads that might cause leaks or poor stamping results.
Also, verify that the ink pad is fresh and unused for the best re-inking experience. You can confirm compatibility by consulting the product specifications or packaging, which should clearly state if the ink pad fits your Trodat Printy 7913.
Choosing the right ink pads not only extends your stamp’s lifespan but also guarantees consistent, clear impressions every time you stamp.
Insert and Align the New Ink Pad in Your Trodat Printy 7913
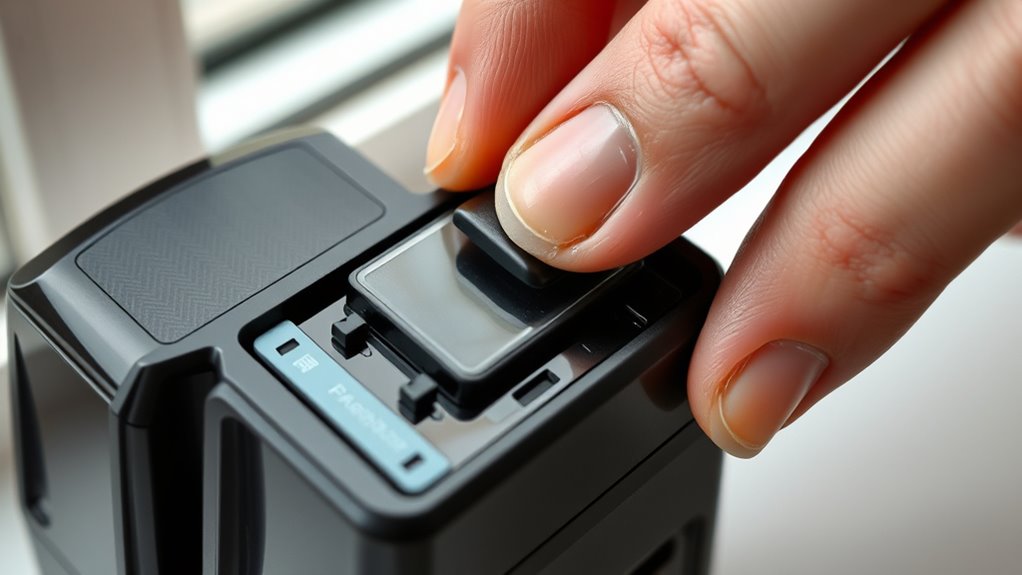
To insert the new ink pad into your Trodat Printy 7913, carefully align its edges with the designated slots inside the stamp’s ink compartment. Make certain the ink side of the pad faces downward, toward the stamping surface, so the ink transfers properly.
Gently push the ink pad into place until it clicks or sits flush, indicating it’s properly aligned. This step is vital to guarantee even ink distribution and prevent smudging when stamping. Check that the pad is fully seated and evenly positioned within the compartment.
While ink cartridges differ from ink pads, both require precise placement for peak performance. If the ink pad isn’t aligned correctly, your stamp won’t produce clear impressions, even if you’ve used the right ink cartridges.
Taking the time to position the new ink pad properly in your Trodat Printy 7913 guarantees consistent, crisp stamping results every time.
Securely Lock the Ink Pad in Your Trodat Printy 7913
Although you’ve already inserted the ink pad, you need to press the Trodat Printy 7913 down about 5mm to engage the locking mechanism securely. Doing this guarantees the ink pad snaps firmly into place and won’t shift during use.
Press the Trodat Printy 7913 down 5mm to lock the ink pad securely and prevent shifting during use.
As you press down, make sure the die is slightly off the surface to avoid any damage while locking. Once you release the printy, listen and feel for the lock clicking into position. This confirms you’ve securely locked the ink pad in your Trodat Printy 7913.
Check that the ink pad is fully seated and stable, holding it tightly without any wobble. If it moves, repeat the pressing step until it locks properly.
Securing the ink pad prevents leaks and misprints, keeping your stamping precise and neat every time you use it. Taking these steps guarantees your stamp functions smoothly and lasts longer.
Test Ink Coverage on Scrap Paper
After securing the ink pad firmly in your Trodat Printy 7913, it’s important to check the ink coverage before you start stamping your projects. To test ink coverage, press your stamp onto a clean, blank scrap piece of paper with the logo facing away so you can clearly see the ink transfer.
Apply a light touch to avoid over-inking, which can cause smudges or uneven impressions. Check if the print is dark and consistent; if it looks faint or patchy, add ink gradually to the pad.
Repeat this process, testing on new scrap paper each time, until your stamp produces a clear, crisp impression. This simple step guarantees your stamp works perfectly without ruining your actual project materials, saving time and frustration.
Always test ink coverage carefully to get professional-looking results from your Trodat Printy 7913.
Troubleshoot Ink Pad Removal and Insertion Problems
When you press down about 5mm and release the locking buttons, you’ll find it easier to remove the ink pad from your Trodat Printy 7913. Proper ink pad removal is key to avoid damage and ensure smooth refilling. If the pad resists, don’t force it. Try these steps:
- Confirm you’re pressing the “Click out” button at the stamp’s front center to unlock the ink pad correctly.
- If the pad won’t slide out easily, gently wiggle it or use a plastic tool to loosen it without harming the mechanism.
- Avoid excessive pressure to prevent breaking the locking mechanism or internal parts.
- When inserting the new pad, make sure it’s fully removed, aligned, and seated properly to avoid misplacement or poor sealing.
Following these tips makes ink pad removal and insertion hassle-free, keeping your Trodat Printy 7913 working perfectly.
Maintain Your Trodat Printy to Extend Ink Pad Life
To keep your Trodat Printy 7913 working smoothly, make sure to apply ink carefully—because too much can cause leaks and damage the pad. Also, always store your stamp in a cool, dry place. This helps prevent the ink from drying out. Following these simple steps will help you get the most life from your ink pad.
Proper Ink Application
How often you apply ink to your Trodat Printy 7913 can make a big difference in the quality and longevity of your stamp’s impressions. Proper ink application ensures your pad stays effective and your stamp crisp. Follow these steps:
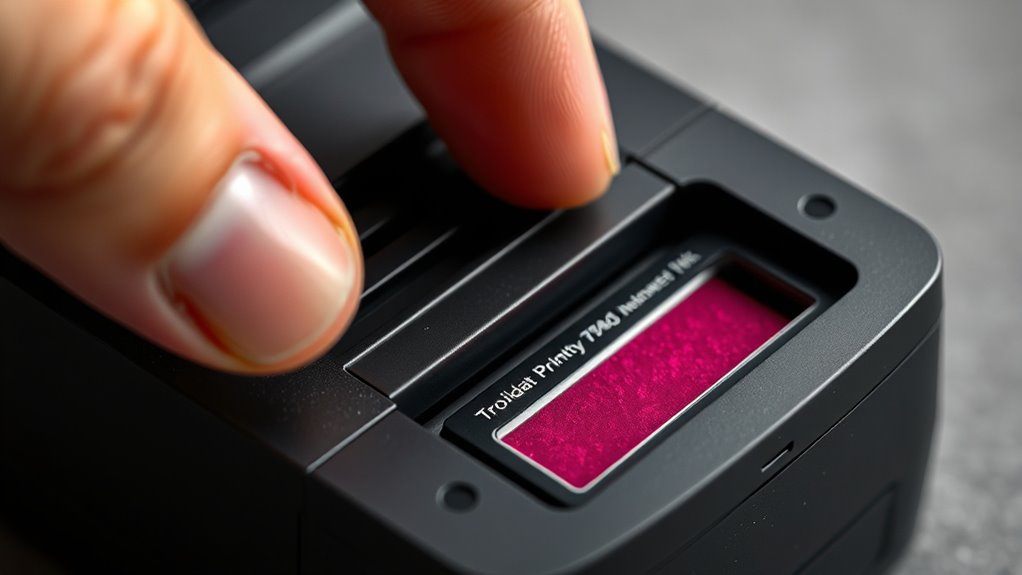
- Apply 3-4 evenly spaced drops of Trodat ink onto the center of the pad to guarantee uniform coverage.
- Avoid over-saturating the pad, as too much ink causes smudging and wears it out faster.
- Use only Trodat-branded ink designed for the Printy 7913 to protect and optimize performance.
- Let the ink fully absorb into the pad before reassembling to maintain consistent impression quality.
Regularly check your pad’s condition and re-ink promptly when your impressions start to fade.
Stamp Storage Tips
Proper ink application keeps your Trodat Printy 7913 producing sharp impressions, but storing it correctly plays a big role in preserving that quality over time. To follow effective stamp storage tips, always store your stamp in a cool, dry place to prevent the ink pad from drying out prematurely.
Keep it upright when not in use; this helps distribute ink evenly and avoids leaks. Avoid exposing the stamp to direct sunlight or extreme temperatures, as these can degrade the ink quality.
Regularly clean the stamp surface to remove dust and debris, which can contaminate the pad. Only re-ink your pad when impressions start to fade, extending the ink pad’s lifespan and ensuring consistent, clear stamping every time.
Frequently Asked Questions
How Long Does a Trodat Printy 7913 Ink Pad Typically Last?
You can expect the ink longevity of a Trodat Printy 7913 ink pad to be around 10,000 to 15,000 impressions under normal use. If you use it heavily every day, the ink pad might last closer to 5,000 impressions.
With lighter use, it can easily stretch over several months. Keeping an eye on fading impressions and re-inking promptly helps maximize the ink longevity and guarantees your stamp always looks sharp.
Can I Use Third-Party Ink Pads With My Trodat Printy 7913?
Sure, you *could* use third-party ink pads with your Trodat Printy 7913 if you enjoy uneven prints, voided warranties, and the thrill of potential stamp damage. Ink compatibility isn’t just a suggestion; it’s essential.
Trodat designs their ink pads to fit perfectly and work smoothly. So, if you want reliable, crisp stamps and a happy Printy, stick with original Trodat ink pads. Your stamp will thank you.
What Should I Do if My Stamp Image Is Blurry After Refilling?
If your stamp image is blurry after refilling, you should first check the image quality by cleaning the stamp surface and die to remove any dust or dried ink. Make sure the ink pad is properly seated and not overloaded with ink, as too much causes smudging.
Let the ink fully absorb and dry before using the stamp again. These steps will help you restore crisp, clear impressions.
Is It Safe to Refill the Ink Directly Without Replacing the Pad?
Refilling ink directly is like pouring water into a sponge already soaked. You’re inviting trouble. It’s not safe because refill risks include uneven ink distribution, potential damage, and ink leakage.
You could clog the stamp mechanism or even void your warranty. Instead, replace the ink pad to keep your stamp crisp and long-lasting. Taking shortcuts might seem easy, but it’s a gamble that could cost you quality and lifespan.
Where Can I Buy Official Trodat Printy 7913 Ink Pads?
You can buy official Trodat Printy 7913 ink pads from Trodat’s website or authorized online retailers to confirm ink compatibility. Many office supply stores and stamping specialty shops also stock genuine replacement pads.
For convenience, check trusted e-commerce platforms like Amazon or eBay, but make sure the seller is an authorized distributor. Sticking to original ink pads guarantees the best performance and prevents damaging your stamp with incompatible ink.
Conclusion
Refilling your Trodat Printy 7913 ink pad isn’t just a task—it’s a game-changer! With these simple steps, you’ll transform your stamp from a fading memory into a bold, ink-slinging machine that never quits.
Say goodbye to smudges and faint imprints forever! You’ll feel like a stamping superhero, conquering every document with perfect clarity.
Trust me, once you master this, you’ll wonder how you ever lived without it!
Leave a Reply