To remove ink from plastic labels, first set up a ventilated workspace and wear gloves for safety.
Test your chosen solvent, like rubbing alcohol for light stains or acetone for tough marks, on a small hidden spot.
Soak or dab gently to lift ink, then wipe carefully to avoid smearing.
Rinse thoroughly and dry completely before storing.
Different plastics need different care, so if you want to master every step, keep exploring these techniques.
Prepare Your Workspace and Safety Gear for Ink Removal
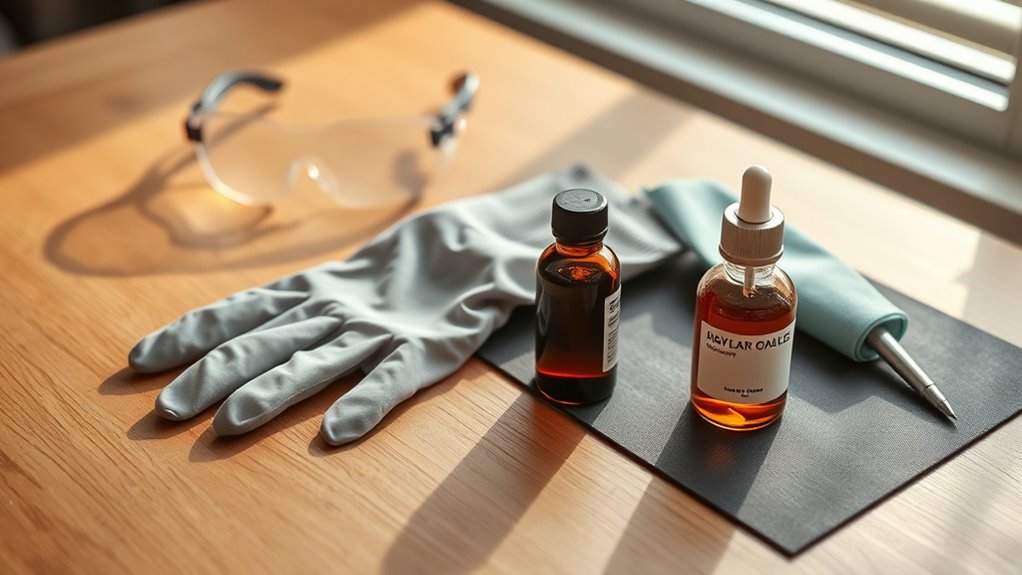
Before you begin removing ink from plastic labels, make sure you set up a well-ventilated workspace and put on protective gloves. Proper safety gear is essential to protect your skin from harsh solvents like acetone or rubbing alcohol, which can cause irritation. Choose rubber or nitrile gloves for the best protection.
Next, prepare a small, designated workspace with a non-reactive surface such as glass or stainless steel. This helps prevent unwanted chemical reactions and keeps your area clean. Keep clean, lint-free cloths or paper towels within reach to apply solvents and wipe away ink efficiently.
Always read and follow the manufacturer’s safety instructions on your cleaning products before use. Working in a well-ventilated area reduces your exposure to fumes, making the process safer. By focusing on your workspace setup and safety gear first, you create an environment that’s both secure and effective for removing ink from plastic labels.
Spot Testing Solvents on Plastic for Ink Removal
Once you’ve prepared your workspace and safety gear, the next step is to test how the solvent interacts with your plastic label. Spot testing solvents is essential to avoid damaging the plastic during ink removal.
Apply a small amount of solvent like acetone or rubbing alcohol with a clean, soft cloth or cotton swab to an inconspicuous area of the label. Wait at least five minutes to observe any changes in color, texture, or surface integrity.
Test solvents on a hidden label spot, waiting five minutes to check for any damage or changes.
Look carefully for signs of discoloration, warping, or cracking. These indicators show whether the solvent is too harsh for your plastic. Document what you observe during this spot testing phase, so you can refer back before proceeding.
This careful approach guarantees you protect the label’s appearance while effectively targeting the ink. Skipping this step risks irreversible damage, so always start small and test first to find a safe way to remove ink from your plastic labels.
How to Choose the Right Solvent for Plastic Ink Removal
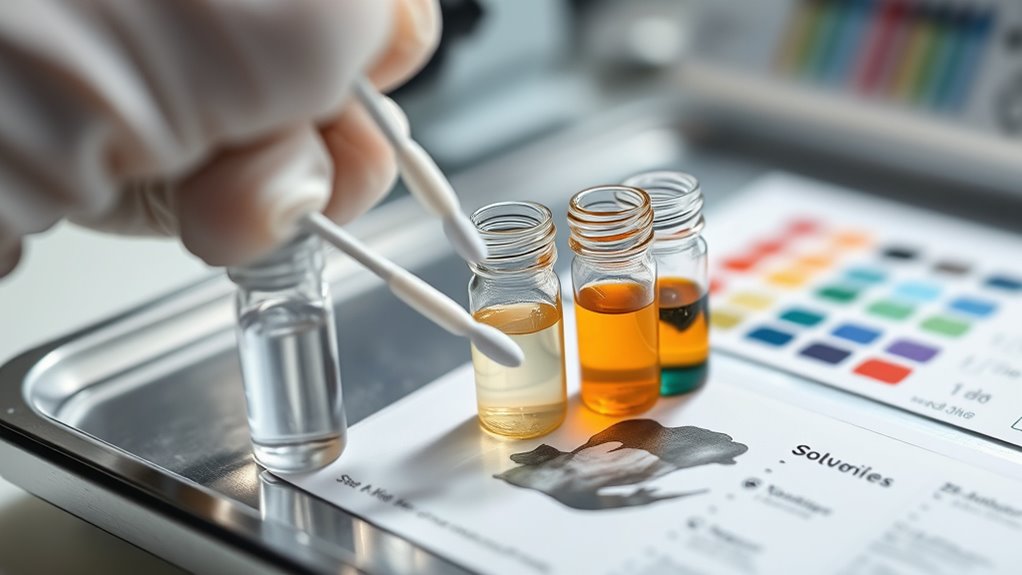
When you’re picking a solvent, begin by thinking about how strong it needs to be. For light ink stains, isopropyl alcohol usually does the trick. But if you’re dealing with tougher spots, you might want to switch to something stronger like acetone.
Also, don’t forget to consider the type of plastic you’re working with. Some solvents can actually harm materials like polycarbonate or acrylic. So, it’s always best to choose the gentlest solvent that still gets the job done without damaging the surface.
Solvent Strength Comparison
Choosing the right solvent for removing ink from plastic labels depends on balancing strength and safety. Acetone is a powerful solvent that dissolves stubborn ink quickly but can damage or discolor plastic surfaces if used carelessly.
Rubbing alcohol, typically 70-90% isopropyl alcohol, offers a gentler alternative. It’s effective on light ink stains and safer for delicate plastics. If you want to avoid harsh chemicals, non-acetone nail polish remover provides a milder option, though it’s less effective than acetone.
Household solutions like vinegar or cooking oil are even gentler but usually won’t tackle permanent marker ink well. When choosing, consider how tough the ink is and how much risk you’re willing to take with the plastic’s finish. That way, you’ll pick a solvent that cleans efficiently without causing damage.
Surface Compatibility Factors
Finding the right solvent is only part of the equation. You also need to consider how the plastic surface will react. Different plastics respond differently to solvents, so testing on a small, hidden spot is essential to avoid damage. Here’s what to consider:
- Plastic type: Polypropylene and polyethylene tolerate rubbing alcohol and acetone better than polycarbonate or PVC, which can be damaged easily.
- Surface finish: Glossy plastics may discolor or dull with some solvents, while matte finishes can be less affected but harder to clean.
- Porosity: Porous or aged plastics absorb ink deeper, making solvent removal less effective.
Use chemical compatibility charts to pick solvents that remove ink without harming your plastic surface.
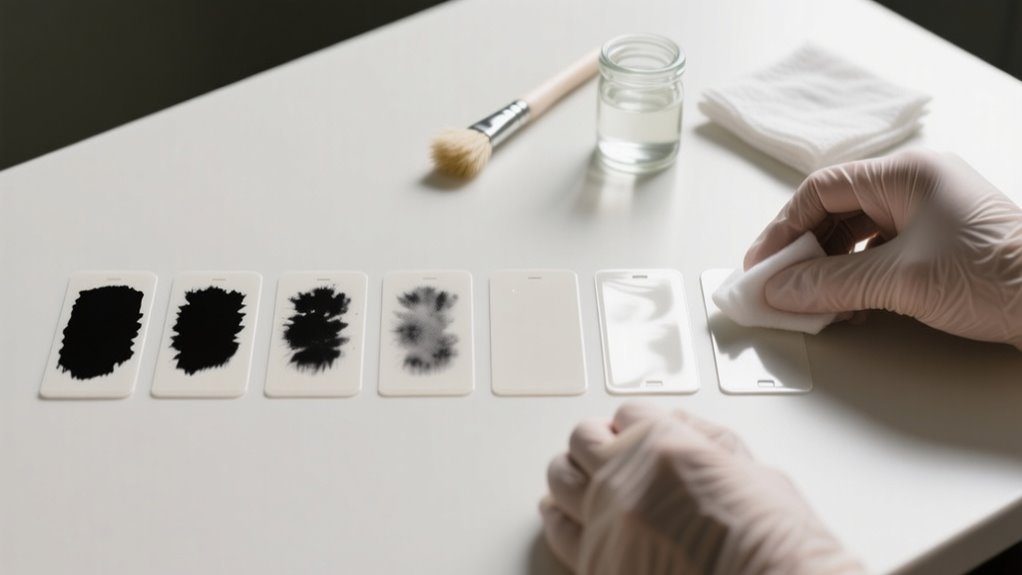
Removing Fresh or Light Ink Stains With Rubbing Alcohol
If you notice a fresh or light ink stain on your plastic label, you can quickly tackle it using rubbing alcohol. Start by dampening a clean cloth or cotton ball with rubbing alcohol, making sure it’s saturated but not dripping.
For fresh ink stains on plastic labels, gently dab with a saturated cloth soaked in rubbing alcohol.
Gently dab or rub the ink stain in a circular motion, applying steady pressure. Keep this up until the ink begins to lift from the plastic, which usually takes just a few seconds to a minute.
To avoid spreading the ink or reapplying dirty alcohol, switch to a fresh section of the cloth or use a new cotton ball as needed. Once the stain is gone, wipe the area with a damp, clean cloth to remove any leftover rubbing alcohol.
Finally, dry the surface thoroughly. This method effectively removes light ink stains without damaging the plastic label’s surface, making it a quick and reliable first step in ink stain removal.
Using Acetone for Tough or Set-In Ink Marks
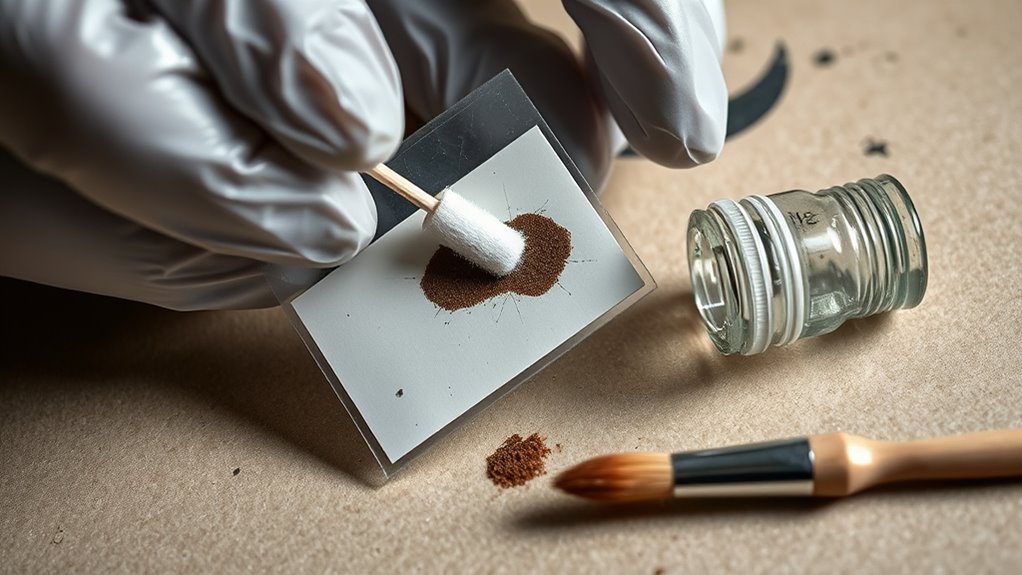
When you’re dealing with tough ink marks, go ahead and start by applying acetone carefully using a cotton swab or a cloth. If the ink is really set in there, try soaking the label in acetone for about 5 to 10 minutes—it can help loosen things up. Once you’ve removed the ink, be sure to rinse the plastic thoroughly and let it dry completely so there’s no residue left behind.
Preparing Acetone Application
To tackle tough or set-in ink marks, start by pouring a small amount of acetone onto a clean cloth or cotton ball. Make sure it’s saturated but not dripping. Proper preparation helps acetone effectively remove stubborn ink without damaging the plastic label.
Follow these steps to prepare for acetone application:
- Select a clean cloth or cotton ball and saturate it evenly with acetone, avoiding excess liquid.
- Test a small hidden area of the plastic label to ensure acetone won’t cause damage or discoloration.
- Keep additional acetone nearby to reapply as needed during the removal process.
Soaking Technique For Labels
Although acetone works well with a cloth application, soaking plastic labels in it can more effectively loosen tough or set-in ink marks. To start, submerge the plastic item fully in a glass or stainless-steel container filled with acetone. Let it soak for 5 to 10 minutes, allowing the acetone to break down the ink and adhesive.
After soaking, gently wipe the label with a cloth or sponge in circular motions to remove loosened ink. If stubborn ink remains, just repeat the soaking process until the label lifts completely. This soaking technique saves time and effort when dealing with persistent marks.
Once the ink is gone, make sure to rinse the plastic thoroughly with water and dry it entirely before reuse to clear away any acetone residue.
Post-Removal Cleaning Tips
After soaking and wiping away ink with acetone, you’ll want to focus on properly cleaning the plastic to protect its surface. Using acetone effectively means you’ll need to rinse the area thoroughly to avoid damage or discoloration. Follow these steps to guarantee the plastic stays intact:
- Rinse the plastic thoroughly with water to remove any residual acetone and prevent surface damage.
- Wipe the cleaned area with a damp cloth to eliminate leftover acetone and help it evaporate faster.
- Allow the plastic to air dry completely in a well-ventilated space before handling or reusing.
Soaking Method for Stubborn Ink
When stubborn ink refuses to budge, soaking your plastic label in acetone or rubbing alcohol can break it down effectively. Start by fully submerging the label in a glass or stainless steel container filled with your chosen solvent. Avoid plastic containers to prevent unwanted reactions.
Let the label soak for 5 to 10 minutes, checking periodically to monitor the ink’s loosening without leaving it exposed too long. Once the ink softens, gently wipe the label with a cloth or sponge, applying minimal pressure to avoid damaging the plastic surface.
After removing the ink, rinse the label thoroughly with water to eliminate any leftover solvent. Finally, allow the plastic to dry completely before reusing it or applying any new labels. This soaking method with acetone offers a simple yet effective way to tackle stubborn ink without harsh scrubbing, saving you time and preserving your plastic labels.
Prevent Ink Smearing When Wiping During Ink Removal
To prevent ink from smearing while wiping it off your plastic labels, you should wipe in a single, consistent direction using a dry or slightly damp cloth. This approach helps control the ink removal and stops the stain from spreading. Avoid using a soaking wet cloth because it can cause the ink to run and smear further.
Instead, apply gentle pressure and work slowly on small sections to keep the process manageable and precise.
Here are three key tips to prevent smearing when you wipe:
- Use a dry or barely damp cloth to maintain control and avoid excess moisture.
- Wipe with gentle, steady strokes in one direction, never back and forth.
- Test your wiping method on a hidden spot before tackling the whole label.
Cleaning Residue and Rinsing Plastic Containers
Once you’ve treated the ink, go ahead and rinse the container thoroughly with warm water. This helps wash away any leftover solvent residue. Then, gently clean the surface using a damp cloth and some mild soap to lift off any remaining marks. Finally, make sure to dry the container completely before storing it—this will prevent water spots and keep it looking nice and clean.
Removing Solvent Residue
How do you guarantee your plastic containers are truly free of solvent residue after cleaning? After using acetone or similar solvents, it’s essential to rinse thoroughly to avoid lingering chemicals that can degrade plastic or leave odors. Follow these steps:
- Rinse the container with warm water, focusing on all surfaces, including edges and crevices, to remove solvent traces.
- Use a mild dish soap during rinsing to break down any leftover solvent residue effectively.
- Wipe the container with a damp cloth or sponge to eliminate any remaining solvent film, then let it air dry completely.
Washing With Soap
A few drops of dish soap mixed with warm water can work wonders when washing plastic containers. Start by soaking the container to loosen ink stains and any leftover residue. Use a soft sponge or cloth to gently scrub the surface, focusing on areas with ink or adhesive.
If the ink doesn’t come off easily, add more soap and keep scrubbing until the stain fades. Once you’ve removed as much ink as possible, rinse the container thoroughly with clean water. This step guarantees that all soap and loosened ink particles wash away, preventing any sticky residue.
Proper rinsing is essential to avoid buildup and prepare the container for the next cleaning stage or reuse.
Drying And Storage
Two essential steps follow cleaning: rinsing and drying your plastic containers thoroughly. After removing ink or residue, rinse each container with warm water to wash away any leftover cleaning solution.
Next, let them air dry completely in a well-ventilated spot to prevent moisture buildup and mold growth.
For effective drying and storage, remember to:
- Use a clean, dry cloth to wipe containers if you need to speed up drying without leaving water spots.
- *Guarantee* containers are fully dry before sealing or stacking to avoid trapped moisture and chemical transfer.
- Store containers in a cool, dry place away from direct sunlight to prevent warping or discoloration.
Following these steps keeps your plastic containers safe and ready for future use.
Ink Removal for Different Plastics
Because different plastics react uniquely to solvents and cleaning methods, you’ll need to tailor your ink removal approach based on the material. For instance, acetone works well on glass or acrylic but can damage plastics like PVC by causing discoloration or cracking.
Softer plastics such as polypropylene are easier to clean, while rigid ones like polycarbonate require gentler care. Always test a small area first, especially with heat-sensitive plastics like polystyrene.
Textured or matte finishes trap ink deeper, making removal tougher than on smooth, glossy surfaces.
| Plastic Type | Ink Removal Tip |
|---|---|
| Polypropylene | Use mild solvents, easy removal |
| Polycarbonate | Avoid acetone, use gentle wipes |
| PVC | Acetone causes damage, test first |
| Polystyrene | Test first to avoid warping |
Caring for Plastic Surfaces After Ink Removal
Once you’ve removed the ink, make sure to rinse the plastic surface thoroughly with water to wash away any leftover cleaning chemicals. Proper aftercare is essential to maintain the plastic’s integrity and appearance following cleaning. Avoid using abrasive materials when drying to prevent scratches or damage.
Rinse plastic thoroughly after ink removal and dry gently to preserve its appearance and prevent damage.
To care for plastic surfaces after ink removal, follow these steps:
- Gently dry the plastic with a soft cloth or sponge to avoid abrasion.
- Apply a plastic conditioner or a small amount of mineral oil to restore flexibility and shine.
- Store the cleaned plastic labels in a cool, dry place away from direct sunlight to prevent UV damage.
Regularly inspect the plastic for discoloration or deterioration caused by solvents during cleaning. Address any issues immediately to prolong the label’s lifespan. With proper care, your plastic surfaces will remain clean and durable after ink removal.
Frequently Asked Questions
Can Ink Removal Damage the Plastic Label’s Design or Texture?
Yes, ink removal can damage the plastic label’s design or texture if you’re not careful. The label durability depends on the type of plastic and ink penetration. Harsh solvents or aggressive rubbing can fade or peel the printed design.
You might also lose tactile features or weaken the adhesive layer, causing bubbling or peeling. Always test a small area first to avoid compromising the label’s durability while removing ink.
How Long Does Ink Typically Take to Fully Come off Plastic Labels?
Ink typically takes anywhere from a few minutes to several hours to fully come off plastic labels, depending on ink penetration and label durability. If the ink hasn’t deeply penetrated the plastic, you’ll see results in about 5 to 10 minutes using effective solvents.
However, tougher stains that soak into the label might need 30 minutes or more. Keep in mind, your label’s durability affects how long and how aggressively you can treat it.
Are There Eco-Friendly Solvents Safe for Plastic Ink Removal?
Yes, you can use biodegradable solvents and natural cleaning agents to remove ink from plastic safely. These eco-friendly options, like distilled white vinegar or plant-based rubbing alcohol, reduce environmental impact and minimize damage to plastic.
Just remember, their effectiveness varies, so you might need to apply them a few times. Always test a small hidden area first to avoid discoloration, ensuring your plastic labels stay intact while you clean them.
Can Ink Removal Methods Affect the Adhesive on Plastic Labels?
Yes, ink removal methods can affect the adhesive on plastic labels due to chemical reactions triggered by solvents. You’ll want to take into account solvent safety because some chemicals, like acetone, may weaken or dissolve the adhesive, causing labels to loosen or fall off.
Since adhesives vary in resistance, it’s smart to test solvents on a small area first. This helps you avoid damaging the adhesive while removing ink effectively.
What Should I Do if Ink Removal Causes Discoloration on Plastic?
If ink removal causes discoloration on plastic, you should immediately rinse the area with clean water to stop any ongoing chemical reactions. Next, test a gentle cleaning solution like diluted vinegar on a small spot to avoid making the stain worse.
If the discoloration persists, avoid harsh solvents because they can make it worse. Instead, try neutralizing remedies or consider repainting to cover stubborn stains and restore the plastic’s original look.
Conclusion
Removing ink from plastic labels doesn’t have to be frustrating. Did you know that nearly 60% of people throw away plastic containers because of stubborn ink marks?
By following these steps, you can save money and reduce waste. Just remember to test solvents first, choose the right method, and care for your plastic afterward.
With a little patience, you’ll keep your plastic looking clean and reusable, helping both your wallet and the planet.
Leave a Reply