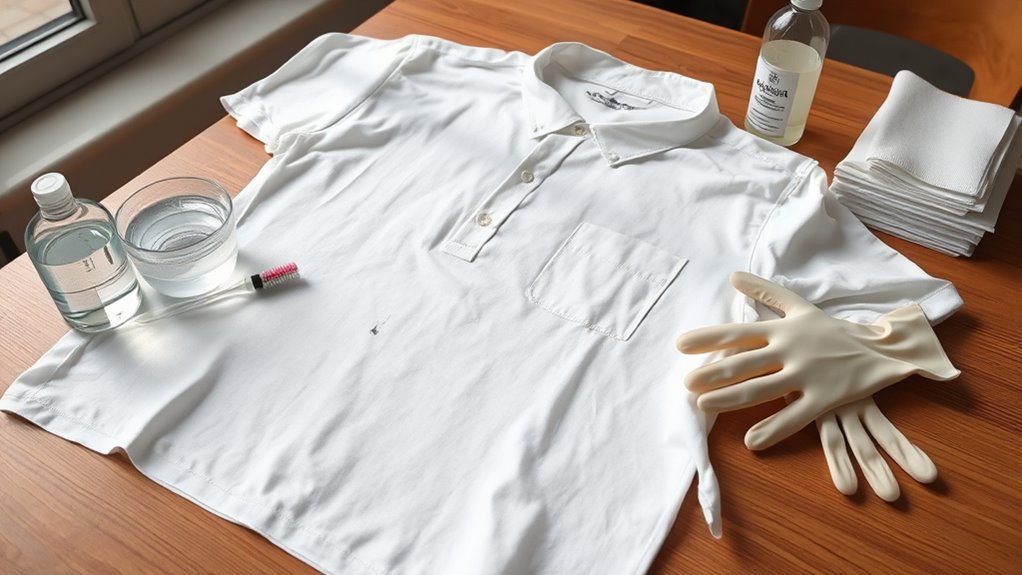
To get ink out of your white shirt, quickly gather rubbing alcohol, clean cloths, and gloves.
Blot the stain gently without rubbing, placing a paper towel underneath to catch ink.
Rinse the area with cold water from behind to dilute and push the ink out.
Dab rubbing alcohol on the stain, rinse again, then wash in the warmest water safe for the fabric.
Air dry and repeat treatment if ink remains.
For a detailed process, you’ll find helpful tips ahead.
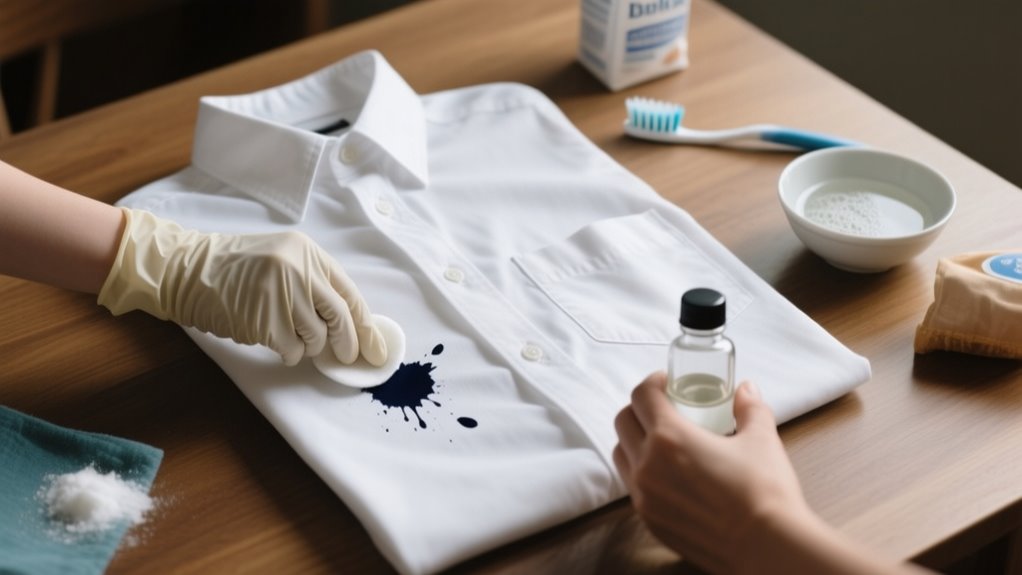
Gather Essential Supplies for Ink Stain Removal
Before you tackle the ink stain, gather all the essential supplies to make the process smoother. For effective ink stain removal, you’ll need household solvents like rubbing alcohol or hand sanitizer, which break down ink quickly on white shirts.
Prepare clean white cloths or cotton pads to apply the solvent carefully; this prevents transferring extra color or dirt onto your shirt. Don’t forget a pair of gloves to protect your skin from the solvents’ harsh effects.
It’s helpful to have a small bowl or container nearby to hold the rubbing alcohol or your chosen solvent for easy dipping and application. Finally, keep a mild laundry detergent ready to wash the shirt thoroughly after treating the stain.
Having all these supplies on hand before you start will save time and increase your chances of completely removing the ink stain without damaging your white shirt.
Act Quickly by Blotting and Diluting the Ink Stain
As soon as you notice the ink stain, start by blotting it gently with a clean cloth. This soaks up the excess ink without rubbing it in. Try to avoid scrubbing because that can actually make things worse by pushing the ink deeper into the fabric. Then, use some cold water to lightly dilute the stain. This helps lift the ink before it has a chance to set.
Immediate Stain Blotting
How fast you act can make all the difference in removing ink from your white shirt. Immediate stain blotting is essential to stop the ink from setting permanently. Here’s what you should do right away:
- Blot the stain gently with a clean, dry cloth or paper towel to absorb excess ink.
- Place a paper towel or cloth underneath the stained area to catch ink that may bleed through.
- Use a damp cloth to dilute the stain, working from the outer edges inward to prevent spreading.
- Repeat blotting with a fresh cloth as needed, avoiding any rubbing that could push ink deeper.
Avoid Rubbing Ink
Although it’s tempting to scrub an ink stain, you should resist rubbing it, as doing so pushes the ink deeper into the fabric. Instead, gently blot the stain with a clean cloth or paper towel to lift excess ink without spreading it further.
Use a light blotting motion, avoiding pressure that could push the ink deeper or cause it to spread. Acting quickly, dilute the ink stain by blotting with cold water, which helps prevent it from setting permanently.
Prompt blotting and dilution considerably increase your chances of removing the ink from your white shirt. Remember, rubbing only makes the stain harder to remove, so focus on blotting to tackle the stain effectively and keep your shirt looking clean.
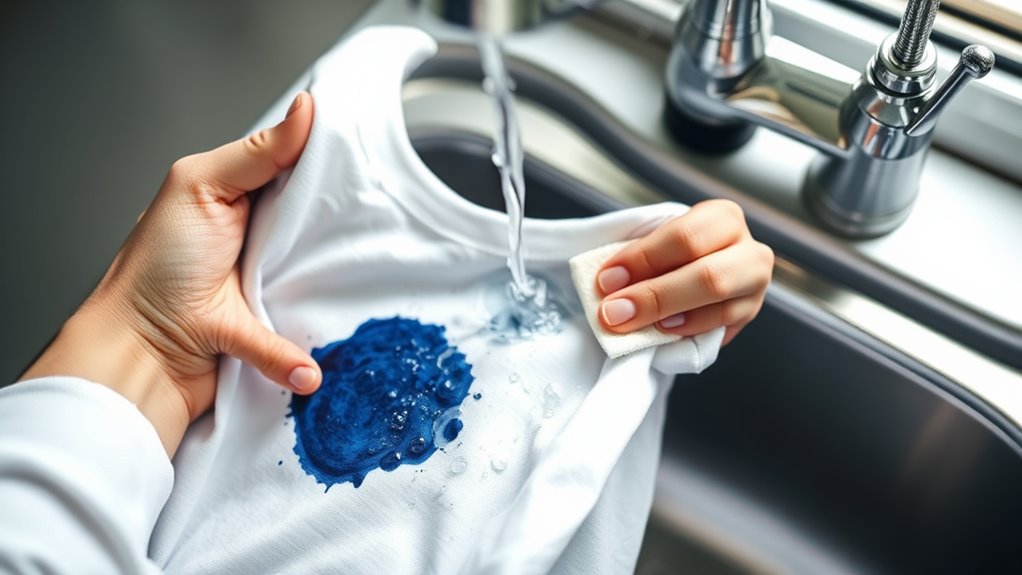
Use Cold Water
Once you’ve gently blotted the ink stain to avoid spreading it, the next step is to use cold water to prevent the ink from setting into the fabric. Acting quickly is key to remove ink stains effectively. Here’s what you should do:
- Rinse the stained area with cold water from the back of the fabric to push the ink out of the fibers.
- Avoid hot water, which can set the ink and make removal harder.
- Continuously blot the stain with a clean cloth while rinsing to dilute the ink.
- Repeat until the stain starts to fade before applying any cleaning agents.
Following these steps helps keep ink stains from settling, improving your chances to remove ink stains successfully.
Blot the Ink Stain Gently Without Rubbing
Before the ink sets deeper into the fabric, gently blot the stain with a clean, white paper towel or cloth to lift excess ink without spreading it. Avoid rubbing, as this can push the stain further into the fibers, making it harder to remove.
Instead, use a light pressing motion to carefully blot the stain. To prevent the ink from transferring to other parts of your shirt, place a clean cloth or paper towel underneath the stained area.
Dampen your blotting material slightly with rubbing alcohol or a stain remover before applying it to the stain, which helps break down the ink. Continue blotting with fresh sections of the cloth until no more ink transfers.
Rinse the Ink Stain With Cold Water
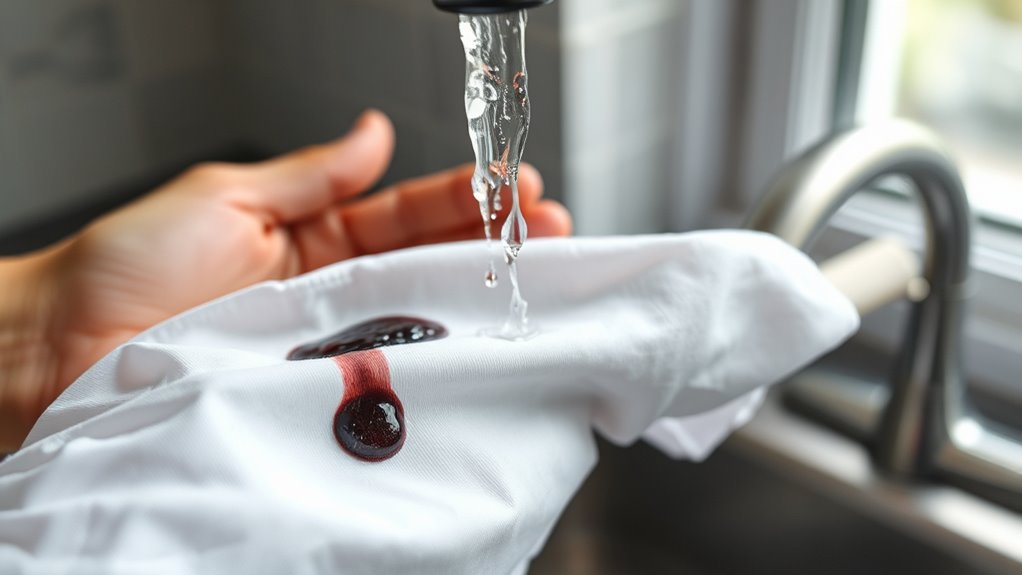
If you want to stop the ink from settling deeper into your shirt, rinse the stain with cold water immediately. This quick action dilutes the ink and prevents it from embedding further into the fabric.
Follow these steps to rinse the stain effectively:
Here’s how to rinse ink stains effectively and prevent them from setting deeper into your fabric.
- Turn the shirt inside out to expose the backside of the stain.
- Hold the stained area under a gentle stream of cold water.
- Let the cold water rinse the stain for 10-15 minutes to flush out as much ink as possible.
- Avoid using hot water, as it can set the stain permanently.
Use Rubbing Alcohol or Hand Sanitizer on the Stain
Choose rubbing alcohol or hand sanitizer that has at least 60% alcohol for the best results. Go ahead and apply it directly to the stain. Then, blot gently with a clean cloth to lift the ink without spreading it around.
After letting it sit for a few minutes, rinse the shirt with cold water. Finally, wash it as usual to remove any leftover residue.
Choosing The Right Product
Two common household products, rubbing alcohol and hand sanitizer, work wonders for removing ink stains from a white shirt. Both contain isopropyl alcohol, a powerful solvent that dissolves ink pigments effectively.
When choosing the right product, consider these points:
- Rubbing alcohol is a classic solvent specifically designed for cleaning ink stains.
- Hand sanitizer is a handy alternative if rubbing alcohol isn’t available.
- Always test either product on a hidden area first to avoid discoloring your fabric.
- Apply the product as soon as possible after the stain appears for the best results.
Effective Application Techniques
When you use rubbing alcohol or hand sanitizer on an ink stain, start by saturating a cotton pad or cloth and gently dabbing the affected area. This helps avoid spreading the ink further. Make certain the stain is fully wetted with the solvent, covering the entire spot.
Use light tapping motions instead of rubbing to lift the ink without damaging the fabric. Change the cloth frequently to prevent reapplying the ink. After treating, rinse with cold water to remove leftover solvent and ink residue.
| Step | Action | Tip |
|---|---|---|
| Saturate cloth | Dab with solvent | Avoid rubbing to prevent spread |
| Cover entire stain | Light tapping | Ensure thorough wetting |
| Replace cloth | Frequent changes | Stop redistributing ink |
Post-Treatment Washing Tips
Although applying rubbing alcohol or hand sanitizer helps break down the ink, you’ll need to rinse the shirt thoroughly with cold water to wash away the solvent and loosened ink. Follow these post-treatment washing tips to guarantee the best results:
- Rinse in cold water immediately after treating the stain to remove excess ink and alcohol.
- Wash the shirt in the warmest water safe for the fabric with regular detergent to lift remaining ink particles.
- Check the stain before drying; if it’s still visible, repeat the treatment and washing to avoid setting the stain.
- Air dry the shirt instead of using a dryer. This way, you can inspect the stain clearly without heat setting any residue.
These steps maximize your chances of fully removing ink from your white shirt.
Blot the Stain Repeatedly to Lift Ink
Since ink easily seeps into fabric fibers, you’ll want to blot the stain repeatedly with a clean, dry cloth or an alcohol-dipped pad to lift as much ink as possible without spreading it. Blotting gently and consistently helps absorb ink without pushing it deeper.
Use a fresh paper towel or cotton pad for each blot to gradually remove the stain. Allow the fabric to dry slightly between sessions to avoid re-transfer and enhance absorption. Repeated blotting with alcohol pads can considerably reduce the ink’s intensity.
| Step | Purpose |
|---|---|
| Use clean, dry cloth | Prevents spreading the stain |
| Blot gently | Lifts ink without embedding it further |
| Change blotting pad | Ensures ink is absorbed effectively |
| Allow drying intervals | Enhances ink absorption |
| Repeat with alcohol pad | Decreases stain intensity |
Following these steps ensures you carefully lift the stain while protecting your white shirt’s fabric.
Rinse the Ink Stain Thoroughly and Prepare for Washing
Rinse the ink stain thoroughly with cold water to dilute the ink and get rid of any leftover solvent. Be sure to hold the fabric under the water from the back of the stain—that way, you can push the ink out more effectively.
Before you move on to washing, take a moment to check the shirt and make sure the stain has lightened enough for the next steps.
Use Cold Water
One of the most essential steps in removing ink from your white shirt is to flush the stain with cold water as soon as you notice it. Cold water helps dilute the ink stain and stops it from setting deeper into the fabric.
Here’s how to use cold water effectively:
- Hold the stained area under cold, running water.
- Direct the flow from the backside of the fabric to push the ink out of the fibers.
- Keep the water running steadily to rinse out as much ink as possible.
- Avoid hot water, which can make the ink set permanently.
Rinsing immediately with cold water increases your chances of removing the ink stain before it dries and becomes harder to treat.
Remove Solvent Residue
After applying a solvent to your ink stain, you’ll want to flush the area thoroughly with cold water to remove any leftover ink and treatment residue. Use a gentle stream of cold water to rinse the fabric under running water for at least five minutes.
This helps dilute and wash away solvent residue, including rubbing alcohol or hand sanitizer, preventing the stain from resetting during washing. Be careful not to spread the ink further by avoiding harsh scrubbing.
Once the area looks rinsed, pat it dry with a clean cloth to absorb excess water and residue. Removing all traces of the solvent is essential before you proceed with washing your white shirt normally, ensuring the stain treatment doesn’t interfere with the final cleaning.
Inspect Before Washing
Make certain the treated area is thoroughly rinsed with cold water to dilute any remaining ink and prevent it from setting. When you inspect the stain, follow these steps to prepare your shirt for washing:
- Rinse the ink stain from the backside with a gentle stream of cold water to flush out as much ink as possible.
- Ensure all pretreatment products, like alcohol or soap, are fully rinsed off to avoid washing interference.
- Carefully inspect the stained area for any residual ink or pretreatment residue.
- Do not dry the shirt until you’re sure the stain is completely gone, as heat can set the ink permanently.
Following these steps ensures your pretreatment efforts won’t be wasted and your shirt will come out clean after washing.
Wash the Shirt in the Hottest Water That’s Safe
Because hot water helps break down ink stains, you should wash your white shirt in the hottest water that’s safe for its fabric. Start by checking the care label to find the maximum water temperature recommended.
Using hot water can dissolve water-based ink stains more effectively, making them easier to remove. Before washing, don’t forget to apply a thorough pre-treatment to the ink stain; this boosts the chances of getting the ink out completely.
If your shirt’s fabric is delicate or prone to shrinking, avoid boiling hot water. Instead, use the highest safe temperature according to the label. Washing in water that’s too hot can damage or shrink the fabric, so balance effectiveness with caution.
Air Dry and Inspect the Shirt Before Using Heat
When you’ve finished washing your shirt, let it air dry completely before using any heat sources like a dryer or iron. Heat can permanently set any remaining ink stains, making them nearly impossible to remove later. To avoid this, follow these steps:
- Air dry your shirt in a well-ventilated area, ensuring it’s fully dry.
- Inspect the entire shirt under good lighting to check for any faint ink marks.
- Focus on areas that were stained, as some ink might still be visible when dry.
- If you spot any remaining ink, don’t use heat; instead, re-treat the stain and air dry again.
Repeat Solvent Application and Washing if Ink Persists
If ink still stains your white shirt after the first wash, don’t give up. Apply the solvent again directly to the affected area and let it sit for 10 to 15 minutes. This repeated solvent application helps loosen stubborn ink and improves your chances of full removal.
Afterward, gently blot the stain to lift the ink before washing the shirt again in cold water. Repeat this solvent and washing process as needed, but always check the stain before drying. If any ink remains, repeat the steps to avoid setting the stain permanently.
| Step | Action | Tip |
|---|---|---|
| 1 | Apply solvent to stain | Let it sit 10-15 minutes |
| 2 | Gently blot the stain | Avoid rubbing |
| 3 | Wash in cold water | Check stain before drying |
Stay patient. Multiple treatments often ensure your white shirt gets ink-free.
Frequently Asked Questions
Can Ink Stains Be Removed From Colored Shirts the Same Way?
Yes, you can remove ink stains from colored shirts using similar methods, but you need to do colorfastness testing first. Test any stain remover on a hidden spot to avoid damaging or fading the fabric.
If rubbing alcohol or hand sanitizer isn’t safe, try alternative stain removers designed for delicate colors. Always blot gently and rinse with cold water to prevent spreading the stain or causing color bleeding.
Is It Safe to Use Bleach on a White Shirt With Ink Stains?
Back in the days of quills and parchment, bleach safety wasn’t a concern. But today, you need to be cautious. It’s not always safe to use bleach on ink stains because it can weaken fabric and cause yellowing.
For ink stain safety, test a small hidden area with diluted bleach first. If you’re unsure, try specialized stain removers or rubbing alcohol before risking damage with bleach on your white shirt.
How Long Can I Wait Before Treating an Ink Stain?
You shouldn’t wait long to treat an ink stain. Ideally, act within minutes before the stain starts drying. The longer you delay, the more ink gets absorbed, making it harder to remove.
If you wait over 24 hours, the stain bonds tightly to fabric fibers, which lowers your chances of a full clean-up. If you can’t treat it right away, keep the area moist to slow down drying and ink absorption until you can deal with it properly.
Will Professional Dry Cleaning Remove Ink Stains Effectively?
Yes, professional dry cleaning can effectively handle stain removal, especially with ink stains. They use specialized solvents and techniques that target ink without harming your shirt’s fabric safety.
Keep in mind, fresher stains respond better, but even stubborn ones often improve. However, some ink stains that have set deeply or are on delicate fabrics might resist complete removal.
Can Ink Stains Damage the Fabric Permanently?
Ink stains can definitely leave a lasting impression on your shirt’s fabric durability. When ink penetration runs deep, it’s like the fabric’s strength takes a quiet hit, becoming more fragile over time.
If you don’t act quickly, the stain can settle in, making the fibers weaker and more prone to damage. So, treating ink spots promptly helps keep your fabric looking fresh and sturdy for longer.
Conclusion
Don’t let ink stains paint your white shirt with regret. By acting fast and following these steps, you’ll chase away those stubborn marks like a gentle rain washing away dirt.
Remember, patience is your brush, and persistence your palette. Sometimes it takes a second stroke to bring your shirt back to life.
So, roll up your sleeves and turn that blotch into a distant memory, keeping your shirt as fresh as a blank canvas.
Leave a Reply