To refill your Epson ink cartridges in 10 easy steps, first gather your ink, syringe, gloves, and workspace cover.
Safely remove the cartridge by powering off the printer and gently pulling it out.
Locate and prepare the refill hole by removing any seals.
Inject ink slowly using a syringe, then seal the hole to prevent leaks.
Reinsert the cartridge, run test prints for quality, and balance air channels to avoid leaks.
You’ll also reset the chip for accurate ink level detection.
Keep following for detailed tips.
Gather Supplies for Epson Ink Cartridge Refill
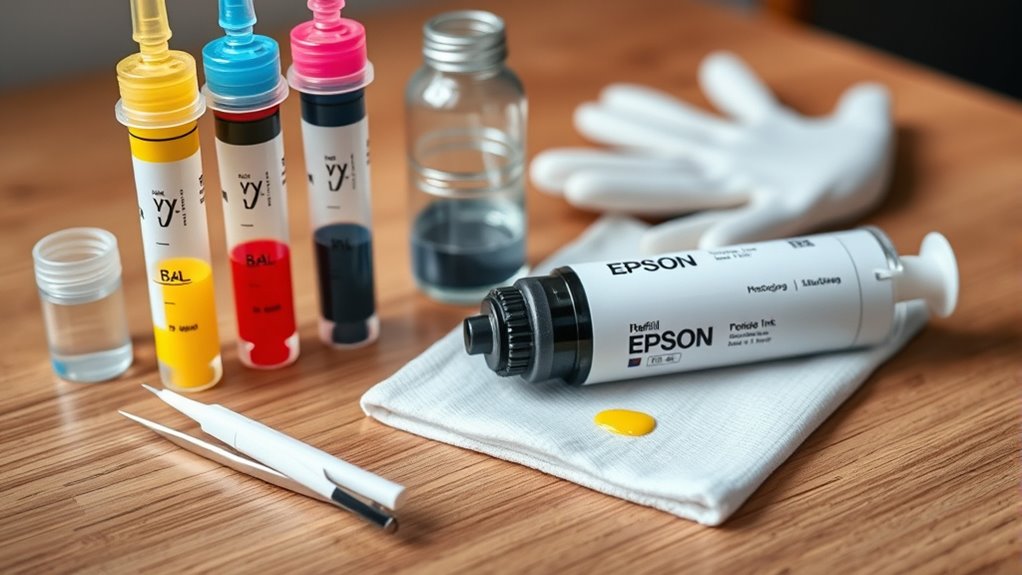
Before you begin refilling your Epson ink cartridges, gather all the necessary supplies to guarantee a smooth process. First, make sure you have high-quality ink bottles matching your cartridge colors: cyan, magenta, yellow, and black. They should be compatible with your Epson model.
Check your cartridge model number, like T048, T200, or Epson 18/18XL, to buy the right supplies. You’ll also need tools such as a blunt needle or syringe for injecting ink, tape to seal the refill holes afterward, and a chip resetter if your cartridge uses a smart chip.
Don’t forget to wear disposable gloves to protect your hands and cover your workspace with paper or plastic to prevent ink stains. Keep a clean cloth or paper towels handy for quickly wiping any spills during refilling. Having these supplies ready will make the entire process safer, cleaner, and more efficient.
How to Safely Remove Your Epson Ink Cartridge
When you’re ready to remove your Epson ink cartridge, make sure the printer is turned off and unplugged to avoid any electrical damage. Next, open the printer cover carefully to access the cartridges. Avoid touching or damaging any surrounding parts to keep everything intact.
Ensure the printer is off and unplugged before carefully opening the cover to access cartridges safely.
Locate the cartridge you want to remove and gently press or lift the release latch, as this varies by printer model. Once released, grasp the cartridge firmly by its sides and pull it straight out without tilting or forcing it. This careful removal prevents ink leaks and damage.
Before removing, it’s helpful to check the ink level to confirm which cartridge needs refilling or replacing. After removal, place the cartridge on a clean, lint-free cloth or paper towel to avoid ink smudges on your work surface.
Following these steps ensures your Epson ink cartridge is safely removed and ready for the next step in the refilling process.
Locate and Prepare Refill Holes on Epson Cartridge
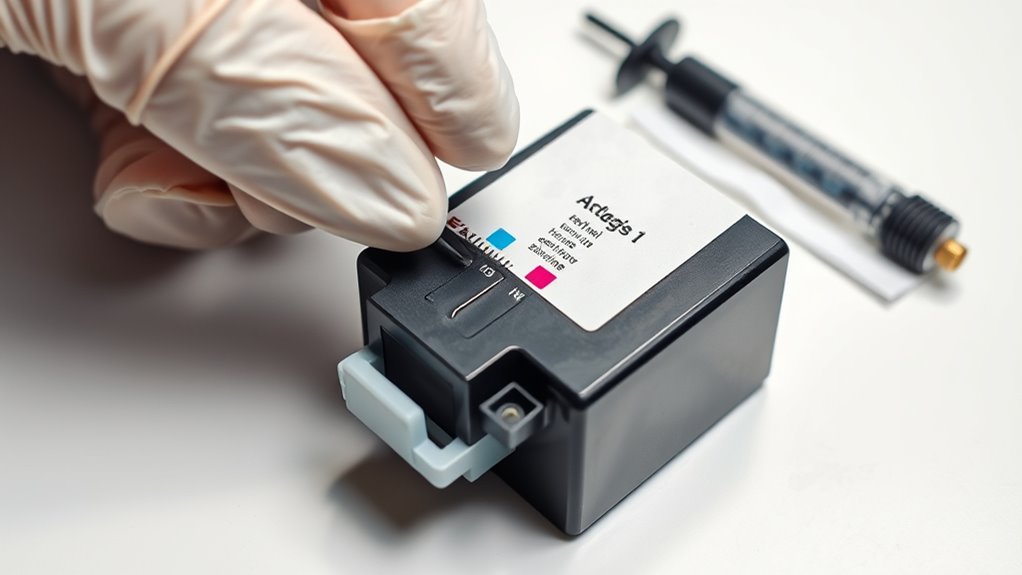
Although refill holes on Epson cartridges can be small and sometimes hidden, you’ll want to locate them carefully to guarantee a successful refill. Typically, the refill hole is a small, circular opening found on the top or side of the cartridge. Use a flashlight if needed to spot it clearly, especially on older or sealed cartridges.
Once you find the refill hole, remove any protective seal or label covering it. This step is essential for smooth ink flow. Make sure the refill hole is clean and free of debris to avoid contamination or leaks during the refill process.
Be mindful of the refill hole’s location to prevent accidentally puncturing or damaging other parts of the cartridge. Taking these steps will prepare your Epson cartridge properly and set you up for an efficient ink refill.
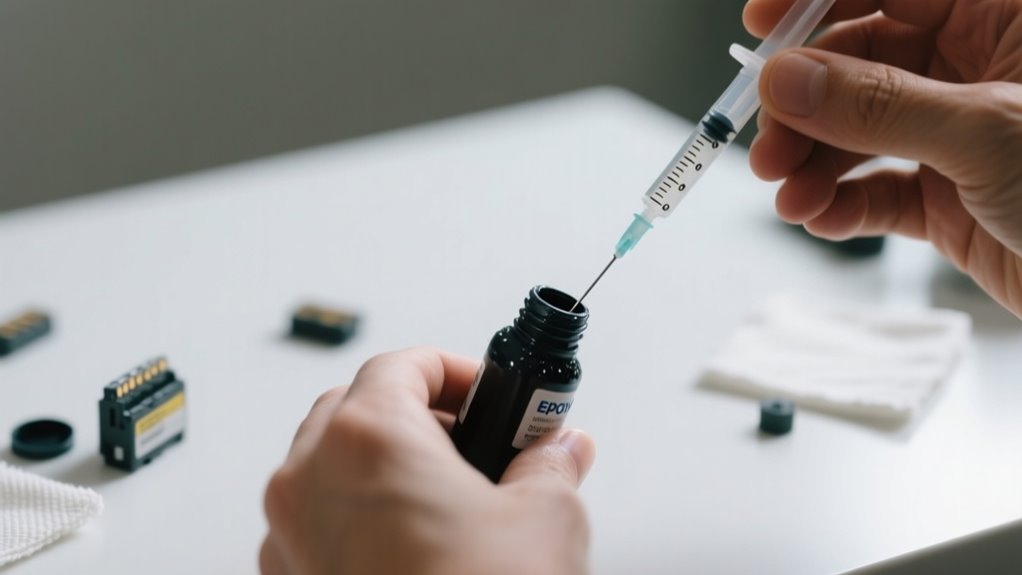
Use a Syringe to Inject Ink Into Epson Cartridges
Start by attaching a clean, blunt needle to your 10ml syringe. Then, draw about 10-12ml of ink, but try not to pull the plunger all the way out. Next, carefully insert the syringe into the refill hole. Be sure to avoid touching other parts to prevent any damage. Slowly inject the ink while keeping an eye on the level rising inside. Stop before it gets too full to make sure the refill goes smoothly.
Syringe Preparation Tips
Since precision is key, you’ll want to use a blunt-tipped syringe designed for ink refilling to protect your Epson cartridge from damage. Attach a 10ml syringe with a tapered tip, dip it into the ink bottle, and slowly pull the plunger to draw 10-12ml of ink without fully withdrawing it.
When you insert the syringe into the refill hole, do so carefully to avoid puncturing or harming the cartridge. Inject the ink slowly and stop once the reservoir is about 5mm from full to prevent overfilling.
After refilling, rinse the syringe immediately with clean water to keep it clean and prevent ink clogging during future uses. Proper syringe preparation guarantees a smooth and safe refilling process.
Ink Injection Techniques
When you’re ready to inject ink into your Epson cartridge, attach a blunt needle to your 10ml syringe to protect the cartridge’s delicate components. Dip the syringe into your ink bottle filled with new ink and gently pull the plunger back to draw about 10-12ml, avoiding air bubbles.
Slowly insert the needle into the refill hole, injecting printer ink steadily until the reservoir is about 5mm from full. Use a controlled motion to prevent over-pressurizing, which can cause leaks or damage.
After filling, carefully remove the syringe, seal the hole, and wipe away any excess ink with clean water to avoid messes. Following these ink injection techniques helps you save money, maintain your printer, and extend the life of your Epson ink cartridges.
Seal Refill Holes on Epson Cartridges to Prevent Leaks
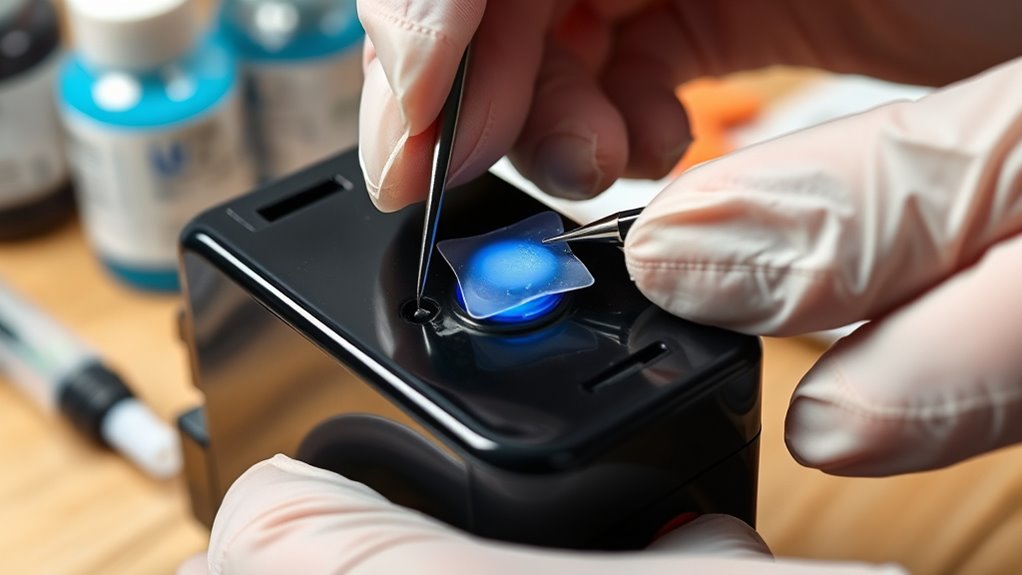
After you refill your Epson cartridge, you’ll want to pick the right seal material. Something like tape made specifically for ink cartridges or even a rubber stopper works well. Just make sure to press it down firmly so it creates an airtight barrier—this helps keep leaks and ink evaporation at bay.
It’s a good idea to check the seal regularly after printing to make sure everything stays secure. That way, you can avoid any messy spills and keep your cartridge working smoothly.
Choosing Proper Seal Materials
Although sealing refill holes might seem minor, choosing the right materials is essential to prevent ink leaks and maintain cartridge performance. You’ll want to use rubber stoppers or silicone plugs since they effectively seal refill holes, ensuring no ink escapes during or after refilling.
While tape or adhesive labels can work temporarily, they don’t provide a secure, lasting seal. Pick seal materials that are ink-resistant and flexible so they won’t crack or leak as the cartridge moves.
Also, make sure the material is easy to remove without damaging the cartridge, so you can refill multiple times without hassle. A proper seal keeps internal pressure stable and prevents air or ink from escaping, preserving your Epson cartridge’s functionality.
Steps For Secure Sealing
To prevent ink leaks and maintain your cartridge’s performance, you’ll need to seal the refill holes immediately after filling. Proper sealing is essential for leak prevention and keeping your printer mess-free.
Follow these steps for secure sealing:
- Use waterproof tape or a rubber stopper designed to withstand ink exposure.
- Cover the refill holes firmly but gently, ensuring a tight seal without damaging the cartridge.
- Double-check that the holes are fully sealed before reinstalling the cartridge to avoid ink oozing out.
Reinstall the Epson Cartridge Correctly
How do you guarantee your refilled Epson cartridge fits perfectly back into your printer? Start by verifying cartridge compatibility; using the correct model prevents misalignment and connection issues.
Carefully align the cartridge with the printer’s slot, making sure the contacts match the designated connectors. Don’t rush. Gently press the cartridge into place until you hear a click, signaling it’s securely seated.
Avoid tilting or forcing the cartridge, as this can damage internal components or contacts. Once installed, double-check that the cartridge is fully inserted and properly aligned.
This step ensures maximum ink flow and maintains print quality. Taking these precautions not only protects your printer but also maximizes the performance of your refilled ink cartridge.
Run a Test Print to Check Ink Quality
After you reinstall your Epson cartridge, go ahead and run a test print to check the print quality closely. Take a good look for any blank spots, streaks, or color inconsistencies—these could be signs that the cartridge refill didn’t go perfectly.
If you notice any problems, try printing a nozzle check pattern. This will help you spot any clogged nozzles so you can make the necessary adjustments.
Inspect Print Quality
When you run a test print following a refill, you’ll quickly spot issues like streaks, missing colors, or blurry lines that signal ink flow problems. To inspect print quality effectively, compare your test print to a standard color chart to check color calibration and saturation.
Look closely at the print for any dots, blank spots, or scratchy lines that may reveal clogged nozzles or uneven ink distribution. Printing multiple test pages helps confirm if the ink flow has stabilized and if the quality remains consistent. Here’s what to focus on:
- Color accuracy and saturation against a reference chart
- Presence of streaks, missing colors, or blurry details
- Consistency of print quality across several pages
If problems persist, consider cleaning the printhead before testing again.
Identify Printing Issues
Once you’ve inspected the print quality and noticed any irregularities, running a test print helps you pinpoint specific issues with the ink. Look closely for streaks, blank spots, or color inconsistencies that suggest low or uneven ink levels.
Pay special attention to faint or missing colors, as they signal which cartridges need refilling or cleaning. A clean, consistent test print without smudges or blotches means your cartridges are properly filled and working well.
If you spot problems, you might need to clean the printhead or reset ink levels before printing again. Running a test print also helps guarantee proper color calibration, confirming that ink distribution is balanced and cartridges are correctly installed after refilling.
This step is essential for maintaining excellent print quality.
Perform Air Balance Test to Prevent Leaks
Although refilling your Epson ink cartridges might seem straightforward, performing an air balance test is vital to prevent leaks. This test checks the small air chamber beneath the refill hole to guarantee it’s free of ink. That helps maintain proper pressure inside the cartridge.
To perform the air balance test effectively, you should:
- Use a syringe to gently remove any ink from the air channel, ensuring the air pocket stays empty.
- Confirm that the air chamber allows air to circulate properly, balancing pressure inside the cartridge.
- Regularly inspect the air balance during refilling to avoid ink spillages and maintain consistent print quality.
Maintaining proper air balance is essential because an overfilled air channel can cause ink to leak during printer operation. By keeping this air pocket clear, you’ll prevent leaks and extend the life of your Epson cartridges while guaranteeing smooth, clean prints every time.
Fix Overfilled Air Channels in Epson Cartridges
If you notice ink leaking or inconsistent print quality, your Epson cartridge’s air channel might be overfilled. To fix this, use an empty syringe with a tapered tip to gently withdraw excess ink from the air chamber.
Insert the syringe carefully into the ink hole and pull slowly to avoid damaging the cartridge. Keeping the air channel nearly empty ensures proper air flow, preventing leaks and maintaining print quality.
After removing the excess ink, re-seal the refill hole and double-check the air balance before reinstalling the cartridge.
| Step | Tool Needed | Purpose |
|---|---|---|
| Insert Syringe | Syringe w/ tapered tip | Remove excess ink carefully |
| Withdraw Ink | Syringe | Clear overfilled air channel |
| Seal Refill Hole | Tape or Sealant | Maintain proper air flow |
Following these steps preserves air flow and prevents ink leakage during printing.
Reset the Epson Cartridge Chip
After fixing any overfilled air channels, you’ll want to reset the Epson cartridge chip to guarantee your printer recognizes the cartridge as full again. This step is vital because the chip keeps track of ink usage and prevents printing when it thinks the cartridge is empty. To reset it, you’ll need a compatible resetter device designed for your Epson cartridge model.
Reset your Epson cartridge chip after fixing air channels to ensure your printer recognizes it as full again.
Here’s how to reset the chip effectively:
Place the cartridge or chip into the resetter device and press the reset button. Wait for the LED light on the device to change, usually turning green or flashing in a pattern, indicating a successful reset.
Confirm your printer no longer shows low ink warnings and that color calibration prints accurately. Resetting the chip ensures your printer correctly reads the cartridge’s ink level, maintaining proper color calibration and preventing unnecessary print interruptions.
Frequently Asked Questions
How Long Does a Refilled Epson Cartridge Typically Last?
A refilled Epson cartridge typically lasts between 150 to 300 pages, depending on your usage and the quality of ink you choose. Your refill durability will be similar to a new cartridge if you maintain and store it properly.
Keep in mind, heavy printing or high-resolution images can use up ink faster. You should monitor your ink levels regularly to get the best estimate of your cartridge’s refill durability before needing a replacement.
Can Refilling Affect My Printer’s Warranty?
Refilling your Epson cartridges can be a double-edged sword, like walking a tightrope over warranty concerns. Yes, it can void your printer’s warranty, especially if Epson detects non-original ink or chips. That means if something goes wrong, you might lose official support.
To protect your investment, you should weigh the cost savings against potential risks and always check your printer’s warranty policy before refilling cartridges.
What Type of Ink Is Best for Epson Cartridges?
The best ink for your Epson cartridges is high-quality, pigment-based ink that matches Epson’s ink compatibility standards. You’ll want to use either Epson’s proprietary ink or Epson-approved refill inks to avoid clogging and maintain print quality.
Avoid generic or low-quality inks, as they can cause smudging and inconsistent flow. Sticking to compatible inks guarantees your printer runs smoothly and your prints look vibrant and sharp every time.
How Do I Know When to Refill My Epson Cartridge?
You’ll know it’s time to refill your Epson cartridge by paying attention to timing cues like warning lights or messages on your printer’s control panel. Fading prints, streaks, or blank spots also signal low ink.
Many cartridges have a visual ink window to check levels directly. You can also use third-party apps for precise alerts.
Staying alert to these cues helps you avoid print interruptions and keeps your printer running smoothly.
Are There Any Risks of Damaging the Printer by Refilling?
Absolutely, refilling risks ruining your printer! Poor printer maintenance, like using incompatible ink or overfilling, can cause leaks, clog the printhead, or damage internal parts.
If you don’t reset the smart chip, your printer might reject the cartridge, leading to frustrating errors. Repeated careless refills can weaken the cartridge, risking cracks and more damage.
Conclusion
Now that you’ve mastered refilling your Epson ink cartridges, you’re practically a printing wizard! With just a little care and these simple steps, you’ll save a fortune and never run out of ink at the worst possible moment.
Just remember to handle everything gently, check for leaks, and reset the chip properly. Soon, your printer will be working like new again, and you’ll wonder how you ever lived without this skill!
Leave a Reply