Author: admin@glaciertattoo.com

  • 3 Reasons Bendy and the Ink Machine Is Scary

    3 Reasons Bendy and the Ink Machine Is Scary

    You feel uneasy because Bendy and the Ink Machine twists a cheerful vintage cartoon style into something creepy and unpredictable.

    The eerie sound effects and flickering shadows keep you on edge, making every moment tense.

    Plus, its psychological horror hits deep by mixing lost innocence with chilling betrayal, making fear personal and lasting.

    If you keep exploring, you’ll uncover how these elements combine to create a uniquely unsettling experience that lingers long after playing.

    Why Bendy and the Ink Machine’s Cartoon Style Feels So Creepy

    vintage cartoon unsettling twist

    Although Bendy and the Ink Machine uses a vintage cartoon style that might seem charming at first, it quickly feels unsettling. You recognize the nostalgic yet unsettling vibe as the game channels 1920s animations, like Steamboat Willie, but with a dark twist.

    Bendy and the Ink Machine’s vintage 1920s cartoon style charms then unnerves with a dark, twisted edge.

    The cartoon characters don’t just look old-fashioned; they have distorted character designs that make you uneasy. Bendy’s twisted smile and elongated limbs turn what should be playful into something sinister.

    Bright, cheerful colors clash with creepy themes, creating a disturbing contrast that keeps you on edge. The exaggerated, unpredictable movements and expressions of these characters make you question what they’ll do next.

    This blend of innocent cartoon aesthetics with horror elements flips your expectations, turning friendly visuals into something threatening. You can’t help but feel that beneath the familiar cartoon style lies something deeply wrong, making the game’s atmosphere uniquely creepy.

    How Sound and Lighting Build Tense Atmosphere in Bendy

    When you explore the world of Bendy and the Ink Machine, sound and lighting work together to keep you on edge. The eerie, distorted sound effects and unsettling ambient noises constantly fuel a tense atmosphere, making you feel uneasy even in seemingly empty rooms.

    Dim, flickering lighting and shadowy corners obscure your view, sparking fear of what might lurk just out of sight. The sharp contrast between the game’s bright, cartoonish visuals and the dark, ominous soundscape deepens this unsettling feeling.

    Lighting strategically highlights key threats or clues, directing your attention while preserving the overall suspense. Sudden jumpscares hit harder because they’re paired with abrupt, jarring sound cues, amplifying shock and surprise.

    Together, sound and lighting craft an atmosphere that keeps you alert and cautious, never letting you relax. This masterful combination plays a vital role in making Bendy’s world so intensely nerve-wracking.

    What Makes Bendy’s Psychological Horror Scare You Deeply?

    innocent cartoon sinister horror

    Because Bendy’s psychological horror blends vintage cartoon innocence with sinister themes, it unsettles you on a deep, emotional level. The eerie world contrasts playful animation with chilling imagery, making the ink demon’s presence feel all the more disturbing.

    You never know when psychological horror will strike, from sudden jump scares to haunting silence, keeping your nerves taut. The story’s focus on lost innocence and betrayal pulls you into the characters’ tragic fates, making the fear personal and profound.

    Element Effect on You Why It Works
    Vintage Cartoon Nostalgia twisted Innocence clashes with darkness
    Ink Demon Heightened anxiety Unpredictable and menacing
    Psychological Horror Emotional unease Explores loss and corruption
    Ambiguity Disorients and unsettles Reality feels unstable

    This blend ensures Bendy’s horror lingers long after you turn off the game.

    Frequently Asked Questions

    What Inspired the Creation of Bendy and the Ink Machine?

    You’ll find that the creation of Bendy and the Ink Machine was driven by artistic inspiration rooted in vintage cartoons from the 1920s to 1940s. The developers wanted to blend nostalgic character design with dark horror aesthetics, giving Bendy a unique, unsettling feel.

    They combined classic animation styles with eerie, spooky elements to craft a world where cute meets creepy. This mix makes the game stand out through its distinct, haunting atmosphere.

    Are There Any Real-Life Locations That Influenced the Game’s Setting?

    You’ll feel like you’re wandering through haunted warehouses and abandoned factories drenched in shadows and forgotten dreams. The game’s setting draws directly from creepy art studios, especially old animation studios like Walt Disney and Fleischer’s, with their decaying walls and eerie silence.

    These real-life locations inspired the game’s Joey Drew Studios, making you explore hidden underground tunnels and dusty rooms that whisper secrets of a lost creative past.

    How Do the Game’s Puzzles Contribute to the Horror Experience?

    The game’s puzzles ramp up your fear by blending clue complexity with puzzle timing, forcing you to think fast under pressure. You’ll need to carefully explore dark, eerie areas, heightening atmospheric tension with every step. This mix keeps you on edge, making each discovery feel essential yet nerve-wracking.

    As you reveal secrets, the unsettling environment wraps around you tighter, making the horror experience all the more intense and immersive.

    What Role Do Secondary Characters Play in the Story’s Scare Factor?

    Secondary characters crank up the scare factor by delivering creepy character interactions that keep you on edge. You’ll encounter unsettling character designs that twist familiar faces into nightmarish forms, making every encounter unpredictable.

    Their mysterious character backstories deepen the game’s dark lore, making you question their motives and origins. These elements work together to create a tense, immersive atmosphere where you’re never quite sure what horrors await.

    Is There a Deeper Meaning Behind the Ink Creatures’ Design?

    Yes, the symbolism behind ink plays a huge role in the creature design influence. You’ll notice the ink creatures mix nostalgic cartoon styles with twisted, grotesque forms, showing the artistic style significance that echoes corruption and lost innocence.

    This contrast isn’t random. It reflects how pure creativity gets warped into something dark and disturbing, making the creatures not just scary but meaningful symbols of decay and obsession within the game’s story.

    Conclusion

    You might think a cheerful cartoon style can’t be scary, but Bendy and the Ink Machine proves otherwise. Just when you’re lulled by its vintage charm, eerie sounds and flickering lights snap you back to reality. Coincidence? Not really.

    It’s this clever mix of playful animation and psychological horror that catches you off guard, making every shadow and whisper feel personal. You’re not just watching fear unfold—you’re living it.

  • How to Use Acrylic Ink in 7 Simple Steps

    How to Use Acrylic Ink in 7 Simple Steps

    Start by preparing a clean, well-ventilated workspace and gathering your acrylic ink, brushes, pens, and water. Mix your ink with water to control transparency, testing on scrap paper.

    Apply ink with brushes or pens, layering colors to build depth.

    Try special techniques like splattering or dry brushing for texture.

    Combine inks with other media for richer effects.

    Finish by letting it dry fully and sealing your work to protect it.

    Keep exploring to discover more creative possibilities.

    Prepare Your Workspace and Gather Acrylic Ink Materials

    set up workspace gather supplies

    Before you begin working with acrylic ink, make sure you clear a flat, well-ventilated space where you can comfortably spread out your materials. This setup is essential whether you’re diving into art or exploring mixed media techniques.

    Clear a flat, well-ventilated space to comfortably spread out your materials before working with acrylic ink.

    Start by gathering your essential supplies: acrylic ink, brushes, water, a palette or mixing tray, and the paper or surfaces you plan to work on. Protect your workspace by covering it with newspapers or plastic sheets to catch any ink splatters or spills.

    Keep a cloth or paper towels nearby so you can quickly clean up any accidental drips or excess ink. Arrange all your tools within easy reach to maintain a smooth workflow.

    Preparing your workspace this way helps you focus on your creative process without interruptions, ensuring your acrylic ink projects go smoothly and your art turns out just the way you want.

    Mix and Dilute Acrylic Inks for Best Results

    When you mix acrylic ink with water, you control its transparency and flow. This lets you create effects ranging from bold, saturated strokes to delicate, translucent washes. Start by diluting your ink in a clean palette, usually with a 1:1 water-to-ink ratio.

    Adjust this dilution to suit your desired effect. More water means lighter, more transparent colors, while less water keeps the hues intense and vibrant. Before applying, test the diluted ink on scrap paper to see how it dries, as heavier dilution lightens the color.

    Use a spray bottle or brush to distribute the ink evenly for smooth washes. Keep these tips in mind when mixing and diluting:

    • Begin with equal parts ink and water for balanced transparency
    • Increase water for softer, transparent layers
    • Test on scrap paper to preview final color and flow
    • Use spray or brush to apply diluted ink smoothly

    This method guarantees your acrylic ink behaves exactly how you want.

    Applying Acrylic Ink With Brushes and Pens

    control precision variety versatility

    When you’re applying acrylic ink with brushes and pens, loading them just right helps you avoid blotches and keeps you in control. It’s all about finding that sweet spot.

    By using different pressures and fine tips, you can create sharp lines and a variety of effects. It really lets you play around with the details.

    And when you combine brushes and pens, you get even more flexibility to build depth and add those finishing touches that make your work stand out.

    Brush Techniques Overview

    Although acrylic ink can be applied in various ways, using brushes and pens gives you precise control and versatility. Mastering brush techniques lets you create detailed lines, bold strokes, and textured effects. Start with a small, flat brush to achieve smooth, controlled strokes for clean lines.

    Adjust your brush pressure to vary your marks from fine details to broad washes. Keep your brushes or pens slightly moist to prevent the ink from drying too quickly. Remember, layering is key. You can build depth by applying multiple ink layers, letting each dry before adding the next.

    Here are some brush techniques to try:

    • Use a fine-tipped brush or pen for intricate details and calligraphy
    • Vary pressure to switch between thin and thick lines
    • Maintain moisture to keep ink flowing smoothly
    • Layer strokes for richer color and texture

    Pen Handling Tips

    Mastering brush techniques sets a solid foundation, but handling your pen or brush correctly will take your acrylic ink work even further. For smooth pen handling, hold your tool at about a 45° angle. This controls ink flow and ensures clean lines.

    Apply gentle, even pressure to avoid pooling or bleeding. Quick, deliberate strokes keep your work precise and prevent smudging. Don’t forget to reload your pen or brush often for consistent application.

    Practice on scrap paper to get comfortable with the feel and flow.

    Tip Why It Helps
    Hold at 45° angle Controls ink flow and line quality
    Use gentle pressure Prevents ink pooling and bleeding
    Quick strokes Maintains precision and avoids smudging

    Combining Brushes Pens

    Because acrylic ink responds well to both brushes and pens, you can combine these tools to achieve detailed line work and expressive textures. Use fine-tipped brushes or pens for precise markings, while dip pens or technical drawing pens offer consistent, controlled strokes.

    Vary your pressure to create different line thicknesses and dynamic effects. Layering with brushes and pens builds intricate details and rich textures. Remember to clean your tools immediately after use to keep tips from clogging.

    • Delicate lines with fine-tipped brushes
    • Controlled strokes from technical pens
    • Expressive textures by varying pressure
    • Layered details using both brushes and pens

    Layer Acrylic Ink Colors and Build Depth

    layering acrylic ink colors

    Start by applying a light, transparent wash of acrylic ink to set your base color. Then, gradually build depth by layering additional colors. Just be sure to let each layer dry enough so the hues stay vibrant. This way, you can create rich, complex tones without muddying the overall effect.

    Transparent Color Layers

    How can you create depth and richness using acrylic ink? Start by applying a light wash of transparent acrylic inks, letting each layer dry completely before adding the next. This approach lets you build subtle color variations without masking previous work.

    To enhance your piece, use diluted acrylic inks for gentle, see-through color washes. Layer different hues gradually to develop complexity. Manipulate wet ink with water or tools to blend colors smoothly. Repeat layering translucent inks, drying between applications for a multidimensional effect.

    This technique helps you achieve vibrant, transparent color layers that add richness and depth to your artwork, making your acrylic ink creations truly stand out.

    Gradual Depth Building

    When do you know it’s time to deepen your acrylic ink layers? Start by applying a light wash of diluted acrylic ink to set your base. Once dry, gradually add darker or more saturated layers, letting each one dry before the next. This technique helps you build depth without muddying colors.

    Use transparent or semi-transparent inks to layer colors effectively, enhancing richness and dimension. Add small details or accents with darker inks on top of lighter layers to create contrast and focal points. You can also tilt your surface or add water between layers to blend and soften progressions, making the depth more natural.

    Special Techniques: Splattering and Dry Brushing Acrylic Inks

    Although splattering and dry brushing might seem spontaneous, mastering these acrylic ink techniques requires careful control over your brush and ink load. When splattering, load a brush or toothbrush, then flick or tap it onto your surface for random, textured effects. Vary your distance to control splatter size and intensity.

    For dramatic results, release ink from a pipette held high, creating energetic splashes. Dry brushing uses a nearly dry brush with minimal ink, applied in quick, twisting strokes to produce textured, broken lines.

    Keep these tips in mind:

    • Flick ink-loaded brushes for random splatters
    • Adjust distance to vary splatter size
    • Drop ink from height for bold splashes
    • Use dry brush strokes for texture and broken lines

    Combining Acrylic Inks With Water and Mixed Media

    Since acrylic inks respond well to dilution, you can mix them with water to create transparent washes that work beautifully for backgrounds and layering. Experiment with different water-to-ink ratios to achieve effects ranging from vibrant, saturated color to soft, translucent washes.

    Use a spray bottle to mist water onto your surface before applying acrylic ink for smooth, watercolor-like blending. This technique helps you control how the ink spreads and interacts with the paper or canvas.

    When working with mixed media, incorporate acrylic ink alongside acrylic paints, gels, or collage elements to add depth and color variation. Apply diluted acrylic ink over dried layers to enhance your artwork with subtle tones and rich layering.

    Combining acrylic ink with water and other mediums opens up endless possibilities for texture and visual interest, making your mixed media pieces vibrant and dynamic.

    Finishing Touches and Protecting Your Acrylic Ink Art

    After layering and blending your acrylic inks with water and other media, it’s important to properly finish and protect your artwork. Let your piece dry fully, usually 15 to 30 minutes, to avoid smudging. Next, apply a clear acrylic sealant to protect the surface and enhance vibrancy. Choose a spray or brush-on sealant made for acrylics, making sure you apply an even coating without bubbles or drips.

    To perfect your finish and safeguard your art, remember to:

    • Use a UV-resistant coating if your artwork faces direct sunlight to prevent fading
    • Store your work in a dust-free, dry place, ideally framed or behind glass
    • Apply sealant in thin, uniform layers for a smooth surface
    • Let each coat dry completely before adding another

    These finishing touches will protect your acrylic ink art and keep its brilliance for years to come.

    Frequently Asked Questions

    How Long Does Acrylic Ink Take to Fully Dry?

    Acrylic ink’s drying time varies, but it usually feels dry to the touch within 10 to 20 minutes. However, for it to fully dry and cure, you should wait up to 24 hours, especially if you applied thick layers or worked on porous surfaces.

    Keep in mind, humidity and temperature affect drying time, so in cooler or more humid conditions, it’ll take longer. Always give your artwork enough time before handling or sealing.

    Can Acrylic Ink Be Used on Fabric?

    Yes, acrylic ink sticks to fabric like paint on a canvas. When considering fabric compatibility, it works best on natural fibers like cotton and linen because they absorb the ink well.

    You’ll want to pre-wash your fabric to improve adhesion, then apply the ink with a fine brush or sponge. Afterward, heat-setting with an iron guarantees the design stays vibrant and washable, making your artwork durable on textiles.

    Is Acrylic Ink Waterproof Once Dry?

    Yes, acrylic ink is generally waterproof once dry because it contains an acrylic binder that provides excellent water resistance. However, you should know that the level of water resistance can vary depending on the brand and formulation.

    To boost its durability and water resistance, you can apply a protective sealant or varnish over the dried ink. Just make sure the ink is fully dry before exposing it to moisture to avoid smudging or running.

    How Should I Store Leftover Acrylic Ink?

    You should store leftover acrylic ink using these storage tips: keep the bottles tightly sealed and upright to prevent leaks and drying out. Place them in a cool, dark spot away from sunlight and temperature extremes to maintain color and consistency.

    Always use clean tools when handling the ink to avoid contamination. Following these steps guarantees your acrylic ink stays fresh and ready for your next project.

    Are Acrylic Inks Toxic or Safe for Children?

    You’ll be glad to know that most acrylic inks are non-toxic and generally safe for children when used properly. Over 90% of popular acrylic inks are labeled as water-based and meet child safety standards. However, you should always check the product label to confirm.

    Keep kids supervised to avoid staining or accidental ingestion, and use protective clothing. Proper ventilation is also key to maintaining a safe environment during use.

    Conclusion

    Now that you know how to use acrylic ink in seven simple steps, you’re ready to create vibrant, dynamic art with ease. Did you know acrylic ink dries up to 50% faster than traditional acrylic paint? This quick drying time means you can layer colors and build depth without long waits.

    So, gather your materials, experiment with techniques, and protect your work to make your acrylic ink creations truly stand out!

  • How Do You Send Invisible Ink in 10 Simple Steps?

    How Do You Send Invisible Ink in 10 Simple Steps?

    To send invisible ink in 10 simple steps, start by gathering household ingredients like lemon juice and tools such as cotton swabs.

    Choose smooth, absorbent paper and carefully write your secret message with steady pressure.

    Let the ink dry completely to avoid smudging.

    Store your message in a cool, dark place and send it in an opaque envelope.

    The recipient reveals it using gentle heat or UV light.

    Keep experimenting to perfect your technique and discover more tips.

    Understand What Invisible Ink Is and How It Works

    invisible ink reveals secrets

    Although invisible ink might seem like a mysterious tool, it’s simply a substance that lets you write secret messages that stay hidden until you reveal them. Invisible ink works by using a chemical reaction or light-sensitive properties to keep the writing invisible to the naked eye.

    When you apply heat, UV light, or certain chemicals, the invisible ink undergoes a chemical reaction that makes the message appear. Common invisible inks include lemon juice, milk, and baking soda, which are initially colorless or transparent.

    When exposed to heat, these substances typically brown, revealing your hidden text. This clever use of chemical reactions allows you to communicate covertly without anyone knowing the message’s existence until you choose to reveal it.

    Understanding how invisible ink works helps you appreciate the science behind secret writing and sets the stage for using it effectively in your own covert communications.

    Gather Your Invisible Ink Supplies and Tools

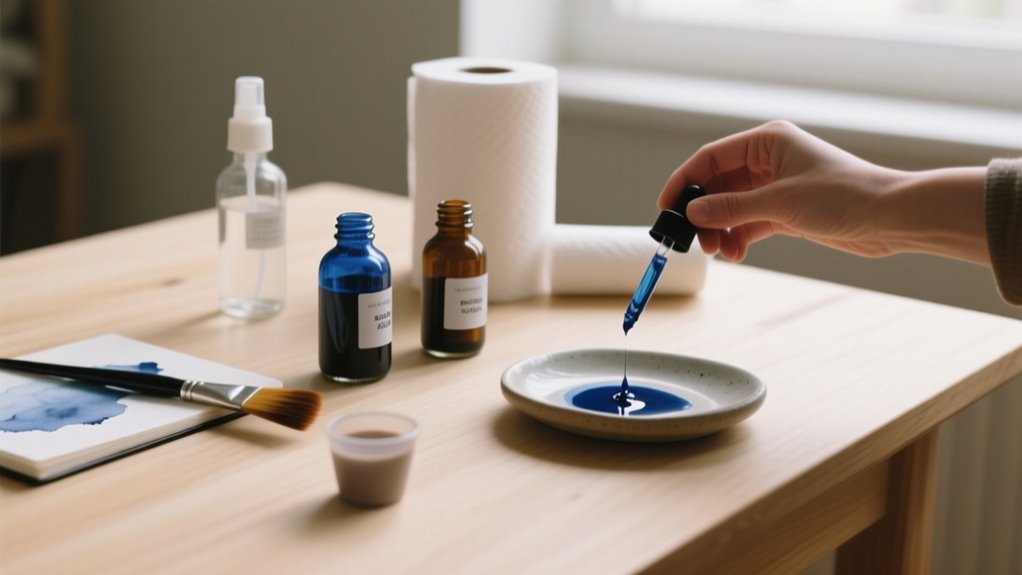
    First, gather some simple ingredients like lemon juice, milk, or a baking soda solution to make your invisible ink. You’ll also want to have small tools on hand—things like cotton swabs, fine brushes, or toothpicks work great for writing with precision. Having all these supplies ready will make it way easier to craft your secret message.

    Essential Ink Ingredients

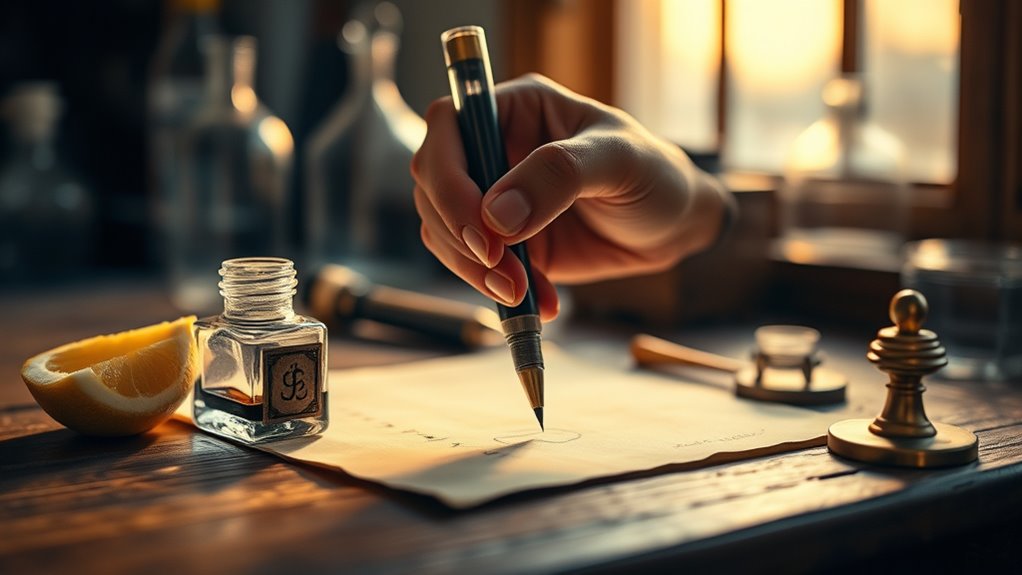
    Before you start writing your secret message, gather a few simple household ingredients like lemon juice, milk, or baking soda solution to create your invisible ink. Lemon juice is a popular choice because it’s easy to find and works well when heated to reveal your message.

    You can also try milk or a baking soda solution for different effects. These liquids serve as the base for your invisible ink. To apply the ink, use tools like a cotton swab or toothpick. These help you write fine, clear messages on plain paper.

    When you gather your invisible ink supplies, choosing the right writing tools is just as important as selecting the ink itself. Use fine-tipped tools like cotton swabs or small brushes for precise application, guaranteeing clear, smudge-free messages.

    Keep your invisible ink in small containers or palettes for easy dipping and control. Don’t forget to prepare a heat source or UV light to reveal your hidden messages later. Select paper that can handle the revealing process without damage for the best results.

    Here’s a quick overview of essential writing tools for invisible ink:

    Tool Purpose Tips
    Cotton Swabs Fine application Use gently to avoid smudging
    Small Brushes Detailed writing Choose fine tips
    Containers Hold ink Use shallow palettes
    Heat Source Reveal messages Use cautiously
    UV Light Reveal UV-reactive ink Ensure proper safety

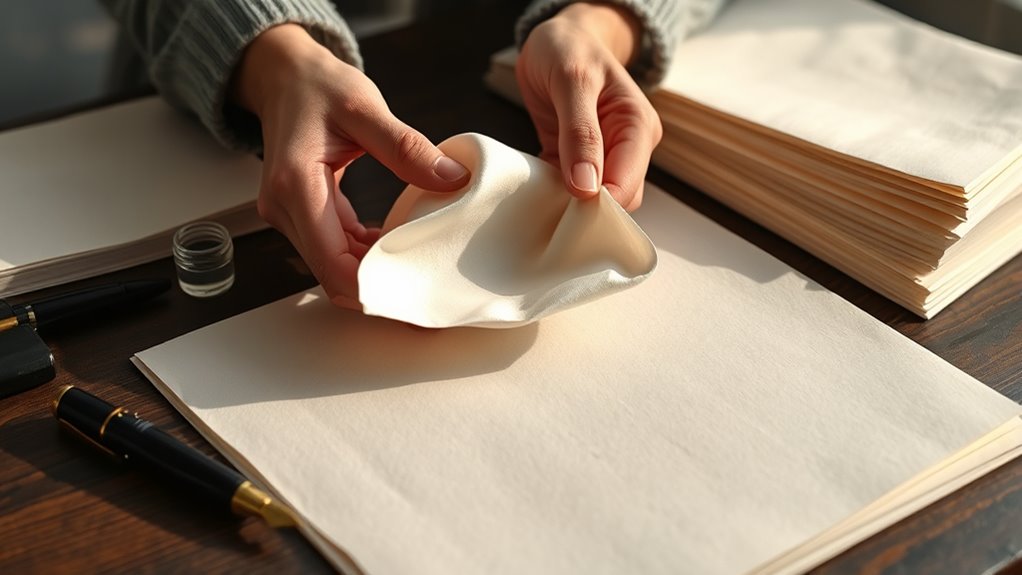
    Choose the Right Paper for Your Invisible Ink Message

    choose absorbent smooth paper

    You’ll want to pick the right paper to make your invisible ink message clear and easy to reveal. It’s best to go with absorbent, smooth paper because it helps prevent the ink from bleeding and keeps your message easy to read.

    Try to avoid glossy or coated paper, though, since that kind can block the ink from showing up properly. Sticking to the right paper makes all the difference when you want your secret message to really stand out!

    Selecting Paper Type

    How do you choose the right paper for your invisible ink message? To send secret messages effectively, opt for plain, lightweight paper like regular printer or thin notebook paper. These absorb invisible ink evenly, ensuring your message dries well.

    Avoid glossy or coated paper since their smooth surfaces block ink absorption and drying. Thinner paper also helps when revealing your message with heat or UV light by allowing better transfer.

    If you want your secret messages to last longer, use acid-free or archival-quality paper, which resists degradation. For indentation techniques, pick softer paper such as tissue or thin cardstock to create clear pressure marks.

    Selecting the right paper type makes a big difference in how well your invisible ink communicates your secret.

    Paper Texture Importance

    Choosing the right paper texture plays a crucial role in how well your invisible ink message appears and reveals. Smooth, non-porous papers like glossy or coated types reduce ink absorption, making your hidden message clearer when revealed.

    Thinner paper dries faster and lets heat or UV light bring out your message more vividly. Avoid rough or highly textured paper since it causes uneven ink absorption, distorting or obscuring the writing.

    High-quality, bleed-proof paper also helps keep your secret note sharp and legible by minimizing ink spread. Remember, the paper texture you select should complement your revealing method. Heat-sensitive papers perform best on regular, heat-resistant surfaces.

    Avoiding Ink Bleed

    Although invisible ink relies on subtlety, selecting the right paper is essential to prevent your message from bleeding or smudging. To avoid ink bleed, choose thick, high-quality paper that resists absorption and keeps your invisible ink sharp and clear.

    Steer clear of porous or highly absorbent papers like newspaper or tissue, as they can cause your ink to spread unpredictably, ruining the message. Opt for smooth, coated surfaces that help maintain clarity during both application and revealing.

    It’s smart to test a small area first to make sure the paper won’t cause any smudging or bleeding. For long-lasting invisible messages, consider acid-free or archival-quality paper to guarantee your writing won’t degrade or blur over time.

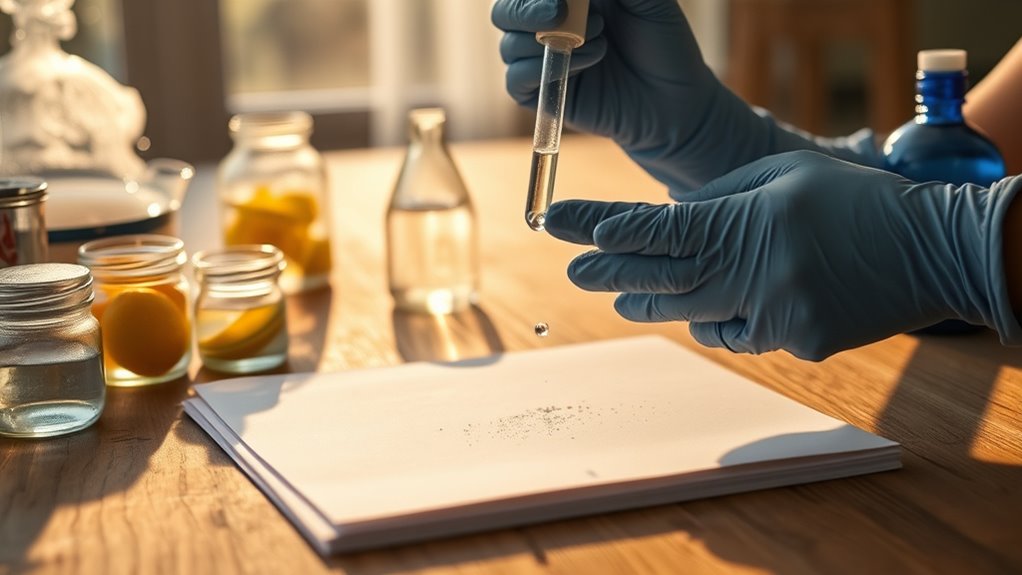
    Mix and Prepare Your Invisible Ink

    prepare apply dry reveal

    Since invisible ink relies on chemical reactions or heat to reveal messages, you’ll want to start by selecting a common household liquid like lemon juice, milk, or vinegar. These liquids are acidic or contain compounds that become visible when heated or exposed to UV light.

    To prepare your invisible ink, you might need to dilute the chosen liquid with a bit of water, making it thinner and easier to write with. This step guarantees smooth application and prevents smudging.

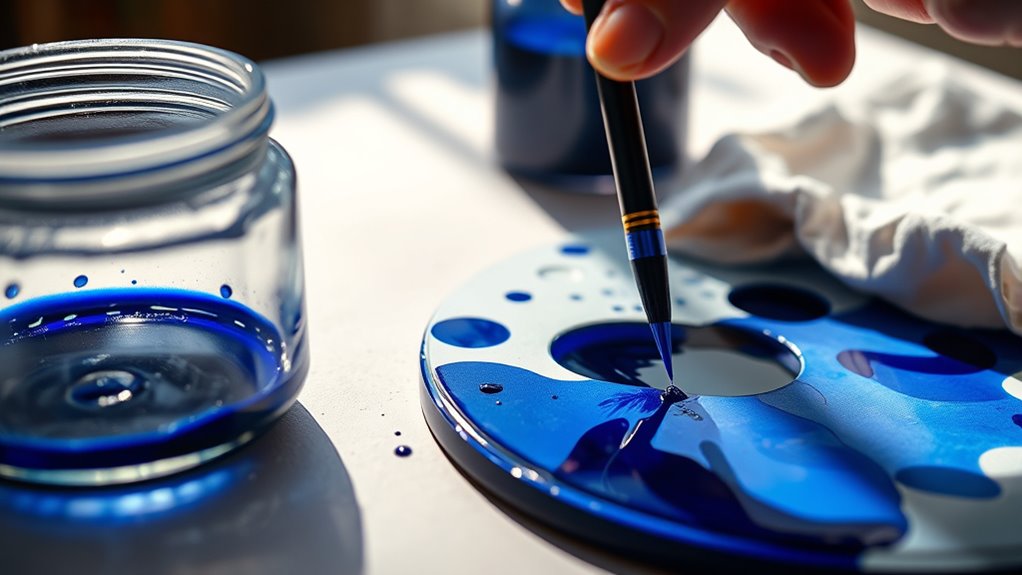
    Once mixed, use a fine-tipped brush, cotton swab, or toothpick to carefully apply the invisible ink onto your paper. Make sure your strokes are even and precise for the best results.

    After writing, let the ink dry completely before moving on, as this prevents accidental smudging or premature revealing. Preparing your invisible ink properly sets the foundation for a successful secret message.

    Select and Use Tools for Writing Invisible Ink

    When you’re ready to write your secret message, pick a fine-tipped paintbrush, cotton swab, or toothpick to apply the invisible ink with precision. These tools help you write your message clearly and control the flow of the liquid, whether you’re using lemon juice, milk, or vinegar.

    Make certain your chosen tool is clean and dry before dipping it into the invisible ink to avoid diluting or contaminating the solution. Dip it lightly, then carefully write your message on the paper.

    Ensure your tool is clean and dry before dipping to keep your invisible ink pure and your message clear.

    Applying the ink evenly is key to keeping your message hidden but still legible when revealed later. Avoid pressing too hard or overloading your tool, as this can cause smudging or blotches.

    After writing, let the invisible ink dry completely before handling the paper. This ensures your secret message stays invisible until you’re ready to reveal it.

    Selecting and using the right tools makes writing your invisible ink message simple and effective.

    Write Your Invisible Ink Message Clearly and Evenly

    When you’re writing your invisible ink message, make sure to pick the right type of ink so it shows up clearly later on. It really helps to keep your hand steady and apply even pressure—that way, your lines will be neat and easy to read. And don’t forget, you need to let the ink dry completely before you handle the paper, or else it might smudge.

    Choose Ink Type

    Choosing the right ink type is essential for crafting a clear and even invisible message. To write a message effectively, select household liquids like lemon juice, milk, or vinegar. Make sure they’re pure and free of additives to get the best results.

    Use a fine-tipped tool such as a toothpick or cotton swab to apply the invisible ink smoothly, ensuring the message is clear and not smudged. Here’s a quick guide to help you choose:

    Ink Type Best Use
    Lemon Juice Easy to find, clear reveal
    Milk Smooth application
    Vinegar Strong, fades slower
    Pure Water Not recommended

    Use these tips, and your invisible ink message will be easier to write and reveal.

    Maintain Consistent Pressure

    Although invisible ink is clear by nature, applying consistent pressure as you write is key to making your message legible and even. When you maintain consistent pressure, the invisible ink spreads uniformly, preventing faint or patchy spots that can make your secret message hard to read once revealed.

    Avoid pressing too hard, as this can cause smudging or bleeding, which blurs the message details. Using a fine-tipped tool, like a cotton swab or pen, helps you control your strokes and keep the pressure steady.

    Practice writing your message evenly to produce clear, professional-looking invisible ink notes. This careful approach ensures your hidden communication is both discreet and easy to decipher later.

    Ensure Complete Drying

    How long should you wait before revealing your invisible ink message? To guarantee the best results, you need to allow the ink to dry completely. Typically, this means waiting 15 to 30 minutes, depending on your ink type and the environment.

    When writing, apply the ink evenly and with consistent pressure to promote complete drying and prevent smudges. Avoid touching or handling the paper until the message is fully dry; any contact can cause smearing or accidental transfer.

    Proper drying preserves the message’s clarity, making it easier to reveal later with heat or UV light. By taking the time to guarantee complete drying, you’ll protect your invisible message’s integrity and make sure it appears crisp and legible when uncovered.

    Let Your Invisible Ink Dry Completely

    Before you try to reveal or handle your invisible ink message, make sure it’s completely dry. Letting the invisible ink dry completely is essential to prevent smudging or accidental exposure.

    Drying times vary depending on the ink type, so patience is key. If the ink isn’t fully dry, moisture or heat might reveal your secret message prematurely, ruining its secrecy.

    Here’s a quick guide to drying times for common invisible inks:

    Ink Type Drying Time Notes
    Lemon Juice 10-15 minutes Air drying recommended
    Baking Soda 5-10 minutes Dries faster, handle gently
    Milk 15-20 minutes Avoid touching until dry
    Vinegar 10-15 minutes Sensitive to heat
    Laundry Detergent 20-30 minutes Requires longer drying time

    Take your time to let the ink dry completely to maintain your message’s integrity and secrecy.

    Store and Send Your Invisible Ink Message Safely

    Once your invisible ink message has dried completely, you’ll want to store it carefully to keep it hidden until the right moment. Proper storage preserves the message’s secrecy and prevents accidental revealing.

    When you’re ready to send your message, follow these steps to guarantee it stays safe:

    1. Store the message in an airtight, dark container to protect it from light and moisture, which can degrade the ink.
    2. Keep the paper in a cool, dry place to maintain the ink’s integrity.
    3. Use secure, opaque envelopes or containers when you send the message to avoid detection or accidental exposure. Clearly label the package as sensitive to ensure careful handling during transit.

    Reveal Your Invisible Ink Message Using Heat or UV Light

    Although invisible ink remains hidden to the naked eye, you can reveal your secret message by carefully applying heat or shining ultraviolet (UV) light on the paper. To use heat, gently hold the paper over a light bulb, candle, or iron, keeping it at a safe distance to avoid burning. The heat causes the invisible ink’s compounds to oxidize and become visible.

    Alternatively, shine UV light or a blacklight on the paper. This method excites certain chemical compounds like those in laundry detergent or highlighters, causing them to fluoresce and reveal your message in bright, glowing colors.

    Both heat and UV light are effective for uncovering hidden ink, but you need to monitor the paper closely during heating. Also, avoid prolonged exposure to UV light to prevent damage. By using these careful techniques, you’ll successfully reveal your invisible ink message and impress anyone curious enough to look.

    Troubleshoot Common Invisible Ink Problems and Experiment With Recipes

    If your invisible ink message doesn’t appear clearly after using heat or UV light, there are a few common issues to check. First, verify the invisible ink was applied evenly and dried completely before trying to reveal it. Wet or smudged ink often leads to incomplete messages.

    Ensure your invisible ink is evenly applied and fully dry before revealing with heat or UV light for clear messages.

    Second, confirm you’re using the right reveal method for your ink recipe. Some inks respond better to gentle heating, while others need UV light. Third, experiment with different invisible ink recipes like lemon juice, baking soda solution, or milk to find what works best on your paper and in your conditions.

    Here’s a quick checklist to troubleshoot and improve your invisible ink results:

    1. Check if the ink dried fully before revealing.
    2. Match the reveal method (heat or UV) to your ink type.
    3. Try alternative recipes to enhance visibility and clarity.

    Frequently Asked Questions

    Can Invisible Ink Be Detected by Modern Security Scanners?

    Invisible ink usually can’t be detected by standard security scanners unless it has special properties. If you use invisible ink that fluoresces under UV light or contains unique chemicals, security scanners with advanced detection methods might reveal it.

    However, most modern security scanners don’t automatically pick up invisible ink without those specific reactive features. So, unless you’re dealing with specialized detection methods, invisible ink often stays hidden from security scanners.

    Is Invisible Ink Safe for Children to Use?

    You don’t have to worry about invisible ink turning your child into a secret agent gone wrong! When you choose non-toxic formulas made from household items, it’s perfectly safe for kids.

    Just keep child safety in mind by supervising their activities and avoiding harsh chemicals or open flames. Using food-safe ingredients and gentle heat sources guarantees your little ones can enjoy secret messages without any risks.

    How Long Does an Invisible Ink Message Remain Hidden?

    An invisible ink message can remain hidden from hours to several years, depending on the type you use. Historical methods like lemon juice often last months if stored cool and dry.

    Common uses today include secret notes or fun experiments, but exposure to light or heat can make your message fade quickly. To keep it hidden longer, you’ll want to seal it airtight and store it in the dark, preserving the ink’s stability.

    Can Invisible Ink Be Reused or Erased?

    Can invisible ink be reused or erased? Sure, if you enjoy playing chemical roulette with the pen types and their mysterious chemical compositions. Most heat or chemical-based inks aren’t exactly begging for an encore; once revealed, they’ve had their moment.

    But if you’re into pressure-based methods, you can press, shade, and reuse like a pro. Just don’t expect your chemical concoctions to magically erase and write again. It’s not Hogwarts, after all!

    Are There Eco-Friendly Invisible Ink Options Available?

    Yes, you can use eco-friendly invisible ink options that rely on biodegradable formulas and plant-based dyes. These natural inks often use ingredients like lemon juice, milk, or vegetable extracts, making them safe and sustainable.

    You’ll appreciate that they’re non-toxic and reduce chemical waste. Plus, using household items like baking soda keeps your invisible ink environmentally friendly, so you can send secret messages without harming the planet.

    Conclusion

    Now that you know how to send invisible ink messages, imagine this: during World War II, spies used invisible ink to send over 70% of their secret communications undetected.

    With your newfound skills, you can create your own secret messages just as cleverly. Remember, practice makes perfect, so don’t hesitate to experiment with different inks and reveal methods.

    Sending invisible ink isn’t just fun; it’s a creative way to share secrets that only you and your recipient can uncover.

  • How to Replace Ink in an Epson Printer in 7 Easy Steps

    How to Replace Ink in an Epson Printer in 7 Easy Steps

    To replace ink in your Epson printer, first find the correct cartridge by checking your model and cartridge numbers.

    Turn on the printer, open the scanner or cartridge cover, and carefully remove the old cartridge.

    Take the new cartridge, peel off protective tape, and insert it until it clicks.

    Close the cover and wait for the printer to recognize the cartridge.

    Run a test print to guarantee quality.

    If you want to avoid common errors and get the best results, there’s more useful info ahead.

    How to Find the Right Ink Cartridge for Your Epson Printer

    check model and cartridge numbers

    How do you make sure you get the right ink cartridge for your Epson printer? First, identify your printer model by checking the label on the device or consulting your user manual. You can also visit Epson’s website to confirm which Epson ink cartridges fit your specific printer model.

    To get the right Epson ink cartridge, first identify your printer model on the device label or user manual.

    Next, examine your current ink cartridge labels for exact cartridge numbers. This helps you avoid buying incompatible ink cartridges. Your printer’s LCD screen or software often shows ink levels and notifies you when replacement cartridges are needed, displaying the correct cartridge model.

    Remember, Epson offers various series like EcoTank and WorkForce, each requiring specific cartridges or refill types. When buying replacement cartridges, match the cartridge number exactly, like Epson 220XL or 252XL, to ensure compatibility.

    If you prefer, compatible ink cartridges from trusted brands can work. But always verify they suit your Epson printer model for maximum performance.

    Get Your Epson Printer Ready for Ink Replacement

    First, turn on your Epson printer and wait for it to initialize. Once it’s ready, you can open the scanner bed or cartridge cover. It’s a good idea to double-check which ink cartridge needs replacing—just take a look at the printer’s display or your manual to be sure. After that, find the exact spot where the cartridge sits so you’re all set to remove and replace it safely.

    Identify Correct Ink

    Wondering which ink cartridge fits your Epson printer? Start by checking your printer model’s manual or online resources to identify the exact ink type you need.

    Next, examine the label on your existing cartridges to find ink model numbers like Epson 220XL or the 252 series. These numbers help you identify the right cartridges easily.

    Verify you choose either genuine Epson cartridges or compatible cartridges designed specifically for your printer model to avoid any issues. Also, confirm the ink color, whether black, cyan, magenta, or yellow, matches your current cartridges.

    For example, the Epson Workforce WF-2750 uses Epson 220XL cartridges, simplifying your selection. Knowing the correct ink type and model numbers ensures your printer runs smoothly and prints beautifully.

    Prepare Printer Properly

    Now that you’ve identified the correct ink cartridges for your Epson printer, it’s important to prepare your printer properly before replacing them. First, turn on your printer and lift the scanner bed carefully to avoid damage. Then, open the cartridge cover to access the ink cartridges.

    Before you start, unplug the printer if you need to guarantee safety while handling cartridges. When removing the old cartridge, squeeze the tab and lift it straight out. Avoid contact with the contacts or nozzles to prevent damage.

    Prepare your new cartridge by removing its protective tape and gently shaking it four to five times for even ink flow. Finally, double-check the compatibility of the new cartridge with your printer model to ensure a smooth replacement process.

    Locate Cartridge Position

    Where exactly are the ink cartridges located in your Epson printer? To locate cartridges, first turn on your printer and gently lift the scanner bed. This lets you access the cartridge position inside the printer.

    Next, open the cartridge cover or door, usually found behind or beneath the scanner bed. Inside, you’ll see a row of cartridges lined up straight at the back of the printer. Carefully identify color labels on each cartridge to confirm you replace the right one.

    Be sure not to touch or move the printhead or any internal parts while you find the printhead and access ink cartridges. Knowing this cartridge location helps you smoothly proceed with ink replacement without causing damage or confusion.

    Removing Old Epson Ink Cartridges Safely

    How do you remove old Epson ink cartridges without causing damage or mess? First, turn on your printer and lift the scanner bed before opening the cartridge cover. This gives you safe access to the cartridges.

    To remove the old cartridge, squeeze the tab firmly and lift it straight up. Be sure to handle the cartridge carefully to avoid any ink spills. Wear gloves if you want to protect your skin from ink stains.

    Most importantly, don’t touch the gold contact points or nozzles on the cartridge. Touching these can cause contamination or electrical problems when you install the new cartridge.

    Once removed, dispose of your old cartridges responsibly by following proper recycling guidelines or manufacturer instructions. Taking these careful steps ensures a smooth, mess-free cartridge removal process and keeps your printer in good working order.

    Installing New Epson Ink Cartridges

    insert peel press confirm

    After safely removing your old Epson ink cartridges, you’re ready to install the new ones. Installing new ink cartridges on your Epson printer is straightforward if you follow these key steps:

    1. Remove the new ink cartridge from its packaging, handling it with the contacts facing downward. Avoid touching the green chip or nozzles to prevent damage.
    2. Peel off the yellow tape or protective cover to allow ink flow.
    3. Insert the cartridge into the correct slot, matching the color code, and press it firmly until it clicks into place.
    4. Close the scanner or cartridge cover. The Epson printer will perform ink recognition, and a confirmation message will show on the LCD screen. Press the designated button to start the priming process, which charges the new ink cartridge.

    This cartridge installation ensures proper function and quality prints as you replace ink with ease.

    How to Refill Ink Tanks on Epson EcoTank Printers

    When you need to refill ink tanks on your Epson EcoTank printer, start by lifting the scanner bed and opening the ink tank cover to access the tanks. Carefully remove the cap from the ink bottle, then slowly pour the ink into the matching color tank without squeezing the bottle.

    Be sure to fill each tank only up to the designated fill line to avoid overfilling. After refilling ink, securely replace the caps on the ink bottles to prevent leakage and contamination.

    Once all tanks are refilled, close the ink tank cover and scanner bed. Following this, your Epson EcoTank will prompt you to complete the ink refill process.

    Verify Epson Ink Cartridge Installation and Run a Test Print

    check cartridges run test print

    After you’ve installed the new ink cartridges, take a look at the printer’s screen to see if it recognizes them. If everything looks good there, go ahead and run a test print from the control panel or your computer. This will help you make sure everything is working properly.

    If the print quality seems off, don’t worry—just double-check that the cartridges are seated correctly. Once you’ve done that, try printing again. It usually does the trick!

    Confirm Cartridge Recognition

    Although installing new ink cartridges is straightforward, you’ll want to confirm your Epson printer recognizes them properly before printing. Proper ink recognition ensures your new cartridges work seamlessly and prevents printing issues.

    Here’s how to confirm:

    1. Check the printer’s LCD screen for a confirmation message indicating successful recognition of new cartridges.
    2. Open the printer software on your computer and navigate to the maintenance or ink status section to verify accurate ink levels.
    3. If the printer doesn’t recognize the cartridges, remove and reinstall them, making sure they click securely into place.
    4. Use built-in diagnostic tools or alignment functions in the printer maintenance menu to confirm cartridges are properly recognized and aligned.

    Following these steps guarantees your Epson printer is ready for peak performance with your new ink cartridges.

    Perform Test Printing

    How can you be certain your Epson ink cartridges are correctly installed? After replacing them, head to your printer’s LCD menu and select “Maintenance” or “Print Test Page” to verify installation.

    Running a test print confirms the printer recognition of your new ink cartridges and helps you assess print quality. Make sure your printer is powered on and connected before starting to avoid errors.

    Examine the print test page for consistent colors, sharp lines, and no streaks or missing sections. If you spot any issues, use these results to troubleshoot problems early.

    Regularly performing test prints after ink replacement keeps your printer in top shape and ensures reliable performance every time you print.

    Troubleshooting Common Epson Ink Cartridge Issues

    When you encounter recognition errors like “Cartridge Not Recognized” or unexpected “Low Ink” warnings, these issues often stem from improper cartridge installation or firmware restrictions. To tackle these common Epson ink cartridge problems, try the following:

    1. Ensure proper cartridge installation to avoid cartridge installation errors that affect ink cartridge recognition.
    2. Clean gold contact points gently with a lint-free cloth to improve communication between the cartridge and printer.
    3. Check for firmware restrictions. Disable automatic updates if you use third-party cartridges, as updates may block their recognition.
    4. Access maintenance mode to reset ink counters and unlock cartridges stuck during replacement, preventing false low-ink warnings.

    Frequently Asked Questions

    How Long Does It Take for New Ink to Dry on Printed Pages?

    The ink drying time on your printed pages usually depends on paper absorption rate, ink formulation, and environmental factors like humidity. If you use fast-drying ink with proper printer settings, your print quality improves, and drying speeds up.

    Ink moisture level plays a role too. Heavier ink coverage takes longer. You can use ink drying techniques, like letting pages sit undisturbed, to reduce smudging. Adjusting paper type also helps speed up drying.

    Can I Use Third-Party Ink Cartridges With My Epson Printer?

    Yes, you can use third-party ink with your Epson printer, but you need to check cartridge compatibility carefully. Third-party ink offers cost savings and can reduce environmental impact by recycling cartridges.

    However, brand differences affect ink quality, ink longevity, and print performance. The installation process is usually straightforward, but some cartridges may trigger errors.

    Choose reputable brands to guarantee reliability and avoid issues while enjoying budget-friendly printing.

    How Should I Store Unused Ink Cartridges to Prevent Drying Out?

    Imagine your ink cartridges as delicate treasure chests. You need proper sealing and careful cartridge handling to protect them.

    To guarantee ink longevity and cartridge preservation, store them upright in cool, dark places away from harsh environmental factors like sunlight and humidity. Keep cartridges in their original packaging to extend shelf life, and avoid leaving them uncapped to prevent drying.

    These storage conditions are key to drying prevention and maintaining vibrant prints.

    What Should I Do if My Printer Doesn’T Recognize the New Cartridge?

    If your printer doesn’t recognize the new cartridge, first check cartridge compatibility to verify it matches your model. Confirm proper cartridge installation; a loose fit can affect ink absorption and print quality.

    Perform a printer reset to refresh ink color matching and cartridge lifespan data. Clean contact points to prevent ink leaks and improve connection.

    Finally, update or rollback firmware, as some updates block third-party cartridges, impacting recognition.

    Is It Safe to Replace Ink Cartridges While the Printer Is Printing?

    Would you risk ink leakage and poor ink color accuracy by replacing cartridges mid-print? It’s not safe to swap ink cartridges while the printer is printing because it can disrupt printer calibration and shorten cartridge lifespan. Always check cartridge compatibility first.

    Instead, pause printing and consider using a refill station for eco-friendly refills. This careful refill process helps protect your printer and reduces environmental impact, ensuring smooth operation and quality prints.

    Conclusion

    Replacing ink in your Epson printer is easier than you think, especially when you’ve just run out right before an important print job. By finding the right cartridge, preparing your printer, safely swapping old ink for new, and running a test print, you’ll keep your printer humming smoothly.

    And if you have an EcoTank model, refilling is just as simple. So, next time ink runs low, you’ll be ready without missing a beat!

  • How to Remove Maybelline Superstay Matte Ink in 7 Easy Steps

    How to Remove Maybelline Superstay Matte Ink in 7 Easy Steps

    To remove Maybelline Superstay Matte Ink, start by gently exfoliating your lips and applying a moisturizing balm to protect the skin.

    Use an oil-based remover on a damp cotton pad, pressing it gently onto your lips to break down the color without scrubbing.

    Wipe away the lipstick softly, reapplying remover on stubborn spots as needed.

    Finish by cleansing and hydrating your lips thoroughly to prevent dryness.

    Follow these steps to guarantee a smooth, comfortable removal process. There’s more to keep your lips healthy after.

    Why Removing Superstay Matte Ink Can Be Tricky

    long lasting resistant lipstick removal

    Although you might expect it to come off easily, Maybelline Superstay Matte Ink is designed to stick around. Its long-lasting, highly pigmented formula is resistant to smudging and fading, which means it clings tightly to your lips. This intense pigmentation and strong adhesion make removal tricky since regular makeup removers often can’t break it down effectively.

    The product’s waterproof and transfer-proof properties add another layer of resistance, requiring special techniques or removers to fully dissolve it. Additionally, the thick, matte texture doesn’t behave like typical lipsticks or glosses, making it harder to remove in one swipe.

    If you try scrubbing or using harsh tools, you risk irritating or drying out your lips, which only complicates the process. Because of its stubborn nature, you need to approach removal carefully to avoid leftover stains and lip discomfort.

    Prep Lips for Easy and Comfortable Removal

    Before you start removing Maybelline Superstay Matte Ink, prepping your lips properly will make the process much easier and more comfortable. Begin by gently exfoliating your lips with a soft toothbrush or a lip scrub to remove dry skin and create a smooth surface.

    Next, apply a moisturizing lip balm or petroleum jelly to hydrate your lips and soften the long-wear formula. Let the balm sit for about a minute so it can penetrate and loosen the stubborn lipstick.

    Afterward, gently blot away any excess balm with a tissue to avoid interfering with the remover’s effectiveness. When you’re ready, make sure your lips are slightly damp or apply a thin layer of your chosen remover.

    This step helps the product glide smoothly over your lips, reducing the need for harsh scrubbing and protecting your delicate skin. Proper preparation ensures a quick and comfortable removal experience every time.

    Pick the Best Remover for Superstay Matte Ink

    gentle effective lipstick remover

    If you want to remove Maybelline Superstay Matte Ink effectively, it’s best to go for an oil-based remover or those special lipstick remover drops. These work by breaking down the long-lasting formula without needing to rub harshly.

    Choosing the right product not only helps get it all off but also keeps your lips healthy and smooth. So, next time you’re taking off that bold color, reach for something gentle yet powerful!

    Oil-Based Removers

    When you want to remove Maybelline Superstay Matte Ink without harsh scrubbing, oil-based removers are your best bet. These removers break down the long-lasting pigments by dissolving the lip stain’s lipid bonds, making removal gentle and efficient.

    Using coconut oil, mineral oil, or specialized oil-based removers, you can wipe away the stubborn color in just a few swipes. Apply the remover generously, let it sit for a few seconds, then wipe off with a soft tissue or cotton pad.

    Unlike alcohol or water-based options, oil-based removers are gentle on your lips, minimizing dryness and irritation. If you want an effective, soothing way to take off Superstay Matte Ink, oil-based removers will make the process quick and comfortable.

    Lipstick Remover Drops

    Wondering how to remove Maybelline Superstay Matte Ink without harsh scrubbing? Lipstick remover drops are your best bet. These drops contain oil-based ingredients that break down stubborn pigments and polymers, making removal easy and gentle.

    You simply apply a few drops directly onto your lips, wait a few seconds, then wipe away with a cotton pad or tissue. This targeted approach minimizes rubbing, protecting your skin.

    Here’s a quick look at why lipstick remover drops stand out:

    Feature Benefit
    Oil-based formula Dissolves long-lasting lipstick
    Targeted application Reduces harsh scrubbing
    Affordable (~$20) Cost-effective and efficient

    Lipstick remover drops make removing Superstay Matte Ink hassle-free and gentle on your lips.

    Gently Apply Remover to Break Down Lipstick

    Although Maybelline Superstay Matte Ink is designed to resist smudging, you can gently press a cotton pad soaked in makeup remover against your lips to start breaking it down. When you soak a cotton pad, make sure it’s saturated enough to dissolve the pigment without dripping.

    Maybelline Superstay Matte Ink resists smudging, but a saturated cotton pad with remover gently breaks it down.

    Follow these steps for effective application:

    1. Soak a cotton pad with a suitable makeup remover.
    2. Gently press the pad against your lips, allowing the remover to sit for several seconds.
    3. Use light, dabbing motions instead of rubbing to avoid irritation.
    4. Apply even pressure across all lip areas to ensure thorough breakdown.

    Wipe Off Superstay Matte Ink With a Soft Cotton Pad

    gentle effective lipstick removal

    After letting the remover sit and break down the Superstay Matte Ink, you’ll want to gently wipe it away using a soft cotton pad. Press a cotton pad soaked in makeup remover or micellar water against your lips, holding it in place for a few seconds. This pause helps dissolve the long-lasting formula effectively.

    Then, swipe the cotton pad across your lips in a gentle, sweeping motion to lift the lipstick off without irritating your skin. If you notice any leftover color, don’t hesitate to use a fresh cotton pad to guarantee complete removal.

    Avoid rubbing or scrubbing, as excessive friction can damage your delicate lip skin. By taking your time and using cotton pads thoughtfully, you’ll remove the Superstay Matte Ink cleanly and comfortably, leaving your lips ready for moisturizing or a fresh application.

    Reapply Remover on Stubborn Spots Without Scrubbing

    If some areas of your lips still hold onto the Superstay Matte Ink, dab a small amount of remover directly onto those stubborn spots and let it sit for a few seconds to break down the pigment. Instead of scrubbing, which can irritate your lips, use a gentle approach to lift the long-wear lipstick effectively.

    Follow these steps to remove stubborn spots with remover without scrubbing:

    Use gentle dabbing and tissue pressing to remove stubborn lipstick without irritating your lips.

    1. Apply a small amount of remover on the resistant areas and wait briefly.
    2. Press a tissue or cotton pad gently onto the treated spots to absorb the dissolved pigment.
    3. Use a soft, patting motion rather than rubbing to protect your lips.
    4. If residue remains, reapply a light layer of remover and allow it to work gradually.

    Cleanse and Moisturize Lips to Restore Hydration

    After you take off Maybelline Superstay Matte Ink, it’s really important to give your lips some hydration to avoid dryness and irritation. Try to find moisturizers that have good stuff like shea butter, hyaluronic acid, or vitamin E—these help soothe your lips and bring back that softness.

    Then, make sure to gently cleanse your lips and keep up with moisturizing regularly. Doing this will keep your lips feeling healthy and super comfortable.

    Importance Of Lip Hydration

    Why does hydrating your lips matter once you remove long-wear lipstick? When you strip away products like Maybelline Superstay Matte Ink, your lips often lose natural moisture. Hydration is key to restoring softness and preventing dryness. Without it, your lips can become chapped and irritated.

    To keep your lips healthy after removal, focus on these steps:

    1. Cleanse gently to remove residual product without harsh rubbing.
    2. Apply a hydrating lip balm or nourishing oil immediately.
    3. Maintain regular hydration to support your lips’ natural barrier.
    4. Replenish moisture consistently to improve texture and prevent damage.

    Following this routine ensures your lips stay smooth, comfortable, and ready for your next lipstick application.

    Best Moisturizing Ingredients

    Although removing long-wear lipstick like Maybelline Superstay Matte Ink can leave your lips dry, using products with key moisturizing ingredients helps restore hydration quickly. Look for lip balms or treatments containing shea butter, jojoba oil, or ceramides to replenish moisture lost during removal.

    Hyaluronic acid is another excellent moisturizing ingredient that attracts water to plump and hydrate your lips. Vitamin E adds antioxidant protection while soothing and repairing any damage. Aloe vera extract also works wonders by calming irritation and restoring hydration, especially after using oil-based removers or mechanical methods.

    To lock in moisture, apply a hydrating lip balm with nourishing oils right after cleansing. Choosing products with these hydrating ingredients ensures your lips stay soft and healthy after removing Superstay Matte Ink.

    Post-Removal Care Tips

    When you finish removing Maybelline Superstay Matte Ink, gently cleanse your lips with a mild, hydrating cleanser to clear away any leftover product without causing dryness. Next, it’s essential to restore moisture to keep your lips soft and healthy.

    Follow these post-removal care tips:

    1. Apply a small amount of nourishing lip balm or hydrating treatment to lock in moisture.
    2. Use a hydrating lip serum to replenish lost hydration and smooth your lips.
    3. Avoid harsh or alcohol-based products immediately after removal to prevent dryness.
    4. Regularly apply a lip mask or moisturizer overnight to maintain ideal hydration and lip health.

    Frequently Asked Questions

    Can Superstay Matte Ink Damage My Lips With Frequent Use?

    Yes, frequent use of Superstay Matte Ink can affect your lip health if you’re not careful. Its long-lasting formula may cause dryness or irritation, especially if you don’t remove it properly or keep your lips hydrated.

    Over time, this can weaken your lips’ natural barrier, making them more sensitive. To protect your lip health, make sure you gently remove the product and regularly moisturize your lips after wearing it.

    Is It Safe to Use Oil-Based Removers on Sensitive Skin?

    Think of oil-based removers as gentle rain that eases away dirt without harsh winds. Yes, you can safely use oil-based removers on sensitive skin, but choose ones made for skin sensitivity, free from fragrances, alcohol, or harsh chemicals.

    They’ll dissolve stubborn makeup without causing irritation. Still, don’t forget to patch-test first to avoid surprises. Using them wisely keeps your skin calm and clean without triggering sensitivity or breakouts.

    How Long Should I Wait Before Reapplying Lipstick After Removal?

    You should wait at least 10-15 minutes before reapplying lipstick after removal. This pause lets your lips recover and absorb any leftover remover, reducing dryness or irritation.

    During this time, consider gentle lip exfoliation to remove dead skin for a smoother finish. If your lips feel dry, apply a hydrating balm and wait longer.

    Giving your lips this care guarantees a more even, comfortable lipstick application every time.

    Can I Use the Same Remover for Eye Makeup and Superstay Lipstick?

    You can use the same remover for eye makeup and Superstay lipstick, but only if it’s gentle and designed for both areas. Eye makeup removers might be too mild for long-lasting lip products, so you risk incomplete removal or irritation if it’s not strong enough.

    Always check the label for safety near eyes and lips. Choosing a dual-purpose, non-irritating remover keeps your skin healthy and makeup-free without extra hassle.

    What Ingredients Should I Avoid in Lip Balms After Removal?

    After removal, you should avoid lip balms with ingredient concerns like menthol, camphor, eucalyptus, alcohol, and artificial fragrances, as they can cause dryness and irritation. Stay clear of harsh preservatives like parabens and medicated ingredients such as benzocaine, which might worsen sensitivity or damage.

    Instead, choose nourishing options with shea butter, beeswax, or hyaluronic acid to keep your lips hydrated and promote healing effectively.

    Conclusion

    Removing Maybelline Superstay Matte Ink might feel like trying to erase a permanent marker, but with the right steps, it’s totally doable. By prepping your lips, choosing a good remover, and treating your skin gently, you’ll wipe away that stubborn color without any struggle.

    Remember to moisturize afterward like watering a plant after a long day so your lips stay soft and healthy. Follow these tips, and you’ll have fresh, kissable lips in no time!

  • How to Remove Sublimation Ink From a Shirt Quickly

    How to Remove Sublimation Ink From a Shirt Quickly

    To remove sublimation ink from your shirt quickly, act fast before the stain sets. Dab the area with a cloth soaked in 70%+ isopropyl alcohol, letting it sit briefly, then blot gently without rubbing.

    You can also pre-treat with dish soap and rinse with cold water or soak the stain in boiling water to loosen the ink. Acting promptly makes removal easier and prevents permanent damage.

    Keep exploring for more effective stain-fighting tips and tricks.

    How to Identify Sublimation Ink Stains on Shirts

    vivid blended ink transfer

    How can you tell if a stain on your shirt is from sublimation ink? First, check if the ink stain shows vibrant, sharp colors similar to the design printed on the sublimation transfer sheet.

    Unlike typical surface stains, sublimation ink penetrates the fabric fibers, making the edges of the stain less defined and more blended into the material. You’ll notice this especially on polyester fabrics, where sublimation ink bonds chemically, creating long-lasting, vivid marks.

    Sublimation ink penetrates fibers, blending edges and bonding chemically with polyester for vivid, lasting stains.

    Look closely for areas where the fabric’s color seems slightly off or where a design has unintentionally transferred onto your shirt. These stains often appear slightly blurred or pixelated because of how the ink interacts with the fabric.

    If you spot these characteristics—bright colors, fabric integration, and a pattern matching sublimation designs—you’re likely dealing with a sublimation ink stain. Recognizing these signs helps you address the stain properly and avoid confusing it with other fabric blemishes.

    Why Acting Fast Removes Sublimation Ink More Easily

    You’ll want to treat sublimation ink stains right away to keep the ink from settling deep into the fabric. When you act fast, the ink hasn’t had time to bond tightly, so it’s much easier to get it out. By jumping on the stain quickly, you’re more likely to remove it without needing harsh chemicals or tough scrubbing.

    Immediate Stain Treatment

    Why act immediately when you spot sublimation ink on your shirt? Because immediate treatment prevents the stain from setting deeper into the fabric fibers, making it easier to remove.

    As soon as you notice the ink, grab some isopropyl alcohol and apply it directly to the stain. This cleaning agent dissolves the ink before it bonds strongly with the material, reducing the effort needed later.

    The longer you wait, the more the stain penetrates, making removal tougher and increasing the risk of permanent discoloration. Acting fast also means you won’t have to scrub aggressively or use harsh chemicals that might damage your shirt.

    Prevent Ink Setting

    When exactly should you act to prevent sublimation ink from setting into your shirt? The answer is simple: immediately. Immediate intervention is essential because the longer the ink stays, the more it bonds to fabric fibers, making stain removal tougher.

    Acting fast lets you dissolve or lift the ink before it becomes permanent. This reduces the need for harsh chemicals or damage. Quick action also cuts the risk of stain transfer or discoloration.

    Time Since Spill Ink Bonding Level Cleaning Difficulty Chemical Requirement Risk of Residue
    0-5 minutes Minimal Easy Mild Low
    5-15 minutes Moderate Moderate Moderate Medium
    15-30 minutes High Difficult Strong High
    30-60 minutes Very High Very Difficult Very Strong Very High
    Over 60 minutes Permanent Nearly Impossible Extreme Extreme

    Enhance Removal Success

    Because sublimation ink bonds quickly with polyester fibers, acting fast dramatically improves your chances of removing the stain. The longer the ink sits, the deeper it embeds, making it tougher to get rid of. Prompt action prevents the ink from setting too deeply, so you can tackle stains before they become permanent.

    When you clean the fabric immediately using alcohol or boiling water, you break down ink molecules early, avoiding harsh chemicals or lengthy treatments. This quick response not only saves time but also protects the shirt’s fibers from damage.

    Quick Removal: Using Isopropyl Alcohol on Sublimation Ink

    Although sublimation ink bonds strongly with fabric, you can quickly tackle fresh stains using isopropyl alcohol. Start by dampening a clean, lint-free cloth with 70% or higher isopropyl alcohol for effective stain removal.

    Gently dab the alcohol onto the stained area and let it sit for 1-2 minutes to break down the ink molecules. Avoid rubbing vigorously. Use a soft cloth or cotton ball to blot the ink carefully. This blotting helps lift the ink without damaging the fabric.

    After blotting, rinse the fabric thoroughly with cold water to remove any dissolved ink residues. If the stain persists, repeat the process but be cautious not to overuse the alcohol, as excessive exposure can deteriorate the fabric.

    Using isopropyl alcohol for quick stain removal is practical and efficient when handled with care, making it a go-to solution for fresh sublimation ink spots on your shirt.

    Pre-Treat Stains With Dish Soap for Better Results

    pre treat stain with dish soap

    To tackle sublimation ink stains effectively, start by picking a mild dish soap like Dawn Ultra and applying it right onto the stain. Just let it sit for a couple of minutes—it gives the soap a chance to break things down.

    After that, gently blot or scrub the area with warm water to really boost the cleaning power. And don’t forget to rinse thoroughly afterward. If the stain’s being stubborn, go ahead and repeat the process to keep soap residue at bay and get the best results.

    Choosing The Right Soap

    How do you choose the best soap to tackle sublimation ink stains on your shirt? Opt for a mild dish soap like Dawn Ultra, known for its grease-cutting power that aids pre-treatment and stain removal.

    Dish soap breaks down ink molecules effectively, making it ideal for tackling stubborn marks. Apply it undiluted directly on the stain and let it sit for a couple of minutes before gently scrubbing.

    Using warm water around 40°C boosts its ability to lift the ink from fabric fibers. You can repeat this pre-treatment process on tough stains to improve results.

    Afterward, always rinse thoroughly with cold water to remove soap residue and prevent the stain from setting back into the fabric.

    Applying Soap Effectively

    When you spot a sublimation ink stain, apply a small amount of mild dish soap directly onto it to start breaking down the ink molecules. Gently press or rub the soap into the stain using your fingers or a soft cloth. This helps the soap penetrate and lift the ink effectively.

    Let the soap sit on the stain for at least two minutes. This dwell time boosts the soap’s cleaning power. Applying soap correctly guarantees the ink begins to break down before you move to rinsing.

    Keep in mind, thorough application is key. Cover the entire stained area without over-saturating. This focused approach makes removing sublimation ink easier and improves your chances of restoring your shirt quickly and efficiently.

    Rinsing And Repeating

    After letting the dish soap sit on the stain, gently blot it with a damp cloth to lift the ink without spreading it further. Next, rinse the treated area thoroughly with cold water to wash away both the soap residue and the dissolved ink.

    If the stain still shows, don’t hesitate to repeat the process. Consistently applying this rinsing and pre-treatment cycle is key to breaking down stubborn sublimation ink. Each repeat loosens more ink particles, preventing the stain from setting into the fabric.

    Removing Sublimation Ink With Boiling Water

    boiling water dissolves sublimation

    Although sublimation ink bonds strongly with polyester fabric, you can break it down by submerging the stained area in boiling water for 5 to 10 minutes. Use boiling water to penetrate the fabric and disrupt the ink molecules effectively.

    Sublimation ink bonds strongly, but boiling water for 5-10 minutes can effectively break it down and remove stains.

    While the fabric is submerged, gently agitate it to help loosen the ink further. For fabric safety, always handle the hot shirt with tongs or heat-resistant gloves to avoid burns.

    Once the time is up, rinse the area thoroughly with cold water to wash away the loosened ink particles. If some ink remains, repeat the boiling water process to enhance ink removal without damaging the fabric.

    This method is a reliable way to tackle stubborn sublimation ink stains quickly, as long as you prioritize fabric safety throughout. Avoid wringing or harsh scrubbing to prevent fabric distortion. Boiling water offers a practical balance between powerful ink removal and preserving your shirt’s quality.

    When to Use Bleach Safely on White Shirts

    If boiling water doesn’t fully remove sublimation ink from your shirt, you might consider using bleach to tackle stubborn stains on white fabric. Use bleach safely only if your shirt’s fabric is 100% cotton and colorfast to avoid damage or discoloration.

    Always dilute bleach properly, about 1 tablespoon per half cup of water, and conduct a patch test on a hidden area to check for unwanted lightening. Limit bleach exposure to 3-5 minutes, then rinse thoroughly with cold water to stop the process and protect the fabric.

    Here’s a quick guide to using bleach safely:

    Step Details
    Fabric Check 100% cotton, colorfast only
    Dilution Ratio 1 tbsp bleach per ½ cup water
    Patch Test Test on inconspicuous area first
    Exposure Time 3-5 minutes max, then rinse

    Following these steps ensures you remove the stain without harming your shirt’s fabric.

    How to Use Dye Removers for Tough Sublimation Ink Stains

    When you’re dealing with tough sublimation ink stains, using a dye remover like Rit Color Remover can be an effective solution. Before you start, pre-wash the shirt to remove oils and dirt. This helps the dye remover work better on the stubborn stains.

    For tough sublimation ink stains, pre-washing your shirt boosts the effectiveness of dye removers like Rit Color Remover.

    Then, carefully treat the stained area by following these steps:

    • Submerge the shirt in a 60 to 70°C dye remover solution for 10 to 15 minutes, stirring occasionally to target the stained area evenly.
    • Always test the dye remover on a small, hidden spot first to avoid fabric damage or discoloration.
    • After soaking, rinse the shirt thoroughly with cold water. Add citric acid to neutralize leftover chemicals.
    • Wash the shirt separately to remove any residual dye remover and prevent transfer to other clothes.

    Using dye removers like this ensures you tackle stubborn stains effectively while protecting your shirt’s fabric.

    How Lemon Juice and Vinegar Can Lift Sublimation Ink

    Wondering how to remove sublimation ink without harsh chemicals? Try mixing lemon juice and vinegar in equal parts for a natural stain removal solution. This acidic mix helps break down sublimation ink on your shirt’s fabric.

    Start by saturating the stained area with the lemon juice and vinegar blend, letting it sit for at least 5 minutes to loosen the ink from polyester fibers. After soaking, gently scrub the stain with a soft cloth or brush to boost the acid’s penetration into the ink molecules.

    Once you’ve treated the stain, rinse the fabric thoroughly with cold water to stop the ink from setting further and wash away any leftover acids. Keep in mind, this method works best on light-colored fabrics, since the acids in lemon juice and vinegar might lighten or discolor darker or delicate textiles.

    This simple, natural approach offers an effective way to tackle sublimation ink stains while avoiding harsh chemicals.

    Creative Cover-Up Ideas for Stubborn Sublimation Ink Stains

    If that stubborn sublimation ink stain just won’t budge, don’t worry—you can easily cover it up with embroidered patches. They not only hide the mark but also add some cool character and style to your shirt.

    Another great trick is fabric paint. Just apply it in thin layers, and you can blend the stain right into the fabric.

    Both of these methods are super simple and let you turn an annoying stain into a creative design feature in no time!

    Embroidered Patches Application

    Although stubborn sublimation ink stains can be tricky to remove, you can quickly conceal them with embroidered patches that add both style and functionality. Embroidery patches provide excellent stain coverage while giving your shirt a fresh, decorative touch.

    To apply them properly, follow these tips for effective fabric repair: Select patches at least 1cm larger than the stained area for full coverage. Iron the patches at 150°C using parchment paper to avoid fabric damage.

    Secure patches with a zigzag stitch using matching or contrasting thread for durability. Optionally, use fabric paint or dye to blend patch edges seamlessly with the shirt.

    This method not only masks the stain but also revitalizes your garment with a creative flair.

    Fabric Paint Techniques

    When you want to creatively cover stubborn sublimation ink stains, fabric paint offers a versatile and effective solution. Use a fine-tipped brush to apply thin layers of fabric paint directly over the stain, carefully matching the shirt’s color to blend in seamlessly.

    Layering multiple thin coats improves coverage and creates a natural look without damaging the fabric. After painting, cure the fabric paint using a heat press, iron, or heat gun to guarantee it adheres well and resists washing.

    To elevate your design, incorporate decorative patterns or elements with fabric paint, transforming the stained area into a stylish feature. This technique not only conceals stains but also personalizes your shirt, making fabric paint a smart choice for quick, creative fixes.

    Protect Your Shirt During Sublimation Ink Removal

    Since sublimation ink removal involves heat and cleaning agents, you’ll want to safeguard your shirt carefully to avoid damage. Always start by placing a protective barrier like parchment paper or a heat-resistant silicone sheet between your shirt and the heat press. This prevents unwanted ink transfer.

    Before applying any cleaning method, test it on an inconspicuous area to ensure it won’t discolor or harm the fabric. Use gentle cleaning techniques with a clean, lint-free cloth or sponge to dab at the ink without rubbing harshly.

    Remember these key tips:

    • Place a protective barrier to shield your fabric during heat treatments.
    • Test all cleaning agents on an inconspicuous area first.
    • Use gentle cleaning tools to avoid fabric damage.
    • Avoid abrasive scrubbing tools that can wear down fibers.

    Frequently Asked Questions

    Can Sublimation Ink Stains Be Removed From Colored Shirts?

    Yes, you can remove sublimation ink stains from colored shirts, especially if they’re colorfast fabrics. You’ll want to act fast and use stain prevention tips like blotting gently and avoiding heat.

    Since some dyes react badly to solvents, try alternative cleaning methods like alcohol-based solutions or gentle scrubbing. Always test on a hidden spot first to protect your shirt’s color and avoid damage while tackling those tough stains.

    Is It Safe to Use a Washing Machine After Treating Sublimation Ink?

    Yes, you can use a washing machine after treating sublimation ink, but only once the stain’s fully addressed. Chemical reactions during treatment help break down the ink, so incomplete removal risks spreading the stain.

    Using alternative solvents carefully guarantees thorough cleaning before washing. To aid stain prevention, wash in cold water with mild detergent, avoiding harsh chemicals that could set any leftover ink.

    Always follow your shirt’s care label instructions.

    How Long Does It Take for Sublimation Ink to Set Permanently?

    You might think sublimation ink sets instantly, but it actually takes about 24 to 48 hours for full ink absorption and permanent bonding. During this time, the ink’s color fading is minimal if the fabric compatibility is right. Polyester works best.

    If you rush, you risk smudging or incomplete setting. So, give your shirt time to cool and cure properly to lock in vibrant colors that won’t wash away.

    Can Hair Spray Help Remove Sublimation Ink Stains?

    Yes, hair spray effectiveness can vary when removing sublimation ink stains. You can spray a small amount on the stain, let it sit, then blot with a clean cloth.

    Remember, it works best on light stains, so test first to avoid fabric damage. For tougher stains, consider alternative removal methods like rubbing alcohol or specialized stain removers.

    Always follow stain removal tips like rinsing with cold water and washing promptly for the best results.

    Are Commercial Stain Removers Effective on Sublimation Ink?

    Commercial stain removers can sometimes help with sublimation ink, but they’re not always effective since the ink is dye-based. If you try one, test a small spot first to avoid fabric damage.

    For better results, explore DIY cleaning methods or alternative options like boiling water or specific solvents. Remember, stain prevention is key, so act fast to stop the ink from setting and making removal harder.

    Conclusion

    Don’t let sublimation ink stains steal your shirt’s spotlight. With quick action and the right tricks, like isopropyl alcohol, dish soap, or even a splash of lemon juice, you can chase those stubborn marks away like shadows at dawn.

    Remember, treating stains is a race against time, so protect your fabric and act fast. Turn your shirt’s story from “ruined” to “rescue” with these simple, powerful moves!

  • How to Remove Pen Ink From Skin Quickly

    How to Remove Pen Ink From Skin Quickly

    To remove pen ink from your skin quickly, act right away before it sets. Use warm water and soap to gently loosen and wash away fresh ink stains.

    If that’s not enough, dab a cotton ball with rubbing alcohol and softly rub the area to break down stubborn ink.

    For sensitive skin, try natural options like milk or oils to protect while cleaning.

    Keep going to discover more easy techniques and tips for dealing with ink stains.

    Remove Pen Ink Quickly: Why Speed Matters

    act quickly prevent deep stains

    Although it might seem minor, removing pen ink quickly makes a big difference because fresh stains are much easier to dissolve before they set into your skin. When you take immediate action to remove ink quickly, you prevent the ink from bonding deeply with your skin cells.

    Fresh stains respond better to cleaning methods, so addressing them right away means you won’t have to work as hard or use harsh chemicals later. Waiting too long allows the ink to penetrate further, making removal tougher and often requiring vigorous scrubbing.

    That scrubbing can lead to skin irritation, which you definitely want to avoid. By acting fast, you increase your chances of completely removing the ink with minimal effort and without damaging your skin. So, whenever you notice a fresh stain, don’t hesitate. Immediate action is your best bet to keep your skin clean and irritation-free.

    Use Soap and Warm Water for Fresh Ink Stains

    When you catch a fresh ink stain, start by washing the area immediately with warm water to stop the ink from settling into your skin. Using soap and water is one of the simplest, most effective ways to remove ink quickly. Warm water helps loosen the ink pigments, while soap breaks them down.

    To remove ink stains effectively, follow these tips:

    • Apply a generous amount of dish soap or hand soap on the ink-stained area.
    • Gently rub the skin with your fingertips or a soft cloth to lift the ink.
    • Rinse thoroughly with warm water, repeating the process if needed.

    Keep washing and rubbing gently until the ink begins to fade. Soap and water won’t damage your skin and are safe for quick cleanup. Acting fast with warm water and soap helps prevent ink stains from setting, making removal much easier.

    Apply Rubbing Alcohol to Remove Pen Ink Safely

    use rubbing alcohol carefully

    If soap and water don’t fully remove the ink, you can turn to rubbing alcohol for a quicker solution. Soak a cotton ball or pad in rubbing alcohol, then gently dab it onto the ink-stained skin. Use circular motions to break down and lift the ink pigments without harsh scrubbing.

    Let the rubbing alcohol sit on the skin for a few seconds to dissolve stubborn ink stains. Afterward, rinse the area with warm water to wash away loosened ink and alcohol residue. To prevent dryness, follow up by washing with soap and water.

    Since rubbing alcohol can irritate sensitive skin, use it sparingly and perform a patch test on a small area first. This method helps you remove pen ink quickly and safely, leaving your skin clean without damage.

    Keep in mind, rubbing alcohol is effective but should always be used with care to protect your skin’s health.

    Try Milk and Tea Bags to Lift Ink Naturally

    Since harsh chemicals can irritate your skin, you can try milk and tea bags to lift ink naturally and gently. Both milk and tea bags contain natural fats and oils that interact with ink pigments, helping you remove ink stains without causing irritation.

    Here’s how you can use them: soak your hands in milk or rub a milk-soaked cloth on the ink stains to dissolve the ink naturally. Use a cooled, used tea bag and gently rub it over the stained area to loosen the ink.

    Repeat these methods as needed to gradually remove stubborn ink stains. This chemical-free approach is especially suitable for sensitive skin. By using milk and tea bags, you avoid harsh ingredients while still effectively lifting ink from your skin’s surface.

    Make a Baking Soda Paste to Exfoliate Ink Stains

    baking soda ink removal

    Milk and tea bags offer a gentle way to lift ink from your skin, but sometimes you need a slightly more abrasive method to remove stubborn stains. Making a baking soda paste is an effective exfoliating technique to tackle ink stains.

    Mix equal parts baking soda and water to form a thick paste. Apply it to the ink-stained skin using gentle circular motions. Let it sit for a few minutes to loosen the ink particles, then rinse thoroughly with warm water.

    If ink remains, repeat the process, scrubbing gently to avoid irritating your skin.

    Step Action
    Mix Equal parts baking soda & water
    Apply Gently on ink-stained skin
    Wait Let sit for a few minutes
    Rinse & Repeat Warm water rinse; repeat if needed

    This method exfoliates your skin while lifting ink stains effectively.

    Use Oils to Break Down Pen Ink Stains

    You can use oils like coconut or olive oil to gently break down pen ink on your skin without causing irritation. Just apply a small amount and massage it into the stain — this helps dissolve the ink pigments. After that, simply wipe it away with a cloth and rinse with soap and water for a clean finish. Easy, right?

    Benefits Of Using Oils

    Although pen ink can be stubborn, using oils like coconut or olive oil quickly breaks down the ink’s oily pigments. This makes it easier for you to wipe the stain away gently and effectively. Oils dissolve the ink’s oily components, helping to remove ink without harsh scrubbing.

    When you apply oil, it creates a barrier that lifts ink from skin cells, protecting your skin from irritation or dryness.

    Using oils offers several benefits:

    • Gently breaks the bonds between ink dyes and skin cells for effective removal
    • Forms a protective barrier that prevents skin irritation
    • Suitable for all skin types, especially sensitive skin

    Types Of Effective Oils

    Several types of oils work effectively to break down pen ink stains on your skin. Olive oil’s natural lubricating properties help dissolve ink, making stubborn stains easier to remove.

    Baby oil, which is mineral oil-based, also loosens and lifts ink from your skin’s surface effectively. You can turn to essential oils like tea tree or eucalyptus, as they have solvent-like qualities that assist in dissolving ink, but use them cautiously to avoid irritation.

    Furthermore, coconut oil contains medium-chain fatty acids that break down ink pigments efficiently. These oils penetrate the ink, helping to break it apart so you can wash it away more easily. Using these oils gives you a simple, gentle way to tackle ink stains without harsh chemicals.

    Application Techniques For Oils

    When tackling pen ink stains on your skin, applying oils like olive, coconut, or baby oil correctly can make all the difference. These oils break down ink pigments by dissolving the ink’s oils and dyes on your skin. To get the best results, follow these steps:

    Apply a generous amount of oil to the ink-stained area and gently massage to loosen the ink particles. Let the oil sit for a few minutes on stubborn stains to penetrate and break down the ink.

    Rinse thoroughly with soap and water, then moisturize your skin to prevent dryness. Using oil this way works best on fresh or semi-set ink stains, helping you remove ink without harsh scrubbing or irritation.

    Protect Sensitive Skin When Removing Ink

    When you’re removing pen ink, it’s best to stick with gentle cleaning methods like diluted soap or natural oils. These help protect your sensitive skin from getting irritated.

    It’s always a good idea to test a small area first, just to make sure your skin doesn’t react badly. And try to avoid using harsh chemicals for too long—they can be tough on your skin.

    Once you’ve cleaned the area, go ahead and apply a moisturizer. This will help soothe your skin and keep it from drying out.

    Gentle Cleaning Methods

    Although removing pen ink quickly might tempt you to scrub hard, protecting your sensitive skin requires a gentler approach. Use gentle cleaning techniques to avoid irritation and redness. Instead of harsh chemicals, try mild, alcohol-free cleansers like gentle hand soap or hand sanitizer with moisturizing properties.

    Natural remedies such as olive oil or coconut oil also work well to break down ink without harming your skin. Here’s how to proceed carefully:

    Always do a patch test to check for allergic reactions before full application. Gently pat or rub the ink stain rather than scrubbing aggressively. After cleaning, apply a moisturizing lotion to soothe and protect sensitive skin.

    These methods help remove ink effectively while keeping your skin calm and healthy.

    Skin Irritation Prevention

    Protecting your skin during ink removal goes beyond choosing gentle cleaners. To prevent skin irritation, always perform a patch test on a small area before using any ink removal solution. This helps you spot potential allergic reactions early.

    Opt for gentle cleaning agents like mild soap instead of harsh chemicals that can damage sensitive skin. Limit how long the solution stays on your skin and rinse thoroughly to avoid dryness.

    Wearing protective gloves is a smart move to shield your hands from direct contact with irritants. After cleaning, apply a moisturizer to soothe and restore your skin’s natural barrier.

    When to Use Commercial Ink Removers

    If household methods like soap and alcohol don’t fully remove stubborn or permanent ink stains, you’ll want to turn to commercial ink removers. These products are designed specifically for tackling tough ink stains on skin when natural remedies fall short. Using ink removers can save you time and effort, especially with older or deeply set stains that just won’t budge.

    When soap and alcohol fail, commercial ink removers effectively tackle stubborn, deeply set ink stains on skin.

    Before you dive in, keep these tips in mind:

    • Choose ink removers formulated for skin to avoid irritation.
    • Always do a patch test to check for allergies or sensitivities.
    • Follow the product’s instructions carefully, including how long and how often to apply it.

    What to Do If Ink Stains Don’t Come Off

    Wondering what steps to take when ink stains just won’t come off? Start by applying a small amount of rubbing alcohol to the stained area and gently massage it before rinsing thoroughly.

    If that doesn’t work, wash the area repeatedly with soap and warm water; patience is key, as stubborn ink stains can require multiple attempts. For persistent marks, consider using a commercial stain remover designed for ink, like Amodex, but always test it on a small skin patch first to avoid irritation.

    If ink stains still remain after several tries, it’s best to consult a dermatologist. They can offer safer alternatives and help prevent skin damage from harsh chemicals.

    Simple Habits to Prevent Ink Stains

    You can prevent ink stains by adopting a few simple habits while writing. For starters, wearing gloves can really help. Also, try adjusting your grip and holding the pen away from the nib—these small changes keep ink off your skin.

    Plus, using blotting paper is a great way to reduce smudges. And don’t forget to wash your hands regularly; it goes a long way in keeping those pesky stains at bay.

    Protective Writing Practices

    Although ink stains can be stubborn, adopting simple protective writing habits can save you time and hassle. When you’re handling or refilling pens, wearing gloves helps keep ink off your skin. Using blotting paper right after writing absorbs excess ink and prevents smudges.

    Adjusting your grip and writing angle minimizes ink transfer, especially if you’re left-handed.

    Try these tips to protect your hands:

    • Wear gloves or finger cots during pen refilling to avoid direct contact with ink.
    • Use blotting paper or a rocker blotter immediately after writing to soak up excess ink.
    • Hold the pen away from the nib while refilling to reduce accidental spills and ink transfer.

    These practices help keep your skin clean and make cleaning ink stains much easier.

    Ink Handling Techniques

    Since ink stains can be tricky to remove, adopting simple handling habits can make a big difference in keeping your skin clean. By mastering effective ink handling techniques, you reduce the chances of needing stain removers to remove ink stains later.

    For example, wearing gloves during ink refilling or using blotting paper right after writing minimizes ink from your skin. Adjusting your grip and holding the pen away from the nib also helps prevent ink transfer.

    Technique Benefit
    Wear gloves Prevents ink contact
    Use blotting paper Absorbs excess ink immediately
    Adjust grip angle Reduces smudging
    Hold pen away from nib Limits ink on fingers

    These habits keep your skin stain-free and reduce the hassle of removing ink stains.

    Smudge Prevention Tips

    When handling ink, adopting simple habits can save you from frustrating smudges and stains. To prevent ink from staining your skin, focus on these easy prevention tips.

    First, use a pen with a built-in cap or wear gloves to minimize accidental ink contact. Second, hold your pen at an angle that reduces ink leakage and keeps ink off your fingers and palm.

    Third, keep blotting paper or tissue nearby to absorb excess ink immediately after writing or refilling. If ink does get on your skin, have a damp cloth or hand sanitizer ready to remove it quickly.

    Frequently Asked Questions

    Can Pen Ink Cause Allergic Reactions on the Skin?

    Yes, pen ink can cause allergic reactions on your skin, especially if you have an ink allergy. You might notice skin irritation, redness, or itching after contact.

    These allergic symptoms often show up as contact dermatitis, which means your skin becomes inflamed where the ink touched it. Permanent or alcohol-based inks tend to cause stronger reactions, so if you’re sensitive, it’s best to avoid prolonged exposure to ink on your skin.

    Is It Safe to Use Nail Polish Remover on Ink Stains?

    Like handling fire, using nail polish remover on your skin demands caution. Yes, nail polish remover can work for ink removal, but skin safety is key. Its acetone may trigger chemical reactions, causing dryness or irritation.

    Test a small patch first and avoid broken skin. Use removal techniques sparingly, then wash and moisturize thoroughly. This way, you protect your skin while effectively tackling ink stains without lasting harm.

    How Long Does It Take for Ink Stains to Fade Naturally?

    Ink fading on your skin usually takes a few hours to a day, depending on how long the stain has been there and how your skin absorbs the ink. If your skin is oily or exfoliates quickly, the stain will naturally disappear faster.

    Water-based inks fade quicker than permanent types. Regular washing speeds up the process, and sun exposure can boost skin cell turnover. So, be patient because your skin’s natural absorption helps clear the stain over time.

    Can Children’s Skin Be Treated With the Same Ink Removal Methods?

    Treating children’s skin for ink is like handling a delicate flower. You can’t use harsh methods. You shouldn’t apply nail remover safety solutions or strong chemicals because children’s skin is sensitive and prone to ink allergy.

    Instead, rely on natural fading techniques like gentle soap and water or mild lemon water. Always patch test first to avoid irritation. If the ink persists or reactions occur, consult a pediatrician for safe treatment options.

    Are There Any Home Remedies to Prevent Ink Stains From Setting?

    Yes, you can use DIY remedies and natural solutions to prevent ink stains from setting. Apply a bit of hand lotion or oil right after ink contact as a quick fix to create a barrier.

    Household hacks like rinsing with warm water and soap or using a damp cloth immediately can also stop ink from bonding to your skin. These simple steps help you tackle ink before it becomes stubborn.

    Conclusion

    When pen ink lands on your skin, acting fast is the name of the game. Whether you reach for soap and warm water, rubbing alcohol, or natural remedies like milk and tea bags, quick action makes all the difference.

    Remember, don’t throw the baby out with the bathwater. Protect your skin while tackling the stain. With these tips, you’ll keep ink at bay and your skin looking fresh in no time.

  • 10 Steps to Remove Pen Ink From Leather

    10 Steps to Remove Pen Ink From Leather

    To remove pen ink from leather, first identify the stain size and leather type. Then quickly blot the ink without rubbing.

    Test any cleaning solution on a hidden spot to avoid damage.

    Use mild soap and water for light stains, and try rubbing alcohol or vinegar for tougher ones.

    You can cautiously apply hairspray or acetone-free nail polish remover.

    Gently scrub stubborn spots with a soft toothbrush, and condition the leather afterward.

    If needed, professional help can guarantee safe removal.

    Keep exploring to uncover detailed tips and tricks.

    Assess Ink Stain Size and Leather Type

    assess stain size and leather

    Before you begin removing pen ink from leather, start by evaluating the stain’s size and the type of leather you’re dealing with. The first step is to determine stain size, as small ink stains often require gentler cleaning methods, while larger stains might need more intensive treatment.

    Next, identify the leather type, whether it’s full-grain, suede, or patent, since each leather surface reacts differently to cleaning products. Porous leather like suede absorbs ink more deeply, demanding specialized care to avoid surface damage.

    Carefully examine the stain extent and stain location on your leather item to focus your cleaning efforts precisely and prevent spreading the ink further. Also, check the leather surface’s finish and condition before applying any cleaning method, ensuring you don’t cause discoloration or harm.

    Blot Ink Immediately Without Rubbing

    You need to act quickly and blot the ink with a soft, dry cloth to stop it from soaking deeper into the leather. Just press gently—don’t rub or scrub—so you don’t spread the stain around. Using a paper towel or soft cloth, work from the stain’s edge inward for the best results.

    Act Quickly To Blot

    The first few minutes after an ink spill are critical. Act quickly to blot the stain with a clean, dry cloth. You need to blot the ink stain immediately to prevent it from setting into the leather and causing permanent damage.

    Use gentle dabbing motions rather than rubbing, because rubbing can spread the ink and push it deeper into the leather fibers. Acting fast helps remove ink right away, making initial stain removal much easier.

    Avoid delays since dried ink can be stubborn and may require harsh chemicals that risk harming your leather. By focusing on blotting right away, you protect the clean leather surface and improve your chances of lifting the ink completely without spreading it further.

    Quick, careful action is essential to prevent permanent damage to your leather item.

    Use Soft Dry Cloth

    After blotting the ink with a clean cloth, grab a soft, dry cloth to continue lifting the stain immediately. Use gentle dabbing motions to blot the ink stain carefully, avoiding any rubbing that could push the ink deeper into the leather surface.

    This immediate action helps prevent spreading and soaks up excess ink effectively. Applying light pressure with your soft cloth supports ink removal without damaging the delicate leather.

    Remember, using a dry cloth is essential at this stage. Moisture can cause the ink to set or spread further. By acting quickly and gently, you increase your chances to remove ink from leather successfully while preserving the material’s integrity.

    Consistently blot with a soft cloth for the best results during this vital step.

    Avoid Rubbing Or Scrubbing

    Although it might be tempting to scrub away the ink, doing so only pushes it deeper into the leather, making removal much harder. You should always avoid rubbing and use gentle blotting instead.

    Patience and a delicate technique with light pressure help lift the ink without damaging the leather or causing cracks. Use a soft, damp cloth to dab the stain carefully, which prevents ink spread and preserves the leather’s texture.

    Action Tool Used Benefit
    Gentle blotting Soft cloth Ink lift
    Dab with light pressure Damp cloth Prevent ink spread
    Avoid rubbing N/A Preserve leather

    Test Cleaning Solutions on a Hidden Spot

    Before you apply any cleaning solution to the visible ink stain, make sure you test it on a hidden spot of the leather first. This initial testing helps you avoid unexpected color change or damage to the leather.

    Always test cleaning solutions on a hidden leather spot first to prevent color changes or damage.

    Choose a small, inconspicuous area and apply a bit of the cleaning solution onto a soft cloth rather than directly on the leather. Gently dab the test spot and wait 15 to 30 minutes to observe any adverse reaction, such as discoloration or texture changes.

    This patch test is essential for damage prevention, ensuring the cleaning solution is safe before treating the leather stain. Document your spot test results carefully. If you notice any negative effects, avoid using that solution on the visible stain.

    Taking these precautions with a thorough patch test will protect your leather and improve the chances of successful ink removal without causing further harm.

    Clean Light Ink Stains With Mild Soap and Water

    gentle ink stain removal

    If you’re dealing with a light ink stain on your leather, mixing a small amount of mild dish soap or saddle soap with warm water creates a gentle cleaning solution that won’t damage the material. Dampen a soft cloth with this mild soap and water mixture, making sure it’s only lightly moist to avoid oversaturating the leather.

    Use the damp cloth to gently clean the ink stains by rubbing in circular motions, starting from the outer edges and working inward to prevent spreading. Afterward, take a clean, damp cloth to wipe away any soap residue and loosened ink particles from the leather surface.

    Finally, dry the area with a soft, dry cloth to remove moisture completely. This gentle cleaning method effectively lifts light ink stains without harsh chemicals, preserving the leather’s quality.

    To keep your leather soft and prevent drying, follow up with a leather conditioner after cleaning.

    Remove Tough Ink Stains Using Rubbing Alcohol or Vinegar

    Light soap and water work well on minor ink stains, but tougher marks call for stronger solutions. When removing ink from leather, start by testing rubbing alcohol or a vinegar and water mixture on a hidden spot to avoid discoloration.

    Light soap and water suit minor ink stains; tougher marks need testing stronger solutions like rubbing alcohol or vinegar first.

    Dampen a cotton swab with rubbing alcohol and gently dab the ink stains, taking care not to saturate the leather. Alternatively, apply the vinegar and water mixture with a soft cloth to lift stubborn ink marks.

    Let the solution sit for a few minutes to break down the stain before gentle blotting with a clean, soft cloth. After treatment, immediately wipe the area with a damp cloth to remove residue.

    Finish by applying a leather conditioner to prevent dryness and maintain the leather’s softness. Always use gentle blotting techniques to avoid damaging the surface, ensuring effective stain removal without compromising the leather’s quality.

    Clean Ink Naturally With Baking Soda Paste

    baking soda removes ink

    One effective way to remove pen ink from leather naturally is by using a baking soda paste. Start by mixing equal parts baking soda and water to create a mild paste perfect for ink stain removal.

    For paste application, use a soft cloth or sponge to gently spread the mixture over the ink stain, taking care not to press too hard. Let the paste sit for 10-15 minutes to allow the baking soda to help lift the ink particles from the leather.

    Next, perform a gentle scrub with a soft-bristled toothbrush or cloth to loosen the ink without harming the leather surface. Afterward, wipe away the residue with a damp cloth to remove the baking soda and lifted ink.

    To complete your leather cleaning and stain treatment, apply a leather conditioner to restore moisture and keep the leather soft. This natural method offers an effective and safe way to tackle ink stains while preserving your leather’s quality.

    Apply Hairspray or Nail Polish Remover Cautiously on Leather

    Although hairspray and nail polish remover can effectively break down ink stains on leather, you need to use them cautiously to avoid damage. Hairspray contains alcohol, which helps dissolve ink residues, while nail polish remover should be acetone-free to protect the leather surface.

    Before applying either, perform a patch test on a hidden area to ensure there’s no discoloration or adverse reaction. When ready, spray hairspray or apply nail polish remover sparingly and hold the can close to the stain.

    Let it sit for 3-5 minutes, then gently blot the area to lift the ink without spreading it. Avoid rubbing, which can worsen the stain or harm the leather. After blotting, use a leather conditioner to restore moisture and prevent drying out.

    This cautious approach helps you remove ink effectively while maintaining your leather’s appearance and durability.

    Gently Scrub Stubborn Ink With a Soft Toothbrush

    When stubborn ink won’t budge, gently scrubbing with a soft toothbrush can help lift it without harming your leather. Use a soft-bristled toothbrush dipped in a mild cleaning solution like leather cleaner or a vinegar-water mix.

    This gentle agitation helps break down ink particles embedded deep in the leather pores. Move the toothbrush in small circular motions, applying light pressure to avoid scratching or deforming the leather surface. These circular motions work to loosen ink effectively while protecting your leather’s integrity.

    After scrubbing stubborn ink, wipe the area with a damp cloth to remove loosened ink and residual cleaning agents. This guarantees no leftover solution harms the leather or attracts dirt.

    Condition Leather to Restore Moisture After Cleaning

    After removing ink from your leather, you’ll want to condition it to replenish the natural oils that cleaning can strip away. Conditioning leather after cleaning is essential to maintain its softness and flexibility. This helps prevent dryness or cracking.

    Conditioning leather after ink removal restores natural oils, keeping it soft, flexible, and protected from damage.

    Here’s how to properly condition the leather:

    Choose a high-quality leather conditioner designed for your specific leather products. Test the conditioner on a hidden area to ensure it won’t alter the color or finish.

    Apply a small amount evenly with a soft cloth to avoid over-saturating the surface. Let it sit for 10-15 minutes to fully absorb and restore moisture.

    Buff gently to create a protective barrier that helps fend off future stains and damage.

    When to Seek Professional Leather Cleaning Services

    How do you know if it’s time to call in a professional for your leather ink stain? If DIY methods fail after several tries, it’s wise to seek professional leather cleaning. Professionals use specialized equipment to tackle deep or ingrained ink stains without causing further damage.

    Also, if your leather is valuable or antique, consulting experts prevents accidental harm. Large ink stains spreading over significant areas or signs of discoloration or cracking after cleaning attempts are clear signals to get professional services.

    Situation Risk Level Recommended Action
    Deep or ingrained ink stains High Professional leather cleaning
    Valuable or antique leather Very High Avoid DIY, hire professionals
    Large ink stains or damage High Seek professional services

    Don’t risk worsening the condition. Professional help ensures safe, effective ink removal.

    Frequently Asked Questions

    Can Pen Ink Damage Leather Permanently if Left Untreated?

    Yes, pen ink can permanently damage leather if left untreated. The durability and quality of the ink affect how deeply it penetrates the leather’s surface porosity.

    High ink absorption rates increase the ink’s penetration depth, making stain removal difficult. Leather stain resistance varies depending on the type of leather, so some leathers absorb ink faster than others.

    The longer the ink takes to dry, the more it bonds with the leather, reducing your chances of cleaning it before permanent discoloration sets in.

    What Types of Leather Are Most Resistant to Ink Stains?

    You’ll find full-grain and patent leather most resistant to ink stains thanks to their dense surfaces and protective coatings. When practicing leather care, focus on stain prevention by using cleaning solutions suited for these types.

    Always perform stain testing before applying any product. Understanding ink types and using proper cleaning tools helps maintain your leather’s appearance.

    Regular leather maintenance slows leather aging and keeps surfaces less prone to stubborn stains.

    How Often Should Leather Be Conditioned After Cleaning Ink Stains?

    You should condition your leather every 3 to 6 months after cleaning ink stains to support leather maintenance and stain prevention. If you use intensive cleaning techniques often, condition more frequently, every 4 to 8 weeks, to aid moisture control and texture preservation.

    Proper conditioning helps with color restoration and protects against leather aging. Always apply protective coatings as recommended, and follow storage tips to keep your leather supple and looking great.

    Are There Any Ink Types That Cannot Be Removed From Leather?

    Yes, some ink types can’t be removed from leather easily. Permanent ink and metallic ink have high ink durability and low ink solubility, making them tough to erase. Gel pen ink and fountain pen ink vary, but their ink composition often leads to deep ink absorption, which complicates removal.

    Erasable ink is usually easier to tackle. Understanding the ink composition and how it interacts with leather helps you decide if removal is possible or if professional help is needed.

    Can Ink Removal Methods Affect Leather Color or Texture?

    Yes, ink removal methods can affect leather color or texture. When you clean leather, ink absorption and stain penetration vary, so using the right cleaning techniques is essential.

    Harsh products may damage the surface finish or clash with dye compatibility, causing fading or patchiness. Improper methods accelerate leather aging and weaken its structure.

    Always prioritize product safety and test solutions first to prevent stains and protect your leather’s original look and feel.

    Conclusion

    Removing pen ink from leather can feel frustrating yet rewarding. While the stain challenges your patience, your careful, gentle cleaning revives the leather’s beauty.

    You move from immediate blotting to cautious scrubbing, each step balancing damage and restoration. Though ink may seem permanent, your thoughtful approach proves otherwise.

    Sometimes, despite your best efforts, professional help becomes the wiser choice, reminding you that some battles are best left to experts.

  • How to Remove Old Ink Stains From Colored Clothes in 7 Easy Steps

    How to Remove Old Ink Stains From Colored Clothes in 7 Easy Steps

    To remove old ink stains from colored clothes, first identify your ink type and check the fabric label.

    Blot excess ink gently without rubbing, then rinse with cold water from the stain’s edge inward.

    Pretreat with mild detergent and, if needed, carefully apply rubbing alcohol or stronger solvents.

    Wash on the correct cycle using the right temperature, then air dry. Never use heat until the stain is gone.

    You’ll find that repeating treatments boosts your success, and there’s more to help you tackle tough stains.

    Identify Ink Type and Fabric

    identify ink and fabric

    Before tackling an ink stain, you need to identify both the type of ink and the fabric involved. Proper stain identification is key because water-based ink, like that from washable markers or gel pens, reacts differently than oil-based ink, such as permanent markers or ballpoint pens.

    Water-based ink usually comes out with water and mild detergents, while oil-based ink demands stronger solvents like rubbing alcohol. Next, check the fabric care label to understand fabric compatibility with various ink removal methods.

    Ignoring the care label risks fabric damage or color fading. Always perform stain testing on a small, hidden area before applying any solution broadly. This step helps you avoid unexpected fabric damage and guarantees the ink removal method suits your garment.

    Blot and Rinse Excess Ink

    Start by gently blotting the excess ink with a clean, white cloth. Don’t rub, though—rubbing will just push the stain deeper into the fabric. Then, use cold water to rinse the area. This helps dilute the ink and keeps it from setting in. Make sure to always blot with a fresh section of your cloth so you don’t accidentally spread the stain back onto the fabric.

    Remove Excess Ink

    Although it’s tempting to rub the ink stain right away, you should gently blot it with a clean, white cloth or paper towel. This soaks up as much ink as possible without spreading it. Use a clean cloth to absorb ink carefully, avoiding pressure that pushes ink deeper into the fabric.

    After blotting, rinse the area with cold water to dilute and loosen the ink. Dab gently with a sponge or cloth, making sure you don’t spread the ink further. Repeat blotting and rinsing to remove excess ink and get the fabric ready for the next cleaning step.

    Step Action Tip
    Blot Use white cloth Avoid rubbing or pressing
    Absorb Ink Dab gently Prevent spreading ink
    Rinse Use cold water Loosen ink before treatment

    Use Cold Water

    When you treat an ink stain, gently blot it with a clean, white cloth soaked in cold water. This helps lift as much ink as possible without spreading it further. Using cold water is key because hot water can set the stain, making older ink marks harder to remove.

    After blotting, rinse the stained area thoroughly with cold water to flush out any residual ink particles trapped in the fabric fibers. To avoid spreading the stain, always work from the outside of the ink stain inward during rinsing.

    For stubborn stains, repeat the blot and cold water rinse process several times. This gradually reduces the stain’s visibility. This careful approach helps preserve your colored clothes while effectively tackling the ink stain without causing damage.

    Blot Don’t Rub

    How should you handle fresh ink stains on your colored clothes? The key is to blot, don’t rub. Blotting helps absorb excess ink without pushing it deeper into the fabric fibers or causing the stain to spread. Here’s what you should do:

    Gently blot the ink stain with a clean, dry cloth or paper towel to absorb excess ink. Use fresh blotting materials repeatedly until no more ink transfers. Avoid rubbing, which can embed ink deeper into the fabric and complicate stain removal. Rinse the stained area with cold water after blotting to dilute and loosen the ink from the fabric.

    Continue blotting and rinsing until the stain lightens, then proceed with further stain removal steps to protect your colored clothes.

    Pretreat Ink Stains With Mild Detergent

    Since ink stains can be stubborn, you’ll want to pretreat them with a mild liquid detergent to break down the ink particles effectively. Start by applying a small amount of mild detergent directly onto the ink stain, making sure the fabric is fully covered.

    Gently rub the detergent into the fabric using your fingers or a soft brush to assist the stain removal process without damaging the fibers. Let the detergent sit on the stain for at least 5 to 10 minutes to maximize its effectiveness.

    For tougher stains, repeat this step and allow the detergent to work longer. Before you begin, always test the mild detergent on a hidden area of the fabric to check for any discoloration or damage. This guarantees the product is safe to use and won’t harm your colored clothes.

    Pretreating with mild detergent is a simple yet essential step for tackling old ink stains efficiently.

    Apply Alcohol-Based and Stronger Solvents

    use alcohol based solvents carefully

    Although mild detergent helps break down ink stains, using alcohol-based solvents can tackle older, more stubborn marks effectively. Start by testing the alcohol-based solvent, like rubbing alcohol, on a hidden part of the fabric to avoid discoloration. Once safe, apply solvent directly to the ink stain and let it sit for about 5 minutes. Gently blot with paper towel to lift the ink without spreading it.

    For stubborn ink stains, test rubbing alcohol on fabric, apply to stain, let sit, then gently blot to lift ink.

    If the stubborn ink doesn’t fade, repeat the process and rinse thoroughly with cold water after each treatment. For tougher stains, you might consider stronger solvents, but use them cautiously or seek professional help.

    Here’s a quick guide:

    • Test fabric first to prevent damage
    • Apply solvent generously to the ink stain
    • Blot with paper towel gently, don’t rub
    • Rinse thoroughly after treatment and repeat if stain persist

    This method boosts your stain removal success on old ink stains without harming colored clothes.

    Wash Clothes Using Correct Cycle and Temperature

    After treating ink stains with alcohol-based solvents, the next step is to wash your clothes using the appropriate cycle and water temperature. Check the garment’s care label to select the hottest water temperature safe for the fabric.

    Hot water helps dissolve and loosen stubborn ink stains but avoid it on delicate or color-sensitive fabrics to prevent setting the stain or fading colors. Choose a wash cycle based on the fabric type. Use the delicate cycle for fragile textiles and heavy-duty for sturdier ones.

    Always pre-treat the stain with a stain remover before washing. Adding extra detergent or stain-fighting agents boosts stain removal during the wash.

    Fabric Type Recommended Cycle Water Temperature Pre-treat Needed Detergent Amount
    Cotton Heavy-duty Hot Yes Extra
    Silk Delicate Cold Yes Regular
    Polyester Normal Warm Yes Extra
    Wool Delicate Cold Yes Regular
    Denim Heavy-duty Hot Yes Extra

    Air Dry and Repeat Ink Treatment If Needed

    air dry repeat stain removal

    When you finish washing your garment, let it air dry completely so you can clearly see if the ink stain is gone. Air drying is essential because heat from dryers can set old ink stains permanently, making further stain removal impossible.

    If the stain persists, don’t hesitate to repeat the ink treatment. Patience is key, as multiple treatments often improve your chances of fully removing stubborn ink from colored clothes.

    Follow these steps during the stain removal process:

    • Always let your garment air dry completely after each wash.
    • Apply a fresh stain remover or solvent directly to the ink spot before rewashing.
    • Avoid using heat until you confirm the stain is fully removed.
    • Repeat the ink treatment as needed, allowing time between each to see results.

    Tips for Preventing Ink Stains From Setting

    To keep ink stains from setting, you need to act quickly and carefully. Quick action is essential in preventing ink set, so treat ink stains as soon as you notice them. First, always test on fabric. Perform a spot test in a hidden area to ensure your stain removal method won’t damage or worsen the fabric.

    When applying stain treatment, blot instead of rub. Rubbing pushes ink deeper, making removal harder. Be sure to avoid heat during the entire process. Hot water or dryers can permanently set old ink stains, so skip them until the stain is fully gone.

    After applying stain treatment, follow drying precautions by air drying the garment. This lets you monitor the stain removal progress and prevents heat from locking in any remaining ink. By combining quick action, careful blotting, spot tests, and avoiding heat, you’ll effectively prevent ink stains from setting and increase your chances of complete removal.

    Frequently Asked Questions

    Can Ink Stains Be Removed From Delicate Fabrics Like Silk?

    Yes, you can remove ink stains from delicate fabrics like silk, but you need to take fabric sensitivity and ink type into account carefully. Since stain duration affects stain absorption, acting quickly helps prevent stain reappearance.

    Use gentle cleaning techniques compatible with the dye to avoid color loss. Test cleaning remedies first to verify dye compatibility. For old stains, professional ink removal is often safest to balance effective stain removal with stain prevention.

    Is It Safe to Use Hair Spray on Colored Clothes for Ink Stains?

    You can use hair spray for ink removal on colored clothes, but you need to prioritize stain safety. Hair spray’s alcohol helps break down ink penetration, but its chemicals risk fabric damage and discoloration, especially with stain longevity on delicate fabrics.

    Always test on a hidden spot first. For better fabric safety, consider specialized cleaning methods that suit ink chemistry.

    Preventing stains and acting swiftly ensures the best results without harming your clothes.

    How Long Should I Wait Before Treating an Old Ink Stain?

    You shouldn’t wait long before treating an old ink stain. Timing is essential because delays let the stain penetrate and get absorbed by the fabric, which makes it harder to remove.

    Stain oxidation and aging cause chemical reactions that set the stain deeper. Also, solvent evaporation can reduce how well treatments work. Acting within 24 to 48 hours helps stop the stain from setting and keeps it less visible.

    The sooner you treat the stain, the better your chances of success.

    Will Ink Stain Removers Damage Printed Designs on Clothes?

    Yes, ink stain removers can damage printed designs if you’re not careful. To protect prints, use bleach alternatives or natural stain removers designed for delicate fabrics. Always test on a small area first.

    Employ fabric-specific methods and gentle pre-treatment techniques with stain removal tools. Remember, the age of the stain impacts success, and colorfastness concerns mean you should avoid frequent cleaning.

    Choosing the right commercial stain remover helps minimize risks to your clothes.

    Can Frozen Ink Stains Be Easier to Remove?

    Yes, frozen ink stains can be easier to remove because cold treatment slows stain penetration and causes ink crystallization, leading to stain hardening. When you apply stain freezing, the ink becomes brittle, letting you gently scrape or blot without spreading it further.

    However, timing is vital. Treat the stain quickly to preserve fabric safety and prevent deep ink preservation. Combining freezing with other stain removal methods improves your chances of success.

    Conclusion

    Now that you’ve gently tackled those stubborn ink marks, your clothes are ready for a fresh start. Remember, stains are just little stories of life’s adventures, not permanent chapters.

    By acting quickly and following these simple steps, you’ll keep your favorite garments looking their best, turning mishaps into manageable memories. With a bit of care and patience, you’ll always find a way to refresh and renew, keeping your wardrobe as vibrant as your spirit.

  • How to Remove Ink Stains From Leather in 7 Easy Steps

    How to Remove Ink Stains From Leather in 7 Easy Steps

    To remove ink stains from leather, first blot fresh ink quickly with a dry cloth. Don’t rub or add water.

    Always test any cleaner on a hidden spot to avoid damage.

    Avoid harsh chemicals like bleach or alcohol-based products. Use mild soap and water to gently lift stains, or dab rubbing alcohol carefully if needed.

    You can also try a magic eraser with care.

    Finish by conditioning your leather to keep it soft and shiny.

    Follow these steps to restore your leather effectively.

    Act Quickly to Blot Fresh Ink Stains on Leather

    blot ink quickly immediately

    If you catch an ink stain on your leather early, act fast by blotting it with a dry cloth. When fresh ink lands on leather, it can quickly seep into the fibers, making removal much tougher.

    Your best bet is to blot the stain immediately, using gentle pressure to absorb the excess ink. Avoid rubbing, as that only spreads the ink and deepens the stain. Don’t reach for water or cleaning solutions just yet because these can cause the ink to set deeper into the leather.

    Acting within the first few minutes is vital. The sooner you blot, the higher your chances of removing the stain successfully. Prompt action not only stops the ink from soaking in but also helps preserve the leather’s appearance, sparing you from harsher cleaning methods later.

    Always Test Cleaners on a Hidden Spot First

    After blotting a fresh ink stain, you’ll want to clean the leather carefully to avoid setting the ink or causing damage. Before applying any cleaning products, always perform a spot test on a hidden, inconspicuous area.

    Use a small amount of the cleaner and wait at least 10 minutes to watch for any discoloration or changes in texture. This step is essential because different leather types react differently to various products.

    Testing the actual cleaning solution you plan to use ensures compatibility and helps prevent irreversible damage. If the test spot shows no change in color or finish, you can confidently proceed with treating the stain.

    Skipping the spot test risks worsening the stain or causing permanent discoloration. Taking this precaution saves your leather from harm and keeps it looking its best throughout the cleaning process.

    Avoid Chemicals That Damage Leather and Ink Stain Removal

    avoid harmful chemical cleaners

    While tackling ink stains on leather, you should steer clear of harsh chemicals that can cause more harm than good. Using damaging substances not designed for leather can lead to discoloration, cracking, or even deterioration. To protect your leather, avoid these common pitfalls:

    Avoid harsh chemicals on leather to prevent discoloration, cracking, and deterioration when removing ink stains.

    1. Bleach or ammonia. They cause discoloration and weaken leather fibers.
    2. Acetone-based nail polish remover. It strips natural oils and harms the finish.
    3. Alcohol-based products like certain hand sanitizers. These dry out and make leather brittle.
    4. Vinegar. It alters pH balance, leading to softening or discoloration over time.

    Always perform a patch test on a hidden area before applying any cleaner. This simple step helps you avoid irreversible damage and ensures the product won’t harm your leather. By steering clear of harsh chemicals and testing first, you’ll keep your leather looking its best while effectively removing ink stains.

    Use Mild Soap and Water for Gentle Ink Removal

    When you need to remove ink stains from leather, using a mild soap and water solution offers a safe and effective approach. Start by mixing a small amount of mild soap, like dish soap or saddle soap, with warm water to create a gentle cleaning solution.

    Dampen a soft cloth with the soapy water, making sure it’s not too wet to avoid soaking the leather. Gently blot the ink stain, working from the outer edges inward to prevent spreading the ink further. Avoid rubbing or scrubbing vigorously, as this can damage or discolor the leather’s surface.

    After blotting, rinse the cloth with clean water and use it to wipe away any soap residue. Finally, pat the area dry with a clean towel. This method provides gentle cleaning that helps remove ink stains without harming your leather, preserving both its appearance and texture.

    Apply Rubbing Alcohol or Vinegar to Lift Ink Stains

    leather ink stain removal tips

    You’ve got two good options for tackling ink stains on leather: rubbing alcohol or diluted vinegar. Both work well, but each has its own perks. Just grab a cotton swab soaked in alcohol or gently blot the stain with your vinegar solution.

    Before you dive in, though, it’s a smart idea to test whichever you choose on a hidden spot first. This way, you can make sure it won’t damage the leather.

    Once you’ve treated the stain, wipe away any leftover residue with a damp cloth. And don’t forget to condition the leather afterward to keep it soft and supple.

    Alcohol Vs. Vinegar

    How do you decide between rubbing alcohol and vinegar to tackle ink stains on leather? Both can work, but choosing depends on your leather type and stain severity. Here’s a quick guide:

    1. Rubbing alcohol dissolves ink pigments fast, making it effective for fresh, tough ink stains.
    2. Vinegar, diluted 1:1 with water, uses mild acidity to break down ink more gently.
    3. Alcohol dries quickly but can dry out leather, so condition afterward to avoid brittleness.
    4. Vinegar is gentler but may need repeated use and thorough rinsing to clear ink residues.

    Always test on a hidden spot, as both can damage leather if overused. This way, you pick the best option to safely lift your ink stains.

    Application Tips

    Although ink stains can be stubborn, applying rubbing alcohol or vinegar carefully can make a big difference. Start by doing a spot test in an inconspicuous area to verify the leather’s color and finish won’t be harmed.

    For application, dab a small amount of rubbing alcohol onto a cotton swab or soft cloth. This lets you target the ink stain precisely without over-saturating the leather. If you choose vinegar, dilute it with water in a 1:1 ratio to protect the leather while still lifting the stain.

    Use gentle, light dabbing motions rather than rubbing, as rubbing can spread the ink or damage the leather. After treatment, wipe away residue with a clean, damp cloth and condition the leather to restore its moisture and flexibility.

    Use a Magic Eraser Carefully on Leather Ink Stains

    When dealing with ink stains on leather, a Magic Eraser can lift marks gently if you handle it with care. This tool, made of melamine foam, offers gentle removal of ink stains without harsh chemicals.

    To use it effectively and safely, follow these steps:

    To use it effectively and safely, follow these careful steps for gentle ink stain removal on leather.

    1. Test the Magic Eraser on a hidden spot to check for any finish damage or discoloration.
    2. Lightly dampen the eraser and gently rub it over the ink stain using minimal pressure. Avoid scrubbing aggressively to prevent harming the leather.
    3. Wipe away any residue with a damp cloth immediately after treatment to keep the surface clean.
    4. Limit use to a few seconds per area to reduce abrasion and protect your leather’s finish.

    Using a Magic Eraser this way ensures you remove ink stains with care, preserving the leather’s look and texture.

    Condition Your Leather to Keep It Soft and Shiny

    Once you’ve removed those pesky ink stains, the next step is to condition your leather to keep it feeling soft and looking shiny. You’ll want to pick a high-quality conditioner that really nourishes the leather and protects it from drying out or cracking.

    Make sure to apply it evenly, and try to do this regularly—about every 3 to 6 months should do the trick. This way, you’ll help maintain your leather’s natural luster and keep it durable for years to come.

    Importance Of Leather Conditioning

    Conditioning your leather regularly restores the moisture it loses during cleaning, keeping it soft and flexible rather than dry and brittle. Using a good leather conditioner is essential because it forms a protective barrier that helps resist future stains, including ink. Here’s why conditioning matters:

    1. It replenishes lost moisture, preventing cracking and creasing.
    2. The protective barrier reduces absorption of ink and other liquids.
    3. Conditioning maintains your leather’s natural shine and supple texture.
    4. Regular care prolongs the lifespan of your leather items by preventing surface deterioration.

    Choosing The Right Conditioner

    Although choosing the right leather conditioner might seem straightforward, selecting one that suits your specific leather type and needs guarantees your item stays soft and shiny. Look for a leather conditioner with natural oils like lanolin, which penetrate deep into the fibers to restore moisture and maintain flexibility.

    This is especially important after removing ink stains, as it helps preserve the leather’s natural shine and prevents discoloration. You’ll also want to think about conditioners that include UV protectants to shield your leather from sun damage, keeping it looking fresh over time.

    Before applying any conditioner, test it on a small, hidden area to make sure it won’t cause unwanted discoloration. This careful selection keeps your leather supple and protected for the long haul.

    Application Tips For Conditioning

    When you want to keep your leather soft and shiny, applying conditioner correctly makes all the difference. Conditioning restores moisture, preventing dryness and cracking after cleaning ink stains. Follow these tips for best results:

    1. Choose a high-quality conditioner suited to your leather type.
    2. Use a soft cloth to apply the conditioner in gentle, circular motions, helping it penetrate the leather.
    3. Let the conditioner sit for 10-15 minutes to fully absorb moisture.
    4. Buff off any excess conditioner for a smooth, shiny finish.

    Regular conditioning not only maintains softness and shine but also prolongs your leather’s lifespan by preserving its natural luster and flexibility. Keep up this routine after every cleaning to protect your leather investment.

    Frequently Asked Questions

    Can Ink Stains Permanently Damage Leather if Not Treated Quickly?

    Yes, ink stains can permanently damage leather if you don’t act quickly. The ink can seep deep into the leather dyeing, causing discoloration that’s tough to reverse.

    To prevent this, you need prompt stain prevention by using proper cleaning tools designed for leather. Waiting too long lets the ink set, making removal difficult and possibly requiring professional restoration.

    What Types of Leather Are Most Susceptible to Ink Stains?

    If you’re dealing with leather dye, ink penetration, and surface coating, you’ll find untreated aniline and semi-aniline leathers most susceptible to ink stains. You’ll notice they lack a protective surface coating, so ink soaks deep quickly.

    In contrast, full-grain and top-grain leathers with strong surface coatings resist ink better. So, when choosing leather, remember: the less surface coating it has, the more vulnerable it is to permanent ink damage.

    How Often Should I Condition Leather After Removing Ink Stains?

    You should condition your leather immediately after removing ink stains to restore moisture and prevent dryness.

    For ongoing leather care, condition every 3 to 6 months as part of your maintenance tips. This routine helps with stain prevention by preserving the leather’s natural oils and keeping it supple.

    Prompt and regular conditioning ensures your leather stays protected, looks great, and resists future damage effectively.

    Are There Any Natural Alternatives to Rubbing Alcohol for Ink Removal?

    They say, “Necessity is the mother of invention,” and when it comes to ink stains, natural remedies can really help. You can try homemade solutions like white vinegar diluted with water or a paste made from baking soda and water.

    Lemon juice mixed with a bit of baking soda also works as an eco-friendly option. These alternatives are gentle yet effective, helping you avoid harsh chemicals while keeping your leather clean and conditioned.

    Can Professional Leather Cleaning Services Remove Old Ink Stains Effectively?

    Yes, professional leather cleaning services can effectively remove old ink stains. They use specialized cleaning solutions tailored to your leather dye and type, ensuring safe and thorough stain removal.

    These experts assess the damage and apply advanced techniques that target ink deeply embedded in the leather without causing harm. So, if home remedies haven’t worked, turning to professionals markedly boosts your chances of restoring your leather’s original look.

    Conclusion

    By boldly battling bothersome blotches, you’ll bring back your leather’s lovely luster. Always act after spotting stains, apply alcohol or a gentle soap, and avoid abrasive agents.

    Test treatments tactfully, tackle tough marks with a magic eraser carefully, and condition consistently to keep your leather soft and shiny. With these simple steps, you’ll swiftly save your stylish stuff from stubborn stains, showcasing savvy stain solutions that shine with success.