Author: admin@glaciertattoo.com

  • How to Remove Ink Security Tag in 7 Simple Steps

    How to Remove Ink Security Tag in 7 Simple Steps

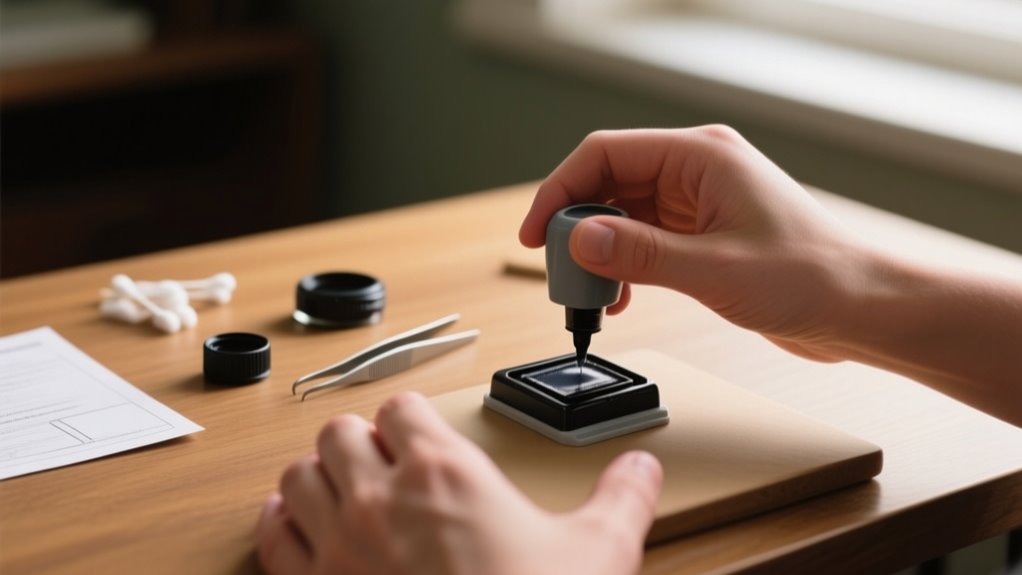
    To remove an ink security tag, first spot the tag by feeling for a plastic casing and identifying the ink cartridge inside. Gather tools like pliers, scissors, and rubber bands for grip.

    Carefully pry off any caps or seals without puncturing the ink. Wrap rubber bands around the pin to loosen it, then gently pull out the pin.

    Hold the garment face down to slide out the cartridge.

    For easier removal, freeze the garment to solidify the ink.

    Keep going to discover tips for a safe, mess-free process.

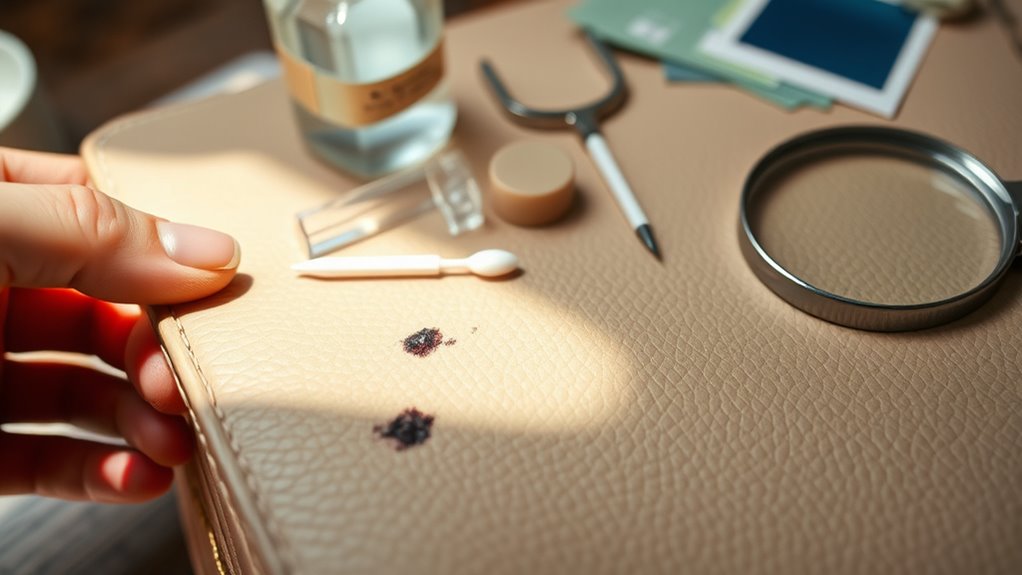
    Spot Ink Security Tags and Their Components

    hidden ink security components

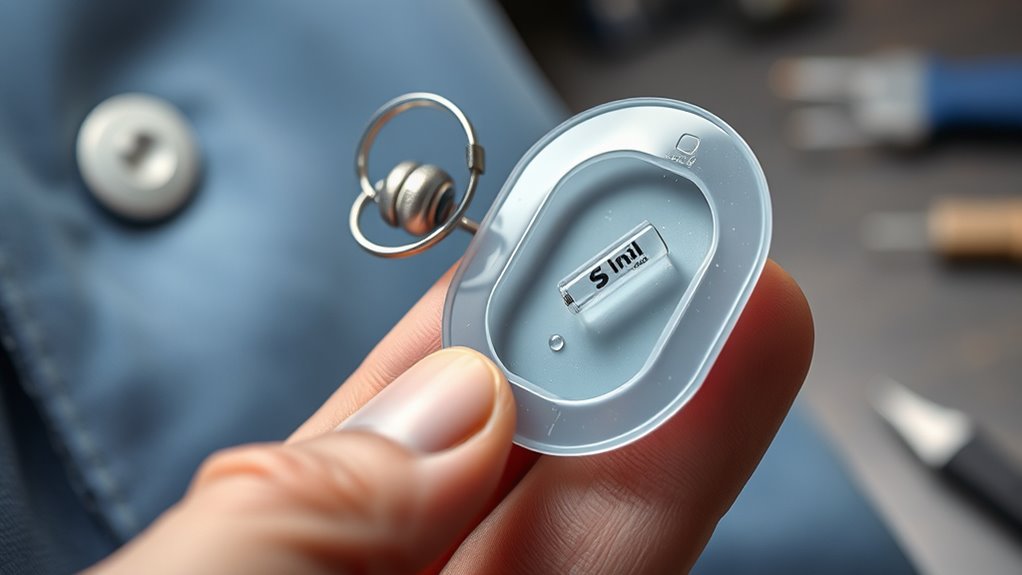
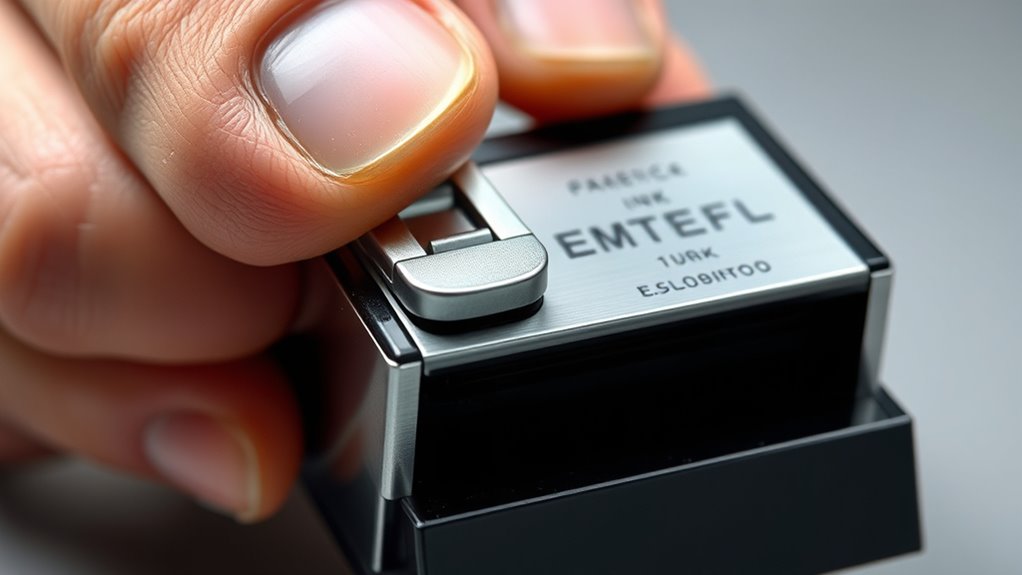
    Although ink security tags are designed to blend in, you can spot them by looking for a small plastic or metal casing that houses an ink cartridge. This casing is often hidden inside seams or labels. This tag is a key component of security measures in clothing, meant to prevent theft by releasing ink if forcibly removed.

    When you examine the garment, pay close attention to less visible areas where these tags are commonly placed. You might even feel the tag embedded within the fabric.

    The ink cartridge inside the tag is usually sealed with a foil or plastic cover, which keeps the ink secure until tampered with. By recognizing this distinctive appearance and feeling for the embedded components, you can identify the security tag effectively.

    Spotting these tags early helps you handle them properly and avoid accidental ink stains while dealing with your new clothing.

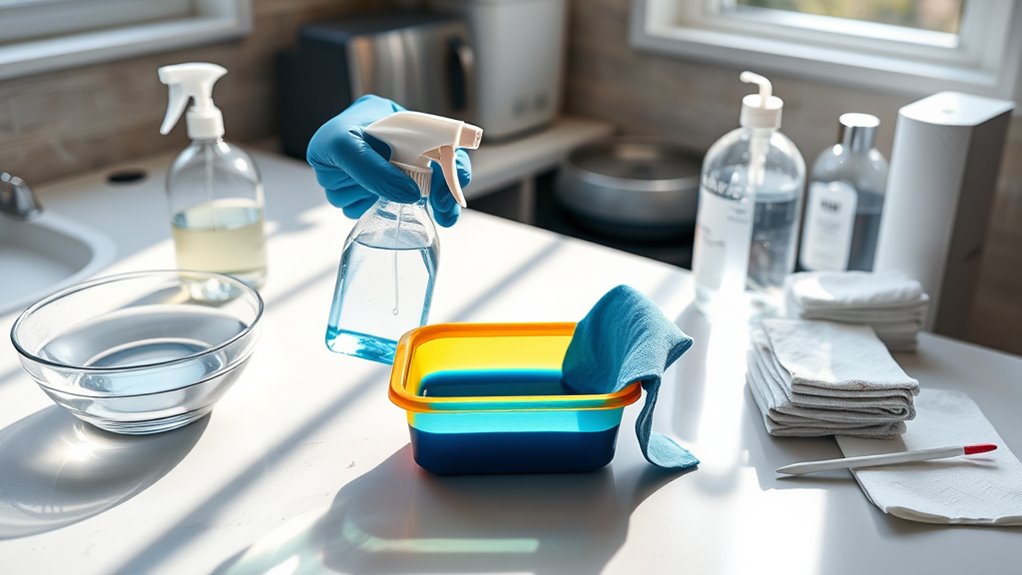
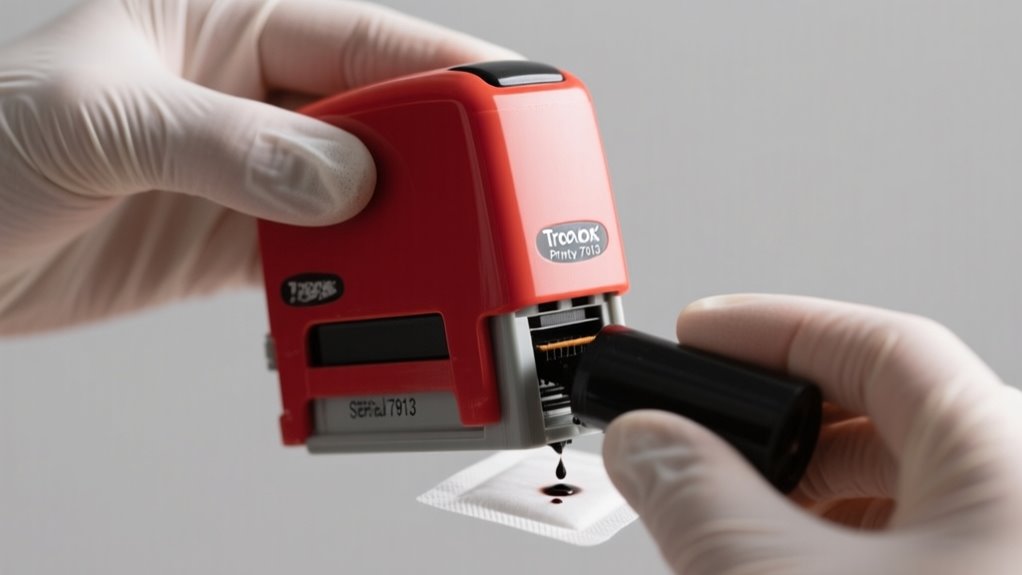
    Get the Right Tools Ready for Ink Tag Removal

    Before you start removing an ink security tag, gather the right tools to make the process safe and efficient. You’ll need a specialized ink tag remover or a pair of pliers designed specifically for detaching security tags without damaging the ink cartridge.

    Gather specialized tools like an ink tag remover or pliers to safely detach security tags without harming the cartridge.

    Have scissors or a utility knife handy to cut any protective coverings or seals around the ink cartridge if necessary. It’s also smart to prepare a piece of cardboard or thick paper to shield the cartridge and catch any ink spills during removal.

    To loosen the pin, consider wrapping rubber bands around it before attempting removal. Most importantly, always wear gloves and protective eyewear to avoid contact with ink in case the cartridge ruptures accidentally.

    With these tools ready, you’ll handle the ink security tag carefully and reduce the risk of damage or mess.

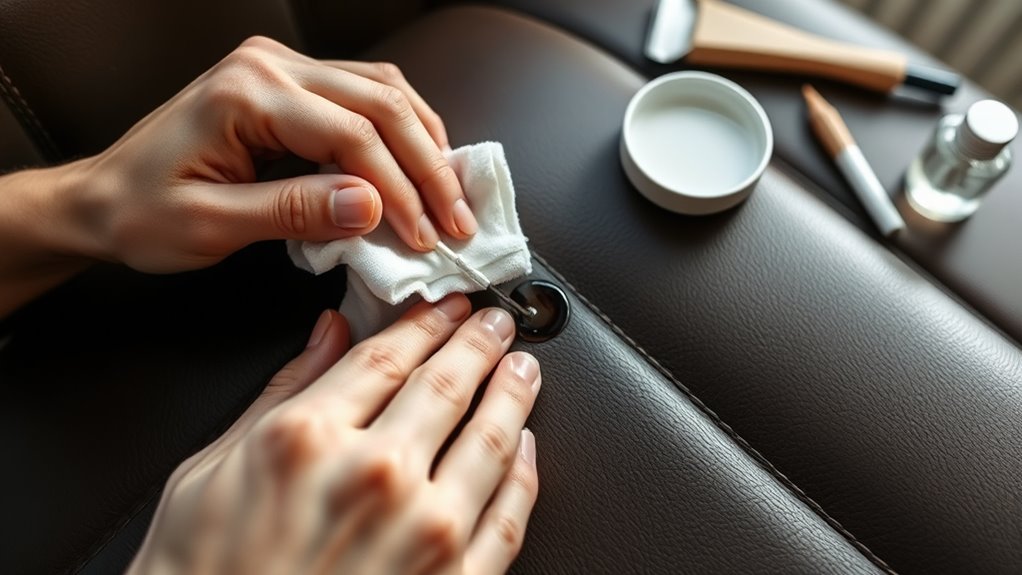
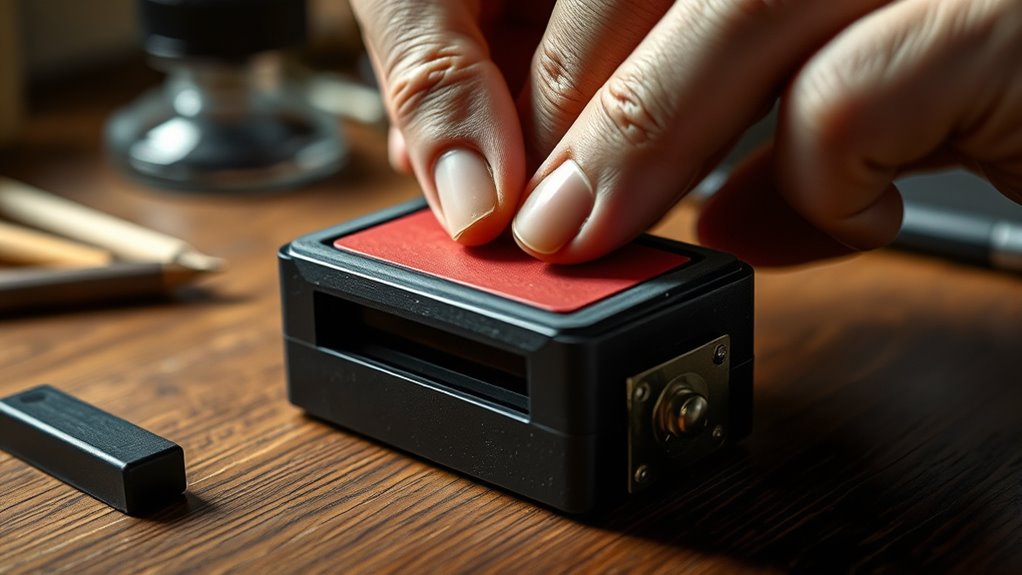
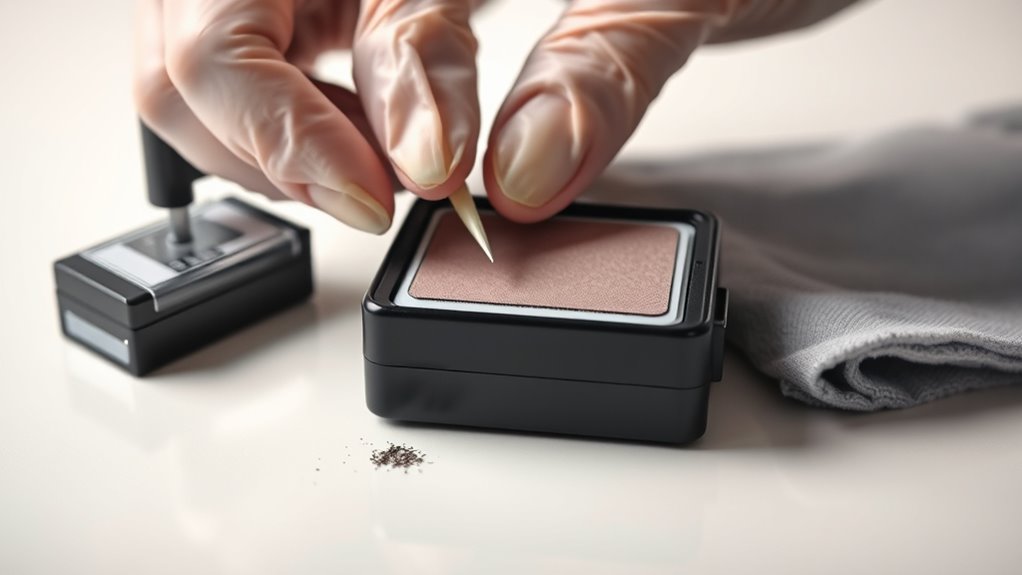
    Carefully Pry Off Caps and Seals on Ink Tags

    gently remove ink seals

    How do you safely remove the caps and seals on an ink security tag without causing damage? Start by using a flat-head screwdriver or a similar thin tool to gently pry off the pyramid-shaped cap. Carefully insert the tool under the cap’s edge and apply gentle upward pressure. This helps you effectively remove the cap without harming the garment.

    Next, focus on any seals or plastic covers securing the ink cartridge inside the tag. Slowly and steadily work to dislodge these seals, taking care not to puncture or break the ink cartridge, which could cause ink spills. Avoid applying excessive force to prevent damage to both the clothing and the tag components.

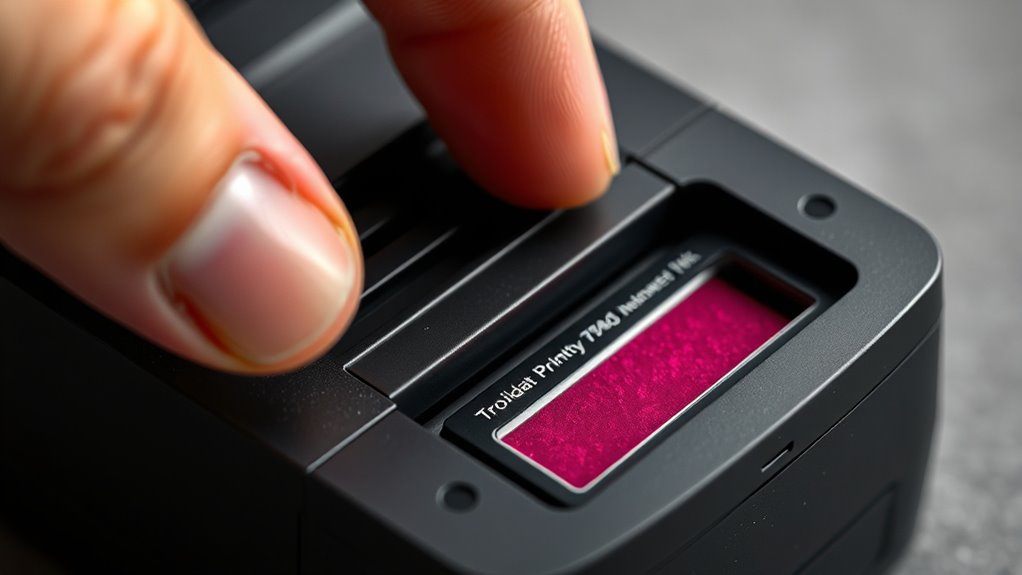
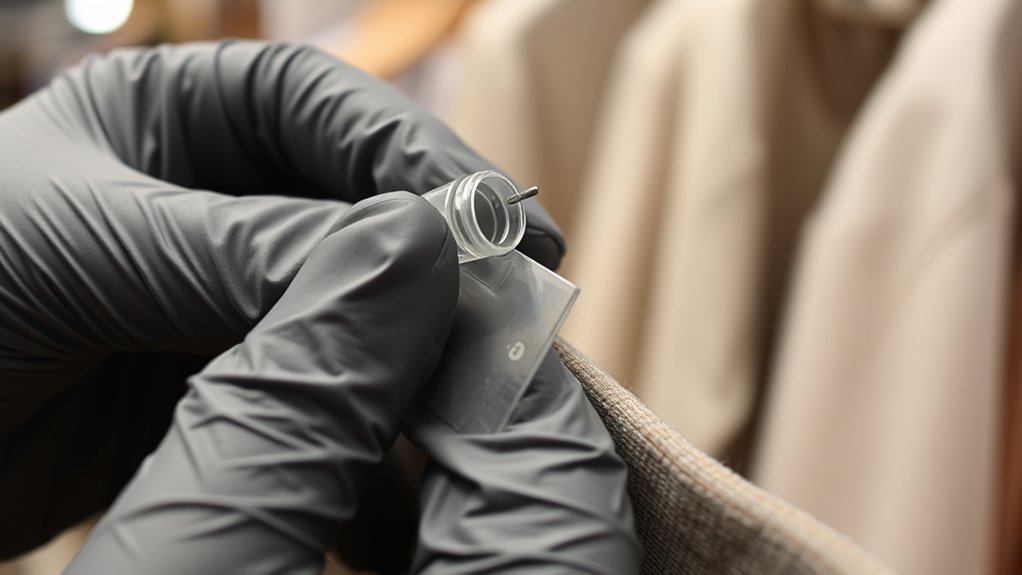
    Loosen the Ink Tag Pin Using Rubber Bands

    To loosen the ink tag pin, begin by wrapping a few thick rubber bands tightly around it. This adds extra friction, which helps you get a better grip when you pull or twist the pin free.

    Just make sure the rubber bands completely encircle the pin, and apply steady pressure as you go. That way, you avoid damaging anything while loosening it.

    Applying Rubber Bands

    Wondering how you can loosen the ink tag pin without causing damage? Applying rubber bands is a simple, effective method. Wrap 3-4 rubber bands tightly around the security tag’s pin to increase friction.

    This tension helps you grip the pin securely, reducing slipping. Stretch the rubber bands snugly to maximize their hold. Once secured, gently pull or twist the pin to ease it out without risking ink spillage or damaging your garment.

    Step Action
    1 Gather 3-4 rubber bands
    2 Wrap them tightly around pin
    3 Ensure bands are snug
    4 Grip pin securely via bands
    5 Gently pull or twist pin

    Enhancing Pin Grip

    Applying rubber bands around the ink tag pin not only increases friction but also substantially enhances your grip, making it easier to loosen and remove the pin. By wrapping multiple rubber bands tightly around the pin, you create a secure grip that reduces slipping when you apply force.

    This added tension lets you pull or twist more effectively without damaging your garment. To maximize the grip using rubber bands, consider these tips:

    • Use several rubber bands for increased friction and grip strength
    • Wrap bands snugly and evenly around the pin
    • Guarantee rubber bands cover the entire pin surface for better hold
    • Pull or twist the pin gently, using the enhanced grip
    • Use pliers or fingers with the rubber bands to pry the pin free

    This method makes loosening the ink tag pin simpler and safer.

    Remove the Ink Tag Pin With Controlled Force

    controlled careful ink removal

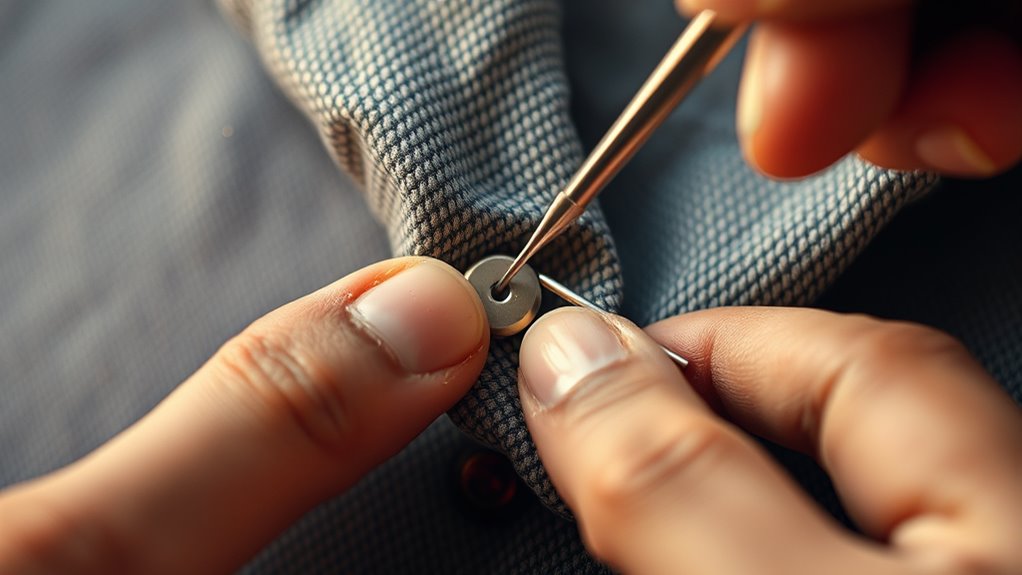
    Although removing the ink tag pin requires patience, you can make the process easier by wrapping rubber bands tightly around the pin to improve your grip. Once you enhance your hold, you need to remove the security tag carefully to avoid damaging the garment.

    Begin by prying off the foil seal beneath the ink cartridge with a flat-head screwdriver to access the pin securely. Then, use pliers or twist the pin with steady, controlled force. Never rush or apply excessive pressure, as this can rupture the ink cartridge and cause messy spills.

    To protect the fabric, cut a small shield from cardstock and place it over the ink cartridge area before pin removal. This simple step prevents accidental ink leakage and ensures a safe process.

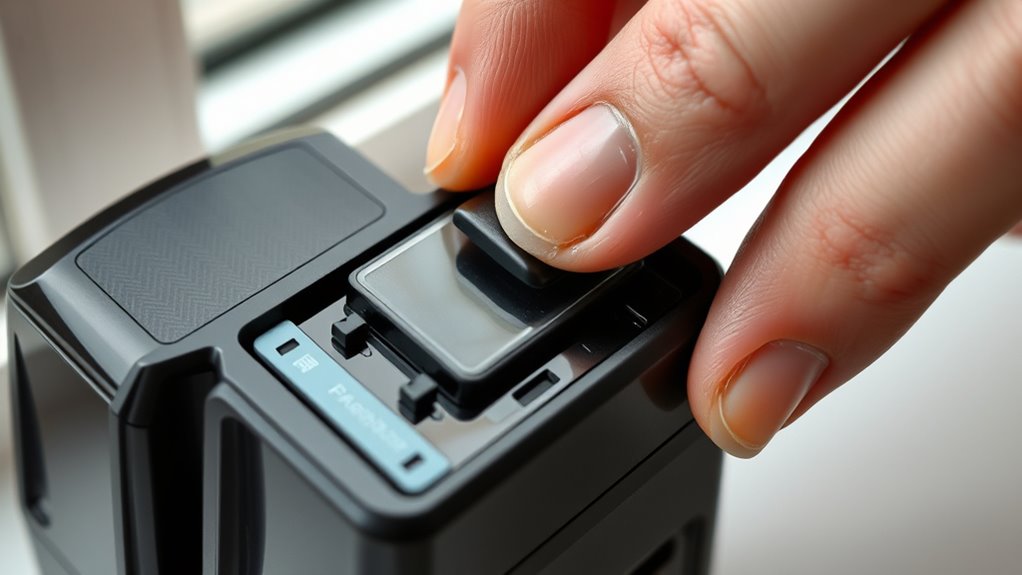
    Slide Out the Ink Cartridge: Hold Garment Face Down

    Hold the garment face down with the ink tag pointing away from you. This way, any ink spills stay contained. It also helps keep your hands and clothes from getting stained if the cartridge leaks.

    When you slide out the ink cartridge, be gentle. You don’t want to press too hard because that could make ink escape. Just take it slow and easy.

    Proper Garment Positioning

    When you position the garment face down, you reduce the chance of ink spills during the removal process. Proper positioning is key to safely handling the ink tag and preventing damage.

    Hold the garment so the ink cartridge faces downward, letting gravity keep the ink sealed inside. This setup minimizes the risk of ink leakage if the cartridge bursts unexpectedly. To maintain control and protect the fabric, keep a firm grip.

    Follow these tips for proper garment positioning:

    • Support the fabric firmly to avoid tearing or stretching
    • Keep the ink tag area facing downward
    • Confirm the ink cartridge is oriented to use gravity’s help
    • Maintain steady leverage on the security tag
    • Handle the garment gently but securely

    This approach ensures safer, cleaner ink tag removal.

    Preventing Ink Spills

    How can you prevent ink spills while removing the security tag? Start by holding the garment face down, so the ink tag points downward. This simple position helps prevent ink from leaking onto the fabric.

    Turning the garment inside out also gives you better access to the ink tag and reduces spill risks. For extra safety, freeze the garment overnight; solidified ink is less likely to spill.

    When you’re ready, carefully remove the foil seal beneath the ink cartridge to expose the pin without disturbing the ink inside. Use a shield or piece of cardboard to cover the ink area during removal.

    These steps are essential for preventing ink spills and keeping your garment clean while sliding out the ink cartridge safely.

    Freeze Garment to Solidify Ink and Prevent Spills

    Although it may seem unconventional, freezing your garment overnight solidifies the ink inside the security tag, making removal cleaner and easier. Cold temperatures cause the ink to harden, reducing the risk of spills or stains during the removal process.

    To do this effectively, follow these tips:

    • Place the garment in a plastic bag to protect it and other items from moisture.
    • Freeze the garment for at least 4 hours to ensure the ink cartridge becomes solid.
    • Avoid thawing the garment immediately after freezing to prevent ink leakage or fabric damage.
    • Handle the frozen garment gently when removing the security tag to minimize risks.
    • Store the garment flat in the freezer to keep the ink evenly solidified.

    Frequently Asked Questions

    Can Ink Security Tags Be Removed Without Damaging the Garment?

    Yes, you can remove ink security tags without damaging your garment if you approach security tag removal carefully. You’ll want to freeze the item overnight to solidify the ink, then gently pry off the foil seal with a flat-head screwdriver.

    Using rubber bands or pliers helps loosen the pin without stretching the fabric. Afterward, focus on ink stain cleaning with mild detergent to keep your garment looking great.

    Yes, it’s legal to remove ink security tags from purchased items since you own them after payment. However, you should consider legal considerations like shoplifting prevention policies stores enforce.

    Unauthorized removal before buying is illegal and can be seen as theft. Always let store staff remove tags if you’re still in the store. Once you’ve paid, you’re free to remove the tag without breaking any laws.

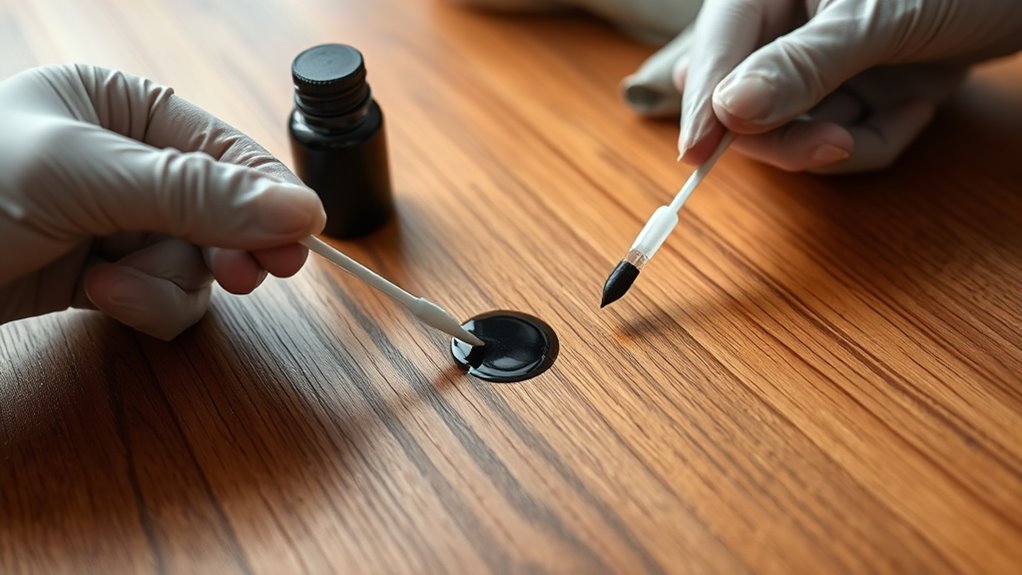
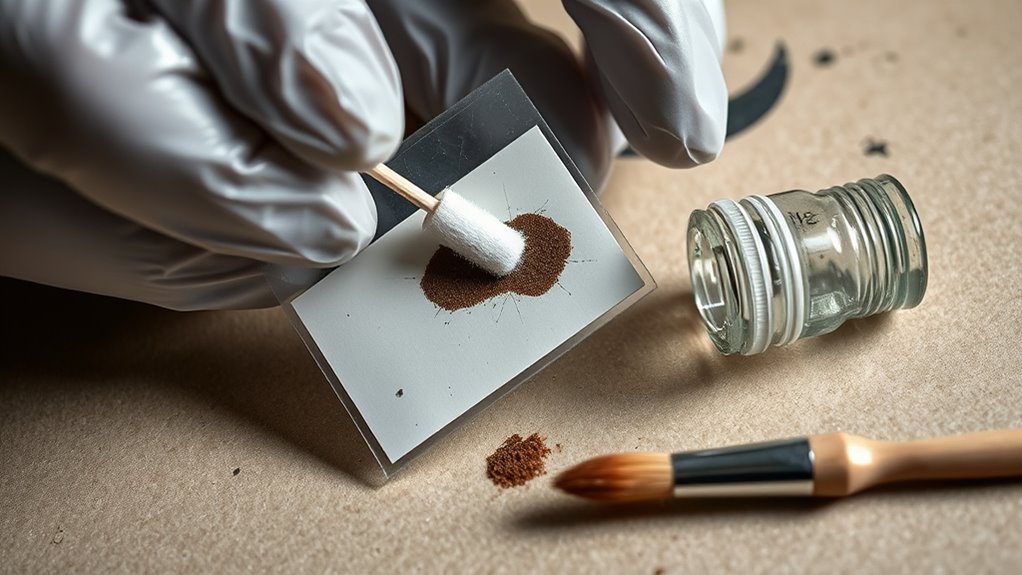
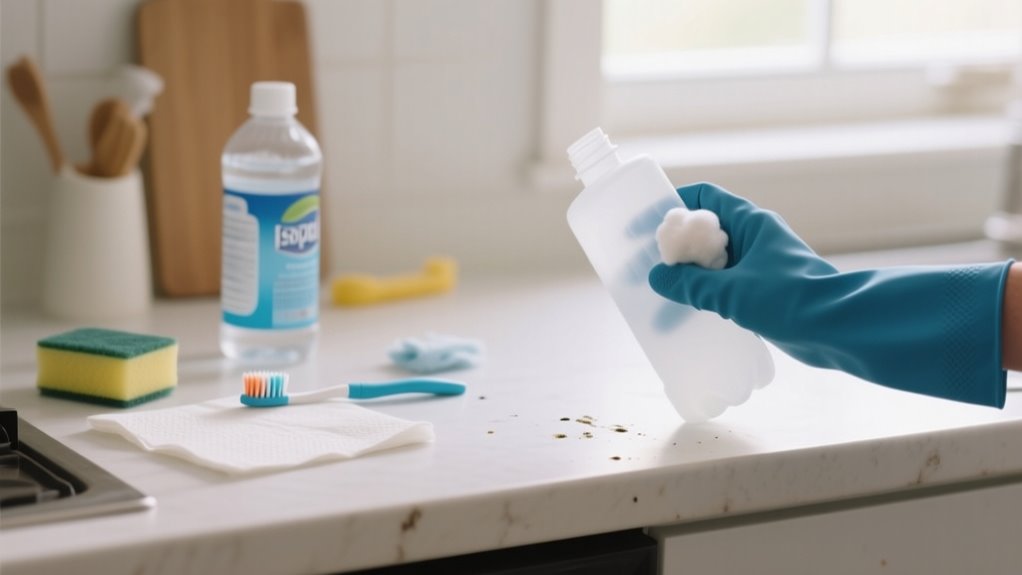
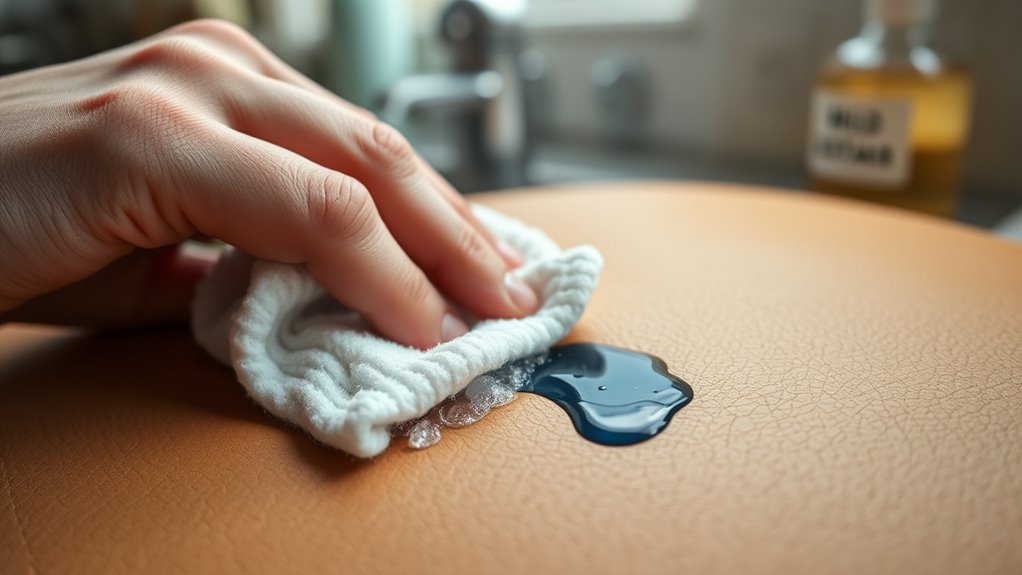
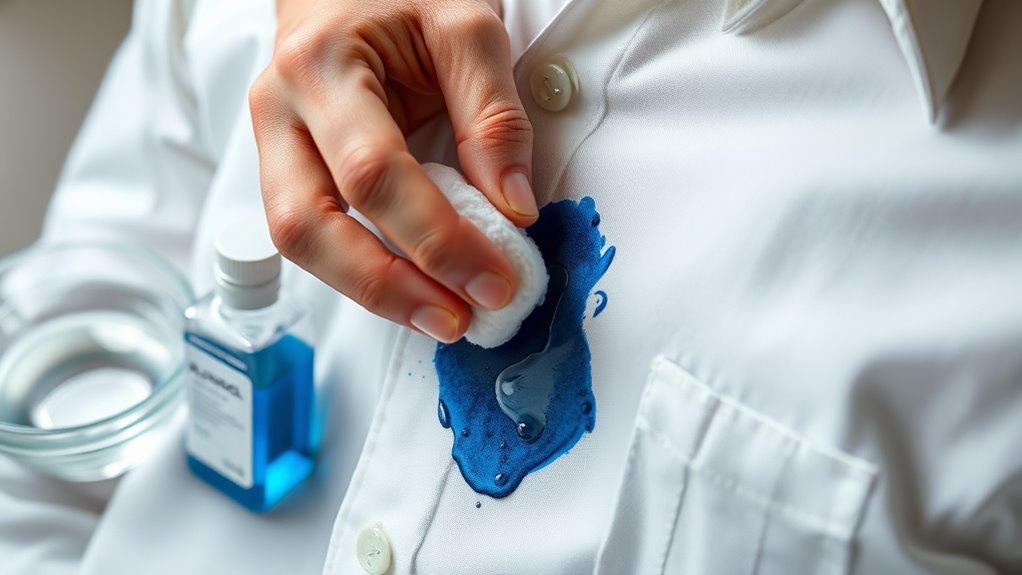
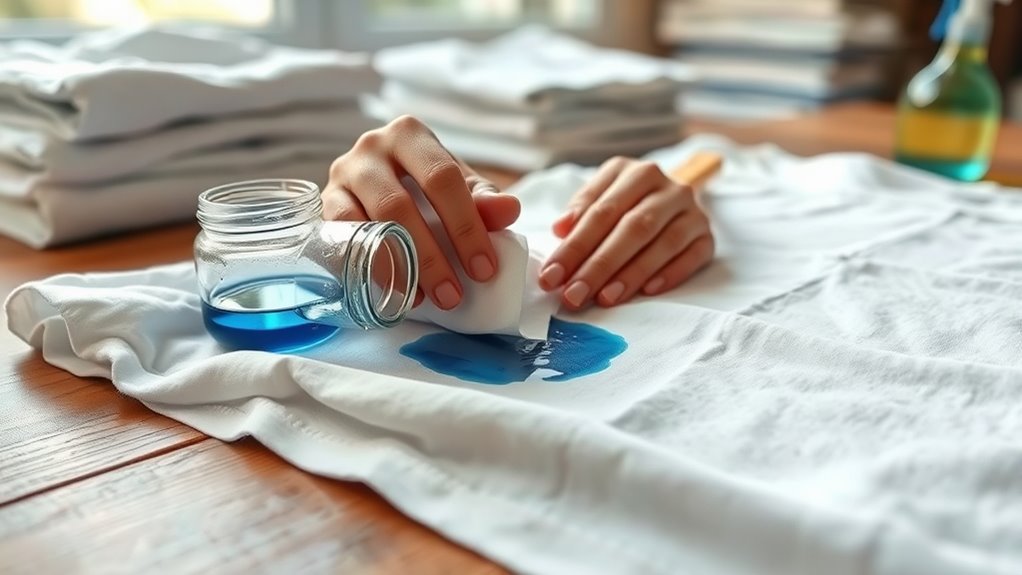
    How Do You Clean Ink Stains After Tag Removal?

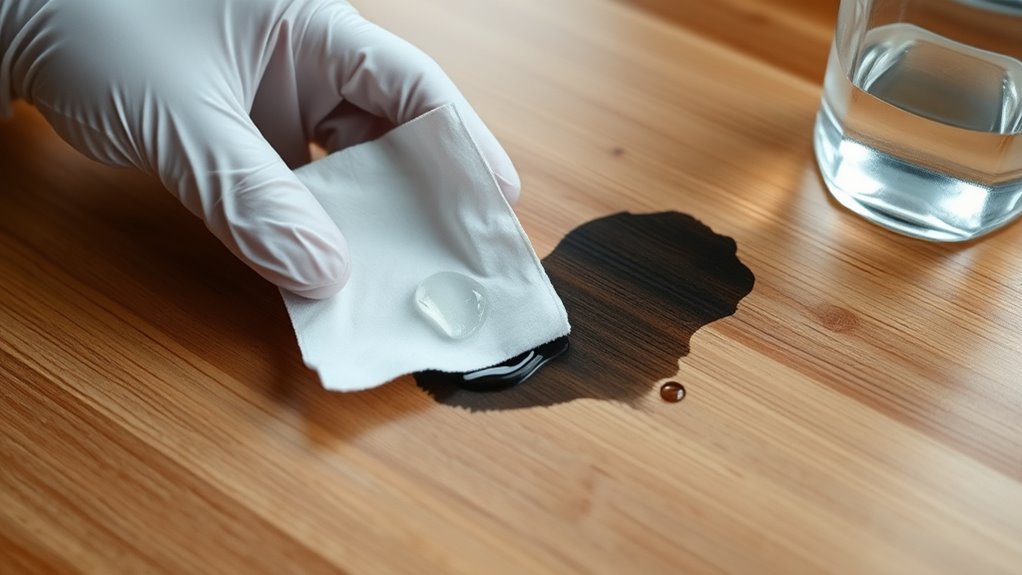
    For ink stain removal after tag removal, start by blotting the stain gently with a clean cloth to absorb excess ink. Use effective cleaning techniques like applying rubbing alcohol or hand sanitizer directly on the stain, letting it sit briefly. Then, blot it again without rubbing.

    Wash the fabric in cold water with detergent and air dry it to avoid setting the stain. These steps help guarantee thorough cleaning without damage.

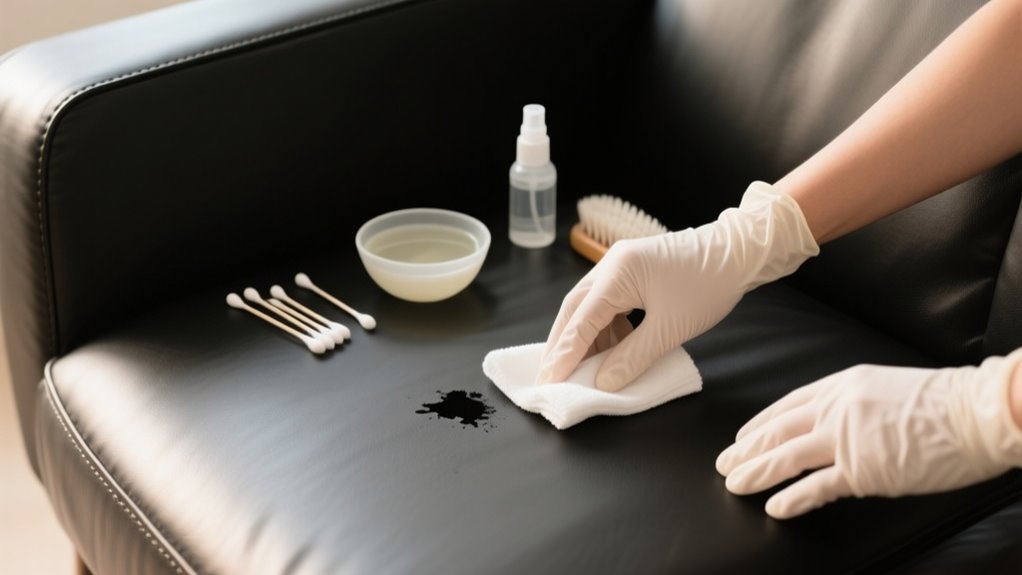
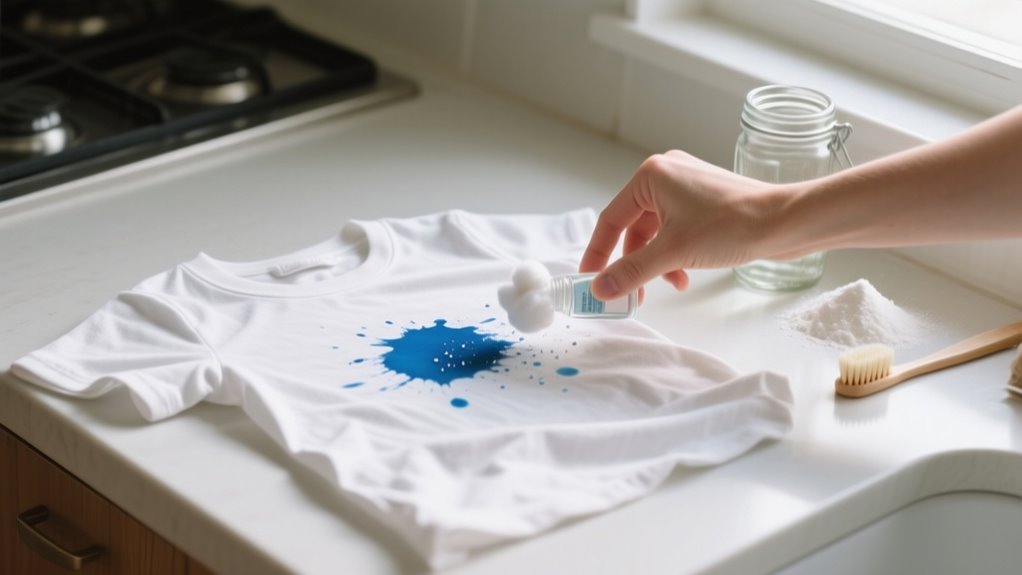
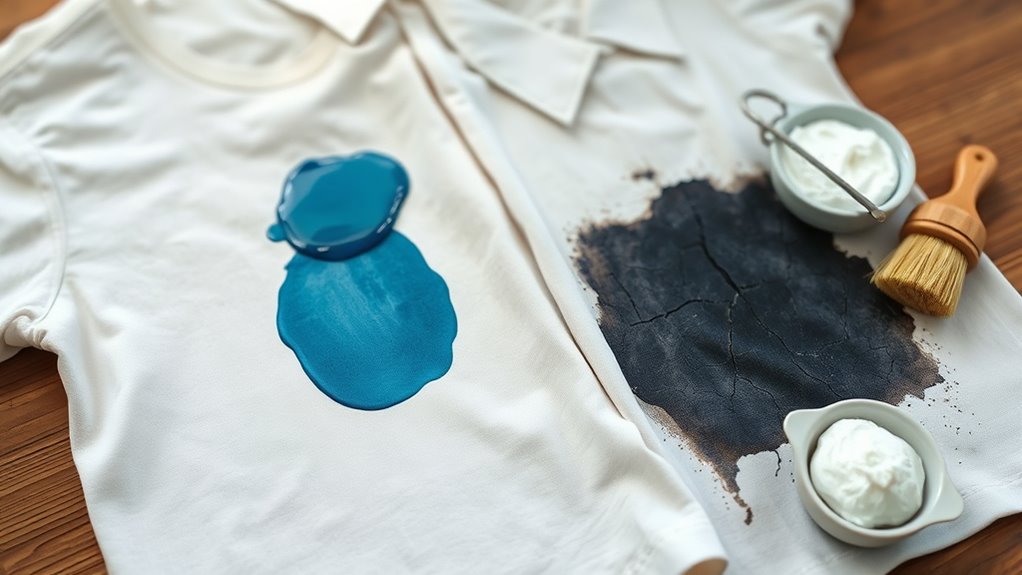
    What Should I Do if the Ink Cartridge Breaks Inside the Garment?

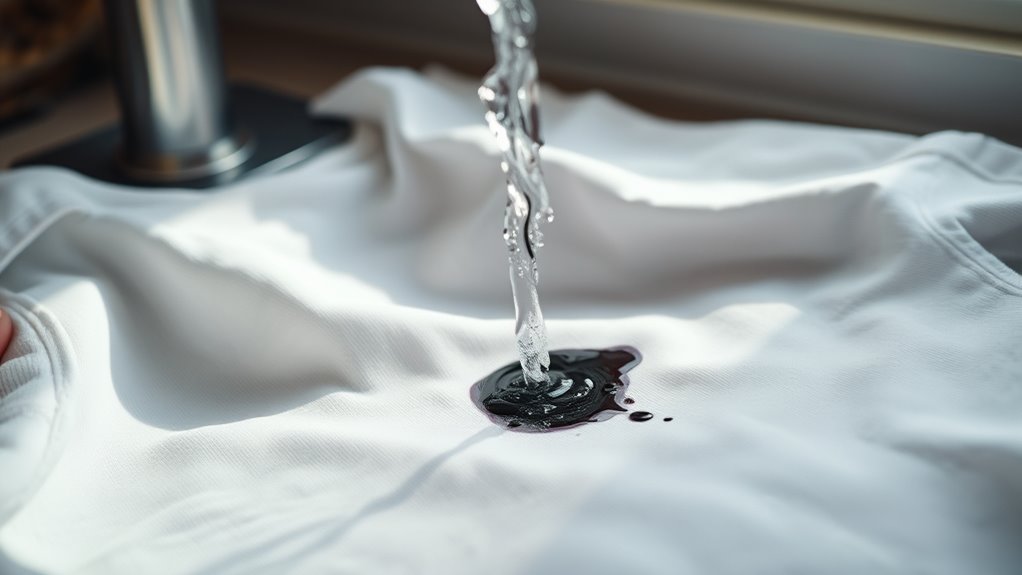
    If the ink cartridge breaks inside your garment, don’t panic. You can still save it. First, avoid spreading the ink further by keeping the fabric still. Carefully blot the area with a clean, dry cloth to soak up as much ink as possible without rubbing.

    Then, freeze the garment overnight to solidify the ink. This makes it easier to remove and helps prevent more damage to the fabric. If needed, seek professional help.

    Can Professional Services Remove Ink Security Tags Safely?

    Yes, professional service options can safely handle security tag removal for you. They use specialized tools designed to disarm ink security tags without damaging your clothing.

    If you’re worried about spills or damaging your garment, relying on experts is your best bet. They’re trained to minimize risks and often offer free removal, making the process smooth and stress-free.

    Conclusion

    By boldly breaking barriers, you’ll banish bothersome ink tags with ease. With careful caution, clever tools, and controlled force, you’ll conquer challenges and champion your clothes’ cleanliness.

    Remember, freezing your fabric firmly fixes potential spills, ensuring safety and saving your style. Stay sharp, stay steady, and swiftly slip past those stubborn security tags, securing your satisfaction every step of the way.

    Your savvy skills will shine, making removal remarkably reliable and revitalizing hassle-free!

  • How to Remove Ink From Wood in 7 Easy Steps

    How to Remove Ink From Wood in 7 Easy Steps

    To remove ink from wood, first identify your ink type and wood finish, then test cleaning solutions on a hidden spot.

    For light stains, gently apply a baking soda paste or rubbing alcohol.

    Use a Magic Eraser for slightly tougher marks, and acetone-based nail polish remover for stubborn ink, but be careful to avoid damage.

    If ink penetrates deeply, sand and refinish the area.

    Finally, restore moisture and protect the surface to keep your wood looking great.

    You can explore more detailed steps to guarantee success.

    How to Identify Ink Types and Wood Finishes

    identify ink and finish

    Before you can remove ink from wood, you need to identify the type of ink and the wood finish you’re dealing with. Ink types like water-based ink are easier to remove since they sit mostly on the wood surface. Alcohol-based ink penetrates deeper and may need stronger solvents.

    Next, check the wood finish, whether it’s lacquer, polyurethane, varnish, or wax. Some cleaning methods can damage certain finishes. Look for glossy, matte, or satin appearances to help identify the finish.

    If you’re unsure about the wood treatment or finish, always test a small area before applying any cleaning solution. Knowing whether the wood is sealed, unfinished, or treated guides you toward the safest and most effective ink removal process. Taking these steps guarantees you protect your wood while tackling the ink stain efficiently.

    Use Baking Soda Paste for Light or Fresh Ink Stains

    Start by mixing 2-3 tablespoons of baking soda with just enough water to make a thick paste. It’s a good idea to test the paste on a hidden spot first, just to be safe. Then, gently rub the paste onto the fresh ink stain using small circular motions.

    After you’ve done that, let it sit for a few minutes. When the time’s up, wipe it off with a damp cloth and make sure to dry the area thoroughly. Easy and effective!

    Preparing Baking Soda Paste

    Mix 2 to 3 tablespoons of baking soda with just enough water to create a thick, spreadable paste. Use a clean spoon or spatula to mix the baking soda and water thoroughly, guaranteeing the paste is smooth and free of lumps. Adjust the water amount gradually to reach the ideal consistency, not too runny so it sticks well to the wood surface.

    Before applying the paste to the ink stain, always test it on a small, inconspicuous area of the wood. This helps you avoid any potential damage or discoloration. Preparing the paste carefully ensures it will be effective in lifting light or fresh ink stains without harming your wood’s finish.

    Applying and Cleaning

    Although it may seem simple, applying the baking soda paste correctly makes all the difference when tackling light or fresh ink stains on wood. First, test the paste on a hidden wood surface to avoid damage.

    Then, use a clean cloth to gently apply the baking soda paste onto the ink stain, rubbing in small circular motions following the wood grain. Let the paste sit for 2-3 minutes to lift the ink, or up to 5 minutes for tougher stains.

    Afterward, wipe the area clean with a damp cloth, removing any residue. If the stain remains, just repeat the process until the ink stain is fully removed, ensuring your wood surface stays intact and clean.

    Use Rubbing Alcohol and Hand Sanitizer for Moderate Ink Stains

    use alcohol carefully gently

    When you’re tackling moderate ink stains, rubbing alcohol and hand sanitizer can really do the trick. Just be sure to apply them carefully.

    It’s a good idea to test a small hidden spot first, so you don’t accidentally harm your wood’s finish. Then, use gentle, circular motions to lift the stain without causing any damage.

    Alcohol-Based Ink Removal

    If you want to tackle moderate ink stains on wood, rubbing alcohol and hand sanitizer are effective tools you can use. Start by dampening a cotton ball or swab with rubbing alcohol and gently dab the ink stain on the wood surface. Avoid rubbing too hard to protect the finish.

    Always test any alcohol-based product on a hidden spot first to ensure it won’t damage the wood or its oils. After applying rubbing alcohol, wipe the area with a clean, damp cloth to lift the ink and any leftover residue, then dry thoroughly.

    If the stain remains, repeat the process with gentle application. This careful method helps remove ink stains while preserving your wood’s integrity and appearance.

    Hand Sanitizer Application

    Because hand sanitizer contains 60-70% alcohol, you can use it to effectively break down moderate ink stains on wood. This alcohol-based sanitizer targets the ink pigments, making removal easier without harming the wood surface.

    To remove ink using hand sanitizer, follow these steps:

    • Apply a small amount of hand sanitizer directly onto the ink stain.
    • Let it sit for 30-60 seconds to break down the ink.
    • Gently rub the stain with a soft cloth to lift the ink without damaging the finish of the wood.
    • Wipe the area with a damp cloth to remove sanitizer and ink residue.
    • Dry thoroughly to preserve the wood’s finish.

    Using hand sanitizer offers a simple, effective way to tackle moderate ink stains while protecting the wood surface.

    Safety And Testing

    Using rubbing alcohol or hand sanitizer can effectively lift moderate ink stains from wood, but you need to take precautions to protect the finish. Always start with a spot test on a hidden area to check for any surface damage, especially if the wood has a delicate finish.

    Apply a small amount of rubbing alcohol to a soft cloth or cotton swab, then use gentle application to avoid abrasion. Let the alcohol sit on the stain for 10-15 seconds before gently blotting, never rub, to lift the ink.

    Afterward, wipe the area with a damp cloth to remove any residual alcohol. This careful method helps prevent damage and keeps your wood looking its best while safely removing ink stains.

    Use Magic Eraser to Remove Light Ink Stains Safely

    gentle ink stain removal

    Wondering how to safely remove light ink stains from wood without damaging the finish? Using a Magic Eraser is an effective method to tackle those minor blemishes on your wood surface. First, wet the Magic Eraser slightly and test it on a hidden test area to ensure the finish stays safe.

    Wondering how to safely remove light ink stains from wood? A damp Magic Eraser tested on a hidden spot works effectively.

    Then, gently rub the ink stain with the eraser in small circular motions, applying light pressure. Keep rubbing for 5 to 10 seconds while frequently checking the surface to prevent dulling or damage. After the ink is removed, wipe the area with a damp cloth to clear any residue and dry it thoroughly. Avoid using excessive force to maintain the wood’s finish.

    • Wet Magic Eraser before use
    • Test on a hidden area first
    • Gently rub ink stain in circles
    • Frequently check to protect finish
    • Wipe residue and dry surface

    This careful approach helps you remove ink without harming your wood surface.

    Remove Stubborn Ink With Acetone-Based Nail Polish Remover

    If light methods haven’t worked, acetone-based nail polish remover can tackle stubborn ink stains on wood effectively. Start by testing the remover on a hidden wood spot to guarantee it won’t damage the finish.

    Dip a cotton swab in the acetone-based nail polish remover and gently apply it to the ink stain, working from the outer edge inward. This prevents the pen ink from spreading further.

    After 5 to 10 seconds, immediately wipe the area with a clean, damp cloth to remove any leftover acetone and dissolved ink. Use the remover sparingly and avoid letting it sit too long, as prolonged contact can strip or damage the wood’s finish.

    This method provides a precise stain removal solution for tough pen ink on wood, helping you clean the surface without causing further harm. Always prioritize caution when using acetone to keep your wood looking its best.

    Sand and Refinish Deep Ink Stains on Unfinished Wood

    When acetone-based nail polish remover can’t fully lift deep ink stains from unfinished wood, sanding and refinishing offers a reliable solution. To effectively remove the ink stain, you’ll need to sand the affected wood surface carefully and then refinish it to restore its natural look.

    Here’s how to approach this stain removal method:

    • Sand the stained area thoroughly with 220-grit sandpaper, always following the wood grain.
    • Frequently inspect the wood surface to ensure the ink stain is gone without over-sanding.
    • Use a tack cloth or damp rag to clear away all dust before refinishing.
    • Apply a matching stain or sealant to refinish the sanded area.
    • Apply 2-3 coats for a consistent and uniform finish.

    Reserve sanding and refinishing for deep, stubborn ink stains on unfinished wood when other methods fail. This approach restores the wood surface while eliminating tough ink marks effectively.

    Protect and Restore Wood After Ink Removal

    Although removing ink stains can restore your wood’s appearance, you’ll want to safeguard and replenish the surface to keep it looking its best. Start by applying a wood conditioner or a light oil like lemon or tung oil to restore moisture and bring back the wood’s natural shine.

    If the cleaning process has dulled or stripped the finish, reapply a matching layer of polyurethane or varnish to seal and protect the area. Before restoring, make sure the surface is completely dry and free of any cleaning residue to achieve a smooth, uniform finish.

    To prevent future surface damage, use desk pads, felt pads, or placemats in high-use areas. Regular maintenance with appropriate oils or finishes will help you defend the wood over time, prolonging its beauty and creating a durable barrier against stains and wear.

    Taking these steps ensures your wood stays restored and protected for years to come.

    Frequently Asked Questions

    Can Ink Stains Reappear After Removal on Wood Surfaces?

    Yes, ink stains can reappear on wood surfaces after removal. You need to think about ink absorption and surface porosity because wood grain can soak up ink deeply.

    Stain reappearance often happens due to color bleeding from residual ink trapped beneath the surface. The pen type and age of the stain also matter. Older stains or certain inks might be harder to fully eliminate, which increases the chance the stain will come back when exposed to moisture or heat.

    Is It Safe to Use Bleach on Wood Ink Stains?

    Think of bleach as fire. It can burn away the stain but also scar the wood’s soul. You shouldn’t use bleach on wood ink stains because it harms protective coatings and causes uneven fading.

    Instead, choose chemical alternatives or natural remedies like rubbing alcohol or baking soda. Focus on surface prep, careful residue removal, and proper drying times to avoid stain penetration.

    Always protect the wood’s finish to keep it looking its best.

    How Long Should I Wait Before Applying Wood Finish After Ink Removal?

    You should wait at least 24 to 48 hours before applying a wood finish after ink removal. Drying time depends on your stain color, removal techniques, and cleaning solutions used.

    Make sure the wood grain is completely dry and free of residues to avoid finish issues. Proper surface prep is key. Test a small area first.

    Following these finishing tips ensures your wood looks flawless and the finish adheres perfectly.

    Can Pet Urine Affect Ink Stain Removal on Wood?

    Pet accidents pose pesky problems, especially for ink stain removal on wood. Yes, pet urine affects your efforts by causing urine damage that can alter the wood’s surface, making stain prevention tougher.

    You’ll need pet-safe solutions and cleaning techniques focused on odor removal and thorough wood treatment. If you skip this, residual urine blocks cleaning agents, trapping ink and worsening stains.

    Are Commercial Ink Removers Safe for Antique Wood Furniture?

    Commercial ink removers aren’t always safe for antique wood furniture due to chemical reactions that can damage finishes and affect antique preservation. You should follow manufacturer guidelines carefully and opt for non-toxic options to minimize environmental impact.

    When dealing with valuable pieces, professional consultation is your best bet to guarantee safety and preserve the wood’s integrity. Don’t risk your antiques by using harsh products without expert advice.

    Conclusion

    Now that you’ve tackled those pesky ink stains, your wood can shine like a diamond in the rough. Remember, gentle methods work wonders before you reach for harsher solutions.

    Treat your wood with care, protect it well, and it’ll thank you by staying beautiful for years to come. With patience and the right steps, even the toughest ink marks don’t stand a chance. Your wood’s charm will always be the star of the show.

  • 7 Easy Steps to Remove Ink From a White Shirt

    7 Easy Steps to Remove Ink From a White Shirt

    Start by laying your white shirt flat and rinsing the ink stain immediately with cold water to prevent setting.

    Dab the stain gently using rubbing alcohol and cotton pads, switching pads to avoid spreading ink.

    Pretreat with dish soap, then rinse again with cold water.

    Wash the shirt in cold water using a good detergent, and air dry it before checking for any leftover stain.

    Keep following these steps closely, and you’ll discover how to restore your shirt effectively.

    Prepare Your Shirt and Gather Supplies

    prepare shirt and gather supplies

    Before you begin, lay your white shirt flat on a clean, smooth surface to prevent the ink from spreading. This step is essential to prepare the stain for effective treatment.

    Next, place white paper towels underneath and inside the shirt. These will absorb excess ink and protect other areas from getting stained.

    Now, gather your supplies: rubbing alcohol (90%), cotton pads or swabs, and a clean cloth for blotting. Make sure you have everything ready before you start.

    Check that the stained area is easily accessible. This way, you can target the ink precisely without spreading it further.

    Also, confirm that your shirt is made of cotton or a fabric compatible with alcohol-based stain removal methods. Otherwise, you risk damaging the material.

    Preparing your shirt and supplies carefully sets you up for success in removing the ink stain efficiently and safely.

    Use Rubbing Alcohol to Remove the Ink Stain

    First, grab a cotton pad or a paper towel and place it right on the ink stain. Then, pour some rubbing alcohol directly onto the pad. Next, gently blot the stained area—make sure to switch to a fresh pad as it absorbs the ink. Keep doing this until you notice the stain isn’t coming off onto the pad anymore.

    Preparing The Stain

    Three simple materials, rubbing alcohol, cotton pads, and paper towels, can help you tackle ink stains effectively. Start by laying your ink-stained white shirt flat on a clean surface. Place white paper towels underneath and inside the garment to catch any excess ink and rubbing alcohol.

    Next, dampen a cotton pad with 90% rubbing alcohol, making sure it’s saturated but not dripping. Gently blot the ink stain using the alcohol-soaked pad, applying light pressure to lift the ink without spreading it further. Keep blotting until the ink transfers to the cotton pad, swapping it out as it becomes soaked.

    Finally, rinse the treated area immediately with cold water to remove leftover alcohol and loosened ink particles. This prepares the stain for the next removal step.

    Applying Rubbing Alcohol

    Once you’ve prepared the stain by laying the shirt flat and positioning paper towels to catch excess liquid, you can begin applying rubbing alcohol directly to the ink spot. Dampen a cotton pad or cloth with 90% rubbing alcohol and gently dab it onto the ink stain.

    Use steady, gentle pressure while blotting to lift the ink without spreading it further. Be sure to replace the cotton pad frequently once it becomes saturated with ink, maintaining the effectiveness of your ink stain removal. This method helps transfer the ink from the fabric onto the alcohol-soaked pad.

    After you finish applying rubbing alcohol, rinse the treated area immediately with cold water to remove any residual alcohol and ink. This step is essential for successful ink stain removal.

    Blotting And Lifting

    Although it might seem tempting to rub the stain, you’ll want to blot it gently with rubbing alcohol instead. Apply the alcohol onto the ink stain with a cotton pad or clean cloth, then start blotting. This method lifts the ink from the fabric onto the alcohol-soaked material without spreading it.

    Replace the cotton pad as it gets saturated to keep blotting effective. Use light, steady pressure to avoid pushing the stain further into the fabric. Once the ink has lifted, rinse the area with cold water to remove any leftover alcohol and ink residue.

    Here’s a quick overview:

    Step Action
    Apply alcohol Use cotton pad or clean cloth
    Blot gently Lift ink without rubbing
    Replace pad Prevent saturation
    Rinse Use cold water after blotting

    Blot the Ink Stain Gently Without Spreading

    You’ll want to blot the ink stain gently instead of rubbing it, so you don’t end up spreading the ink even more. Grab a clean cotton pad or cloth and press it lightly—think of lifting the ink up rather than pushing it deeper into the fabric. Oh, and don’t forget to switch out the blotting material often. That way, you keep the surface clean and make sure you’re actually removing the ink.

    Blot Don’t Rub

    If you want to prevent the ink from spreading, gently blot the stain with a clean cloth or paper towel instead of rubbing it. Rubbing pushes the ink deeper into the fabric, making stain removal harder.

    Use a light, dabbing motion to lift the ink without smudging or enlarging the stain. Place a paper towel or clean cloth underneath the fabric to catch any ink that seeps through, protecting other parts of your shirt.

    Keep blotting carefully until no more ink transfers to your cloth. This technique helps you remove the stain effectively while minimizing damage to the fabric.

    Use Clean Cotton

    Building on the importance of blotting rather than rubbing, using clean cotton pads can make a big difference when tackling ink stains. You should gently blot the stain with a clean, absorbent cotton pad to lift the ink without spreading it.

    Press lightly to absorb as much ink as possible before applying any cleaning solution. Avoid rubbing, as it pushes ink deeper into the fabric. Keep the cotton pad clean to maximize ink removal efficiency.

    Step Action Purpose
    1 Use clean cotton pad Avoid spreading the stain
    2 Gently blot Lift ink without rubbing
    3 Press lightly Absorb ink effectively
    4 Maintain pad cleanliness Maximize removal efficiency

    Replace Pads Frequently

    While blotting the ink stain, replace your cotton pads frequently to prevent spreading ink back onto the fabric. Using fresh pads guarantees you don’t reapply ink to the white cloth, which can make the stain worse.

    Always blot the stain gently, dabbing rather than rubbing, so the ink doesn’t embed deeper into the fibers. When you replace pads frequently, you keep removing fresh ink residues instead of recycling contaminated material.

    This simple step improves your chances of lifting the stain more thoroughly before washing. Remember, consistent pad replacement keeps the blotting process effective, helping you restore your white shirt to its clean, ink-free state without spreading the stain further.

    Pretreat the Ink Stain With Dish Soap

    Since dampening the stained area helps loosen the ink, start by wetting the fabric with a little water before applying dish soap. Next, put a small amount of dish soap directly onto the ink stain. Use a damp cloth to gently rub the soap into the fabric, breaking down the ink pigments.

    This method works well for stain removal because dish soap is designed to cut through oils and residues, which helps lift the ink from the fibers. Let the dish soap sit on the stain for a few minutes to allow it to penetrate deeply.

    If the stain is stubborn, don’t hesitate to repeat the process, applying more dish soap and rubbing again with the damp cloth. This pretreatment is essential for loosening the ink before you move on to rinsing.

    Taking these steps carefully will improve your chances of fully removing the ink from your white shirt.

    Rinse the Area Immediately With Cold Water

    rinse immediately with cold

    After applying dish soap, rinse the stained area immediately with cold water to prevent the ink from setting further into the fabric. Acting quickly is essential because cold water helps dilute the stain and stops it from bonding permanently with the fibers.

    Rinse ink stains immediately with cold water to prevent permanent setting and effectively dilute the stain.

    Make sure to use cold running water directly on the ink stain for at least 5 minutes to flush out as much ink as possible.

    Keep these tips in mind when you rinse:

    • Use cold water, never warm or hot, to avoid coagulating the ink.
    • Hold the stained area under running water to push ink out.
    • Rinse as soon as possible for the best results.
    • Avoid scrubbing, which can spread the stain.
    • Early rinsing reduces the need for harsh chemicals later.

    Following these steps increases your chances of removing the ink stain effectively and keeps your white shirt looking clean.

    Wash the Shirt in Cold Water Using Suitable Detergent

    Once you’ve rinsed the ink stain thoroughly with cold water, it’s time to wash the shirt using a suitable detergent that targets stains effectively. Choose a high-quality detergent designed for stain removal, like Tide Ultra Stain Release, to boost your chances of success.

    Always use cold water for the wash cycle to prevent the ink from setting deeper into the fabric. Set your washing machine to a gentle or normal cycle at the manufacturer-recommended cold water temperature. This careful approach helps lift the ink without damaging the shirt.

    Rinsing beforehand dilutes any lingering ink, making the detergent’s job easier during the wash. After the cycle finishes, check the stained area before moving on to drying. This ensures you catch any remaining ink.

    Air Dry and Check Before Retreatment

    air dry inspect thoroughly

    How do you guarantee the ink stain is truly gone before moving on? After treating the stain, always air dry the shirt to avoid heat setting any remaining ink. Once dry, you need to carefully check the area to confirm effective stain removal. Here’s what you should do:

    Air dry the shirt completely before inspection. Check the stained area under natural light for clear visibility. Avoid using a dryer until you’re sure the stain is gone.

    Gently inspect the fabric for any discoloration or residue. Only proceed with further treatment if you spot remaining ink.

    Frequently Asked Questions

    Can I Use Other Alcohol Types Besides Rubbing Alcohol?

    Yes, you can use alcohol alternatives like denatured alcohol, methylated spirits, or ethanol-based hand sanitizers for stain removal. Just remember to prioritize fabric safety by testing these products on a small, hidden area first.

    Some alternatives may be less effective or cause discoloration, so a patch test helps you avoid damage. Using alcohol with a higher concentration usually improves ink removal, but always proceed cautiously to protect your shirt’s fabric.

    Will This Method Work on Colored Shirts Too?

    About 30% of colored fabrics experience color removal issues when treated improperly. So, this method can work on colored shirts, but you must prioritize dye compatibility and fabric safety.

    Always test the solvent on a hidden spot first to avoid unwanted fading or bleeding. Use gentle, color-safe products and cold water to protect the fabric’s hue.

    Following these steps helps you remove ink without ruining your favorite colored shirts.

    How Long Should I Wait Before Rewashing the Shirt?

    You should wait at least 15 to 30 minutes before rewashing your shirt to allow the stain removal solution to fully penetrate the fabric. For tougher ink stains, waiting up to an hour can improve results. This pause helps break down the ink effectively, ensuring better fabric care.

    Is It Safe to Use Bleach on Ink Stains?

    You shouldn’t use bleach on ink stains because bleach safety concerns arise from its potential to damage fabric and worsen the stain. Instead, follow stain removal tips that involve alcohol-based solvents or specialized stain removers.

    Always prioritize fabric care by testing any product on a hidden area first. Bleach may cause discoloration or permanent marks, so it’s best to avoid it for ink stains to keep your shirt looking its best.

    What if the Ink Stain Is Old and Set In?

    If the ink stain is old and set in, you’ll need to think carefully about the fabric type and stain color. Older ink stains usually require repeated treatments with alcohol-based solvents or commercial stain removers.

    Since ink age affects how deeply it’s embedded, pre-soaking your shirt in warm water with detergent can help. Be patient and avoid bleach on delicate fabrics or colored inks, as it might damage the fabric or change the stain color.

    Conclusion

    Now that you’ve tackled the ink stain step by step, your white shirt is ready to shine like new again. Remember, treating stains quickly is your secret weapon. Think of it as a race against time where you’re the champion.

    So don’t wait! Follow these simple steps, and you’ll turn those pesky ink marks into nothing more than a distant memory. Your shirt and your confidence will thank you!

  • How to Remove Ink From Upholstery in 7 Easy Steps

    How to Remove Ink From Upholstery in 7 Easy Steps

    First, check your upholstery tag to know its cleaning code.

    Blot fresh ink gently with a clean cloth from the edges inward, don’t rub.

    Test rubbing alcohol on a hidden spot, then dab it on the stain.

    For tough ink, mix vinegar and soap to blot repeatedly.

    You can also try milk and baking soda for natural removal.

    Avoid heat drying; instead, air-dry and condition leather if needed.

    Keep going to uncover more helpful tips for spotless upholstery care.

    Identify Your Upholstery Type and Cleaning Code

    identify fabric and cleaning codes

    Before you begin cleaning ink from your upholstery, you need to identify its type and cleaning code. Look for the upholstery tag, usually found under cushions or on the sofa platform, which reveals the fabric type and cleaning code.

    These codes “W” for water-based cleaners, “S” for solvent-based, “S-W” for either, and “X” for vacuuming only guide you in choosing the safest cleaning methods. Following the manufacturer instructions is vital because using the wrong cleaner can cause discoloration or damage, complicating stain removal.

    Knowing your upholstery’s fabric care requirements assures you use the proper cleaning process, maintaining your furniture’s look and longevity. This step is fundamental not just for effective ink stain removal but also for stain prevention in the future.

    Blot Fresh Ink Stains Immediately to Prevent Spreading

    When you notice fresh ink on your upholstery, blot it immediately with a clean, dry cloth or paper towel to soak up as much ink as possible before it sets. Acting fast helps absorb excess ink and prevents spreading, which can make removal harder. Use gentle pressing motions instead of rubbing to avoid pushing ink deeper into the fabric.

    Follow these steps for best results:

    Follow these steps carefully to effectively remove fresh ink stains from your upholstery without spreading or embedding the ink.

    1. Use a clean cloth or paper towel to blot the fresh ink stain with immediate, gentle pressing from the outside edges toward the center to prevent spreading.
    2. Change to a dry section or a new cloth frequently to absorb ink effectively and avoid re-deposit onto the upholstery.
    3. Refrain from rubbing, as this can embed the ink further, increasing the chance of a permanent stain.

    Use Rubbing Alcohol and Household Solutions for Ink Removal

    use alcohol or vinegar

    You can tackle ink stains by using rubbing alcohol. It breaks down the ink effectively when you dab it gently onto the fabric. Just make sure to test it on a hidden spot first so you don’t accidentally damage your clothes.

    If rubbing alcohol isn’t handy, you can try a mix of vinegar and soap. This combo can also help lift those stubborn stains—just remember to blot carefully.

    Alcohol-Based Ink Removal

    How exactly can rubbing alcohol help you remove ink from upholstery? Rubbing alcohol, especially 90% isopropyl alcohol, dissolves ink pigments quickly, making it ideal for alcohol-based removal.

    To treat ink stains effectively, follow these steps:

    1. Test rubbing alcohol on a hidden upholstery spot to avoid damage.
    2. Dab the stain gently with a clean cloth soaked in alcohol, working from the outside inward without rubbing.
    3. For stubborn stains, apply alcohol repeatedly, then rinse with water and blot dry to remove residue.

    Using a clean cloth ensures you lift the ink without spreading it. This method targets both fresh and dried ink stains, making it a reliable solution for alcohol-based ink removal on upholstery.

    Vinegar And Soap Solutions

    Why settle for just one method when combining household solutions can boost your ink stain removal efforts? Mix 1 tablespoon of white vinegar, 1 tablespoon of dish detergent, and 2 cups of cool water to make an effective cleaning solution.

    Blot the ink stain on your upholstery immediately with a cloth soaked in this vinegar and soap solution. Gently press and dab every 5 minutes for about 30 minutes to lift the ink.

    Once treated, rinse the area with a damp cloth to remove residue and blot dry to avoid moisture damage. Repeat if needed, always blotting gently to prevent spreading.

    Step Action
    Prepare Solution Mix vinegar, soap, and water
    Apply & Blot Gently press and dab the stain
    Rinse & Dry Use damp cloth, then blot dry

    Use Vinegar and Soap to Tackle Tough Ink Stains

    Although ink stains can be stubborn, mixing a solution of dish detergent, white vinegar, and cool water can help you tackle even the toughest spots on your upholstery. This powerful vinegar and soap cleaning solution works to loosen and lift stubborn ink stains effectively.

    Here’s how to use it:

    1. Blot the ink stain immediately with a clean cloth or paper towel to prevent it from setting deeper.
    2. Dab the vinegar and soap solution onto the stain and let it sit for about 30 minutes to loosen the ink particles.
    3. Every 5 minutes, blot the stain with a clean cloth dipped in the solution to gradually lift the ink.

    Once the stain shows signs of fading, rinse the area thoroughly with a damp cloth to remove any soap residue. This step guarantees your upholstery stays clean without any leftover stains or stickiness.

    Try Gentle Natural Remedies Like Milk and Baking Soda

    milk and baking soda treatment

    You can pour milk directly onto the ink stain to soften it and make it easier to lift. After that, sprinkle some baking soda over the milk. This helps absorb the loosened ink particles. Then, gently scrub the area to remove the stain without damaging your upholstery.

    Milk Soften Ink

    Wondering how to tackle ink stains without harsh chemicals? Using milk to soften ink is an effective and gentle stain treatment for upholstery. Milk helps loosen ink particles, making stain removal easier. Here’s how you can do it:

    1. Pour milk directly onto the ink stain to allow stain penetration and loosen ink from fibers.
    2. Sprinkle baking soda over the milk; it enhances absorption and acts as a mild abrasive.
    3. After letting the mixture sit for several minutes, gently scrub the area with a soft cloth, then rinse with a damp cloth to remove residue.

    This simple method combines natural ingredients to break down stubborn ink stains while protecting your upholstery.

    Baking Soda Absorption

    Milk helps soften ink stains, but combining it with baking soda takes stain removal a step further by absorbing and lifting ink from upholstery fibers. Start by pouring milk directly onto the ink stain to loosen ink particles.

    Then, sprinkle baking soda over the milk-covered area to create a gentle abrasive that aids in stain lifting. Use a soft cloth or sponge to gently scrub the stain, working the milk and baking soda into the fabric for effective absorption.

    After scrubbing, wipe the treated area with a clean, damp cloth to remove any residue. Finally, let the upholstery dry completely to avoid moisture buildup, which can cause further damage or re-staining.

    This natural method offers a gentle scrub for delicate upholstery while ensuring thorough ink removal.

    Avoid Common Mistakes That Can Damage Upholstery

    Although it might seem like scrubbing the ink stain aggressively will get rid of it faster, this can actually push the ink deeper into the fabric, making removal harder. To protect your upholstery, avoid these common mistakes:

    1. Don’t use harsh chemicals or hot water, as they can set the ink permanently and cause staining. Instead, opt for gentle cleaning agents.
    2. Avoid excessive cleaning or soaking the fabric, which may lead to water damage, mold growth, or fabric damage.
    3. Steer clear of abrasive tools or rough cloths. These can scratch or weaken delicate fabric fibers, causing discoloration and permanent damage.

    Also, always test any cleaning solution on a hidden area first to prevent unexpected discoloration or fading. By handling your upholstery carefully and avoiding these errors, you’ll improve the chances of successfully removing ink without harming the fabric.

    Dry and Condition Upholstery After Ink Removal

    Once you’ve carefully removed the ink stain without damaging the fabric, your next step is to dry and condition the upholstery properly. Start by blotting the cleaned area with a clean, dry towel to absorb as much moisture as possible, preventing it from settling into the fabric.

    After removing the ink, gently blot the area with a dry towel to absorb moisture and protect the fabric.

    Avoid using direct heat sources like hair dryers, as they can warp delicate materials. Instead, use a fan or an air blower to speed up the drying process and guarantee no residual moisture remains.

    For leather upholstery, once it’s completely dry, apply a leather conditioner to restore suppleness and prevent cracking. Proper drying and conditioning not only maintain the upholstery’s appearance but also prevent mold growth and re-staining.

    Make sure the area is fully dry before using the furniture again to keep your upholstery looking clean and fresh. Taking these steps guarantees your upholstery stays in great shape after ink removal.

    Frequently Asked Questions

    Can Ink Stains Be Removed From Leather Upholstery?

    Yes, you can remove ink stains from leather upholstery with the right leather cleaning and spot treatment techniques. Use gentle cleaning solutions like isopropyl alcohol or specialized leather cleaners to lift ink, but always test a small area first.

    Incorporate upholstery care and leather maintenance by applying a conditioner afterward to keep your leather supple. Using proper cleaning tools and DIY methods helps improve stain resistance and supports effective stain prevention for your leather furniture.

    How Long Should I Wait Before Attempting Ink Removal?

    You should wait at least 15 to 30 minutes before attempting ink removal to allow proper drying time and stain absorption. Depending on the ink type, upholstery material, and stain size, longer waiting might improve stain visibility and treatment duration.

    Adjust cleaning frequency based on how the stain responds. Consider your drying environment and use appropriate cleaning tools for the best results. Patience helps maximize ink removal success.

    Are There Professional Services for Ink Stain Removal?

    You bet there are professional services for ink stain removal! When your upholstery looks like a crime scene, these pros bring powerful cleaning solutions and expert stain removal tips.

    Forget risky DIY methods. They use precise stain identification and advanced cleaning tools to guarantee stain removal safety. They combine stain treatment with upholstery care, saving your fabric from damage.

    Plus, their professional cleaning guarantees stain prevention and restores your furniture’s look like new.

    Can Ink Stains Cause Permanent Discoloration?

    Yes, ink stains can cause permanent discoloration, especially when ink penetration is deep and fabric porosity is high. The longer the stain stays, the more complex the absorption becomes, which increases fiber damage and color fading.

    Aging effects make the stain more visible and the surface discoloration worse, so removal gets harder over time. You’ll notice that old ink stains bond tightly with fibers. That’s why acting quickly is essential to prevent permanent marks and keep your upholstery looking good.

    How to Prevent Ink Stains on Upholstery in the Future?

    Think of your upholstery as a fortress. Using ink-resistant fabric and stain-resistant treatments acts like a strong shield. You’ll want to apply fabric coating or upholstery sealing regularly to strengthen defenses.

    Quick spill response is key, so keep cleaning supplies handy. Protective covers guard high-risk spots, and knowing ink marker types helps you prepare better.

    Stick to stain prevention tips and boost upholstery maintenance by increasing your cleaning frequency to keep your fortress impenetrable.

    Conclusion

    Now that you’ve gently lifted the ink stain, imagine your upholstery looking fresh and vibrant again, free from blotches and smudges. By acting quickly and choosing the right solutions, you’ve restored its beauty like a skilled artist touching up a masterpiece.

    Remember to dry and condition your fabric so it feels soft and inviting. With these simple steps, your furniture will continue to brighten your space, ink-free and effortlessly charming.

  • 10 Steps to Remove Ink From Plastic Labels

    10 Steps to Remove Ink From Plastic Labels

    To remove ink from plastic labels, first set up a ventilated workspace and wear gloves for safety.

    Test your chosen solvent, like rubbing alcohol for light stains or acetone for tough marks, on a small hidden spot.

    Soak or dab gently to lift ink, then wipe carefully to avoid smearing.

    Rinse thoroughly and dry completely before storing.

    Different plastics need different care, so if you want to master every step, keep exploring these techniques.

    Prepare Your Workspace and Safety Gear for Ink Removal

    set up safe workspace

    Before you begin removing ink from plastic labels, make sure you set up a well-ventilated workspace and put on protective gloves. Proper safety gear is essential to protect your skin from harsh solvents like acetone or rubbing alcohol, which can cause irritation. Choose rubber or nitrile gloves for the best protection.

    Next, prepare a small, designated workspace with a non-reactive surface such as glass or stainless steel. This helps prevent unwanted chemical reactions and keeps your area clean. Keep clean, lint-free cloths or paper towels within reach to apply solvents and wipe away ink efficiently.

    Always read and follow the manufacturer’s safety instructions on your cleaning products before use. Working in a well-ventilated area reduces your exposure to fumes, making the process safer. By focusing on your workspace setup and safety gear first, you create an environment that’s both secure and effective for removing ink from plastic labels.

    Spot Testing Solvents on Plastic for Ink Removal

    Once you’ve prepared your workspace and safety gear, the next step is to test how the solvent interacts with your plastic label. Spot testing solvents is essential to avoid damaging the plastic during ink removal.

    Apply a small amount of solvent like acetone or rubbing alcohol with a clean, soft cloth or cotton swab to an inconspicuous area of the label. Wait at least five minutes to observe any changes in color, texture, or surface integrity.

    Test solvents on a hidden label spot, waiting five minutes to check for any damage or changes.

    Look carefully for signs of discoloration, warping, or cracking. These indicators show whether the solvent is too harsh for your plastic. Document what you observe during this spot testing phase, so you can refer back before proceeding.

    This careful approach guarantees you protect the label’s appearance while effectively targeting the ink. Skipping this step risks irreversible damage, so always start small and test first to find a safe way to remove ink from your plastic labels.

    How to Choose the Right Solvent for Plastic Ink Removal

    choose appropriate solvent strength

    When you’re picking a solvent, begin by thinking about how strong it needs to be. For light ink stains, isopropyl alcohol usually does the trick. But if you’re dealing with tougher spots, you might want to switch to something stronger like acetone.

    Also, don’t forget to consider the type of plastic you’re working with. Some solvents can actually harm materials like polycarbonate or acrylic. So, it’s always best to choose the gentlest solvent that still gets the job done without damaging the surface.

    Solvent Strength Comparison

    Choosing the right solvent for removing ink from plastic labels depends on balancing strength and safety. Acetone is a powerful solvent that dissolves stubborn ink quickly but can damage or discolor plastic surfaces if used carelessly.

    Rubbing alcohol, typically 70-90% isopropyl alcohol, offers a gentler alternative. It’s effective on light ink stains and safer for delicate plastics. If you want to avoid harsh chemicals, non-acetone nail polish remover provides a milder option, though it’s less effective than acetone.

    Household solutions like vinegar or cooking oil are even gentler but usually won’t tackle permanent marker ink well. When choosing, consider how tough the ink is and how much risk you’re willing to take with the plastic’s finish. That way, you’ll pick a solvent that cleans efficiently without causing damage.

    Surface Compatibility Factors

    Finding the right solvent is only part of the equation. You also need to consider how the plastic surface will react. Different plastics respond differently to solvents, so testing on a small, hidden spot is essential to avoid damage. Here’s what to consider:

    1. Plastic type: Polypropylene and polyethylene tolerate rubbing alcohol and acetone better than polycarbonate or PVC, which can be damaged easily.
    2. Surface finish: Glossy plastics may discolor or dull with some solvents, while matte finishes can be less affected but harder to clean.
    3. Porosity: Porous or aged plastics absorb ink deeper, making solvent removal less effective.

    Use chemical compatibility charts to pick solvents that remove ink without harming your plastic surface.

    Removing Fresh or Light Ink Stains With Rubbing Alcohol

    If you notice a fresh or light ink stain on your plastic label, you can quickly tackle it using rubbing alcohol. Start by dampening a clean cloth or cotton ball with rubbing alcohol, making sure it’s saturated but not dripping.

    For fresh ink stains on plastic labels, gently dab with a saturated cloth soaked in rubbing alcohol.

    Gently dab or rub the ink stain in a circular motion, applying steady pressure. Keep this up until the ink begins to lift from the plastic, which usually takes just a few seconds to a minute.

    To avoid spreading the ink or reapplying dirty alcohol, switch to a fresh section of the cloth or use a new cotton ball as needed. Once the stain is gone, wipe the area with a damp, clean cloth to remove any leftover rubbing alcohol.

    Finally, dry the surface thoroughly. This method effectively removes light ink stains without damaging the plastic label’s surface, making it a quick and reliable first step in ink stain removal.

    Using Acetone for Tough or Set-In Ink Marks

    use acetone to remove ink

    When you’re dealing with tough ink marks, go ahead and start by applying acetone carefully using a cotton swab or a cloth. If the ink is really set in there, try soaking the label in acetone for about 5 to 10 minutes—it can help loosen things up. Once you’ve removed the ink, be sure to rinse the plastic thoroughly and let it dry completely so there’s no residue left behind.

    Preparing Acetone Application

    To tackle tough or set-in ink marks, start by pouring a small amount of acetone onto a clean cloth or cotton ball. Make sure it’s saturated but not dripping. Proper preparation helps acetone effectively remove stubborn ink without damaging the plastic label.

    Follow these steps to prepare for acetone application:

    1. Select a clean cloth or cotton ball and saturate it evenly with acetone, avoiding excess liquid.
    2. Test a small hidden area of the plastic label to ensure acetone won’t cause damage or discoloration.
    3. Keep additional acetone nearby to reapply as needed during the removal process.

    Soaking Technique For Labels

    Although acetone works well with a cloth application, soaking plastic labels in it can more effectively loosen tough or set-in ink marks. To start, submerge the plastic item fully in a glass or stainless-steel container filled with acetone. Let it soak for 5 to 10 minutes, allowing the acetone to break down the ink and adhesive.

    After soaking, gently wipe the label with a cloth or sponge in circular motions to remove loosened ink. If stubborn ink remains, just repeat the soaking process until the label lifts completely. This soaking technique saves time and effort when dealing with persistent marks.

    Once the ink is gone, make sure to rinse the plastic thoroughly with water and dry it entirely before reuse to clear away any acetone residue.

    Post-Removal Cleaning Tips

    After soaking and wiping away ink with acetone, you’ll want to focus on properly cleaning the plastic to protect its surface. Using acetone effectively means you’ll need to rinse the area thoroughly to avoid damage or discoloration. Follow these steps to guarantee the plastic stays intact:

    1. Rinse the plastic thoroughly with water to remove any residual acetone and prevent surface damage.
    2. Wipe the cleaned area with a damp cloth to eliminate leftover acetone and help it evaporate faster.
    3. Allow the plastic to air dry completely in a well-ventilated space before handling or reusing.

    Soaking Method for Stubborn Ink

    When stubborn ink refuses to budge, soaking your plastic label in acetone or rubbing alcohol can break it down effectively. Start by fully submerging the label in a glass or stainless steel container filled with your chosen solvent. Avoid plastic containers to prevent unwanted reactions.

    Let the label soak for 5 to 10 minutes, checking periodically to monitor the ink’s loosening without leaving it exposed too long. Once the ink softens, gently wipe the label with a cloth or sponge, applying minimal pressure to avoid damaging the plastic surface.

    After removing the ink, rinse the label thoroughly with water to eliminate any leftover solvent. Finally, allow the plastic to dry completely before reusing it or applying any new labels. This soaking method with acetone offers a simple yet effective way to tackle stubborn ink without harsh scrubbing, saving you time and preserving your plastic labels.

    Prevent Ink Smearing When Wiping During Ink Removal

    To prevent ink from smearing while wiping it off your plastic labels, you should wipe in a single, consistent direction using a dry or slightly damp cloth. This approach helps control the ink removal and stops the stain from spreading. Avoid using a soaking wet cloth because it can cause the ink to run and smear further.

    Instead, apply gentle pressure and work slowly on small sections to keep the process manageable and precise.

    Here are three key tips to prevent smearing when you wipe:

    1. Use a dry or barely damp cloth to maintain control and avoid excess moisture.
    2. Wipe with gentle, steady strokes in one direction, never back and forth.
    3. Test your wiping method on a hidden spot before tackling the whole label.

    Cleaning Residue and Rinsing Plastic Containers

    Once you’ve treated the ink, go ahead and rinse the container thoroughly with warm water. This helps wash away any leftover solvent residue. Then, gently clean the surface using a damp cloth and some mild soap to lift off any remaining marks. Finally, make sure to dry the container completely before storing it—this will prevent water spots and keep it looking nice and clean.

    Removing Solvent Residue

    How do you guarantee your plastic containers are truly free of solvent residue after cleaning? After using acetone or similar solvents, it’s essential to rinse thoroughly to avoid lingering chemicals that can degrade plastic or leave odors. Follow these steps:

    1. Rinse the container with warm water, focusing on all surfaces, including edges and crevices, to remove solvent traces.
    2. Use a mild dish soap during rinsing to break down any leftover solvent residue effectively.
    3. Wipe the container with a damp cloth or sponge to eliminate any remaining solvent film, then let it air dry completely.

    Washing With Soap

    A few drops of dish soap mixed with warm water can work wonders when washing plastic containers. Start by soaking the container to loosen ink stains and any leftover residue. Use a soft sponge or cloth to gently scrub the surface, focusing on areas with ink or adhesive.

    If the ink doesn’t come off easily, add more soap and keep scrubbing until the stain fades. Once you’ve removed as much ink as possible, rinse the container thoroughly with clean water. This step guarantees that all soap and loosened ink particles wash away, preventing any sticky residue.

    Proper rinsing is essential to avoid buildup and prepare the container for the next cleaning stage or reuse.

    Drying And Storage

    Two essential steps follow cleaning: rinsing and drying your plastic containers thoroughly. After removing ink or residue, rinse each container with warm water to wash away any leftover cleaning solution.

    Next, let them air dry completely in a well-ventilated spot to prevent moisture buildup and mold growth.

    For effective drying and storage, remember to:

    1. Use a clean, dry cloth to wipe containers if you need to speed up drying without leaving water spots.
    2. *Guarantee* containers are fully dry before sealing or stacking to avoid trapped moisture and chemical transfer.
    3. Store containers in a cool, dry place away from direct sunlight to prevent warping or discoloration.

    Following these steps keeps your plastic containers safe and ready for future use.

    Ink Removal for Different Plastics

    Because different plastics react uniquely to solvents and cleaning methods, you’ll need to tailor your ink removal approach based on the material. For instance, acetone works well on glass or acrylic but can damage plastics like PVC by causing discoloration or cracking.

    Softer plastics such as polypropylene are easier to clean, while rigid ones like polycarbonate require gentler care. Always test a small area first, especially with heat-sensitive plastics like polystyrene.

    Textured or matte finishes trap ink deeper, making removal tougher than on smooth, glossy surfaces.

    Plastic Type Ink Removal Tip
    Polypropylene Use mild solvents, easy removal
    Polycarbonate Avoid acetone, use gentle wipes
    PVC Acetone causes damage, test first
    Polystyrene Test first to avoid warping

    Caring for Plastic Surfaces After Ink Removal

    Once you’ve removed the ink, make sure to rinse the plastic surface thoroughly with water to wash away any leftover cleaning chemicals. Proper aftercare is essential to maintain the plastic’s integrity and appearance following cleaning. Avoid using abrasive materials when drying to prevent scratches or damage.

    Rinse plastic thoroughly after ink removal and dry gently to preserve its appearance and prevent damage.

    To care for plastic surfaces after ink removal, follow these steps:

    1. Gently dry the plastic with a soft cloth or sponge to avoid abrasion.
    2. Apply a plastic conditioner or a small amount of mineral oil to restore flexibility and shine.
    3. Store the cleaned plastic labels in a cool, dry place away from direct sunlight to prevent UV damage.

    Regularly inspect the plastic for discoloration or deterioration caused by solvents during cleaning. Address any issues immediately to prolong the label’s lifespan. With proper care, your plastic surfaces will remain clean and durable after ink removal.

    Frequently Asked Questions

    Can Ink Removal Damage the Plastic Label’s Design or Texture?

    Yes, ink removal can damage the plastic label’s design or texture if you’re not careful. The label durability depends on the type of plastic and ink penetration. Harsh solvents or aggressive rubbing can fade or peel the printed design.

    You might also lose tactile features or weaken the adhesive layer, causing bubbling or peeling. Always test a small area first to avoid compromising the label’s durability while removing ink.

    How Long Does Ink Typically Take to Fully Come off Plastic Labels?

    Ink typically takes anywhere from a few minutes to several hours to fully come off plastic labels, depending on ink penetration and label durability. If the ink hasn’t deeply penetrated the plastic, you’ll see results in about 5 to 10 minutes using effective solvents.

    However, tougher stains that soak into the label might need 30 minutes or more. Keep in mind, your label’s durability affects how long and how aggressively you can treat it.

    Are There Eco-Friendly Solvents Safe for Plastic Ink Removal?

    Yes, you can use biodegradable solvents and natural cleaning agents to remove ink from plastic safely. These eco-friendly options, like distilled white vinegar or plant-based rubbing alcohol, reduce environmental impact and minimize damage to plastic.

    Just remember, their effectiveness varies, so you might need to apply them a few times. Always test a small hidden area first to avoid discoloration, ensuring your plastic labels stay intact while you clean them.

    Can Ink Removal Methods Affect the Adhesive on Plastic Labels?

    Yes, ink removal methods can affect the adhesive on plastic labels due to chemical reactions triggered by solvents. You’ll want to take into account solvent safety because some chemicals, like acetone, may weaken or dissolve the adhesive, causing labels to loosen or fall off.

    Since adhesives vary in resistance, it’s smart to test solvents on a small area first. This helps you avoid damaging the adhesive while removing ink effectively.

    What Should I Do if Ink Removal Causes Discoloration on Plastic?

    If ink removal causes discoloration on plastic, you should immediately rinse the area with clean water to stop any ongoing chemical reactions. Next, test a gentle cleaning solution like diluted vinegar on a small spot to avoid making the stain worse.

    If the discoloration persists, avoid harsh solvents because they can make it worse. Instead, try neutralizing remedies or consider repainting to cover stubborn stains and restore the plastic’s original look.

    Conclusion

    Removing ink from plastic labels doesn’t have to be frustrating. Did you know that nearly 60% of people throw away plastic containers because of stubborn ink marks?

    By following these steps, you can save money and reduce waste. Just remember to test solvents first, choose the right method, and care for your plastic afterward.

    With a little patience, you’ll keep your plastic looking clean and reusable, helping both your wallet and the planet.

  • How to Remove Ink From Plastic in 7 Simple Steps

    How to Remove Ink From Plastic in 7 Simple Steps

    First, gather supplies like rubbing alcohol, acetone, soft cloths, and gloves, and set up in a ventilated space.

    Identify the plastic and ink types to choose safe cleaners.

    Test solvents on a hidden spot, then apply rubbing alcohol or gentle solvents with a soft cloth.

    For stubborn ink, soak the plastic briefly, then gently scrub in circular motions.

    Rinse well and dry thoroughly to protect the surface.

    Keep going for tips on protecting and maintaining your plastic after cleaning.

    Gather Cleaning Supplies and Prepare Workspace

    prepare workspace and supplies

    Before you begin removing ink from plastic, gather essential supplies like rubbing alcohol, acetone, soft cloths, gloves, and a sponge to make certain you have everything on hand. Proper preparation is key to a smooth cleaning process.

    Set up your workspace in a well-ventilated area to safely disperse fumes from chemical solvents. Choose a clean, flat surface and protect it with paper towels or plastic sheets to avoid damage.

    Prepare a clean, flat workspace in a well-ventilated area and protect surfaces from damage.

    Wear rubber gloves to shield your skin from irritation and maintain hygiene while handling chemicals. Before applying any cleaning agent on a visible area, test it on a small, inconspicuous spot of the plastic to ensure it doesn’t cause discoloration or surface damage.

    This careful workspace setup and use of appropriate cleaning supplies will help you efficiently and safely remove ink from plastic without causing harm to the material or yourself. Taking these steps guarantees you’re ready to tackle the task effectively.

    Identify Plastic and Ink Types Before Cleaning

    Once you’ve prepared your workspace and gathered supplies, the next step is to identify the types of plastic and ink you’re dealing with. Proper plastic identification, such as acrylic, polycarbonate, or polyethylene, helps you choose suitable cleaning agents and avoid surface damage.

    Recognizing ink types like ballpoint, gel, or permanent marker is equally important since each requires specific ink removal methods. Before applying any solution, consult manufacturer recommendations to confirm plastic compatibility.

    Understanding ink types guides you toward the right solvent for effective ink removal.

    Plastic Type Ink Type Recommended Cleaning Agents
    Acrylic Ballpoint (oil) Rubbing alcohol (gentle)
    Polycarbonate Gel (water-based) Mild detergent or isopropyl alcohol
    Polyethylene Permanent marker Stronger solvents (test first)
    Acrylic Permanent marker Solvent testing essential to prevent damage

    Identifying these factors ensures safe and effective ink removal without harming the plastic surface.

    Test Cleaning Agents on Hidden Plastic Ink Stains

    test cleaner on hidden plastic

    Before you start using any cleaning agent, try it out on a hidden part of the plastic first. This way, you can avoid any damage or discoloration. Just take a soft cloth or a cotton swab and apply a little bit of the cleaner.

    Then, give it a few minutes to see how the plastic reacts. Doing this quick test helps you pick a safe method without putting the visible areas at risk. It’s a simple step that can save you a lot of trouble later on.

    Importance Of Spot-Testing

    Although cleaning ink from plastic can be tempting to do right away, you should always spot-test your chosen cleaning agent on a hidden area first. Spot-testing helps you avoid discoloration or surface damage by revealing any adverse plastic reaction before full application.

    Different plastic surfaces react uniquely to chemicals, so testing solvents on a conspicuous area can lead to irreversible damage.

    Plastic Type Testing Solvent Possible Reaction
    Acrylic Isopropyl Alcohol No discoloration
    Polycarbonate Acetone Surface damage
    PVC Vinegar Mild discoloration
    Polyethylene Soap & Water Safe
    Polystyrene Acetone Severe chemical reaction

    Always wait 5-10 minutes, then remove residue to check results accurately.

    Safe Testing Techniques

    Spot-testing your cleaning agent on a hidden section of the plastic helps prevent damage, but you’ll need to apply safe testing techniques to get reliable results. Always test the solvent by applying a small amount to an inconspicuous part of the plastic.

    Use a soft cloth or cotton swab to gently dab the solution, avoiding harsh rubbing that could cause scratches. Wait at least five minutes to watch for any discoloration or surface damage. Document the plastic’s initial condition so you can compare it after testing.

    Avoid aggressive solvents on delicate plastics like acrylic or polycarbonate, as they may cause irreversible damage. By carefully following these safe testing steps, you’ll guarantee the cleaning agent won’t harm your plastic item while effectively removing ink stains.

    Use Rubbing Alcohol or Gentle Solvents for Fresh Ink

    When you’ve got fresh ink on plastic, it’s best to reach for rubbing alcohol or some gentle solvents that won’t harm the surface. Just dab them on carefully using a soft cloth or a cotton ball—try to avoid any harsh scrubbing.

    And hey, don’t forget to test it out first on a hidden area. That way, you can be sure the plastic stays safe and doesn’t get damaged.

    Selecting Suitable Solvents

    Since fresh ink stains haven’t set deeply into plastic surfaces, you can effectively remove them using rubbing alcohol or gentle solvents. Rubbing alcohol acts as a powerful solvent that dissolves fresh, oil-based ink stains on most plastics.

    However, for delicate plastic, opt for gentle solvents like dilute vinegar or mild dish soap to avoid damaging the surface. Before applying any solvent, always perform a spot test on an inconspicuous area of the plastic to guarantee it won’t cause discoloration or harm.

    When selecting your solvent, consider the plastic’s sensitivity and the ink’s age. Using the right solvent assures efficient ink stain removal without compromising the plastic’s finish. This careful choice sets the stage for safe and effective cleaning.

    Applying Solvents Safely

    Although applying solvents might seem straightforward, you should always wear rubber gloves and work in a well-ventilated area to protect your skin and lungs from irritation or fumes.

    Before treating the entire stain, test rubbing alcohol or gentle solvents on a small inconspicuous area of the plastic to check for any surface damage or discoloration.

    Use a soft cloth or cotton ball lightly soaked with your chosen solvent to gently dab the fresh ink in circular motions. Apply the solvent sparingly to avoid over-saturation, which can warp the plastic.

    Let the solvent sit for a few seconds to dissolve the ink, then gently wipe without scrubbing aggressively. This careful approach guarantees effective ink removal while preserving your plastic’s integrity.

    Soak Plastic to Remove Stubborn Ink

    soak plastic 5 10 minutes

    How long should you soak plastic to remove stubborn ink? To effectively loosen ink stains, fully submerge the plastic item in a non-reactive container filled with a suitable solvent like acetone or rubbing alcohol. Make sure the plastic is completely covered and soak it for 5 to 10 minutes.

    This soaking time is usually enough to break down set-in ink stains without causing damage. For larger or heavily stained plastic items, you can extend the soak carefully but don’t exceed 15 minutes, as prolonged exposure to solvents can damage the plastic. After soaking, gently wipe the surface to remove the loosened ink.

    Always rinse the plastic thoroughly with water afterward to remove any residual solvent, then dry with a soft cloth to avoid water spots. By controlling the soaking time and using the right solvent, you’ll safely and efficiently remove ink from your plastic items without compromising their finish.

    Gently Scrub to Remove Remaining Ink

    When soaking doesn’t remove all the ink, you’ll want to gently scrub the remaining stains to avoid damaging the plastic. Use a soft cloth or sponge dampened with a suitable cleaning agent, such as rubbing alcohol or vinegar, to enhance ink removal.

    Apply minimal pressure and move the cloth in small, circular motions to lift residual ink without scratching or dulling the plastic surfaces. Avoid abrasive brushes or scrubbing pads, as they can harm the plastic protection and leave permanent marks.

    This careful approach guarantees you remove stubborn ink while preserving the integrity of the plastic. By gently scrubbing, you target the remaining ink effectively without risking surface damage, making your ink removal process both safe and efficient.

    Rinse and Dry to Remove Ink and Protect Plastic

    After gently scrubbing away the remaining ink, you’ll want to rinse the plastic thoroughly to wash off any leftover cleaning agents and ink residue. Use water and a soft cloth or sponge to gently rinse the surface, avoiding abrasive materials that could scratch or damage the plastic. This step is important to prevent any chemical buildup that might harm the plastic over time.

    Once rinsed, dry the plastic immediately with a clean, lint-free towel to prevent water spots and potential moisture damage. For electronic or sensitive plastic items, it’s best to let the surface air dry in a well-ventilated area to ensure all solvents evaporate completely.

    Regular rinsing and proper drying after your cleaning routine help maintain the plastic’s appearance and extend its lifespan. By following these gentle rinse and dry steps, you’ll effectively remove ink while protecting the plastic surface from damage.

    Frequently Asked Questions

    Can Ink Removal Damage the Color of Plastic?

    Yes, ink removal can damage the plastic color if you’re not careful. Aggressive cleaning or harsh chemicals may cause pigment removal, leading to color fading or dye transfer.

    You risk surface damage and plastic staining from chemical reactions that strip or alter the plastic’s original hue. To avoid this, always test on a small spot first and choose gentle methods to protect the plastic color while removing the ink stain.

    Is It Safe to Use Nail Polish Remover on Plastic?

    Think of nail polish remover as a double-edged sword. You can wield it carefully or risk cutting too deep. You shouldn’t use it blindly on plastic because chemical reactions vary with plastic compatibility.

    Non-acetone removers offer safer removal techniques but sacrifice solvent effectiveness. Always test first, follow safety precautions, use proper cleaning tools, and compare products to prevent stains or damage. This way, you balance stain prevention with preserving your plastic’s integrity.

    How Long Should I Wait After Cleaning to Use the Plastic Item?

    You should wait at least 30 minutes to an hour of drying time after cleaning before using the plastic item. If your plastic has material sensitivity or adhesive residue, extending drying time to 24 hours helps.

    Cleaning frequency and stain persistence matter. More stubborn stains might need extra surface preparation and cleaning tools. Use gentle drying methods to avoid damage.

    Always check the plastic type to match drying time and cleaning methods effectively.

    Can Sunlight Help in Fading Ink Stains on Plastic?

    Imagine leaving a plastic toy marked with water-based ink on your sunny windowsill. Yes, sunlight fading can naturally bleach those stains over weeks through UV exposure.

    However, too much sunlight duration may cause plastic oxidation, leading to discoloration and damage. Weather effects like clouds slow fading, so monitor the process to balance natural bleaching and color preservation.

    To prevent unwanted fade prevention, avoid overexposure while harnessing sunlight’s gentle power.

    Are There Any Eco-Friendly Alternatives for Ink Removal on Plastic?

    Yes, you can use biodegradable solvents and plant-based cleaners as eco-friendly sprays to remove ink from plastic. These natural ink removvers work gently yet effectively, providing green chemical alternatives to harsh products.

    Try organic stain removers like lemon juice mixed with baking soda for sustainable cleaning methods. These environmentally safe solutions protect plastic surfaces while minimizing chemical impact, letting you clean responsibly without compromising on results.

    Conclusion

    By boldly battling bothersome blotches, you’ll brilliantly banish ink from your plastic. With careful cleaning, cautious checking, and consistent courage, you can conquer stubborn stains without causing cracks.

    Remember to rinse and refresh your rescued plastic, preserving its perfection and prolonging its life. So, stay steady, stay smart, and say sayonara to smudges.

    Your sparkling, spotless surfaces will surely satisfy, making maintenance more manageable and more meaningful every time!

  • 7 Easy Steps to Remove Ink From Faux Leather

    7 Easy Steps to Remove Ink From Faux Leather

    To remove ink from faux leather, first identify your material and ink type.

    Then gently blot excess ink without rubbing to avoid spreading.

    Test a mild soap and water solution on a hidden spot before dabbing the stain with it.

    For stubborn ink, carefully use rubbing alcohol, again testing first.

    Rinse with a damp cloth, let it air dry, and apply a conditioner to restore softness.

    Keep following for step-by-step guidance and expert tips.

    How to Identify Your Faux Leather and Ink Type

    identify faux leather ink

    How can you tell what type of faux leather you have and what kind of ink you’re dealing with? Start by checking any manufacturer labels, which often specify whether your faux leather is made from polyurethane or PVC.

    If labels aren’t available, gently test a small, hidden area with a mild cleaning solution to observe how the surface reacts. Faux leather typically has a smooth, uniform texture that can be either matte or glossy, which affects the cleaning methods you should use.

    Next, identify the ink type: water-based ink is usually easier to remove, while permanent ink requires more careful treatment. Knowing whether the ink is water-based or permanent helps you choose the right cleaning approach without damaging the synthetic material.

    Since faux leather is less porous than real leather, harsh chemicals and excessive moisture can cause damage, so it’s essential to match your cleaning methods to both the faux leather type and ink type for the best results.

    Remove Excess Ink Carefully Without Spreading

    You’ll want to blot the ink gently with a soft cloth. Start from the edges and work your way inward so you don’t end up spreading the stain. Just be careful not to rub or scrub—that can actually push the ink deeper into your faux leather.

    Using a small amount of cleaning solution on a soft cloth can help lift the excess ink without soaking the surface too much. Take it slow and steady, and you’ll avoid making the stain worse.

    Blot Ink Gently

    Start by gently blotting the ink stain with a clean, dry white cloth or paper towel to soak up excess ink without spreading it further. Work from the outer edges inward, applying light pressure to lift the ink without pressing it deeper into the faux leather.

    Use a fresh section of the cloth as needed to avoid reapplying ink. Avoid rubbing or scrubbing, which spreads ink and damages the surface. Here’s a quick guide:

    Step Action
    1 Use a clean cloth or paper towel
    2 Blot gently, don’t rub
    3 Start from outer edges of ink stain
    4 Apply light pressure
    5 Change cloth section frequently

    This careful blotting helps remove ink without worsening the stain.

    Avoid Ink Spreading

    Although it’s tempting to rub the ink stain, doing so will only spread it further across your faux leather. To avoid this, you need to remove excess ink carefully without causing more damage. Start by gently blotting the ink rather than scrubbing, as rubbing will make the stain spread. Here’s how you can prevent ink from spreading:

    • Use a clean, dry cloth or paper towel to blot the ink, working from the outer edges toward the center.
    • Avoid scrubbing or rubbing the stained area to keep the ink from smudging.
    • Lift and remove as much ink as possible before applying any cleaning products.
    • If the ink is fresh, lightly dab with a damp cloth to blot excess ink without pushing it deeper.

    Being gentle and patient helps keep the ink from spreading and embedding into the faux leather.

    Use Soft Cloth

    When dealing with ink stains on faux leather, gently blotting with a soft, clean white cloth helps absorb excess ink without causing it to spread. You want to carefully blot the stain, working from the outside inward to stop the ink from expanding to unaffected areas.

    Avoid rubbing or scrubbing, as this only pushes the ink deeper into the faux leather’s surface. Use light, gentle pressure to lift the ink, ensuring the stain stays contained.

    Remember to replace the soft cloth often; a dirty or ink-soaked cloth can reapply the stain or dirt, undoing your progress. By using a soft cloth and blotting carefully, you’ll effectively remove excess ink while protecting the faux leather from further damage or spreading the stain.

    Test Cleaning Solutions Safely on a Hidden Spot

    Before you apply any cleaning solution to the visible areas of your faux leather, test it on a hidden spot to make certain it won’t cause discoloration or damage. This step is essential to protect your item from unwanted effects.

    Use a soft, white cloth or sponge to apply a small amount of the cleaning solution to an inconspicuous hidden area. Then, wait 5 to 10 minutes to observe any changes in color or texture. Avoid using too much solution during testing, as a small amount is enough to evaluate compatibility.

    To test cleaning solutions safely:

    • Apply a small amount on a hidden area
    • Use a soft, white cloth or sponge for testing
    • Wait 5-10 minutes to check for discoloration or surface changes
    • Take photos before and after to compare results

    This method guarantees you won’t risk damaging your faux leather while removing ink stains effectively.

    Dab Ink Stains With Mild Soap and Water

    gentle blotting with soap

    Once you’ve confirmed the cleaning solution won’t harm your faux leather, you can move on to gently tackling the ink stain. Start by mixing a small amount of mild soap, like Woolite®, with water to create a gentle cleaning solution.

    Dampen a soft, white cloth with this soapy water, making sure it’s not overly wet to avoid damaging the faux leather. Carefully blot the ink stain, working from the edges toward the center to prevent the ink from spreading. Remember, don’t rub or scrub, as this can push the ink deeper into the material.

    Rinse the cloth frequently and continue blotting until the ink begins to lift. Once the stain starts to fade, switch to a clean, damp cloth to gently remove any soap residue. This method keeps your faux leather safe while effectively addressing fresh ink stains.

    Remove Stubborn Ink Stains With Alcohol

    When you’re dealing with stubborn ink stains, the right kind of alcohol really makes a difference—usually 70% rubbing alcohol works best. You’ll want to gently dab the stain with a soft cloth, being careful not to rub too hard. Rubbing can actually spread the ink or even damage your faux leather.

    It’s always a good idea to test a small, hidden spot first. That way, you can be sure the alcohol won’t discolor or harm your material before you go all in.

    Choosing The Right Alcohol

    • Use 70% isopropyl alcohol for safe, effective stain removal.
    • Avoid higher concentrations to prevent damage.
    • Test any product on an inconspicuous area before full use.
    • Apply alcohol sparingly with a soft cloth or cotton swab.

    This careful choice guarantees you tackle stubborn stains while preserving your faux leather’s look and feel.

    Application Techniques For Ink

    How exactly should you apply rubbing alcohol to tackle stubborn ink stains on your faux leather? Start by dabbing 70% isopropyl alcohol onto a soft cloth, then gently apply it to the ink stain.

    Use a cleaning technique that works from the outside of the stain inward to avoid spreading the ink. Blot carefully with a small, damp, white cloth, lifting the ink without soaking the material.

    Allow a few seconds for the alcohol to break down the ink before wiping clean. You might need to repeat this application a few times for tough stains. This precise approach guarantees effective ink stain removal while preserving your faux leather’s appearance.

    Safety Precautions And Testing

    Before applying rubbing alcohol to stubborn ink stains on your faux leather, you should always test the solution on a hidden spot first. This patch test guarantees that alcohol-based solutions won’t discolor or damage your material.

    Follow these safety precautions for the best results:

    • Use 70% isopropyl rubbing alcohol applied with a soft cloth or cotton swab.
    • Dab gently; avoid rubbing or scrubbing to prevent spreading the ink or harming the surface.
    • Let the alcohol sit for about 30 seconds to loosen the ink.
    • Wipe with a clean, dry cloth, then rinse the area with a damp cloth to remove residue.

    These steps help protect your faux leather while effectively removing ink stains using alcohol-based solutions.

    How to Rinse and Dry Faux Leather After Cleaning

    After cleaning your faux leather, you’ll want to rinse it thoroughly with a damp, clean cloth to remove any leftover cleaning solution and soap. Use a gentle blotting motion instead of rubbing to avoid spreading the ink or damaging the surface. You might need to repeat this rinsing several times until no soap residue or bluish tint remains on the material.

    Once rinsed, let the faux leather air dry in a well-ventilated area, keeping it away from direct sunlight to prevent discoloration or warping. If you want to speed up drying, use a hair dryer on a warm setting, maintaining a safe distance from the surface to avoid heat damage. By carefully rinsing and drying your faux leather, you’ll preserve its appearance and prepare it for any further care steps.

    Condition Faux Leather to Restore and Protect

    faux leather conditioning tips

    Though cleaning removes visible stains, conditioning your faux leather is essential to restore its moisture and flexibility. This helps prevent stiffness and cracking. Conditioning not only aids in restoring your item but also forms a protective barrier that extends its lifespan.

    To condition effectively, follow these steps:

    Choose a leather-specific conditioner suitable for faux leather and test it on a hidden spot first. Apply the conditioner in thin, circular motions to ensure even absorption. Allow 10-15 minutes for the conditioner to set before buffing with a dry cloth.

    Avoid petroleum-based products, as they can clog pores and damage the material over time.

    Frequently Asked Questions

    Can Ink Stains on Faux Leather Be Completely Removed Without Damage?

    You can sometimes completely remove ink stains on faux leather, but it’s tricky. Using gentle cleaning solvents helps avoid damage, but harsh chemicals might ruin the surface.

    If the stain’s deep, you might need leather repair techniques to restore the finish. To protect your faux leather in the future, focus on stain prevention by treating spills quickly and using protective sprays.

    How Often Should I Clean My Faux Leather to Prevent Ink Stains?

    You might think cleaning your faux leather daily is the best way to prevent ink stains, but that’s not true. The ideal cleaning frequency is every 1 to 2 weeks. This balance keeps dirt from building up and reduces the chance of ink setting in.

    Stick to stain prevention tips like wiping spills promptly and using mild cleaners. Regular faux leather maintenance helps protect the surface without causing damage or excessive wear.

    Are There Specific Brands of Faux Leather More Resistant to Ink Stains?

    Yes, when you look at brand comparisons, you’ll notice some faux leathers offer better stain resistance. Brands like Pleather and Vinyluxe stand out because their coated surfaces prevent ink from soaking in.

    If you want material durability that resists stains, choose leatherette with a PU coating. It’s much tougher against ink than cheaper, uncoated options. So, picking the right brand really boosts your chances of avoiding stubborn ink marks.

    Can DIY Cleaning Damage the Faux Leather’s Texture or Color?

    You’ve got to treat faux leather like a delicate dance partner. One wrong move can leave it bruised. Yes, DIY cleaning can damage its texture or color if you’re too rough or use harsh chemicals.

    Proper leather care means gentle cleaning techniques and careful stain prevention. Always test solutions on hidden spots first to avoid ruining the finish.

    With the right touch, you’ll keep your faux leather smooth and vibrant, not scratched or faded.

    What Should I Do if Ink Stains Reappear After Cleaning?

    If ink stains reappear after cleaning, don’t worry. You should repeat stain removal tips using gentle cleaning tools like a soft cloth and mild solution to lift trapped ink. Make sure to clean deeply without harsh scrubbing to protect faux leather care.

    After cleaning, apply a protective coating to prevent future stains. If the problem persists, consider consulting a professional for advanced treatment or re-dyeing to fully restore your faux leather.

    Conclusion

    Did you know that 70% of faux leather users struggle with ink stains at least once? Don’t worry, you’ve got this! By following these simple steps, you can easily tackle ink stains without damaging your faux leather.

    Remember to test solutions first, gently dab the stain, and condition your material afterward. With a little care, your faux leather will look fresh and protected, keeping it in great shape for years to come.

  • How to Remove Ink Stains Quickly and Easily

    How to Remove Ink Stains Quickly and Easily

    To remove ink stains quickly and easily, act immediately to prevent ink from setting into fabric. Blot fresh stains gently with rubbing alcohol or hand sanitizer, avoiding rubbing to stop spreading.

    For dried ink, soak the fabric in stain remover or a gentle solution suited to your fabric type.

    Always test cleaners on hidden areas first.

    If needed, repeat treatment or seek professional help for delicate fabrics or stubborn stains.

    Keep going, and you’ll discover more tips to protect your clothes effectively.

    Why You Should Act Fast to Remove Ink Stains

    act quickly for stain removal

    Why should you act fast when dealing with ink stains? Because ink stains can set into fabric within minutes, making prompt stain removal essential. When you act fast, you prevent setting, stopping the ink from drying and penetrating deeper into fibers.

    Immediate treatment increases your chances of completely eliminating the stain without leaving a trace. Your quick response not only boosts the effectiveness of fabric care but also reduces the need for harsh chemicals or professional cleaning.

    The longer you wait, the more stubborn the stain becomes, risking permanent damage to the fabric’s appearance and value. By addressing ink stains right away, you save time, effort, and avoid costly treatments.

    Choosing the Best Cleaning Solutions for Ink Stains

    Choosing the right cleaning solution can make all the difference when tackling ink stains. For successful ink stain removal, you need to match the solution to the ink type and fabric. Here’s what to take into account:

    Selecting the proper cleaning solution is key to effectively removing ink stains from different fabrics.

    1. Rubbing alcohol and hand sanitizer: These contain at least 60% alcohol and act as effective solvents for dissolving water-based ink and ballpoint ink stains quickly.
    2. Commercial stain removers: Products like OxiClean are safe, colorfast, and suitable for most fabrics. They offer reliable results without harsh damage.
    3. Testing fabric first: Always test any solvent or stain remover on an inconspicuous area to avoid color bleeding or fabric damage.

    How to Remove Ink Stains From Common Fabrics

    treat blot soak test

    Once you’ve picked the right cleaning solution, you can focus on treating the fabric itself. For common fabrics like cotton, denim, and canvas, quick and repeated stain removal treatments work best.

    Apply rubbing alcohol or Tide Ultra Stain Release directly on the ink stains, then blot gently with a white cloth soaked in water. For dried ink on denim, soak the fabric in milk before washing.

    Cotton responds well to a paste of vinegar and baking soda for stubborn marks. Always test the treatment on a hidden fabric area first to avoid damage.

    Fabric Treatment
    Cotton Rubbing alcohol, vinegar paste
    Denim Milk soak, alcohol-based product
    Canvas Tide Ultra Stain Release
    All Blot with white cloth and water

    Prompt action and proper treatment help you effectively remove ink stains from common fabrics.

    How to Remove Ink Stains From Delicate and Textured Fabrics

    Although delicate and textured fabrics demand extra care, you can still tackle ink stains effectively by using gentle blotting and appropriate cleaning solutions. When dealing with delicate fabrics like silk or wool, avoid aggressive rubbing to prevent damage. Instead, gently blot the stain with cold water and a white cloth.

    For textured fabrics such as velvet, preserving the texture is key, so soak the area in a mixture of dish soap, white vinegar, and water, then rinse carefully.

    Follow these steps for effective stain removal:

    1. Always test any solvent, like rubbing alcohol or specialized stain removers, on a hidden spot to ensure it won’t harm the fabric.
    2. Use soft dabbing motions rather than scrubbing to lift the ink without damaging delicate or textured fabrics.
    3. If unsure about fabric care, seek professional cleaning services to safely remove stubborn ink stains.

    This approach guarantees gentle removal without compromising your fabric’s integrity.

    How to Remove Fresh vs. Dried Ink Stains

    act quickly remove stains

    Because fresh ink stains haven’t set into the fabric fibers yet, you can often remove them with quick, gentle action like blotting or applying alcohol. Acting fast is key; quick action prevents the ink from penetrating deeper, making stain removal much easier.

    Fresh ink stains can be easily removed with quick, gentle blotting or alcohol before they set into fabric fibers.

    For fresh ink stains, avoid rubbing, which can spread the ink and embed it further into the fibers. Instead, gently blot the area to lift the ink.

    Dried ink stains, however, are tougher to tackle. Since the ink has already set in the fabric fibers, you’ll likely need more intensive treatment. Start by gently scraping or loosening the dried ink to improve solvent penetration.

    Soaking the fabric in a stain remover or solvent can help break down the ink more effectively. Multiple applications might be necessary for complete removal. Remember, the longer you wait, the harder dried ink stains become to eliminate, so prompt stain removal is always your best strategy.

    Removing Ink Stains With Rubbing Alcohol and Other Solvents

    You’ll want to pick solvents like rubbing alcohol because they break down ink really well without harming your fabric. It’s always a good idea to test the solvent on a hidden spot first. Then, when you apply it, dab gently instead of rubbing. This way, you can lift the stain quickly and avoid spreading it or pushing it deeper into the fabric.

    Choosing Effective Solvents

    How do you choose the best solvent to tackle stubborn ink stains? Selecting the right solvent is vital for effective removal without harming the fabric. Here’s what you need to take into account:

    1. Effectiveness: Rubbing alcohol is a top solvent because it breaks down the dye and pigment molecules in the ink stain efficiently.
    2. Fabric Safety: Always test the solvent on a hidden spot first to make sure it won’t discolor or damage the fabric.
    3. Alternatives: Consumer dry cleaning solvents and hairspray can help, but use them cautiously and test before applying.

    Proper Application Techniques

    Once you’ve selected a suitable solvent like rubbing alcohol, applying it correctly can make all the difference in removing ink stains effectively. First, test on an inconspicuous spot to verify the fabric won’t discolor.

    Next, hold the fabric taut over a jar or bowl and apply directly by dripping rubbing alcohol onto the stain. You can also gently dab with a cotton swab soaked in the solvent, avoiding rubbing to prevent spreading.

    Allow the solvent to sit for about five minutes, letting it break down the ink. Then, blot with a clean cloth to absorb the dissolved ink.

    Finally, rinse with cold water to dilute any remaining ink and prevent the stain from setting. Following these steps ensures efficient ink stain removal without damaging your fabric.

    How to Avoid Setting Ink Stains When Washing and Drying

    Before you toss ink-stained clothes into the dryer, make sure the stain is fully treated and noticeably faded. Heat from drying can permanently set ink stains, undoing all your stain removal efforts. To avoid this, follow these steps carefully:

    1. Always rinse and wash ink-stained fabrics in cold water. Hot water causes ink to bind tighter to fibers, making the stain harder to remove.
    2. Ensure the stain is thoroughly pretreated before washing. Check that the stain has visibly faded before moving on to drying.
    3. Opt for air drying instead of using a dryer. Air drying prevents heat from setting any remaining ink, giving you a chance to re-treat the stain if needed.

    Tips for Removing Ink From Jeans and Shirts

    When ink finds its way onto your jeans or shirt, acting quickly can make all the difference in removing the stain effectively. First, gently blot the excess ink with a clean cloth to stop it from spreading or setting deeper into the fabric.

    Act swiftly to blot excess ink and prevent stains from spreading or settling into your fabric.

    Before using any remover, test rubbing alcohol or a stain remover like Tide Ultra Stain Release on a hidden spot to verify your clothing won’t fade. Apply a small amount of rubbing alcohol or hand sanitizer directly to the stained area and dab gently, letting it sit for about five minutes.

    This treatment helps break down the ink stains. Afterward, rinse the fabric with cold water to dilute and remove the loosened ink particles. Finally, wash your jeans or shirt on the hottest cycle safe for the material.

    Check if the stain has completely disappeared before drying to keep your clothing clean and ink-free. Acting quickly is key to successful ink stain removal.

    When to Use Professional Cleaning for Ink Stains

    How do you know if an ink stain needs professional cleaning? Sometimes, DIY methods just won’t cut it, especially with certain fabrics and stubborn stains. Here are three key situations when you should opt for expert treatment:

    1. Delicate Fabrics and Valuable Items: If the stain is on silk, wool, suede, or any valuable item, professional cleaning is safer. It helps avoid damage and ensures thorough removal.
    2. Set-In Stains and Industrial Inks: Old, dried ink or industrial inks often resist home remedies. Professionals have specialized solutions that tackle these tough stains effectively.
    3. Failed Home Attempts: If you’ve tried multiple DIY methods without success or the stain worsens, it’s time to seek expert help. This prevents permanent damage.

    Choosing professional cleaning in these scenarios guarantees the best outcome. It protects your fabrics and saves you time and frustration.

    Troubleshooting Persistent Ink Stains: Causes and Fixes

    Although ink stains can be frustratingly stubborn, understanding the common causes behind their persistence can help you tackle them more effectively. Persistent stains often occur when removal methods are insufficient or inappropriate, allowing set-in ink to bond deeply with fabric fibers.

    Heat exposure, like hot water or dryers, accelerates stain setting, so timely action is critical. Older or dried ink stains are tougher because the ink’s resin or fabric dyes have strongly adhered, requiring more aggressive cleaning solutions.

    Avoid using ineffective solvents such as hairspray or plain water, as they can leave residual ink and worsen the problem. Instead, rely on repeated applications of proper stain removal products like rubbing alcohol or oxygen-based cleaners to break down stubborn stains.

    Frequently Asked Questions

    Can Ink Stains Be Removed From Leather or Non-Fabric Materials?

    Yes, you can remove ink stains from leather and non-fabric materials, but you need to use the right leather cleaning and non-fabric methods. For leather stain removal, apply gentle leather care tips like using a lemon juice and cream of tartar paste sparingly.

    For non-fabric cleaning, try rubbing alcohol or commercial non-fabric solutions, but always test first. Regular leather maintenance helps prevent damage and keeps your items looking great.

    Are There Any Natural Alternatives to Chemical Solvents for Ink Removal?

    When life gives you ink stains, turn to nature’s toolbox. You can use plant-based solvents like olive oil techniques combined with baking soda solutions to gently lift stains.

    Lemon juice remedies and vinegar stain removal work wonders with their natural acidity. Herbal extracts act as subtle helpers, enhancing natural dye removal without harsh chemicals.

    These natural alternatives keep your fabrics safe while tackling those stubborn ink marks effectively and gently.

    How Long Can Ink Stains Remain Before They Become Impossible to Remove?

    Ink stain history shows that common ink types start bonding with fabric fibers quickly, making removal tougher over time. You’ll find that after 24 to 48 hours, stain permanence spikes due to deeper stain absorption and color fading.

    The older the ink stain, the more removal challenges you’ll face, as age-related difficulty increases. Acting fast is key; once an ink stain sets beyond two days, it often becomes impossible to fully erase without professional help.

    Does Ink Stain Removal Differ Between Ballpoint and Gel Pens?

    Yes, ink stain removal differs between ballpoint pen and gel ink because of stain penetration and ink drying. Ballpoint pen ink is oil-based, so you’ll need solvents like rubbing alcohol for effective removal.

    Gel ink, being water-based, responds better to gentle aqueous techniques. Stain color also matters. Darker stains may require multiple treatments.

    Knowing your pen types helps you pick the right removal techniques and act quickly before ink drying sets the stain.

    Can Ink Stains Transfer to Other Clothes During Washing?

    Yes, ink stains can transfer to other clothes during washing due to fabric transfer. If you don’t take washing precautions, the stain setting can worsen, causing color bleeding and fabric damage.

    Detergent effectiveness alone isn’t enough if the stain remains visible before washing. To prevent this, pre-treat the ink thoroughly and wash stained items separately or with similar colors. This minimizes fabric transfer and keeps your clothes safe.

    Conclusion

    Ink stains can feel like unwelcome shadows on your favorite clothes, but with quick action and the right approach, you can chase them away before they settle in. Remember, treating stains promptly and choosing the right method is your secret weapon.

    Whether fresh or stubborn, delicate or durable fabric, you’ve got the power to restore your garments’ spotless glow. Don’t let ink win. Take charge, and watch your clothes shine like new again.

  • How to Refill an Ink Stamp in 7 Easy Steps

    How to Refill an Ink Stamp in 7 Easy Steps

    To refill your ink stamp, start by locking it to stabilize and access the ink pad safely.

    Gently remove the ink pad, making sure not to damage it, then apply 10 to 20 drops of ink evenly using a dropper.

    Let the ink soak for 15 to 30 minutes or longer for best results.

    Reinsert and lock the pad securely, then test the stamp on scrap paper.

    Follow these steps, and you’ll quickly restore crisp, clear impressions while avoiding common issues.

    Lock the Stamp to Access the Ink Pad for Refill

    lock stamp for refilling

    Before you add ink, lock the stamp by pressing it down to its first position to release the internal mechanism. This step is crucial because locking the stamp stabilizes the ink pad, making it easier to refill without causing misalignment or accidental movement.

    Many self-inking stamps come with a lock feature specifically designed to prevent the ink pad from sliding out prematurely. When you lock the stamp, you ensure the internal parts stay secure and accessible, so you can refill the ink precisely where it’s needed.

    Follow the manufacturer’s instructions carefully to properly lock and unlock the stamp before and after refilling. Doing this prevents damage and keeps the refill process smooth.

    Carefully Remove the Ink Pad Without Damage

    When you’re ready to remove the ink pad, gently grasp its edges and lift it straight out to prevent any damage to the pad or the surrounding mechanism. Before you remove the ink pad, check if there are any clips or locks holding it in place. Release them slowly and carefully to avoid snapping or bending.

    Use both hands to support the ink pad evenly during extraction. This helps prevent bending or warping. Never pull the pad at an angle, as this can cause snagging or tearing from the stamp housing.

    Once removed, place the ink pad on a clean, dry surface to avoid contamination or unwanted ink spills during maintenance. Taking these cautious steps ensures you remove the ink pad without damage, making the refill process smoother and preserving the stamp’s longevity.

    Apply the Right Amount of Ink to the Ink Pad

    control ink application carefully

    Although it might be tempting to add a lot of ink, you should apply only 10 to 20 drops to the ink pad to guarantee proper saturation without overfilling. Using a dropper or a gentle squeeze bottle helps you control the amount of ink precisely, preventing excess that could lead to smudging or leakage.

    When you refill the ink, distribute the drops evenly across the pad to assure consistent impressions every time you stamp. Avoid pouring ink directly and heavily in one spot, as this causes uneven saturation and messy results.

    Let Ink Soak Fully Before Reassembly

    After you apply the ink, give it some time—let it soak into the pad for at least 15 to 30 minutes before you put everything back together. This waiting period really helps make sure the ink absorbs properly. It also prevents any damage from overfilling and keeps the ink spreading evenly.

    If you can, try to leave it soaking overnight. That way, you get the best possible results.

    Ink Absorption Time

    How long should you wait for the ink to fully absorb before putting your stamp back together? For self-inking stamps, proper ink absorption is crucial for sharp, consistent impressions.

    After you refill ink onto the stamp pad, allow at least 15 to 30 minutes for the ink to soak in evenly. Some inks designed for these stamps may require up to an hour or overnight for complete absorption.

    Avoid using the stamp immediately after applying ink, as this can cause uneven distribution and potential leakage. By letting the ink fully soak, you ensure the pad is properly saturated, which helps maintain clean, clear stamping results every time.

    Patience during this ink absorption time makes a big difference in your stamp’s performance.

    Prevent Overfilling Damage

    When you refill your stamp, resist the urge to add too much ink at once. Instead, apply small drops gradually to prevent overflow. Overfilling leads to excess ink, causing damage like smudges or leaks.

    Always let the ink soak fully, ideally 10-15 minutes or overnight, before reassembling. This prevents uneven printing and protects internal parts from damage.

    Risk Cause Prevention
    Ink Leakage Overfilling Add ink gradually
    Smudged Prints Excess ink Wait for full absorption
    Stamp Damage Reassembly too soon Let ink soak completely

    Following these steps keeps your stamp working smoothly and extends its lifespan. Be patient; letting ink soak fully is key to avoiding overfilling damage.

    Reinsert the Ink Pad and Lock the Stamp

    securely lock ink pad

    Once you’ve refilled the ink pad with the right ink, carefully slide it back into the stamp body, making sure it’s properly aligned. When you reinsert the ink pad, push it down firmly until you hear a click or feel it lock into place, depending on your stamp model. This ensures the pad is securely seated and flush with the stamp surface, which is vital to prevent uneven impressions.

    If your stamp features a locking mechanism, be sure to engage it to hold the ink pad firmly during use. This lock keeps the pad stable and avoids any shifting that could affect your stamping quality. Taking these steps guarantees that your ink pad stays in position, ready for clear, consistent impressions every time you stamp.

    Test the Ink Stamp on Scrap Paper for Clarity

    Before you start using your freshly refilled stamp, test it on scrap paper to check the clarity and consistency of the impression. Grab a piece of plain, uncoated scrap paper. This will give you the most accurate view of how the ink covers the surface.

    Press your stamp firmly onto the paper and examine the impression for sharpness and even ink distribution. Make multiple test impressions to catch any areas that might be faint or over-inked. If the impression isn’t clear or looks uneven, add a few more drops of ink to the pad and test again.

    Also, verify you clean the stamp surface before testing to avoid any smudges or ink buildup that could affect the impression quality. By carefully testing on scrap paper, you’ll ensure your stamp delivers crisp, consistent impressions every time you use it.

    Troubleshoot Common Ink Stamp Refilling Problems

    Although refilling your ink stamp is straightforward, you might encounter some common issues like faint impressions or ink smudging. If your stamp produces faint or inconsistent marks after refilling, make sure the ink cartridge has fully absorbed into the pad. Sometimes it just needs more time.

    Refilling your ink stamp is easy, but faint marks may appear if the ink hasn’t fully absorbed yet.

    Avoid overfilling during refilling; adding too much ink at once can cause ink leakage or smudging. Instead, add drops gradually and test frequently. Also, use only compatible, high-quality ink to prevent poor ink distribution and damage to the stamp’s internal parts.

    Before refilling, clean off any dust, lint, or dried ink residue from the stamp and pad, as these can interfere with ink transfer. If you notice ink pooling or leaking around the edges, double-check that the ink pad or cartridge is seated correctly and the stamp is properly reassembled.

    Following these steps will help you avoid common refilling problems and keep your stamp working smoothly.

    Frequently Asked Questions

    What Type of Ink Is Best for Different Stamp Materials?

    You’ll want to match ink to your stamp material for the best results. For rubber stamps, oil-based inks work great, giving vibrant, lasting prints.

    Self-inking or polymer stamps need water-based inks to dry quickly and avoid damage. Always follow ink compatibility tips and clean your stamp pad regularly to prevent clogging.

    If you’re feeling crafty, try DIY ink formulas, but test first to avoid harm. Stamp pad cleaning keeps your impressions sharp and consistent.

    How Often Should I Refill My Ink Stamp?

    You should adjust your refill frequency based on stamp maintenance and how quickly ink drying affects impression quality. If your impressions start fading or drying out, it’s time to refill.

    High-use stamps might need re-inking every few days or weeks, while occasional use could last longer. Keep an eye on your stamp’s clarity and avoid over-inking to prevent smudging or damage.

    Regular checks help you maintain best performance.

    Can I Use Colored Inks in My Stamp?

    Yes, you can use colored inks in your stamp, but make sure the ink color options match your stamp’s ink type. Colored inks can bring fresh stamp design ideas to life, enhancing your branding or decor.

    Look for alternative ink sources that specify compatibility with your stamp to avoid smudging or damage. Always follow the manufacturer’s guidelines to keep your stamp working smoothly and your impressions crisp.

    How Do I Store My Ink Stamp to Prevent Drying Out?

    To prevent your ink stamp from drying out, store it in a cool, dry place away from direct sunlight. Keep it upright or flat to guarantee even ink distribution, which helps with stamp longevity.

    Always cover or seal your stamp when not in use to limit air exposure. Regular stamp cleaning also ensures ink color selection stays vibrant and prevents clogs.

    Avoid extreme temperatures, and check ink levels frequently to maintain moisture and performance.

    Is It Safe to Refill Ink Stamps for Children to Use?

    It’s safe to refill ink stamps for children only if you prioritize child safety by using non-toxic inks and ensuring age appropriateness. You shouldn’t let kids handle refilling themselves because of the risks involved.

    Always supervise closely during any stamping activities, and store ink refills securely out of their reach. This way, you protect them from accidental ingestion or spills while still letting them enjoy creative fun safely.

    Conclusion

    You’ve just mastered the ancient art of ink stamp refilling. Who knew such drama came in such a tiny pad? Now, instead of buying a new stamp every time, you’re basically an ink wizard, saving trees and wallets alike.

    Just remember, if your stamp smears like modern art or refuses to cooperate, it’s not you. It’s the ink’s dramatic personality. Keep at it, and soon you’ll reign supreme in the kingdom of perfectly stamped documents!

  • How to Refill Ink in Trodat Printy 7913 in 10 Easy Steps

    How to Refill Ink in Trodat Printy 7913 in 10 Easy Steps

    To refill ink in your Trodat Printy 7913, first unlock the stamp by pressing the side buttons and lifting the top cover.

    Remove the old ink pad gently, avoiding force.

    Use the correct Trodat ink pad and insert it properly with the ink side down, pushing until it clicks into place.

    Add 3-4 drops of Trodat ink evenly, then test on scrap paper.

    Secure the ink pad and maintain your stamp to guarantee smooth use.

    Keep following for more detailed tips and tricks.

    Locate and Access the Ink Pad Compartment on Your Trodat Printy 7913

    access ink pad compartment carefully

    Before you can refill the ink in your Trodat Printy 7913, you need to locate and access the ink pad compartment. The ink pad compartment is found beneath the stamp’s top cover.

    To refill your Trodat Printy 7913, first find and open the ink pad compartment under the top cover.

    To open it, press and hold the locking buttons on both sides of the stamp firmly. While holding the buttons, lift the top cover carefully to reveal the ink pad inside. Place your stamp on a flat surface before doing this to avoid any damage.

    Once the compartment is open, you’ll see the ink pad resting in its designated slot. Gently lift or slide out the old ink pad without forcing it. Being cautious here ensures you don’t harm the stamp or the ink pad holder.

    Now that you’ve accessed the ink pad compartment, you’re ready for the next steps to refill or replace the ink pad and keep your Trodat Printy 7913 stamping clearly.

    Gather Supplies and Prepare Your Workspace for Ink Pad Replacement

    Before you start, make sure you have the correct Trodat ink pad for the Printy 7913. You’ll also want some small tools like screwdrivers or tweezers on hand.

    Next, set up a clean, flat workspace that’s free of dust—it’ll make the process much easier. Don’t forget to wear disposable gloves to keep your hands ink-free.

    Finally, keep a scrap piece of paper nearby so you can test the stamp after you’ve finished refilling.

    Essential Supplies Checklist

    While gathering a new Trodat ink pad compatible with your Printy 7913 model, make sure you prepare a clean, flat workspace free from dust and debris to avoid contamination. Your necessary supplies checklist should include the new ink pad, gloves or paper towels to keep your hands clean, and a small cloth or extra paper towels for wiping up any ink spills.

    Good lighting is also crucial so you can clearly see the ink pad and follow each step accurately. Having these items ready guarantees a smooth and mess-free ink pad replacement.

    Workspace Setup Tips

    Gathering your supplies is just the start; setting up your workspace correctly makes the ink pad replacement much easier and cleaner. Choose a clean, flat workspace with good lighting to improve visibility and ease handling small parts.

    Protect your surface with newspaper or a disposable cover to avoid ink stains. Clear away clutter so you won’t lose any tiny components during the process. A well-organized workspace helps you focus and work efficiently.

    Keep gloves or paper towels nearby to quickly manage any ink spills or safely handle the ink pad. This thoughtful setup guarantees a smooth, mess-free experience while replacing the ink pad in your Trodat Printy 7913.

    Taking these steps will save time and prevent frustration during the refill process.

    Safety Precautions

    How can you guarantee a smooth and safe ink pad replacement for your Trodat Printy 7913? Start by following essential safety precautions. Always work on a clean, flat surface to avoid ink spills and assure accurate handling.

    Wear disposable gloves to protect your skin from ink stains and keep things tidy. Gather all necessary supplies, including the replacement ink pad, before you begin to prevent interruptions.

    Make certain your workspace is well-ventilated to minimize inhaling any ink fumes. Finally, cover surrounding areas with paper or cloth to protect surfaces from accidental drips.

    Unlock Your Printy and Press Down Slightly to Access the Ink Pad

    Before you can refill the ink pad, you’ll need to open your Trodat Printy 7913 by pressing it down about 5mm while holding both locking buttons on either side. This action releases the internal mechanism, allowing the stamp to move into a slightly lifted position.

    Press down 5mm while holding both side buttons to unlock and lift your Trodat Printy 7913 for ink pad access.

    Once you release the buttons, the stamp locks in place, with the die lifted just enough to reveal the ink pad inside. Make certain the stamp is correctly positioned so the die rests just off the surface, preventing any accidental stamping.

    This careful unlocking and pressing step is essential for safely accessing the ink pad without damaging the stamp. Now that the ink pad is exposed, you’re ready for the next step of removing it safely to prepare for refilling.

    Taking these steps guarantees your Trodat Printy 7913 stays in great working order while making the refilling process smooth and efficient.

    Remove the Old Ink Pad Safely and Cleanly

    remove ink pad safely

    First, open your Printy 7913 by pressing the locking buttons on both sides and gently lifting the top cover. Then, carefully remove the old ink pad—make sure to handle it only by the edges to avoid any ink spills. This way, you keep the process clean and safe before moving on to cleaning and refilling.

    Unlocking The Printy

    Though unlocking the Printy might seem tricky at first, you can easily remove the old ink pad by pressing the stamp down about 5mm to release the latch. To unlock the ink pad compartment, hold both locking buttons on either side of the stamp firmly.

    This unlocking action disengages the pad, allowing you to access it safely. Be careful not to force anything to avoid damaging the internal parts. Once unlocked, take a moment to check and clean the area inside the stamp using a clean cloth or tissue to remove any residual ink or dust.

    Proper unlocking and cleaning ensure a smooth ink pad replacement and help maintain your Trodat Printy 7913’s performance over time.

    Removing The Ink Pad

    Once you’ve opened the Printy 7913, gently push it down slightly to release the locking mechanism. Hold the sides of your Trodat self-inking stamp and carefully pull out the old ink pad. Doing this gently helps prevent damage to the stamp and avoids ink spills.

    After removing the used ink pad, dispose of it properly to keep your workspace clean. Use a soft cloth or tissue to wipe away any remaining ink or dust inside the stamp housing. Ensuring the compartment is clean and free of lint will help your new ink pad fit perfectly and work efficiently.

    Now, you’re ready to insert your new ink pad and continue using your Trodat stamp smoothly.

    Choose the Right Replacement Ink Pad for Your Trodat Printy 7913

    When replacing the ink pad in your Trodat Printy 7913, make certain you pick one that’s specifically designed for this model to guarantee a perfect fit and smooth operation. Using genuine Trodat replacement ink pads is essential to maintain your stamp’s peak performance and avoid damage.

    Always check the size and shape of the ink pad to match the Printy 7913’s designated ink compartment precisely. Avoid generic or incompatible pads that might cause leaks or poor stamping results.

    Also, verify that the ink pad is fresh and unused for the best re-inking experience. You can confirm compatibility by consulting the product specifications or packaging, which should clearly state if the ink pad fits your Trodat Printy 7913.

    Choosing the right ink pads not only extends your stamp’s lifespan but also guarantees consistent, clear impressions every time you stamp.

    Insert and Align the New Ink Pad in Your Trodat Printy 7913

    align and insert carefully

    To insert the new ink pad into your Trodat Printy 7913, carefully align its edges with the designated slots inside the stamp’s ink compartment. Make certain the ink side of the pad faces downward, toward the stamping surface, so the ink transfers properly.

    Gently push the ink pad into place until it clicks or sits flush, indicating it’s properly aligned. This step is vital to guarantee even ink distribution and prevent smudging when stamping. Check that the pad is fully seated and evenly positioned within the compartment.

    While ink cartridges differ from ink pads, both require precise placement for peak performance. If the ink pad isn’t aligned correctly, your stamp won’t produce clear impressions, even if you’ve used the right ink cartridges.

    Taking the time to position the new ink pad properly in your Trodat Printy 7913 guarantees consistent, crisp stamping results every time.

    Securely Lock the Ink Pad in Your Trodat Printy 7913

    Although you’ve already inserted the ink pad, you need to press the Trodat Printy 7913 down about 5mm to engage the locking mechanism securely. Doing this guarantees the ink pad snaps firmly into place and won’t shift during use.

    Press the Trodat Printy 7913 down 5mm to lock the ink pad securely and prevent shifting during use.

    As you press down, make sure the die is slightly off the surface to avoid any damage while locking. Once you release the printy, listen and feel for the lock clicking into position. This confirms you’ve securely locked the ink pad in your Trodat Printy 7913.

    Check that the ink pad is fully seated and stable, holding it tightly without any wobble. If it moves, repeat the pressing step until it locks properly.

    Securing the ink pad prevents leaks and misprints, keeping your stamping precise and neat every time you use it. Taking these steps guarantees your stamp functions smoothly and lasts longer.

    Test Ink Coverage on Scrap Paper

    After securing the ink pad firmly in your Trodat Printy 7913, it’s important to check the ink coverage before you start stamping your projects. To test ink coverage, press your stamp onto a clean, blank scrap piece of paper with the logo facing away so you can clearly see the ink transfer.

    Apply a light touch to avoid over-inking, which can cause smudges or uneven impressions. Check if the print is dark and consistent; if it looks faint or patchy, add ink gradually to the pad.

    Repeat this process, testing on new scrap paper each time, until your stamp produces a clear, crisp impression. This simple step guarantees your stamp works perfectly without ruining your actual project materials, saving time and frustration.

    Always test ink coverage carefully to get professional-looking results from your Trodat Printy 7913.

    Troubleshoot Ink Pad Removal and Insertion Problems

    When you press down about 5mm and release the locking buttons, you’ll find it easier to remove the ink pad from your Trodat Printy 7913. Proper ink pad removal is key to avoid damage and ensure smooth refilling. If the pad resists, don’t force it. Try these steps:

    1. Confirm you’re pressing the “Click out” button at the stamp’s front center to unlock the ink pad correctly.
    2. If the pad won’t slide out easily, gently wiggle it or use a plastic tool to loosen it without harming the mechanism.
    3. Avoid excessive pressure to prevent breaking the locking mechanism or internal parts.
    4. When inserting the new pad, make sure it’s fully removed, aligned, and seated properly to avoid misplacement or poor sealing.

    Following these tips makes ink pad removal and insertion hassle-free, keeping your Trodat Printy 7913 working perfectly.

    Maintain Your Trodat Printy to Extend Ink Pad Life

    To keep your Trodat Printy 7913 working smoothly, make sure to apply ink carefully—because too much can cause leaks and damage the pad. Also, always store your stamp in a cool, dry place. This helps prevent the ink from drying out. Following these simple steps will help you get the most life from your ink pad.

    Proper Ink Application

    How often you apply ink to your Trodat Printy 7913 can make a big difference in the quality and longevity of your stamp’s impressions. Proper ink application ensures your pad stays effective and your stamp crisp. Follow these steps:

    1. Apply 3-4 evenly spaced drops of Trodat ink onto the center of the pad to guarantee uniform coverage.
    2. Avoid over-saturating the pad, as too much ink causes smudging and wears it out faster.
    3. Use only Trodat-branded ink designed for the Printy 7913 to protect and optimize performance.
    4. Let the ink fully absorb into the pad before reassembling to maintain consistent impression quality.

    Regularly check your pad’s condition and re-ink promptly when your impressions start to fade.

    Stamp Storage Tips

    Proper ink application keeps your Trodat Printy 7913 producing sharp impressions, but storing it correctly plays a big role in preserving that quality over time. To follow effective stamp storage tips, always store your stamp in a cool, dry place to prevent the ink pad from drying out prematurely.

    Keep it upright when not in use; this helps distribute ink evenly and avoids leaks. Avoid exposing the stamp to direct sunlight or extreme temperatures, as these can degrade the ink quality.

    Regularly clean the stamp surface to remove dust and debris, which can contaminate the pad. Only re-ink your pad when impressions start to fade, extending the ink pad’s lifespan and ensuring consistent, clear stamping every time.

    Frequently Asked Questions

    How Long Does a Trodat Printy 7913 Ink Pad Typically Last?

    You can expect the ink longevity of a Trodat Printy 7913 ink pad to be around 10,000 to 15,000 impressions under normal use. If you use it heavily every day, the ink pad might last closer to 5,000 impressions.

    With lighter use, it can easily stretch over several months. Keeping an eye on fading impressions and re-inking promptly helps maximize the ink longevity and guarantees your stamp always looks sharp.

    Can I Use Third-Party Ink Pads With My Trodat Printy 7913?

    Sure, you *could* use third-party ink pads with your Trodat Printy 7913 if you enjoy uneven prints, voided warranties, and the thrill of potential stamp damage. Ink compatibility isn’t just a suggestion; it’s essential.

    Trodat designs their ink pads to fit perfectly and work smoothly. So, if you want reliable, crisp stamps and a happy Printy, stick with original Trodat ink pads. Your stamp will thank you.

    What Should I Do if My Stamp Image Is Blurry After Refilling?

    If your stamp image is blurry after refilling, you should first check the image quality by cleaning the stamp surface and die to remove any dust or dried ink. Make sure the ink pad is properly seated and not overloaded with ink, as too much causes smudging.

    Let the ink fully absorb and dry before using the stamp again. These steps will help you restore crisp, clear impressions.

    Is It Safe to Refill the Ink Directly Without Replacing the Pad?

    Refilling ink directly is like pouring water into a sponge already soaked. You’re inviting trouble. It’s not safe because refill risks include uneven ink distribution, potential damage, and ink leakage.

    You could clog the stamp mechanism or even void your warranty. Instead, replace the ink pad to keep your stamp crisp and long-lasting. Taking shortcuts might seem easy, but it’s a gamble that could cost you quality and lifespan.

    Where Can I Buy Official Trodat Printy 7913 Ink Pads?

    You can buy official Trodat Printy 7913 ink pads from Trodat’s website or authorized online retailers to confirm ink compatibility. Many office supply stores and stamping specialty shops also stock genuine replacement pads.

    For convenience, check trusted e-commerce platforms like Amazon or eBay, but make sure the seller is an authorized distributor. Sticking to original ink pads guarantees the best performance and prevents damaging your stamp with incompatible ink.

    Conclusion

    Refilling your Trodat Printy 7913 ink pad isn’t just a task—it’s a game-changer! With these simple steps, you’ll transform your stamp from a fading memory into a bold, ink-slinging machine that never quits.

    Say goodbye to smudges and faint imprints forever! You’ll feel like a stamping superhero, conquering every document with perfect clarity.

    Trust me, once you master this, you’ll wonder how you ever lived without it!