Author: admin@glaciertattoo.com

  • How Do You Refill a Stamp With Ink in 7 Easy Steps?

    How Do You Refill a Stamp With Ink in 7 Easy Steps?

    To refill your stamp with ink in seven easy steps, first gather your materials and set up a clean workspace.

    Identify your stamp type and the correct ink needed.

    Release and remove the ink pad or cartridge, then apply ink gradually without overfilling.

    Let the ink soak in before reinserting the pad securely.

    Finally, test the stamp and clean any excess ink to maintain clarity.

    Follow these basics, and you’ll soon master stamp care and clear impressions.

    Gather Materials and Set Up a Clean Workspace

    prepare workspace before refilling

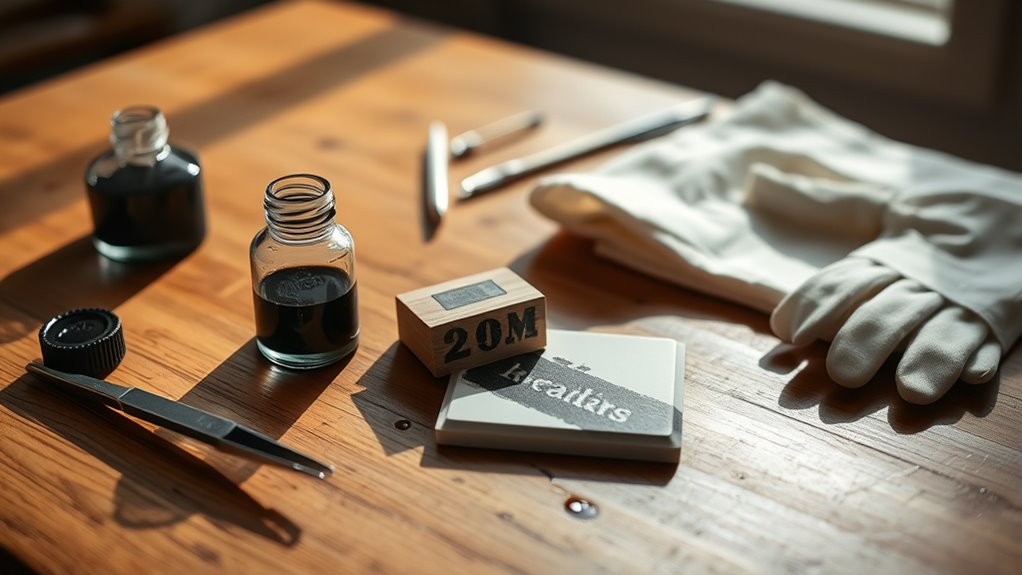
    Where should you begin when refilling a stamp with ink? Start by gathering all the materials you’ll need, including your stamp, the correct ink refill, and a stamp pad if applicable.

    Before you get started, set up a clean workspace in a well-lit, flat area. This helps you avoid mistakes and keeps your stamp pad and refill safe from dust or debris that could ruin your impression quality. Place paper towels or a cloth under the stamp to protect your surface from spills.

    Organize your supplies neatly and clear distractions to keep the process smooth and efficient. Having everything at hand means you won’t be scrambling mid-refill. Remember, a tidy, well-prepared area is key to successful stamp maintenance and clean ink application. Taking these steps upfront saves time and ensures your stamp works perfectly after the refill.

    Identify Your Stamp Type and Ink Requirements

    Before you start refilling, it’s a good idea to figure out whether your stamp is self-inking, pre-inked, or the traditional kind. Each one needs a slightly different approach.

    You should also check the manufacturer’s guidelines to make sure you’re using the right type and color of ink for your specific model.

    Knowing exactly where the ink pad or cartridge sits will help you refill it correctly and avoid any damage.

    Stamp Types Overview

    How do you know which ink to use when refilling your stamp? It all starts with identifying your stamp type. Self-inking stamps usually require water-based refill ink, while pre-inked stamps need oil-based ink made for their specific reservoirs.

    Rubber stamps often use separate ink pads that can be re-inked. Using the wrong ink can damage your stamp or ruin the impression quality, so it’s essential to check the manufacturer’s recommendations.

    Stamp Type Ink Type Needed
    Self-inking stamps Water-based refill ink
    Pre-inked stamps Oil-based ink
    Rubber stamps Ink pads (varies)
    Brand-specific Follow guidelines

    Knowing your stamp type helps you pick the right refill ink every time.

    Ink Compatibility Essentials

    Why does ink compatibility matter when refilling your stamp? Using the right ink ensures your stamp works smoothly and produces clear impressions.

    First, identify if your stamp is pre-inked or self-inking, as this determines the ink type you need. For most pre-inked stamps, use oil-based ink, while self-inking stamps require water-based ink.

    Always check your stamp model’s instructions or the manufacturer’s website for recommended ink brands and specifications. Avoid mixing different ink types or brands because incompatible ink can damage the stamp’s internal mechanisms or cause poor prints.

    Also, make sure the ink color matches your needs. Following these ink compatibility essentials helps you refill the ink correctly and maintain your stamp’s performance.

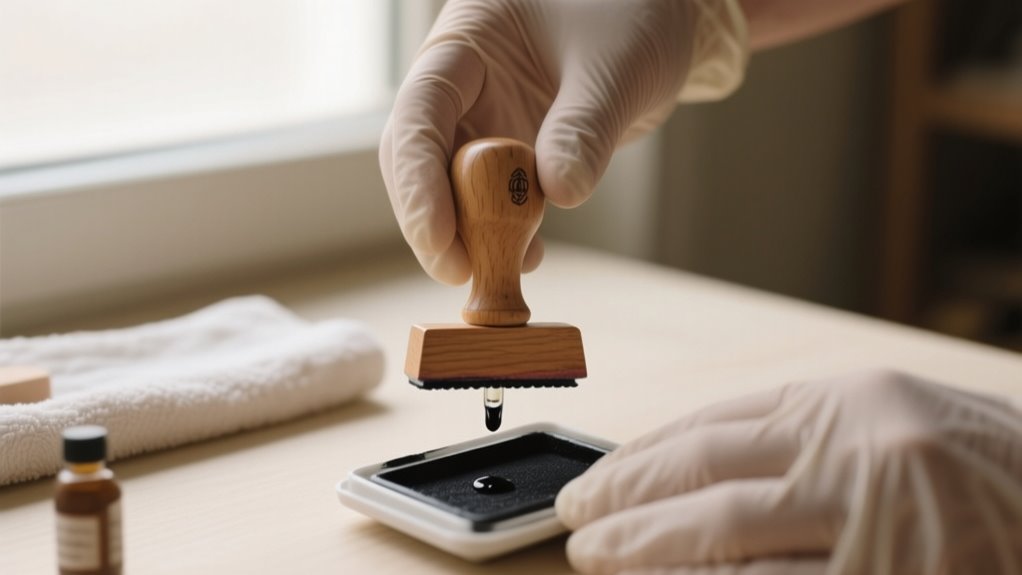
    Unlock and Remove the Ink Pad or Cartridge

    remove ink pad carefully

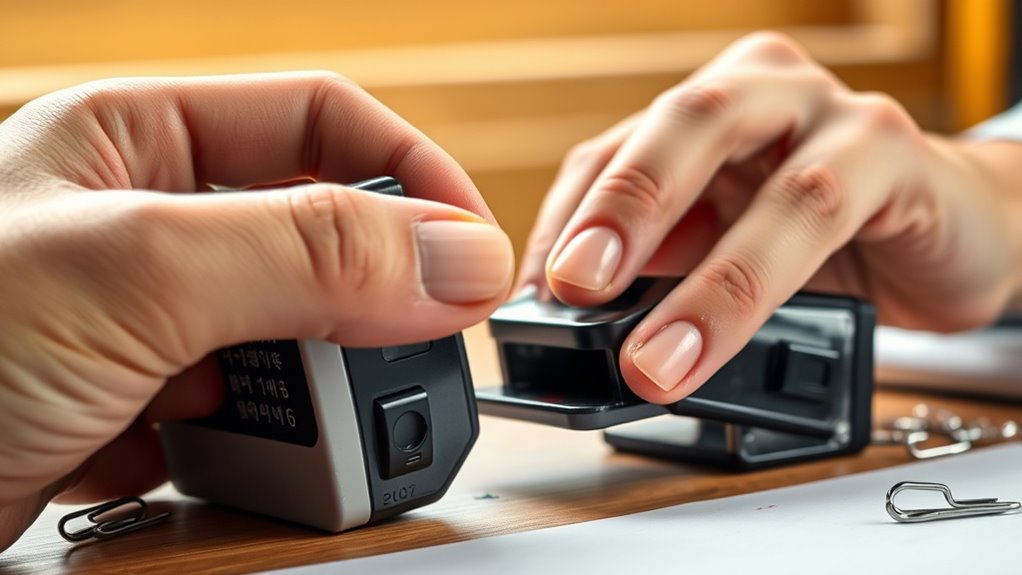
    When you open the ink pad or cartridge, gently press down or slide the stamp handle according to your model’s mechanism to reveal the ink compartment. To release the ink pad, look for a latch or button, usually on the underside or side, and press or slide it to free the pad. Carefully pull the ink pad or cartridge straight out, avoiding contact with the foam or ink surface to prevent contamination.

    Always check your stamp’s instructions to guarantee you follow the correct unlocking method and avoid damaging internal parts.

    Stamp Model Type Unlock Method
    Self-inking Press/slide latch
    Pre-inked Slide handle or press
    Custom designs Consult manual

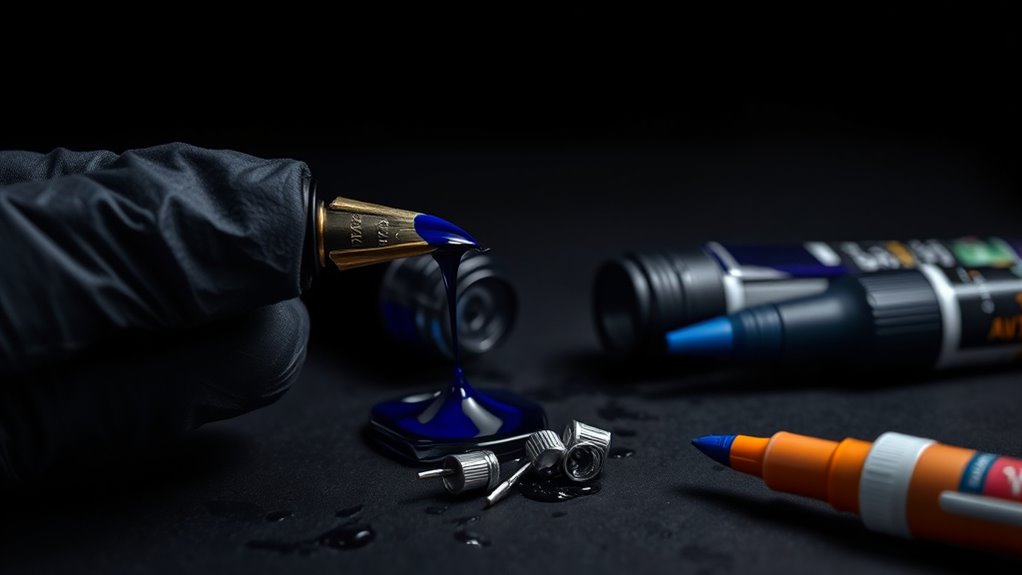
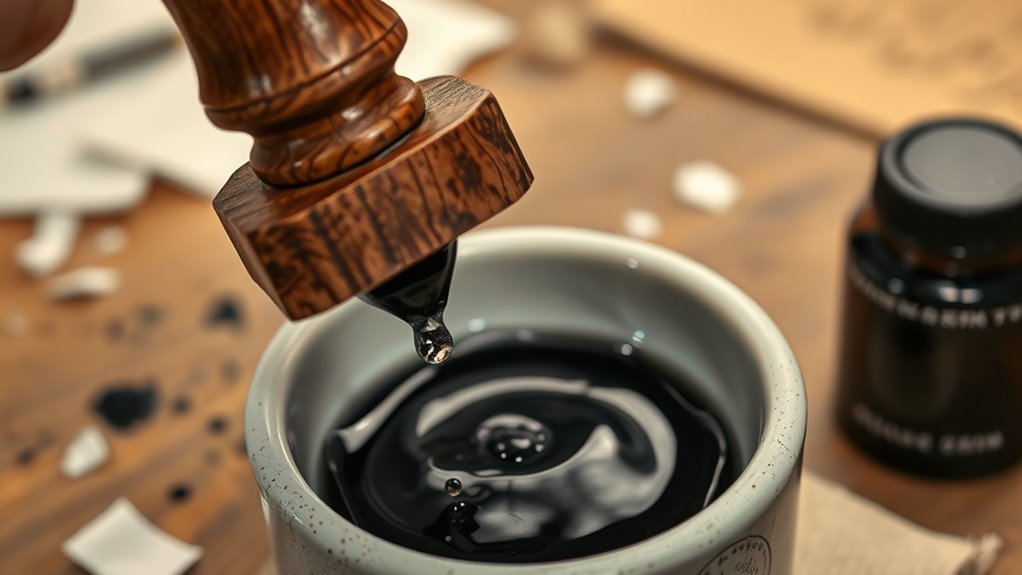
    Apply Ink Without Overfilling

    Although it might be tempting to add a large amount of ink at once, you should apply it gradually by squeezing only a few drops at a time to avoid overfilling the stamp’s reservoir or pad.

    Adding ink slowly guarantees you don’t flood the stamp body with excess ink, which can cause smudging and leakage. After each few drops, wait a few minutes to let the ink absorb fully, then test the impression.

    This helps you gauge whether more ink is needed without risking over-saturation. Keep a close eye on the ink level throughout the process to maintain even distribution and prevent the pad from becoming overly saturated.

    Avoid pouring or squeezing large quantities at once, as it’s harder to control and increases the chance of ink spilling out of the stamp body. Taking these careful steps keeps your stamp clean and functional, ensuring crisp impressions every time.

    Let Ink Soak

    let ink soak

    After you add ink to your stamp, just let it soak overnight. This helps make sure the ink is fully absorbed and spreads out evenly. Try to keep the stamp flat and upright while it soaks—it really helps the ink settle uniformly. Being patient like this will give you clear, consistent impressions every time.

    Optimal Soaking Duration

    To achieve clear and consistent impressions, you should let the ink soak into the stamp pad for at least 12 to 24 hours. This ideal soaking duration ensures proper ink absorption, allowing the ink to fully permeate the pad and preventing uneven distribution.

    Avoid using the stamp immediately after refilling; giving it this time helps maintain consistent, clear stamping results. While the exact ink absorption time varies depending on your ink type and stamp model, the standard overnight period generally works best.

    Allowing enough soaking time also minimizes risks like ink leakage or patchy impressions caused by incomplete absorption. By following this guideline, you’ll get the most reliable performance from your refilled stamp every time you use it.

    Ink Absorption Tips

    When you apply ink to your stamp, let it sit overnight so the pad absorbs it fully. This ink absorption step is essential for your rubber stamp to deliver clear, consistent impressions.

    Start with a small amount of ink to avoid overfilling, then let the ink soak in completely. Placing the rubber stamp horizontally during this time helps the ink distribute evenly across the pad.

    Proper soaking prevents uneven marks and guarantees a smooth ink flow when you use the stamp next. By giving the ink sufficient time to permeate the pad, you’ll get sharper, more defined stamped images every time.

    Patience in this process helps maintain the quality and longevity of your rubber stamp’s performance.

    Reinsert the Ink Pad Securely

    Before reinserting the ink pad, make sure it’s fully saturated to avoid uneven impressions. Once the surface of the pad is evenly soaked, carefully reinsert it into the stamp housing.

    Align the pad with the designated slots or guides inside the stamp to guarantee it fits correctly without tilting. Press the ink pad firmly into place until you feel a click or secure seating, which prevents any shifting during use.

    Double-check that the handle or locking mechanism engages properly, keeping the pad stable and maintaining the stamp’s integrity. This secure fit ensures the ink distributes evenly across your stamping surface every time.

    Taking these steps helps you avoid smudges or incomplete prints due to a loose or misaligned ink pad. By reinserting the ink pad correctly, you set the stage for crisp, professional-looking stamps with consistent ink coverage.

    Test Your Stamp, Clean Excess Ink, and Maintain It

    Although you’ve just refilled and reinserted the ink pad, you should always test your stamp on scrap paper to check for even ink distribution and clear impressions. If the impression looks blotchy or too dark, blot the stamp lightly on scrap paper several times to remove surplus ink and sharpen the image.

    Always test your stamp on scrap paper to ensure clear, even impressions before use.

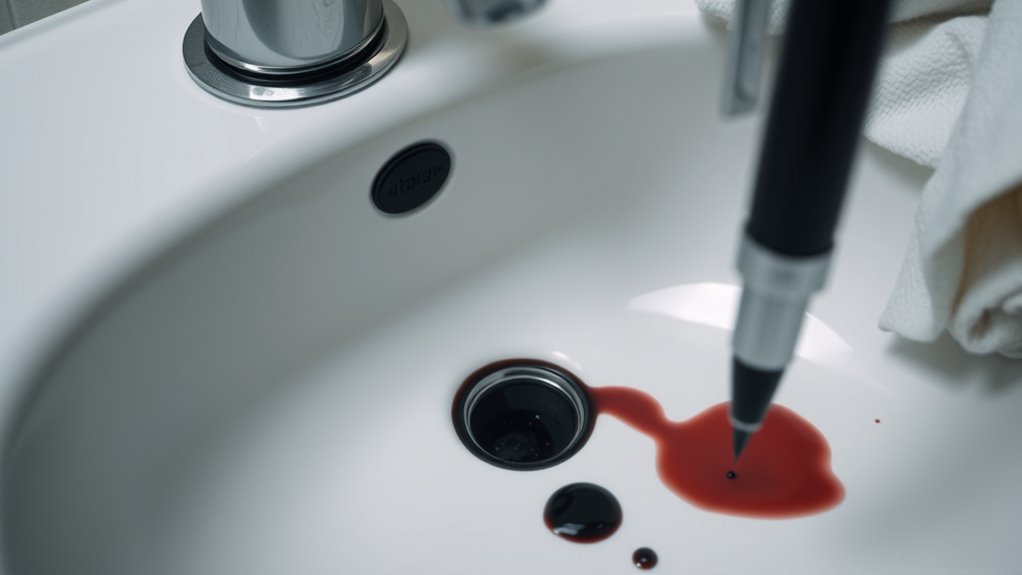
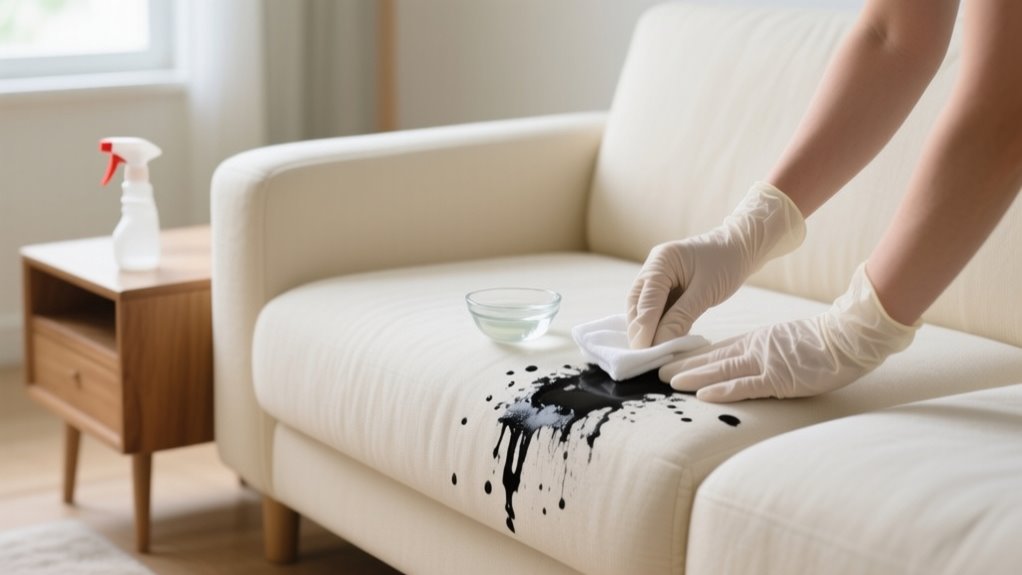
    Next, clean excess ink from the stamp surface using a damp cloth or paper towel to prevent smudges and ink buildup. This step keeps your stamp looking neat and prevents unwanted marks.

    To maintain your stamp’s performance, regularly inspect and clean its internal mechanisms to avoid ink clogging. Store your stamp in a dry, cool place, and only re-ink when the impressions become noticeably faint.

    Following these simple steps will help you keep your stamp in great working condition and ensure every impression stays crisp and clear.

    Frequently Asked Questions

    How Often Should I Refill My Stamp With Ink?

    You should refill your stamp with ink whenever the impressions start looking faint or inconsistent. If you use your stamp frequently, expect to refill it every few months. For low-volume use, once or twice a year might be enough.

    Can I Use Any Type of Ink for All Stamps?

    No, you can’t use any type of ink for all stamps. Different stamps need specific inks. Pre-inked stamps usually require oil-based ink, while self-inking ones use water-based ink.

    Using the wrong ink can ruin your stamp’s mechanism and cause poor impressions. When you refill, consider ink color choices carefully. Also, do regular stamp cleaning to avoid clogs and smudges.

    Always follow the manufacturer’s guidelines for the best results.

    What Should I Do if My Stamp Is Still Faint After Refilling?

    If your stamp is still faint after refilling, don’t worry. It’s not just about adding more ink. Start with thorough stamp cleaning to remove dried ink or debris blocking transfer.

    Next, double-check ink compatibility; using the wrong type can cause faint impressions. Allow the ink to fully absorb overnight, then test again.

    Finally, inspect internal parts for proper alignment. This ensures smooth ink flow and crisp stamping every time.

    Is It Safe to Reuse Old Ink Pads for Refilling?

    It’s generally not safe to reuse old ink pads for refilling without proper stamp cleaning. Old pads can harbor bacteria or dried ink that affects ink compatibility, leading to uneven impressions or damage.

    If you want the best results, thoroughly clean or replace the pad before adding ink. This guarantees your stamp stays in good shape and works smoothly every time, preventing clogging and maintaining consistent ink flow.

    How Do I Store Ink to Prevent It From Drying Out?

    To prevent ink drying, store your ink bottles upright in cool, dry places away from direct sunlight and heat. Always keep the caps tightly sealed to stop air exposure.

    When you transfer ink into smaller storage containers, use airtight or resealable lids to maintain freshness. Following these steps guarantees your ink stays vibrant and ready to use, so you won’t waste time dealing with dried-out ink or messy refills.

    Conclusion

    Now that you know how to refill your stamp in just seven easy steps, you’re ready to keep your stamping sharp and efficient.

    Did you know that regularly maintained stamps can last up to five times longer than neglected ones? By following these simple tips, you’ll save money, reduce waste, and enjoy crisp, clean impressions every time.

    Keep your workspace clean, handle ink carefully, and your stamps will serve you well for years to come!

  • How Do You Read Invisible Ink Text in 7 Easy Steps

    How Do You Read Invisible Ink Text in 7 Easy Steps

    To read invisible ink text on your iPhone, first spot the blurred message bubble indicating hidden content. Tap, press and hold, or swipe directly on the bubble to reveal the message instantly.

    The hidden text stays visible until you choose to hide or delete it.

    Make sure your iOS is updated and you have a stable connection for smooth access.

    If the message won’t reveal, try restarting your app or device.

    Keep going to uncover tips and fixes for common issues.

    Identify Invisible Ink Messages in Your iPhone Conversations

    identify hidden message bubbles

    When you receive an invisible ink message on your iPhone, you’ll notice a blurred or blank bubble in your conversation that hides the content. This unique look helps you quickly identify that the message is encrypted and not yet revealed.

    The chat bubble appears obscured, making it stand out from regular text messages. By learning to identify these hidden bubbles, you’ll know exactly which messages require your interaction to unveil their content.

    The invisible ink message remains protected and unreadable until you choose to reveal it. Once you identify an invisible ink message, you can decide when to view it without accidentally exposing sensitive information.

    Invisible ink messages stay hidden until you choose to reveal them, protecting your sensitive information from accidental exposure.

    Recognizing these hidden bubbles is crucial for maintaining privacy and ensuring you don’t miss any concealed messages. So, keep an eye out for those blurred or blank bubbles; they’re your signal that something’s hidden and waiting for you to uncover it.

    Trigger the Reveal by Tapping or Pressing and Holding

    To reveal invisible ink text, just tap on the hidden message in your chat. On some devices, pressing and holding the message works too. Once you do this, the text will appear clearly until you choose to hide it again.

    Tap To Reveal

    How exactly do you reveal invisible ink text in a chat? The easiest way is to tap to reveal. Just tap on the message bubble containing the invisible ink, and the hidden text instantly appears in black.

    This quick action lets you access the concealed content without any delay, so you can read, reply to, or delete the message right away. Tapping to reveal is intuitive and perfect for when you want to see the message fast.

    If tapping doesn’t work, you can try pressing and holding instead, but tapping remains the primary, straightforward method. So next time you encounter invisible ink text, remember to tap to reveal and uncover the message hidden beneath the surface in seconds.

    Press And Hold

    Tapping to reveal invisible ink is the quickest way to see hidden messages, but sometimes pressing and holding the message bubble works just as well. On some devices, you can press and hold the message bubble to trigger the reveal, showing the concealed text in black.

    If the message doesn’t appear right away, try tapping or press and hold it for a second or two. Here’s how to use the press and hold method effectively:

    1. Locate the message bubble with invisible ink.
    2. Press and hold the bubble gently for 1-2 seconds.
    3. Watch as the hidden message appears in black text.
    4. Release your finger to let the message fade back to invisible ink.

    Press and hold is a simple, quick way to access secret messages.

    Activate Hidden Text by Swiping or Pressing

    swipe or tap reveal

    Wondering how to reveal the hidden message in an invisible ink text? It’s simple, just swipe or tap on the invisible ink message. When you swipe across the message bubble, the concealed text quickly appears in black, making it easy to read.

    If swiping feels tricky, a straightforward tap directly on the hidden message will do the trick just as well. Both actions instantly activate the hidden text without any extra steps, so you can access the message right away.

    If the text doesn’t show up immediately, make sure you’re tapping directly on the invisible ink bubble. Using either a swipe or a tap gives you a quick, convenient way to disclose content that was meant to stay hidden until you’re ready.

    Follow Prompts to Reveal the Invisible Ink Message

    Although the invisible ink message stays hidden at first, you just need to tap the blank message bubble to reveal it. This simple action unlocks the hidden text, making it appear clearly in black. You won’t need to follow any complicated steps. Just tap, and the message will show up instantly.

    Here’s how to follow prompts to reveal the invisible ink message:

    1. Locate the blank message bubble in your chat.
    2. Tap the bubble once to uncover the hidden content.
    3. Watch as the concealed message appears in black text.
    4. Interact with the message by reading, replying, or deleting it.

    Read and Understand the Revealed Invisible Ink Message

    tap to reveal message

    Once you tap the blank area, the hidden text will appear clearly for you to read. Then, you can respond right away or decide to delete the message if you want to keep things private. Just remember, the message stays visible only until you choose to hide or remove it.

    Tap To Reveal

    How exactly do you reveal an invisible ink message? It’s simple. You just tap to reveal the hidden text. Here’s how it works:

    1. Locate the blank message bubble in your chat.
    2. Tap on the bubble once.
    3. The invisible ink text instantly appears in black, making it readable.
    4. After revealing, you can read, reply, or forward the message as usual.

    The message stays hidden until you tap to reveal it, ensuring your privacy. There’s no need for extra steps or tools. Just a quick tap unlocks the content. This straightforward process keeps your conversations both secure and convenient, letting you control when and how you see hidden messages.

    View Hidden Text

    Wondering how to read and understand a message hidden with invisible ink? Once you tap the message bubble, the invisible ink text instantly appears as black text, allowing you to view hidden text clearly.

    This revealed message stays visible until you leave the chat or delete it, so you have plenty of time to read and comprehend the content. Keep in mind that tapping on the message again won’t hide it; it remains accessible for you to view hidden text whenever you need.

    This straightforward process doesn’t require any extra tools or complicated steps, making it easy to access the secret message whenever you want. Just tap, read, and understand the invisible ink message with ease.

    Respond Or Delete

    What do you do after revealing an invisible ink message? Once you tap the message bubble, the hidden text appears clearly in black. From here, you have several options to manage the message effectively. You can:

    1. Respond directly by typing a reply to keep the conversation going.
    2. Forward the message if you want to share it with others.
    3. Delete the message if it’s no longer needed or you want to clear your chat.
    4. Leave the message visible until you decide to take action.

    Tapping is the only step required to read the message, and it stays visible until you respond or delete it. So, after reading, you’re in full control of how to respond or handle the invisible ink text.

    Hide or Keep Invisible Ink Messages Visible After Reading

    Where can you find options to keep invisible ink messages visible after reading? Actually, there’s no built-in feature to permanently keep invisible ink messages visible. Once you tap to reveal the message, it stays visible in the chat until you manually delete or hide it again.

    However, if you want to keep invisible ink messages visible without them disappearing, you should avoid tapping on the message altogether. Instead, ask the sender to resend it as a regular, non-invisible ink message.

    To preserve the content after revealing it, taking a screenshot is a reliable method. This way, you can save the message without worrying about it reverting to hidden if the chat clears or the message gets deleted.

    Fix Common Problems When Invisible Ink Won’t Reveal

    Having trouble revealing an invisible ink message? Don’t worry, common issues can often be fixed quickly. First, make sure the message was sent using the invisible ink effect and that both you and the sender are using iOS 10 or later.

    Next, remember to tap directly on the invisible ink bubble to reveal the hidden text. Sometimes it’s easy to miss this step. Also, check your screen brightness and display settings; low brightness can make the revealed message hard to see.

    Finally, confirm there were no network problems that might have interrupted the message delivery.

    If these steps don’t work, try these additional fixes:

    1. Close and reopen the Messages app to refresh it.
    2. Restart your iPhone to reset system processes.
    3. Update your iOS to the latest version.
    4. Ask the sender to resend the invisible ink message.

    Following these tips should help you unlock your invisible ink messages without hassle.

    Frequently Asked Questions

    What Types of Invisible Ink Are Commonly Used in Messaging Apps?

    You’ll commonly see two types of invisible ink in messaging apps: blurred overlays and animated effects. The blurred overlay hides the text behind a fuzzy layer you clear by tapping or swiping.

    Animated effects, like those in iMessage, use special colors or movements to conceal messages until you interact. Both rely on messaging encryption to securely obscure content, ensuring only you can reveal and read the hidden text when you choose to.

    Can Invisible Ink Messages Be Saved or Exported?

    Yes, you can save or export invisible ink messages, but you need to reveal the text first. Once revealed, you can screenshot or copy the message to preserve it.

    Keep in mind, privacy concerns arise because invisible ink is meant to keep messages hidden. So saving or sharing them might expose sensitive info.

    Always be cautious about who might access your saved invisible ink messages to protect your privacy.

    Is Invisible Ink Text Secure From Hacking or Interception?

    Invisible Ink isn’t completely secure from hacking or interception, so you should be cautious. While it adds a layer of privacy by hiding messages until you tap them, it doesn’t offer robust encryption.

    Security concerns arise if your device gets compromised. Hackers could access those hidden texts. For truly sensitive info, you’ll want stronger security measures like end-to-end encryption or specialized secure apps to protect your messages effectively.

    Does Invisible Ink Work on All Smartphone Models?

    You can’t fit a square peg in a round hole. Invisible Ink doesn’t work on all smartphone models. Due to technology limitations, it’s exclusive to iPhones running iOS 10 or later, starting with iPhone 7.

    If you’re using an Android or an older device, you won’t see the effect. Third-party messaging apps usually can’t support it either, so your device and app need to be compatible to enjoy Invisible Ink.

    Can Invisible Ink Messages Be Recovered After Deletion?

    No, you can’t recover invisible ink messages after deletion because the hidden encryption is designed to protect privacy, not allow retrieval. Once you delete the message, both the visible and hidden content vanish permanently.

    If you want to keep important info, you should save or back it up before deleting. The hidden encryption ensures your data stays secure but doesn’t support message recovery after removal.

    Conclusion

    Now that you know how to reveal invisible ink messages on your iPhone, you won’t miss any secret notes from friends or family. Imagine your best friend sends you a surprise party invite hidden in invisible ink. Just tap, swipe, or press to reveal it instantly.

    By following these simple steps, you’ll always be ready to uncover hidden messages and keep the fun going without any hassle. Don’t let invisible ink keep you guessing!

  • How Do You Make Invisible Ink With Black Light in 7 Easy Steps?

    How Do You Make Invisible Ink With Black Light in 7 Easy Steps?

    To make invisible ink that glows under black light, gather highlighters, white paper, a UV light, and a cup.

    Carefully pry open a highlighter to extract its ink, then mix it into hot water and heat until boiling to activate the fluorescence.

    Dilute the ink until it’s nearly invisible, then write your secret message with a fine brush.

    Once dry, shine a black light to reveal your glowing words.

    Keep going to uncover detailed tips for perfecting this fun, secret craft.

    Gather Materials for Invisible Ink Under Black Light

    gather materials for invisible ink

    Before you begin making invisible ink that glows under black light, gather a highlighter, a UV light or black light, and white paper. These three materials are essential for creating invisible ink that reveals your secret messages only when exposed to UV light.

    The highlighter contains the fluorescent ink needed to write your hidden notes. White paper works best because it provides a blank canvas that won’t interfere with the ink’s glow. The UV or black light lets you see the invisible ink when you shine it on your message.

    Once you have these materials, you’re ready to start making your invisible ink. Remember, without any one of these items, your message won’t stay hidden or glow properly. So, take a moment to find a bright highlighter, a reliable UV light, and clean white paper before moving forward.

    With these, your invisible ink experience will be successful and fun.

    How to Safely Extract Ink From a Highlighter

    When you want to extract ink from a highlighter, handle it gently to avoid damaging the internal parts. Start by using pliers to carefully open the highlighter casing without harming the ink tube inside. Then, remove the ink tube cautiously to prevent leaks or breakage.

    Next, use pliers to pull out the writing tip, making sure it stays intact. For the ink extraction, squeeze the ink tube into a small container filled with hot water. This will help dissolve the ink, creating a solution that glows under black light.

    Throughout the process, handle all components with care to avoid damage, as a broken ink tube can make extraction difficult and messy. By safely extracting the ink this way, you can prepare your own invisible ink that reveals secret messages when exposed to black light.

    Heat and Prepare Invisible Ink Solution

    heat dilute reveal invisibility

    Now that you’ve extracted the ink, it’s time to heat and prepare your invisible ink solution. You’ll need to microwave the mixture until it boils so it fully releases the ink’s properties.

    After that, dilute the solution until it looks faint or clear on paper. This way, it stays invisible until you shine a black light on it. Easy, right?

    Heating Process Overview

    How do you activate the invisible ink hidden within a highlighter? Start by squeezing the ink into a small cup of hot water. Heating the water until it boils helps extract and activate the fluorescent compounds in the ink.

    These compounds are key since they remain invisible on paper once dry but glow vividly under UV light. Be sure to handle the hot water carefully to avoid burns.

    The heating process guarantees the ink dilutes properly, making it clear and invisible until you expose it to a black light. This simple step enables the ink’s fluorescent properties, allowing you to write secret messages that only appear when illuminated by UV light.

    Heating is essential for preparing your invisible ink effectively and safely.

    Ink Dilution Techniques

    After heating the highlighter ink in hot water to activate its fluorescent properties, the next step is to dilute the solution until it becomes nearly invisible on paper. Start by squeezing the highlighter ink into a cup of hot water and stir thoroughly to disperse the pigment evenly.

    This ink dilution process is essential because too much pigment will make your writing visible, while too little won’t fluoresce well under a black light. Gradually add small amounts of hot water, testing each dilution by writing on paper with a clean paintbrush or Q-tip.

    Keep adjusting until the ink appears almost clear or very faint. Once dry, the diluted ink won’t be noticeable, but it will fluoresce brightly when exposed to UV or black light, revealing your secret message.

    Dilute Invisible Ink for Writing

    When you want to create invisible ink for writing, start by squeezing the ink from a highlighter into a small cup of warm water and stirring it well. This step helps you dilute the ink, making it less visible to the naked eye.

    To achieve the perfect concentration, add more water if the ink seems too dark. Your goal is to have the ink remain invisible or barely noticeable in normal light but glow brightly under a black light or UV light.

    Test different dilution levels until you find the right balance. Keep in mind that the more diluted the ink, the fainter it appears without UV light, which is ideal for secrecy.

    Using diluted invisible ink ensures your secret messages stay hidden until revealed by a UV light source, making it perfect for covert writing. This method is simple, effective, and easy to customize based on your needs.

    Write Your Secret Message With a Fine Brush

    precise invisible ink writing

    Although writing with invisible ink requires patience, you can create clear secret messages by using a fine-tipped brush or Q-tip. Dip your fine brush lightly into the diluted invisible ink, often made from highlighter ink or other fluorescent substances, and carefully write your secret message.

    Be sure not to overload the brush, as excess ink can cause smudging or uneven lines. Write slowly and steadily to maintain control over thin, precise strokes, guaranteeing your message remains neat.

    After finishing, allow the ink to dry completely before handling the paper. This helps prevent accidental smudging or removal. Practicing on scrap paper first is a smart move; it helps you perfect your technique and ensures your secret message will appear crisp and legible under black light.

    With patience and careful brushwork, your invisible ink messages will be ready to reveal when you shine a black light on them.

    Reveal Invisible Ink With a Black Light

    How exactly do you reveal a message written in invisible ink? You use a black light or UV light to make it visible. When you shine UV light on paper with invisible ink made from certain chemicals or household items like highlighters, the fluorescent molecules in the ink absorb the light and emit a bright glow.

    This fluorescence makes the hidden message stand out clearly against the paper. To do this effectively, work in a darkened room and hold a portable black light or UV flashlight close to the paper. The ink will fluoresce without needing heat or damaging the material.

    This method is simple, safe, and effective for uncovering secret writings. With just a black light, you can instantly reveal those invisible messages and enjoy the fun of secret communication.

    Store Leftover Invisible Ink Safely for Reuse

    To keep your invisible ink ready for future use, store any leftovers in a waterproof, airtight container. This prevents evaporation and contamination, preserving the ink’s effectiveness. Make certain to label the container clearly with the contents and the date of storage.

    For proper storage, place the container in a cool, dark spot away from direct sunlight and heat sources. Exposure can degrade the fluorescent properties activated by UV light. Avoid leaving your invisible ink where it might get warm or bright, as this breaks down the chemicals and weakens the ink’s glow under a black light.

    Check your stored invisible ink regularly for any changes in consistency or color before using it again. Proper storage ensures your invisible ink remains stable and reliable, so you can keep enjoying your UV light experiments without needing to make fresh ink every time.

    Frequently Asked Questions

    Can Invisible Ink Damage Paper Over Time?

    Yes, invisible ink can damage paper over time depending on the ink composition. If the ink contains acidic or corrosive chemicals, chemical reactions may weaken the paper fibers, reducing ink longevity and harming paper preservation.

    To protect your documents, choose UV-reactive inks that are gentle and store them in a cool, dark place. By managing these factors, you’ll maintain both the invisible message and the paper’s quality longer.

    How Long Does the Invisible Ink Remain Visible Under Black Light?

    You’ll find that invisible ink with UV reaction usually stays visible under black light for about 2 to 8 hours. Ink longevity depends on the type of fluorescent compounds and how concentrated they are.

    Keep in mind, light exposure, especially sunlight, can cause ink fading and reduce visibility over time. To extend ink longevity, store your ink in a dark, airtight container to protect it from light and preserve its glow.

    Is It Possible to Erase or Remove Invisible Ink After Writing?

    Yes, you can attempt ink removal, but it’s tricky. Chemical reactions using solvents like alcohol or acetone might fade or erase the invisible ink, yet you risk damaging the paper.

    If you want to preserve the paper, avoid harsh chemicals. Keep in mind, the ink longevity varies by formula; some invisible inks are designed to be permanent and resist removal.

    Can Different Colored Black Lights Affect Ink Visibility?

    Imagine shining a prism of color over your secret message. Different colored black lights can definitely affect ink visibility. The color contrast changes how your ink pops, while light intensity influences how brightly it glows.

    Since ink composition determines which wavelengths it reacts to, only inks tuned to the UV spectrum reveal their secrets clearly. So, to make your invisible ink shine, choose a black light that matches the ink’s fluorescent nature perfectly.

    Are There Safe Alternatives to Tonic Water for Invisible Ink?

    Yes, you can use safe alternative solutions like highlighter ink or vitamin B2 for invisible ink. These rely on chemical reactions that fluoresce under black light without the risks tonic water might pose.

    You should consider ink longevity since some alternatives fade faster. Always follow safety precautions, especially with kids, ensuring the ink is non-toxic and skin-safe.

    This way, you get effective invisible ink without compromising safety or durability.

    Conclusion

    Now that you’ve mastered making invisible ink with a black light, you’re part of a clever tradition. Did you know invisible ink was used as early as the 16th century for secret messages?

    With just a highlighter and a few simple steps, you’ve revealed a fun way to send hidden notes. Keep your leftover ink stored safely, and get ready to amaze friends with your glowing secrets anytime you want!

  • Do You Know If You Have Ink Poisoning?

    Do You Know If You Have Ink Poisoning?

    If you’ve swallowed or come into contact with ink, watch for signs like nausea, vomiting, skin or eye irritation, and staining around your mouth or skin.

    Small amounts from pens or markers usually cause minor upset, but larger ingestions or exposure to industrial inks with toxic solvents can be more serious.

    Rinse affected areas immediately and seek help if symptoms worsen.

    Understanding the risks and proper care can help you stay safe and know what to do next.

    What Is Ink Poisoning? How Common Is It?

    low toxicity ink ingestion

    What exactly is ink poisoning, and how likely are you to experience it? Ink poisoning happens when you ingest or absorb harmful substances from ink. But with everyday writing inks, this is extremely rare because they have low toxicity.

    Most inks contain nonpoisonous dyes, pigments, and water, so swallowing small amounts accidentally usually doesn’t cause serious harm. If you happen to ingest ink, the effects are typically minor, like mild stomach upset or skin staining, rather than severe poisoning.

    Larger quantities, such as from ink bottles or industrial inks, might present a higher risk, but even then, serious cases are uncommon. You can reduce the already low risk by handling and storing ink properly in your home or office.

    Harmful Ingredients in Ink

    Although most common writing inks are made with low-toxicity dyes, pigments, solvents, and water, some types of ink contain harmful ingredients you should be aware of. Everyday pen ink ingredients like solvent, resin, and dye are generally safe when used properly. However, industrial or tattoo inks may include toxic solvents and unregulated chemicals.

    These can pose significant health risks if handled improperly or in large quantities.

    Here’s a breakdown of typical ink ingredients and their potential effects:

    Ingredient Type Common Use Potential Health Risks
    Dyes/Pigments Coloring agents Usually low toxicity
    Solvents Ink flow and drying Can be toxic in high doses
    Unregulated Chemicals Industrial inks Possible skin irritation, poisoning

    Knowing which ink ingredients could be toxic helps you stay cautious and avoid exposure that might lead to ink poisoning.

    Where Can You Find Potentially Harmful Ink?

    potentially harmful household inks

    When you handle everyday items like pens, markers, or printer cartridges, you might not realize they contain ink that could be harmful if swallowed in large amounts. Household ink sources can sometimes act as a poison, especially if ingested accidentally or by children.

    Everyday inks in pens and cartridges can be harmful if swallowed, especially by children.

    Here are common places you can find potentially harmful ink:

    1. Bottled ink, pens, markers, and highlighters used daily at home or school.
    2. Printer cartridges and stamp-pad inks, which hold larger volumes and extra chemicals.
    3. Industrial and art inks, often containing solvents and toxic substances beyond standard writing inks.
    4. Tattoo inks and industrial-use inks, which carry higher risks due to unregulated, hazardous ingredients.

    While small amounts of common writing ink usually aren’t poisonous, ingesting large quantities or specific toxic compounds found in some inks can pose serious health risks. Always be cautious with household inks and keep them out of children’s reach.

    Symptoms of Ink Poisoning

    Handling ink safely means knowing the signs that something might be wrong. Ink poisoning symptoms usually involve irritation and localized effects rather than serious health issues. If you come into contact with ink, you may notice eye irritation, skin staining, or mucous membrane staining.

    Ingesting a large amount, over 1 oz (30 mL), could cause nausea, vomiting, or abdominal pain. Most symptoms are mild, but if you experience severe reactions like difficulty breathing or fever, seek medical help immediately.

    Here’s a quick overview of common symptoms:

    Symptom Type Description Severity
    Skin & Eye Irritation Redness, itching, or staining Usually mild
    Gastrointestinal Nausea, vomiting, abdominal pain Possible with large ingestion
    Serious Reactions Difficulty breathing, fever, allergies Requires urgent care

    Being aware of these ink poisoning symptoms helps you respond promptly and stay safe.

    What to Do After Swallowing Ink

    swallowing ink what to do

    If you’ve swallowed ink, don’t panic. Small amounts usually aren’t harmful and might only cause mild stomach upset or staining in your mouth. Here’s what you should do:

    If you swallow ink, stay calm—small amounts are typically harmless and may only cause minor stomach upset or staining.

    1. Rinse your mouth thoroughly with water for 15 minutes to help remove ink and reduce staining.
    2. Drink a few sips of water to dilute any ink swallowed and soothe your stomach.
    3. Avoid inducing vomiting unless a healthcare professional or poison control center advises you to do so.
    4. Contact the poison control center at 1-800-222-1222 or seek medical attention if you experience persistent nausea, vomiting, abdominal pain, or if you swallowed a large amount.

    Following these steps helps manage minor ink ingestion safely. Remember, small amounts rarely cause serious harm. But when in doubt, reaching out to poison control center professionals ensures you get the right guidance quickly.

    How to Treat Ink Exposure on Skin and Eyes

    If you get ink on your skin, just rinse the area thoroughly with soap and water to help reduce any irritation. It’s pretty straightforward and usually does the trick. Now, if ink gets in your eyes, it’s important to flush them gently with lukewarm water for at least 15 minutes. This can really help ease the discomfort. And remember, if you notice any redness, pain, or changes in your vision that don’t go away, don’t hesitate to get medical help right away.

    Skin Exposure First Aid

    Although ink exposure on your skin or eyes is usually harmless, you should act quickly to minimize irritation and staining. Proper first aid helps prevent prolonged discoloration and discomfort.

    For skin exposure first aid, follow these steps:

    1. Rinse the affected area immediately with soap and water to remove ink and reduce irritation.
    2. Avoid harsh chemicals or alcohol-based cleaners that may worsen skin irritation.
    3. If irritation or rash appears, wash the area again and apply a gentle, fragrance-free moisturizer.
    4. Seek medical care if symptoms worsen or don’t improve.

    Prompt action guarantees your skin clears quickly without complications. Remember, ink on the skin is typically a temporary issue, not systemic poisoning.

    Eye Irritation Relief

    How should you handle ink exposure to your eyes to ease irritation? First, immediately rinse with water. Clean, lukewarm water is best. Keep your eye under a gentle stream for at least 15 minutes to flush out the ink and reduce eye irritation.

    Avoid using any chemicals or soap directly in your eye because this can make the discomfort worse. Don’t rub or scrub the eye since that might cause further damage.

    For ink on your skin, wash gently with soap and water or use a commercial ink remover. Just be careful not to get these products in your eyes.

    If redness, pain, or persistent eye irritation continues after rinsing, it’s important to seek medical attention promptly to prevent complications.

    When To Seek Help

    When should you seek help after ink exposure to your skin or eyes? If you notice persistent redness, swelling, or pain after rinsing thoroughly, it’s time to seek medical help. Ink in the mouth or large amounts on skin can cause toxicity, so don’t ignore symptoms.

    For eye exposure, rinse with lukewarm water for 15 minutes. If irritation continues, get prompt medical attention.

    1. Rinse skin with soap and water immediately.
    2. Flush eyes with lukewarm water for at least 15 minutes.
    3. Avoid harsh chemicals or alcohol on skin stains.
    4. Seek medical help if irritation persists or if ink in the mouth causes discomfort.

    Taking quick action can prevent complications from ink exposure.

    When to Call Poison Control or Get Emergency Help

    If someone swallows more than an ounce of ink or starts feeling nauseous, vomiting, or has trouble breathing, you should call poison control immediately at 1-800-222-1222. Even if symptoms seem mild, it’s important to contact poison control for guidance, especially if a large amount of ink was ingested. Don’t try to induce vomiting or give anything by mouth unless a healthcare professional or poison control instructs you to do so.

    Seek emergency medical help if the person develops severe symptoms like persistent vomiting, chest pain, or loses consciousness. Also, call emergency services if ink causes significant eye irritation, skin reactions, or if large quantities are swallowed. Acting quickly and knowing when to call poison control or emergency help can prevent serious complications and ensure proper care for ink poisoning symptoms.

    What to Expect at the ER After Ink Exposure

    After contacting poison control or emergency services, you’ll be taken to the ER where medical staff will quickly evaluate your condition. They’ll monitor your vital signs and assess the severity of your symptoms caused by ink exposure. Depending on your situation, treatment varies to provide the necessary medical help and supportive care.

    Here’s what you can expect at the ER:

    1. Thorough rinsing of your eyes or skin to remove residual ink and reduce irritation.
    2. Administration of activated charcoal if a large amount of ink was ingested, to limit toxin absorption.
    3. Continuous monitoring of symptoms like nausea or skin irritation to guide further treatment.
    4. A variable duration of stay depending on symptom severity and ingestion amount.

    Most cases receive prompt supportive care, helping you recover quickly without complications.

    Severity and Outlook of Ink Poisoning

    If you have ink poisoning, you’ll usually notice mild symptoms like skin stains or a slight upset stomach. Most of the time, recovery happens pretty quickly, especially if you get medical care right away. How much ink you swallowed and how fast you get treated really make a big difference in how things turn out.

    Typical Symptom Severity

    Although ink poisoning can sound alarming, most cases from everyday writing inks cause only minor symptoms like skin staining or mild stomach upset. When ink causes issues, it’s usually because you’ve ingested a small amount or had direct contact with the skin or eyes. Here’s what you might expect:

    1. Mild upset such as nausea or slight stomach discomfort after swallowing a small amount of ink.
    2. Skin staining and mild irritation that fades with washing.
    3. Eye redness or irritation that resolves quickly after rinsing.
    4. Rarely, larger ingestion may cause vomiting or abdominal pain, but serious effects are uncommon.

    Recovery Expectations

    Because typical writing inks are generally nonpoisonous, most cases of ink poisoning have a favorable outlook. If you experience small exposures, your recovery will likely be quick with minimal or no lasting effects.

    Prompt medical treatment, like washing your eyes or skin, plays an essential role in speeding up healing and preventing complications. Even if a larger amount is ingested, early intervention usually leads to a good prognosis.

    Medical professionals will monitor your vital signs and symptoms to guarantee you recover fully and safely. By seeking timely care and following medical advice, you can expect a smooth recovery from ink poisoning in most situations.

    Factors Affecting Prognosis

    When determining how serious ink poisoning might be, the amount of ink you’ve been exposed to plays a crucial role. Ingesting more than about one ounce (30 mL) raises the risk of complications. The severity of ink poisoning depends largely on this, along with other key factors.

    Here’s what affects your outlook:

    1. The amount of ink swallowed. Larger quantities increase risks.
    2. The type of ink. Industrial inks with harmful solvents are more dangerous.
    3. Prompt medical treatment. Quick eye or skin washing and monitoring improve recovery.
    4. Early identification. Recognizing symptoms early leads to better prognosis.

    Most writing inks are nonpoisonous when used properly, so with prompt care, your chances of a favorable outcome are high.

    Preventing Ink Poisoning and Keeping Families Safe

    To keep your family safe from ink poisoning, always store ink and writing supplies out of children’s reach. Make sure ink bottles are sealed tightly when not in use.

    Proper storage of ink is essential for preventing ink poisoning because it minimizes accidental spills and ingestion. Ensure pens and ink containers have secure caps, and keep them in places children can’t access or see.

    Store ink securely with tight caps, out of children’s reach, to prevent accidental spills and ingestion.

    Educate everyone in your household, especially kids, about the dangers of swallowing or mishandling ink products. Use inks in well-ventilated areas and strictly follow the manufacturer’s safety instructions to avoid inhalation risks.

    Also, dispose of used ink containers properly instead of refilling or altering them, which can lead to accidental poisoning.

    Frequently Asked Questions

    Can Ink Poisoning Cause Long-Term Health Problems?

    Ink poisoning rarely causes long-term health problems if you limit exposure and get treated quickly. However, if you’re dealing with ink toxicity from industrial inks, chronic effects might develop due to toxin absorption over time.

    Large or repeated exposures increase risks, potentially leading to internal damage or allergic reactions. So, if you suspect serious exposure, seek medical help promptly to prevent any lasting health issues.

    Is Ink Poisoning More Dangerous for Children Than Adults?

    Yes, ink poisoning is more dangerous for children than adults because they are smaller and less able to detoxify harmful substances. You should know the risks of ink exposure and follow safe handling tips to protect kids.

    Always store ink products out of reach and supervise children to avoid accidental ingestion. Taking these prevention steps helps keep children safe and lowers the risk of serious health problems from exposure.

    Are All Types of Ink Equally Toxic if Ingested?

    No, all types of ink aren’t equally toxic if ingested. The ink composition plays a big role in how dangerous it can be. Toxic ink types, like industrial or some tattoo inks, contain harmful chemicals and solvents that increase ingestion risks.

    Everyday writing inks usually have safer formulations, so swallowing small amounts isn’t typically harmful. You should always check what kind of ink you’re dealing with to understand the potential health risks better.

    Can Pets Suffer From Ink Poisoning Too?

    Yes, pets can suffer from ink poisoning too. For pet safety, you need to watch for animal symptoms like vomiting, diarrhea, or drooling after potential toxic exposure to ink.

    Some inks contain harmful chemicals that can seriously affect your pet’s health. If you suspect your pet has ingested ink, don’t wait. Get immediate veterinary help to prevent complications and keep your furry friend safe.

    Does Ink Poisoning Require a Hospital Stay?

    You might need a hospital stay if poisoning symptoms get severe, if you ingest a large amount, or if treatment options at home aren’t enough. You don’t always require hospitalization for ink poisoning, especially with minor exposure or quick ink removal.

    But if you experience breathing difficulty, persistent vomiting, or skin irritation, seek medical help immediately. Doctors will monitor you closely and provide supportive care to guarantee your safety.

    Conclusion

    So, if you’re thinking ink poisoning is just a fancy excuse for doodling too much, think again. Swallowing ink isn’t exactly your ticket to becoming a superhero. It’s more like a trip to the ER.

    Keep those pens away from your mouth, or you might find yourself starring in a very unfunny medical drama. Stay smart, stay safe, and remember: ink belongs on paper, not inside you.

  • How Do You Get Ink Out of Upholstery in 7 Easy Steps?

    How Do You Get Ink Out of Upholstery in 7 Easy Steps?

    To get ink out of upholstery in 7 easy steps, start by blotting excess ink immediately without rubbing to prevent spreading.

    Next, test cleaning methods on a hidden spot.

    Pick a cleaner suited to your fabric type and gently dab it on the stain.

    Rinse carefully with a damp cloth to remove residue.

    Then, dry the area thoroughly with a soft towel and air circulation.

    Know when to call a professional for tough or delicate stains.

    Keep following for a detailed, step-by-step guide.

    Blot Excess Ink Immediately To Prevent Spread

    blot ink immediately gently

    If you catch the ink stain early, blot it immediately with a clean, dry cloth or paper towel to stop it from spreading. When dealing with ink on upholstery, press gently with the cloth, using light tampon movements. This helps absorb excess ink without pushing it deeper into the fabric.

    Avoid rubbing or scrubbing, as that only drives the ink further into the upholstery fibers, making removal much harder. Act quickly because fresh ink stains are far easier to lift than dried or set-in ones.

    Make sure to replace the blotting cloth or paper towel regularly; using a saturated cloth won’t absorb more ink. By blotting carefully and promptly, you prevent the ink stain from spreading and set yourself up for more effective cleaning later.

    Test Cleaning Methods On Your Upholstery Fabric

    Before applying any cleaning solution to your upholstery, you should always test it on a hidden area to verify it won’t damage or discolor the fabric. Start by choosing a discreet spot, like the underside or back of a cushion, where a patch test won’t be noticeable.

    Always test cleaning solutions on a hidden upholstery spot to prevent damage or discoloration.

    Use a small cloth or cotton swab to gently apply a bit of the cleaner you plan to use. Wait at least 15 minutes to watch for any discoloration, fabric damage, or texture changes. This waiting period is essential because some reactions aren’t immediate.

    Make sure the patch area dries completely before deciding if it’s safe to proceed. If you notice any discoloration or weakening, avoid using that cleaner on the stained area.

    Keeping a record of which solutions pass your test helps you confidently tackle ink stains without risking further damage. This careful testing step ensures your upholstery stays intact while you clean.

    Pick The Best Cleaner For Your Upholstery

    choose gentle or strong cleaners

    First, figure out what type of fabric your upholstery is made from and take a look at its care label. This will help you pick the right cleaner. It’s important to match your cleaner carefully—go for gentle solutions if the fabric is delicate, and stronger ones if it’s more durable.

    Also, always test the cleaner on a hidden spot first. This way, you can avoid any damage or discoloration before applying it to the whole piece.

    Identify Fabric Type

    Because each upholstery fabric reacts differently to cleaning products, you need to identify your fabric type to choose the best cleaner. Start by checking the manufacturer’s care label or cleaning code. W means water-based cleaners, S means solvent-based, S-W means either, and X means professional cleaning only.

    For example, velvet is sensitive to moisture, so avoid water-based cleaners. Microfiber resists stains and handles gentle cleaning well. Leather needs special products to prevent cracking, and suede or delicate fabrics often require professional care.

    Before applying any cleaner, always test it on a hidden fabric area to confirm it won’t cause discoloration or damage. This simple test protects your upholstery and helps you select the safest, most effective cleaning method for your specific fabric.

    Match Cleaner Carefully

    Although selecting the right cleaner might seem straightforward, you need to match it carefully to your upholstery fabric to avoid damage. Start by identifying the fabric type and consulting its care label to choose an appropriate cleaning agent.

    For example, alcohol-based solutions like isopropyl alcohol or hairspray can work well on some fabrics for ink removal, but they’re not safe on delicate materials like silk or velvet. Always avoid harsh chemicals like acetone, as they can cause irreversible damage or discoloration.

    While testing is essential, that’s a separate step; here, focus on picking a cleaner that suits your fabric’s needs. If you’re unsure about the fabric or cleaner, it’s best to seek professional cleaning to prevent unwanted damage during your ink stain removal.

    Test Cleaner First

    Before applying any cleaner to your upholstery, always test it on a hidden spot to make certain it won’t cause discoloration or damage. Find a small, inconspicuous area and apply a bit of the cleaner. Then wait 5-10 minutes to see if the fabric reacts negatively.

    Different materials need different cleaners. Synthetics often handle alcohol-based solutions well, while delicate fabrics like silk or velvet require gentler options. Check your upholstery’s care label or cleaning code to guide your choice.

    This test step is vital to avoid permanent stains or damage. By testing the cleaner first, you protect your upholstery and increase the chances of successfully removing the ink without harming the fabric. Always prioritize this simple but essential precaution before tackling any stain.

    Gently Dab Cleaning Solutions Onto The Stain

    gentle dabbing prevents spreading

    First, pick a cleaning solution that’s safe for your upholstery. It’s a good idea to test it on a hidden spot first, just to make sure it won’t cause any damage. Then, take a clean cloth or a cotton swab and gently dab the solution onto the ink stain. Avoid rubbing the stain—just softly dab it. This way, you can lift the ink without spreading it or harming the fabric.

    Choose Suitable Cleaning Solutions

    When you choose a cleaning solution, gently dabbing it onto the ink stain with a soft cloth or cotton swab helps prevent the ink from spreading further. For effective ink stain removal on upholstery, select solutions like rubbing alcohol, diluted vinegar, or mild soap.

    Apply these sparingly to avoid soaking the fabric, which can cause damage. Always test your chosen cleaning solutions on a hidden area first to ensure they won’t discolor or weaken the upholstery.

    Dab Without Rubbing

    Although it may be tempting to rub the stain, you should gently dab the cleaning solution onto the ink instead. Dab with light, tapping motions using a clean cloth or cotton swab. This gentle approach lifts ink without spreading or embedding the stain deeper.

    Always work from the outer edges inward to contain the ink. Apply small amounts of cleaning solution to avoid over-saturating the fabric. Patience is key; repeated gentle dabbing works better than rubbing and protects your upholstery’s integrity.

    Step Action Purpose
    1 Apply solution lightly Prevent over-saturation
    2 Dab outer edge gently Contain the stain
    3 Move inward gradually Avoid enlarging the stain
    4 Use tapping motions Lift ink particles
    5 Repeat patiently Preserve fabric condition

    Test On Hidden Areas

    Before you gently dab cleaning solutions onto the ink stain, you should always test the product on a hidden area of your upholstery. This patch test helps prevent any unexpected damage or discoloration.

    Follow these steps:

    1. Apply a small amount of the cleaning solution with a soft cloth onto an inconspicuous patch.
    2. Wait 5 to 10 minutes to see if any discoloration, bleeding, or texture changes occur.
    3. Confirm the tested area is completely dry before proceeding.

    If the fabric shows signs of damage, stop using the product right away. This simple test protects your upholstery and makes sure you’re using a safe method to treat the visible ink stain without causing more harm. Always prioritize this step before tackling the main stain.

    Rinse The Area Carefully To Remove Residue

    Since leftover ink and cleaning solution can damage your upholstery if not properly removed, you’ll want to rinse the area carefully using a damp cloth soaked in lukewarm water. Gently blot the stained spot with the damp cloth to lift away any residual ink and cleaning agents. Avoid soaking the fabric; instead, lightly dab to prevent water damage or moisture buildup.

    Use a separate clean, damp cloth to repeatedly blot the area, ensuring all residue is removed from the upholstery fibers. This step is vital to stop ink and chemicals from settling deeper into the fabric. Remember to test this rinsing method on a hidden section first to check for any adverse reactions like discoloration.

    Once you’ve successfully rinsed the area and removed the residue, press a dry towel lightly against the upholstery to absorb excess moisture. This careful rinsing process helps protect your upholstery while preparing it for drying.

    Dry Upholstery After Ink Removal

    When you’ve finished rinsing the ink stain, gently blot the upholstery with a dry, clean towel to soak up any leftover moisture. Press a dry microfiber cloth or soft towel lightly on the area, avoiding rubbing to prevent re-soaking the fabric. Proper drying is essential to protect your upholstery from damage or mold.

    To dry upholstery effectively after ink removal, follow these steps:

    1. Air dry the area in a well-ventilated room, steering clear of direct sunlight that can cause fading or harm the fabric.
    2. Use a fan or a hairdryer on a cool setting to speed up drying without risking heat damage.
    3. Ensure the cleaned upholstery is completely dry before using the furniture again to avoid lingering moisture issues.

    Know When To Call A Professional For Ink Stains

    Although many ink stains can be tackled at home, you should call a professional if the stain is old, deeply set, or on delicate fabrics like silk or velvet. Professional cleaning is your best bet for stubborn stains that DIY methods can’t remove.

    Delicate fabrics require specialized care that only trained experts can provide without causing damage. If you’ve tried multiple treatments and the stain persists, it’s time to seek expert help. Large or extensive ink stains, especially on valuable or antique upholstery, also demand professional attention to prevent further harm.

    Furthermore, if you notice any discoloration, fabric damage, or worsening of the stain despite your efforts, don’t hesitate to consult a professional. Taking this step ensures the stain is treated safely and effectively, preserving your upholstery’s appearance and integrity. Sometimes, knowing when to call in the pros saves you time, effort, and potential costly damage.

    Frequently Asked Questions

    Can Ink Stains Cause Permanent Damage to Upholstery Fabric?

    Yes, ink stains can cause permanent damage to upholstery fabric if you don’t act quickly. You should always do a colorfast test before trying any stain prevention method to avoid worsening the damage.

    Keep fabric considerations in mind. Delicate materials like silk or velvet are more vulnerable to lasting stains. By addressing ink spills promptly and carefully, you’ll protect your upholstery and keep it looking its best over time.

    Are All Ink Types Equally Difficult to Remove From Upholstery?

    Not all ink types are equally hard to remove from upholstery. It’s like peeling layers of paint; some come off easily, while others cling tight. Your success depends on ink absorption, stain color, and fabric texture.

    Water-based inks absorb less and fade faster. Permanent markers bond deeply, making removal tough. Delicate fabrics soak ink differently, so you’ll need to adjust your cleaning approach based on these factors for the best results.

    How Long Should I Wait Before Attempting to Clean an Ink Stain?

    You should act quickly for the best stain removal techniques, ideally within minutes of the ink spill. However, if you can’t clean it right away, wait until the ink is completely dry before treating it.

    Cleaning timeframes depend on ink absorption factors like fabric type and ink composition. Acting too late risks setting the stain, making it harder to remove. So, balance prompt action with letting the ink dry fully if needed.

    Can Homemade Cleaning Solutions Damage Upholstery Fibers?

    About 60% of DIY remedies for cleaning upholstery can harm fabric safety if used improperly. Yes, homemade cleaning solutions can damage upholstery fibers, especially if they contain harsh acids, alkalis, or abrasive ingredients.

    To guarantee stain prevention without ruining your fabric, always test solutions on a hidden spot first. Avoid strong chemicals that strip natural oils, and choose pH-balanced cleaners to protect your upholstery’s color and texture.

    Is It Safe to Use Commercial Ink Removers on All Fabric Types?

    No, it’s not safe to use commercial products on all fabric types. You need to take fabric compatibility into account carefully because some chemicals can damage delicate fibers like silk or wool.

    Always follow safety precautions by checking the manufacturer’s label and testing the remover on a hidden spot first. If you’re dealing with sensitive or antique upholstery, it’s smarter to seek professional cleaning instead of risking harm with commercial ink removers.

    Conclusion

    Removing ink from upholstery can feel like finding a needle in a haystack, but following these steps makes it manageable. By acting quickly, testing cleaners, and treating stains gently, you’ll save your fabric without causing damage.

    Remember to rinse and dry thoroughly to keep your upholstery looking fresh. And if the stain’s too stubborn, don’t hesitate to call in a professional. Sometimes it’s best to know when to pass the baton.

  • How Do You Get Ink Out of Denim in 7 Simple Steps?

    How Do You Get Ink Out of Denim in 7 Simple Steps?

    To get ink out of denim, act quickly by blotting the stain gently with a paper towel. Don’t rub.

    Rinse with cold water to dilute the ink, then test rubbing alcohol on a hidden spot before applying it carefully to the stain.

    Let it sit, blot again, and try a dish soap and baking soda paste if needed.

    Rinse thoroughly and wash the jeans cold to avoid setting the ink.

    If the stain persists, knowing when to seek expert help can save your denim.

    Act Quickly to Prevent Ink Stains on Denim

    act fast blot apply solvent

    Since ink stains set fast on denim, you need to act quickly to prevent permanent marks. The moment ink touches your jeans, prompt treatment is vital to stop it from drying and setting deep into the fabric.

    To prevent the stain from spreading, gently blot the area with a paper towel. Don’t rub. Once you’ve absorbed the excess ink, apply a solvent like rubbing alcohol or hand sanitizer to break down the ink’s pigments.

    After treatment, rinse the stained spot with cold water to dilute the ink and loosen its grip on the denim fibers. Acting quickly like this minimizes the need for harsh scrubbing, which can damage your jeans and embed the ink further.

    How to Gently Blot and Remove Excess Ink From Jeans

    Although ink stains can be stubborn, you can start removing excess ink from your jeans by gently blotting the area with a clean paper towel or cloth. Use a clean, dry cloth underneath the stained denim to catch any ink that seeps through, preventing it from transferring to other fabric parts.

    Always avoid rubbing the stain, as this pushes ink deeper into the fabric fibers, making stain removal harder. Instead, use a blotting technique. Press gently and lift excess ink without spreading it.

    Work from the outer edges of the stain inward to keep it from enlarging. If the stain is fresh, lightly press a damp cloth onto the area to help lift the ink before trying any other stain removal methods. This gentle approach helps you effectively blot and remove excess ink while protecting your denim’s fabric.

    Using Rubbing Alcohol Safely on Denim Ink Stains

    test blot stretch carefully

    Before you start, it’s a good idea to test the rubbing alcohol on a hidden spot of your denim. This way, you can be sure the color won’t fade or get damaged.

    When you’re ready, take a cotton ball or a soft cloth and gently blot the ink stain. Try to avoid rubbing too hard because that could make things worse.

    Also, keep the fabric stretched tight while you work. Apply the rubbing alcohol carefully to stop the ink from spreading around. Just take your time, and you’ll be fine!

    Testing Fabric Colorfastness

    How can you be sure rubbing alcohol won’t damage your denim while treating an ink stain? Always test fabric colorfastness first. Apply rubbing alcohol to a small, hidden area of the denim using a white cloth or cotton swab.

    Wait a few minutes and check for any discoloration or damage to the fabric integrity. If the fabric stays intact with no color change, it’s safe to continue.

    Test Area Observation Time Result Needed
    Small hidden spot 3-5 minutes No discoloration
    Fabric texture During test No damage or stiffness
    Colorfastness After drying Fabric looks unchanged

    This test helps avoid ruining your denim with rubbing alcohol.

    Proper Application Techniques

    When you’re ready to treat an ink stain on your denim, start by gently dabbing rubbing alcohol with a cotton ball or cloth, working from the outer edges toward the center. For proper application, first check your care label and test the rubbing alcohol on an inconspicuous spot to avoid discoloration.

    Hold the fabric taut over a bowl as you apply the solvent to prevent dripping. Let it sit for 10-15 minutes to break down the ink. Afterward, rinse with cold water and blot with a paper towel to lift residue.

    If needed, repeat the process, incorporating gentle scrubbing to enhance ink stain removal without damaging the denim. Using rubbing alcohol cautiously ensures effective treatment and preserves your jeans.

    Using Dish Soap and Baking Soda on Tough Ink Stains in Jeans

    You’ll want to mix dish soap and baking soda into a thick paste to tackle those tough ink stains. Just apply the paste directly onto the stain, then gently scrub it with a soft toothbrush or cloth. This method really helps break down the ink, making it easier to lift right out of your denim.

    Mixing Dish Soap Paste

    Although stubborn ink stains can be tough to remove, mixing a paste of dish soap and baking soda provides a powerful solution. Start by combining equal parts dish soap and baking soda to create a thick paste. This paste works by breaking down the ink pigments embedded in your denim.

    Apply the mixture directly onto the ink stain, making sure it fully covers the area. Let it sit for 15 to 30 minutes to penetrate the fabric for the best removal process. Afterward, you’ll gently scrub the stain using a soft toothbrush or cloth to help lift the ink.

    Finally, rinse the denim thoroughly with cold water to wash away the paste and the dissolved ink. Repeat this process if the stain persists.

    Applying And Scrubbing

    Since tough ink stains can be stubborn, applying the dish soap and baking soda paste carefully is essential for effective removal. You want to apply the paste directly onto the denim stain and gently scrub it using a soft-bristled brush or toothbrush. This action helps loosen the ink from the fabric fibers.

    Let the paste sit for 10-15 minutes to maximize stain removal. After scrubbing, rinse with cold water to wash away the paste and loosened ink. If the stain remains, repeat the apply-and-scrub process until fully treated.

    Stubborn Stain Gentle Scrub Fresh Denim
    Frustration Hope Relief
    Persistence Care Success
    Ink Marks Brush Action Clean Look
    Tough Spot Paste Power Satisfaction

    Rinsing and Assessing Ink Removal Before Washing Denim

    rinse blot assess test

    How should you start handling an ink stain on denim to increase your chances of removing it? Begin by rinsing the stained area with cold water immediately. This helps dilute the ink and prevents it from settling deeper into the fabric. Avoid warm or hot water, as higher wash temperatures can cause the ink to set permanently.

    After rinsing, gently blot the stain with a clean cloth or paper towel to lift excess ink without rubbing it further in.

    Next, focus on assessing the ink removal progress. Check the stain’s visibility and look for any discoloration or changes in size. This evaluation helps you decide if additional pre-treatment is necessary before washing.

    Always test any solvent or treatment on a small, hidden spot of your denim to avoid damage or discoloration. Proper rinsing and careful assessing set you up for successful ink removal without harming your favorite jeans.

    How to Wash Jeans to Keep Ink Stains From Setting

    When you wash jeans with ink stains, acting quickly and carefully can prevent the ink from setting permanently. Start by rinsing the ink stains thoroughly with cold water. Hot water might set the stain, making removing ink much harder.

    Next, pre-treat the stained area using rubbing alcohol or a commercial stain remover designed for ink. This pretreatment helps break down the ink before you wash jeans.

    Follow your denim’s care label and wash jeans in the hottest water safe for the fabric to lift any remaining ink. After washing, inspect the jeans carefully.

    If you still see ink stains, avoid putting them in the dryer, as heat will set the stain permanently. Instead, repeat the pre-treat and wash process until the ink is gone.

    When to Call a Pro for Ink Stains on Jeans

    Although many ink stains on jeans can be treated at home, you should call a professional if the stain resists multiple attempts or has been heat-set. They have specialized tools and expertise to remove stubborn ink without damaging your denim.

    Professional cleaning uses specialized solvents and techniques that protect delicate denim while tackling set ink and heat-dried stains effectively. Ignoring persistent stains risks fabric damage or incomplete removal.

    Here’s when to contemplate professional stain removal:

    Situation Reason
    Stain resists multiple attempts Prevents worsening fabric damage
    Heat-dried stain Avoids embedding ink deeper
    Delicate denim Protects from tearing or discoloration
    Set ink for several days Ensures thorough removal with expertise

    When homemade remedies fail, calling a pro is your best bet to restore your jeans without risking damage.

    Frequently Asked Questions

    Can Ink Stains on Denim Be Removed After Drying?

    Yes, you can remove pen ink from denim even after drying, though it’s tougher. For ballpoint stains, start pen ink removal by gently blotting ink smudges or ink blotches with rubbing alcohol or a commercial remover.

    Ink transfer and ink marks might need multiple treatments to fade ink discoloration. Be patient, and avoid harsh scrubbing to protect your denim’s fibers. If ink stains persist, consider professional cleaning for best results.

    Are There Natural Alternatives to Chemical Solvents for Ink Removal?

    Imagine gently dabbing a soft cloth soaked in a homemade stain remover made from baking soda and white vinegar onto your denim. You can definitely use natural remedies like plant-based solvents and botanical extracts for sustainable ink removal.

    Eco-friendly solutions, such as organic cleaning agents and herbal remedies, work wonders without harsh chemicals. These homemade stain removers offer a gentle, earth-conscious way to lift ink stains while protecting your denim and the planet.

    Will Bleach Damage Denim When Removing Ink Stains?

    Yes, bleach risks damaging your denim when removing ink stains. It can cause fabric weakening and unwanted color change due to chemical reactions with the dye. You might notice texture effects like roughness or thinning.

    Bleach often leads to stain persistence if not applied correctly, which can make the problem worse. Since denim’s dye compatibility varies, you should avoid bleach or test a hidden spot first to prevent permanent damage.

    How Do Different Ink Types Affect Stain Removal Methods?

    Ink composition shapes how you tackle stains: pen ink needs gentle soap, marker ink demands stronger solvents, and fabric ink calls for specialized cleaners.

    Water-based ink responds well to soap and water, while permanent ink requires alcohol-based solvent types to break down its tough ink formulation.

    Understanding ink formulation helps you pick the right method quickly. So, match your approach to the ink type, and you’ll remove stains more effectively every time.

    Can Ink Removal Methods Affect Denim Color or Texture?

    Yes, ink removal methods can cause color fading and texture alteration on denim. When you use strong solvents, you risk color bleeding and damaging denim dye stability. This affects surface reflection and the overall appearance.

    Ink penetration depth matters, so aggressive treatments may reduce fabric resilience and material softness. To protect your denim, always test first on a hidden spot. This helps avoid unwanted fading or roughness while preserving the fabric’s look and feel.

    Conclusion

    So, you’ve battled the ink like a denim warrior. Act fast, blot gently, and scrub smart. Who knew a tiny pen mishap could turn you into a stain-fighting pro?

    If your jeans still look like modern art, maybe it’s time to phone a real expert. But hey, at least now you’ve got a seven-step saga that makes laundry day way more exciting than it should be.

    Ink stains? Consider them ink-credible stories!

  • How Do You Get Ink Out of Clothes Quickly?

    How Do You Get Ink Out of Clothes Quickly?

    To get ink out of clothes quickly, first blot the stain gently without rubbing.

    Then apply rubbing alcohol or hand sanitizer directly to break down the ink.

    Rinse the area with cold water from the back, and avoid any heat until the stain is fully treated.

    If needed, repeat the process before washing normally.

    Using these steps promptly improves your chance of complete removal.

    Keep going to discover more tips for tackling stubborn ink stains.

    How To Spot The Type Of Ink Stain Fast

    identify ink type quickly

    How can you quickly tell what type of ink stained your clothes? First, look closely at the ink stain’s color and edges. Water-based ink stains usually appear lighter and have blurry or feathered edges, which often wash out more easily.

    Permanent ink stains, on the other hand, show darker, more saturated colors with sharp, well-defined edges. Ballpoint pen ink leaves a smudgy, oily mark that feels different and can resist removal more than water-based ink.

    If you still have the pen or marker that caused the stain, check it to identify whether the ink is water-based, permanent, or oil-based. Knowing the ink type helps you choose the right cleaning method. So spotting these details quickly saves you time and effort.

    Why You Should Act Fast On Ink Stains

    You want to act fast on ink stains because if you don’t, they can set permanently into the fabric. The sooner you treat the stain, the better your chances of getting it out completely without harming the material. Plus, dealing with it right away helps keep your clothes looking fresh and preserves their original color.

    Prevent Permanent Ink Setting

    Because ink dries quickly, acting fast is essential to stop it from setting permanently into your clothes. Fresh stains are easier to treat because the ink hasn’t bonded deeply with the fabric fibers yet.

    When you address ink stains immediately, you prevent permanent ink setting by stopping the ink from soaking in. Using solvents like alcohol or hand sanitizer on fresh stains increases your chances of lifting the ink before it becomes stubborn.

    If you wait too long, the ink bonds more strongly, making removal difficult. Plus, if heat from washing or drying hits untreated stains, the ink can set permanently, ruining your clothes.

    Increase Stain Removal Success

    When ink stains happen, acting quickly can make all the difference in removing them effectively. The longer you wait, the deeper the ink penetrates the fabric, making stain removal much tougher.

    If you treat the stain immediately with rubbing alcohol or hand sanitizer, you can prevent the ink from setting and reduce its visibility. Quick action also stops heat from drying the stain, which would otherwise make it permanent.

    By responding fast, you avoid multiple cleaning attempts that could harm delicate fabrics. Remember, prompt treatment increases your chances of fully removing ink stains and keeps your clothes looking clean and fresh.

    Don’t let ink set. Act fast to boost your stain removal success every time.

    Minimize Fabric Damage Risks

    Although ink stains can be frustrating, acting quickly helps minimize fabric damage by preventing the ink from setting deep into the fibers. When you treat ink stains immediately with a proper remover, you reduce the need for harsh chemicals that can weaken your fabric.

    The longer you wait, the more the ink binds, making removal tougher and risking permanent damage. Quick action lets you use gentler cleaning methods, protecting your clothes and saving time.

    Waiting Too Long Acting Fast
    Ink sets deeper Ink lifts easily
    Harsh chemicals needed Gentle remover suffices
    Risk of permanent stain Fabric stays intact

    Don’t delay, grab your remover and tackle ink stains right away!

    How To Use Rubbing Alcohol Or Hand Sanitizer On Ink Stains

    If you want to remove ink stains quickly, applying rubbing alcohol or hand sanitizer can be highly effective. Start by pouring rubbing alcohol or hand sanitizer directly onto the ink stain, making sure the fabric is fully saturated. Then, gently blot the area with a clean cloth or cotton ball to lift the ink without spreading it further.

    Let the rubbing alcohol or hand sanitizer sit on the stain for 10 to 15 minutes to break down the ink particles. After that, rinse the treated area with cold water from the back of the stain to flush out the loosened ink.

    Finally, wash the garment as usual and check the stain before drying. If any ink remains, just repeat the process. Using rubbing alcohol or hand sanitizer is a quick and practical way to tackle ink stains, especially when you need fast results and want to avoid fabric damage.

    When And How To Use Dish Soap And Water For Ink Removal

    dampen soap patience fade

    When you notice an ink stain, the first thing to do is dampen the area with some water. This helps to loosen up the ink a bit. After that, grab a damp cloth and put a small amount of dish soap on it to gently work on the stain.

    Just keep in mind, this method usually takes a few tries to really make a difference. It might not get rid of the ink completely the first time around, but with a little patience, you’ll see the stain start to fade.

    Dish Soap Application

    Since water helps loosen ink from fabric fibers, start by dampening the stained area before applying dish soap. Next, put a small amount of dish soap directly onto the ink stains using a damp cloth. Gently rub the soap into the fabric to break down the ink.

    Let it sit for a few minutes to boost the cleaning effect. After that, rinse the fabric thoroughly with water to wash away the loosened ink particles. If the stain persists, repeat the dish soap application process until the ink fades.

    This method works best on water-based inks and helps you tackle ink stains quickly and effectively. Remember, consistent gentle treatment with dish soap can make a big difference in removing stubborn ink.

    Effectiveness And Limitations

    Although dish soap and water can help fade ink stains, you shouldn’t expect them to completely remove all types of ink with just one try. This stain remover works best on water-based inks and may require multiple applications for better results.

    It’s less effective on oil-based or permanent ink stains. You’ll find it easy to use, but stubborn or older stains might resist full removal.

    Ink Type Effectiveness (3/5) Ease of Use (4/5)
    Water-based Ink Moderate Easy
    Oil-based Ink Low Easy
    Permanent Ink Low Easy
    Older Stains Low Easy

    Use dish soap and water as a quick, gentle stain remover, but be ready to repeat or try stronger methods for tough ink stains.

    Alternative And Less Effective Ink Removal Methods (Hair Spray, Vinegar, Baking Soda)

    Even though many people turn to hair spray, vinegar, or baking soda to tackle ink stains, these methods often fall short. Hair spray, for instance, can actually make the ink stain worse instead of fading it.

    Vinegar mixed with cornstarch creates a thick, cement-like paste that’s tough to apply and doesn’t fully remove the stain. This paste hardens and flakes off in chunks, which means you’re left with a messy residue rather than a clean fabric.

    Overall, these alternative methods tend to score low on effectiveness, usually between 0 to 3 out of 5, especially when compared to alcohol-based solutions. Both hair spray and vinegar-based treatments lack the consistency and reliability you need for quick ink removal.

    How To Treat Ink Stains On Cotton, Denim, And Delicate Fabrics

    quick ink stain removal

    When ink stains appear on cotton, denim, or delicate fabrics, acting quickly can make all the difference in removing them effectively. To remove ink stains from cotton and denim, apply rubbing alcohol or hand sanitizer promptly. Blot gently to lift the ink without spreading it.

    You can also soak the stained area in alcohol before washing in warm or hot water for the best results. For delicate fabrics like silk, avoid harsh rubbing. Instead, mix white vinegar and cornstarch into a gentle paste, apply carefully, and let it sit.

    Always test any cleaning solution on a hidden spot first to avoid discoloration or damage. After treating the stain, avoid drying the fabric until you’re sure the ink is completely gone, since heat can set the stain permanently. By using these targeted methods, you can effectively remove ink stains from a variety of fabrics without causing harm.

    Tips To Prevent Ink Stains From Setting Before Washing

    When you notice ink on your clothes, grab a clean cloth and blot it right away to lift as much as you can without spreading it around. Make sure not to expose the stain to heat because that can set the ink permanently. Then, rinse the area with cold water from the back to help push the ink out before you wash it.

    Immediate Stain Blotting

    Because ink stains can set quickly, you should blot the area immediately with a clean, dry cloth or paper towel to absorb as much excess ink as possible. Don’t rub; rubbing only spreads the stain, making it harder to remove. Instead, gently dab to lift ink without pushing it deeper into the fabric.

    Follow these steps to blot the stain effectively:

    1. Use a clean, dry cloth or paper towel to blot the ink stain gently.
    2. Work from the outside of the stain inward to prevent spreading.
    3. Apply a pre-treatment like rubbing alcohol or hand sanitizer to help loosen the ink.

    Avoid Heat Exposure

    If you want to stop ink stains from setting permanently, steer clear of heat until the stain is fully treated. Heat from dryers or hot water can cause ink to penetrate deeper into fabric fibers, making removal much tougher.

    Avoid using any heat-based drying methods until you’re certain the stain is gone. Instead, let your clothes air dry or dry naturally after treating the ink. This prevents the stain from setting and gives you a better chance at complete removal.

    Use Cold Water

    Although ink stains can seem stubborn, rinsing them with cold water right away prevents them from setting into the fabric. Cold water minimizes the chemical reaction that bonds ink permanently to fibers, making removal easier. Here’s how to use cold water effectively:

    1. Rinse the ink stain immediately with cold water to stop it from settling.
    2. Apply cold water from the back of the fabric to push the ink out instead of embedding it further.
    3. Avoid hot or warm water initially, as heat sets the ink stain, making it harder to remove.

    How To Rewash Clothes To Fully Remove Ink Stains

    When you rewash clothes to remove ink stains, act quickly to prevent the ink from setting deeper into the fabric. After treating the stain, put the garment back in the wash promptly.

    Use hot water if the fabric can handle it, as heat helps dissolve and loosen ink residues more effectively. Add a stain-fighting laundry booster or extra detergent to the cycle to increase your chances of fully removing ink stains.

    Use hot water and a stain-fighting booster to better dissolve and remove stubborn ink stains.

    Avoid fabric softeners or bleach at this stage, since they can sometimes make ink harder to remove. Once the cycle finishes, inspect the fabric thoroughly under good lighting.

    If you still see ink marks, repeat the treatment and rewash clothes again before drying. Drying too soon can set the stain permanently, so always make sure the ink is completely gone before using the dryer.

    Acting swiftly and following these steps will help you fully remove ink stains from your clothes.

    Best Household Products To Get Ink Out Of Clothes Fast

    Because ink stains can set quickly, using the right household products immediately gives you the best chance to remove them fast. You don’t need fancy cleaners. Common items in your home can tackle ink effectively. Here are the top 3 household products to get ink out of clothes fast:

    1. Rubbing Alcohol or Hand Sanitizer: Both break down ink quickly. Apply directly, blot gently, then rinse with cold water to prevent setting.
    2. Hairspray with Alcohol: Spray it on the stain to dissolve ink rapidly, making it easier to wash away.
    3. Vinegar and Baking Soda Paste: Mix for a natural alternative that loosens ink stains if you don’t have alcohol-based products.

    For a gentler start, use dish soap with a damp cloth to treat the stain before applying stronger solutions. Always rinse treated areas promptly with cold water. Using these household products smartly helps you get ink out of clothes fast and saves your favorite garments from permanent stains.

    How To Check Clothes To Ensure Ink Stains Are Gone

    To make sure the ink stain is completely gone, you should carefully examine the area under good lighting right after washing. Conduct a thorough visual inspection of the stained spot to spot any remaining ink stains or discoloration.

    Gently blot the fabric with a white cloth or paper towel. If ink transfers, you’ll need to treat it again. Sometimes, faint traces of ink aren’t visible to the naked eye, so use a magnifying glass if you have one to catch any hidden stains.

    Avoid putting the garment in the dryer until you’re absolutely sure the stain is gone, as heat can set the ink permanently. Always inspect both before and after washing to confirm the stain has fully lifted without fading the fabric.

    Taking these careful steps ensures your clothes come clean and your ink stains won’t return.

    Frequently Asked Questions

    Can Ink Stains Be Removed From Leather or Suede?

    Yes, you can remove ink stains from leather or suede, but you need to be cautious. For leather care, gently apply rubbing alcohol with a cotton swab to lift ink without damaging the surface.

    When it comes to suede cleaning, use a specialized suede eraser or soft cloth, avoiding excess moisture. Always test any method on a hidden spot first.

    If you’re unsure, professional cleaning is your safest bet to protect your items.

    Are There Any Professional Cleaning Services for Ink Stains?

    Yes, you can rely on professional cleaning services for ink stains. They use advanced ink removal tips and industrial solvents to tackle tough stains effectively.

    These experts also offer stain prevention methods for delicate fabrics, ensuring your clothes stay safe. If you want quick, reliable results, taking your garment to a professional cleaner is a smart move.

    They can restore your clothes when DIY methods just won’t cut it.

    How Long Does It Take for Ink Stains to Set if Untreated?

    Ink drying and stain setting happen pretty fast. You’re looking at as little as 24 hours for untreated ink stains to set. Water-based inks can dry and set even quicker, sometimes within just a few hours.

    If you don’t act quickly, the stain will become harder to remove. Plus, heat speeds things up, causing the stain to set permanently in about 30 minutes. So, don’t wait to treat those ink marks!

    Can Heat From Ironing Make Ink Stains Permanent?

    Sure, if you want to make that ink stain a permanent part of your shirt’s charm, just iron right over it! Ironing causes heat damage that sets the stain, making it nearly impossible to remove later.

    Heat locks the ink deep into the fibers, accelerating stain setting like a stubborn signature you never wanted. So, don’t let your iron betray you. Always treat the stain first before applying any heat.

    Is It Safe to Use Bleach on Ink-Stained Clothes?

    Bleach safety is a big concern when treating ink stains. You shouldn’t use bleach on colored or delicate fabrics because it can cause discoloration or damage. Instead, try ink removal methods like alcohol-based solutions or specialty stain removers, which are much safer.

    If you must use bleach, always spot test first on a hidden area to avoid ruining your clothes. Remember, bleach can weaken fibers if overused, so use it cautiously.

    Conclusion

    Don’t worry if you think ink stains are impossible to remove. Acting fast is key, and you’ve got effective tools like rubbing alcohol and dish soap right at home.

    Even if the stain seems stubborn, rewashing and using household products can do the trick. Just remember, quick action and checking your clothes before drying will save your favorite outfit.

    So, don’t stress. Ink stains don’t have to be permanent!

  • How Do You Check Canon Printer Ink Levels in 7 Easy Steps?

    How Do You Check Canon Printer Ink Levels in 7 Easy Steps?

    You can check your Canon printer ink levels easily in seven steps: open your computer’s Control Panel (Windows) or System Preferences (Mac), select your Canon printer, and access the maintenance or supply levels tab.

    Alternatively, use the Canon PRINT app on your mobile device connected to Wi-Fi, then navigate to the ink level section. The indicators show real-time ink status, helping you replace cartridges before they run out.

    Keep an eye on these to avoid print issues, and discover how to maintain your printer for best results.

    Check Ink Levels on Your Canon Printer Using Windows

    check canon ink levels windows

    If you’re using a Windows computer, you can easily check your Canon printer’s ink levels through the Control Panel. Start by opening the Control Panel and navigating to Devices and Printers. Find your Canon printer icon, right-click it, and select “Printing Preferences.”

    Within the Preferences window, click the “Maintenance” tab. Here, look for the “View Printer Status” option or something similar. Selecting this displays your current ink levels, showing the status of each ink cartridge either as a graphical bar or a percentage.

    Using the printer software via the Control Panel lets you monitor your Canon’s ink cartridges effortlessly, helping you maintain optimal print quality. Regularly checking the printer status ensures you don’t run out of ink unexpectedly and keeps your printer running smoothly.

    This method is a straightforward way to check ink levels on your Canon printer using Windows without needing extra applications. It’s simple and handy, so you can keep printing without interruptions.

    Check Ink Levels on Your Canon Printer Using Mac

    When you want to check your Canon printer’s ink levels on a Mac, start by opening “System Preferences” and selecting “Printers & Scanners.” Next, choose your Canon printer from the list of available devices.

    Once selected, click on “Options & Supplies” to access more settings. Then, navigate to the “Supply Levels” tab, where you can view the current ink levels for each cartridge. The supply levels are displayed as graphical bars or percentages, making it easy to check how much ink you have left.

    Monitoring these levels regularly helps you avoid running out of ink unexpectedly. If you notice low supply levels, you can prepare to order replacement cartridges or plan a refill.

    This method provides a quick and straightforward way to check your Canon printer’s ink levels directly from your Mac without needing additional apps or software.

    Use the Canon PRINT App to View Ink Levels

    check ink levels remotely

    Besides checking ink levels directly on your Mac, you can also use the Canon PRINT app on your mobile device for quick access. This mobile app lets you monitor ink effortlessly, ensuring you stay updated on your printer’s ink cartridges without needing a computer.

    To check ink status via the Canon PRINT app, follow these steps:

    Download and install the Canon PRINT Inkjet/SELPHY app from the App Store or Google Play.

    Connect your Canon printer and mobile device to the same Wi-Fi network for seamless wireless printing.

    Open the app and select your printer from the available devices.

    Navigate to the “Maintenance” or “Ink Level” section to view the ink level indicator.

    Review ink levels displayed as bar graphs or percentages to monitor ink efficiently.

    Using the Canon PRINT app not only simplifies printer maintenance but also keeps you informed about ink levels anytime, anywhere.

    What Your Ink Level Indicators Are Telling You

    Although ink level indicators might seem straightforward, they provide essential information that helps you manage your printer’s performance effectively. On your Canon printer, the ink level display gives you a real-time status of each cartridge’s ink levels, often shown as colored bars or percentages. These ink level indicators let you monitor cartridge status closely, so you know exactly when ink is running low.

    Recognizing low ink warnings early helps you avoid sudden drops in print quality that can disrupt your work. When the ink level indicators show a low or nearly empty status, it’s a clear signal to refill or replace your cartridges soon.

    When and How to Get Replacement Ink Cartridges

    replace cartridges when low

    To keep your Canon printer running smoothly, you should replace ink cartridges as soon as the ink level indicator signals low or empty. Monitoring ink levels regularly helps you avoid running out of ink unexpectedly and guarantees consistent print quality. When it’s time to replace cartridges, follow these key steps:

    Use the Canon PRINT app or your printer’s display to check ink levels and confirm low ink status. Consult your printer manual or Canon’s website to find compatible replacement ink cartridges.

    Purchase genuine Canon ink cartridges to maintain top-notch print quality and printer maintenance. Remove protective tape from new cartridges and install them correctly to prevent print errors.

    After installation, perform a test print to verify the cartridges are seated properly and print quality is restored.

    How to Replace Ink Cartridges on Your Canon Printer

    To replace your Canon printer’s ink cartridges, first get your new cartridges ready and peel off any protective tape. Next, gently remove the old cartridges from their slots. After that, pop the new ones in securely. Once that’s done, it’s a good idea to run a test print to make sure everything’s working just right.

    Preparing New Ink Cartridges

    When you’re ready to replace the ink cartridges on your Canon printer, start by turning on the device and opening the ink cartridge access cover to expose the cartridges.

    To prepare your new ink cartridges properly, follow these steps:

    Remove the new ink cartridges from their packaging carefully.

    Take off the protective tape covering the ink nozzles without touching the nozzles themselves.

    Identify the correct color-coded slot for each cartridge.

    Insert each cartridge firmly until it clicks, ensuring it’s securely installed.

    Close the access cover and run a test print to confirm the cartridges are functioning correctly.

    Removing Old Cartridges

    After preparing your new ink cartridges, you’ll need to remove the old ones from your Canon printer. First, turn on the printer and open the ink cartridge cover to access the cartridges.

    To remove each cartridge, press the eject button or gently lift the cartridge latch. Be careful not to touch the electrical contacts or nozzles, as this can cause printing issues.

    Once removed, you can observe the ink levels on the old cartridges, which helps decide if replacement is necessary. When handling new cartridges, make sure to remove any protect tape before installing them.

    Properly removing and replacing cartridges is essential for smooth operation and troubleshooting problems related to print quality or ink detection in your Canon printer.

    Installing And Testing Cartridges

    Although you’ve just removed the old cartridges, installing new ones is straightforward and guarantees your Canon printer continues producing high-quality prints. To assure proper ink levels and functionality, follow these steps when installing cartridges:

    Turn on your Canon printer and open the ink cartridge cover. Remove new ink cartridges from packaging and peel off any protective tape. Insert cartridges firmly into the correct slots, listening for a click. Close the cartridge cover securely.

    Print a test page to verify installation and confirm the cartridges work properly. After completing these steps, your Canon printer should display accurate ink levels.

    Running a test print helps you confirm the cartridges are correctly installed, preventing issues before your next print job.

    Tips for Maintaining Your Canon Printer’s Ink System

    To keep your Canon printer’s ink system running smoothly, check ink levels regularly using the Canon PRINT app or the printer’s control panel, especially if your model has a touchscreen. Monitoring ink status helps you avoid unexpected shortages and ensures consistent print quality. Make it a habit to check ink through the printer software or built-in display frequently.

    Always use genuine ink cartridges to guarantee accurate ink level reporting and protect your Canon printer from damage. Keep spare cartridges on hand, especially for models like the Pixma TS202 that need frequent replacements. Also, perform routine printhead cleaning and alignment to maintain optimal ink flow and prevent clogs.

    Frequently Asked Questions

    Can I Check Ink Levels Without Connecting to a Computer or App?

    Yes, you can check ink levels without connecting to a computer or app if your Canon printer supports wireless printing with a built-in display. Navigate the menu for ink cartridge replacement or printer maintenance tips like print head cleaning.

    This helps avoid error message troubleshooting and paper jam removal caused by low ink. Keeping an eye on ink levels also aids print quality adjustment and timely ink cartridge recycling, reducing the need for frequent printer software updates.

    What Should I Do if the Ink Level Display Is Inaccurate?

    Think of your printer as a delicate clockwork. If the ink level display’s off, start with printer software updates to recalibrate its heartbeat.

    Perform print head cleaning and ink flow troubleshooting to guarantee smooth ink absorption technology. Check cartridge replacement tips and ink refill procedures, as worn cartridges affect ink level calibration.

    Regular printer maintenance extends ink cartridge lifespan. When glitches persist, manually inspect cartridges or contact support to keep your printing rhythm flawless.

    How Do Different Canon Printer Models Show Ink Levels?

    Different Canon printer models show ink levels using ink level indicators on their display screen options or control panel menus. You’ll see ink cartridge symbols or printer status icons that represent each cartridge’s ink status.

    Some models send ink status notifications or ink level alerts through the Canon PRINT app or printer driver settings on your computer. Maintaining your printer firmware updates current guarantees accurate ink readings and smooth operation across all these display methods.

    Can Low Ink Levels Cause Print Quality Issues Before Cartridges Run Out?

    You’d think your printer would stop printing when ink runs out, right? Nope. Low ink levels can sneakily sabotage your color accuracy and printing speed before cartridges die, thanks to imperfect ink level sensors.

    You’ll notice streaks or faded prints as cartridge lifespan wanes. Skipping print head cleaning or ignoring ink drying time only makes this worse.

    Stick to maintenance routines, check cartridge compatibility, and follow ink refill tips to avoid surprises.

    Is It Safe to Use Third-Party Ink Cartridges With My Canon Printer?

    Using third-party ink with your Canon printer can risk voiding your printer warranty and may cause ink compatibility issues. You might face reduced cartridge lifespan, ink drying inside the printer, or print head clogs.

    Color accuracy often suffers too. Proper ink storage with third-party cartridges varies, which could increase environmental impact. While some are affordable, you should weigh these risks before deciding to use third-party ink in your Canon printer.

    Conclusion

    Checking your Canon printer’s ink levels is as easy as pie when you follow these simple steps. Whether you’re on Windows, Mac, or using the Canon PRINT app, staying on top of ink guarantees your prints never skip a beat.

    Remember, timely replacements and regular maintenance keep your printer running smoothly, saving you from unexpected ink droughts. So, take charge now and keep your creativity flowing without a hitch!

  • Does Aquaphor Pull Ink Out of Tattoos?

    Does Aquaphor Pull Ink Out of Tattoos?

    Aquaphor doesn’t pull ink out of your tattoos because the ink sits deep within the dermis, far below where the ointment works. It mainly creates a protective barrier on the skin’s surface to lock in moisture and aid healing.

    While you might see fluid that looks like ink, that’s just normal healing plasma, not tattoo pigment.

    Using Aquaphor properly supports your tattoo’s recovery without fading the ink.

    Keep going to understand how to care for your tattoo best.

    What Is Aquaphor and How Does It Work on Your Skin?

    creates moisture locking protective barrier

    Although you might have heard concerns about Aquaphor affecting tattoo ink, this ointment primarily works by creating a protective barrier on your skin to lock in moisture and speed up healing. Aquaphor’s main ingredient is petrolatum, which forms an occlusive layer that seals in moisture and prevents water loss from your skin.

    This barrier helps keep your skin hydrated, which is vital for proper healing after a tattoo. Besides petrolatum, Aquaphor contains glycerin, lanolin, and panthenol, which soothe and hydrate the skin further.

    When you apply Aquaphor, it doesn’t penetrate deeply enough to reach the tattoo ink embedded in the dermis. Instead, it focuses on the surface, maintaining a moist environment that accelerates healing and reduces irritation or dryness.

    Why Do People Think Aquaphor Pulls Ink Out of Tattoos?

    You might think Aquaphor pulls ink out because you notice fluid weeping from your tattoo after you put it on. But actually, that fluid is mostly healing plasma and lymph—not the ink itself. The ink sits deeper in your skin’s dermis, so it’s not really coming out. It’s an easy mix-up to make because natural healing can look like ink loss, even though it’s not.

    Misunderstanding Healing Fluid

    When you apply Aquaphor to a fresh tattoo, the fluid that appears on the surface might look like ink being pulled out, but it’s actually just your body’s natural healing fluids. This healing fluid includes plasma and lymph and is part of the skin’s normal weeping process as it repairs itself.

    Many people mistake this clear or slightly colored fluid for ink because it can resemble the tattoo pigment. However, Aquaphor doesn’t cause ink removal; it simply helps to protect and moisturize the skin, supporting the healing process.

    Since tattoo ink is embedded deep in the dermis, topical ointments like Aquaphor cannot reach or extract it. Understanding this can prevent confusion about the role Aquaphor plays during tattoo healing.

    Ink Location In Dermis

    Understanding why Aquaphor doesn’t pull ink out of tattoos starts with knowing where tattoo ink actually resides in your skin. Tattoo ink is embedded deep in the dermis, the thick layer beneath the outer epidermis.

    Since Aquaphor only stays on the surface, it can’t reach the ink or remove it during healing. What you see as fluid when applying Aquaphor is healing plasma and lymph, not ink.

    Skin Layer Description
    Epidermis Outer layer, sheds easily
    Dermis Ink resides here, stable
    Hypodermis Fat and connective tissue
    Surface (Topical) Aquaphor stays here, no ink

    Knowing this clears the misconception that Aquaphor pulls ink out during your tattoo’s healing process.

    Weeping Vs Ink Removal

    Although Aquaphor doesn’t pull ink from your tattoo, the weeping fluid during healing can easily be mistaken for ink being drawn out. This weeping is a natural part of tattoo healing, consisting mainly of plasma, lymph, and a small amount of excess ink mixed with these fluids.

    When you see this fluid, it might look like Aquaphor is causing ink removal, but that’s not the case. Tattoo ink is embedded deep in the dermis, beyond the reach of topical ointments like Aquaphor.

    There’s no scientific proof that Aquaphor or any ointment can extract ink once it’s properly placed. People often confuse the normal weeping process with ink removal, misunderstanding how tattoos heal and how ink stays locked within your skin.

    Where Does Tattoo Ink Actually Stay: What Aquaphor Can’t Reach

    Since tattoo ink settles deep within the dermis layer of your skin, Aquaphor can’t reach or remove it. The ink particles embed themselves firmly in this middle layer, which lies beneath the outer epidermis.

    Topical ointments like Aquaphor only create a protective barrier on the surface and don’t penetrate far enough to interact with the ink. What you see leaking from a fresh tattoo isn’t ink but healing fluids: plasma, lymph, and other natural excretions your body produces during the recovery process.

    Because the ink remains locked in the dermis, no amount of ointment rubbing or application will pull it out. Aquaphor’s role is to protect and moisturize the surface, assisting healing, but it can’t extract pigment from beneath your skin.

    How Does Aquaphor Impact New Tattoo Healing?

    promotes healing without ink removal

    When you put Aquaphor on a new tattoo, it won’t pull the ink out because the pigment is deep in your skin. Instead, it helps by creating a moist environment that speeds up healing and cuts down on scabbing. Just be sure to use it the right way so you don’t end up with irritation or clogged pores while your skin is healing.

    Aquaphor And Ink

    How does Aquaphor affect the ink in your new tattoo? Rest assured, Aquaphor doesn’t pull tattoo ink out because the ink sits deep within the dermis layer of your skin, beyond the reach of any topical ointment.

    When you apply Aquaphor, the ink stays put; what you might notice is healing fluid mixing with surface ink, creating the illusion of ink leaching. Aquaphor forms an occlusive barrier that traps moisture and heat, which can influence your healing environment, but it doesn’t extract or fade the ink itself.

    Scientific evidence shows Aquaphor supports healing effectively without compromising the vibrancy or longevity of your tattoo ink. Using Aquaphor properly helps your tattoo heal smoothly while keeping the ink intact.

    Healing Effects And Risks

    Although Aquaphor doesn’t pull ink from your new tattoo, it plays an essential role in the healing process by keeping your skin moisturized and protected. Using Aquaphor correctly supports healing and promotes ink retention. However, you should be aware of potential risks if overused. Here’s what you need to know:

    1. Aquaphor locks in moisture, preventing dryness and aiding faster healing.
    2. Over-application can trap bacteria and fluid, increasing the chance of clogged pores and skin irritation.
    3. Ink stays intact because it’s embedded in the dermis, beyond Aquaphor’s reach, so no ink loss occurs from ointment use.

    In short, Aquaphor helps your tattoo heal well when applied properly, but using too much may hinder healing and cause skin issues.

    Can Aquaphor Fade or Damage Your Tattoo?

    Since Aquaphor doesn’t contain ingredients that directly affect tattoo ink, it won’t pull or fade your tattoo during healing. Tattoo ink sits deep in the dermis layer of your skin, making it unreachable by topical products like Aquaphor. When used as directed, Aquaphor doesn’t cause fading or damage to the ink itself.

    That said, improper or excessive use of Aquaphor might create an overly moist environment, trapping heat and moisture against your skin. This can potentially contribute to premature fading, but it’s not because Aquaphor actively removes your tattoo ink. Instead, poor healing conditions caused by over-application could indirectly affect your tattoo’s vibrancy.

    Why Aquaphor Might Not Be Your Best Tattoo Friend

    avoid occlusive clogging products

    When you’re caring for a new tattoo, choosing the right aftercare product matters, and Aquaphor might not always be the best option. Although it’s popular, Aquaphor’s heavy, occlusive nature can sometimes do more harm than good for your healing tattoo. Here’s why it might not be your best tattoo friend:

    1. It can clog pores. Trapping moisture and heat creates an environment where bacteria thrive, risking infection and breakouts.
    2. It may interfere with proper healing. Too much occlusion can slow skin recovery, leading to complications like milia or irritation.
    3. It’s not breathable. Your tattoo needs air to heal efficiently, and Aquaphor’s thick barrier can suffocate the skin.

    For effective aftercare, you want gentle, breathable products that protect without smothering. Avoiding clogged pores and allowing your healing tattoo to breathe helps ensure vibrant, long-lasting results.

    What Ingredients Help Tattoos Heal Better Than Aquaphor?

    If you want your tattoo to heal quickly and look its best, choosing products with the right ingredients makes all the difference. Healing ingredients like bisabolol offer anti-inflammatory and soothing benefits that calm your skin and support faster recovery.

    Vitamins A, C, and B12 boost tissue repair, speeding up the healing process and helping your tattoo retain its vibrancy. For skin hydration, natural oils such as argan and sweet almond oil deeply nourish and improve elasticity, preventing dryness and cracking.

    Unlike heavy ointments like Aquaphor, breathable formulations allow your skin to breathe, reducing the risk of clogged pores and irritation. Non-comedogenic ingredients keep pores clear, minimizing breakouts that can interfere with healing.

    How to Switch From Aquaphor to Lotion Without Problems

    Choosing the right products for your tattoo’s healing stage can make a big difference in the outcome. When you’re ready to switch from Aquaphor to lotion, timing and technique matter. Typically, you’ll make this transition after 2-3 days or once your tattoo starts peeling to avoid clogged pores.

    Follow these steps for smooth tattoo aftercare:

    1. Gently wash your tattoo with mild soap and water to keep it clean before applying lotion.
    2. Gradually reduce how often you use Aquaphor while increasing lotion application, maintaining hydration.
    3. Use fragrance-free, non-comedogenic lotions containing skin-nourishing ingredients like glycerin and panthenol.

    Avoid putting lotion on raw or heavily scabbed areas to prevent irritation. By carefully managing this switch to lotion, you’ll support your tattoo’s healing without disrupting ink or causing complications.

    Best Tattoo Aftercare Practices: Protecting Your Ink While Healing

    To keep your tattoo vibrant, it’s important to focus on proper moisture retention. But try not to overdo it with heavy ointments—those can clog your pores and cause issues. Also, be gentle with your new ink. Avoid any mechanical irritation because it can damage your healing skin and the tattoo itself. And one more thing: don’t forget to protect your tattoo from the sun. UV exposure can cause fading, especially during that crucial healing phase. So, keeping it covered or using sunscreen when it’s healed is key!

    Proper Moisture Retention

    While healing, your tattoo needs proper moisture retention to prevent scabbing and keep the ink vibrant. Balancing hydration without overdoing it is key to preserving your artwork. Here’s how you can manage moisture retention effectively:

    1. Use breathable, non-clogging moisturizers to support healing without risking ink leaching.
    2. Apply Aquaphor sparingly; too much can trap heat and moisture, possibly affecting ink retention.
    3. Keep your skin consistently hydrated to reduce dryness and enhance ink clarity.

    Avoiding Mechanical Irritation

    Since your tattoo is still healing, you need to protect it from any mechanical irritation that could damage the ink. Avoid tight or rough fabrics that rub against your skin, and refrain from scratching or picking at the tattoo.

    Use Aquaphor gently to keep the area moisturized without applying pressure. When cleaning, pat the tattoo softly to prevent pulling ink or causing irritation.

    Also, protect your tattoo from friction caused by backpacks or belts by wearing breathable clothing or dressings.

    Avoid Why Tip
    Tight clothing Causes ink fading/distortion Opt for loose, soft fabrics
    Scratching/picking Leads to uneven healing Keep nails trimmed
    Rough accessories Causes friction irritation Avoid tight belts/backpacks
    Harsh rubbing Pulls ink during cleaning Use gentle patting motions

    Sun Protection Essentials

    Although your tattoo is still healing, protecting it from the sun’s UV rays is essential to preserve its color and detail. UV rays can cause tattoo fading and damage delicate ink particles.

    To keep your ink vibrant, follow these sun protection essentials:

    1. Apply a broad-spectrum sunscreen with SPF 30 or higher whenever you go outside, even on cloudy days.
    2. Cover your tattoo with clothing or a physical barrier to block direct sunlight and reduce the risk of premature fading.
    3. Continue consistent sun protection after healing to extend your tattoo’s lifespan and prevent UV-induced ink breakdown.

    How to Keep Your Tattoo Vibrant for Years to Come

    To keep your tattoo vibrant for years to come, you need to protect it from UV damage by regularly applying broad-spectrum SPF sunscreen. Sun protection is essential because UV rays cause ink to fade faster, dulling your tattoo’s colors.

    Alongside sunscreen, maintaining moisturized skin with non-comedogenic products supports healthy skin, which preserves your tattoo’s brightness. Proper tattoo aftercare also plays a key role. Use gentle, tattoo-specific products that promote healing and prevent irritation.

    Avoid excessive sun exposure and tanning beds, as they accelerate fading. Staying hydrated and following a balanced skincare routine can boost collagen production, helping your tattoo look fresh longer.

    Frequently Asked Questions

    Can Aquaphor Cause Allergic Reactions on Tattooed Skin?

    Yes, Aquaphor can cause allergic reactions on tattooed skin, especially if you have skin sensitivity to its product ingredients like petrolatum and lanolin. These ingredients might trigger redness, itching, or rash when applied to your tattooed area.

    To avoid discomfort, you should do a patch test before using Aquaphor extensively. If you notice any signs of an allergic reaction, stop using it immediately and consult a healthcare professional.

    How Often Should I Apply Aquaphor to a New Tattoo?

    You should apply Aquaphor to your new tattoo 2-3 times daily during the initial tattoo healing phase. As your skin starts peeling and healing, you can reduce it to once or twice a day.

    Avoid over-application to prevent skin irritation or trapped moisture. If Aquaphor doesn’t suit you, consider product alternatives like fragrance-free lotions.

    Always follow your tattoo artist’s advice for the best healing results.

    Is Aquaphor Safe to Use on Colored Tattoos?

    Coincidentally, if you’re worried about tattoo ink removal or ink extraction creams harming your art, Aquaphor is safe for colored tattoos. Unlike tattoo fading techniques, it doesn’t pull ink out or cause fading when used correctly.

    You can trust it to protect your skin and ink during healing without risking color loss. Just apply it as directed and avoid overuse, so your vibrant tattoo stays sharp and beautiful.

    Can Aquaphor Be Used on Tattoos During Sun Exposure?

    Yes, you can use Aquaphor on tattoos during sun exposure, especially while your tattoo is healing. It helps keep your skin moisturized and reduces the risk of irritation.

    However, Aquaphor isn’t a sunscreen, so it won’t protect your tattoo from UV damage on its own. For full protection, apply a broad-spectrum SPF over Aquaphor once your tattoo is healed to prevent fading and protect your ink effectively.

    Should Aquaphor Be Used on Tattooed Skin With Scabs?

    Yes, you should use Aquaphor on tattooed skin with scabs. During tattoo healing, skin scabs need gentle care, and Aquaphor offers great moisturizer benefits.

    It soothes dryness, reduces itching, and prevents scabs from cracking, which helps your tattoo heal better. Just apply a thin layer gently without picking at scabs.

    This protective barrier keeps the area moist and safe, promoting best healing without harming your tattoo ink.

    Conclusion

    You might worry Aquaphor pulls ink from your fresh tattoo, like rain washing away chalk drawings on a sidewalk, but it doesn’t. The ink lies deep beneath your skin, safe from any ointment’s reach.

    Instead, Aquaphor helps seal in moisture, creating the perfect healing environment. So, while you care for your new art, think of Aquaphor as a gentle raincoat, protecting your vibrant tattoo from drying out, not from fading away.

  • What Ink Do Octopuses Have?

    What Ink Do Octopuses Have?

    You’ve got to know octopus ink is mostly made of melanin and mucus, creating a dark, thick cloud that confuses predators visually and chemically. It also contains irritants that can mess with attackers’ senses while signaling danger to nearby octopuses.

    Some species even produce glowing or rope-like ink for extra defense. How they control and use their ink is fascinating, and it plays a surprisingly big role beyond just escape. There’s a lot more to uncover.

    What Is Octopus Ink Made Of?

    complex colored mucus containing ink

    Although you might think octopus ink is just a simple dark fluid, it’s actually a complex mixture primarily made of melanin, which gives it its deep color. But the ink isn’t just about color. It contains mucus, which influences its texture and how it disperses in water. This helps the ink form unique shapes like clouds or ropes.

    The ink also includes enzymes such as tyrosinase, which can irritate the eyes of other creatures. You’ll find metals like copper and trace elements in the ink too, adding to its density and physical properties. Notably, the chemical makeup of octopus ink can vary between species, affecting factors like color, thickness, and how irritating it is.

    Octopus Ink’s Role in Defense

    When an octopus feels threatened, it quickly releases a cloud of ink that confuses and distracts its predator. This gives it a critical chance to escape. The ink comes from specialized ink sacs, which eject the dark fluid through the rectum.

    The ink cloud not only blocks the predator’s view but also contains irritants like tyrosinase, which impair the predator’s senses. Octopuses can create different shapes with their ink to mislead attackers, buying essential moments to flee.

    This defense mechanism also signals danger chemically to nearby cephalopods, enhancing survival.

    Defense Mechanism Source Effect
    Ink cloud Ink sacs Visual concealment
    Irritants Ink sacs Sensory impairment
    Ink shapes Ink sacs Predator misdirection
    Chemical signals Ink sacs Alarm to others
    Rapid ejection Ink sacs Quick escape opportunity

    You’ll see how ink sacs play a key role in this fascinating defense strategy.

    How Melanin and Mucus Shape Ink Color and Texture

    melanin and mucus interplay

    Because melanin forms the core pigment in octopus ink, it gives the cloud its deep black or brown color that you can easily spot underwater. The concentration of melanin directly affects how dark and opaque the ink appears, making it an essential factor in the ink’s visual impact.

    Melanin gives octopus ink its deep black or brown color, shaping its darkness and opacity underwater.

    But melanin isn’t the whole story. The mucus mixed with the melanin-rich ink plays a critical role in shaping its texture and consistency. This mucus thickens the ink, making it more viscous and cohesive so it disperses effectively in the water.

    Depending on the amount of mucus, the ink can form different shapes, like ropes or pseudomorphs, which help confuse predators. So, melanin determines the ink’s color intensity, while mucus controls its thickness and physical form.

    Together, they create an ink cloud that’s not only visually striking but also physically adaptable, helping the octopus defend itself with a perfectly balanced ink mixture.

    Chemicals in Octopus Ink That Deter Predators

    If you’ve ever wondered how octopus ink does more than just obscure vision, its chemical makeup holds the answer. The ink contains tyrosinase, an enzyme that irritates predators’ eyes and mucous membranes, making it uncomfortable for them to continue their attack.

    Alongside tyrosinase, small amino acids like taurine, aspartic acid, and glutamic acid contribute to this chemical defense, adding layers of irritation and confusion. Melanin, which gives the ink its dark color, also plays an essential role by interacting chemically to further deter predators.

    Beyond causing discomfort, these compounds can interfere with a predator’s sense of smell, making it harder for them to track or identify the octopus as prey. Together, these chemicals don’t just block vision; they send a clear warning, disorienting and repelling threats so you can escape safely.

    Control and Release of Octopus Ink

    ink release and cloud formation

    You’ll find that octopuses use muscles around their ink sac to control how and when ink is released. They don’t just squirt it out randomly. Instead, they mix the ink with mucus, which helps form shapes or clouds. These shapes work like a smokescreen to confuse predators. It’s pretty clever, actually. Understanding this shows just how precise their escape tactics really are.

    Ink Sac Anatomy

    One vital organ that controls the octopus’s ink release is the ink sac, a muscular structure tucked beneath the visceral mass. This specialized sac stores and produces the dark ink, rich in melanin pigment.

    It connects to the rectum through a duct, allowing the octopus to release ink precisely when threatened. When you observe an octopus inking, muscles around the ink sac contract, pushing the ink rapidly through the duct and out into the water.

    This design gives the octopus control over the amount and shape of the ink cloud it releases, helping it confuse predators effectively. Understanding the ink sac’s anatomy reveals how this organ plays a pivotal role in the octopus’s defense strategy without involving the actual ejection mechanism.

    Ink Ejection Mechanism

    How does an octopus release its ink so quickly and effectively? It uses a precise ink ejection mechanism controlled by muscular contractions around its ink sac. When threatened, the octopus contracts these muscles, forcing ink mixed with mucus through the rectum and out of the siphon.

    The siphon acts like a nozzle, directing the ink cloud with accuracy. You’ll see the ink expelled rapidly, often like a jet, giving the octopus a chance to escape predators in a split second.

    This control isn’t random; coordinated muscle movements regulate both the timing and shape of the release. Whether it’s a quick smoke screen or a shaped decoy, the octopus masters ink ejection to confuse threats and protect itself.

    Mucus-Ink Mixture Control

    Although octopuses rely on rapid ink ejection to escape predators, their real advantage lies in controlling the mucus-ink mixture that shapes and slows the release. You’ll notice that the ink sac expels ink, which then mixes with mucus from specialized glands.

    This mucus-ink mixture lets octopuses adjust the density and dispersal of the ink cloud, creating either diffuse clouds or more structured, rope-like shapes. By tweaking how much mucus blends with the ink, they can form decoys that mimic their body, confusing predators.

    The mucus slows the ink’s spread, giving octopuses precise control over its release. This ability to rapidly deploy varied forms of the mucus-ink mixture considerably boosts their escape tactics, making it an impressive survival tool.

    Types of Octopus Ink Clouds and Their Defense Roles

    When an octopus feels threatened, it doesn’t just release ink blindly; it produces distinct types of ink clouds tailored to specific defense strategies. One common ink cloud is a large, dispersed one that acts like a smoke screen, giving the octopus a chance to dart away unseen.

    Another clever tactic involves pseudomorphs, ink clouds shaped like the octopus itself. These decoys confuse predators and divert attention from the real escape route. You might also encounter rope-like ink clouds, which help the octopus blend into floating debris or seagrass, boosting its camouflage.

    In the deep sea, some octopuses take it a step further by releasing luminous, glowing ink clouds that startle or distract their attackers. Each type of ink cloud plays a precise role in defense, showing how octopuses adapt their ink use to survive in different environments and threats.

    Why Some Octopuses Don’t Produce Ink

    While many octopuses rely on ink clouds to escape danger, some species don’t produce ink at all. This absence often stems from the lack of ink sacs, as seen in creatures like the dumbo octopus and nautiluses.

    You’ll find these species mainly in deep-sea environments, where predation pressure is much lower, reducing the need for ink as a defense mechanism. Instead, these octopuses depend on other defense mechanisms like camouflage, color change, and physical agility to avoid threats.

    Nautiluses, for example, use their hard shells and slow movements rather than ink to protect themselves. This evolutionary loss of ink production highlights that ink sacs aren’t essential for survival in every habitat.

    Cool Types of Octopus Ink: Glowing and Rope Forms

    If you think all octopus ink is the same, you’ll be surprised by the cool variations some species produce. For instance, some octopuses release glowing ink that contains bioluminescent compounds. This glowing ink lights up dark waters, helping the octopus evade predators by creating a dazzling visual distraction in deep-sea environments.

    Another fascinating type is rope-shaped ink, expelled as thick, viscous strands resembling jellyfish tentacles. Coated with mucus, this rope ink hangs in the water longer, effectively obscuring the octopus’s escape path. The unusual shape and texture confuse predators, giving the octopus valuable time to flee.

    These unique ink forms show how octopuses have evolved diverse strategies for survival. By using glowing ink to light up the dark or rope ink to create tangled obstacles, they adapt creatively to their underwater challenges. You can see how octopus ink is far more than just a simple cloud of darkness.

    How Ink Signals Danger to Other Octopuses

    Because octopus ink contains chemical compounds like tyrosinase that irritate predators, it also serves as an important alarm signal to other octopuses nearby. When an octopus releases ink, it’s not just creating a smokescreen, it’s sending a chemical alarm that warns others of danger.

    Here’s how the ink signals danger to other octopuses:

    1. The ink acts as a visual cue, alerting nearby octopuses to a predator’s presence.
    2. Chemical compounds in the ink create a trail in the water that octopuses can detect.
    3. This chemical alarm prompts octopuses to take evasive action, increasing their chances of escape.
    4. In some species, ink secretion functions as communication, encouraging collective escape behaviors.

    Human Applications of Octopus Ink

    Although octopus ink primarily serves as a defense mechanism in the wild, humans have found many uses for it throughout history. You might be surprised to learn that octopus ink was once a popular medium for artists and writers. Its rich pigment, melanin, creates the dark sepia tones valued in pen and quill drawings.

    In the 19th century, photographers even used this ink to produce sepia-tone prints, showing its cultural importance beyond nature.

    Today, you can find octopus ink in kitchens worldwide, especially in Mediterranean and Japanese cuisines. Chefs use it as a natural coloring and flavoring agent in dishes like pasta, risotto, and seafood sauces. Its unique taste adds depth and a striking black hue that enhances presentation.

    Commercial harvesting guarantees a steady supply, letting you enjoy this remarkable ink’s culinary and artistic legacy.

    Frequently Asked Questions

    How Do Octopuses Store Their Ink Before Release?

    You store your ink in a specialized ink sac inside your mantle cavity. This sac acts as your ink storage, holding the mixture your ink gland produces.

    When you sense danger, muscles around the sac contract, pushing the ink through a duct connected to your rectum. This controlled release lets you eject ink quickly to escape predators.

    Your ink sac’s size varies, so your storage capacity depends on your species.

    Can Octopus Ink Be Used for Artistic Purposes?

    Can you imagine using a natural substance for artistic expression? Yes, octopus ink can definitely be used for that. Artists have long harnessed its rich, dark pigment to create stunning drawings and calligraphy.

    Its permanence and unique tonal qualities make it perfect for detailed work. Whether in traditional or modern art, octopus ink adds a depth and character you just can’t replicate with synthetic inks.

    Why not try it yourself?

    Are There Any Predators Immune to Octopus Ink?

    You won’t find any predators with complete immunity to octopus ink, but some have developed ways to tolerate it. Predator immunity isn’t absolute; deep-sea sharks and marine mammals might resist the ink’s chemical irritants better than others.

    You’ll notice that whales and dolphins often use echolocation to bypass ink clouds instead of relying on sight. So, while predator immunity varies, no marine predator fully ignores the ink’s defensive effects.

    How Long Does Octopus Ink Remain Visible Underwater?

    Back in Shakespeare’s day, you’d see an octopus’s inked defense vanish in about 10 to 15 minutes underwater. You’ll notice this cloud’s visibility depends on water currents, temperature, and salinity.

    If the ink’s thick with mucus, it might linger up to 20 minutes. In calm waters, you can expect it to stick around a little longer before it gradually disperses, letting your underwater view clear up again.

    Do Baby Octopuses Produce Ink From Birth?

    Yes, baby octopuses produce ink from birth. You’ll find their ink composition closely matches that of adults, made up of melanin and mucus.

    This early development of their ink sacs means they’re ready to defend themselves right away. So, when you see a hatchling release ink, it’s using the same natural defense mechanism you’d expect from a grown octopus, helping it escape predators effectively even at a young age.

    Conclusion

    When an octopus releases its ink, it’s like a magician’s smoke screen, giving it a fleeting chance to vanish and survive. You can see how this dark, melanin-rich cloud isn’t just a simple defense but a complex blend of chemicals and mucus that confuses and deters predators.

    Understanding this natural marvel reminds you how even the smallest creatures have powerful tools, inspiring you to appreciate the hidden wonders in the ocean’s depths.