To make invisible ink that glows under black light, gather highlighters, white paper, a UV light, and a cup.
Carefully pry open a highlighter to extract its ink, then mix it into hot water and heat until boiling to activate the fluorescence.
Dilute the ink until it’s nearly invisible, then write your secret message with a fine brush.
Once dry, shine a black light to reveal your glowing words.
Keep going to uncover detailed tips for perfecting this fun, secret craft.
Gather Materials for Invisible Ink Under Black Light
Before you begin making invisible ink that glows under black light, gather a highlighter, a UV light or black light, and white paper. These three materials are essential for creating invisible ink that reveals your secret messages only when exposed to UV light.
The highlighter contains the fluorescent ink needed to write your hidden notes. White paper works best because it provides a blank canvas that won’t interfere with the ink’s glow. The UV or black light lets you see the invisible ink when you shine it on your message.
Once you have these materials, you’re ready to start making your invisible ink. Remember, without any one of these items, your message won’t stay hidden or glow properly. So, take a moment to find a bright highlighter, a reliable UV light, and clean white paper before moving forward.
With these, your invisible ink experience will be successful and fun.
How to Safely Extract Ink From a Highlighter
When you want to extract ink from a highlighter, handle it gently to avoid damaging the internal parts. Start by using pliers to carefully open the highlighter casing without harming the ink tube inside. Then, remove the ink tube cautiously to prevent leaks or breakage.
Next, use pliers to pull out the writing tip, making sure it stays intact. For the ink extraction, squeeze the ink tube into a small container filled with hot water. This will help dissolve the ink, creating a solution that glows under black light.
Throughout the process, handle all components with care to avoid damage, as a broken ink tube can make extraction difficult and messy. By safely extracting the ink this way, you can prepare your own invisible ink that reveals secret messages when exposed to black light.
Heat and Prepare Invisible Ink Solution

Now that you’ve extracted the ink, it’s time to heat and prepare your invisible ink solution. You’ll need to microwave the mixture until it boils so it fully releases the ink’s properties.
After that, dilute the solution until it looks faint or clear on paper. This way, it stays invisible until you shine a black light on it. Easy, right?
Heating Process Overview
How do you activate the invisible ink hidden within a highlighter? Start by squeezing the ink into a small cup of hot water. Heating the water until it boils helps extract and activate the fluorescent compounds in the ink.
These compounds are key since they remain invisible on paper once dry but glow vividly under UV light. Be sure to handle the hot water carefully to avoid burns.
The heating process guarantees the ink dilutes properly, making it clear and invisible until you expose it to a black light. This simple step enables the ink’s fluorescent properties, allowing you to write secret messages that only appear when illuminated by UV light.
Heating is essential for preparing your invisible ink effectively and safely.
Ink Dilution Techniques
After heating the highlighter ink in hot water to activate its fluorescent properties, the next step is to dilute the solution until it becomes nearly invisible on paper. Start by squeezing the highlighter ink into a cup of hot water and stir thoroughly to disperse the pigment evenly.
This ink dilution process is essential because too much pigment will make your writing visible, while too little won’t fluoresce well under a black light. Gradually add small amounts of hot water, testing each dilution by writing on paper with a clean paintbrush or Q-tip.
Keep adjusting until the ink appears almost clear or very faint. Once dry, the diluted ink won’t be noticeable, but it will fluoresce brightly when exposed to UV or black light, revealing your secret message.
Dilute Invisible Ink for Writing
When you want to create invisible ink for writing, start by squeezing the ink from a highlighter into a small cup of warm water and stirring it well. This step helps you dilute the ink, making it less visible to the naked eye.
To achieve the perfect concentration, add more water if the ink seems too dark. Your goal is to have the ink remain invisible or barely noticeable in normal light but glow brightly under a black light or UV light.
Test different dilution levels until you find the right balance. Keep in mind that the more diluted the ink, the fainter it appears without UV light, which is ideal for secrecy.
Using diluted invisible ink ensures your secret messages stay hidden until revealed by a UV light source, making it perfect for covert writing. This method is simple, effective, and easy to customize based on your needs.
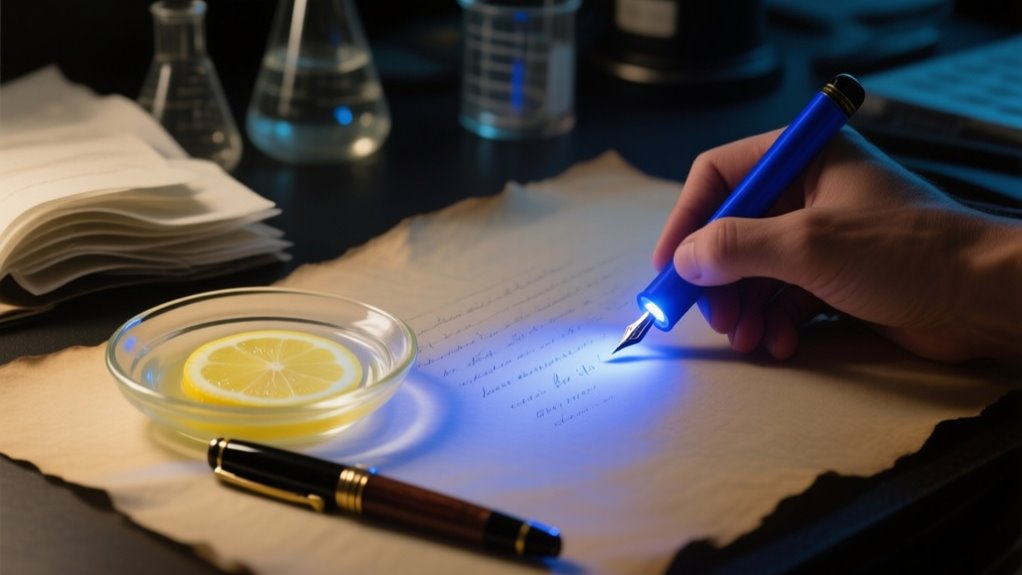
Write Your Secret Message With a Fine Brush
Although writing with invisible ink requires patience, you can create clear secret messages by using a fine-tipped brush or Q-tip. Dip your fine brush lightly into the diluted invisible ink, often made from highlighter ink or other fluorescent substances, and carefully write your secret message.
Be sure not to overload the brush, as excess ink can cause smudging or uneven lines. Write slowly and steadily to maintain control over thin, precise strokes, guaranteeing your message remains neat.
After finishing, allow the ink to dry completely before handling the paper. This helps prevent accidental smudging or removal. Practicing on scrap paper first is a smart move; it helps you perfect your technique and ensures your secret message will appear crisp and legible under black light.
With patience and careful brushwork, your invisible ink messages will be ready to reveal when you shine a black light on them.
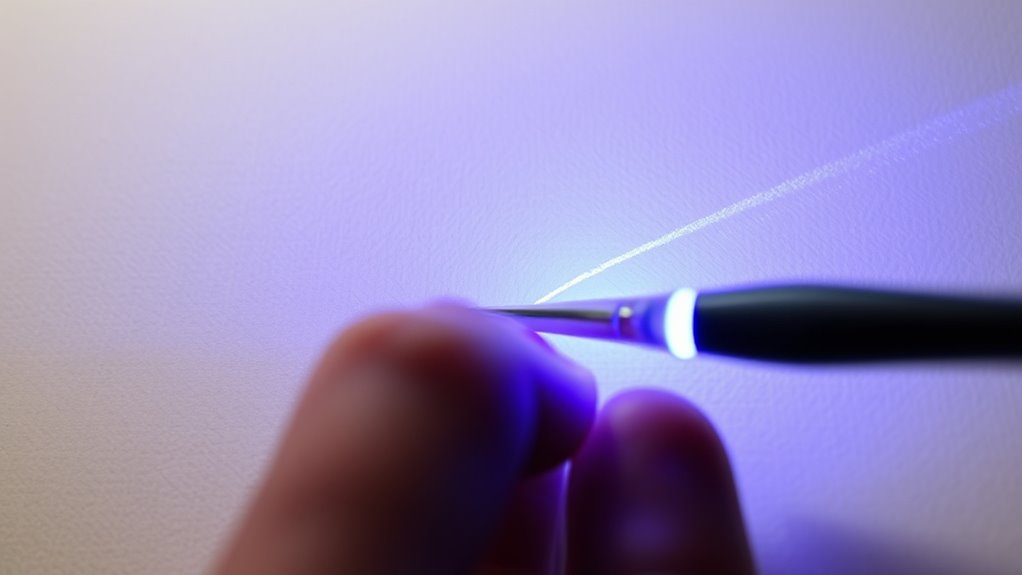
Reveal Invisible Ink With a Black Light
How exactly do you reveal a message written in invisible ink? You use a black light or UV light to make it visible. When you shine UV light on paper with invisible ink made from certain chemicals or household items like highlighters, the fluorescent molecules in the ink absorb the light and emit a bright glow.
This fluorescence makes the hidden message stand out clearly against the paper. To do this effectively, work in a darkened room and hold a portable black light or UV flashlight close to the paper. The ink will fluoresce without needing heat or damaging the material.
This method is simple, safe, and effective for uncovering secret writings. With just a black light, you can instantly reveal those invisible messages and enjoy the fun of secret communication.
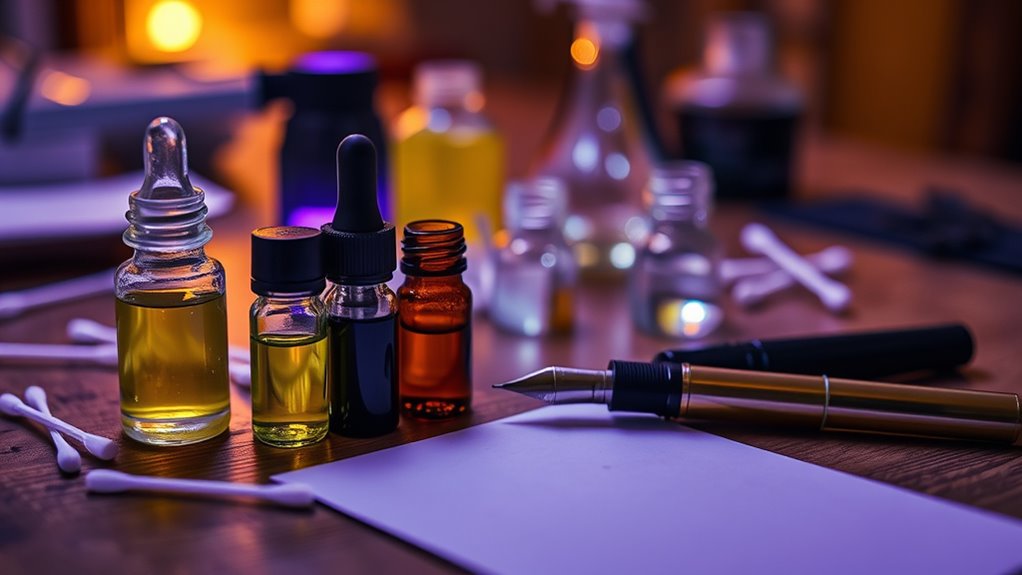
Store Leftover Invisible Ink Safely for Reuse
To keep your invisible ink ready for future use, store any leftovers in a waterproof, airtight container. This prevents evaporation and contamination, preserving the ink’s effectiveness. Make certain to label the container clearly with the contents and the date of storage.
For proper storage, place the container in a cool, dark spot away from direct sunlight and heat sources. Exposure can degrade the fluorescent properties activated by UV light. Avoid leaving your invisible ink where it might get warm or bright, as this breaks down the chemicals and weakens the ink’s glow under a black light.
Check your stored invisible ink regularly for any changes in consistency or color before using it again. Proper storage ensures your invisible ink remains stable and reliable, so you can keep enjoying your UV light experiments without needing to make fresh ink every time.
Frequently Asked Questions
Can Invisible Ink Damage Paper Over Time?
Yes, invisible ink can damage paper over time depending on the ink composition. If the ink contains acidic or corrosive chemicals, chemical reactions may weaken the paper fibers, reducing ink longevity and harming paper preservation.
To protect your documents, choose UV-reactive inks that are gentle and store them in a cool, dark place. By managing these factors, you’ll maintain both the invisible message and the paper’s quality longer.
How Long Does the Invisible Ink Remain Visible Under Black Light?
You’ll find that invisible ink with UV reaction usually stays visible under black light for about 2 to 8 hours. Ink longevity depends on the type of fluorescent compounds and how concentrated they are.
Keep in mind, light exposure, especially sunlight, can cause ink fading and reduce visibility over time. To extend ink longevity, store your ink in a dark, airtight container to protect it from light and preserve its glow.
Is It Possible to Erase or Remove Invisible Ink After Writing?
Yes, you can attempt ink removal, but it’s tricky. Chemical reactions using solvents like alcohol or acetone might fade or erase the invisible ink, yet you risk damaging the paper.
If you want to preserve the paper, avoid harsh chemicals. Keep in mind, the ink longevity varies by formula; some invisible inks are designed to be permanent and resist removal.
Can Different Colored Black Lights Affect Ink Visibility?
Imagine shining a prism of color over your secret message. Different colored black lights can definitely affect ink visibility. The color contrast changes how your ink pops, while light intensity influences how brightly it glows.
Since ink composition determines which wavelengths it reacts to, only inks tuned to the UV spectrum reveal their secrets clearly. So, to make your invisible ink shine, choose a black light that matches the ink’s fluorescent nature perfectly.
Are There Safe Alternatives to Tonic Water for Invisible Ink?
Yes, you can use safe alternative solutions like highlighter ink or vitamin B2 for invisible ink. These rely on chemical reactions that fluoresce under black light without the risks tonic water might pose.
You should consider ink longevity since some alternatives fade faster. Always follow safety precautions, especially with kids, ensuring the ink is non-toxic and skin-safe.
This way, you get effective invisible ink without compromising safety or durability.
Conclusion
Now that you’ve mastered making invisible ink with a black light, you’re part of a clever tradition. Did you know invisible ink was used as early as the 16th century for secret messages?
With just a highlighter and a few simple steps, you’ve revealed a fun way to send hidden notes. Keep your leftover ink stored safely, and get ready to amaze friends with your glowing secrets anytime you want!
Leave a Reply