If ink spills on your leather chair, blot it gently with a soft, dry cloth to avoid spreading.
Test any cleaning solution on a hidden area before applying it fully.
Use mild soap with warm water and rub in circular motions to lift ink.
For stubborn stains, try rubbing alcohol or a vinegar and baking soda mix carefully.
Always condition the leather afterward to restore moisture.
Keep following to explore more tips on handling different leather types and tougher stains.
What to Do Immediately After Ink Spills on Leather
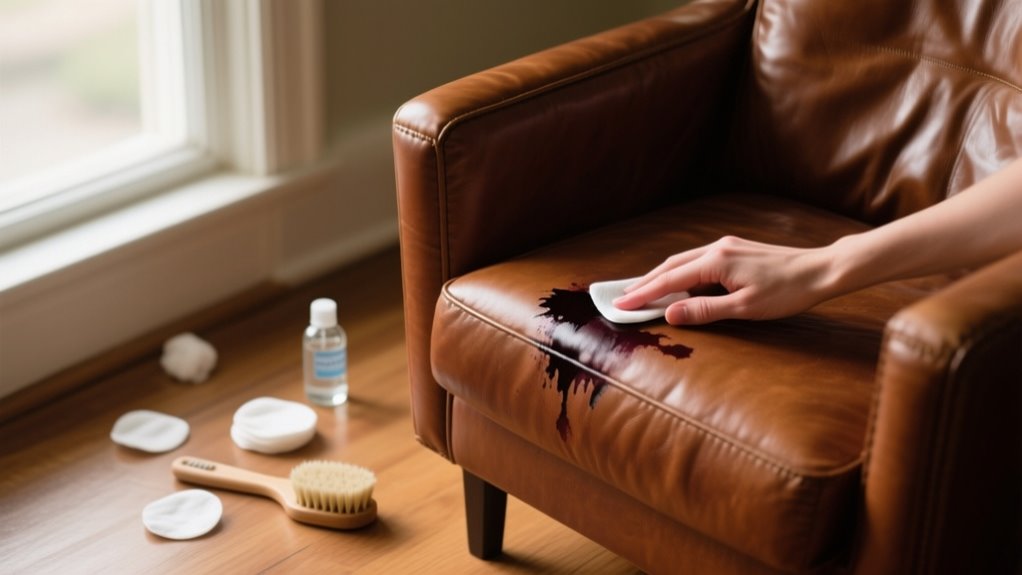
As soon as ink spills on your leather chair, blot it immediately with a soft, dry cloth to stop the stain from spreading. Don’t rub or scrub the ink, as doing so pushes it deeper into the leather, making the stain harder to clean. Instead, gently blot the spot to absorb as much ink as possible without damaging the leather surface.
Once you’ve blotted the excess ink, you’ll want to clean the area carefully. Use a damp cloth with a mild cleaning agent to apply a gentle circular motion on the stained spot, avoiding harsh scrubbing. This method helps lift the ink without harming the leather’s finish.
How to Test Cleaning Solutions Without Damaging Leather
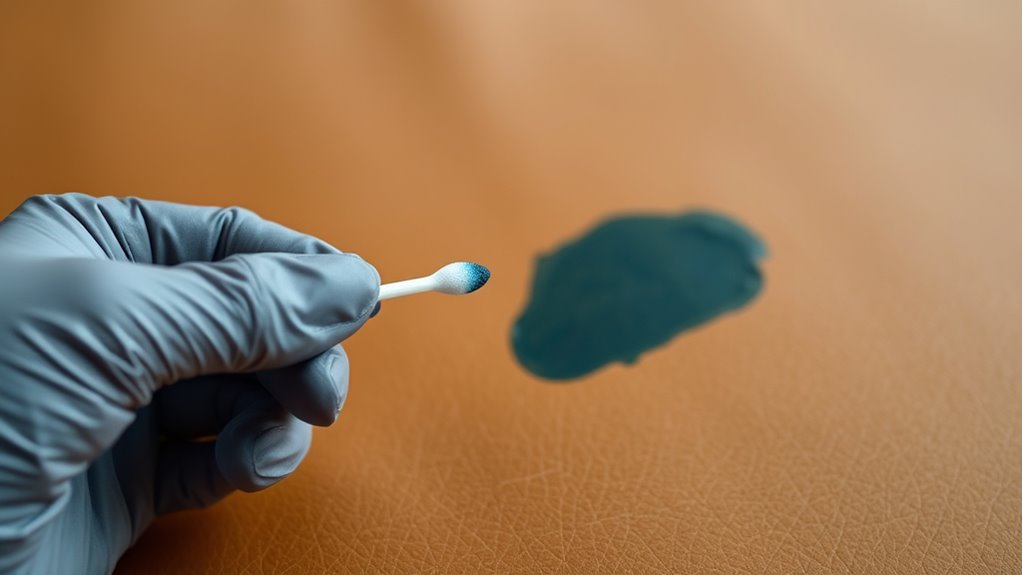
Before you apply any cleaning solution, always spot test on a hidden area of your leather chair to avoid damage. Just take a cotton swab or a soft cloth and dab a little on the spot. Then, wait several minutes to see if there are any color changes or discoloration.
It’s best to pick a test spot that represents the entire surface. That way, you can be sure your cleaning method is safe before you go all in.
Spot Test Importance
While cleaning ink from your leather chair, you should always perform a spot test on a hidden area first to avoid unexpected damage. A spot test helps you check how the leather reacts to the cleaning solution without risking discoloration or surface harm.
Use a small cloth or cotton swab to apply the solution on a discreet spot, such as under the chair, and wait 10 to 15 minutes. This lets you observe any color changes, stiffness, or cracking. Avoid testing on a conspicuous area to prevent visible damage if the solution isn’t safe.
Selecting Test Areas
Performing a spot test is only the first step. You also need to pick the right area on your leather chair to test cleaning solutions safely. Always choose an inconspicuous spot like the underside or back of the chair to avoid visible damage.
Use a clean, soft cloth or cotton swab to apply a small amount of the solution for your patch test. Wait 5-10 minutes to check for discoloration or any other damage before proceeding to visible areas. Document your findings to guarantee the cleaning method is safe.
| Test Area | Reason to Choose |
|---|---|
| Underside | Hidden, less visible |
| Back of Chair | Less exposed to light and wear |
| Under Armrests | Rarely noticed, ideal for patch tests |
Observing Color Changes
How can you tell if a cleaning solution is safe for your leather chair? Start by performing a patch test on an inconspicuous spot near the ink stain. Apply a small amount of the cleaning solution using a cotton swab or soft cloth, then carefully observe any immediate color change on the leather.
Use gentle pressure to avoid damaging the surface. After application, wait several minutes to monitor if the leather’s hue stays consistent or begins to discolor. Document any visible color changes you notice during this time.
Observing these changes helps you determine whether the cleaning solution will harm the leather or safely remove the ink stain. This careful approach guarantees you protect your chair’s finish while effectively treating the stain.
Removing Ink Stains From Leather With Mild Soap and Water
If you want to remove ink stains from your leather chair without causing damage, start by mixing a small amount of mild soap, like saddle soap or gentle dish soap, with warm water. Dampen a soft cloth with this soapy water, making sure it’s not soaking wet to avoid saturating the leather.
Gently rub the ink stains in circular motions, beginning at the outer edges and moving inward. This helps loosen the ink without spreading it further. Afterward, use a clean, damp cloth to wipe away any soap residue and lifted ink.
Finally, pat the area dry with a soft towel. To keep your leather in good condition and prevent it from drying out, apply a leather conditioner once the spot is dry. This method uses mild soap and water to effectively remove ink stains while protecting your leather chair’s surface.
Using Rubbing Alcohol and Alcohol-Based Products for Ink Removal
While rubbing alcohol is a powerful solution for breaking down ink stains on leather, you’ll want to use it carefully to avoid damaging the surface. For effective ink removal on your leather chair, apply rubbing alcohol sparingly with a cotton swab or soft cloth, focusing gently on the stain on leather. This prevents any harsh impact on the material.
Alcohol-based products like hand sanitizer can serve as quick alternatives, but always test them first on a hidden area to check for discoloration or damage. Once you treat the stained spot, immediately wipe it with a clean, damp cloth to remove residue and avoid drying out the leather.
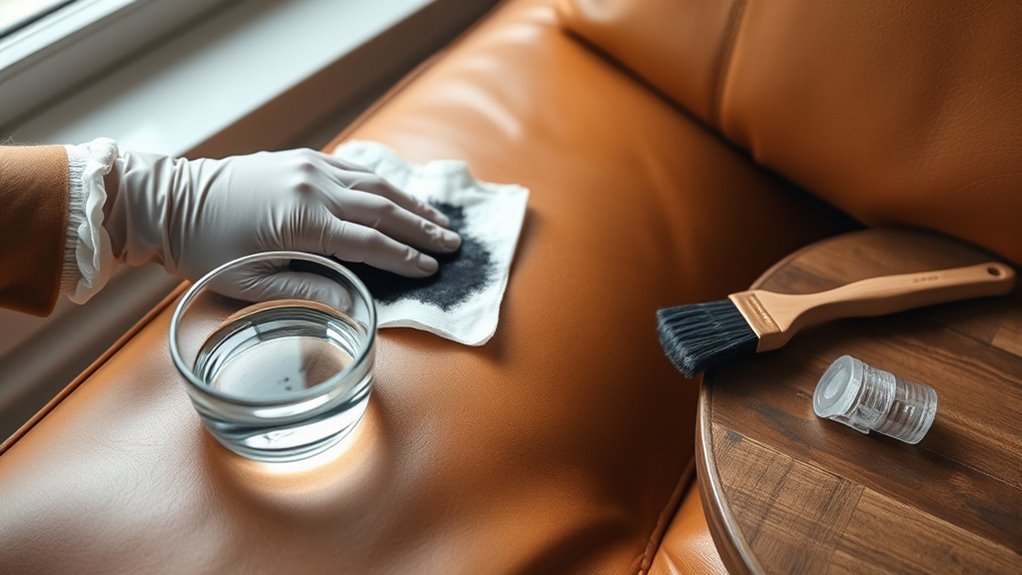
How to Use White Vinegar and Baking Soda on Ink Stains
When tackling ink stains on your leather chair, combining white vinegar and baking soda offers a natural and effective cleaning method. Start by mixing equal parts white vinegar and water, then dampen a soft cloth with this solution. Gently dab the ink stain with the cloth to loosen the ink.
Combining white vinegar and baking soda creates a natural, effective solution to gently loosen ink stains on leather.
Next, create a paste by mixing baking soda with a small amount of water and apply it directly onto the stain. Let the vinegar and baking soda paste sit for 5-10 minutes to lift the ink from the leather.
Afterward, use a soft cloth or soft-bristled toothbrush to gently scrub the treated area, helping to break up ink particles without damaging the leather. Finally, wipe away all residue with a clean, damp cloth.
To keep your leather chair in good condition, don’t forget to condition the leather afterward, restoring moisture and preventing drying or cracking. This cleaning method is both gentle and effective for ink stain removal.
Using Hairspray and Toothbrushes on Ink Stains
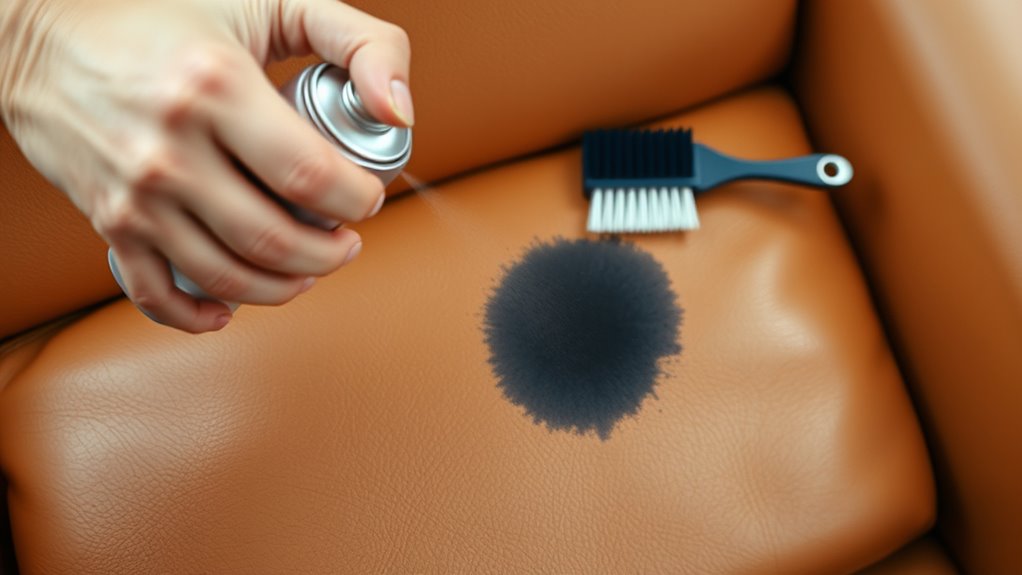
Although hairspray is typically used for styling, it can also help break down ink stains on leather. To start, lightly spray hairspray onto the ink stains on your leather chair and let it sit for 3-5 minutes. This allows the hairspray to weaken the ink’s bond with the surface.
Next, use a soft-bristled toothbrush to gently scrub the treated area, helping to loosen and lift the ink particles without damaging the leather. Be sure to perform a patch test on a hidden spot first to avoid discoloration.
After brushing, use a clean cloth to blot the area carefully, removing loosened ink and excess hairspray. Finally, wipe the area with a damp cloth to clear away any residue. This method combines the power of hairspray with gentle cleaning from a toothbrush, making it an effective way to tackle ink stains on your leather chair.
How to Condition Leather After Ink Removal
After you’ve removed the ink, you’ll want to pick a leather conditioner that matches your chair’s finish. This helps keep the leather soft and supple. Just apply a small amount using a soft cloth, and gently rub it in so the leather gets nourished evenly.
Give it a few minutes to soak in. Then, take a clean cloth and buff the surface to bring back the shine and protect it. It’s an easy way to keep your leather looking great!
Choosing The Right Conditioner
Why should you choose the right conditioner for your leather chair after removing ink stains? Selecting a high-quality leather conditioner is essential for effective leather care and preservation. After leather cleaning, the surface often loses natural oils, making it prone to drying and cracking.
The right conditioner restores moisture and flexibility, aiding in leather repair and prolonging your chair’s lifespan. When conditioning leather, use a small amount on a soft cloth and gently rub it in to avoid damage. Always test the product on a hidden spot first to make sure it won’t cause discoloration or harm.
Properly choosing your leather conditioner helps maintain your chair’s appearance and supports ongoing leather preservation, keeping it supple and beautiful after each cleaning.
Application Techniques For Conditioning
When you condition your leather chair following ink removal, applying the conditioner evenly with a soft cloth is key to restoring moisture without causing damage. Start by applying a small amount of leather conditioner to the cloth, then gently spread it over the cleaned area.
Avoid soaking the leather; instead, let the conditioner absorb naturally for 10-15 minutes to ensure proper absorption. Afterward, use a clean, dry cloth to buff the surface, enhancing shine and removing any excess product.
This process helps rehydrate the leather and rebuilds a protective barrier against future stains. Be sure to choose a conditioner suited for your leather type to prevent discoloration or damage.
Regular conditioning maintains suppleness and extends your chair’s lifespan.
Ink Removal Tips for Full-Grain, Suede, Aniline & Patent Leather
Although removing ink from leather can be tricky, knowing the specific type you’re dealing with makes a big difference in choosing the right method. For full-grain leather, use gentle alcohol-based solutions like rubbing alcohol for effective ink removal, then condition to restore softness.
Identifying your leather type is key to safely and effectively removing ink stains.
Suede needs careful blotting and brushing with a suede eraser. Avoid liquid cleaners, as they can ruin its texture.
Aniline leather demands quick, gentle cleaning with a soft cloth and mild alcohol-based solutions since it stains easily.
Patent leather’s glossy finish resists absorption, so wipe it with a damp cloth or mild soap. Avoid harsh chemicals or scrubbing that may cause scratches.
Always do a patch test on a hidden area before applying any stain treatment to prevent irreversible damage. Tailoring your approach to these leather types ensures safe, effective ink removal while preserving your chair’s beauty.
When to Seek Professional Help for Ink Stains on Leather
If the ink stain just won’t come out or has really soaked in, that’s when you should think about calling a professional. Some types of leather, like naked or antique leather, are extra delicate and need special care so you don’t accidentally damage them. So, if you’re ever unsure or dealing with stubborn stains, getting expert help is definitely the safest bet to keep your chair looking great.
Signs of Persistent Stains
Since ink stains can sometimes penetrate deeply into leather, you might find that home cleaning methods don’t always eliminate them completely. Persistent ink stains that remain after several cleaning attempts likely involve deeply embedded ink, making professional removal your best option.
If you notice leather damage such as discoloration, peeling, cracking, or worsening stains despite gentle efforts, it’s a clear sign to seek expert help. Continuing DIY cleaning risks further leather deterioration and can compromise the material’s integrity.
When your attempts fail to restore the chair’s appearance, a specialist can safely and effectively treat the stain without causing additional harm. Recognizing these signs early ensures your leather chair stays in good condition while addressing stubborn ink marks properly.
Complex Leather Types
When you’re dealing with complex leather types like suede, nubuck, or aniline, you’ll want to be extra cautious about removing ink stains. These materials have a delicate surface that can easily suffer leather damage from harsh cleaning agents.
Trying to remove stains yourself risks worsening the problem, especially with aniline leather, which is highly sensitive. Seeking professional help guarantees safe and effective stain removal without compromising your leather chair’s integrity.
| Leather Type | Reason to Seek Professional Help |
|---|---|
| Suede | Porous, delicate surface |
| Nubuck | Easily ruined by liquid cleaners |
| Aniline Leather | Sensitive, prone to discoloration |
| Patent/Coated | Resistant but requires expert cleaning |
How to Identify the Type of Leather on Your Chair
Although it might seem tricky at first, identifying the type of leather on your chair is essential before attempting any cleaning or ink removal. Start by examining the leather surface closely. Finished leather usually has a glossy, smooth coating, while naked leather appears more porous and matte.
To be sure, perform a simple water drop test: place a small drop of water on an inconspicuous area. If the water beads up, you’re dealing with finished leather; if it soaks in, it’s naked leather. You can also feel the texture. Naked leather tends to be softer and more supple, whereas finished leather feels more uniform and coated.
Finally, check for any manufacturer labels or product tags, which often specify the leather type. Knowing whether your chair features finished or naked leather guides you in selecting the right cleaning method, protecting your furniture while effectively removing ink stains.
Frequently Asked Questions
Can Ink Stains on Leather Cause Permanent Damage if Untreated?
Yes, ink stains on leather can cause permanent damage if untreated. The ink penetration depends on stain depth and leather porosity. Unfinished or porous leather lets ink seep deeper.
Darker stain color makes damage more visible, and the leather finish affects how easily ink sets in. Over time, aging effects worsen the damage, causing discoloration and weakening fibers. You need to act quickly to prevent lasting harm to your leather.
Are There Any Natural Remedies for Ink Removal on Leather?
When it comes to ink stains on leather, you can’t just throw in the towel. Herbal solutions like tea tree oil mixed with coconut oil work wonders.
Vinegar techniques using a 1:1 mix with water gently lift ink without harm. Lemon application, combined with baking soda paste, also helps break down stains naturally.
Always test a small area first to avoid unwanted damage while tackling those pesky ink marks.
How Often Should I Condition Leather After Cleaning Ink Stains?
You should condition leather within 24 hours after leather cleaning to restore moisture and aid leather preservation. For stain prevention and overall care, stick to a conditioning frequency of every 3 to 6 months.
After tackling ink stains, you might want to condition more often. Use high-quality cleaning tools and conditioners, and follow maintenance tips to avoid over-conditioning, which can cause grease buildup.
This routine keeps your leather soft and protected.
Can Ink Stains Affect the Leather’s Color or Texture Permanently?
Yes, ink stains can permanently affect your leather’s color and texture. When ink absorbs deeply, it causes stain depth that’s hard to reverse, leading to color fading and texture alteration.
Leather preservation becomes challenging as the leather ages with these marks, especially on untreated or delicate types. Acting quickly helps minimize damage, but once ink sets, you risk lasting changes in both appearance and feel.
Is It Safe to Use Commercial Leather Cleaners for Ink Stains?
Yes, you can safely use commercial products for stain removal on leather, but you need to prioritize product safety. Many cleaning solutions include leather dye and conditioning agents that aid in leather restoration. Always test a small area first to avoid discoloration.
If the ink stain is stubborn, choose a commercial cleaner designed specifically for ink removal to protect the leather’s texture and color while effectively removing stains.
Conclusion
Removing ink from your leather chair takes patience, much like untangling a knot, careful and steady. Act quickly, test solutions on a hidden spot, and use gentle cleaners to protect your leather’s finish.
Remember to condition afterward to keep it supple. Different leather types need different care, so know your chair’s material. If the stain persists, don’t hesitate to call a professional.
With the right approach, your leather can look great again in no time.
Leave a Reply