To change ink on your HP printer, first check your printer model and compatible cartridges, then verify ink levels.
Power on the printer and open the cartridge access door.
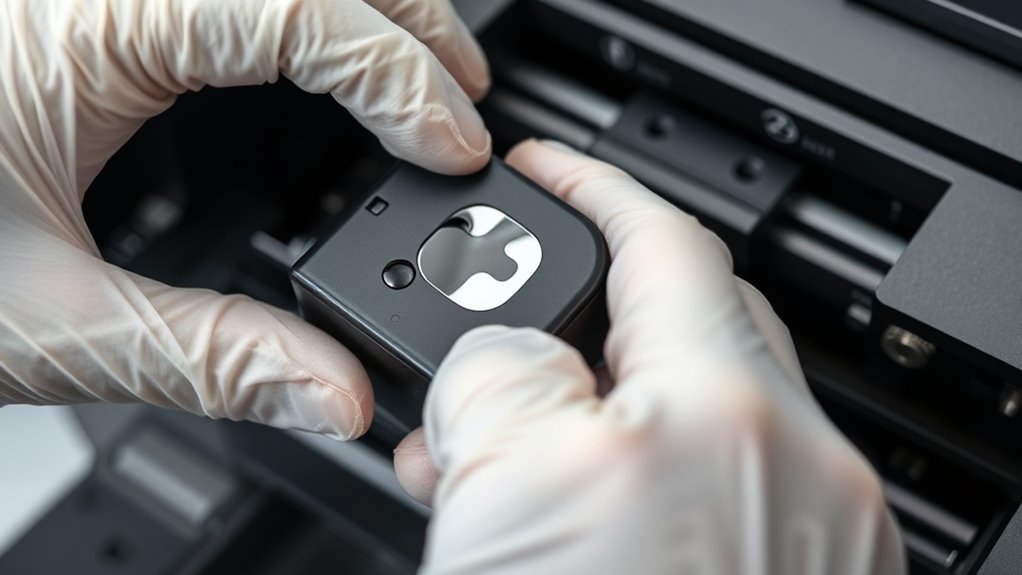
Carefully remove the old cartridges without touching contacts.
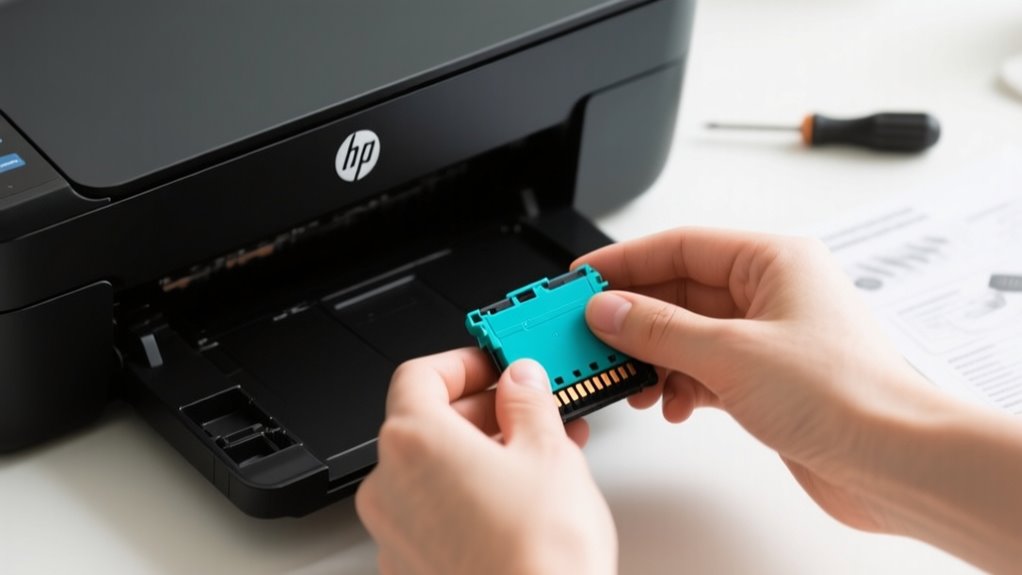
Unpack new cartridges, remove protective seals, and insert them firmly.
Close the printer cover to start initialization.
Finally, print a test page to guarantee quality.
Follow these simple steps, and you’ll keep your prints vibrant and your printer running smoothly.
You can explore more tips for flawless results.
Find Your HP Printer Model and Compatible Ink

To begin, locate your HP printer’s model number. You can usually find it on the front, back, or bottom of the device. Knowing your exact HP printer model is vital before buying ink.
Start by finding your HP printer’s model number, typically on the front, back, or bottom of the device.
Once you have it, check your user manual or visit HP’s official website to identify compatible ink cartridges designed for your printer. Compatibility is essential to avoid issues or damage.
You can also look at the cartridges currently installed to identify ink part numbers like HP 63 or HP 64. This helps confirm you’re getting the right replacements.
Always opt for genuine HP cartridges or verified third-party options that meet HP’s standards. This guarantees quality printing and printer compatibility.
This step saves you from wasted money or printer errors, making your ink replacement process smooth and successful. Remember, confirming your printer model and ink compatibility upfront is vital before purchasing any cartridges.
Check Ink Levels Before Replacing Cartridges
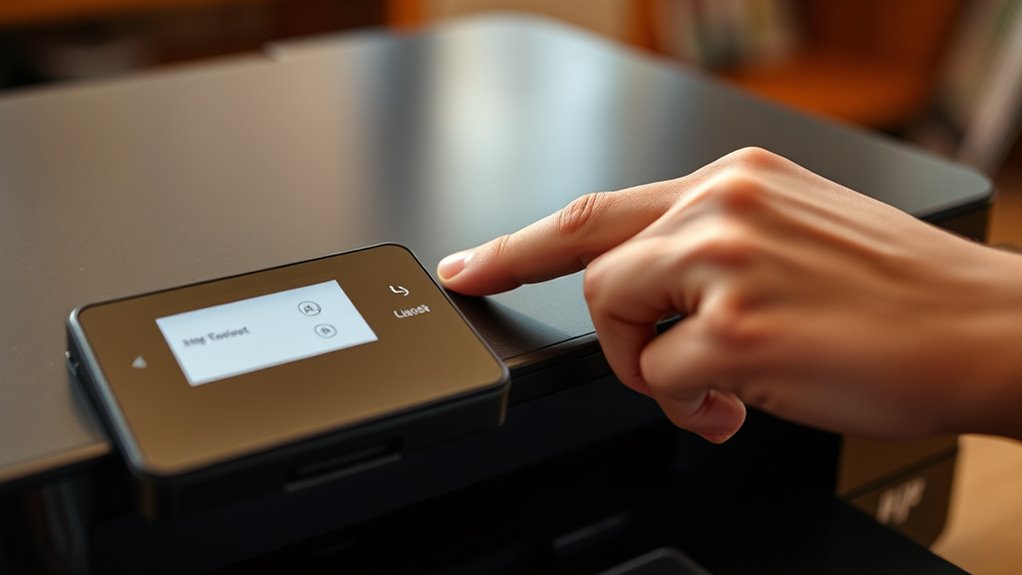
After identifying the right ink cartridges for your HP printer, the next step is to verify your current ink levels. Most HP printers let you easily check ink levels via the control panel or LCD display.
You can also monitor ink levels through the printer software installed on your computer or mobile device. Before checking, make sure your printer is powered on and fully initialized to get accurate readings.
Some HP models even show notifications or alerts when printer ink cartridges are running low or critically low. By regularly monitoring ink levels, you can avoid unexpected print quality problems and replace cartridges on time.
This helps maintain smooth printing without interruptions. Taking a moment to check ink levels ensures you’re prepared and won’t run out of ink mid-job.
It’s a simple step that keeps your HP printer running efficiently and your prints looking their best.
Power On Printer and Open Cartridge Access
First, make sure your HP printer is powered on and fully started up. Then, find the cartridge access door—it’s usually on the top or front of the printer. Just lift the cover carefully to open the compartment. This will allow the cartridges to move into place, making it easy for you to replace them.
Ensure Printer Is Powered
One essential step before changing your HP printer’s ink is making sure the printer is powered on and ready. Check the power indicator on the printer’s control panel; it should be steady or blinking, signaling the device is powered on and ready for maintenance.
Avoid starting the ink replacement if the printer isn’t powered on, as it may not recognize the new cartridges. Once powered on, carefully open the access door to reach the ink cartridges. This is typically at the front or top of your printer.
Opening this door while the printer is powered on ensures the system switches to maintenance mode, allowing safe cartridge replacement. Remember, don’t unplug the printer until you confirm it’s powered on and the access door is open.
Locate Cartridge Access Door
With your printer powered on and the access door ready to be opened, locate the cartridge access door on your HP printer. This door is usually found on the top or front, depending on your printer model.
Carefully open the cartridge access door to expose the ink cartridges and printhead area. Once opened, wait a few moments as the ink cartridges automatically move to the center for easy access.
Make sure the printer remains powered on and stable throughout this process, as it helps the system recognize any changes. By correctly locating and opening the cartridge access door, you set the stage for a smooth ink cartridge replacement without causing any damage to your printer.
Safely Open Printer Cover
Before you open the cartridge access area, make sure your printer is powered on to prevent any error messages. Once powered on, gently lift the top cover or access panel to open the printer cover and reveal the cartridge compartment.
Wait for the printer to complete its initialization sequence. The cartridges will automatically move to the center for easy access. Be careful handling the cover to avoid damage and guarantee safe access. Only touch the cartridges once the printer finishes initializing.
| Step | Action |
|---|---|
| 1 | Power on the printer |
| 2 | Locate the access panel |
| 3 | Gently open printer cover |
| 4 | Wait for initialization sequence completion |
Following these steps assures safe and smooth cartridge changes.
Safely Remove the Old Ink Cartridge Without Spills
Before you begin, it’s a good idea to set up your workspace so it can catch any accidental ink drips. Once the cartridge moves to the center, gently press the tab to release it. Be sure to hold the cartridge by its sides and take your time removing it slowly to prevent any spills or damage.
Prepare Workspace Carefully
How do you prevent mess and damage when removing your old ink cartridge? Start by preparing your workspace carefully. First, turn off the printer and unplug it to avoid electrical hazards.
Clear a flat surface near the printer to catch any drips or spills. Next, open the access panel gently. This prevents damage to the printer’s components.
Wait for the cartridge to move into a reachable position automatically before touching it. When removing the cartridge, handle it by the sides only, avoiding contact with electrical contacts or nozzles to prevent damage or ink spills.
Keeping these steps in mind makes the process safer and cleaner, ensuring your printer stays in good shape as you change the ink cartridge.
Release Cartridge Gently
While you release the cartridge, press the front tab gently to unfasten it from the carriage without forcing it. This prevents any damage to the printer or cartridge.
Once released, carefully lift the cartridge straight out by holding it on the sides, avoiding contact with the electrical contacts to maintain proper function. Remove the cartridge over a paper towel or disposable surface to catch any ink drips.
Don’t tilt or shake the cartridge, as this can cause spills or leaks. Use a steady, gentle motion throughout to ensure the cartridge doesn’t snap or get stuck in the slot.
Handle Ink Cartridge Properly
After you’ve gently released the cartridge, it’s important to handle it properly to avoid spills and damage. Always wash your hands before touching ink cartridges to prevent stains and skin irritation.
When removing the cartridge, carefully push the tab or latch and lift it out without force. Handle the cartridge by its sides, avoiding contact with electrical contacts or nozzles to prevent damage or clogging.
Place the used cartridge on a clean, dry surface like paper to catch any ink leaks. Dispose of old cartridges properly through recycling programs.
| Do’s | Don’ts |
|---|---|
| Wash hands thoroughly | Touch contacts or nozzles |
| Handle cartridge sides | Apply excessive force |
| Place on clean surface | Ignore proper disposal |
Unpack and Prepare New Ink Cartridges for Installation
Before you install the new ink cartridges, carefully remove them from their packaging without touching the electrical contacts or nozzles to avoid damage.
As you unpack the ink cartridges, remove any protective plastic clips, pull tabs, or vent seals that cover the ink nozzles. These must be taken off to guarantee proper ink flow.
Once unpacked, place the cartridges face up on a clean, lint-free surface like a sheet of paper to prevent any ink leaks from staining your workspace.
Before proceeding, inspect each cartridge for visible damage or leaks. If you spot any issues, replace the cartridge before installation.
Also, prepare the cartridges by verifying their orientation, ensuring the side with the electrical contacts will face the printer. This step helps the printer recognize the cartridges correctly.
Taking these simple precautions will make the installation process smoother and help maintain your printer’s performance.
Insert New Ink Cartridges Correctly and Securely
Once you’ve prepared the new ink cartridges, it’s time to insert them into your printer. Begin by aligning the color on each cartridge with the corresponding marker on the printhead. This step is essential for installing cartridges correctly.
Make sure the contact side of the cartridge faces the printer’s internal contacts to guarantee proper communication. Next, gently slide the cartridge into its designated slot. You’ll want to hear a click, signaling secure placement.
Press the cartridge firmly to prevent it from becoming loose or misaligned during operation. Repeat this process for each cartridge, matching colors carefully. Avoid forcing the cartridges, as this can cause damage.
After all cartridges are installed, don’t forget to close the lid carefully to help the printer recognize the new ink. Following these steps ensures your ink cartridges are inserted correctly and securely, setting you up for smooth printing without errors or leaks.
Close Printer Cover to Initialize New Ink Cartridges
When you gently close the printer cover, you trigger the system to recognize and initialize the new ink cartridges. This step is essential because the printer needs to detect the cartridges before it can start printing. Make certain you close the cover fully and latch it securely to avoid errors during initialization.
Once closed, the printer runs a brief calibration process to verify the cartridges are installed correctly.
Here’s what you need to keep in mind:
- Close the cover gently to avoid damaging components.
- Ensure the cover is completely latched for proper detection.
- Wait patiently for the printer to recognize the new ink cartridges.
- Don’t open the cover again until initialization finishes.
- Look for on-screen messages or indicator lights confirming cartridge readiness.
Following these steps helps the printer smoothly initialize and recognize your new ink cartridges, setting you up for flawless printing.
Run a Test Print and Check for Print Quality Issues
After closing the printer cover and allowing it to initialize the new ink cartridges, you’ll want to run a test print to check the output quality. Load paper into the tray, then select the “Print Test Page” option from your printer’s menu or software.
Once the test page prints, examine it closely for clarity, color accuracy, and any streaks or missing sections. If you notice print quality issues, use the printer’s cleaning utility to clean the print heads automatically. Alternatively, you can gently clean the print heads manually with a lint-free cloth or cotton swab.
Compare your test print with sample images from the manual or online to evaluate color fidelity and sharpness. After cleaning or adjustments, run another test print to confirm the issues are resolved.
This step guarantees your printer is ready to produce clear, vibrant documents before you print anything important.
Troubleshoot Cartridge Errors and Fix Print Problems
If your printer displays cartridge error messages, it usually means the cartridges aren’t installed correctly, the contacts are dirty, or the cartridges aren’t compatible. To fix this, start by checking the installation. Make sure each cartridge clicks securely into place. Then, clean contacts gently using a lint-free cloth or a Q-tip dipped in isopropyl alcohol to remove any debris that might cause recognition issues.
Consider these troubleshooting tips to resolve cartridge errors and improve print quality:
- Verify cartridge compatibility with your HP printer model
- Reinstall cartridges firmly to ensure proper installation
- Clean contacts carefully without damaging them
- Run the printer’s built-in diagnostic utility to identify and fix issues
- Update or rollback printer firmware if genuine cartridges are misread
Following these steps helps you avoid cartridge errors and maintain consistent print quality without extra hassle.
Maintain Your HP Printer and Clean Ink Cartridges for Best Performance
To keep your HP printer running smoothly, it’s important to regularly clean the print heads and cartridges. This helps prevent clogs and keeps your print quality looking sharp. You can use the printer’s built-in cleaning utility for an easy fix, or if you prefer, gently wipe the cartridges with a lint-free cloth dampened with isopropyl alcohol. Just be sure the printer is turned off and unplugged before you start.
Taking care of your ink cartridges and doing routine maintenance can really make a difference. It helps avoid streaks and faded prints, plus it extends the life of your printer. So, a little regular upkeep goes a long way in keeping everything working great!
Cleaning Print Heads
Although it might seem like a minor task, cleaning your HP printer’s print heads regularly prevents clogs that cause streaks, smudges, or faded printouts. To maintain the best print quality, use your printer’s built-in cleaning utility to run head cleaning cycles.
If needed, manually clean the print heads by turning off the printer and gently wiping nozzles with a lint-free cloth dampened with isopropyl alcohol. Proper cleaning helps extend the lifespan of ink cartridges and keeps colors vibrant.
Remember to:
- Perform routine head cleaning cycles via your printer’s control panel
- Avoid harsh chemicals that can damage print heads
- Use lint-free cloths for manual cleaning
- Run multiple cleaning cycles if print quality doesn’t improve
- Regularly maintain print heads to prevent ink buildup and clogs
Routine Printer Maintenance
Maintain your HP printer’s performance by routinely cleaning its ink cartridges and internal components. Use the printer’s built-in cleaning utility regularly to keep print heads clear and avoid clogs.
Always turn off and unplug your printer before cleaning electrical contacts with a lint-free cloth dipped in isopropyl alcohol. Dust and debris around cartridges affect print quality and printer lifespan.
Incorporate these routine maintenance steps for consistent, high-quality printing.
| Task | Frequency | Method |
|---|---|---|
| Cleaning ink cartridges | Monthly or as needed | Built-in cleaning utility |
| Cleaning print heads | Monthly or as needed | Cleaning utility or manual wipe |
| Dust removal | Weekly | Soft cloth or compressed air |
| Inspect cartridges | Every refill | Visual and contact check |
Ink Cartridge Care
How often do you take care of your HP printer’s ink cartridges? Proper ink cartridge care is key to maintaining print quality and avoiding costly replacements. Always handle cartridges by their sides. Never touch the contacts or nozzles to prevent damage.
Keep the cartridges clean by using your printer’s built-in cleaning utility regularly to avoid clogs. If you notice streaks or print quality issues, gently clean the contacts with a lint-free cloth or Q-tip dipped in isopropyl alcohol.
Don’t forget to keep the printer’s interior dust-free. Also, store unused cartridges sealed in a cool, dry place.
- Handle cartridges carefully, avoiding contacts and nozzles
- Use built-in cleaning tools to maintain print quality
- Clean contacts gently if issues arise
- Keep printer interior and cartridges dust-free
- Store unused cartridges properly to prevent drying out
Frequently Asked Questions
Can I Use Third-Party Ink Cartridges With My HP Printer?
Yes, you can use third-party ink cartridges with your HP printer, but you should weigh third-party compatibility and ink cartridge quality carefully. While these cartridges often offer cost savings, they might affect print quality or trigger error messages.
Keep in mind, using them can risk your brand warranty. To avoid third-party risks, always check reviews and compatibility with your specific printer model before buying to guarantee reliable performance and avoid problems.
How Long Does It Take for the Printer to Recognize New Ink Cartridges?
It usually takes about 30 seconds for ink recognition after cartridge installation. During this time, your printer performs cartridge detection and printer calibration to guarantee everything works smoothly.
You’ll see the ink level update on the screen as it confirms the new cartridges. If it takes longer than a couple of minutes, try cleaning the contacts or restarting the printer to expedite cartridge detection and ink recognition.
What Should I Do if the Ink Cartridge Is Not Recognized?
If your printer isn’t recognizing the ink cartridge, start with ink cartridge troubleshooting by removing and reinstalling it, making sure it clicks into place. Check for any protective tape and clean the electrical contacts.
Run cartridge reset procedures if needed, and update your printer’s firmware to fix printer recognition issues. Also, watch for ink level alerts and verify compatibility concerns to guarantee the cartridge works correctly with your printer model.
Can I Change Ink Cartridges While Printing a Document?
You generally shouldn’t change ink cartridges while printing a document. Doing so can cause ink flow issues, smudges, or paper jams.
If you ignore a printer ink warning and replace cartridges mid-print, you might face ink cartridge troubleshooting later. It’s best to pause or cancel the job, then follow proper cartridge replacement steps.
After replacing, perform ink cartridge alignment to guarantee print quality stays sharp and consistent.
How Do I Recycle Used Ink Cartridges Responsibly?
To recycle used ink cartridges responsibly, you should use HP’s cartridge recycling programs for eco-friendly disposal. Drop off your cartridges at designated recycling collection points or authorized partners to guarantee responsible waste management.
This reduces environmental impact by preventing plastic waste and conserving resources. You can also visit local recycling centers or participating stores that support these programs. Recycling this way keeps ink and toner out of the environment safely.
Conclusion
Changing your HP printer ink is easier than you might think. Did you know that regularly replacing cartridges can extend your printer’s lifespan by up to 30%?
By following these simple steps, you’ll keep your prints sharp and avoid costly repairs. Remember to check ink levels often and handle cartridges carefully to prevent spills.
Taking a little time for maintenance guarantees your HP printer delivers the best quality every time you print.
Leave a Reply