To fill your fountain pen in 10 easy steps, first gather your pen, ink, and a clean cloth in a well-lit space.
Choose suitable ink and the right filling method, whether cartridge, converter, or piston.
Remove the cap and unscrew the barrel.
Insert the cartridge or dip the nib into ink, drawing it up slowly to avoid bubbles.
Wipe excess ink carefully.
Reassemble and test the pen for smooth flow.
Keep following for tips on perfecting your technique.
Gather Supplies and Prepare Your Workspace
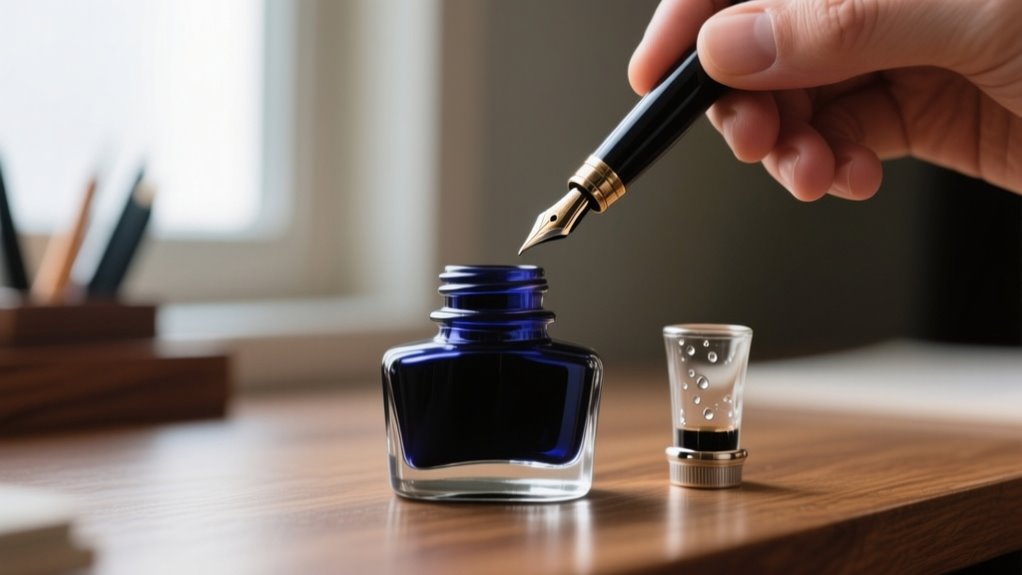
Where should you begin when filling a fountain pen? First, gather supplies like your fountain pen, ink bottle, and a clean cloth. Having everything ready helps you avoid interruptions and potential messes.
Next, prepare your workspace by choosing a well-lit, clutter-free area with a stable, flat surface. This setup ensures you handle the pen and ink bottle precisely without risking spills or accidents. Place a clean cloth or paper towel nearby to catch any ink drips during filling.
Remove the pen cap and have any necessary tools, such as eyedroppers or converters, within reach. By setting up this way, you create an efficient, safe environment that makes the ink-filling process smoother. Taking these simple steps before you start guarantees you protect your workspace and makes filling your fountain pen a straightforward task.
Choose the Right Ink for Your Fountain Pen
After setting up your workspace and gathering your fountain pen and tools, the next step is selecting the right ink. Always use ink specifically formulated for fountain pens to guarantee smooth flow and prevent clogging.
Whether you’re using ink cartridges or prefer ink refilling from a bottle, opt for high-quality brands to protect your pen’s internal components. Check that the ink is fresh and not expired, as old ink can cause inconsistent flow and potential damage.
Choose ink colors that suit your paper type and writing purpose for the best results. Avoid inks with additives like shimmer or glitter unless your fountain pen is designed to handle them properly, as these can clog the nib or feed.
Select the Best Filling Method for Your Pen Type
Because fountain pens come with different filling systems, you’ll need to choose the method that matches your pen type for the best performance. Cartridge pens are the simplest, using pre-filled ink cartridges that snap into place. They offer mess-free refills, ideal for on-the-go use.
If your pen has a convertor, you can use bottled ink by attaching it to the pen’s feed. This filling mechanism gives you more ink capacity and flexibility. Piston fillers and eyedropper pens require specialized techniques but hold larger ink volumes, perfect if you write extensively.
Selecting the right filling method guarantees smooth ink flow and helps prevent ink from leaking, protecting both your pen and writing surface. Understanding your pen’s filling mechanism also aids in maintenance and prolongs its lifespan. So, match your choice to your pen type and writing habits to enjoy maximum performance every time you refill.
Remove the Cap and Unscrew the Barrel
Start by removing the cap to expose the filling mechanism. Then, carefully unscrew the barrel from the section—usually by turning it counterclockwise. Once you’ve done that, set both parts aside safely while you get ready to fill your pen.
Removing Pen Components
How do you begin preparing your fountain pen for filling? First, remove the cap carefully to access the nib and barrel. Next, unscrew the barrel from the section, depending on your pen’s design.
Keep these components separate to avoid spills and hold the pen securely to prevent dropping. Place all removed parts on a clean surface, ensuring no dirt or ink contamination.
| Action | Emotion Felt |
|---|---|
| Remove the cap | Anticipation |
| Unscrew the barrel | Confidence |
| Set parts aside | Preparedness |
Removing these components carefully sets the stage for a smooth, mess-free ink filling. With your pen disassembled, you’re ready for the next step.
Preparing for Filling
Why does preparing your fountain pen properly matter? It guarantees a smooth filling process and prevents ink spills or damage. First, remove the cap to expose the nib and feed, so your pen’s ready for filling.
Next, carefully unscrew or detach the barrel from the section to access the ink reservoir or filling mechanism. Place the pen on a clean, flat surface to avoid stains or accidents.
Before you fill, check that the nib and feed are clean and free of dried ink, which could block the ink flow. Handle the pen gently to avoid damaging the threads or internal parts during disassembly.
Taking these steps to prepare your pen will make filling it with ink easier and keep your pen in great condition.
Insert an Ink Cartridge Properly
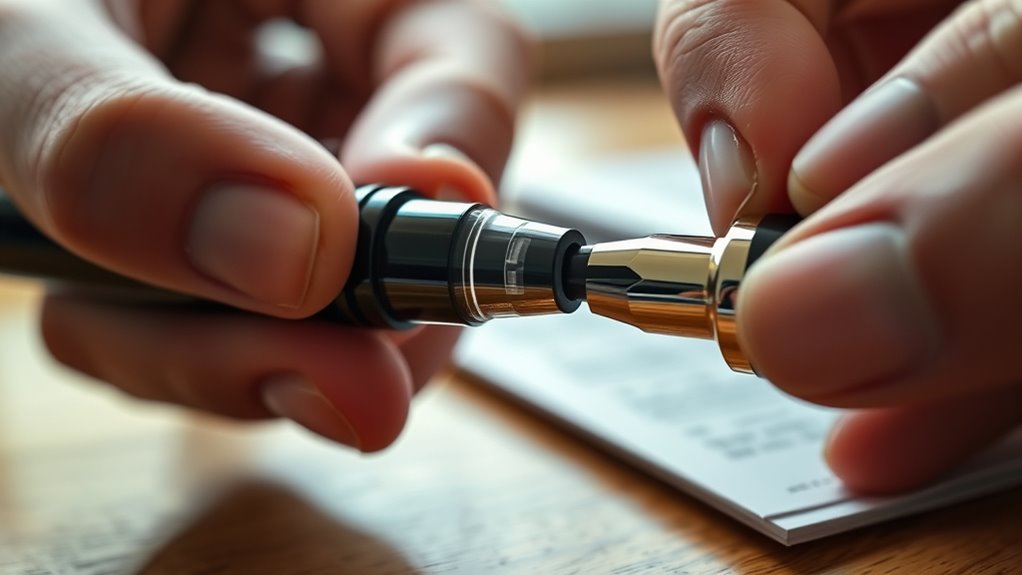
Once you’ve removed the pen cap and unscrewed the barrel, you can access the ink chamber to insert a compatible cartridge. Take your ink cartridge and carefully insert the open end into the pen’s section. Make sure to achieve proper alignment so the cartridge fits snugly without forcing it.
Applying gentle pressure will puncture the cartridge’s seal, allowing ink to flow smoothly into the feed and nib. After inserting the cartridge, reattach the barrel securely to avoid leaks and guarantee consistent ink flow.
It’s important to wait about a minute for the ink to travel fully through the feed to the nib before you start writing. This step is vital to fill fountain pens effectively and avoid dry starts or skipping. By following these steps, you’ll have your pen ready with fresh ink, guaranteeing a smooth writing experience every time.
Fill Your Pen Using a Converter or Piston Mechanism
Although filling your pen might seem tricky at first, using a converter or piston mechanism is straightforward once you get the hang of it. Start by removing the pen’s barrel and securely inserting the converter or piston mechanism into the section.
Next, dip the nib and feed into the ink bottle, making sure the breather hole is submerged to avoid air bubbles. Slowly operate the piston or push the converter’s plunger to draw ink into the chamber. Keep the nib submerged and move steadily to ensure a full fill.
Finally, reassemble your pen, wipe off any excess ink, and wait a few moments for the ink to flow to the nib before writing.
| Step | Action |
|---|---|
| 1 | Remove barrel |
| 2 | Insert converter/piston |
| 3 | Dip nib in ink bottle |
| 4 | Operate piston/plunger slowly |
| 5 | Reassemble and wipe excess |
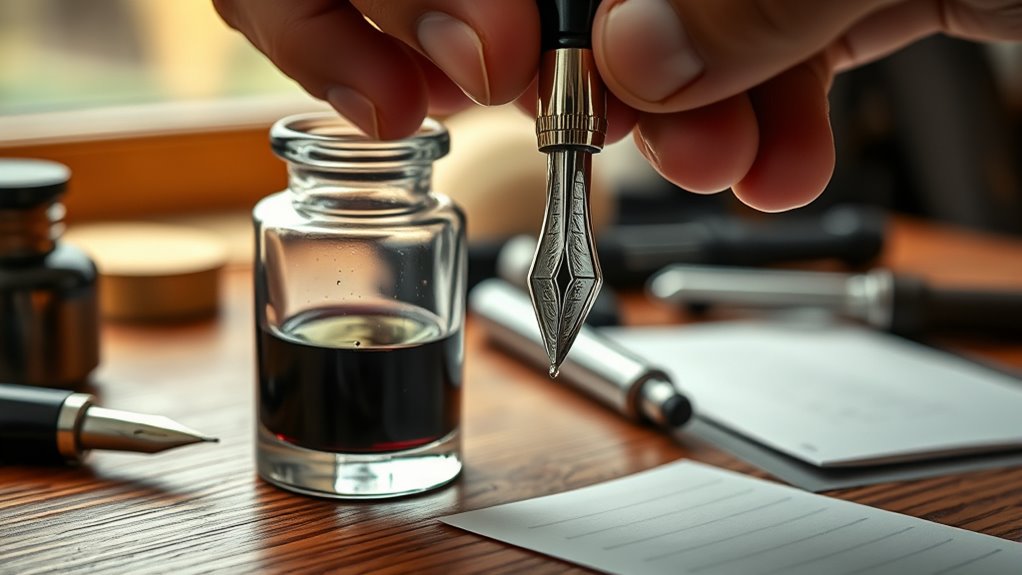
Dip the Nib Correctly to Avoid Air Bubbles
When you dip the nib into the ink, make sure to cover just the vent hole without submerging the entire nib to prevent air from entering the feed. Hold the pen at a slight angle as you dip to guarantee a smooth, controlled immersion that avoids trapping air around the nib and feed.
Avoid quick or deep dips because these can flood the feed and cause air bubbles to form. After dipping, gently twist or tap the pen to help dislodge any air bubbles that might be trapped.
When removing the nib from the ink, do it slowly to minimize air entrapment and let excess ink flow off naturally. This careful dipping technique helps maintain a clean ink flow and prevents the formation of air bubbles, assuring your fountain pen writes smoothly every time you use it.
Release Air Bubbles Slowly for Smooth Ink Flow
After carefully dipping the nib to prevent air bubbles, you’ll want to focus on releasing any that remain inside the pen. To guarantee smooth ink flow, gently adjust the piston or lever to release air gradually.
Gently adjust the piston to release trapped air and ensure smooth, uninterrupted ink flow.
This slow release helps trapped air escape without causing ink splatters or introducing bubbles that interrupt writing. Hold the pen upright during this process to minimize ink leakage and maintain proper vacuum pressure within the chamber.
Patience here is key. By easing the piston gradually, you allow air bubbles to escape steadily, preventing ink starvation and ensuring consistent ink delivery.
Taking your time to release air correctly results in a smooth, uninterrupted ink flow, enhancing your overall writing experience. Remember, rushing this step can cause ink to sputter or flow unevenly.
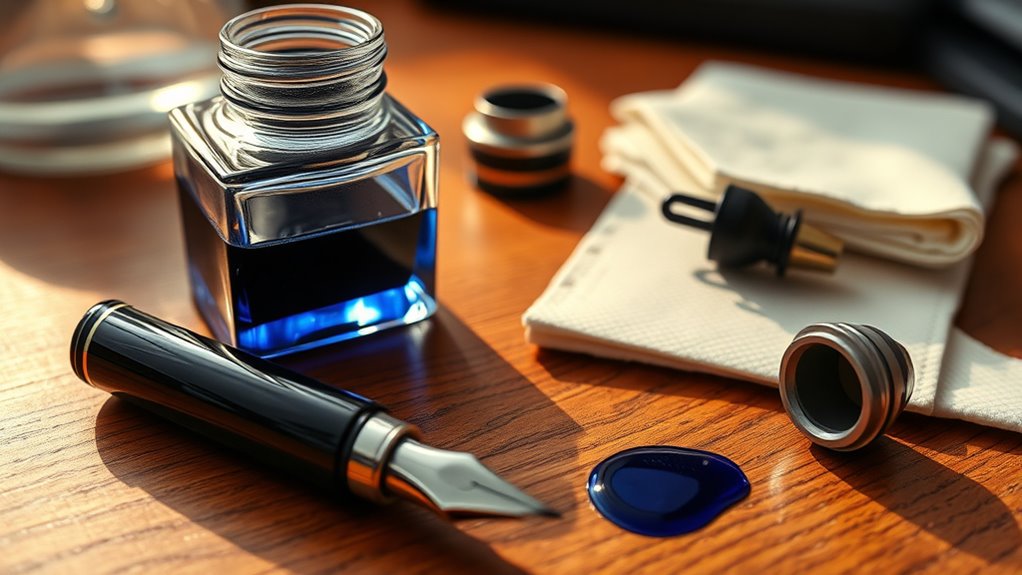
Wipe Excess Ink From the Nib and Section
Once you’ve filled your fountain pen, you’ll want to gently wipe away any excess ink from the nib and section using a soft, lint-free cloth or tissue. This helps prevent smudges and buildup. Carefully wipe around the nib and section, applying light pressure to avoid bending or damaging delicate parts.
This step removes residual ink that could cause smudging when you write and helps keep the pen clean. Using a soft cloth or absorbent tissue ensures you don’t scratch the nib or section while removing excess ink.
Regularly wiping your pen after filling also helps prevent clogging by removing leftover ink that can dry and block ink flow. By maintaining a clean nib and section, you guarantee smooth writing and ideal pen performance.
Taking a moment to wipe off excess ink is a small but essential part of caring for your fountain pen. It keeps the pen reliable and ready for every use.
Reassemble and Test Your Fountain Pen
Although it might seem simple, carefully reassembling your fountain pen guarantees all parts fit securely and function properly. Start by aligning the nib, feed, and barrel, making sure each piece clicks or screws into place without forcing. Before you fully reassemble, wipe any excess ink from the nib and feed to prevent ink buildup, which can affect performance.
Once reassembled, fill the pen with a few drops of ink or from the reservoir to test the ink flow. Gently make a few strokes on paper to confirm the ink flows smoothly and consistently. If you notice uneven ink flow or skipping, slightly disassemble the pen to check for misalignment or trapped air bubbles. Correct any issues, then refill and test again. This careful process ensures your fountain pen writes beautifully every time without interruptions caused by ink buildup or improper assembly.
Frequently Asked Questions
How Often Should I Clean My Fountain Pen to Prevent Clogging?
You should clean your fountain pen every 4 to 8 weeks if you use it regularly to prevent clogging. If you switch ink color variations often or use fast-drying inks, clean it more frequently, about every 2 to 4 weeks.
Keep ink cartridge compatibility in mind to avoid damage. Follow refill frequency tips and use proper cleaning tool recommendations, like a bulb syringe or pen flush solution, to keep your pen flowing smoothly and ink-free from buildup.
Can I Mix Different Brands of Fountain Pen Ink Safely?
You shouldn’t mix different brands of fountain pen ink without caution because ink compatibility varies. Mixing inks can cause color mixing risks, like unexpected hues or ink separation.
To maintain brand consistency and avoid damage, it’s safer to stick with one brand per refill. If you want to experiment, try ink layering or small tests in a separate container first. This way, you protect your pen and guarantee smooth writing.
What Should I Do if My Pen Leaks After Filling?
If your pen leaks after filling, start with leakage troubleshooting by checking your pen maintenance. Make sure all parts are tightened securely and you didn’t overfill it.
Clean the nib and feed to prevent pressure buildup. Also, confirm ink compatibility since the wrong ink can cause swelling and leaks.
Finally, review your filling techniques to avoid excess ink and store the pen upright to minimize leakage.
How Do I Store My Filled Fountain Pen to Avoid Drying Out?
To avoid ink drying, store your filled fountain pen upright with the nib pointing up. This minimizes ink evaporation and keeps the feed moist.
Always make sure the cap is tight to create a sealed environment that prevents air exposure. Keep your pen away from extreme temperatures or direct sunlight, since heat speeds up ink evaporation.
Regularly capping and proper storage help maintain ink quality and prevent clogging.
Is It Normal for Ink to Take Time to Start Flowing?
Yes, it’s normal for ink to take a moment to start flowing, for ink flow issues to happen, and for drying time to vary. You’ll notice ink consistency affects how smoothly it moves through the feed, and flow adjustment can help speed things up.
If the ink doesn’t flow right away, gently priming the nib or ensuring the feed is saturated usually resolves the delay, making your writing experience smoother and more reliable.
Conclusion
Filling your fountain pen doesn’t have to be tricky. Just follow these simple steps, and you’re set. Did you know that over 50% of fountain pen users prefer bottled ink over cartridges? It’s a great way to customize your writing experience.
Once you get the hang of it, refilling becomes quick and satisfying. So, keep your pen ready, enjoy smooth writing, and let your creativity flow with every stroke!
Leave a Reply