
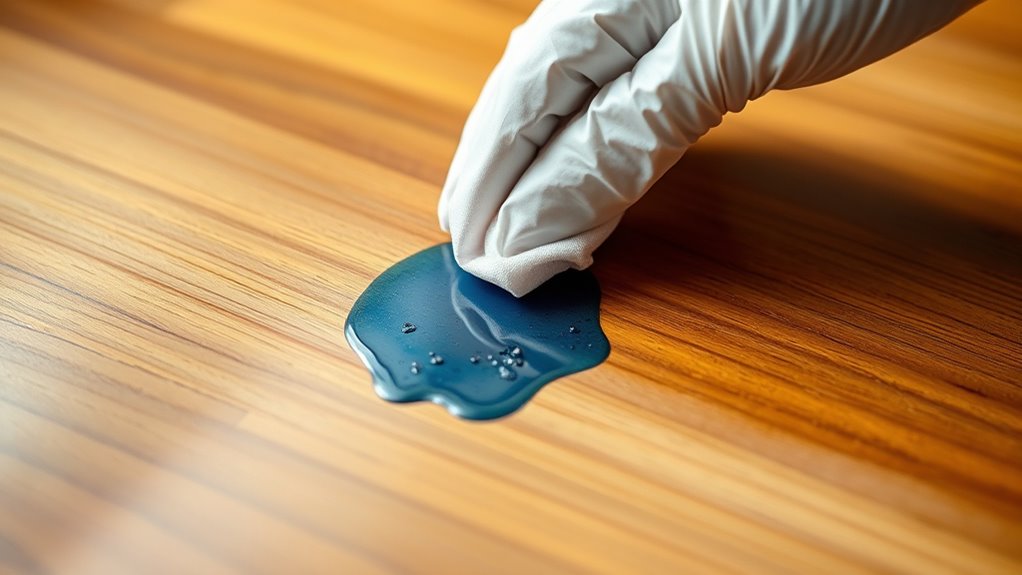
To get ink out of wood in 10 easy steps, first identify if your wood is sealed or unfinished by testing a hidden spot with water.
Then use rubbing alcohol or vinegar depending on the finish.
Gently apply hand sanitizer or a baking soda paste to lift stains.
For stubborn marks, carefully try acetone or sanding with fine-grit paper.
Always wipe clean and dry between steps, and refinish to protect the surface.
Keep going to uncover detailed tips and tricks.
How to Identify Your Wood Type and Finish
Before you start removing ink stains, it’s important to identify whether your wood is sealed or unfinished. The easiest way to check your wood finish is to test a small, hidden area with a drop of water.
Start by testing a hidden spot with water to determine if your wood is sealed or unfinished.
If the water beads up and stays on the surface, you’re dealing with sealed wood, likely coated with polyurethane, varnish, or lacquer. This finish resists absorption and protects the wood from ink and moisture.
On the other hand, if the water soaks into the wood quickly, you have unfinished wood. Unsealed wood is porous, allowing ink and liquids to seep deep into the grain.
This makes stains trickier to remove without damaging the wood. Knowing your wood’s finish helps you choose cleaning methods that won’t harm the surface or worsen the stain.
Best Supplies for Removing Fresh Ink Stains
Once you’ve figured out whether your wood is sealed or unfinished, you can pick the right supplies to tackle fresh ink stains effectively. For sealed wood, rubbing alcohol or denatured alcohol works best to dissolve ink quickly without harming the surface.
On unfinished wood, white vinegar combined with a gentle soft cloth can lift ink without soaking in too deeply. Avoid harsh chemicals that may damage your wood’s finish.
Here’s a quick guide to the best supplies for fresh ink stains:
| Supply | Best For | Notes |
|---|---|---|
| Rubbing Alcohol | Sealed wood ink stains | Use sparingly, test first |
| White Vinegar | Unfinished wood stains | Mild and natural |
| Magic Eraser | Light ink marks | Use with light pressure |
| Toothpaste + Baking Soda | Light ink stains | Mild abrasive, gentle on finish |
| Acetone | Stubborn fresh stains | Use cautiously |
Choose supplies carefully to protect your wood while removing ink stains efficiently.
Use Baking Soda Paste to Lift Light Ink Marks
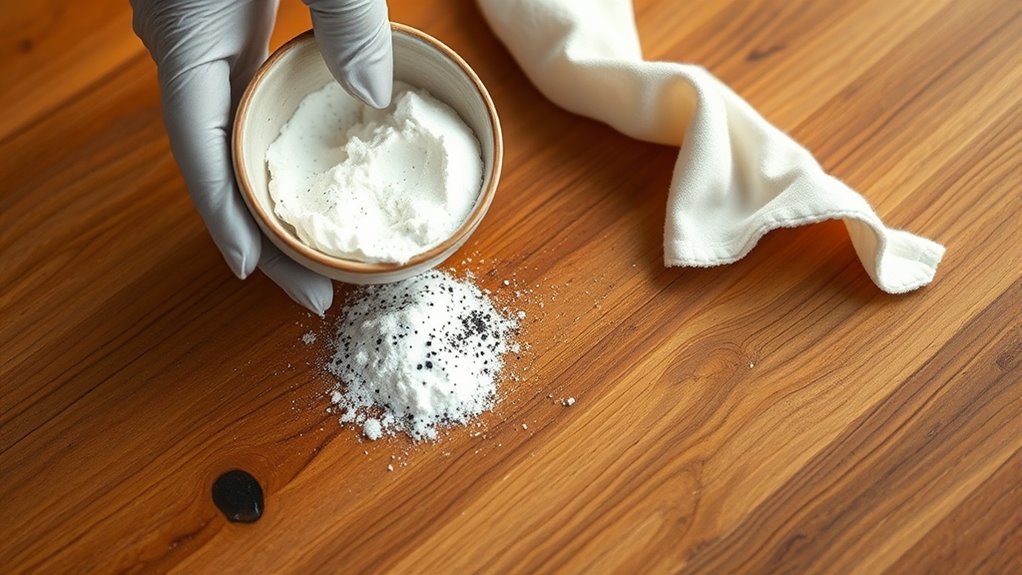
Start by mixing 2-3 tablespoons of baking soda with just enough water to make a thick paste. Once you have that, apply the paste directly onto the ink stain. Then, gently rub it in using small circular motions, making sure to follow the wood grain.
After that, let it sit for a few minutes. When the time’s up, simply wipe it away, and you should see the ink lift effectively. It’s pretty simple and works well for light ink marks!
Preparing Baking Soda Paste
Although ink stains on wood can be stubborn, you can lift light marks effectively by preparing a baking soda paste. Start by mixing 2-3 tablespoons of baking soda with just enough water to create a thick, spreadable paste.
Before using it on the stain, test the paste on a hidden spot to make sure it won’t damage or discolor the wood. Once you’re confident, apply the baking soda paste directly onto the ink mark using your fingers or a soft cloth, covering the stain completely.
Gently rub the paste in small circular motions, following the wood grain to avoid scratching. Let the paste sit on the stain for 2-3 minutes, or up to 5 if the mark is stubborn, before wiping it away with a damp cloth.
Applying Paste Effectively
When you apply the baking soda paste to the ink stain, make sure to spread it evenly using your fingers or a soft cloth to cover the entire affected area. This guarantees the baking soda can work effectively for stain removal by breaking down the ink particles.
Gently dab and spread the paste over the stain, fully covering it without rubbing too harshly. Let the paste sit for 5 to 10 minutes so it can lift the light ink marks.
Afterward, use a damp cloth to carefully wipe off the baking soda paste. If the stain persists, don’t hesitate to apply paste again and repeat the process until the wood looks clean. This method is a simple, gentle way to tackle ink stains using baking soda.
Try Baking Soda and Toothpaste for Mild Abrasive Cleaning
If you want to remove ink stains without harsh chemicals, mixing baking soda and plain white toothpaste creates a gentle abrasive paste that can lift ink from wood surfaces. Combine 1 tablespoon of baking soda with 1 tablespoon of non-gel toothpaste to form a mild abrasive mixture ideal for ink removal.
Before applying, test the paste on a hidden wood spot to guarantee it won’t damage the finish. Using a soft cloth or your finger, gently rub the paste onto the ink stain with light pressure in small circular motions for about 10 seconds.
Then, cover the area with a thin layer of the paste and continue rubbing for 30 to 60 seconds. Wipe away the residue with a damp cloth and dry the wood thoroughly. If the stain persists, just repeat the process.
This method offers a safe, effective way to tackle ink stains using common household items like baking soda and toothpaste.
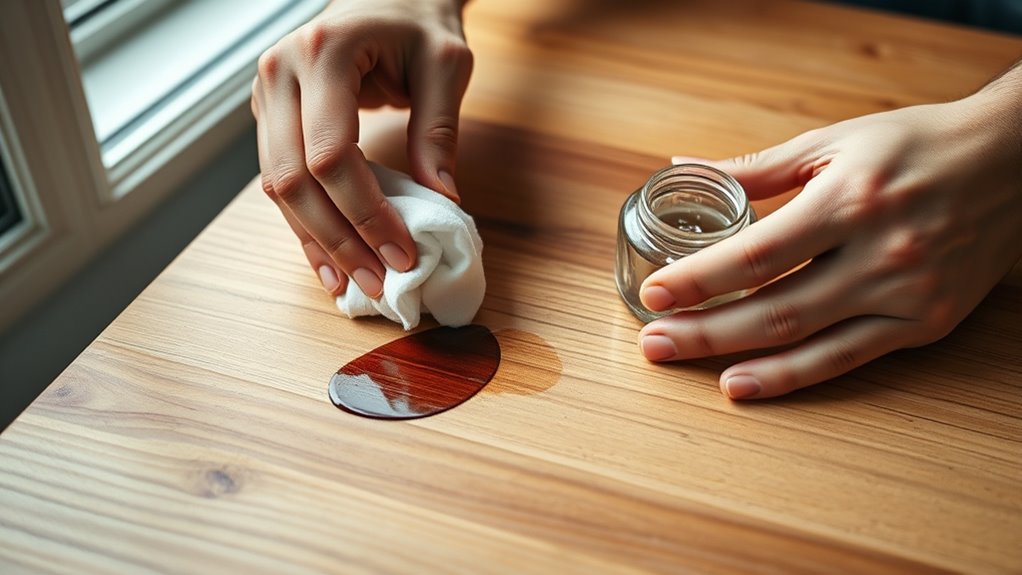
Apply Rubbing Alcohol for Quick Ink Removal
Since ink can quickly set into wood, applying rubbing alcohol offers a fast and effective way to break down the stain. Start by dampening a cotton ball or soft cloth with isopropyl rubbing alcohol. Use 70% or higher for the best ink removal.
Gently dab the ink stain on the wood surface, applying light pressure to avoid damaging the finish. Let the rubbing alcohol sit on the stain for about 10 to 15 seconds to dissolve the ink before wiping or blotting it away.
After treating the area, use a clean, damp cloth to remove any remaining ink and alcohol residue. Always test the rubbing alcohol on a small, hidden spot of the wood surface first to confirm it won’t harm the finish.
This quick method is ideal when you need efficient ink removal without risking damage to your wood furniture or flooring.
Use Hand Sanitizer for Fast Everyday Ink Stains
You can use hand sanitizer to quickly tackle everyday ink stains on wood. Its alcohol content helps break down the ink pigments, making the stain easier to remove. Just apply a small amount and let it sit for a moment.
Then, gently rub the stain with a soft cloth. Be careful not to overdo it, though. Afterward, make sure to wipe and dry the area thoroughly to protect the wood’s finish.
Hand Sanitizer Effectiveness
How quickly can you tackle fresh ink stains on wood? Hand sanitizer, especially one with 60-70% alcohol, works fast to break down ink stains on wood surfaces. Simply apply a small amount directly onto the ink stain and let it sit for 30 to 60 seconds.
This allows the alcohol to dissolve the ink effectively. Then, gently rub the area with a soft cloth to lift the stain without damaging the wood finish. Hand sanitizer is an accessible and quick solution for small ink stains, making it handy when you don’t have specialized cleaners nearby.
Just remember to test it on a hidden part of the wood surface first to ensure it doesn’t cause discoloration or harm the finish before treating the stain.
Application Precautions
Applying hand sanitizer to fresh ink stains on wood can be an effective quick fix, but it requires some care to prevent damaging the surface. Before you start, keep these application precautions in mind to protect the wood finish:
- Always test on a hidden spot first to ensure the sanitizer won’t discolor or harm the wood.
- Use only a small amount of alcohol-based hand sanitizer, as excessive use can degrade delicate finishes.
- Let the sanitizer sit for 30-60 seconds before gently rubbing, then wipe the area with a damp cloth to remove residue.
Ink Removal Technique
Although ink stains on wood can be stubborn, hand sanitizer offers a quick and effective way to tackle everyday marks. To remove ink from wood, apply a small amount of hand sanitizer directly onto the stain. Let it sit for 30 to 60 seconds to break down the ink pigments.
Then, gently rub the area with a soft cloth or sponge using circular motions to lift the ink. Afterward, wipe the wood surface with a damp cloth to clear away any remaining sanitizer and ink residue. Finally, dry the area thoroughly.
If needed, reapply a finish or sealant to restore the wood’s appearance. This simple technique helps you remove ink stains quickly without damaging the wood’s surface.
Buff Light Ink Stains Gently With a Magic Eraser
When you spot a light ink stain on your wood surface, slightly dampen a Magic Eraser and test it on a hidden area first to make certain it won’t damage the finish. This step ensures your wood finish remains intact throughout the cleaning process.
Once confirmed safe, follow these steps to gently buff the ink stain:
- Rub the Magic Eraser in small, circular motions over the ink stain, applying just light pressure. Avoid pressing too hard to prevent removing the finish.
- Work in short intervals of 5-10 seconds, frequently checking the wood to catch any signs of dulling or damage.
- After buffing, wipe the area with a clean, damp cloth to remove residue and restore the wood’s natural sheen.
Using a Magic Eraser carefully helps lift light ink stains without harming the wood finish, keeping your furniture looking clean and well-maintained.
Remove Stubborn Ink With Acetone-Based Nail Polish Remover
If you find that light cleaning methods haven’t removed the ink stain, you can turn to acetone-based nail polish remover for tougher marks. This remover dissolves the ink stain quickly but can damage the surface of the wood if not used carefully. Always test it on a hidden spot first to check for discoloration or finish damage.
Use a damp cotton swab dipped in nail polish remover and gently dab from the stain’s edges inward. Leave it on for 5 to 10 seconds, then wipe immediately with a clean, damp cloth. Afterward, clean and dry the area thoroughly before applying any finish.
| Step | Action |
|---|---|
| 1 | Test remover on hidden wood area |
| 2 | Dab ink stain gently with remover |
| 3 | Wait 5 to 10 seconds |
| 4 | Wipe with damp cloth |
| 5 | Clean and dry surface |
Sand and Refinish Deep Ink Stains on Unfinished Wood
If the ink stain is really deep, the best way to tackle it is by sanding the unfinished wood with 220-grit sandpaper. Just make sure you always sand along the grain—that way, you won’t accidentally damage the wood. Keep an eye on how things are going as you sand so you don’t go too far or mess up the area around the stain.
Once the stain is completely gone and you’ve wiped away all the dust, it’s time to bring the wood back to life. Apply a finish that matches the wood in thin coats, and this will help restore its natural look. With a little patience, your wood will look good as new!
Sanding Techniques For Ink
Although deep ink stains can be stubborn, sanding offers an effective way to remove them from unfinished wood. To achieve the best ink removal results, follow these sanding techniques carefully:
- Sand the stained area using 220-grit sandpaper, always moving with the wood grain. This helps avoid surface damage and guarantees even removal.
- Use a sanding block or electric sander for consistent pressure. This prevents uneven spots and protects the surrounding wood.
- Regularly inspect the surface to avoid over-sanding. Then wipe away dust with a tack cloth or damp rag before allowing it to dry completely.
After sanding, you can refinish the area by applying a matching stain or finish in thin coats. This restores the wood’s natural appearance smoothly and effectively.
Choosing Sandpaper Grit
When sanding deep ink stains on unfinished wood, choosing the right sandpaper grit is essential to remove the stain effectively without damaging the surface. Start with 220-grit sandpaper for gentle sanding, following the wood grain. Increase pressure gradually to avoid over-sanding and damaging the wood surface.
Multiple passes may be needed for deeply absorbed ink, but don’t remove too much wood. Use the table below to guide your sanding choices:
| Sandpaper Grit | Purpose | Wood Surface Effect |
|---|---|---|
| 120 | Remove heavy stains | Rough, removes more |
| 150 | Moderate sanding | Smoother than 120 |
| 220 | Fine sanding, finish | Smooth, minimal damage |
| 320 | Final smoothing | Very smooth, delicate |
| 400+ | Polishing | Very fine, gentle |
Choose grit carefully to protect your wood surface during sanding.
Refinishing After Sanding
After sanding away the ink stain with 220-grit sandpaper, you’ll want to prepare the surface for refinishing to restore its original look. First, remove all dust and debris using a tack cloth or damp rag to guarantee a smooth finish.
Next, apply a matching stain or finish in thin, even coats, letting each layer dry fully before adding more. Finally, protect the wood with a durable topcoat like polyurethane or varnish to enhance its appearance and longevity.
Follow these steps for effective refinishing:
- Clean the sanded area thoroughly to remove dust.
- Apply thin coats of stain or finish, allowing drying time.
- Seal with a protective topcoat for durability.
Proper sanding and refinishing bring your wood back to life.
Protect and Restore Your Wood After Ink Removal
Once you’ve removed the ink stains, nourish the wood by applying a conditioner or light oil like lemon or tung oil to protect its surface. Using a quality wood conditioner helps restore moisture lost during the stain remover process and prevents the wood from drying out or cracking.
After applying, buff the area gently with a soft cloth to bring back the wood’s natural shine and blend the treated spot with surrounding finishes. If the removal dulled or stripped the surface, reapply polyurethane, varnish, or a matching finish to create a uniform look and add a protective barrier.
To keep your wood looking pristine, use furniture wax or specialized wood polish periodically. This builds an extra layer of defense against future stains and damage. Finally, prevent new ink marks by keeping pens and markers away from wood surfaces and using desk or felt pads to shield your furniture.
Frequently Asked Questions
Can Ink Stains Damage Wood Permanently?
Yes, ink stains can cause permanent damage if you don’t act quickly. Ink absorption into the wood fibers can alter the wood grain, leading to discoloration or wood grain damage.
If the surface finish is compromised, ink can penetrate deeper, making removal tough or impossible. You’ll want to treat stains early and gently, or else the ink might permanently affect the wood’s appearance and texture, sometimes requiring refinishing.
Is It Safe to Use Bleach on Wood Ink Stains?
You wouldn’t want to use a knight’s sword to carve a delicate sculpture. That’s how risky bleach is for wood ink stains. Bleach risks damaging wood safety by stripping finishes and causing discoloration.
Instead, you should try alternative methods like gentle cleaning solutions or specialized stain removers. These options protect your wood’s surface without the harsh effects bleach can bring. This keeps your furniture looking its best without unintended damage.
How Long Should I Wait Before Removing Ink Stains?
You should wait until the ink pen stain is completely dry before starting stain removal on your wood surface. This usually takes several hours to overnight, depending on the ink type.
Removing the stain while it’s wet can cause smudging and push the ink deeper into the wood. Waiting guarantees your cleaning efforts target the actual stain, making your stain removal more effective and protecting your wood surface from damage.
Can Ink Stains Spread While Cleaning?
Yes, ink stains can spread while cleaning. Studies show improper cleaning increases stain layering by up to 40%. When you clean, ink absorption into wood varies, so using harsh techniques can push ink deeper or spread it.
Instead, focus on gentle blotting and apply cleaning solutions directly to the stain. This way, you control ink absorption and avoid making the stain worse by spreading it across the wood surface.
Are There Natural Alternatives to Chemical Removers?
Yes, you can definitely use natural agents as DIY solutions to remove ink from wood. Household remedies like a baking soda paste or a mix of vinegar and baking soda work wonders without harsh chemicals.
Lemon juice and hydrogen peroxide also act as gentle natural agents to lift stains. These options are safer for your wood’s finish and better for the environment, so you don’t have to rely on chemical removers.
Conclusion
Now that you’ve navigated these gentle artful steps, your wood can quietly shed its unwanted ink memories and regain its natural charm. With patience and care, you’re not just removing stains—you’re restoring your wood’s whispered stories and subtle beauty.
Remember, a little kindness goes a long way in preserving its character, turning what once seemed permanent into a fresh canvas ready for new moments and memories.
Leave a Reply