
To put ink in your printer in 7 easy steps, first gather compatible cartridges and prepare your printer by turning it off and opening the ink access panel.
Next, remove old cartridges safely, then unpack and prep the new ones by removing protective tapes.
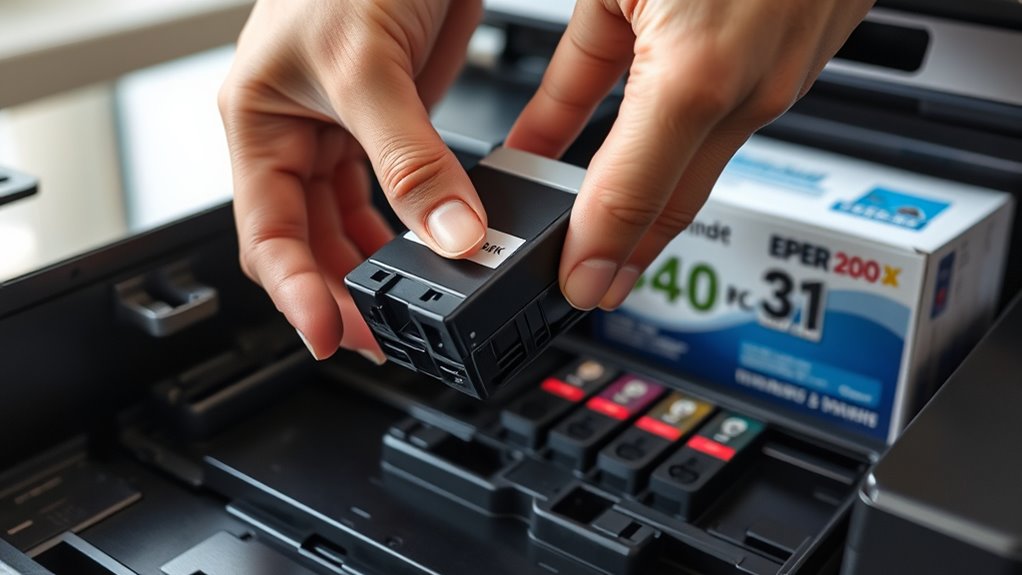
Insert each cartridge correctly, ensuring they click in their color-coded slots.
Secure the cartridges, close the cover, and run an alignment followed by a test print.
Keep going to discover tips for flawless installation and ideal print quality.
Gather Compatible Ink Cartridges and Prepare Your Printer
Before you start, make sure you have the right ink cartridges for your printer model by checking the user manual or manufacturer’s website. This guarantees you get compatible ink cartridges designed specifically for your device.
Verify your printer model to ensure you purchase compatible ink cartridges for optimal performance.
Next, gather tools like gloves and paper towels to keep your workspace clean. Turn on your printer and open the access panel or ink cartridge compartment to prepare your printer for ink insertion.
Carefully remove packaging from the new cartridges, making sure to peel off any protective tapes without touching the ink nozzles. Before you insert ink cartridges, verify cartridge match by aligning each cartridge with its designated color slot. Black goes in black, color goes in color. This step prevents mistakes that could affect print quality.
With everything ready, you’re set to insert ink cartridges properly, ensuring your printer is ready for smooth, efficient operation.
Turn Off Printer and Open Ink Cartridge Access
Once you’ve gathered the right ink cartridges and prepared your printer, the next step is to turn off the printer completely and unplug it. This power down prevents electrical shock and protects your device.
Next, locate the ink cartridge access area, usually behind a top lid or front access panel, and open it carefully. Wait for the printer to stop moving and for the cartridge carriage to settle in a safe position.
Avoid opening the access panel while the printer is still on. Doing so can cause ink leaks or recognition errors. If unsure, consult your printer’s manual for exact instructions on accessing the ink cartridge compartment safely.
| Step | Action | Notes |
|---|---|---|
| 1 | Turn off and unplug printer | Prevents electrical hazards |
| 2 | Locate access panel or lid | Usually on top or front |
| 3 | Open access carefully | Avoid sudden jerks or damage |
| 4 | Wait for cartridge carriage | Ensures safe ink cartridge access |
| 5 | Refer to manual if unsure | Model-specific guidance |
Remove Old Ink Cartridges Safely
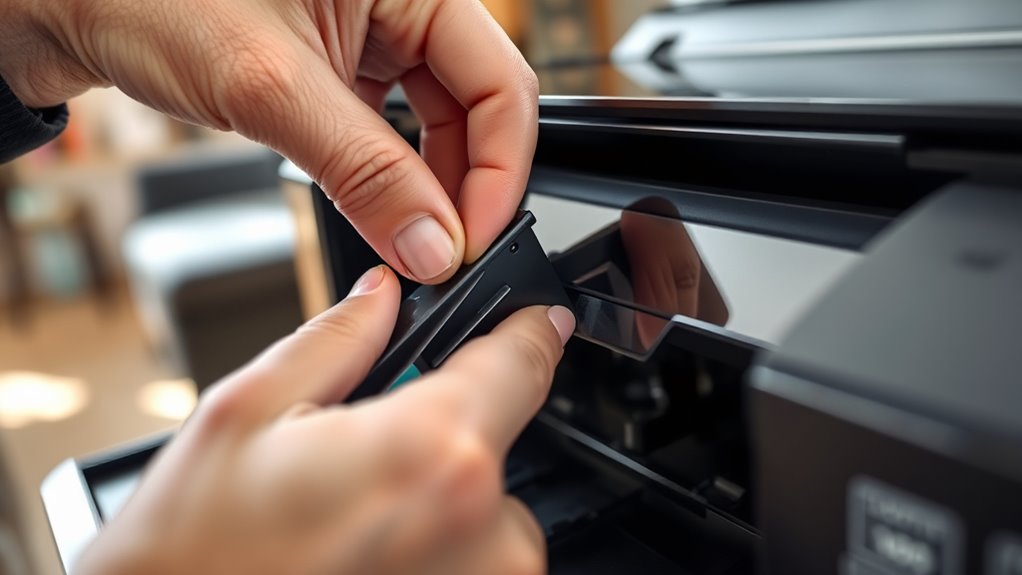
Before you remove the old ink cartridge, make sure your printer is powered down to avoid any issues. Then, press down gently on the cartridge until it clicks and releases from its slot. Just be careful not to touch the copper contacts or nozzles — this helps keep them clean and functioning properly.
Power Down Printer
Although it might be tempting to jump right into replacing your ink cartridges, you should always turn off your printer and unplug it from the power outlet first. Power down the device using the power button, then unplug it to guarantee safety precautions are met.
After unplugging, wait at least 10 minutes to let internal components cool and settle. Next, open the printer carefully to access the ink cartridge carriage or tray.
Make sure the printer remains completely turned off and unplugged as you remove cartridges. Handling cartridges carefully prevents damage and ink spills.
Following these steps guarantees your safety and protects your printer from electrical shock or harm during cartridge replacement. Always remember, never remove cartridges unless the printer is fully powered down and unplugged.
Release Cartridge Carefully
When you press down gently on the existing cartridge until it clicks, you release it from its slot. This allows you to grasp it carefully by the sides and pull it straight out. Be sure to handle the cartridge carefully to avoid spilling ink or damaging your printer.
Avoid touching the copper contacts and nozzles, as this can cause ink clogs or poor printing performance. Once released, make sure the old cartridge is fully removed before installing a new one. Proper removal ensures your printer functions correctly.
After removing the cartridge, dispose of or recycle it according to local regulations to protect the environment. Taking these steps will help you replace your ink cartridge safely and maintain your printer’s effective operation.
Avoid Touching Contacts
After you’ve carefully removed the old cartridge, it’s important to avoid touching the metal contacts or ink nozzles. When you handle cartridges, hold them by their sides to prevent damage and static discharge.
Don’t touch the copper-colored contacts or ink nozzles, as oils from your fingers can contaminate contacts and cause printing issues. Before installing cartridges, make sure your hands are clean and dry to keep the contacts area free from dirt.
Using gloves or a lint-free cloth helps prevent contaminating contacts.
| What to Avoid | Why It Matters | How to Handle |
|---|---|---|
| Touching contacts | Prevent static damage | Hold cartridges by sides |
| Contacting nozzles | Avoid ink flow issues | Use gloves if needed |
| Contaminating area | Ensure good connection | Clean hands, dry surface |
Unpack and Prepare New Ink Cartridges
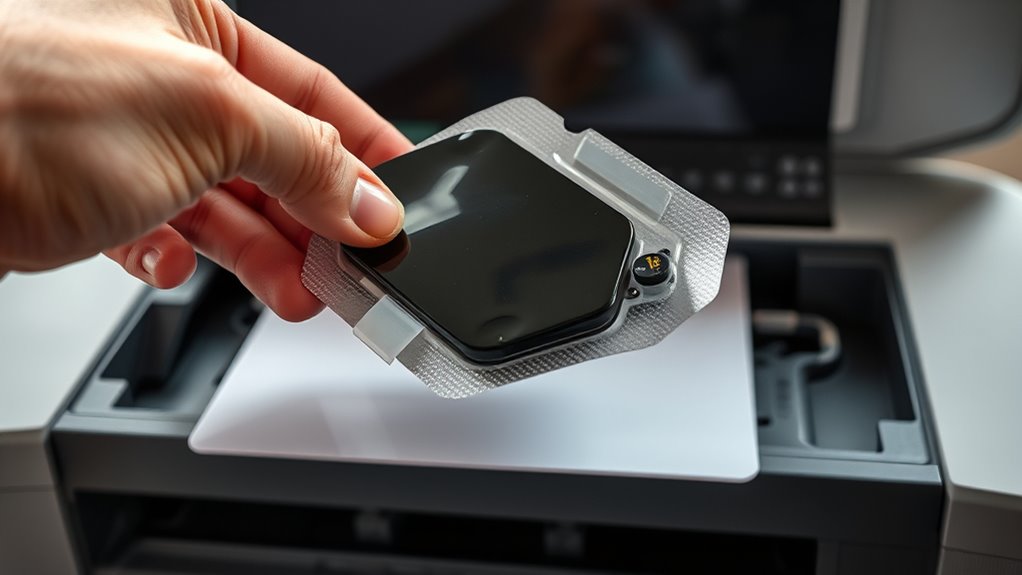
To get your new ink cartridges ready for installation, start by carefully removing them from their packaging, holding them by the sides to avoid touching the nozzles or electrical contacts. Once unpacked, gently shake the new ink cartridge a few times to help prime the ink, making certain smooth flow during printing.
Next, remove any protective tape covering the nozzles and contact points, being careful not to touch these sensitive areas. Also, take off any plastic seals or covers from the ink-dispensing parts, making sure the nozzles remain clear and unobstructed.
After preparing the cartridge, keep it upright to prevent leaks. If you’re not inserting it immediately, store the cartridge in a cool, dry place to maintain ink quality. Handling and preparing your new ink cartridge this way helps guarantee ideal printer performance and avoids damage to the nozzles and contacts.
Insert New Cartridges With Correct Alignment
Make sure you align the cartridges correctly by matching the contacts and nozzles with their slots. Just take your time and insert each cartridge gently until you hear a click—that’s how you know it’s securely seated. Also, double-check that you’re placing the cartridge in the right color-coded slot to avoid any mix-ups.
Align Cartridges Properly
When you insert new cartridges, make sure the nozzles face away from you and slide each one gently into its matching color-coded slot. To install cartridges correctly, align each cartridge so it fits into the correct slot without forcing it.
You’ll know the cartridge is properly placed when it clicks into place securely. Always match cartridges to their corresponding slots to avoid errors. If a cartridge doesn’t seat properly, remove it and realign before trying again.
Proper placement ensures smooth printing and avoids damage. Take your time to insert each cartridge into the correct position, applying even pressure. By doing this, you’ll ensure cartridges are aligned properly and ready for the next step in setting up your printer.
Ensure Secure Cartridge Seating
Although inserting cartridges might seem straightforward, guaranteeing they seat securely is essential for your printer’s performance. First, align the cartridge so its electrical contacts match those in the slot.
When you insert the cartridge, slide it gently until you hear a click. This confirms it’s securely seated. Make sure the nozzles face away from you and are aligned correctly with the carriage to avoid leaks or recognition errors.
Check that the cartridge sits flush with the printer’s surface; if it’s not properly seated, electrical contacts might not connect. Proper alignment and seating guarantee smooth printing and prevent damage.
Taking these steps guarantees your cartridge is installed correctly and ready to work without issues.
Confirm Correct Slot Placement
Before closing the printer lid, you’ll want to confirm that each cartridge is placed in its designated slot. Start by matching the color-coded cartridge to the correct slot, ensuring the nozzles facing away from you are aligned properly.
Gently slide each cartridge into place until you hear a click, signaling it’s fully seated. It’s important to verify that every cartridge is securely in place and flush with the others to avoid recognition errors.
Double-check the correct slot placement before moving on. Installing a cartridge in the wrong slot can cause printing issues.
When all cartridges are properly seated and aligned, you can confidently close the lid, knowing your printer is ready for use with nozzles facing the right direction and cartridges securely positioned.
Secure Cartridges and Close Printer Cover
To secure the cartridges properly, press each one down gently until you hear a click that signals it’s fully seated in its slot. This click confirms proper engagement, ensuring each cartridge is securely seated within the cartridge holder.
Press each cartridge gently until you hear a click, confirming it’s securely seated in its slot.
Take a moment to align the cartridges correctly, making sure they sit flush with the holder to prevent any misfitting. Misaligned cartridges can cause error messages or damage when you close the cover.
When you’re confident all cartridges are in place, close the cover slowly and carefully. Make sure it latches properly without forcing it.
If the cover resists, double-check the cartridge alignment, as improper closure can dislodge cartridges or trigger error messages. A secure latch keeps everything in place, allowing your printer to function smoothly.
Run Alignment and Print Test Page
Once you’ve secured the cartridges and closed the printer cover, the next step is to run the alignment process and print a test page. This step calibrates the print head to guarantee excellent print quality and consistent ink flow.
Many printers automatically start alignment after installing new print cartridges, but you can also initiate it manually through printer settings. During alignment, the printer prints a test pattern that helps fine-tune nozzle placement, preventing issues like streaks or blurry colors.
Printing a print test page verifies that colors align correctly and the ink flows evenly. Regularly performing this calibration keeps your prints sharp and vibrant.
| Step | Purpose |
|---|---|
| Alignment Process | Calibrate print head for accuracy |
| Test Pattern | Fine-tune nozzle placement |
| Print Test Page | Verify print quality and ink flow |
Frequently Asked Questions
How Do I Recycle Used Ink Cartridges Properly?
To recycle used ink cartridges properly, you should follow cartridge recycling guidelines from your printer manufacturer or local recycling centers. Use their refill program or cartridge donation options to support waste reduction and eco friendly disposal.
Many retail stores and recycling centers accept cartridges for responsible disposal, minimizing environmental impact. By participating in these programs, you contribute to cartridge recycling efforts and guarantee your used cartridges don’t harm the environment.
Can I Mix Different Brands of Ink Cartridges?
Did you know 30% of printer issues stem from ink compatibility problems? You shouldn’t mix different brands of ink cartridges because brand compatibility affects cartridge color matching and ink formulation.
Different inks can alter ink drying time, reduce cartridge lifespan, and hurt color accuracy. Also, refill kit safety varies by brand.
To avoid clogs or damage, stick with cartridges from the same manufacturer and store them properly for ideal cartridge storage and print quality.
What Should I Do if My Printer Doesn’T Recognize New Cartridges?
If your printer doesn’t recognize new cartridges, start with cartridge troubleshooting by checking compatibility and ink cartridge types. Inspect for cartridge expiration or poor ink quality issues.
Clean the print head and perform cartridge alignment through printer ink settings. Make sure cartridges are properly seated and stored correctly.
Update drivers and run any calibration tools. If problems persist, reset the printer and double-check ink cartridge storage to avoid damage or drying out.
How Often Should I Replace Ink Cartridges?
You should replace ink cartridges based on ink lifespan, printing frequency, and cartridge storage. When ink dries, colors fade, and printhead maintenance suffers, affecting ink quality and color matching.
Watch for ink leakage and guarantee cartridge compatibility to avoid damage. Frequent printing or poor storage means replacing cartridges sooner.
Regularly check ink levels to maintain sharp prints and prevent printhead clogs, keeping your printer running smoothly without interruption.
Is It Safe to Refill Ink Cartridges at Home?
Yes, you can refill ink cartridges at home safely if you follow refill kit instructions carefully. Wear gloves and handle fragile cartridges gently to avoid damage.
Be mindful of ink cartridge safety by avoiding ink leaks and the risk of ink spills. Check ink compatibility to prevent errors, and consider authorized refill services if you’re unsure.
Always use proper disposal methods to reduce environmental impact and keep your printer running smoothly.
Conclusion
Refilling your printer with ink is as simple as following these seven straightforward steps. Like fitting the last piece in a puzzle, installing new cartridges guarantees your printer works smoothly and delivers crisp prints every time.
By gathering the right supplies, handling cartridges carefully, and running a test page, you’ll keep your printer in top shape. Soon, you’ll be back to printing with ease and confidence.
Leave a Reply