To replace ink in your HP printer, first find the right cartridge by matching your model number and cartridge type.
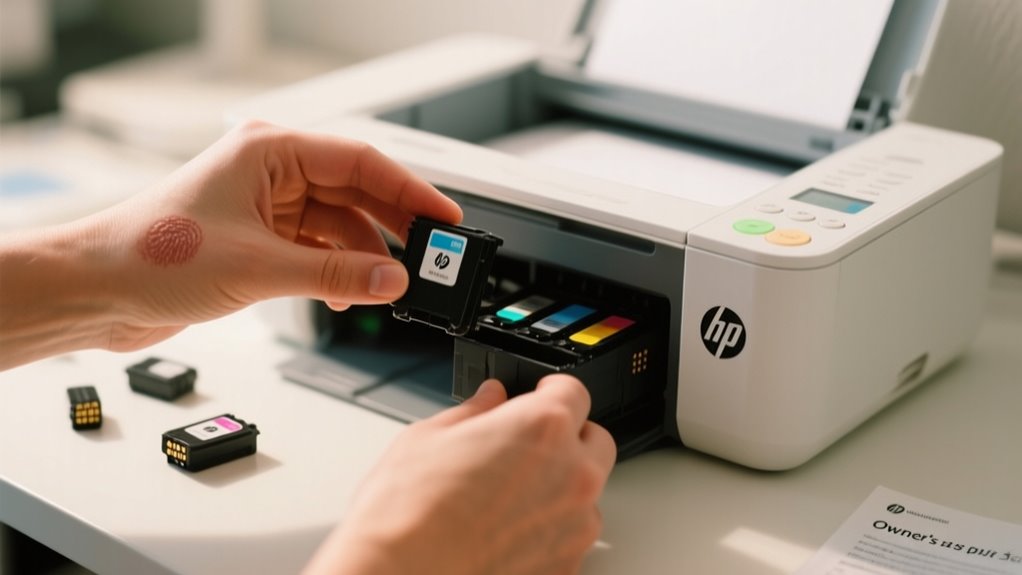
Power on the printer and open the access door, waiting for the cartridge carriage to center.
Gently remove the old cartridge without touching contacts.
Prepare your new cartridge by removing protective tape, then insert it securely.
Close the access door and wait for the printer to recognize it.
Finally, print a test page to check quality, and if needed, troubleshoot common issues for smooth printing.
Find the Right Ink Cartridge for Your HP Printer
Before you buy a new ink cartridge, start by checking your HP printer’s model number. It’s usually on the front, back, or bottom of the device. This model number is essential because it helps you find the exact compatible ink cartridge for your printer.
Next, consult your printer’s user manual or visit the official HP website to identify which cartridges work with your model. You can also look at the part numbers on your current cartridges, like HP 63 or HP 65, to match replacements precisely.
Make sure you choose genuine HP ink cartridges to guarantee the best print quality and protect your printer’s warranty. Also, confirm whether your printer requires color, black, or multipack cartridges before making a purchase.
Power On the Printer and Open the Access Door
First, make sure your HP printer is powered on to avoid any errors. Then, gently open the ink cartridge access door, which is usually located at the front or top.
Wait for the carriage to move to the center and stop before you go any further. This way, you won’t accidentally interrupt anything.
Powering On Printer
Although your HP printer may seem ready to use at a glance, you’ll need to plug it into a power source and press the power button to turn it on. Powering on the printer properly guarantees it completes its startup process and is ready for the next steps.
Depending on your HP printer model, the display will indicate when it’s fully powered on and idle. Avoid opening any access doors or covers while the printer is busy with printing or maintenance tasks.
Once the printer is on and idle, you can carefully open the access door or ink cartridge cover to access the ink cartridges. Following these steps will help you safely and effectively prepare your printer to replace the ink.
Opening Cartridge Door
How do you safely access the ink cartridges in your HP printer? First, make sure your printer is powered on to avoid errors. Then, carefully open the ink cartridge access door without forcing it, using the designated latch or handle. Wait for the cartridge to move to the center and stop before handling.
Follow these steps to open the cartridge door correctly:
- Locate the ink cartridge access door, usually at the front or top of the printer.
- Gently open the ink cartridge access door to reveal the cartridges.
- Wait for the cartridge to release and stop moving before proceeding.
Remove the Old Ink Cartridge Without Damaging Contacts
When you press down gently on the old ink cartridge, it releases from its slot, allowing you to pull it out without force. To remove the old ink cartridge in an HP printer safely, avoid touching the electrical contacts or nozzles. These parts are sensitive and can affect print quality if damaged or contaminated.
Use a lint-free cloth or gloves if needed to handle the cartridge. Lift it straight out carefully to prevent ink spills and avoid contact with the printer’s interior components. Make sure the cartridge fully releases before pulling it out to avoid breaking any clips or damaging the printer.
| Step | Action | Tip |
|---|---|---|
| 1 | Press down on cartridge | Release it without force |
| 2 | Avoid touching contacts | Protect electrical contacts |
| 3 | Use gloves or lint-free cloth | Prevent contamination |
| 4 | Lift cartridge straight out | Avoid ink spills |
| 5 | Confirm release before removal | Prevent printer damage |
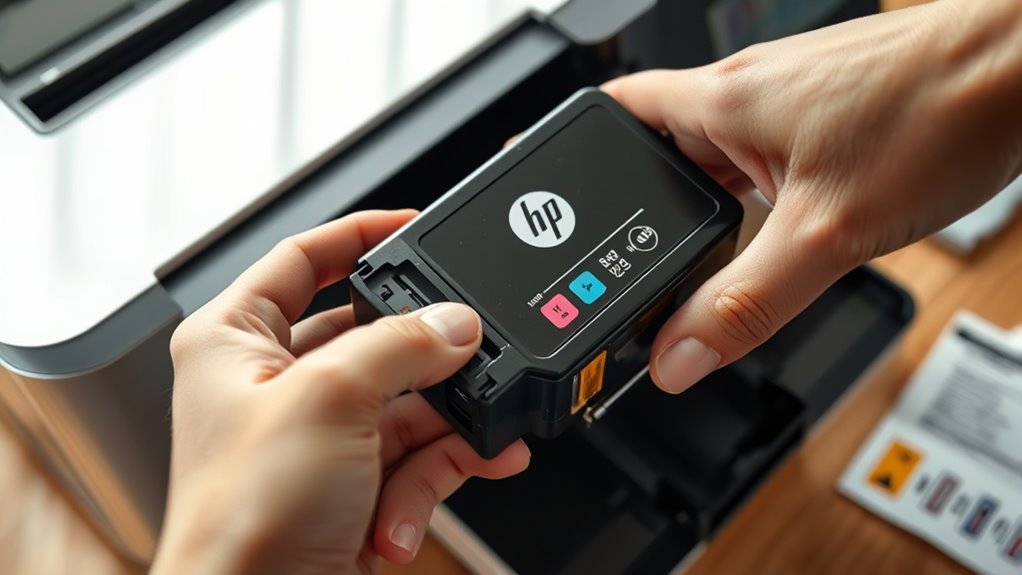
Get Your New HP Ink Cartridge Ready to Install
Before you install your new HP ink cartridge, double-check that it’s compatible with your printer model. Take your time unpacking the cartridge, and make sure to remove all the protective tapes and caps. Just be careful not to touch the contacts.
Also, give the cartridge a quick look over to see if there’s any damage or leaks. This way, you’ll help ensure your printing goes smoothly.
Verify Cartridge Compatibility
Where do you start to assure your new HP ink cartridge will work with your printer? First, you need to verify cartridge compatibility carefully to avoid installation issues or damage.
Follow these steps:
- Check your HP printer’s model number and compare it with the new ink cartridge packaging to ensure it matches.
- Refer to your printer’s user manual or HP’s official website to confirm which HP printer ink cartridges are compatible.
- Examine your current cartridges for part numbers and make sure your new ink cartridge has the same numbers or approved alternatives.
Inspect Cartridge Packaging
How do you guarantee your new HP ink cartridge is ready for installation? First, carefully inspect the cartridges’ packaging for any signs of damage or leaks before opening. Damaged packaging can indicate compromised ink quality.
Keep the cartridge sealed until you’re ready to install it to prevent ink drying or contamination. When you open the packaging, look for any protective tape or plastic covers on the cartridge’s contacts and nozzles. Removing them as instructed ensures proper function.
Also, double-check that the cartridge model matches your printer to avoid compatibility issues. Until installation, store unopened cartridges in a cool, dry place away from direct sunlight. Taking these steps will help keep your new HP ink cartridge in peak condition for a smooth replacement process.
Prepare Cartridge For Installation
Once you’ve confirmed your new HP ink cartridge is undamaged and matches your printer, it’s time to prepare it for installation. Follow these steps to get your new ink cartridges ready:
- Remove the protective plastic or tape from the cartridge carefully. This step is essential to avoid any blockages or malfunctions during printing.
- Handle the cartridge by its edges, steering clear of the nozzles and electrical contacts to prevent damage.
- Make sure you have the correct ink by matching the cartridge’s color and model number with the designated slot in the printer.
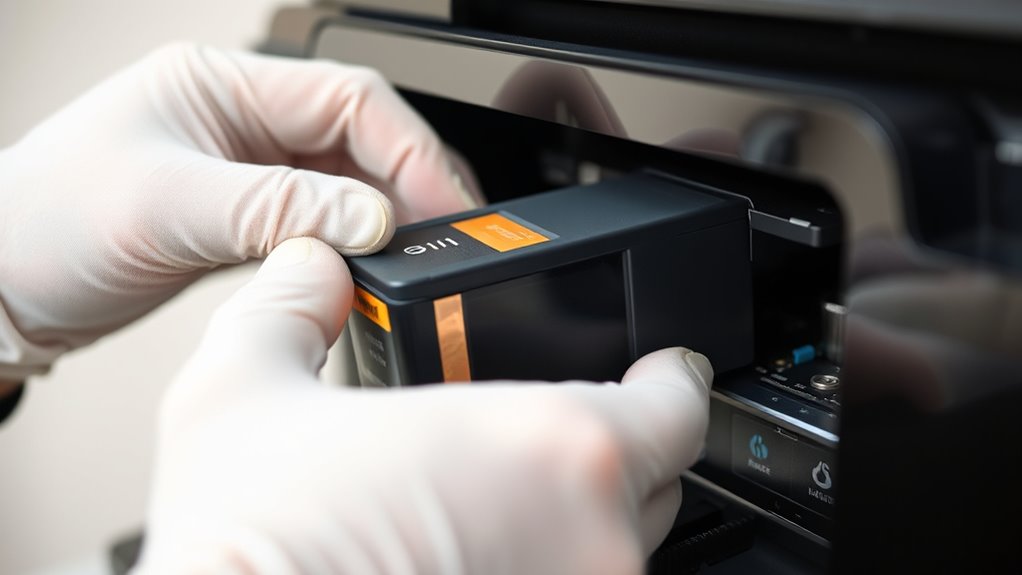
Insert the New HP Ink Cartridge Securely
Why does inserting the new HP ink cartridge securely matter? If the cartridge isn’t seated properly, your printer may fail to recognize it, leading to printing errors or poor print quality.
To insert your cartridge securely, align it straight with the correct slot, matching the color-coded or labeled position. Gently push the cartridge in until you hear it snap firmly into place. This sound confirms the cartridge is locked in and the electrical contacts are properly connected.
Avoid forcing the cartridge; if it resists, carefully remove and try again to prevent damaging the contacts. Ensuring a secure insert not only protects the cartridge but also guarantees smooth communication between the cartridge and printer, so your prints come out crisp and clear every time.
Take your time with this step to avoid issues down the road and keep your HP printer running efficiently.
Close the Access Door and Let the Printer Recognize the Cartridge
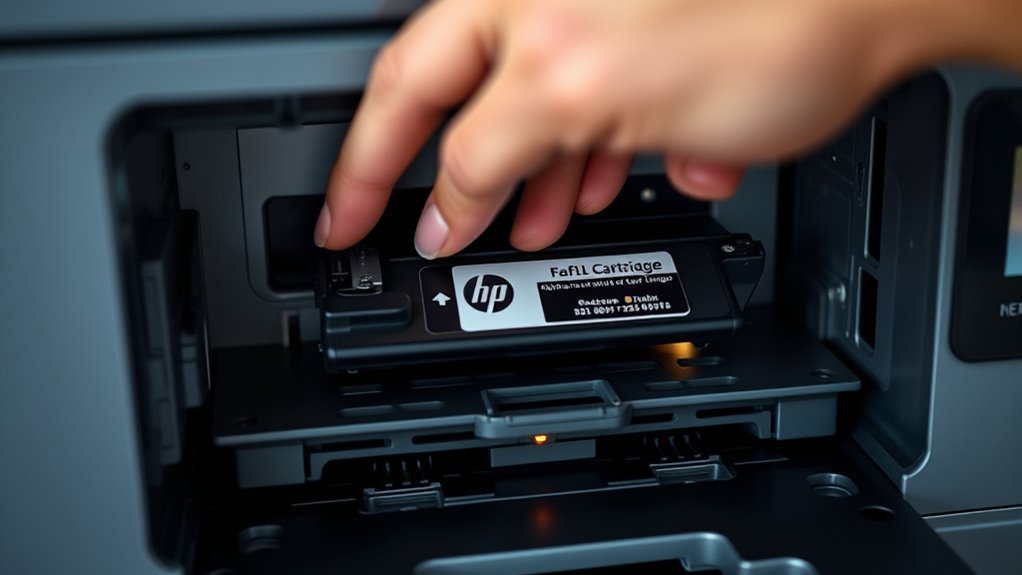
After you finish installing the cartridge, close the access door firmly so your printer can recognize the new ink. This step is vital for the printer to complete the printer initialization and confirm the cartridge installation. Here’s what you should do next:
Close the access door firmly after installing the cartridge to ensure your printer recognizes and initializes the new ink properly.
- Close the access door firmly to guarantee the printer can detect the cartridge. Don’t open it immediately after closing, as recognition takes a few moments.
- Wait for the printer to recognize the cartridge. Look for a message or a light indicator confirming the successful installation.
- If the cartridge isn’t recognized, double-check that you properly installed the new ink and that the access door is fully closed. Re-seat the cartridge if needed and try again.
Once recognized, some HP models perform an automatic printer initialization or alignment to optimize performance. Following these steps ensures your printer is ready for the next stage.
Print a Test Page and Troubleshoot Common Issues
Although you’ve just installed new ink cartridges, printing a test page helps confirm they’re seated correctly and that your printer delivers the best quality. To print a test page, use your printer’s control panel or connected device and find the option under the maintenance or tools menu. This step verifies that your HP ink cartridges are recognized and functioning properly.
If the test page shows streaks, faded areas, or missing colors, you’ll need to troubleshoot. Run the printer’s cleaning or alignment utility to fix print quality issues. Also, check ink levels, clean print heads, or update the printer firmware if problems persist.
| Issue | Cause | Solution |
|---|---|---|
| Streaks on print | Dirty print heads | Run cleaning utility |
| Missing colors | Low ink or misalignment | Check ink levels, align cartridge |
| Faded print | Improper cartridge seating | Re-seat HP ink cartridges |
| Printer not recognizing | Firmware issue | Update printer firmware |
Frequently Asked Questions
Can I Use Third-Party Ink Cartridges in My HP Printer?
Yes, you can use third-party ink cartridges in your HP printer, but you need to check cartridge compatibility carefully. While third-party ink often costs less, ink quality can vary, sometimes causing streaks or poor color output.
Make sure to buy from reputable sellers to avoid damage. Weigh the cost comparison against potential risks like voiding your warranty or poor print results before deciding.
How Do I Store Unused Ink Cartridges Properly?
To guarantee proper ink cartridge storage, keep unused cartridges in a cool, dry place away from sunlight. For unused ink preservation, store them upright in their original packaging or sealed plastic bags to protect nozzles and contacts.
Practice proper ink handling by touching only the plastic exterior. Avoid extreme temperatures to extend cartridge shelf life. These steps help maintain your cartridges’ quality and prevent ink from drying out or leaking.
What Should I Do if the Printer Shows an Ink Cartridge Error?
If your printer shows an ink cartridge error, start with error code troubleshooting to identify the issue. Check the ink levels to guarantee cartridges aren’t empty.
Try cartridge resetting by removing and reinserting them firmly to clear recognition problems. Clean the contacts if needed.
If errors persist, perform a cartridge replacement using genuine HP cartridges to avoid compatibility issues. Updating your printer firmware can also help resolve persistent errors.
How Long Does an Ink Cartridge Typically Last Once Installed?
An ink cartridge lifespan typically ranges between 200 to 300 pages for standard cartridges, while high-yield ones last up to 1,000 pages. Your ink consumption rate depends on what you print. Color and graphics use more ink than text, which affects how often you need to refill.
Cartridge durability also plays a role since some cartridges hold ink better over time. Keep an eye on your printer’s software to manage when you’ll need to replace or refill cartridges.
Are There Environmental Benefits to Recycling Ink Cartridges?
Yes, recycling ink cartridges greatly reduces environmental impact by keeping plastic waste out of landfills and preventing harmful chemicals from polluting soil and water. When you participate in recycling programs, you support sustainability initiatives that conserve natural resources and lower carbon footprints.
Proper cartridge disposal through these programs ensures manufacturers like HP can reuse materials, making your eco-friendly actions part of a larger effort to protect the planet and reduce waste.
Conclusion
Replacing your HP ink cartridge is like tuning a musical instrument. Each step guarantees your printer plays the perfect note.
By choosing the right cartridge, handling it with care, and following the simple steps, you’ll keep your printer running smoothly. Don’t forget to print a test page to confirm everything’s in harmony.
With a little practice, swapping ink becomes second nature. This keeps your prints vibrant and your creativity flowing effortlessly.
Leave a Reply