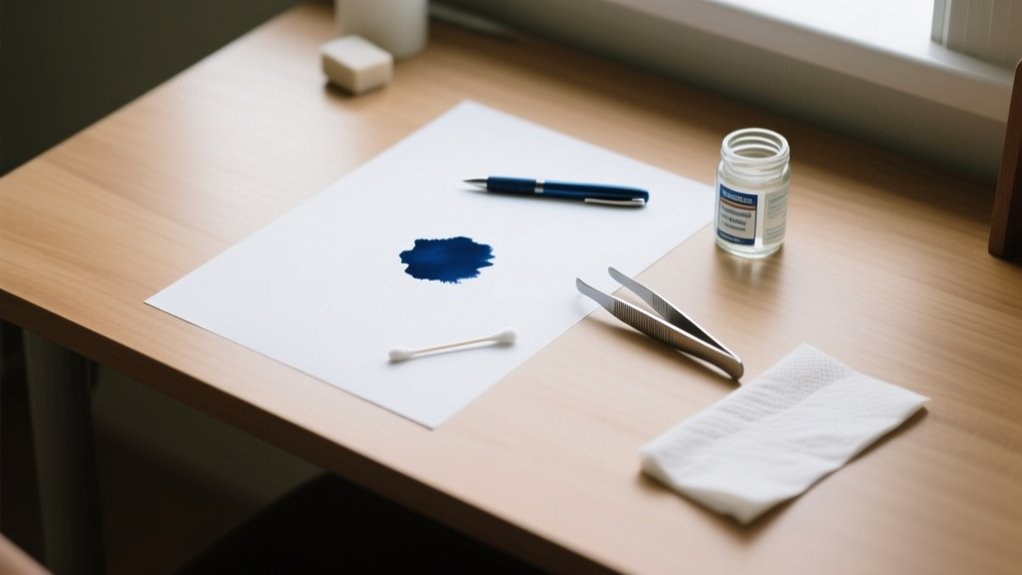
To erase pen ink in seven simple steps, first identify your ink type to pick the best method. Use ink erasers or correction pens for light mistakes, and try rubbing alcohol or acetone on stubborn stains.
Gently fade ink with diluted lemon juice for delicate cases, or carefully sand thick paper if needed. Cover errors with white-out if necessary, but always test on scrap paper first.
Choosing the right pen and paper helps prevent future mistakes. Keep going to reveal all the tips for flawless results.
Identify Your Ink Type to Choose the Best Method

How can you effectively erase pen ink without damaging your paper? The key lies in identifying your ink type first. Different ink types, like ballpoint, gel, and fountain pen ink, have unique properties that affect how easily they can be removed.
For example, fountain pen ink soaks deeper into paper fibers, making it tougher to erase completely compared to ballpoint ink, which usually sits more on the surface. Understanding whether your ink is water-based, oil-based, or pigment-based helps you pick the right removal methods.
Water-based inks might respond well to gentle blotting, while oil-based inks need more careful techniques. Before you try anything drastic, test a small, hidden spot to see how the ink reacts.
Also, keep in mind the ink’s color and saturation since darker or heavily saturated ink can be harder to lighten or remove. Identifying these characteristics ensures you choose the best method without harming your paper.
Use Ink Erasers or Correction Pens to Erase Light Mistakes
Although ink erasers and correction pens are designed for light mistakes, they offer an effective way to quickly fix small errors without damaging your paper. To erase ink with these tools, start by testing your correction pen on a scrap piece to verify it won’t discolor or damage your document.
When using an ink eraser, gently rub it over the ink in small, circular motions. Don’t press too hard to avoid tearing the paper. Correction pens work by covering the ink, so apply the fluid carefully over the mistake.
Always let the correction fluid dry completely before rewriting to maintain a neat finish. Both ink erasers and correction pens are best suited for small, light to moderate errors, giving you a quick and clean solution to erase ink without hassle.
Keep these tools handy for easy fixes and avoid using them on larger or tougher stains that require stronger methods.
Use Rubbing Alcohol or Acetone to Remove Tough Ink

When you’re dealing with tough pen ink, rubbing alcohol or acetone can do a great job breaking it down. Just be sure to apply the solvent carefully using a cotton swab. Dab gently so you don’t spread the ink or damage the paper.
Also, it’s a good idea to test a small area first. That way, you can avoid any unwanted discoloration or warping before you go all in.
Applying Solvents Safely
Since solvents like rubbing alcohol and acetone can damage paper, you should always test them on a small, hidden spot first. This test area helps you verify solvent safety by checking for discoloration or weakening of the paper.
When ready, dip a cotton swab in rubbing alcohol or acetone, making sure it’s damp but not dripping. Gently dab the inked area, working from the edges inward to avoid spreading the ink.
Immediately blot with a clean tissue to absorb the dissolved ink and prevent the solvent from soaking too deep. Finally, let the paper dry completely before writing over it again.
Following these steps keeps your paper safe while effectively using solvents to tackle tough ink stains.
Ink Removal Techniques
If you need to remove tough pen ink, rubbing alcohol or acetone can be highly effective solvents. For ink removal, dip a cotton swab or soft cloth in a small amount of rubbing alcohol or acetone, making sure it’s damp but not dripping.
Gently dab the pen ink stain, working from the outer edges inward to avoid spreading. Immediately blot with a clean tissue to absorb the dissolved ink and stop it from soaking deeper.
Always test the solvent on a hidden spot first to verify it won’t discolor or damage the paper. Using rubbing alcohol or acetone this way offers a reliable method to tackle stubborn pen ink stains while preserving the material underneath.
Fade Ink Gently With Lemon Juice or Mild Acids
You can gently fade pen ink by dabbing a cotton swab dipped in diluted lemon juice onto the stained area. Just be sure to blot the paper with a clean tissue and let it dry completely before you touch it or write over it. It’s always a good idea to test on a small spot first to avoid any damage or discoloration.
Lemon Juice Application
A gentle way to fade pen ink involves using lemon juice, a mild acid that can break down ink pigments without harsh chemicals. For effective ink removal, dip a cotton swab into diluted lemon juice and gently dab the inked area.
Let it sit for a few minutes so the acidity can work on the ink. Next, blot the spot with a clean tissue to absorb the dissolved ink and excess lemon juice. This method is ideal for paper correction because it minimizes damage compared to stronger solvents.
Before you start, test the lemon juice on a small, hidden corner to verify it won’t discolor or weaken the paper. With care, lemon juice offers a simple, safe way to correct pen ink mistakes.
Paper Drying Tips
When using lemon juice or mild acids to fade ink, letting the paper dry thoroughly is essential to prevent warping or discoloration. After applying the acid with a cotton swab, avoid adding too much moisture to protect the paper’s integrity. Proper drying guarantees the acid doesn’t cause unwanted damage.
To help your paper dry effectively, follow these tips:
- Place the paper on a flat, absorbent surface to promote even drying.
- Keep the paper away from direct sunlight or heat sources, which can cause warping.
- Allow ample drying time between acid applications to maintain paper quality.
Carefully Sand or Scrape to Erase Ink on Thick Paper
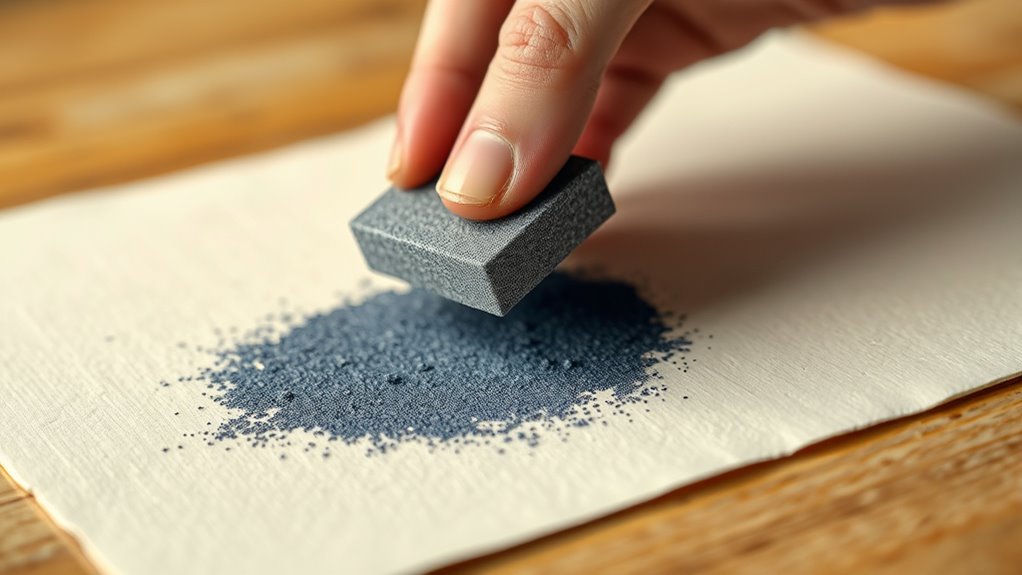
Although sanding may seem risky, carefully using fine-grit sandpaper lets you remove pen ink from thick paper without causing damage. Choose sandpaper with a very fine grit, like 000 or 0000, to gently abrade the inked area.
Hold the sandpaper at a slight angle and rub in small, lateral motions to avoid tearing or thinning the paper. Apply light pressure, just enough to lift the ink’s surface without puncturing the thick paper.
Before you start, test this method on a hidden spot to make sure the abrasion won’t harm your paper. After sanding, blow away any loose grit and ink particles using a soft brush or a gentle puff of air.
This careful approach allows you to erase pen ink effectively while preserving the integrity of your thick paper. Remember, patience and a delicate touch are key when using sandpaper for ink removal.
Cover Ink Mistakes Neatly With White-Out or Tape
Since ink mistakes can be frustrating, you can quickly fix them by applying white-out or correction tape for a clean, professional look. When using correction fluid or correction tape, it’s important to apply evenly for a smooth finish that blends well with your paper.
With correction tape, hold it at a 45-degree angle to guarantee precise, neat coverage. If the mistake is larger or stubborn, layering multiple coats of correction fluid works best. Just let each layer dry before adding the next.
Keep these tips in mind:
- Apply correction fluid or tape evenly, smoothing edges carefully.
- Wait for the correction material to dry completely before writing over it.
- Use correction tape at a 45-degree angle for accuracy and a clean appearance.
Prevent Ink Mistakes by Choosing the Right Pen and Paper
How can you reduce ink mistakes before they even happen? Start by choosing the right pen and paper. Using a high-quality pen with controlled ink flow helps prevent accidental smudges and blotches.
Choose a high-quality pen with controlled ink flow to prevent smudges and blotches before they happen.
Opt for pens with fine or precise tips to avoid overshooting and messy lines, ensuring your writing stays clean and sharp. Next, select smooth, non-bleeding paper designed specifically for ink use, such as fountain pen or gel pen compatible paper.
This type of paper minimizes ink saturation, feathering, and smudging, making corrections easier if needed. Before working on important documents, test your pen on scrap paper to check how the ink interacts with your chosen paper.
This simple step can alert you to potential issues and save you from frustrating mistakes. By carefully pairing your pen and paper, you’ll considerably reduce ink errors and keep your writing neat from the start.
Frequently Asked Questions
Can Ink Stains Be Removed From Clothing With These Methods?
Yes, you can remove ink stains from clothing using these methods. By acting quickly, you prevent excessive ink absorption into the fabric, making stain removal easier.
Proper pen maintenance helps avoid leaks that cause stains. When treating your clothes, dab gently with rubbing alcohol or a stain remover to lift the ink without spreading it. Always test first to protect your fabric, ensuring effective and safe stain removal every time.
How Do I Prevent Ink From Bleeding Through Thin Paper?
Worried about ink bleeding through thin paper? You can prevent it by paying attention to ink absorption and paper thickness. Choose thicker, high-quality paper to reduce how much ink soaks through.
Also, pick pens with good pen quality, like those with quick-drying, low-bleed ink. Applying ink in thin layers helps too. Why let your writing ruin the back side when a few smart choices can keep everything clean and crisp?
Are There Eco-Friendly Alternatives to Chemical Solvents for Ink Removal?
Yes, you can use biodegradable solvents and natural ink removers to erase pen ink without harsh chemicals. Try plant-based solutions like orange oil or citrus extracts. They’re effective and eco-friendly.
Lemon juice and baking soda paste also work well to lighten ink stains naturally. These options help you avoid toxic fumes and reduce environmental impact, making your ink removal process safer for both you and the planet.
Can Ink Erasing Techniques Damage Printed Text Nearby?
Oh, sure, you can erase ink without risking any damage if you enjoy smudged printed text! Since ink absorption varies with paper texture and pen type, aggressive methods often ruin nearby text.
Abrasive erasing or harsh chemicals might wipe out what you wanted to keep. So, you’ve got to be gentle and test first, or you’ll end up erasing the print, not just the pen ink.
How Should I Store Pens to Minimize Ink Leakage Risks?
You should always guarantee proper pen cap placement to keep ink sealed and prevent leaks. Store your pens horizontally inside a sturdy, airtight storage container type to maintain consistent ink flow and avoid pressure buildup.
Also, control humidity by keeping pens in a cool, dry place. Excess moisture can cause ink to run or pens to malfunction. These steps help you minimize ink leakage and keep your pens in great shape longer.
Conclusion
Now that you know these seven simple steps to erase pen ink, you can tackle mistakes with confidence. Did you know that over 60% of people say they avoid writing errors by using erasable pens?
Whether you’re using correction pens or natural solutions like lemon juice, these methods help keep your work neat and professional. So, next time ink slips happen, you’ll be ready to fix them quickly and easily.
Leave a Reply