Category: Ink

  • How to Refill 7000 Plus Ink in 7 Easy Steps

    How to Refill 7000 Plus Ink in 7 Easy Steps

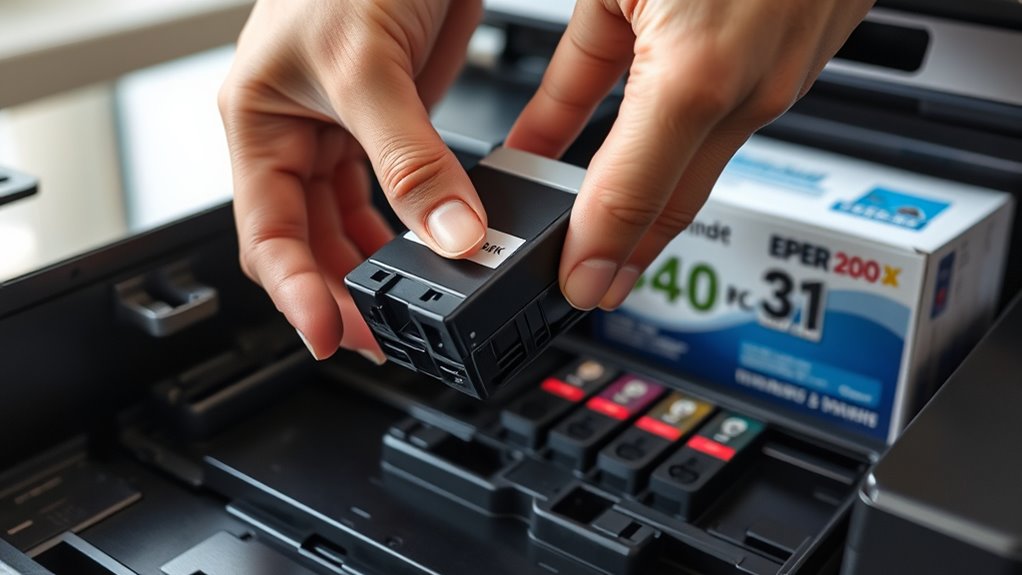
    To refill your HP 7000 Plus ink cartridge, first gather your refill kit and prepare a clean workspace. Turn off the printer and carefully remove the cartridge.

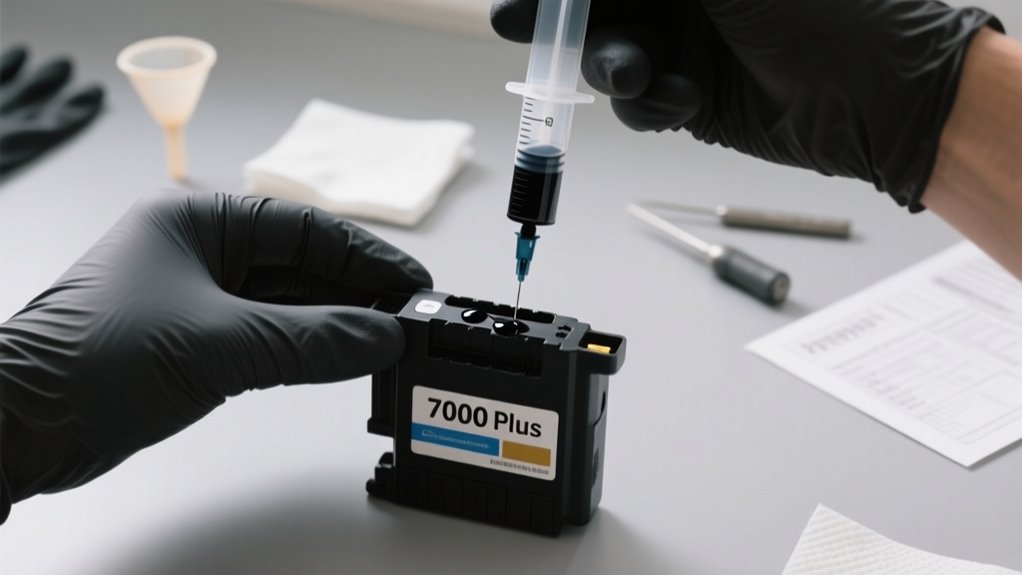
    Locate and open the refill port, then fill a syringe with matching ink. Slowly inject the ink to avoid bubbles, seal the port securely, and reinstall the cartridge.

    Finally, print a test page and troubleshoot any issues. Follow these steps, and you’ll soon enjoy smooth, cost-effective printing with ease.

    Gather Tools to Refill HP 7000 Plus Ink Cartridges

    gather refill tools and supplies

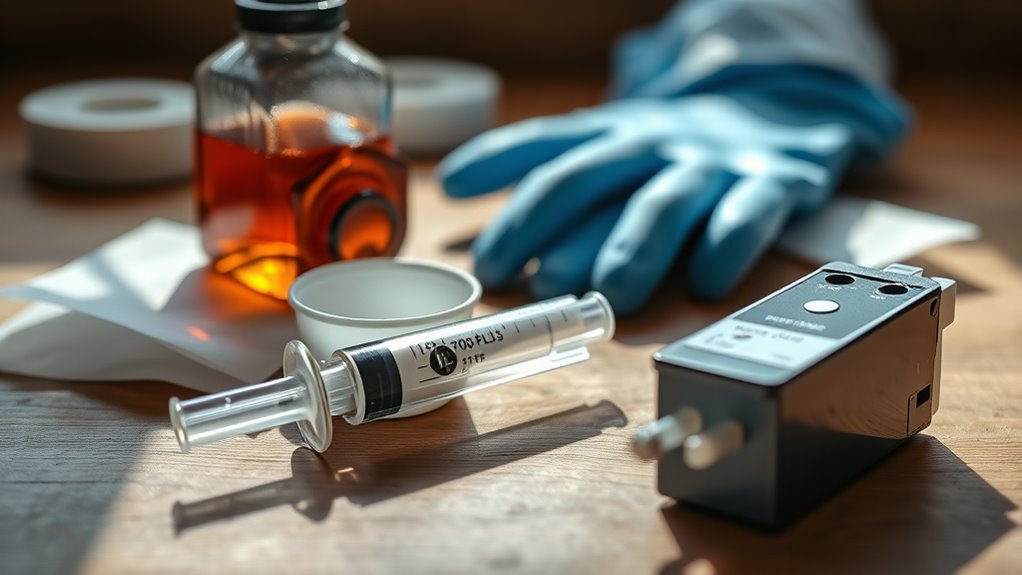
    Before you begin refilling your HP 7000 Plus ink cartridges, gather a universal refill kit that includes compatible ink, syringes, and clear instructions tailored to your model. You’ll also want gloves, paper towels, and sealing materials like tape or plugs to prevent any ink spills during the refill.

    Gather a universal refill kit with compatible ink, syringes, gloves, and sealing materials to prevent spills.

    Make sure the ink and tools you have are compatible with your HP 7000 Plus to avoid any issues. Set up a well-lit, spacious workspace covered with protective material to keep everything clean and organized.

    Arrange all necessary items within easy reach to make the refill process smoother and reduce the chance of messes. Having everything prepared beforehand guarantees you can focus on the refill step without interruptions.

    This preparation is key to a successful and efficient ink cartridge refill for your HP 7000 Plus printer.

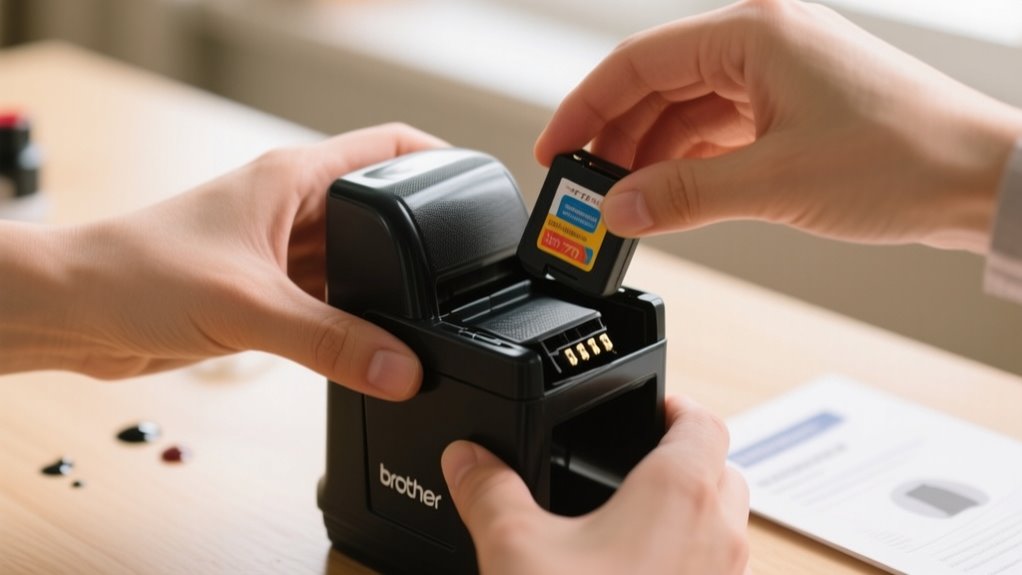
    Turn Off Your Printer and Remove the Cartridge

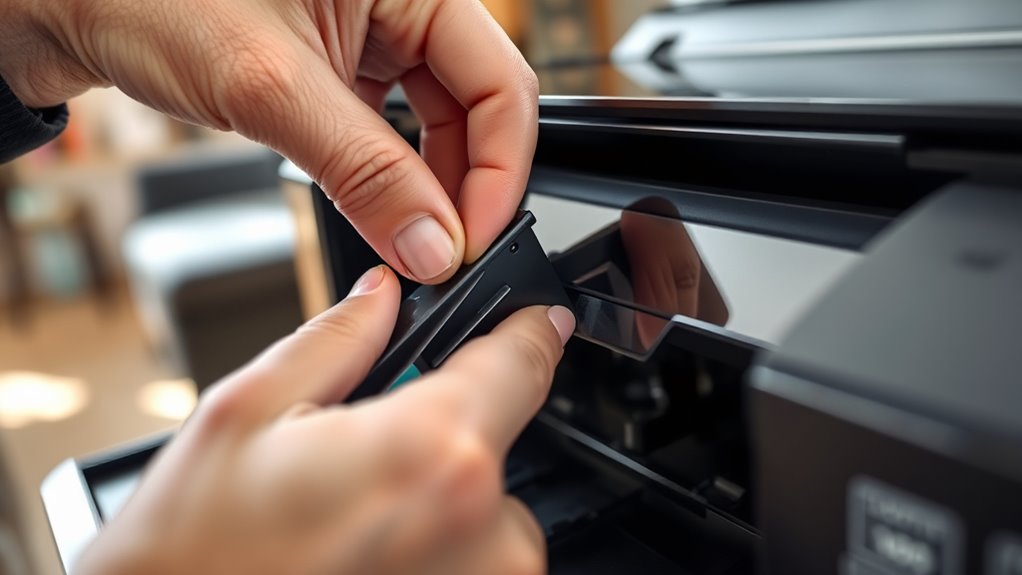
    First, go ahead and turn off your printer. Don’t forget to unplug it too—this helps avoid any electrical issues while you’re removing the cartridge. Next, open the printer cover carefully. Make sure to follow the manufacturer’s instructions for taking out the ink cartridge.

    When you handle the cartridge, be gentle and hold it by the edges. Then, place it on a clean surface so it’s ready for refilling.

    Power Down Safely

    How do you guarantee safety when starting the refilling process? First, power down your printer by turning it off and unplugging it from the power source. This prevents any electrical mishaps.

    Next, carefully open the printer cover and wait for the printer to completely shut down. This pause allows internal components to stabilize, reducing risk. Only then should you gently remove the ink cartridge, handling it by the edges to avoid spills or damage.

    Confirming the printer is powered off and disconnected ensures it won’t accidentally activate during refilling.

    Step Action Reason
    1 Turn off the printer Prevent electrical issues
    2 Unplug the power source Ensure no power flow
    3 Open printer cover Access cartridge safely
    4 Wait a few moments Stabilize internal parts
    5 Remove cartridge carefully Avoid spills and damage

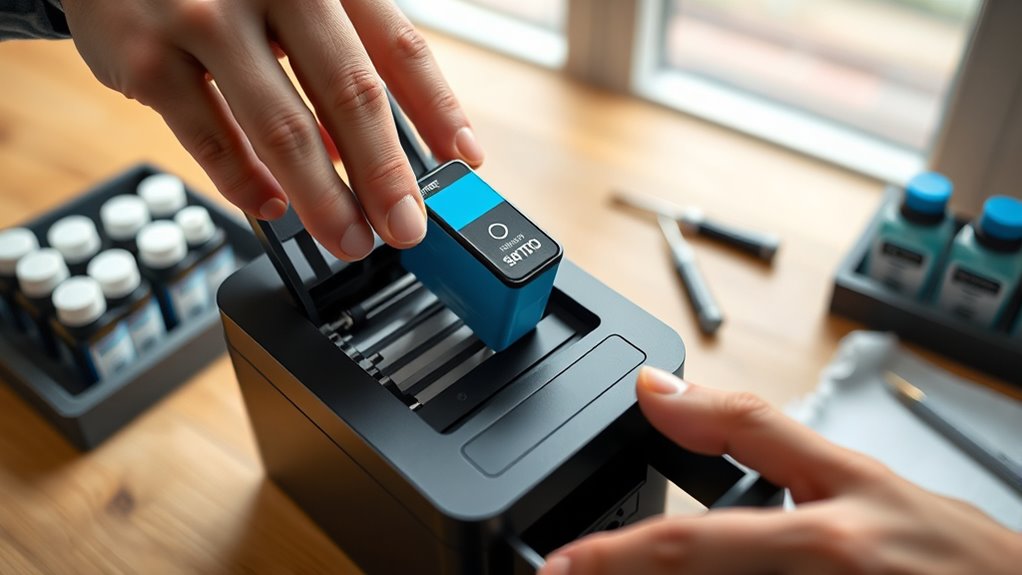
    Cartridge Removal Tips

    After powering down and unplugging your printer, the next step is to carefully remove the ink cartridge. First, wait a few moments to let the internal components stabilize. Then, open the printer cover or access panel to access the ink.

    Locate the cartridge and eject it gently, avoiding any force that might damage the printer. Handle the cartridge gently by its edges, steering clear of the nozzles and electrical contacts to prevent print issues.

    Once removed, keep the cartridge upright on a protected surface to avoid ink spills and drying out. Following these cartridge removal tips ensures you protect your printer while making the refilling process smooth and safe.

    Locate the Refill Port or Vent Hole on Your Cartridge

    find and open refill port

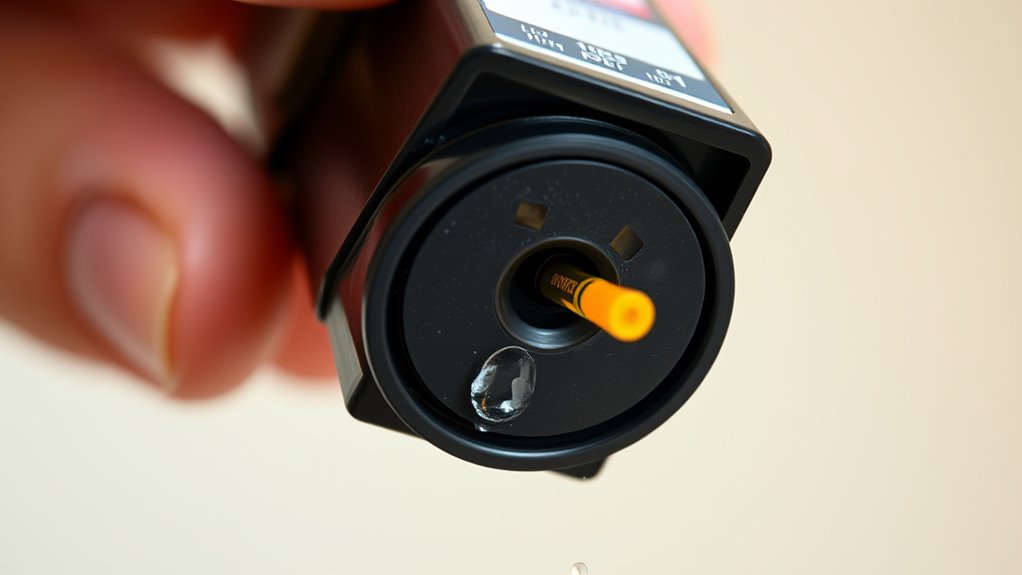
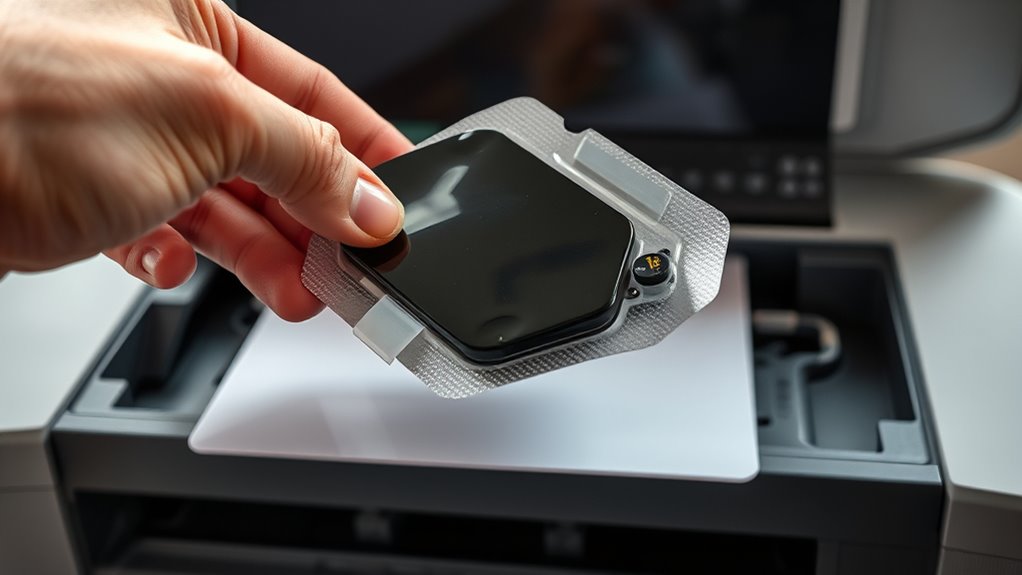
    Start by taking a close look at your cartridge to find a small refill port or vent hole. You’ll usually spot it on the top or the side. If there’s a sticker covering the port, just gently peel it back or carefully puncture it—make sure not to damage the cartridge while doing this. Finding and opening this port the right way helps you avoid leaks and makes the whole refill process go smoothly.

    Identifying Cartridge Ports

    While locating the refill port or vent hole on your cartridge might seem tricky, it’s usually marked by a small rubber or silicone plug that you can peel back or puncture. To identify the refill port, check the top or side of your cartridge for a small symbol or label indicating the spot.

    Some models require peeling off a sticker or label to reveal the port underneath, so look carefully without rushing. Newer cartridges may have a chip or seal integrated with the port, so handle it gently to avoid damage.

    Properly identifying the refill port is essential to prevent leaks or cartridge damage during refilling. Take your time and inspect your cartridge closely before proceeding to refill.

    Removing Sticker Safely

    How do you safely remove the sticker covering the refill port without damaging your cartridge? Start by using your fingernail or a small tool to gently lift the sticker’s edge. Apply steady, gentle pressure to avoid tearing the sticker or scratching the cartridge.

    If the sticker sticks stubbornly, warm it slightly with a hairdryer to soften the adhesive. This makes it easier to peel off cleanly. Be careful not to puncture or damage any internal parts beneath the sticker, as this could cause leaks or affect print quality.

    Once removed, dispose of the sticker properly to prevent it from accidentally covering the refill port again. Taking these precautions ensures you access the refill port safely and keep your cartridge intact.

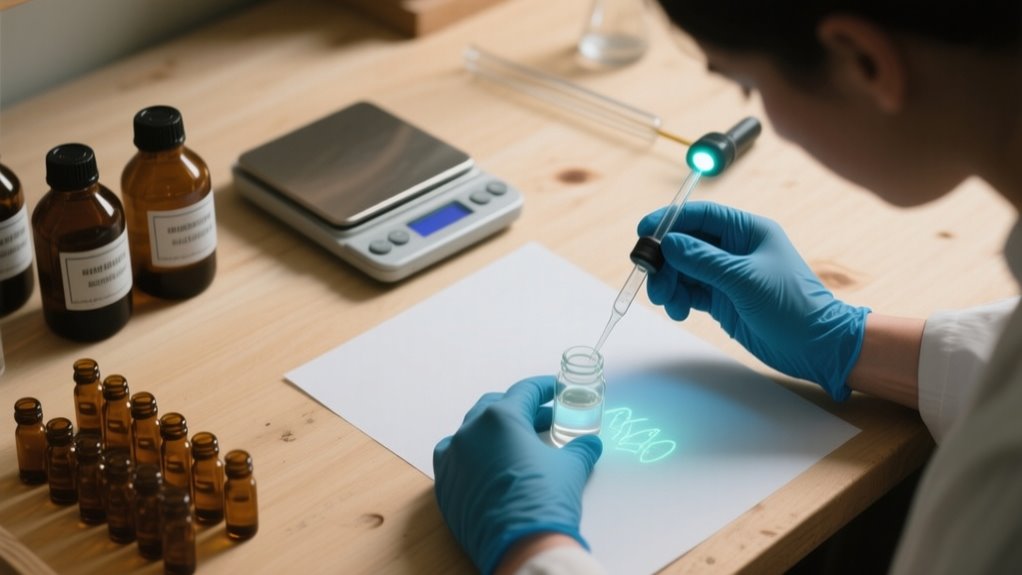
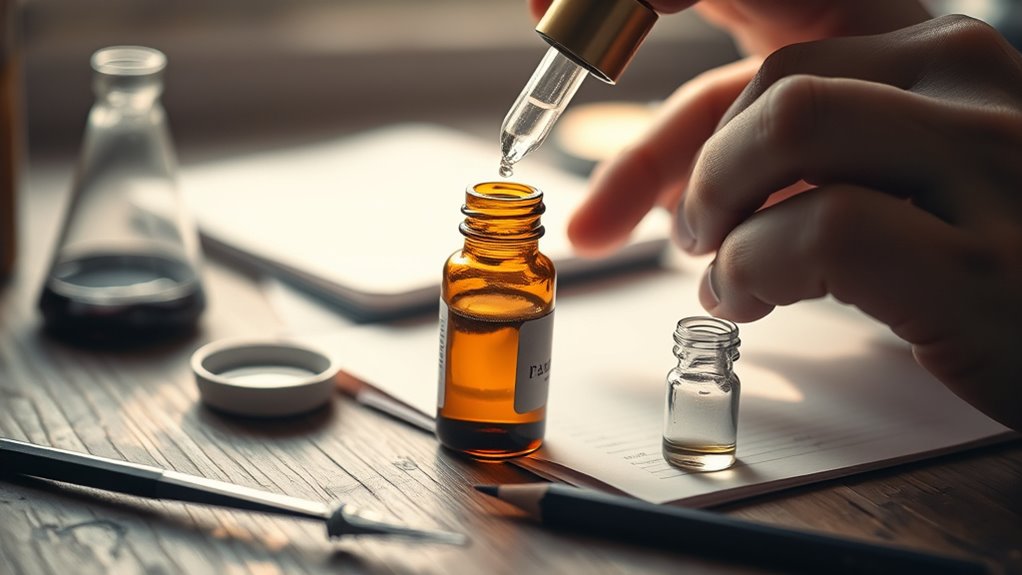
    Prepare Ink and Fill the Syringe With the Right Color

    Before filling the syringe, make certain you’ve chosen the ink color that matches your cartridge to maintain print quality. Selecting the right color is essential to refill ink and cartridge properly.

    Gently shake the ink bottle to mix it thoroughly for consistent flow. Then, slowly fill the syringe, avoiding overfilling to prevent spills. Keep the syringe upright during filling, and tap it lightly to remove any air bubbles before use.

    Step Action Tip
    1 Choose correct ink color Match cartridge color
    2 Shake ink bottle gently Ensures consistent ink flow
    3 Fill syringe slowly Avoid overfilling
    4 Remove air bubbles Tap syringe lightly

    Following these steps helps you refill ink and cartridge properly, ensuring smooth refills and high-quality prints every time.

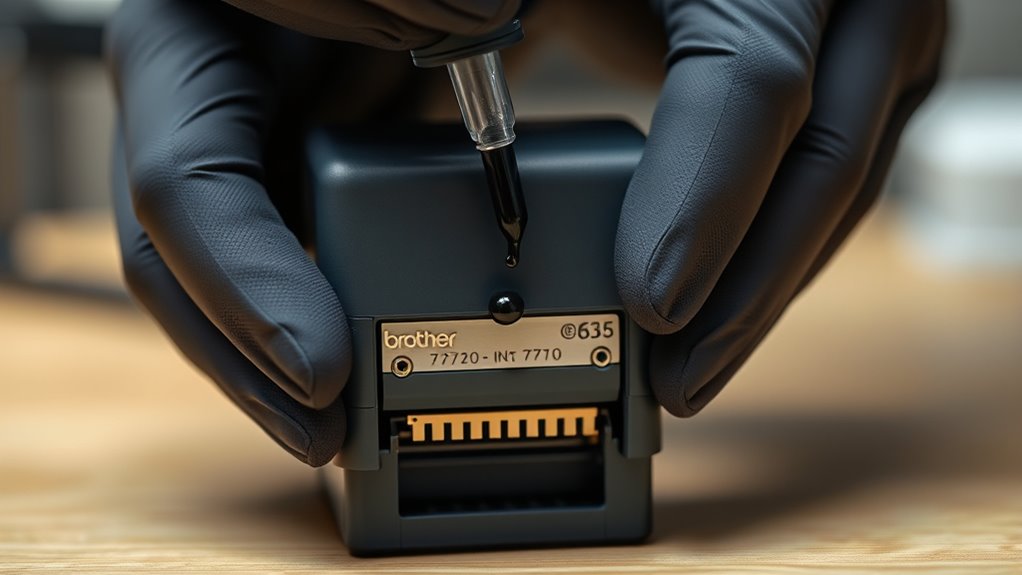
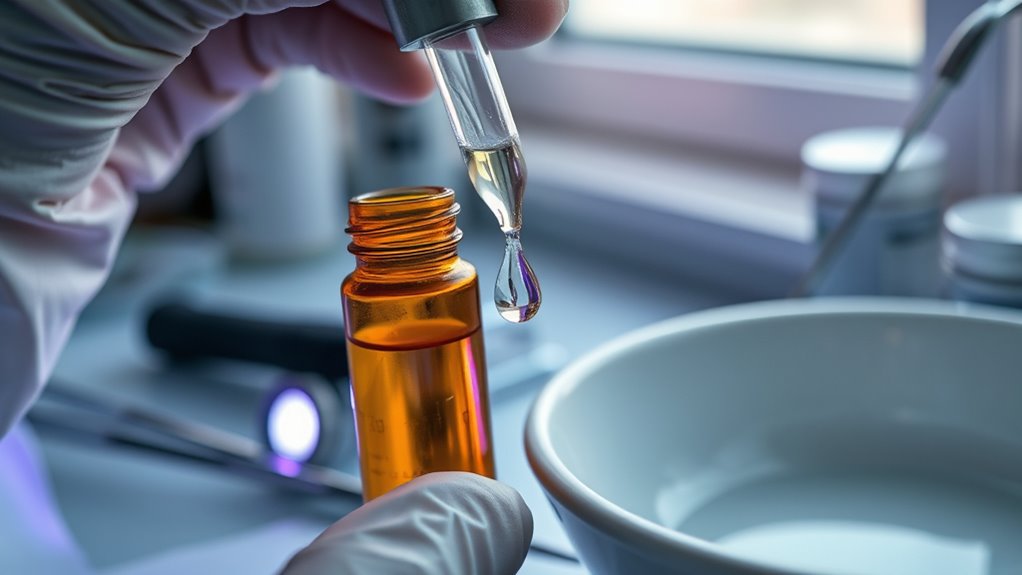
    Inject Ink Slowly to Prevent Air Bubbles

    inject ink gradually carefully

    Why should you inject ink slowly when refilling your cartridge? Injecting ink at a steady, gentle pace allows air to escape gradually, preventing air bubbles from forming inside the cartridge.

    If you inject ink too quickly, air pockets can get trapped, leading to printing issues and poor ink flow. When you inject ink slowly, you guarantee the ink flows smoothly without forcing air into the printhead or internal chambers.

    Keep an eye out for bubbles rising to the surface. That’s a sign you need to slow down. Maintaining a cautious, consistent injection preserves print quality by avoiding air-related problems.

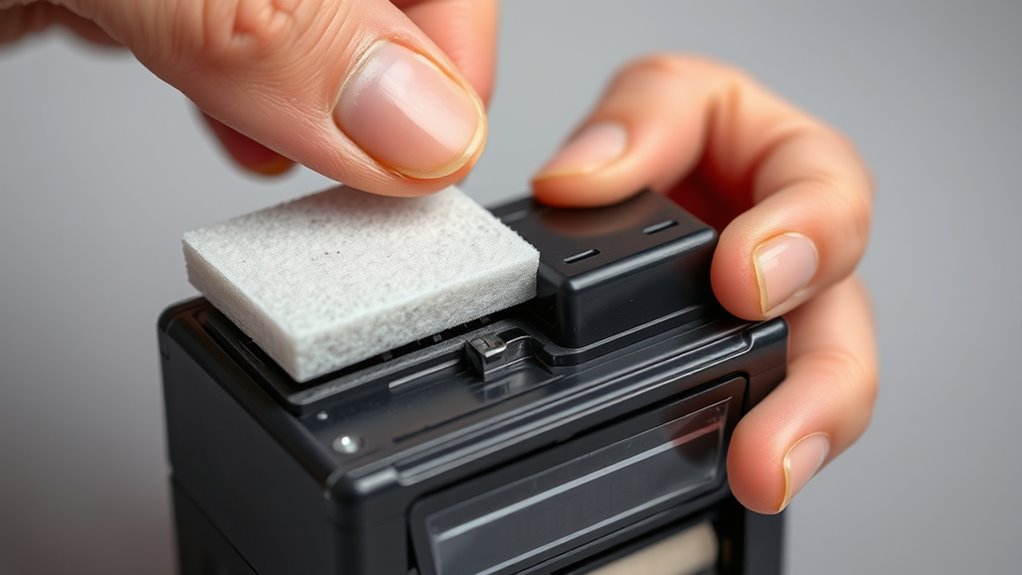
    Seal the Refill Port, Then Reinstall the Cartridge

    Once you finish refilling the cartridge, make certain you seal the refill port tightly with tape or a sealing plug to prevent any leaks. This step is vital to maintain ink integrity and avoid air entering the cartridge, which could cause printing issues.

    Use seal tape or a compatible sealing plug designed for your cartridge to seal the refill port properly. Before reinstalling, double-check that the port is completely sealed to avoid spills and guarantee the cartridge works flawlessly.

    Step Importance
    Seal with tape Prevents ink leakage
    Use sealing plug Ensures secure, leak-proof seal
    Double-check seal Avoids ink spills and air entry
    Proper sealing Maintains print quality
    Reinstall carefully Protects cartridge lifespan

    After sealing, carefully reinstall the cartridge into your printer to complete the process.

    Test Your Refilled HP 7000 Plus Cartridge and Troubleshoot Issues

    After sealing and reinstalling your HP 7000 Plus cartridge, the next step is to print a test page to check color accuracy and overall print quality. If the printer doesn’t recognize the refilled cartridge, try resetting the printer or cleaning the cartridge contacts.

    Sometimes, poor print quality results from clogged nozzles or air bubbles in the ink flow. Running the printer’s cleaning cycle can help clear these issues. Also, double-check that the refill port is properly sealed to avoid leaks that might damage your printer or cause print defects.

    If problems persist, reseat the cartridge to guarantee a solid connection. Use only compatible ink to maintain peak performance. By following these steps, you’ll quickly identify and fix any issues, guaranteeing your refilled HP 7000 Plus cartridge prints smoothly and reliably every time.

    Frequently Asked Questions

    How Often Can I Safely Refill My 7000 Plus Ink Cartridge?

    You can safely refill your 7000 Plus ink cartridge about 3 to 5 times, depending on ink absorption and refill frequency. Pay close attention to how well the cartridge absorbs ink each time.

    If you notice leaks, clogs, or print quality drops, it’s time to stop refilling. Regularly check for damage to guarantee safe reuse.

    Keeping refill frequency moderate helps maintain performance and prevents cartridge wear.

    Will Refilling Affect My Printer’s Warranty?

    You might worry if refilling your 7000 Plus ink cartridge will void your warranty. Here’s the truth: it usually won’t, as long as you handle printer maintenance carefully.

    Make sure you use ink compatibility that matches your cartridge specifications and avoid damaging seals. If you refill responsibly, your warranty should stay intact.

    Just keep records of your refills to prove you maintained your printer properly if issues ever arise.

    Can I Use Third-Party Ink for Refilling?

    Yes, you can use third-party ink for refilling as long as you guarantee cartridge compatibility with your 7000 Plus printer. You’ll want to choose high-quality ink to maintain ink quality and avoid clogs or poor print performance.

    Keep in mind, some printers may detect third-party cartridges and show warnings. Always pick reputable brands designed specifically for your model to protect your prints and help your printer run smoothly.

    How Do I Store Leftover Ink Properly?

    You should store leftover ink in its original sealed container or a clean, airtight bottle to prevent ink stain issues. Keep it in a cool, dark place away from heat and sunlight to preserve quality.

    Label the container with the color and date to track freshness. Before using, shake gently for consistency.

    Make sure your refill kit compatibility is considered, and use the ink within the recommended time to avoid clogs or poor prints.

    What if the Cartridge Still Shows Empty After Refilling?

    If your cartridge still shows empty after refilling, think of it as a wilting flower refusing water. It might be signaling deeper issues. You’ll want to check the cartridge lifespan, as frequent refilling can wear it down.

    Clean the chip and contacts thoroughly, and reset the printer memory to refresh communication. Using quality ink and sealing the cartridge properly helps too. If problems persist, the chip or sensor might need replacement.

    Conclusion

    By following these simple steps, you not only save money but also extend your HP 7000 Plus cartridge’s life. It’s funny how a little patience and care can turn a nearly empty cartridge into a fully functional one again.

    So, next time you see that “low ink” warning, you’ll know exactly what to do. Refill it yourself and keep printing without missing a beat. It’s convenience and savings, all in one.

  • How to Put Ink in Brother Stamp 7770 in 10 Easy Steps

    How to Put Ink in Brother Stamp 7770 in 10 Easy Steps

    To put ink in your Brother Stamp 7770, first gather compatible ink and tools. Then remove the handle and ink pad carefully while wearing gloves.

    Locate the refill holes under small caps and add about five drops of ink slowly to avoid overfilling. Let the ink soak, then reassemble the stamp, ensuring proper alignment and secure locking.

    Test on scrap paper and clean any excess ink. Keep the stamp stored dry and clean to prevent issues.

    For a complete guide to smooth refilling and maintenance, keep going with these helpful tips.

    Get Your Ink and Tools Ready for Brother Stamp 7770

    gather tools and ink

    Before you begin refilling your Brother Stamp 7770, make sure you have all the necessary ink and tools on hand. First, gather ink refill bottles compatible with Brother stamps, specifically designed for the 7770 model. Using the right ink assures smooth operation and prevents damage.

    Ensure you have the correct ink and tools ready before refilling your Brother Stamp 7770 for optimal performance.

    Next, prepare essential tools like gloves to protect your hands, absorbent cloths to catch any spills, and a small applicator or needle for precise ink placement. Set up your workspace in a well-ventilated area to avoid inhaling ink fumes.

    Have clean scrap paper nearby so you can test the stamp right after refilling to confirm proper ink flow. Carefully remove the stamp from its casing to access the ink reservoir or pad.

    Taking these preparation steps will make the refilling process efficient and mess-free, helping your Brother Stamp 7770 perform at its best.

    Safely Remove Stamp Handle and Ink Pad for Brother Stamp 7770

    To safely remove the stamp handle, just gently pull it upward while pressing the release mechanism, if your model has one. It’s pretty straightforward.

    Next, carefully lift the ink pad out—try to do this slowly so you don’t spill any ink or damage the parts. Oh, and it’s a good idea to wear gloves to keep your hands clean from any ink stains while you’re doing this.

    Handle Removal Techniques

    When you need to remove the handle of your Brother Stamp 7770, press and hold the release button at its base, then lift the handle straight up with care. Avoid using excessive force to prevent damage to the stamp components.

    Before lifting, check for any locking clips or mechanisms securing the handle. If necessary, use a small flat-head screwdriver to gently disengage these clips without scratching the stamp.

    Always handle the handle with clean, dry hands or gloves to avoid smudges or contamination. Carefully detaching the handle allows you to access the inner parts safely, preparing you for the next steps.

    Following these simple handle removal techniques ensures your Brother Stamp 7770 stays in good condition while you maintain it.

    Ink Pad Extraction

    Although it may seem tricky at first, you can safely extract the ink pad from your Brother Stamp 7770 by lifting the handle gently to expose the ink pad compartment. Before you start, make sure the stamp is turned off or disconnected from power to avoid any accidents.

    Wearing gloves helps prevent ink stains on your hands during removal. Carefully slide the ink pad out of its holder, taking care not to spill ink or damage the pad.

    Confirm the ink pad is fully detached before you proceed to refill or replace it. Handling the ink pad with care will keep your Brother Stamp 7770 in good condition and ready for use.

    Safety Precautions

    After you’ve carefully extracted the ink pad from your Brother Stamp 7770, it’s important to follow safety precautions to protect both yourself and the device. First, gently lift the stamp handle without applying excessive force to avoid damage.

    Always wear gloves before removing the ink pad to prevent ink stains on your hands and maintain cleanliness. Slide the ink pad out slowly, holding it by the edges to minimize ink spillage or damage.

    Place the ink pad on a protected surface or paper towel to catch any residual ink and prevent stains. Throughout the process, handle all components with care and follow the manufacturer’s instructions.

    Observing these safety precautions guarantees proper maintenance and extends the life of your Brother Stamp 7770.

    Locate Ink Refill Holes on Brother Stamp 7770

    You’ll find the ink refill holes on the top or side of your Brother Stamp 7770’s casing. They’re often hidden under small caps, so you might need to look closely. Just carefully remove these caps to access the refill points—make sure you don’t damage the stamp while doing it. Once you identify and reach these holes correctly, you’ll be set for a clean and effective ink refill.

    Identifying Refill Hole Locations

    Where exactly do you find the refill holes on your Brother Stamp 7770? These small, circular openings are usually located on the top or side of the stamp housing.

    Refill holes are designed specifically for ink refilling, often marked or recessed to help prevent accidental ink spills. To identify them, carefully examine your stamp for any visible ports or small removable caps.

    If you don’t spot the refill holes right away, don’t worry. Consulting your user manual or product guide will point you in the right direction. Knowing where these refill holes are is essential for a smooth ink refill process and helps avoid any mess or damage to your stamp.

    Accessing Ink Refill Points

    Although locating the refill holes on your Brother Stamp 7770 might seem tricky at first, a careful inspection of the top and sides will reveal small, recessed openings or caps designed for ink refilling. To access these ink refill points properly during the refilling process, follow these steps:

    1. Examine the stamp’s top and sides for small holes or plastic caps.
    2. Use a small tool or needle to gently remove the caps without damaging the stamp.
    3. Confirm you’re using the correct Brother-specific ink refill to avoid damage.
    4. Handle the refill points carefully to prevent ink leaks or harm to internal components.

    Following these precise steps ensures a smooth refilling process and keeps your Brother Stamp 7770 functioning perfectly.

    Add Ink Drops Carefully to Brother Stamp 7770 Without Overfilling

    add ink drops carefully

    When adding ink drops to your Brother Stamp 7770, take your time to apply the ink slowly and precisely to the refill holes. Use a small applicator or needle to guarantee each drop goes exactly where it should, avoiding any excess ink that could cause leaks or smudges.

    For the best results, add about five drops per ink refill hole. This amount maintains ideal ink levels without overfilling. Overfilling can lead to ink spilling out and ruining your stamp or documents.

    Be patient and steady during this process to keep the ink confined within the designated areas. After you’ve added the ink drops, give the stamp a few minutes to absorb the ink before you use it. This careful approach prevents messes and helps your Brother Stamp 7770 deliver clear, sharp impressions every time.

    Let Ink Soak Properly Into Brother Stamp 7770 Pad

    To get the best results from your Brother Stamp 7770, let the ink soak properly into the pad by leaving it undisturbed for several hours or overnight. This helps the ink cartridge’s liquid distribute evenly, so your stamping comes out clear and consistent.

    Follow these steps to let the ink soak correctly:

    1. Position the stamp upright to help the ink spread uniformly across the pad.
    2. Use only the recommended ink cartridge designed for Brother Stamp 7770 to guarantee proper absorption.
    3. Avoid touching or pressing the pad during the soaking period to prevent uneven ink distribution.
    4. Check the pad occasionally to confirm the ink has fully soaked in before using the stamp again.

    Reassemble Ink Pad and Handle Securely

    securely click ink pad

    Now that the ink has soaked in, go ahead and line up the ink pad properly inside the handle. Press the handle and pad together firmly until they click or lock into place. Just take a quick moment to make sure the handle is secured well—this helps prevent any ink from leaking while you’re using it.

    Align Components Properly

    Although reassembling the ink pad and handle might seem straightforward, aligning them correctly is crucial to prevent ink leaks and guarantee smooth stamping. Proper aligning ensures your Brother Stamp 7770 works flawlessly every time.

    Follow these steps for perfect alignment:

    1. Align the ink pad carefully with its slot, ensuring it fits snugly without gaps.
    2. Make sure the ink pad sits securely to maintain consistent ink flow.
    3. Position all components flush and properly aligned to avoid uneven stamping.
    4. After reassembly, test the stamp gently on scrap paper to confirm everything’s aligned and working perfectly.

    Secure Handle Firmly

    When you firmly hold the handle, you prevent any unwanted movement during ink refilling and guarantee the Brother Stamp 7770 functions smoothly. Make certain the handle clicks into place when reassembling the ink pad to avoid leaks or misalignment.

    Confirm the locking mechanism is fully engaged before adding ink. This ensures proper ink distribution and protects your stamp.

    Task Reason
    Secure handle tightly Prevents ink leaks and misalignment
    Reassemble ink pad correctly Ensures smooth stamp operation
    Engage locking mechanism fully Maintains proper ink flow and protects stamp

    Test Brother Stamp 7770 on Scrap Paper for Ink Flow and Clarity

    Before using your Brother Stamp 7770 on important documents, you’ll want to test its ink flow and clarity by pressing it onto scrap paper. This step guarantees your stamp pad has the right amount of ink and will produce clear, professional impressions.

    Test your Brother Stamp 7770 on scrap paper first to ensure clear, professional impressions every time.

    Follow these steps to check ink flow and clarity:

    1. Press the stamp firmly onto scrap paper to transfer the ink evenly.
    2. Examine the impression for any fading, uneven spots, or smudges.
    3. If the image is too faint or blotchy, add more ink to the stamp pad and test again.
    4. Confirm the ink appears smooth and consistent for a crisp, clear imprint.

    Testing on scrap paper helps you avoid mistakes on important documents by ensuring your Brother Stamp 7770 is ready to use with proper ink flow and clarity.

    Clean Up Excess Ink to Prevent Stains

    How should you handle excess ink after refilling your Brother Stamp 7770? Start by putting on gloves to keep your hands clean and protect your workspace. Then, take an absorbent paper towel and gently blot the excess ink. Avoid rubbing to prevent smudging or spreading it further.

    This careful approach helps you avoid ink stains on surrounding surfaces. If any ink has spilled or dried on the stamp or nearby areas, use a mild cleaning solution with a clean cloth or paper towel to remove it thoroughly.

    Don’t forget to regularly inspect your stamp for ink buildup or leaks to catch any problems early and keep your work area tidy. By promptly and carefully cleaning up excess ink using a paper towel and proper technique, you’ll maintain both your Brother Stamp 7770 and your workspace free from unwanted stains.

    Store Ink and Stamp Properly After Refill

    After cleaning up any excess ink, you’ll want to focus on storing both your Brother Stamp 7770 and the ink properly to keep them in top condition. Proper storage prevents leaks, ink drying, and damage to your stamp.

    Follow these tips to store your ink and stamp effectively:

    1. Store the ink bottle upright and tightly sealed to avoid leaks and keep the ink fresh.
    2. Make sure the stamp is completely dry before storing to prevent smudging.
    3. Keep the stamp in a clean, dry place away from direct sunlight to maintain its quality.
    4. Use a protective case or cover for the stamp to prevent dust buildup and preserve stamping clarity.

    Troubleshoot Ink Issues With Brother Stamp 7770

    If your Brother Stamp 7770 suddenly stops producing ink or the impressions look faint, you’ll want to check the ink pad’s saturation and inspect the reservoir for any clogs. Make sure the ink you’re using is compatible with your stamp to avoid poor flow or clogging.

    Clean the stamp thoroughly with a proper cleaning solution to remove dried ink or debris that could block ink distribution. When refilling, follow the manufacturer’s instructions carefully to prevent overfilling, which can cause leaks or smudging.

    Issue Solution
    Faint impressions Check ink pad saturation
    Ink flow stoppage Inspect and clean reservoir
    Smudging or leaks Avoid overfilling during refill

    Frequently Asked Questions

    How Often Should I Refill the Brother Stamp 7770 Ink Pad?

    You should refill the Brother Stamp 7770 ink pad after about 1,000 to 2,000 impressions, depending on how often you use it. If you stamp frequently, expect to refill every few weeks; less use means longer intervals. Always check for fading.

    Make certain you use ink compatible with Brother stamps to avoid damage and maintain quality. Using the right ink ensures clear, consistent impressions every time you stamp.

    Can I Use Different Ink Brands in Brother Stamp 7770?

    You might think using different ink brands is a quick fix, but ink compatibility matters a lot for your Brother Stamp 7770. Stick to Brother-approved ink to avoid clogging, smudging, or damaging your stamp.

    Using generic ink might seem convenient but can void your warranty and cause malfunctions. Trust the manufacturer’s guidelines to keep your stamp working smoothly and maintain peak performance with the right ink choice every time.

    Is It Safe to Use Brother Stamp 7770 on All Paper Types?

    No, it’s not safe to use the Brother Stamp 7770 on all paper types due to material compatibility. You should avoid porous or delicate papers since they can absorb ink unevenly or get damaged.

    Glossy or coated papers might cause smudging or unclear impressions. To get the best results, test the stamp on a small area first and always use the recommended ink for your specific paper material.

    How Long Does Brother Stamp 7770 Ink Last After Refilling?

    Imagine your stamp leaving clear impressions like raindrops falling steadily on a window. After refilling, the Brother Stamp 7770’s ink longevity usually lasts about 3 to 6 months with regular use.

    You’ll notice the impressions fade when ink runs low, signaling it’s time for another refill. Keep an eye on usage and storage, as these factors affect how long the ink stays vibrant and reliable for your stamping needs.

    Can I Replace the Ink Pad Instead of Refilling It?

    Yes, you can replace the ink pad instead of refilling it. The Brother Stamp 7770’s ink pad is designed for easy removal and replacement.

    Just lift the stamp cover, take out the old ink pad, and insert a new one. Replacing the ink pad guarantees consistent ink flow and clear impressions without the mess of refilling.

    Always use manufacturer-approved ink pads to keep your stamp working perfectly.

    Conclusion

    Now that you’ve mastered the magic of managing your Brother Stamp 7770 ink, maintaining its mark-making might is manageable. Remember to remove the handle carefully, refill with precision, and test thoroughly to avoid any messy mishaps.

    With a little love and a lot of lubrication, your stamp will stay sharp and striking. Keep cleaning, caring, and confidently crafting clear, crisp impressions every time you stamp!

  • How Do You Put Ink in a Printer in 7 Easy Steps?

    How Do You Put Ink in a Printer in 7 Easy Steps?

    To put ink in your printer in 7 easy steps, first gather compatible cartridges and prepare your printer by turning it off and opening the ink access panel.

    Next, remove old cartridges safely, then unpack and prep the new ones by removing protective tapes.

    Insert each cartridge correctly, ensuring they click in their color-coded slots.

    Secure the cartridges, close the cover, and run an alignment followed by a test print.

    Keep going to discover tips for flawless installation and ideal print quality.

    Gather Compatible Ink Cartridges and Prepare Your Printer

    check prepare insert verify

    Before you start, make sure you have the right ink cartridges for your printer model by checking the user manual or manufacturer’s website. This guarantees you get compatible ink cartridges designed specifically for your device.

    Verify your printer model to ensure you purchase compatible ink cartridges for optimal performance.

    Next, gather tools like gloves and paper towels to keep your workspace clean. Turn on your printer and open the access panel or ink cartridge compartment to prepare your printer for ink insertion.

    Carefully remove packaging from the new cartridges, making sure to peel off any protective tapes without touching the ink nozzles. Before you insert ink cartridges, verify cartridge match by aligning each cartridge with its designated color slot. Black goes in black, color goes in color. This step prevents mistakes that could affect print quality.

    With everything ready, you’re set to insert ink cartridges properly, ensuring your printer is ready for smooth, efficient operation.

    Turn Off Printer and Open Ink Cartridge Access

    Once you’ve gathered the right ink cartridges and prepared your printer, the next step is to turn off the printer completely and unplug it. This power down prevents electrical shock and protects your device.

    Next, locate the ink cartridge access area, usually behind a top lid or front access panel, and open it carefully. Wait for the printer to stop moving and for the cartridge carriage to settle in a safe position.

    Avoid opening the access panel while the printer is still on. Doing so can cause ink leaks or recognition errors. If unsure, consult your printer’s manual for exact instructions on accessing the ink cartridge compartment safely.

    Step Action Notes
    1 Turn off and unplug printer Prevents electrical hazards
    2 Locate access panel or lid Usually on top or front
    3 Open access carefully Avoid sudden jerks or damage
    4 Wait for cartridge carriage Ensures safe ink cartridge access
    5 Refer to manual if unsure Model-specific guidance

    Remove Old Ink Cartridges Safely

    power off press release avoid

    Before you remove the old ink cartridge, make sure your printer is powered down to avoid any issues. Then, press down gently on the cartridge until it clicks and releases from its slot. Just be careful not to touch the copper contacts or nozzles — this helps keep them clean and functioning properly.

    Power Down Printer

    Although it might be tempting to jump right into replacing your ink cartridges, you should always turn off your printer and unplug it from the power outlet first. Power down the device using the power button, then unplug it to guarantee safety precautions are met.

    After unplugging, wait at least 10 minutes to let internal components cool and settle. Next, open the printer carefully to access the ink cartridge carriage or tray.

    Make sure the printer remains completely turned off and unplugged as you remove cartridges. Handling cartridges carefully prevents damage and ink spills.

    Following these steps guarantees your safety and protects your printer from electrical shock or harm during cartridge replacement. Always remember, never remove cartridges unless the printer is fully powered down and unplugged.

    Release Cartridge Carefully

    When you press down gently on the existing cartridge until it clicks, you release it from its slot. This allows you to grasp it carefully by the sides and pull it straight out. Be sure to handle the cartridge carefully to avoid spilling ink or damaging your printer.

    Avoid touching the copper contacts and nozzles, as this can cause ink clogs or poor printing performance. Once released, make sure the old cartridge is fully removed before installing a new one. Proper removal ensures your printer functions correctly.

    After removing the cartridge, dispose of or recycle it according to local regulations to protect the environment. Taking these steps will help you replace your ink cartridge safely and maintain your printer’s effective operation.

    Avoid Touching Contacts

    After you’ve carefully removed the old cartridge, it’s important to avoid touching the metal contacts or ink nozzles. When you handle cartridges, hold them by their sides to prevent damage and static discharge.

    Don’t touch the copper-colored contacts or ink nozzles, as oils from your fingers can contaminate contacts and cause printing issues. Before installing cartridges, make sure your hands are clean and dry to keep the contacts area free from dirt.

    Using gloves or a lint-free cloth helps prevent contaminating contacts.

    What to Avoid Why It Matters How to Handle
    Touching contacts Prevent static damage Hold cartridges by sides
    Contacting nozzles Avoid ink flow issues Use gloves if needed
    Contaminating area Ensure good connection Clean hands, dry surface

    Unpack and Prepare New Ink Cartridges

    handle cartridges carefully prime

    To get your new ink cartridges ready for installation, start by carefully removing them from their packaging, holding them by the sides to avoid touching the nozzles or electrical contacts. Once unpacked, gently shake the new ink cartridge a few times to help prime the ink, making certain smooth flow during printing.

    Next, remove any protective tape covering the nozzles and contact points, being careful not to touch these sensitive areas. Also, take off any plastic seals or covers from the ink-dispensing parts, making sure the nozzles remain clear and unobstructed.

    After preparing the cartridge, keep it upright to prevent leaks. If you’re not inserting it immediately, store the cartridge in a cool, dry place to maintain ink quality. Handling and preparing your new ink cartridge this way helps guarantee ideal printer performance and avoids damage to the nozzles and contacts.

    Insert New Cartridges With Correct Alignment

    Make sure you align the cartridges correctly by matching the contacts and nozzles with their slots. Just take your time and insert each cartridge gently until you hear a click—that’s how you know it’s securely seated. Also, double-check that you’re placing the cartridge in the right color-coded slot to avoid any mix-ups.

    Align Cartridges Properly

    When you insert new cartridges, make sure the nozzles face away from you and slide each one gently into its matching color-coded slot. To install cartridges correctly, align each cartridge so it fits into the correct slot without forcing it.

    You’ll know the cartridge is properly placed when it clicks into place securely. Always match cartridges to their corresponding slots to avoid errors. If a cartridge doesn’t seat properly, remove it and realign before trying again.

    Proper placement ensures smooth printing and avoids damage. Take your time to insert each cartridge into the correct position, applying even pressure. By doing this, you’ll ensure cartridges are aligned properly and ready for the next step in setting up your printer.

    Ensure Secure Cartridge Seating

    Although inserting cartridges might seem straightforward, guaranteeing they seat securely is essential for your printer’s performance. First, align the cartridge so its electrical contacts match those in the slot.

    When you insert the cartridge, slide it gently until you hear a click. This confirms it’s securely seated. Make sure the nozzles face away from you and are aligned correctly with the carriage to avoid leaks or recognition errors.

    Check that the cartridge sits flush with the printer’s surface; if it’s not properly seated, electrical contacts might not connect. Proper alignment and seating guarantee smooth printing and prevent damage.

    Taking these steps guarantees your cartridge is installed correctly and ready to work without issues.

    Confirm Correct Slot Placement

    Before closing the printer lid, you’ll want to confirm that each cartridge is placed in its designated slot. Start by matching the color-coded cartridge to the correct slot, ensuring the nozzles facing away from you are aligned properly.

    Gently slide each cartridge into place until you hear a click, signaling it’s fully seated. It’s important to verify that every cartridge is securely in place and flush with the others to avoid recognition errors.

    Double-check the correct slot placement before moving on. Installing a cartridge in the wrong slot can cause printing issues.

    When all cartridges are properly seated and aligned, you can confidently close the lid, knowing your printer is ready for use with nozzles facing the right direction and cartridges securely positioned.

    Secure Cartridges and Close Printer Cover

    To secure the cartridges properly, press each one down gently until you hear a click that signals it’s fully seated in its slot. This click confirms proper engagement, ensuring each cartridge is securely seated within the cartridge holder.

    Press each cartridge gently until you hear a click, confirming it’s securely seated in its slot.

    Take a moment to align the cartridges correctly, making sure they sit flush with the holder to prevent any misfitting. Misaligned cartridges can cause error messages or damage when you close the cover.

    When you’re confident all cartridges are in place, close the cover slowly and carefully. Make sure it latches properly without forcing it.

    If the cover resists, double-check the cartridge alignment, as improper closure can dislodge cartridges or trigger error messages. A secure latch keeps everything in place, allowing your printer to function smoothly.

    Run Alignment and Print Test Page

    Once you’ve secured the cartridges and closed the printer cover, the next step is to run the alignment process and print a test page. This step calibrates the print head to guarantee excellent print quality and consistent ink flow.

    Many printers automatically start alignment after installing new print cartridges, but you can also initiate it manually through printer settings. During alignment, the printer prints a test pattern that helps fine-tune nozzle placement, preventing issues like streaks or blurry colors.

    Printing a print test page verifies that colors align correctly and the ink flows evenly. Regularly performing this calibration keeps your prints sharp and vibrant.

    Step Purpose
    Alignment Process Calibrate print head for accuracy
    Test Pattern Fine-tune nozzle placement
    Print Test Page Verify print quality and ink flow

    Frequently Asked Questions

    How Do I Recycle Used Ink Cartridges Properly?

    To recycle used ink cartridges properly, you should follow cartridge recycling guidelines from your printer manufacturer or local recycling centers. Use their refill program or cartridge donation options to support waste reduction and eco friendly disposal.

    Many retail stores and recycling centers accept cartridges for responsible disposal, minimizing environmental impact. By participating in these programs, you contribute to cartridge recycling efforts and guarantee your used cartridges don’t harm the environment.

    Can I Mix Different Brands of Ink Cartridges?

    Did you know 30% of printer issues stem from ink compatibility problems? You shouldn’t mix different brands of ink cartridges because brand compatibility affects cartridge color matching and ink formulation.

    Different inks can alter ink drying time, reduce cartridge lifespan, and hurt color accuracy. Also, refill kit safety varies by brand.

    To avoid clogs or damage, stick with cartridges from the same manufacturer and store them properly for ideal cartridge storage and print quality.

    What Should I Do if My Printer Doesn’T Recognize New Cartridges?

    If your printer doesn’t recognize new cartridges, start with cartridge troubleshooting by checking compatibility and ink cartridge types. Inspect for cartridge expiration or poor ink quality issues.

    Clean the print head and perform cartridge alignment through printer ink settings. Make sure cartridges are properly seated and stored correctly.

    Update drivers and run any calibration tools. If problems persist, reset the printer and double-check ink cartridge storage to avoid damage or drying out.

    How Often Should I Replace Ink Cartridges?

    You should replace ink cartridges based on ink lifespan, printing frequency, and cartridge storage. When ink dries, colors fade, and printhead maintenance suffers, affecting ink quality and color matching.

    Watch for ink leakage and guarantee cartridge compatibility to avoid damage. Frequent printing or poor storage means replacing cartridges sooner.

    Regularly check ink levels to maintain sharp prints and prevent printhead clogs, keeping your printer running smoothly without interruption.

    Is It Safe to Refill Ink Cartridges at Home?

    Yes, you can refill ink cartridges at home safely if you follow refill kit instructions carefully. Wear gloves and handle fragile cartridges gently to avoid damage.

    Be mindful of ink cartridge safety by avoiding ink leaks and the risk of ink spills. Check ink compatibility to prevent errors, and consider authorized refill services if you’re unsure.

    Always use proper disposal methods to reduce environmental impact and keep your printer running smoothly.

    Conclusion

    Refilling your printer with ink is as simple as following these seven straightforward steps. Like fitting the last piece in a puzzle, installing new cartridges guarantees your printer works smoothly and delivers crisp prints every time.

    By gathering the right supplies, handling cartridges carefully, and running a test page, you’ll keep your printer in top shape. Soon, you’ll be back to printing with ease and confidence.

  • Make Squid Ink Pasta in 7 Easy Steps

    Make Squid Ink Pasta in 7 Easy Steps

    You’ll start by gathering 00 flour, eggs, and squid ink, then mix them into a dough on a clean surface.

    Knead the dough until smooth and elastic, then let it rest wrapped in cling film to relax.

    Roll it out thin using a pasta machine or pin, and cut into your preferred shape.

    Cook fresh pasta in salted water for just minutes until al dente.

    Serve immediately with seafood or herbs for best flavor.

    Following these steps gets you close; there’s more to perfecting the process.

    Gather Essential Utensils and Ingredients for Squid Ink Pasta

    gather utensils and ingredients

    Before you begin making squid ink pasta, gather all the essential utensils and ingredients to guarantee a smooth process. You’ll need 200g of 00 flour, 2 large eggs, and a little bit of squid ink, about 1.5 teaspoons. Set up a clean work surface where you can comfortably prepare your dough.

    A fork will help you beat the eggs and mix in the squid ink evenly before you start kneading. For rolling out the pasta, have a pasta machine or rolling pin ready. Don’t forget cling film to wrap the dough during resting, which helps keep it from drying out.

    When you roll the dough, cover it with a damp tea towel to maintain moisture. Having these utensils and ingredients organized ahead of time ensures you won’t have to stop midway, making the entire process smoother and more enjoyable. With everything on hand, you’re ready for the next step.

    Prepare Squid Ink Pasta Dough From Scratch

    With your utensils and ingredients ready, start by creating a well with the 200g of 00 flour on a clean surface. Crack in two large eggs and beat them smoothly with a fork before adding 1.5 teaspoons of squid ink. This coloring technique gives your dough a striking black hue that enhances visual appeal and subtly infuses oceanic flavor, perfect for seafood-based dishes. Gradually incorporate the flour into the egg and ink mixture, forming a cohesive dough.

    While preparing your squid ink pasta dough from scratch, consider flavor pairing to complement your sauce choice. The dough’s briny, umami notes work best with light, creamy sauces or tomato-based ones, ensuring sauce compatibility without overpowering the pasta’s unique taste.

    Once combined, avoid kneading here since that’s next. Instead, focus on mixing ingredients evenly to set a strong foundation for texture and flavor, making your squid ink pasta stand out both in color and taste.

    Knead Squid Ink Pasta Dough for Perfect Texture

    knead until smooth and elastic

    You’ll want to knead your squid ink pasta dough for about five minutes to develop the gluten properly. This is what gives it that smooth, elastic texture we’re aiming for. Make sure to press and fold the dough evenly as you go along.

    Try to get the dough to feel slightly tacky but not sticky—that’s the sweet spot. Once you notice these texture signs, you’ll know your dough is ready to rest and then roll out. Easy, right?

    Kneading Techniques Explained

    Although kneading squid ink pasta dough might seem simple, mastering the technique is key to achieving the perfect texture. Proper kneading helps develop gluten and enhances dough elasticity, making your pasta smooth and resilient. Focus on these essential steps:

    Use the heel of your hand to press the dough away, then fold it back over to build a consistent gluten network. Knead for about five minutes until the dough feels smooth, slightly tacky, and elastic but not sticky. Test the dough by pressing your finger gently; it should spring back quickly, signaling good gluten development.

    Avoid over-kneading to prevent toughness. Stop once the dough is cohesive and elastic, ensuring your squid ink pasta will have the ideal bite and texture.

    Gluten Development Importance

    When you knead squid ink pasta dough properly, you develop gluten that gives your pasta its essential elasticity and chewiness. Gluten formation is crucial because it creates a strong network within the dough, enhancing elasticity and improving dough stability.

    Kneading for about five minutes helps the dough become smooth and cohesive, ensuring this network traps air and moisture effectively. This prevents your pasta from becoming brittle or sticky during cooking.

    If you under-knead, the gluten won’t develop enough, leaving the dough fragile and prone to tearing when rolled or shaped. By focusing on consistent gluten formation, you’ll achieve a springy, resilient pasta dough that holds its shape and offers the perfect bite every time.

    Prioritize proper kneading to unlock the full potential of your squid ink pasta.

    Dough Texture Indicators

    As you knead squid ink pasta dough, pay close attention to its texture to know when it’s just right. Achieving perfect dough elasticity signals proper gluten formation, which is essential for that ideal bite. You want a good moisture balance, not too dry or sticky, for smooth handling.

    Look for these dough texture indicators:

    • The dough feels smooth and elastic, bouncing back gently when pressed, showing strong gluten formation.
    • It’s slightly tacky but never sticky, indicating the right moisture balance.
    • The dough rolls out easily without cracking or tearing, proving it’s pliable and well-kneaded.

    If your dough feels crumbly or overly dry, add a bit of water or eggs. Mastering these signs guarantees your squid ink pasta dough will have the perfect texture every time.

    Let the Dough Rest to Improve Texture and Flavor

    let dough rest for flavor

    Since letting the dough rest in the refrigerator for at least 30 minutes relaxes the gluten, you’ll find it much easier to roll out and shape. This resting period is essential to dough fermentation, where flavor development occurs as the ingredients meld together, enriching your squid ink pasta’s taste.

    During this time, moisture redistribution happens within the dough, improving its cohesiveness and preventing cracks while rolling. To keep the dough from drying out and forming a skin, wrap it tightly in cling film before refrigerating.

    This simple step enhances the dough’s texture, making it smoother and more elastic, which makes handling and shaping a breeze. By giving the dough this vital resting time, you set the stage for a pasta that’s not only flavorful but also has a perfect consistency. Don’t skip this step; your squid ink pasta will thank you for it.

    Roll Out Squid Ink Pasta Dough Thinly and Evenly

    Start by dividing your rested dough into smaller portions, and make sure to keep the unused pieces covered so they don’t dry out. Then, use a pasta machine or a rolling pin to roll the dough out evenly.

    You’ll want to aim for about 2mm thickness. Keep an eye on the surface as you roll to make sure the sheet stays uniform without any thin spots.

    Prevent Dough From Drying

    When you roll out squid ink pasta dough, keeping it moist is essential to prevent cracking and guarantee a smooth texture. Effective dough drying prevention starts with moisture retention techniques and covering methods that shield the dough from air exposure.

    To maintain moisture while rolling out your dough, try these tips: cover the dough with a damp tea towel during pauses to lock in moisture. Lightly flour the surface and rolling pin, which helps reduce sticking without drying the dough. Work quickly and shape the pasta immediately after rolling to minimize air exposure.

    Achieve Uniform Thickness

    Although rolling out squid ink pasta dough thinly can be challenging, using a pasta machine set to the widest setting first helps you achieve an even thickness. Start by rolling the dough through the machine, gradually decreasing the thickness setting until it’s translucent.

    Rotate the dough 90 degrees between each pass to promote thickness consistency and prevent curling. Use light, consistent pressure. Pressing too hard can compromise dough elasticity and cause uneven thickness.

    Lightly flour the dough before each pass to avoid sticking and tearing, which disrupts smooth rolling. Periodically check the dough by holding it up to the light or comparing it to a coin to ensure uniform thinness.

    These rolling techniques guarantee your squid ink pasta dough stays thin and even, ready for perfect cooking.

    Choose Your Pasta Shape and Shape the Dough

    Before shaping your squid ink pasta dough, decide on the pasta shape that best suits your dish, whether it’s wide pappardelle ribbons, delicate tagliatelle, or stuffed ravioli. This choice affects not only the cooking time but also the presentation and pairing with sauces.

    Divide the rested dough into small portions to roll out evenly, preventing uneven thickness. Use a pasta machine or rolling pin to achieve the perfect thinness for your selected shape. Cut or fill the dough accordingly, working quickly to keep it from drying out.

    Divide dough into portions and roll thinly with a machine or pin, working swiftly to prevent drying.

    Keep these tips in mind:

    • Follow traditional pasta recipes to respect authentic textures and flavors.
    • Use proper pasta storage techniques if you plan to save some dough or finished pasta for later.
    • Apply pasta presentation tips to elevate the visual appeal of your dish, especially with striking squid ink pasta.

    Choosing and shaping your pasta thoughtfully guarantees a delicious, professional-looking meal.

    Cook and Serve Fresh Squid Ink Pasta Perfectly

    After shaping your squid ink pasta, cooking it properly brings out its unique flavor and texture. Start by boiling a large pot of salted water, about 1-2 tablespoons of salt per liter. Add the fresh pasta and cook for 2-3 minutes until it floats and becomes al dente. Drain it quickly, reserving a small cup of pasta water to adjust your sauce’s consistency if needed.

    Immediately toss the pasta with your sauce or olive oil to prevent sticking and enhance flavor. Classic flavor pairings include seafood, garlic, and fresh herbs, which complement the pasta’s briny taste beautifully. Serve it hot with a garnish of fresh herbs or seafood for an authentic touch.

    For pasta storage, keep any leftovers in an airtight container in the fridge and consume within 1-2 days. A key cooking tip is to avoid overcooking, as fresh squid ink pasta cooks much faster than dried varieties. Enjoy your perfectly cooked dish!

    Frequently Asked Questions

    Can I Substitute Squid Ink With Another Ingredient?

    Yes, you can substitute squid ink with color alternatives like activated charcoal powder or black food coloring for a similar dark hue.

    If you want dietary substitutions, black sesame or black bean paste works but changes the flavor. Beetroot juice offers a vibrant twist but shifts the taste completely.

    Keep in mind these substitutes bring flavor variations and won’t replicate the traditional seafood taste, so pick based on what matters most to you.

    How Long Can Squid Ink Pasta Be Stored in the Fridge?

    You can keep your squid ink pasta cozy in the fridge for up to 2 days without worry. To avoid a less-than-ideal texture, don’t let it dry out. Cover it lightly or leave it uncovered if your fridge’s humidity is just right.

    If you’re thinking about ingredient substitution, remember that storage tips might differ. Always check for freshness before enjoying, ensuring your pasta stays as delightful as when you first made it.

    What Dishes Pair Best With Squid Ink Pasta?

    You’ll find that seafood dishes like shrimp, calamari, or clams offer excellent flavor enhancement when paired with squid ink pasta.

    If you want ingredient alternatives, try rich cream sauces with lobster or scallops for a luscious twist. Cooking techniques such as lightly sautéing seafood or using citrus-infused olive oil help highlight the pasta’s unique taste.

    Don’t forget to garnish with parsley or lemon to brighten the dish beautifully.

    Is Squid Ink Pasta Safe for People With Seafood Allergies?

    If your seafood allergy concerns feel like steering through a stormy sea, you’re right to be cautious with squid ink pasta. While squid ink itself isn’t a typical allergen, cross-contamination can lurk beneath the surface.

    You should look for allergy-friendly options labeled free from shellfish traces or consider ingredient substitutions like black garlic pasta. Always consult your allergist before diving in to keep your meals safe and worry-free.

    Can I Freeze Squid Ink Pasta Dough Before Cooking?

    Yes, you can freeze squid ink pasta dough before cooking. When using this cooking technique, wrap the dough tightly to avoid freezer burn and maintain flavor variations.

    Thaw it overnight in the fridge, then knead gently to restore elasticity. If you want, try ingredient substitutions like adding herbs or spices after thawing to boost flavor.

    Freezing helps you prep ahead while preserving the unique taste of squid ink pasta.

    Conclusion

    Now that you’ve mastered these seven simple steps, you’re just moments away from tasting something truly extraordinary. Imagine the rich, briny flavor of homemade squid ink pasta melting on your tongue, crafted entirely by you.

    But don’t rush. The magic happens when patience meets passion.

    So, get ready to impress your friends or treat yourself to a dish that’s as stunning as it is delicious. Ready to dig in? Your culinary adventure starts now!

  • How to Make Invisible UV Ink in 7 Easy Steps

    How to Make Invisible UV Ink in 7 Easy Steps

    To make invisible UV ink in seven easy steps, start by gathering fluorescent compounds like quinine or fluorescein and a suitable solvent like distilled water or ethanol.

    Extract ink from highlighters or mix your compounds in solvent.

    Apply a thin layer to paper using a fine brush, then let it dry fully.

    Test it under a 365nm UV light to see the invisible message glow.

    Store your ink in a cool, dark place and handle it safely.

    Keep exploring to master application and storage tips.

    What Is Invisible UV Ink and How Does It Work?

    invisible uv ink fluorescence

    Although invisible to the naked eye under normal lighting, invisible UV ink reveals itself vividly when you shine ultraviolet light on it. This special ink contains fluorescent compounds that absorb UV light, usually at a 365nm wavelength, and then re-emit it as visible light.

    That’s why you only see the ink glow under UV light and not in regular conditions. Invisible ink typically includes organic fluorophores, synthetic dyes, phosphors, or quantum dots, all designed to guarantee fluorescence.

    The brightness you see depends on how concentrated these fluorescent materials are and the exact UV wavelength used. When you apply invisible UV ink, it remains hidden until you illuminate it with a UV source, making it perfect for secret messages or security markings.

    Professional-grade UV inks undergo rigorous testing to make certain they’re safe, durable, and consistently bright, so you’ll get reliable fluorescence every time you use them.

    Gather Fluorescent Compounds and Solvents for Invisible UV Ink

    Before you start mixing your invisible UV ink, you’ll need to gather the right fluorescent compounds and solvents. Common fluorescent compounds like quinine sulfate, fluorescein, and rhodamine are excellent choices because they glow brightly under UV light. You’ll want to use these compounds at concentrations between 0.1% and 1% by weight to avoid clumping or drying issues.

    For solvents, distilled water, ethanol, and glycerin work well to dissolve your fluorescent compounds and control the ink’s viscosity. Choosing the right solvent depends on your application method and desired drying time. You might also consider adding pH buffers or stabilizers to keep the ink stable and enhance its fluorescence over time.

    Make sure to handle all fluorescent compounds and solvents carefully, as some can be toxic or irritating. Wearing gloves and working in a well-ventilated area will help keep you safe while preparing your invisible UV ink ingredients.

    Extract Fluorescent Ink From Highlighters or Prepare Tonic Water Solution

    extract and use fluorescent liquids

    You can extract fluorescent ink by carefully opening a highlighter with pliers and removing the ink tube without damaging it. Then, place the ink on a clean surface or in a jar so it’s easier to handle while you squeeze out the liquid.

    Alternatively, if you don’t want to go through that, you can use tonic water instead. It contains quinine, which glows under UV light. Just pour some into a container and apply it with a brush or pen—super simple!

    Extract Ink Safely

    When extracting fluorescent ink from highlighters or preparing a tonic water solution, handle all materials with care to avoid spills and skin contact. To extract invisible ink from a highlighter, use pliers to gently pry open the casing and remove the ink reservoir or tip.

    Squeeze or dip it into a small container for easy access. This ink fluoresces under UV light, making it perfect for invisible ink projects. If you’re using tonic water, pour it into a dark, waterproof container to preserve its fluorescent properties.

    Always store your extracted ink away from light and air to maintain its glow. Taking these precautions guarantees you safely prepare effective invisible ink that reacts well under UV light without risking exposure or waste.

    Tonic Water Preparation

    Although tonic water naturally fluoresces under UV light thanks to quinine, diluting it with water can make it easier to apply as invisible ink. To prepare your fluorescent ink, mix equal parts tonic water and water.

    You can also extract fluorescent ink from highlighters by soaking inked paper in alcohol or water. Then test under UV light for brightness.

    Use a small brush or cotton swab to write secret messages on paper. Store your solution in a dark, airtight container to keep its glowing effect.

    Step Description
    1. Mix Combine equal parts tonic water and water
    2. Extract (optional) Soak highlighter ink in alcohol or water
    3. Apply Use brush or swab to write on paper
    4. Store Dark, airtight container for preservation

    Mix and Test Invisible UV Ink Under UV Light

    Since the key to effective invisible UV ink lies in its composition, you’ll want to start by mixing a fluorescent compound like tonic water, which contains quinine, with a suitable solvent such as water or alcohol. This blend creates the foundation for your invisible ink.

    The secret to invisible UV ink starts with mixing quinine-rich tonic water and a clear solvent for glowing results.

    Once mixed, apply a thin, even layer on paper using a brush, cotton swab, or fine-tip marker. Then, expose the paper to UV light, ideally a 365nm blacklight, to see the ink’s glow. Testing different concentrations of your fluorescent compound helps you find the perfect brightness and longevity.

    Keep these tips in mind:

    • Use a 365nm UV light for best fluorescence.
    • Apply ink evenly for clear visibility under UV light.
    • Experiment with solvent ratios to enhance glow.
    • Store your ink in a dark, airtight container to preserve its properties.

    Apply Invisible UV Ink: Tips for Best Results

    use fine tipped tools carefully

    To get the best results, use a fine-tipped brush or marker to apply your invisible UV ink evenly and precisely. It really helps to keep the paper flat and handle it carefully, so you don’t smudge your message. Once you’ve applied the ink, be sure to store the paper in a cool, dark place. This will protect the ink from fading too soon.

    Optimal Ink Application

    When applying invisible UV ink, you’ll want to use a fine-tip brush or applicator that matches the ink’s viscosity to achieve precise, even coverage. This helps guarantee your message appears clear under UV light without blotches or smudges.

    To get the best results, keep these tips in mind:

    • Apply a thin, consistent layer of invisible ink to avoid uneven fluorescence.
    • Test a small area first to find the right amount of ink.
    • Let the ink dry fully before exposing it to UV light to prevent smearing.
    • Use tools that fit the ink’s thickness for smooth application.

    Following these steps assures your invisible ink displays sharply and reliably when revealed with UV light.

    Storage And Handling

    After applying your invisible UV ink carefully, proper storage and handling become key to preserving its effectiveness. Store the ink in airtight, opaque containers to block light and prevent degradation.

    Keep these containers in a cool, dark place to maintain the ink’s fluorescent properties and extend its shelf life. Always use clean applicators to avoid contamination, and seal the container tightly after each use.

    Label your storage containers clearly to avoid accidental misuse or mixing with other chemicals. When handling the ink, wear gloves and safety glasses to protect your skin and eyes, especially if you’re working with concentrated formulations.

    Following these storage and handling tips guarantees your invisible UV ink stays reliable and safe for future use.

    Store Invisible UV Ink to Keep It Bright and Ready

    A completely opaque, airtight container is essential for storing your invisible UV ink to keep it bright and ready. Proper storage prevents exposure to light and air, which can degrade the ink’s fluorescence.

    To maintain your invisible ink’s effectiveness, keep it in a cool, dark place like a refrigerator or storage cabinet. Always label the container clearly to avoid confusion and guarantee it’s tightly sealed after each use.

    Here are key tips for invisible ink storage:

    • Use an airtight, opaque container to block light and air
    • Store in a cool, dark environment away from sunlight and UV exposure
    • Label containers clearly to prevent accidental misuse
    • Follow manufacturer guidelines for storage duration and conditions

    Stay Safe When Using Invisible UV Ink and UV Lights

    Because invisible UV ink and UV lights involve chemicals and radiation, you need to prioritize safety to protect your skin and eyes. Always wear UV-protective safety glasses and gloves when handling UV lights to prevent damage.

    Work in a well-ventilated area to avoid inhaling fumes from the ink’s chemical components. Keep UV lamps and all chemicals away from heat sources or open flames since many solvents are flammable and pose fire risks.

    Store your UV inks in dark, cool containers to maintain their effectiveness and ensure safe storage. Moreover, follow local safety regulations and guidelines when making or using homemade UV ink to stay within legal boundaries.

    Frequently Asked Questions

    Can Invisible UV Ink Be Removed With Regular Soap and Water?

    You can’t fully remove invisible UV ink with regular soap and water because its chemical composition bonds it strongly to surfaces. While mild washing might fade the fluorescence temporarily, it won’t erase the ink entirely.

    Application techniques guarantee the ink adheres deeply, making simple cleaning ineffective. To remove it completely, you’d need stronger solvents or physical methods, since soap and water just won’t break down the chemical bonds holding the ink in place.

    How Long Does Invisible UV Ink Remain Visible Under UV Light?

    Invisible ink longevity under UV light typically lasts from several hours to a few weeks, depending on the formulation. You’ll notice UV light duration varies because some inks fluoresce longer if stored properly in cool, dark places.

    Exposure to sunlight or heat shortens this time. Professional invisible inks can even last months or years, but for most DIY inks, expect visibility to fade within days to weeks.

    Is Invisible UV Ink Safe for Use on Skin or Clothing?

    Invisible UV ink generally isn’t safe for use on skin or clothing because its formulation often includes chemicals that can irritate or cause allergic reactions. You shouldn’t apply it directly to your skin without confirming skin safety through manufacturer guidelines or safety data sheets.

    For clothing, the ink might stain or damage fabrics, and removal could be tricky. Always prioritize safety and avoid prolonged contact with skin or fabrics unless the ink’s specifically designed for that.

    Can Invisible UV Ink Be Used for Security or Anti-Counterfeiting?

    You see a blank surface, yet under UV light, hidden patterns glow vividly. Yes, invisible UV ink is perfect for counterfeit prevention.

    You can use these security markers on documents, banknotes, or IDs to reveal covert details only under specific lighting. This clever contrast between invisibility and bright fluorescence makes forgery tough.

    What Types of UV Lights Work Best for Viewing Invisible Ink?

    You’ll get the best results viewing invisible ink by using UV lights in the 365nm range of the UV light spectrum, known as long-wave UV or blacklight. These lights maximize ink fluorescence, making the ink glow brightly and clearly.

    Avoid shorter wavelengths like 254nm since they’re less effective and more harmful. For sharp, vivid fluorescence, choose a dedicated 365nm UV flashlight with high lumens to enhance visibility.

    Conclusion

    Invisible UV ink is like a secret handshake, only visible to those who know the trick. Just as a magician reveals hidden wonders under the right light, your invisible ink comes to life under UV rays.

    Remember, a single drop can brighten a whole message, so handle it with care. With these steps, you’re not just making ink; you’re creating a hidden world, ready to surprise and delight whenever you shine a little light on it.

  • How to Make Disappearing Ink in 7 Easy Steps

    How to Make Disappearing Ink in 7 Easy Steps

    To make disappearing ink, first gather baking soda, water, a mixing bowl, and applicators like cotton swabs. Mix ¼ cup baking soda with ¼ cup water until smooth.

    Write your secret message on white paper using the solution, then let it dry completely.

    Next, prepare a revealing solution by mixing turmeric powder with rubbing alcohol.

    Apply it to reveal your hidden message instantly.

    Store your ink safely and handle it with care.

    Keep going to discover expert tips and safety advice.

    Gather Ingredients and Tools for Disappearing Ink

    gather ingredients and tools

    Before you start making disappearing ink, gather common household ingredients like lemon juice, baking soda, turmeric, or grape juice. These ingredients form the base of your ink, each offering unique properties for invisibility or color change.

    Alongside ingredients, you’ll need essential tools such as a small bowl for mixing, cotton swabs or paintbrushes for application, and a heat source like an iron or hairdryer to reveal or erase your ink. Protect your workspace with coverings to avoid stains.

    Gather tools like a mixing bowl, applicators, and a heat source, and protect your workspace from stains.

    You might also want a UV or black light if you plan to use inks that glow under special lighting. Don’t forget safety tools like gloves and aprons to prevent skin irritation or staining from natural dyes.

    Measuring your ingredients precisely, like one tablespoon of baking soda or half a teaspoon of turmeric, ensures consistent results. With these ingredients and tools ready, you’re well-prepared to create disappearing ink effectively and safely.

    Mix Baking Soda and Water for Invisible Ink

    To make your invisible ink, start by mixing ¼ cup of baking soda with ¼ cup of water in a small container. Make sure to stir it well until the baking soda fully dissolves—this way, you’ll get a smooth solution. This simple ratio is perfect because it helps your ink write clearly and stay hidden until you’re ready to reveal it.

    Baking Soda Preparation

    When you combine ¼ cup of baking soda with an equal amount of water in a small container, you create the base for your invisible ink. Stir the mixture thoroughly until the baking soda fully dissolves in the water, ensuring a smooth solution.

    This simple baking soda and water blend is non-toxic, making it safe for classroom or household activities. Once prepared, this invisible ink solution allows you to write secret messages that remain hidden until revealed later.

    Before using, give the mixture a quick stir to maintain even consistency, which helps the ink write clearly on paper. With this basic baking soda preparation, you’re all set to create your own disappearing ink for fun and educational experiments.

    Mixing Water Ratio

    Although the baking soda and water mixture is simple, getting the ratio right is key to making effective invisible ink. You’ll want to mix ¼ cup of baking soda with ¼ cup of water. This equal parts ratio guarantees your ink is balanced and works well for writing secret messages.

    Stir the mixture thoroughly until the baking soda fully dissolves, creating a smooth solution. Use a small container to hold your invisible ink. It makes dipping your brush or pen easier and keeps things neat.

    Plus, this mixture is non-toxic, so it’s perfectly safe for kids to use. By following this simple ratio, you’ll have reliable disappearing ink ready for fun and secret writing activities.

    Write Your Secret Message With Invisible Ink

    invisible ink secret message

    How exactly do you write a secret message using invisible ink? First, dip a fine brush or cotton swab into your invisible ink mixture, such as baking soda and water. Then, carefully write your secret message on white paper. Make sure the message stays invisible while you write and dries.

    To write your secret message clearly and effectively, keep these tips in mind:

    Use a steady hand to write evenly, preventing smudges or faint lines. Choose white paper to keep the message truly invisible. Avoid pressing too hard to maintain smooth ink flow. Write your message in simple, clear lettering for easy revealing later.

    Once finished, your message will be invisible or very faint, ready to be revealed with a decoding solution like turmeric in alcohol or grape juice. This way, you’ll have a perfectly hidden note written with invisible ink!

    Let Your Ink Dry Completely

    Why should you let your invisible ink dry completely before revealing your message? If the ink isn’t fully dry, you risk smudging or smearing your secret writing, which could make it visible too soon or ruin the message entirely.

    Typically, drying takes about 15 to 20 minutes, but this depends on the ink type and humidity in your environment. To speed things up, place your paper in a warm, dry spot or use a fan to help the ink dry faster.

    Be careful not to touch or handle the paper too soon, as this can cause the ink to smear and reveal your secret prematurely. Letting the ink dry thoroughly ensures your message stays invisible until you’re ready to reveal it, keeping your secret safe and intact.

    Taking this simple step helps maintain the magic of your disappearing ink perfectly.

    Mix the Revealing Solution for Your Disappearing Ink

    mix turmeric revealing solution

    Once you’ve let your invisible ink dry completely, you can prepare the revealing solution by mixing turmeric powder with rubbing alcohol. This mixture will help bring your disappearing ink message to life by changing color when applied.

    To mix the solution effectively, follow these steps:

    Combine 1 teaspoon of turmeric powder with 1/2 cup of rubbing alcohol in a small bowl or container. Stir thoroughly until the turmeric fully dissolves, ensuring an even revealing solution.

    Handle the mixture carefully to avoid staining your skin or surfaces. Store the solution in a sealed, waterproof container to keep it fresh and prevent evaporation.

    This turmeric and rubbing alcohol blend acts as a pH indicator, making the hidden message visible when you’re ready. By preparing this revealing solution correctly, you’ll have a reliable way to uncover your disappearing ink notes quickly and clearly.

    Reveal Your Disappearing Ink Message

    After preparing your turmeric and rubbing alcohol revealing solution, you’re ready to uncover the hidden message. First, make sure the disappearing ink is completely dry. Then, gently apply the revealing solution using a paintbrush, cotton swab, or spray bottle.

    As the solution reacts chemically with the ink, the message will quickly reveal itself. Be careful to avoid smudging the writing. The message appears almost instantly but may disappear again over time if exposed to air or moisture.

    Here’s a quick guide to reveal your message effectively:

    Step Tips
    Dry Ink Wait until ink is fully dry
    Apply Solution Use brush, swab, or spray
    Watch Message Reveal Observe immediate color change
    Preserve Message Avoid moisture and air exposure

    Follow these steps to make your disappearing ink message come alive and enjoy the magic of it revealing itself before your eyes!

    Store and Use Your Disappearing Ink Safely

    Make sure you store your disappearing ink in a sealed, waterproof container. Keep it away from sunlight and extreme temperatures to maintain its quality.

    Always handle the ink with clean tools, and try to avoid getting it on your skin. This helps prevent any stains or irritation.

    Don’t forget to label your container clearly. When you have leftover ink, dispose of it according to local rules to stay safe.

    Safe Storage Tips

    Although disappearing ink is a fun and intriguing substance, you need to store it carefully to keep it effective and safe. Proper storage is key to maintaining its quality and ensuring safety around your home.

    Here are some safe storage tips to follow:

    • Store the ink in a sealed, waterproof container to prevent evaporation and contamination.
    • Keep it away from direct sunlight and heat sources to preserve its potency.
    • Clearly label the container to avoid accidental misuse or ingestion.
    • Always keep the ink out of reach of children and pets to prevent spills and accidents.

    Proper Ink Handling

    Storing your disappearing ink properly is just one part of keeping it safe and effective. Proper ink handling means always using gloves or finger cots to protect your skin, as some ink formulas can cause irritation.

    When you’re ready to use the disappearing ink, make sure to work in a clean area and avoid direct sunlight or extreme temperatures, which can degrade the ink’s quality. After using the ink, clean all utensils and surfaces thoroughly to prevent accidental staining or residue buildup.

    Always keep the ink in a tightly sealed, waterproof container, clearly labeled with its contents and date. Following these straightforward steps ensures your disappearing ink remains safe, stable, and ready for your next creative project.

    Frequently Asked Questions

    Can Disappearing Ink Be Used on Fabrics or Only Paper?

    You can definitely use disappearing ink on fabrics, but fabric applications require special formulas. Regular disappearing ink made for paper often won’t work well or fade properly on fabric.

    You’ll want ink designed for fabric that balances ink durability with easy fading, usually triggered by water or friction. Always test on a hidden spot first to make sure the disappearing effect works without harming the fabric or leaving stains behind.

    How Long Does the Invisible Ink Remain Effective Before Fading?

    You’ll find that invisible ink usually remains effective for several days to a few weeks before fading. The ink longevity depends on the chemical reaction between the ink’s organic compounds and environmental factors like heat or sunlight, which speed up fading.

    To maximize how long your message stays hidden, store your paper in a cool, dry, and dark place. This slows that chemical reaction and extends the ink’s life.

    Is Disappearing Ink Safe for Children to Use?

    Disappearing ink is a gentle dance for your kids’ creativity, thanks to its non-toxic formula made from household items. You should always have child supervision to keep things safe, making sure they don’t ingest or get it in their eyes.

    With your watchful eye, they can enjoy the magic without worry. Just remind them to wash hands and work on easy-to-clean surfaces to avoid stains or irritation.

    Can Other Liquids Besides Juice Reveal the Message?

    Yes, other liquids besides juice can reveal the message through chemical reactions. You can try alternative liquids like vinegar, which is acidic and can react with certain inks to show hidden writing.

    Colored drinks, such as sodas or sports beverages, also contain dyes that might change color when heated or applied, revealing the message. The success depends on the ink type and the chemical properties of the liquid you use.

    What Should I Do if the Ink Smudges Before Drying?

    If the ink smudges before drying, quickly blot the area with a dry paper towel or tissue to absorb extra moisture. Don’t rub or press the inked spot, as that will cause more smudging.

    Let the ink dry completely without moving the paper to guarantee proper ink drying. To speed this up, you can use a hairdryer on a low, cool setting. This helps with smudging prevention and keeps your message clear.

    Conclusion

    Now that you’ve mastered the art of crafting your secret message, you hold the key to a little magic, one that gently slips away, leaving behind a whisper of mystery.

    Remember, with a touch of care and a sprinkle of curiosity, your disappearing ink can turn ordinary moments into enchanting memories. Keep your creativity alive, and let your hidden words dance just out of sight, ready to surprise and delight whenever you choose.

  • How to Send Invisible Ink on iMessage in 7 Easy Steps

    How to Send Invisible Ink on iMessage in 7 Easy Steps

    To send Invisible Ink on iMessage, open Messages and start a chat.

    Type your message or select a photo, then press and hold the send button to open message effects.

    Swipe through the options until you find Invisible Ink and tap it to preview the hidden message.

    When it looks right, tap send to deliver your secret message, which the recipient can swipe to reveal.

    Keep exploring for tips on troubleshooting and compatibility to guarantee smooth use.

    Open Messages and Start a Conversation

    open messages to send

    Before you can send an invisible ink message, open the Messages app by tapping its green or blue icon on your iPhone’s home screen. Once you’re in Messages, you’ll need to start a conversation. Tap the compose button, a square with a pencil, located in the upper right corner to begin a new chat.

    If you want to send your invisible ink message in an ongoing conversation, simply select an existing chat thread from your messages list. Make sure your iPhone has iMessage enabled and is running iOS 10 or later, so you have access to all the features, including invisible ink.

    After choosing or starting a conversation, tap the text input field at the bottom of the screen to prepare for your message. Now, you’re ready to proceed with composing and sending your invisible ink message. Opening Messages and starting a conversation is the essential first step to send your secret note smoothly and efficiently.

    Type Your Message or Choose a Photo

    Once you’ve opened a conversation in Messages, start by typing your message as you normally would. Whether you want to send a quick text or a longer note, just enter your words in the text field.

    Begin your conversation by typing your message naturally, whether it’s a brief text or a detailed note.

    If you prefer to send a photo instead, you can easily choose one from your library or take a new picture right within the conversation. This flexibility lets you share exactly what you want before adding the invisible ink effect.

    Make certain your message or photo is exactly how you want it because once you move on to the next step, you’ll apply the effect to it. Previewing your message or photo at this stage helps ensure it looks right before sending.

    This simple step sets the foundation for sending a hidden message or image that your recipient can reveal with a tap, adding a fun and private touch to your communication.

    Press and Hold the Send Button to Access Effects

    hold to reveal effects

    To reveal the hidden message effects in iMessage, press and hold the Send button after typing your message or selecting a photo. When you hold down the send button, a menu pops up, showing options like bubble effects, full-screen effects, and invisible ink.

    This effect menu lets you preview how your message will appear, so you can decide if it looks just right before sending. You can explore the different effects by sliding your finger across the options.

    If you want to pick an effect, just tap on it while still holding the send button. If you change your mind, release the send button without selecting anything to cancel.

    Pressing and holding the send button is the essential step to unlock these fun and secretive message effects, including invisible ink. This feature adds a playful, surprising touch to your iMessage conversations.

    Swipe to Find and Pick Invisible Ink

    After you hold down the Send button, just swipe left or right through the effects menu to find Invisible Ink. Keep an eye out for the icon with tiny dots or a blurred preview—that’s the one you want. Tap it to see a quick preview of how your message will look before you send it. Easy, right?

    Accessing Effects Menu

    When you finish typing your message in iMessage, press and hold the grey send button to open the effects menu. Holding this button brings up a screen filled with various message effects you can use to enhance your message.

    At the top of the effects menu, tap the “Bubble” button to reveal different bubble effects. This is where you’ll find options like Loud, Gentle, Slam, and Invisible Ink.

    Selecting “Invisible Ink” lets you preview how your message will appear obscured by the effect. Once you’re happy with your choice, simply tap the send arrow to deliver your message with the Invisible Ink applied.

    Accessing the effects menu is straightforward and essential for customizing your iMessage experience with fun, creative effects.

    Locating Invisible Ink

    Once you open the effects menu by holding the send button, you’ll need to swipe left or right to find the Invisible Ink effect. To locate it easily, look for a shimmering, blurred icon that stands out among the options.

    Selecting this effect adds a fun layer of surprise to your message. Here’s what you can expect when you locate Invisible Ink:

    • A mysterious blur hides your message until swiped
    • Adds excitement and curiosity to your texts
    • Keeps messages private until revealed
    • Makes your iMessage stand out in conversations
    • Creates a playful interaction with the recipient

    Previewing Message Effect

    How can you be sure the Invisible Ink effect looks right before sending it? Previewing is simple. First, type your message in the Messages app as usual. Then, tap and hold the send button, the blue upward arrow, to open the effects menu.

    Swipe through the options and pick “Invisible Ink.” Here, you’ll see a preview of how your message appears obscured, just like your recipient will see it. This previewing step lets you confirm the effect is exactly what you want.

    If you change your mind, just tap the “X” icon before sending to cancel the Invisible Ink effect. This way, you control how your message looks and can ensure a perfect, private reveal when your recipient swipes over the text.

    Preview the Invisible Ink Effect Before Sending

    Once you select Invisible Ink, just tap the “Send” arrow to preview how your message will look with the blurred effect. This way, you can make sure the effect is applied just right before your recipient sees it. If you change your mind, simply tap the “X” to cancel and discard the preview.

    How To Preview

    Wondering how you can check the Invisible Ink effect before sending your message? It’s simple to preview it on iMessage to make sure it looks just right. After typing your message, press and hold the send button. This opens the effects menu where you can tap the “Invisible Ink” option.

    You’ll see a clear preview of your message obscured by the blurred effect, exactly how your recipient will view it. If it’s not what you want, just tap “X” to cancel. Ready to send? Tap “Send” to deliver your message with the Invisible Ink effect.

    Previewing lets you:

    • Ensure your message stays hidden
    • Confirm the blur effect looks perfect
    • Avoid sending mistakes
    • Control the message’s final appearance
    • Feel confident before you hit send

    Previewing Message Appearance

    Before sending your message with Invisible Ink, you can easily preview how it will appear to your recipient. To do this, tap and hold the blue send arrow after composing your message, but don’t release it right away. This action triggers previewing of the Invisible Ink effect, showing how the message bubble looks with the obscured content.

    You can even tap on the message bubble in the preview to reveal the hidden text, ensuring everything looks exactly how you want. If you’re satisfied with the previewing, simply tap the send arrow to deliver your message with the effect applied.

    If not, cancel by tapping the X icon, then adjust your message before trying previewing again. This way, you control the message’s final appearance before sending.

    Confirming Invisible Ink Effect

    Although it might seem simple, verifying the Invisible Ink effect before sending guarantees your message appears exactly as you intend. Verifying the Invisible Ink effect involves previewing it first, so you know exactly how your message will look.

    To do this, type your message, press and hold the send button, then select the Invisible Ink effect from the effects menu. A preview will then show you the obscured message or image. If it’s not quite right, tap the X icon to cancel and edit before sending.

    By confirming the Invisible Ink effect, you can:

    • Avoid sending unintended messages
    • Ensure your secret remains hidden until revealed
    • Add a fun surprise element
    • Prevent miscommunication
    • Send with confidence knowing the effect works perfectly

    Send the Invisible Ink Message and Reveal It

    When you want to send a message with a hidden touch, type it out and press and hold the Send button to access the effects menu. Then, tap the “Invisible Ink” option to apply the effect. After that, tap the Send arrow to deliver your message. Your recipient will receive a blurred message bubble that keeps the content concealed at first glance.

    To reveal the message, the recipient simply swipes over the blurred area. This action temporarily uncovers your message, letting them read it before it fades back to the hidden state. Remember, both you and the recipient need iMessage enabled with iOS 10 or later for the Invisible Ink effect to work properly. This ensures the message remains private until deliberately revealed, adding a fun and secure way to share secretive notes or surprises.

    Troubleshoot Invisible Ink and Compatibility Issues

    check imessage and updates

    If you encounter problems with Invisible Ink not displaying correctly, start by confirming that both you and the recipient have iOS 10 or later with iMessage enabled. Invisible Ink requires compatibility with Apple’s iMessage system and won’t work on SMS or non-Apple devices.

    To troubleshoot, check these key points: verify iMessage is turned on under Settings > Messages. Confirm both devices run the latest iOS version for full effect support. Disable Reduce Motion in Settings > Accessibility, as it can block message animations. Restart your device to clear temporary glitches affecting compatibility. Verify the recipient’s device also meets these requirements.

    Following these steps helps solve most compatibility issues and guarantees your Invisible Ink messages reveal perfectly. Remember, proper device settings and software updates are vital to experience all iMessage features without interruption.

    Frequently Asked Questions

    Can Invisible Ink Messages Be Saved or Screenshot by Recipients?

    Yes, recipients can screenshot or save Invisible Ink messages despite the Message Security feature. When they screenshot, the hidden effect stays, but the actual message content is captured and can be viewed anytime.

    You can’t control this since Message Security doesn’t prevent saving outside the app. So, while Invisible Ink adds a layer of privacy, it doesn’t guarantee your messages won’t be stored or shared once received.

    Does Using Invisible Ink Consume Extra Data or Battery?

    You won’t notice any extra data use when sending Invisible Ink messages since it uses the same amount as regular iMessages.

    As for battery impact, it’s minimal, just a slight increase when your device animates the effect while sending or viewing. Overall, Invisible Ink doesn’t drain your battery more than normal iMessage activity, so you can use it without worrying about significant data or battery consumption.

    Is Invisible Ink Effect Available on All Apple Devices?

    No, the Invisible Ink effect isn’t available on all Apple devices. Device compatibility is key here. You need an iPhone, iPad, or iPod Touch running iOS 10 or later with iMessage enabled.

    Older devices or those without iOS 10 won’t support this feature. Also, both you and the person you’re messaging must have compatible devices for Invisible Ink to work properly. Non-Apple devices can’t send or receive it at all.

    Can Invisible Ink Be Used in Group iMessage Chats?

    Imagine sharing secrets that only your closest friends can reveal. Yes, you can use Invisible Ink in group iMessage chats! Group privacy matters here because each recipient must have iOS 10 or later to see the effect.

    While everyone sees the message bubble, only the person who swipes discloses the hidden content. Keep in mind, these effects aren’t synchronized, so each device shows the Invisible Ink individually, preserving your group’s privacy perfectly.

    Are There Any Privacy Concerns With Invisible Ink Messages?

    Yes, you should be aware of privacy risks with Invisible Ink messages. They only obscure content temporarily, so anyone with access to the device can reveal and see the message.

    Invisible Ink doesn’t encrypt your texts or delete them automatically, which means sensitive info isn’t fully protected. If privacy matters to you, relying on this feature alone isn’t secure since messages can still be captured or viewed before you expect.

    Conclusion

    Now that you’ve mastered sending invisible ink on iMessage, you’re all set to add a little mystery and charm to your conversations. It’s like sharing a secret note that only your intended friend can reveal, making your messages feel more personal and playful.

    Just remember, if things don’t go as planned, a quick troubleshooting check will keep your invisible ink flowing smoothly. Enjoy the magic of hidden messages!

  • How to Heat Set Speedball Fabric Ink in 7 Easy Steps

    How to Heat Set Speedball Fabric Ink in 7 Easy Steps

    To heat set Speedball fabric ink, first wash and dry your fabric thoroughly to remove residues.

    Let the ink naturally cure for 7 to 10 days in a ventilated area.

    Choose a heat method: iron, heat press, or oven, set to 320°F.

    Evenly heat the design for 3 to 5 minutes, keeping the iron moving.

    Flip the fabric and heat the reverse side the same way.

    Let it cool completely before washing.

    These steps guarantee vibrant, long-lasting prints, and there’s more to guarantee perfect results.

    Prepare Fabric By Washing And Drying Thoroughly

    wash dry smooth test

    Before you apply Speedball fabric ink, make sure to wash your fabric thoroughly to remove any sizing, chemicals, or residues that could prevent the ink from adhering properly. You’ll want to pre-wash the fabric to guarantee it’s clean and ready for printing.

    Always pre-wash fabric to remove residues that can hinder Speedball ink adhesion for optimal printing results.

    After washing, allow the fabric to dry completely; no moisture should remain before you move on to printing or heat setting. It’s best to wait at least 24 hours after washing so the fabric stabilizes fully.

    Once dry, use a hot, dry iron to remove wrinkles and create a smooth surface for better ink application. This thorough preparation helps the ink bond well and last longer.

    To be safe, test a small fabric sample by washing and drying it first to confirm your process works. By following these steps, you’ll set the stage for a successful heat setting and vibrant Speedball fabric ink results.

    Allow Ink To Cure Naturally For 7 To 10 Days

    You’ll want to let your printed fabric air dry undisturbed for 7 to 10 days. This gives the ink time to cure naturally and fully bond with the fibers.

    Trust me, this waiting period is key to getting the best durability and wash resistance. Being patient here really pays off by protecting your design from fading or damage too soon.

    Natural Ink Curing

    Although heat setting is common, you can let Speedball fabric ink cure naturally by air drying your printed fabric for 7 to 10 days. During this natural curing process, the fabric ink slowly bonds with the fibers through evaporation of moisture, strengthening the print’s durability.

    To guarantee proper curing, keep your fabric in a well-ventilated area away from direct sunlight, which can cause premature fading. Avoid washing or excessive handling during this time to allow the ink to fully set.

    This method relies solely on air dry conditions rather than heat, making it a gentle alternative. After the curing period, you can perform a wash test to confirm the ink’s resistance.

    Natural ink curing offers a reliable way to set your fabric ink without heat application.

    Optimal Drying Time

    How long should you let Speedball fabric ink cure naturally? You should allow the printed fabric to air dry for 7 to 10 days. This drying time is essential for proper curing of the fabric ink.

    During this period, keep your fabric in a well-ventilated area away from direct sunlight to guarantee natural drying without premature damage. Avoid handling or folding the fabric, as it can disrupt the ink’s adhesion.

    Proper natural drying before heat setting maximizes the ink’s durability and wash resistance. Taking the time for this curing process helps the ink bond deeply with the fabric, reducing fading and smudging after washing.

    Trusting this ideal drying time ensures the best long-term results for your Speedball fabric ink projects.

    Benefits Of Patience

    Giving your Speedball fabric ink the full 7 to 10 days to cure naturally offers significant benefits for your project’s longevity. By practicing patience and allowing proper air drying, you guarantee the ink’s solvents fully evaporate, which strengthens the bond between ink and fabric fibers.

    This curing process maximizes adhesion, reducing the chance of fading or cracking after washing. If you rush and heat set too soon, you risk incomplete bonding that compromises the design’s long-term durability. Waiting the recommended period aligns with manufacturer guidelines, giving you confidence that your design will hold up well over time.

    Choose The Best Heat Setting Method For Fabric Ink

    Choosing the right heat setting method really depends on the type of fabric you’re working with, the size of your design, and the tools you have on hand. You’ll want to find the perfect balance between timing and temperature so you don’t accidentally damage your fabric. At the same time, you need to make sure the ink cures properly for the best results. So, let’s dive into some of the best options to help you get durable and vibrant prints every single time.

    Heat Setting Options

    When selecting the best heat setting method for Speedball fabric ink, you’ll want to take into account the tools you have and the size of your project. Using a household iron on the highest fabric setting for 3-5 minutes per side is a reliable choice for most projects.

    If you have access to a heat press, setting it to 320°F (160°C) for about 40 seconds offers even heat and faster curing time. The oven method, heating fabric wrapped in a towel at 400°F for roughly 10 minutes, works well but requires caution to prevent scorching.

    For small areas, a heat gun held 4-5 inches away on medium-high heat for 1-2 minutes ensures proper curing. Each option balances temperature control and curing time for suitable fabric ink setting.

    Fabric Compatibility Considerations

    Although Speedball fabric ink works well on many materials, the type of fabric you’re using plays a crucial role in determining the best heat setting method. Fabric compatibility affects ink durability, so understanding your fabric is key.

    Polyester fabrics handle higher heat settings without fading, making them ideal for longer or hotter curing. Cotton fabrics, or blends with more cotton, tend to fade faster and usually need gentler heat setting or alternative curing methods.

    Proper fabric preparation, like pre-washing and drying, ensures the ink adheres well and lasts longer. Since design thickness and size impact heat setting duration, test a small sample on your specific fabric first. This way, you’ll find the perfect balance to maximize durability without damaging your fabric.

    Timing And Temperature

    Knowing your fabric type helps you pick the right timing and temperature for heat setting Speedball fabric ink. The ideal temperature for curing is about 320°F (160°C), held for 3-5 minutes or 40 seconds if you use a heat press or EasyPress.

    Avoid going above 350°F to prevent scorching. If you use a household iron, set it to the highest fabric setting and press for 3-5 minutes, guaranteeing even heat without damage. A heat gun can also work but requires steady movement to avoid overheating spots.

    Oven curing at 400°F for 10 minutes is an option, but watch out for synthetic fibers that might melt. Consistent timing and temperature during heat setting ensure your fabric ink cures properly, delivering durable, wash-resistant prints.

    Set Your Heat Source To 320°F (160°C)

    To achieve the best results with Speedball fabric ink, you’ll want to set your heat source to exactly 320°F (160°C). This precise heat setting guarantees the ink cures properly without scorching the fabric or causing discoloration.

    Before you start, confirm your heat source’s temperature with a reliable thermometer or digital control. Allow the heat source to stabilize at 320°F for a few seconds to guarantee even heat distribution across your design. Avoid exceeding this temperature, as higher heat can damage both fabric and ink.

    Heat Source Type Recommended Temperature Notes
    Heat Press 320°F (160°C) Use digital control
    EasyPress 320°F (160°C) Allow time to stabilize
    Iron 320°F (160°C) Use thermometer to check
    Heat Gun Not recommended Temperature control issues
    Oven Not recommended Uneven heat distribution

    Setting your heat source accurately is vital for a flawless finish.

    Heat The Design Evenly For 3 To 5 Minutes

    evenly heat for optimal curing

    When you heat the design, set your iron to the highest dry heat setting without steam and keep it moving continuously over the entire area for 3 to 5 minutes. This steady motion guarantees the heat distributes evenly, preventing hot spots that could damage the fabric or cause uneven curing.

    Place a pressing cloth or parchment paper between the iron and your design to protect the ink and fabric from sticking or scorching. Overlap your strokes as you move the iron, maintaining consistent contact with the fabric to make sure every part of the design reaches the proper temperature.

    Don’t rush the process. Spending a full 3 to 5 minutes applying heat is essential for properly curing the Speedball fabric ink. By applying heat evenly and steadily, you’ll lock in your design’s durability and vibrancy, ensuring it stands up to washing and wear.

    Flip Fabric And Heat The Reverse Side

    Although you’ve already heated the front side, flipping the fabric and applying heat to the reverse side is essential for locking in your design’s durability. This step helps the heat penetrate the ink layer directly, improving the cure and ensuring your design lasts through many washes.

    Heating the fabric’s reverse side locks in your design’s durability for long-lasting, vibrant results.

    Before you flip, make sure the ink is fully air-dried to avoid smudging or incomplete curing.

    When you flip the fabric, follow these key steps:

    1. Set your iron or heat press to 320°F for even heat application on the reverse side.
    2. Protect the fabric with parchment paper or a Teflon sheet to prevent scorching.
    3. Apply heat evenly for about 40 seconds to bond the ink securely to the fabric fibers.

    Let Fabric Cool Completely Before Washing

    cool fabric before washing

    How long should you wait before washing your fabric after heat setting? It’s essential to let your fabric cool completely before you wash it. After heat setting, the ink is still in a delicate state, and rushing to wash the fabric can cause the ink to smudge, shift, or fade prematurely.

    Typically, you’ll want to allow at least 30 minutes to 1 hour for proper cooling and drying. During this cooling period, the ink solidifies and bonds effectively to the fabric fibers, ensuring durability.

    If you wash the fabric while it’s still warm, the ink may loosen, leading to less vibrant designs and reduced longevity. So, be patient and let the fabric dry and cool thoroughly before washing.

    This simple step safeguards the integrity of your artwork and keeps your printed design looking fresh through many washes.

    Frequently Asked Questions

    Can I Use a Hairdryer Instead of an Iron to Heat Set?

    You shouldn’t rely on a hairdryer as a heat setting technique for Speedball fabric ink. Hairdryer alternatives like an iron or heat press offer better temperature control, reaching the necessary heat for proper curing.

    Using a hairdryer can extend drying times and compromise ink longevity, especially with fabrics needing consistent heat. To guarantee fabric compatibility and durable results, choose tools that maintain ideal temperatures, not just blow hot air.

    Is Heat Setting Necessary for All Fabric Ink Colors?

    No, heat setting isn’t necessary for all fabric ink colors. You’ll find that ink color durability and long-term adhesion depend on the curing temperature and fabric type compatibility.

    Darker shades often benefit from heat setting to prevent color fading and maintain ink flexibility. Lighter or specialty inks might cure well without heat.

    Always consider the ink’s formula and instructions to guarantee your design lasts without sacrificing softness or flexibility.

    How Does Humidity Affect the Heat Setting Process?

    Humidity impacts the heat setting process by increasing drying time and causing moisture interference, which weakens ink adhesion. You’ll notice environmental effects like slower ink curing and a higher risk of smudging in humid conditions.

    Climate considerations mean you should let your fabric ink dry longer before heat setting to guarantee proper bonding. Managing humidity with good ventilation helps prevent these issues, improving the durability of your fabric design.

    Can Heat Setting Damage Delicate Fabrics?

    Yes, about 60% of delicate fabrics can get damaged if you don’t manage temperature control and setting duration carefully. When working with sensitive fabric textures, you must prioritize fabric compatibility to avoid scorching or deformation.

    Proper heat setting guarantees ink adhesion without compromising the fabric’s integrity. Always follow safety precautions and test a small area first. This way, you protect your fabric while achieving great results.

    How Do I Fix Ink That Smudges After Heat Setting?

    If you notice ink smudging after heat setting, start fixing mistakes by immediately applying a light layer of ink over the smudged area. Use proper drying techniques by letting the ink fully air dry for 24 hours before heat application next time.

    Check your ink consistency and fabric preparation to prevent issues. When reheating, press gently with a clean cloth or parchment paper to help the ink bond better and avoid uneven smudging.

    Conclusion

    Now that you’ve mastered heat setting Speedball fabric ink, imagine your design locking in like a vibrant sunset sealed beneath glass. It will last and stay radiant. Just follow these simple steps, and your creativity will shine wash after wash.

    Remember, patience and care turn your fabric into a masterpiece that stands the test of time. So, heat it right, let it cool, and wear your art proudly. Know that it’s set to stay vivid and strong.

  • How to Get Stamp Ink Off Skin in 10 Easy Steps

    How to Get Stamp Ink Off Skin in 10 Easy Steps

    Act quickly to prevent stamp ink from setting on your skin by blotting with warm water and a paper towel.

    Identify if your ink is water- or oil-based to choose the right remover.

    Test any cleaning agent on a small skin patch first.

    Use gentle oils or rubbing alcohol to break down fresh ink, then softly scrub with a damp cloth.

    Rinse thoroughly and repeat as needed.

    Finish by moisturizing to soothe your skin.

    Keep going to uncover more effective, safe removal techniques.

    Act Quickly to Prevent Ink From Setting

    act quickly for easier removal

    Although it might seem minor, acting quickly when you get stamp ink on your skin makes removal much easier. The longer the ink stays, the more it sets and bonds with your skin cells, making it tougher to remove ink stains later.

    Acting quickly when ink gets on your skin makes removal easier before it sets and bonds with skin cells.

    As soon as you notice ink, try using warm water and a paper towel to blot the area gently. If that doesn’t work, rubbing alcohol or nail polish remover can help, but make sure to test a small patch first.

    Depending on the type of ink, whether it’s pen ink, fountain pen ink, or even a permanent marker, you might need to repeat the process or try different products like baby oil or a clean magic eraser. Using a nail brush can assist in scrubbing stubborn spots with little effort.

    When it comes to removing ink, acting fast gives you the best chance to remove it completely without harsh scrubbing or irritating your skin.

    Identify Your Ink Type for Best Removal Results

    Once you’ve acted quickly to blot or treat the ink, the next step is to figure out what kind of ink you’re dealing with. Stamp inks vary. Some are water-based, while others are solvent-based or oil-based.

    Permanent ink stamps usually contain oil or pigment inks, which resist removal more than dye-based inks. Identifying whether your ink is alcohol-soluble or water-soluble is key because it guides your choice of cleaning agents.

    For example, water-based inks respond well to soap and water. Solvent-based inks may need alcohol or specialized removers. Acting fast is essential since some inks contain chemicals that can permanently stain your skin if left untreated.

    How to Safely Test Cleaning Agents on Sensitive Skin

    patch test for skin safety

    How can you make sure a cleaning agent won’t irritate your sensitive skin before using it to remove stamp ink? Start by performing a patch test. Apply a small amount of the cleaning agent on a discreet area of your skin, like the inside of your wrist or elbow, where skin sensitivity is similar. Make sure this area is clean and free from other products to avoid skewed results. Use only a tiny dab of the agent, such as rubbing alcohol or soap, to minimize potential irritation.

    Wait at least 24 hours to observe any redness, itching, swelling, or discomfort. If you notice any adverse reaction, discontinue use immediately. This cautious approach helps you identify if the product triggers sensitivity before applying it broadly, protecting your skin’s health.

    Testing first lets you confidently choose a safe method for ink removal without risking a painful or allergic response.

    Use Oils and Soaps for Gentle Ink Removal

    If you want to remove stamp ink without irritating your skin, using oils and soaps offers a gentle and effective solution. Oils like baby oil and mineral oil have proven effectiveness in breaking down ink residues without harsh chemicals.

    You can apply a small amount of olive or coconut oil first to loosen the ink. Then, wash the area with warm water and a gentle hand soap, preferably one with pumice or exfoliants, to lift away the ink particles.

    Here’s a quick guide to help you:

    Product Purpose
    Baby oil Breaks down ink gently
    Mineral oil Effective for sensitive skin
    Olive/Coconut oil Loosens ink before washing
    Pumice hand soap Scrubs away ink particles

    This method guarantees thorough cleansing without causing irritation, making it ideal for sensitive skin types.

    Use Rubbing Alcohol to Break Down Fresh Ink

    use isopropyl alcohol carefully

    When you’re using rubbing alcohol to get rid of fresh ink, it’s best to choose the right kind—like isopropyl alcohol—for the best results. Just apply it gently with a cotton ball so you don’t irritate your skin.

    And hey, don’t forget to test a small area first to make sure you’re not sensitive to it before going after the whole stain.

    Choose Appropriate Alcohol Type

    Two common types of rubbing alcohol, isopropyl and ethyl, work effectively to break down fresh stamp ink on your skin. When it comes to alcohol selection, both types serve as excellent solvents that break apart ink molecules, making removal easier.

    Isopropyl alcohol is widely available and often preferred for its strong cleaning power, while ethyl alcohol, commonly found in hand sanitizers, can also do the job. Choosing the right type depends on what you have on hand, but either will help prevent the ink from setting if used promptly.

    Apply Gently With Cotton

    Although fresh stamp ink can be stubborn, you can effectively break it down by dampening a cotton ball or pad with rubbing alcohol. Take a gentle approach: press the alcohol-soaked cotton onto the inked skin and rub lightly in a circular motion. This helps lift the ink without irritating your skin.

    Be sure to apply the rubbing alcohol soon after the ink gets on your skin to prevent it from setting in. If needed, reapply alcohol to the cotton and continue the gentle rubbing until the ink fades. Avoid harsh scrubbing, as this can damage your skin.

    Using this gentle approach with rubbing alcohol and cotton makes removing fresh stamp ink quick and safe.

    Test Skin Sensitivity First

    Why should you test your skin’s sensitivity before applying rubbing alcohol to remove fresh stamp ink? Because rubbing alcohol can cause irritation or trigger skin allergies, especially if your skin is sensitive.

    Before treating the stained area, apply a small amount of rubbing alcohol to a discreet spot on your skin. Wait a few minutes to check for any redness, itching, or inflammation.

    Fresh ink responds well to rubbing alcohol since it hasn’t set yet, but skipping this test could lead to painful reactions. By performing this patch test, you reduce the risk of skin damage and verify rubbing alcohol is safe for you. Taking this simple precaution helps protect your skin while effectively breaking down fresh ink stains.

    Apply Commercial Ink Removers for Stubborn Ink Stains

    When stubborn stamp ink just won’t budge, it’s time to reach for a commercial ink remover like KRESTO Stoko. This kind of product is made specifically to tackle tough ink stains. Just be sure you pick the right one—look for something labeled for ink and dye removal, not just a general hand cleaner.

    Once you have the right remover, follow the application instructions carefully. And don’t forget to rinse your skin thoroughly afterward. This helps prevent irritation and keeps your skin safe and healthy.

    Choosing Suitable Removers

    If you’re dealing with stubborn stamp ink stains, commercial ink removers like KRESTO Stoko offer a powerful and safe solution. When choosing removers, opt for products specifically labeled as “ink and dye removvers” rather than general hand cleaners.

    These removers are specially formulated to dissolve ink quickly, often within five minutes, without harming your skin. You’ll typically find them at industrial supply houses rather than regular stores.

    Make sure to follow the manufacturer’s instructions carefully and rinse your skin thoroughly afterward to avoid irritation. Unlike household solvents, these commercial removers target ink chemicals precisely, preventing damage to your skin tissue.

    Application Techniques

    Although stubborn stamp ink can be tough to remove, applying a commercial ink remover correctly makes the process much easier. Start by choosing a product like KRESTO Stoko that’s specifically labeled for ink removal.

    Apply it directly onto the stained skin using a cotton swab or soft cloth, spreading it gently over the entire inked area. Let it sit for a few minutes to dissolve the ink, following the manufacturer’s recommended contact time.

    Then, softly scrub with a cloth or soft brush to lift the ink residue. Finally, rinse thoroughly with soap and water to wash away any leftover chemicals. This supports proper ink safety and helps prevent skin irritation.

    Using these application techniques guarantees effective removal while protecting your skin.

    Safety Precautions

    Because commercial ink removers contain strong chemicals, you should always follow safety precautions to protect your skin. Prioritize skin safety by choosing products specifically labeled as “ink and dye remover,” not just “hand cleaner.”

    To use them safely, conduct a patch test on a small skin area to check for adverse reactions, especially if you have sensitive skin. Apply the remover gently with a cotton pad or cloth, avoiding excessive rubbing that can irritate your skin.

    Follow the manufacturer’s instructions precisely to ensure effective and safe use. Then rinse your skin thoroughly with soap and water after removal to wash away residual chemicals and minimize irritation.

    Taking these steps helps you remove stubborn ink stains while keeping your skin safe and healthy.

    Soft Scrubbing Techniques to Remove Ink Without Irritation

    When you want to remove stamp ink without irritating your skin, using soft scrubbing techniques is key. Start by dampening a soft cloth or sponge and apply gentle pressure. Avoid harsh rubbing to protect sensitive skin.

    Combine mild soap or a gentle cleaning agent with water to create a light lather. Then gently scrub the stained area using these gentle techniques. If needed, use a soft-bristled toothbrush or a non-abrasive scrub pad to enhance cleaning without causing irritation.

    Remember to rinse your skin frequently during scrubbing to wash away loosened ink and prevent buildup that could aggravate your skin. After you’ve removed the ink, apply a moisturizer or soothing lotion to restore hydration and calm any potential irritation caused by scrubbing.

    Rinse Thoroughly and Repeat as Needed

    After gently scrubbing the ink, make certain to rinse your skin thoroughly with soap and water. Effective rinsing is key to removing most of the stamp ink quickly and preventing it from settling deeper into your skin.

    Don’t hesitate to repeat the rinsing process multiple times, especially if some ink remains stubborn. To maximize removal, consider these steps:

    1. Rinse your skin under warm water while applying soap to lift ink particles.
    2. Use rubbing alcohol or an alcohol-based hand cleaner during rinsing to break down ink residues.
    3. Repeat the rinsing and scrubbing cycle until you see no visible ink traces.
    4. Make certain you rinse off all soap and cleaning agents completely to avoid irritation and prevent ink from re-adsorbing.

    Moisturize Skin to Soothe After Ink Removal

    Though you’ve successfully removed the stamp ink, your skin may feel dry or irritated from the cleaning process. Applying a fragrance-free moisturizer right after cleaning gives your skin a much-needed hydration boost, helping to soothe and restore its natural barrier. Harsh solvents like alcohol or bleach can strip your skin, so moisturizing immediately prevents further dryness and irritation.

    You can also use oils such as mineral or baby oil to create a protective layer, calming any residual tightness or discomfort. For faster healing, pick a gentle lotion with soothing ingredients like aloe vera or chamomile. They reduce redness and promote skin repair.

    Regularly moisturizing after ink removal is especially important if you have sensitive or dry skin, as it helps prevent cracking and keeps your skin healthy. By giving your skin this hydration boost, you’ll feel more comfortable and support its recovery after the cleaning process.

    When to Call a Dermatologist for Help

    If your skin starts to feel irritated—like getting red, swollen, or painful—after you try to remove ink, it’s a good idea to call a dermatologist. Don’t wait too long if the ink stain just won’t come off, even after you’ve cleaned it several times. And if you see any signs of infection, that’s another clear reason to get professional help. A dermatologist can offer safe and effective treatments, especially for ink that’s stubborn or has soaked in deeply.

    Signs Of Skin Irritation

    How do you know when stamp ink removal has gone too far? Watch for signs of skin irritation, especially if you experience an allergic reaction. You should pay attention to:

    1. Redness, swelling, itching, burning, or blistering at the treated area.
    2. Irritation that lasts more than 24-48 hours or worsens despite care.
    3. Severe pain, spreading rash, or signs of infection.
    4. Increased inflammation if you have pre-existing conditions like eczema or psoriasis.

    If you notice any of these, stop all removal methods immediately and consider consulting a dermatologist. Early intervention can prevent complications and ensure your skin heals properly. Don’t ignore persistent discomfort or unusual symptoms. Your skin’s health matters.

    Persistent Ink Stains

    When persistent ink stains refuse to fade despite your best removal efforts, it’s important to contemplate professional help. If the ink remains after several days and multiple home treatments, or if you notice an ink reaction causing irritation, a dermatologist’s advice can be vital.

    Those with sensitive or damaged skin conditions like eczema or psoriasis should be especially cautious. Watch for signs of infection such as redness, swelling, pain, or pus around the stained area. These symptoms require immediate medical attention.

    Furthermore, if you experience allergic reactions like severe itching, blistering, or swelling linked to the ink, don’t hesitate to seek professional care. For stubborn or deeply embedded stains that resist standard methods, a dermatologist can guide you on the safest and most effective next steps.

    Professional Treatment Options

    Although many ink stains come off with home remedies, you should reach out to a dermatologist if the marks won’t budge or your skin reacts badly. A Dermatologist Consultation can provide professional treatment options that are safer and more effective.

    Consider seeing a dermatologist if ink stains persist after trying multiple home treatments. Also, if your skin shows signs of irritation, burns, or allergic reactions from chemical exposure, it’s time to get professional help.

    If the ink has penetrated deeply or caused skin damage or infection, or if you’re unsure about the safety of your skin’s reaction to the ink or cleaning attempts, a dermatologist can guide you.

    They can recommend medicated scrubs or topical solvents that safely remove stubborn ink without harming your skin. Don’t hesitate to seek professional advice to protect your skin health.

    Frequently Asked Questions

    Can Stamp Ink Cause Allergic Reactions on Skin?

    Yes, stamp ink can cause allergic reactions on your skin. If you’re sensitive or have conditions like eczema, you’re more likely to experience redness, itching, or swelling after contact.

    You might not notice a reaction immediately, but repeated exposure can increase your risk. To protect yourself, you should perform a patch test before using new stamp inks extensively.

    If you notice any irritation, stop using the ink and wash the area promptly.

    Is It Safe to Use Nail Polish Remover on Skin Ink Stains?

    You can use nail polish remover on skin ink stains, but you should be cautious about safety concerns. It often contains acetone, which can irritate or dry out your skin, especially if you have sensitive skin.

    Always test a small area first and avoid prolonged use. Afterward, rinse thoroughly with soap and water to remove any residue. Taking these precautions helps protect your skin while effectively removing ink.

    How Long Does It Take for Stamp Ink to Naturally Fade?

    The fade duration for stamp ink on your skin usually takes several days to about a week. It depends on factors like the ink type, your skin, and how often you wash or exfoliate.

    Fresh stains may start fading within a few days, but heavily pigmented inks can stick around longer. To speed up the fade duration, keep cleaning and expose the area to sunlight, but remember it varies from person to person.

    Can Children Use Rubbing Alcohol for Ink Removal Safely?

    You wouldn’t let a child wander through a thorny forest without guidance, right? When it comes to using rubbing alcohol for ink removal, children’s safety must be your priority.

    Their sensitive skin reacts differently, so it’s best to avoid direct use or dilute it heavily with adult supervision. Instead, stick to gentle soap and water.

    Always check with a healthcare professional before trying stronger solutions on kids to keep them safe and irritation-free.

    What Are Natural Alternatives to Chemical Ink Removers?

    You can use herbal remedies like tea tree oil to break down ink stains gently. Baby oil also works well by softening your skin and dissolving ink.

    Lemon or orange juice offers a natural, mild acidic option to lift ink without harsh chemicals. These alternatives provide a safer, soothing way to remove stamp ink while protecting your skin. Just apply, gently scrub, and rinse for best results.

    Conclusion

    So, now that you’re practically a stamp ink removal guru, you can proudly flaunt your spotless hands like a magic trick, but less applause-worthy. Remember, rushing to scrub your skin with harsh chemicals is not the same as winning a battle. It’s just a fast track to dryness and irritation.

    If your skin rebels, don’t be a hero. Call a dermatologist. After all, your hands deserve a spa day, not a chemistry experiment gone wrong!

  • How to Get Ink Out of Khaki Pants Fast

    How to Get Ink Out of Khaki Pants Fast

    To get ink out of your khaki pants fast, blot the stain immediately with a clean cloth, don’t rub. Dab gently with rubbing alcohol or hand sanitizer and let it sit for a few minutes to break down the ink.

    Then pre-treat with liquid detergent before washing in warm water. Avoid heat until the stain’s gone to prevent setting.

    You can repeat treatments carefully, but if it won’t budge, professional help might be your best bet.

    There are smart steps to tackle ink stains effectively.

    Quick Steps to Remove Ink From Khaki Pants

    blot dab treat air dry

    If you catch an ink stain on your khaki pants, start by blotting it immediately with a clean cloth to soak up excess ink without spreading it. Next, dab the stain gently with a cotton swab soaked in alcohol, but test a hidden area first to make sure the fabric won’t get damaged.

    Blot ink stains immediately, then gently dab with alcohol tested on a hidden fabric area.

    Let the alcohol sit for about five minutes to break down the ink before rinsing the spot with cold water. After that, apply a stain remover or a small amount of liquid laundry detergent directly to the ink stain and gently rub it in.

    Finally, wash your khaki pants in the hottest water safe for the fabric. Avoid drying them right away. Air dry the pants first to check if the ink stain is gone. If any ink remains, repeat the process before using heat, as heat can set the stain permanently.

    These quick steps help you remove ink effectively from your khaki pants.

    How Prompt Treatment Prevents Ink Stains From Setting on Khakis

    Because ink stains start bonding with khaki fabric fibers almost immediately, treating them right away is essential to prevent permanent damage. When you notice ink on your khaki pants, prompt treatment is vital to prevent setting and make stain removal easier.

    The longer ink remains untreated, the more it seeps into the fabric, making it harder to remove. Immediate pretreatment with an alcohol-based solution like rubbing alcohol or hand sanitizer dissolves the ink quickly, stopping it from embedding deeper.

    Acting fast also means you can lift excess ink before it dries, reducing the stain’s intensity. By addressing ink stains on khaki pants promptly, you notably increase your chances of complete stain removal without harming the fabric.

    This quick response not only saves your pants but also keeps them looking clean and fresh. Don’t wait—tackle ink stains as soon as they happen to avoid permanent marks.

    How to Blot Ink Stains on Khakis Without Spreading Them

    gently blot to prevent spreading

    When you spot an ink stain on your khaki pants, gently blotting it with a clean, white cloth helps absorb excess ink without spreading it further. This step is vital to prevent the ink from settling deeper into the fabric.

    To blot effectively, place a paper towel or another clean cloth underneath the fabric to catch any ink that bleeds through. Dab the stain lightly from the outside toward the center to contain the ink and avoid spreading it.

    Use a gentle pressing motion instead of rubbing to absorb the ink without pushing it further into the fibers. Avoid applying too much pressure, as that can cause the ink stain to spread or set deeper in your khaki pants.

    Use Rubbing Alcohol to Remove Ink From Khaki Fabric

    Before you start using rubbing alcohol, try testing it on a hidden spot of your khaki pants first. This way, you can make sure it won’t damage the fabric.

    Next, dampen a cotton ball with the rubbing alcohol and gently blot the ink stain. It’s a good idea to put a paper towel underneath to catch any ink that comes off.

    After letting it sit for a few minutes, rinse the area with cold water. If the stain is still there, just repeat the process. Once you’re happy with the results, go ahead and wash your pants as usual.

    Testing Fabric First

    How should you start removing ink from your khaki pants without risking damage? Begin with fabric testing to make sure rubbing alcohol won’t cause discoloration or harm the fabric. Here’s how to do it safely:

    1. Apply a small amount of rubbing alcohol to a cotton swab or cloth.
    2. Dab it gently on an inconspicuous area of the pants.
    3. Wait a few minutes to check for any colorfastness issues or texture changes.

    If the fabric shows no adverse reaction, you can confidently move on to ink stain removal. Testing first protects your khakis from unintended damage and ensures the rubbing alcohol will work effectively. Taking this precaution helps keep your pants looking great while tackling stubborn ink stains.

    Applying Rubbing Alcohol

    Once you’ve confirmed that rubbing alcohol won’t damage your khaki pants, you can move on to treating the ink stain directly. Dampen a clean cloth or cotton ball with rubbing alcohol and gently dab it onto the ink stain, holding the fabric taut over a disposable surface to prevent spreading.

    Let the rubbing alcohol sit for about 5 minutes to loosen the ink particles. As the ink begins to break down, use a fresh cloth to blot and lift it from the fabric.

    Repeat dabbing and blotting as needed to effectively treat ink on your khaki pants. This method targets the stain without damaging the fabric, helping you remove ink quickly and efficiently before rinsing and washing.

    Blotting And Rinsing

    Where should you start when blotting ink from your khaki pants? Begin by dampening a clean white cloth with rubbing alcohol and gently blot the ink stain on the fabric. Avoid rubbing to prevent spreading.

    To effectively remove the ink stain, follow these steps:

    1. Place a paper towel or clean cloth underneath the khaki fabric to absorb excess ink and protect other areas.
    2. Use a cotton swab dipped in rubbing alcohol to target small or stubborn spots precisely.
    3. Rinse the treated area with cold water immediately after blotting to dilute and lift the ink from the fabric fibers.

    Repeat the blotting and rinsing process as needed until the ink is fully lifted before washing your pants.

    Use Hand Sanitizer or Hair Spray to Remove Ink

    If you spot an ink stain on your khaki pants, applying an alcohol-based hand sanitizer or hair spray can quickly break down the ink. Start by generously applying hand sanitizer directly onto the ink stain. Let it sit for 5-10 minutes to dissolve the ink.

    Then, gently blot the area with a white cloth or paper towel. Avoid rubbing to prevent spreading the ink deeper into the fabric. After blotting, rinse the treated fabric with cold water to wash away the sanitizer and loosened ink particles.

    Finally, launder your pants in the hottest water safe for the fabric and air dry to check if the stain is gone.

    Step Action
    Apply Use hand sanitizer on the ink stain
    Wait Let it sit for 5-10 minutes
    Blot Gently blot with a white cloth
    Rinse and Launder Rinse with cold water, then wash

    This method efficiently helps remove ink without damaging your khaki fabric.

    Pre-Treat Ink Stains With Laundry Detergent

    apply detergent rub gently

    Start by picking a liquid laundry detergent that’s good at fighting stains. Then, put a small amount right on the ink stain and gently rub it in with your fingers or a soft toothbrush. After that, let the detergent sit for a few minutes so it can break down the ink before you wash it.

    Detergent Application Techniques

    Although ink stains can be tough to remove, applying liquid laundry detergent directly onto the affected area can make a big difference. To effectively pre-treat your khaki pants, follow these detergent application techniques:

    1. Apply a small amount of liquid laundry detergent to the stain, ensuring full coverage for better results.
    2. Gently rub the detergent into the fabric with your fingers or a soft-bristled toothbrush to break down ink particles.
    3. Let the detergent soak on the stain for at least 5 minutes to penetrate and loosen the ink before washing.

    If the stain persists, don’t hesitate to repeat the process. This careful pre-treatment maximizes ink removal and improves your chances of restoring your khaki pants to their original state.

    Optimal Detergent Selection

    What detergent works best for tackling ink stains on your khaki pants? Choose a liquid laundry detergent with stain-fighting enzymes, like Tide Ultra Stain Release, for effective pre-treatment. Apply the detergent directly to the ink stain and gently rub it in with your fingers or a soft toothbrush to break down the ink.

    Let it sit for at least 5 minutes to maximize stain loosening before tossing the pants into the wash cycle. Use a detergent formulated for cold water if your fabric care label recommends it, as the right wash temperature prevents setting the ink stain further.

    If the stain persists after washing, don’t hesitate to reapply detergent and repeat the pre-treatment. This guarantees the stain is thoroughly tackled without damaging your khaki pants.

    Best Washing Techniques for Khaki Pants With Ink Stains

    When you spot ink on your khaki pants, acting quickly and washing them in the hottest water safe for the fabric can make a big difference in removing the stain. To get the best results, follow these steps:

    1. Pre-treat the ink stains by applying rubbing alcohol or hand sanitizer directly to the affected areas. Let it sit for at least 5 minutes to break down the ink.
    2. Use a heavy-duty laundry detergent designed for stain removal, like Tide Ultra Stain Release. Set your machine to a prolonged wash cycle with the hottest water safe for your khakis.
    3. After washing, always air dry your pants. Avoid using heat until you’re sure the stain is gone since heat can set ink permanently.

    If the stain persists, repeat the pre-treat and wash cycle before drying. This method maximizes your chances of fully removing ink stains without damaging your khaki pants.

    Why You Should Avoid Heat Until Ink Stains Are Gone

    You’ll want to avoid heat until the ink stain is completely gone because heat can actually set the stain for good. Instead, just let your khaki pants air dry so you can keep an eye on how the stain is doing. Make sure to repeat your cleaning treatments a few times before you even think about using any heat—this way, you’re sure the ink lifts fully.

    Heat Sets Ink Permanently

    Although it might be tempting to speed up drying with a dryer or iron, applying heat before removing ink stains will only make the problem worse. Heat sets ink permanently by causing its molecules to bond tightly with the fabric fibers, making the stain nearly impossible to remove.

    Here’s why you should avoid heat until the stain is gone:

    1. Heat causes ink to set permanently, locking the stain into the fabric.
    2. Once set, drying with heat reduces the effectiveness of stain treatments.
    3. Stains exposed to heat often require professional cleaning, which is costly and time-consuming.

    To protect your khaki pants, always treat ink stains thoroughly and avoid any heat-based drying until you’re sure the stain is fully removed. This careful approach gives you the best chance of eliminating ink without permanent damage.

    Air Dry For Monitoring

    Avoiding heat is only the first step in protecting your khaki pants from permanent ink stains. By air drying your pants, you give yourself the chance to carefully monitor the stains and check if the ink removal is complete.

    Using the heat setting too soon can set any leftover ink, making stains impossible to remove later. Air drying keeps delicate fabrics safe from damage and color fading caused by high temperatures.

    This method also lets you decide if additional treatment is needed before any heat exposure. Remember, patience during air drying ensures you don’t lock in stains permanently.

    Repeat Treatment Before Drying

    Because heat can permanently set ink stains, you should repeat treatment steps before drying your khaki pants. This approach guarantees effective ink stain removal and helps prevent heat fixation, which can make stains impossible to remove later. After each treatment, always allow fabric to air dry so you can carefully assess stain progress.

    Here’s why you need to repeat treatments before drying:

    1. Heat from dryers causes ink particles to bond tightly with fabric fibers, reducing the success of further cleaning.
    2. Air drying lets you see if the stain is gone or needs more attention.
    3. Multiple treatments before drying protect the fabric and avoid aggressive cleaning later.

    Repeat Ink Treatment Safely on Khaki Fabric

    When you notice the ink stain hasn’t fully disappeared after the first attempt, you’ll want to repeat the treatment carefully to protect your khaki pants. Before you apply any ink treatment again, always test the solvent on a hidden area of the khaki fabric to guarantee it’s safe and won’t cause discoloration.

    Use a clean, white cloth or cotton swab soaked in rubbing alcohol to gently apply the solution to the stain without rubbing aggressively. After each application, wait at least 5 minutes before you inspect the fabric to see if the ink is lifting.

    You can repeat this process, but limit yourself to 2-3 times to avoid damaging the fibers or causing uneven fading. After the final treatment, rinse the area with cold water and air dry it.

    Inspect the stain carefully, and if it’s still visible, consider your next steps. But always prioritize gentle, safe methods to preserve your khaki fabric.

    When Should You Consider Professional Cleaning for Ink on Khakis?

    If an ink stain has dried for several days or stubbornly resists your home treatments, it’s time to consider professional cleaning. You want to avoid fabric discoloration or damage from aggressive DIY methods, especially with delicate fabrics or dry clean-only khakis. Consider professional cleaning when:

    1. The dried ink stain remains after multiple attempts with household stain removers.
    2. The ink is deeply embedded or covers a large area, requiring specialized solvents and techniques.
    3. Your khakis are made of delicate fabrics that risk damage from at-home treatments.

    Professionals have the expertise and tools to remove stubborn or old ink stains without harming the fabric. They use specialized solvents designed to break down ink while preserving khaki’s color and texture. When in doubt, choosing professional cleaning ensures your pants are treated safely and effectively, saving you time and frustration.

    Frequently Asked Questions

    Can Ink Stains Damage the Fabric Fibers of Khaki Pants?

    Yes, ink stains can damage the fabric fibers of your khaki pants. When ink penetrates deeply, it compromises fabric durability and causes fiber damage. This weakens textile resilience, leading to color fading and thinning.

    If you don’t treat stains quickly, the garment’s longevity decreases because repeated attempts to remove ink may worsen fiber damage. Protect your khakis by addressing stains promptly to maintain their strength and appearance.

    Are Certain Inks Easier to Remove From Khaki Fabric Than Others?

    Yes, you’ll find pen ink and temporary ink easier to remove from khaki fabric compared to permanent ink. Ballpoint ink can be tricky since its oil and dye components set deeper. Gel ink and marker stains often require stronger solvents because of their resin or pigment content. Acting quickly helps, especially with water-based inks, but permanent ink usually demands more effort to get out of your khaki pants.

    Is It Safe to Use Bleach on Khaki Pants With Ink Stains?

    Bleach safety is a big concern since 70% of fabric damage comes from improper use. You shouldn’t use bleach on khaki pants with ink stains because it risks fabric damage and uneven fading.

    Different ink types react differently, but bleach often makes stains permanent by weakening fibers. Instead, try homemade remedies like rubbing alcohol to prevent worsening the stain.

    Prioritize stain prevention and safer alternatives over bleach to keep your khakis looking fresh.

    How Long Can Ink Stains Remain Before They Become Impossible to Remove?

    Ink pen stains can start becoming impossible to remove after 48 hours, especially once drying time allows the stain to spread and penetrate fabric fibers deeply. The longer you wait, the deeper the stain becomes, making removal tough.

    Fabric color affects stain visibility. Dark khakis might hide stains better, but lighter ones show them more.

    Act quickly to prevent permanent damage and minimize stain spread for best results.

    Can Homemade Remedies Be as Effective as Commercial Stain Removers for Ink?

    You can try DIY solutions and natural remedies using household ingredients, but homemade solutions usually aren’t as effective as commercial stain removers for ink. While alternative methods and eco friendly techniques offer a gentle approach, they often need multiple treatments and take longer.

    If you want fast, reliable results, commercial products are better. Still, homemade solutions can work well on fresh stains and are a great eco friendly option when you’re in a pinch.

    Conclusion

    Getting ink out of your khaki pants fast is like catching a spark before it turns into a wildfire. Act quickly! By blotting carefully, using rubbing alcohol or hand sanitizer, and avoiding heat, you can save your fabric from permanent stains.

    Don’t hesitate to repeat treatments gently, but know when it’s time to call in professional help. With these steps, your khakis will look fresh and clean in no time!