Category: Ink

  • How to Check Printer Ink in 7 Simple Steps

    How to Check Printer Ink in 7 Simple Steps

    First, turn on your printer and make sure it’s properly connected to your device via USB or Wi-Fi.

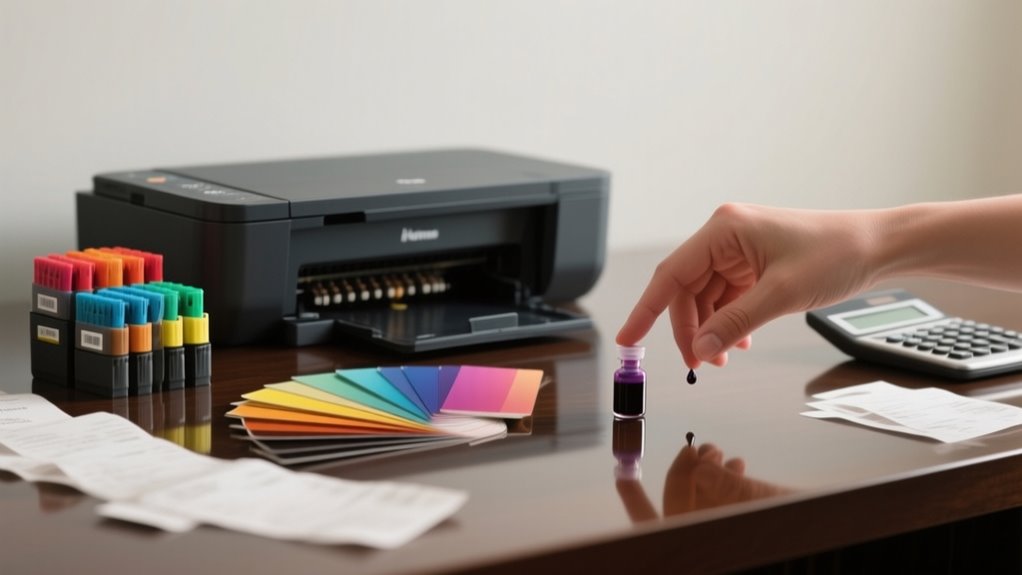
    Next, open the printer software or app, like HP Smart, to view real-time ink levels.

    You can also check ink status directly on the printer’s control panel by accessing “Ink Levels” or “Status.”

    Printing a test page or report helps verify ink amounts.

    Learn to interpret ink symbols and troubleshoot incorrect readings to manage cartridges effectively.

    Find out how easy it is to stay ahead of ink needs and avoid interruptions.

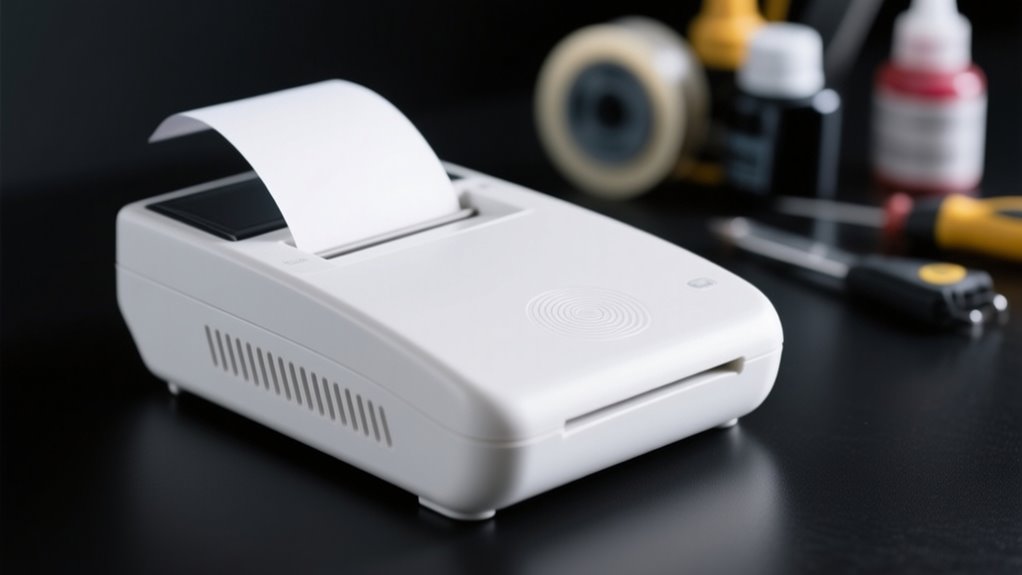
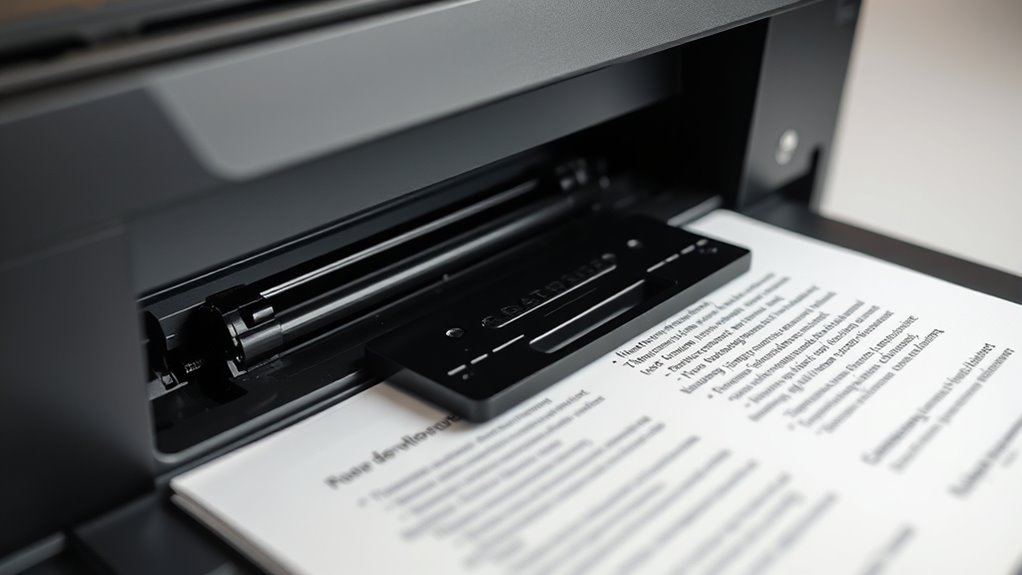
    Start By Turning On Your Printer and Connecting It

    turn on and connect printer

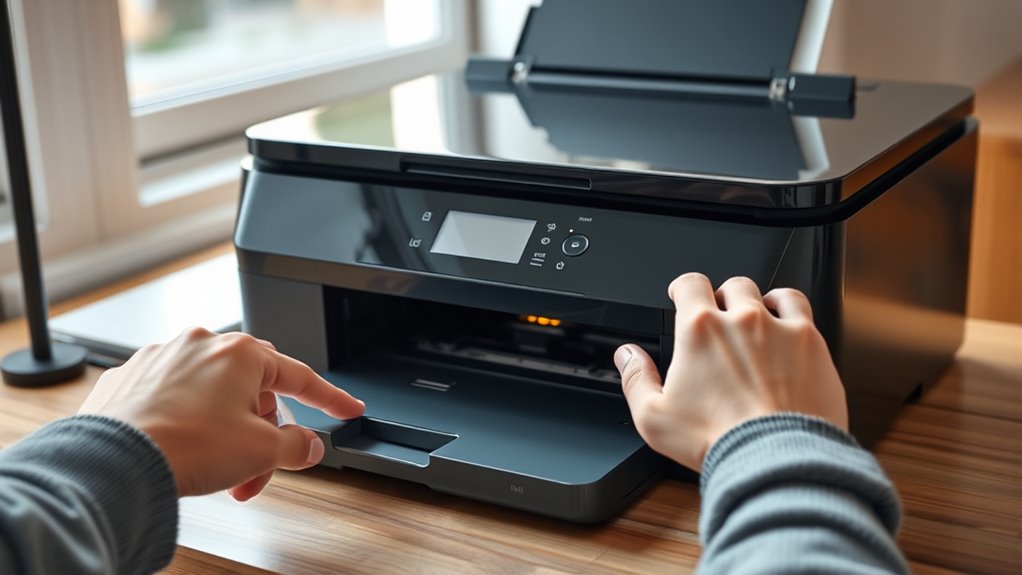
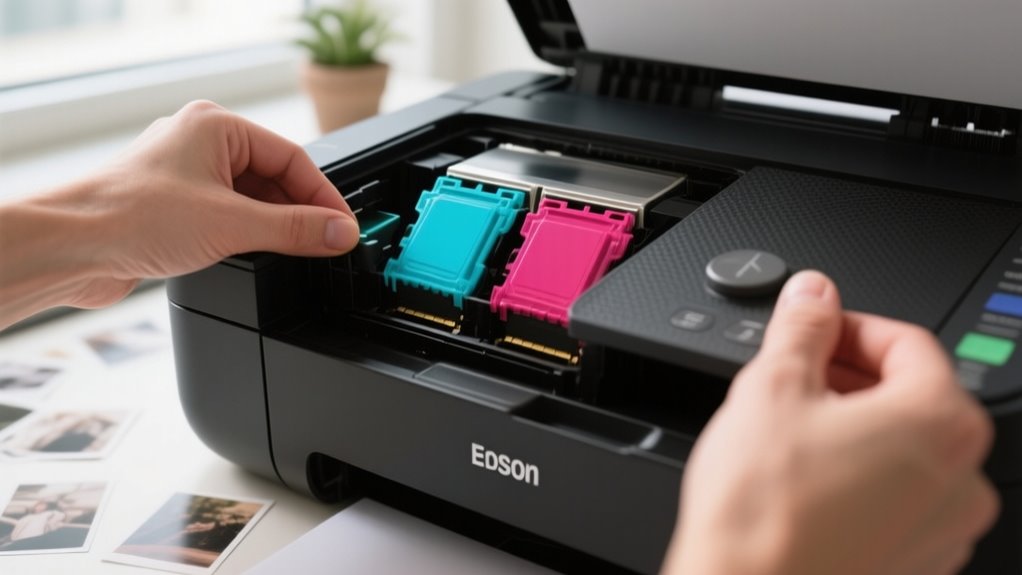
    Before you can check your printer ink, make sure you turn on your printer and connect it properly. First, plug your printer into a power source and press the power button to turn on the device.

    Turn on your printer and connect it properly before checking ink levels for accurate results.

    Watch the display screen as the printer powers up and completes its initial startup, including any automatic calibration or alignment. You want to see a ready status or home screen on the display before moving forward.

    Next, connect your printer to your computer or network. This connection can be through USB, Wi-Fi, or Ethernet, depending on your setup.

    If you opt for a wireless connection, double-check that your printer is connected to the correct Wi-Fi network to avoid any communication issues. Once your printer is turned on and connected, you’re set to proceed with checking ink levels accurately.

    Ensuring these steps helps prevent errors and guarantees your printer is ready for use.

    Open Printer Software or App to View Ink Levels

    Once your printer is connected, open the printer software or app on your computer or mobile device to check ink levels. This software provides a direct link to your printer, giving you detailed and real-time information about your ink status. Most printer apps have a dedicated section, often labeled “Supply” or “Status,” where you can view accurate ink levels for each cartridge.

    Opening the software is crucial because it usually offers more precise readings than just looking at the printer itself. Popular apps like HP Smart or Epson iPrint not only show ink levels but also alert you when cartridges are running low or need replacement.

    Before opening the software, make sure your printer is properly connected to guarantee the data you see is up-to-date. This method makes managing your printer’s ink much easier and helps you avoid unexpected print interruptions.

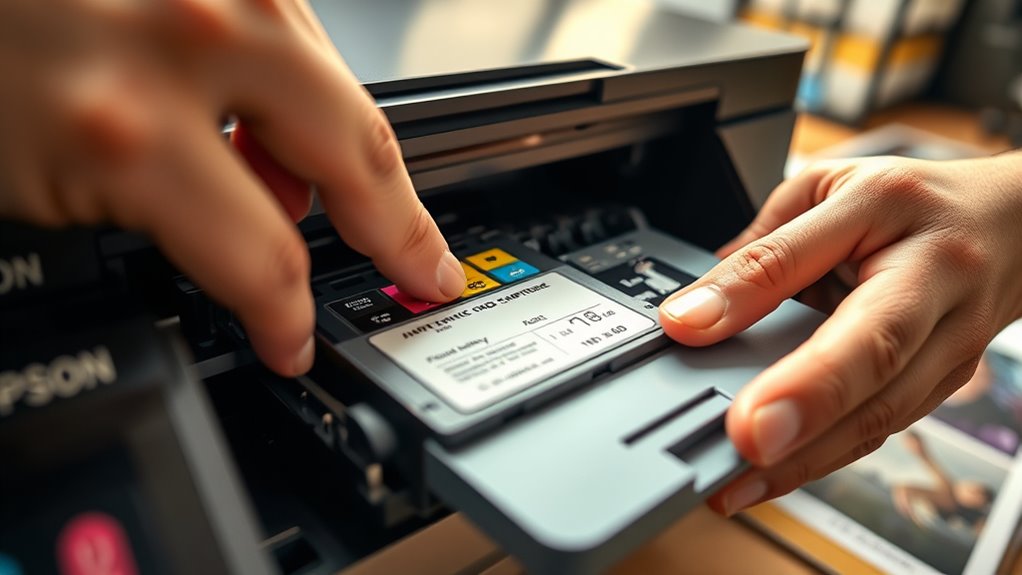
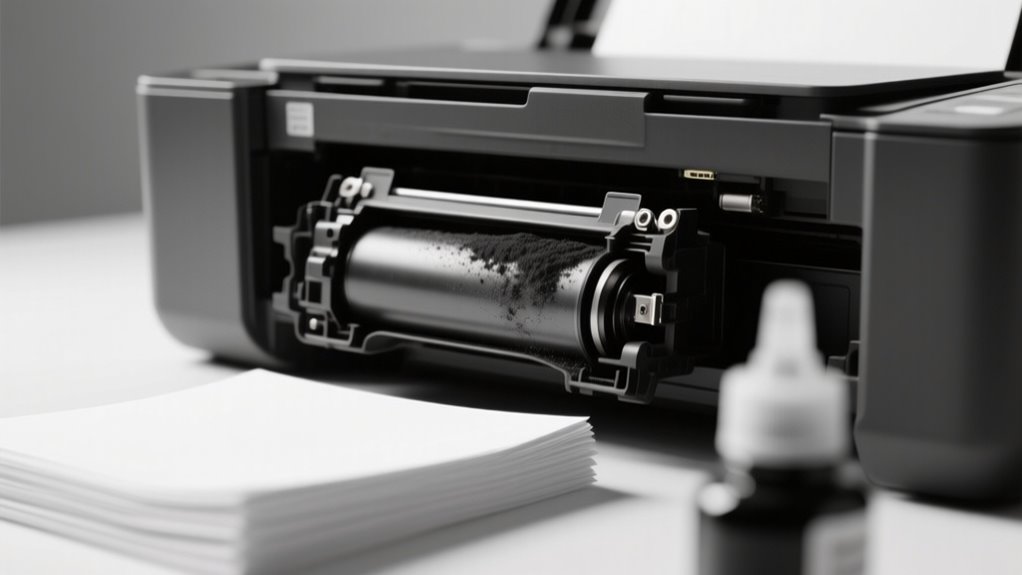
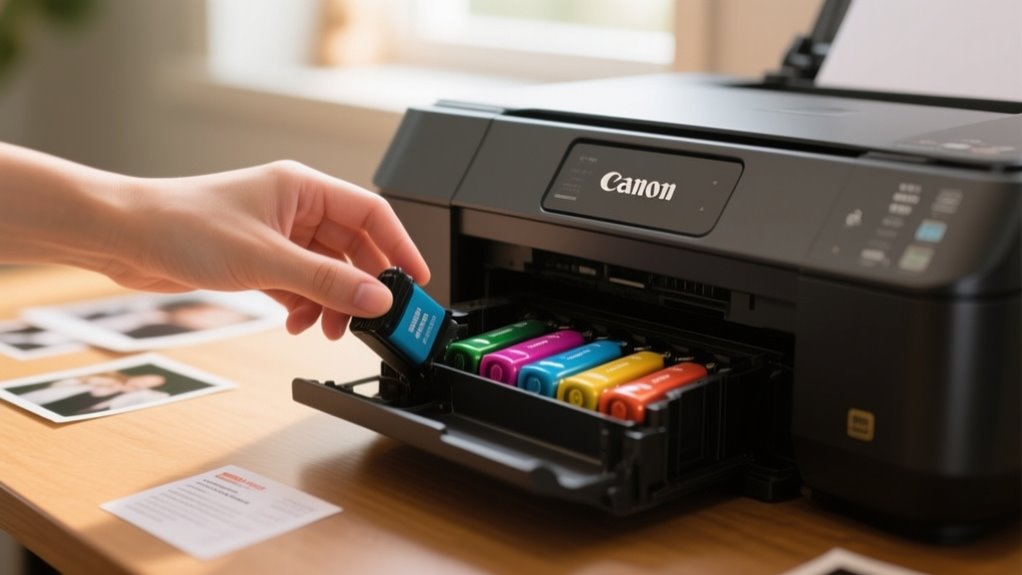
    Check Ink Levels Using Your Printer’s Control Panel

    check ink levels menu

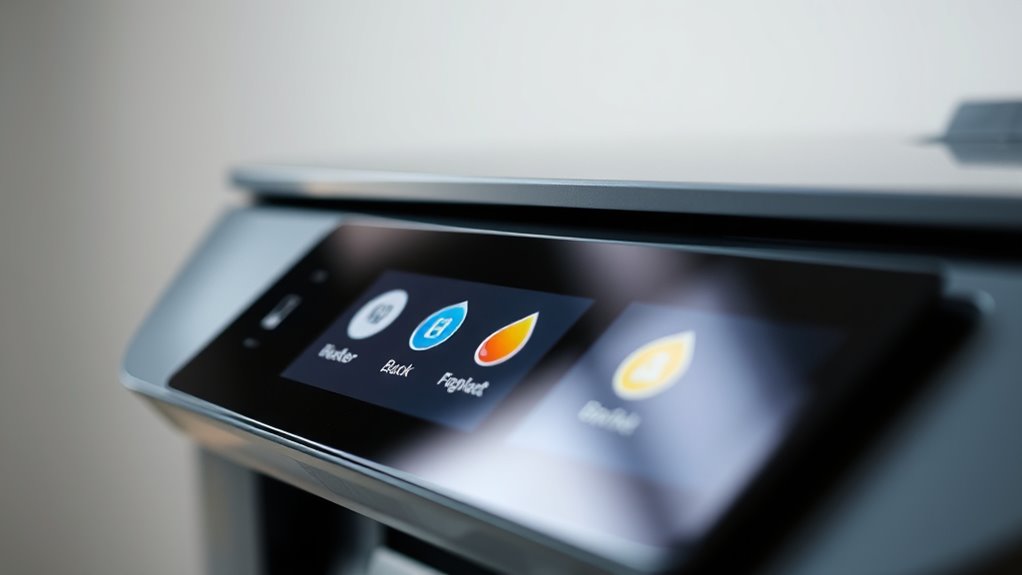
    You can easily check your ink levels right from your printer’s control panel. Just explore the menus—usually, you’ll find the option under something like “Status” or “Ink Levels.”

    Look out for icons or bars that show how much ink is left in each cartridge. Keep in mind, though, that the exact steps and display might vary depending on your printer model.

    Accessing Control Panel Menus

    Although many printers offer multiple ways to check ink levels, accessing the control panel menu directly on your device provides a quick and reliable method. Start by turning on your printer and locating the control panel display.

    Use the menu options to navigate to sections like ‘Maintenance,’ ‘Tools,’ or directly to ‘Ink Status’ or ‘Supply Status.’ If your printer has a color LCD screen, use the arrow buttons to scroll through detailed ink levels for each cartridge.

    This direct access helps you monitor ink amounts without needing a computer. If you’re unsure where to find these menu options, consult your printer’s user manual for exact steps. By using the control panel, you’ll get real-time updates on your ink levels easily and efficiently.

    Interpreting Ink Level Icons

    When your printer’s control panel shows ink level icons, understanding what they represent helps you manage cartridge status effectively. These icons often appear as droplets, bars, or question marks.

    A full droplet or bar means your cartridge is sufficiently filled, while a partially filled icon signals that ink levels are running low and should be monitored. If you see blinking or empty icons, that’s a clear low ink warning, indicating it’s time to replace the cartridge soon.

    Some printers even display specific error messages or symbols on the printer control panel to alert you directly about low ink. By recognizing these ink level icons promptly, you ensure your printer runs smoothly and avoid unexpected interruptions caused by empty cartridges.

    Since printer control panels vary by brand and model, checking ink levels directly on your device means exploring specific menus. Many printers, like Brother and Canon, have built-in control panels that let you view ink status right on their screens.

    To find this info, navigate to the maintenance or ink status menu. The name and location depend on your printer’s model-specific setup. Some printers show simple ink status icons or bars, indicating whether cartridges are full, low, or empty.

    Others provide detailed ink level readings after pressing certain buttons or menu options. If you’re unsure how to access these options on your control panel, check your printer’s user manual. Knowing these model-specific steps helps you monitor ink efficiently without guessing.
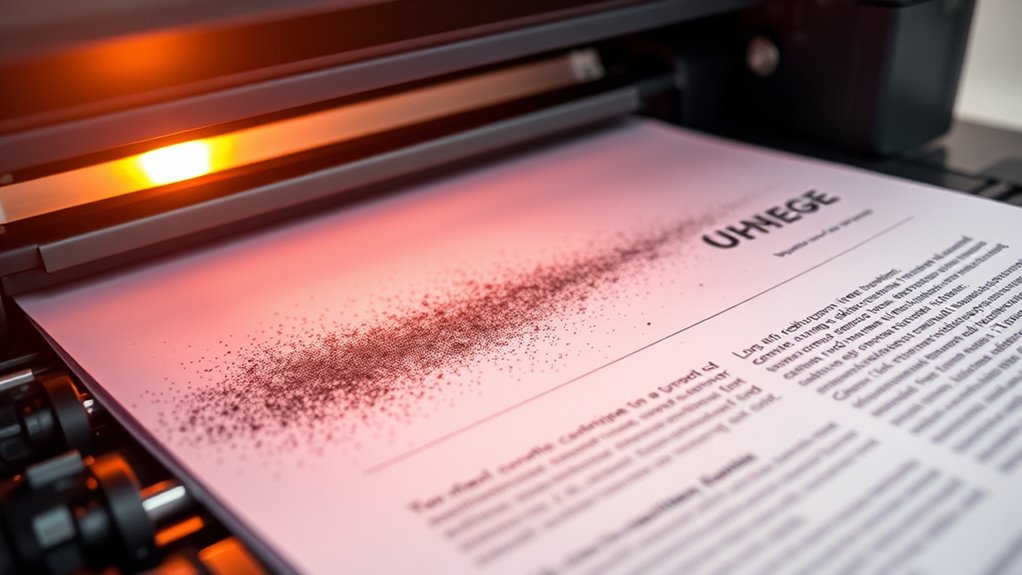
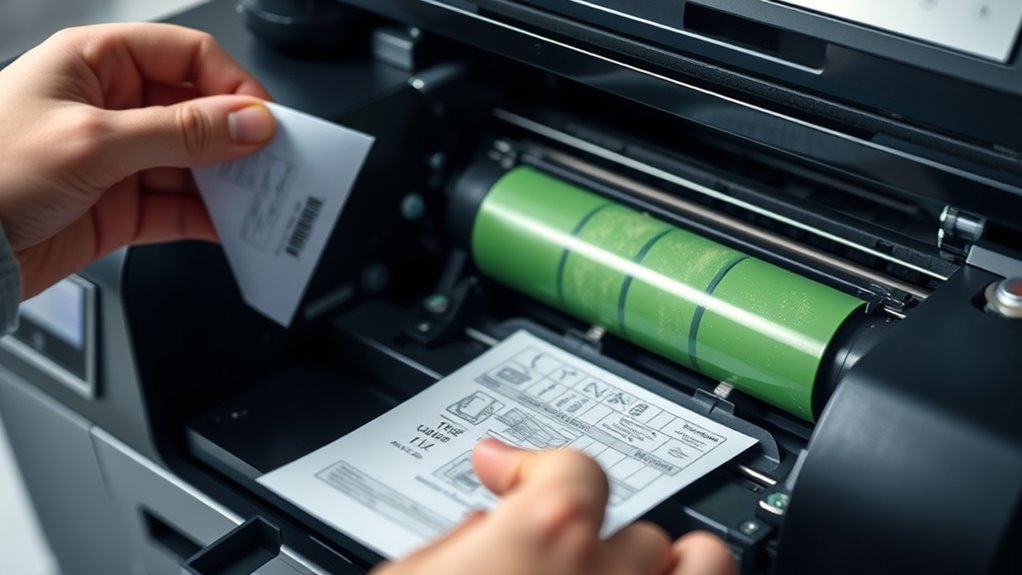
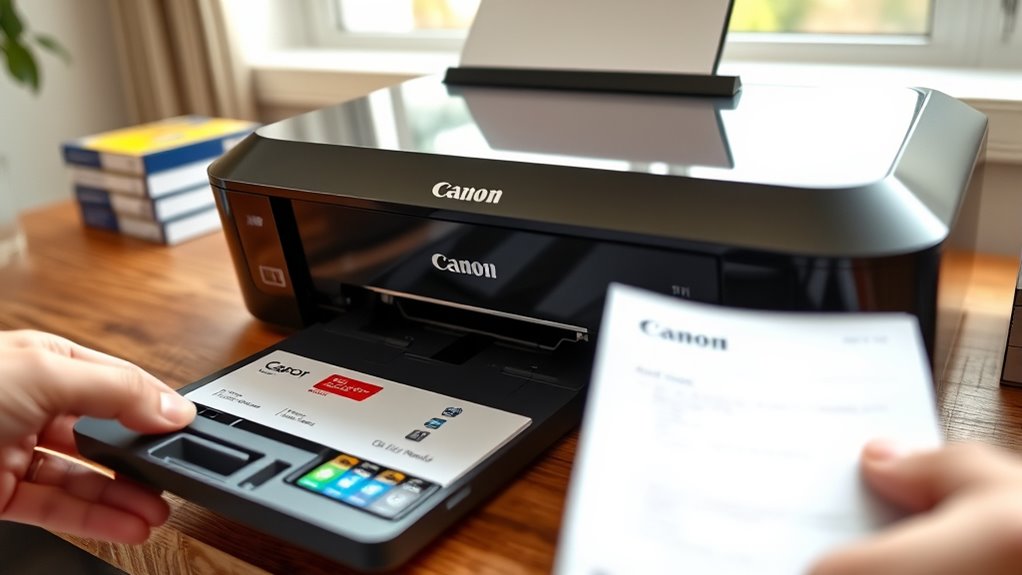
    check ink levels regularly

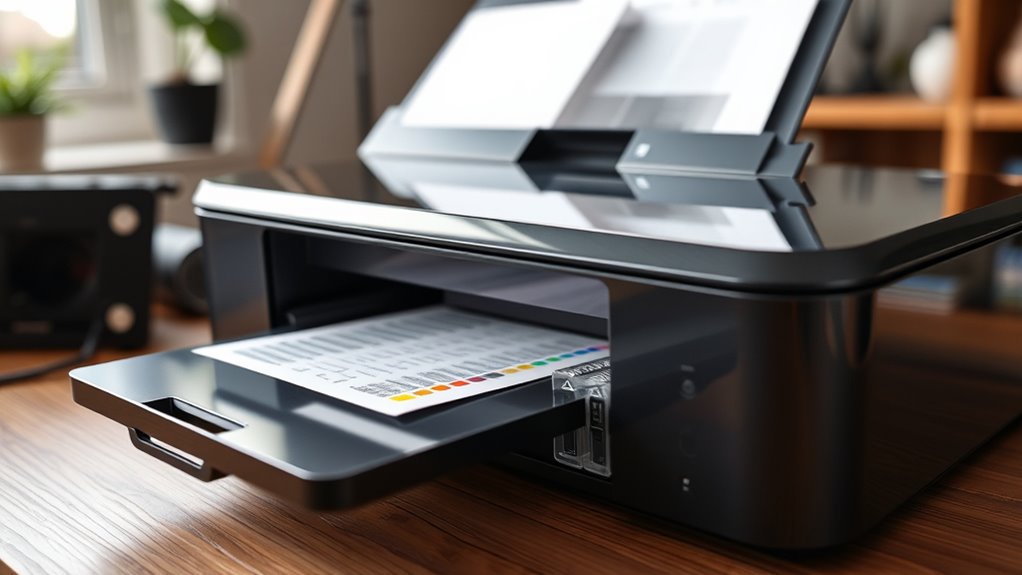
    You can easily check your ink levels by going into your printer’s menu. Just look for an option to print a test page or a status report. Usually, these options are found under sections labeled “Reports” or “Print Quality Report.”

    Once you print it out, take a moment to review the report. It will clearly show your current ink status, so you’ll know exactly when it’s time to replace your cartridges.

    Access Printer Menu

    Although accessing your printer’s menu might seem intimidating at first, it’s the quickest way to check your ink levels by printing a test page or status report. You’ll find the printer menu usually on the control panel, which may have physical buttons or a touchscreen.

    Navigate through the options to locate the right setting, often under “Reports,” “Tools,” or “Maintenance.” Here’s how to proceed:

    Use the control panel to open the printer menu. Select the option labeled “Print Test Page” or a similar status report. Print the report to see detailed ink levels for each cartridge.

    This method gives you a clear, direct look at your ink status without guessing, so you can plan replacements before running out.

    Locate Status Report Option

    When you want to check your ink levels quickly, locating the status report option on your printer’s menu is key. Start by accessing your printer’s control panel or settings menu. Look for options like “Reports,” “Print Status,” or “Test Page.”

    Selecting any of these will print a status report that reveals your current ink levels, often showing remaining percentages or simple visual indicators. This print status page gives you a clear snapshot of your ink cartridges without digging deeper into settings.

    Keep in mind, the exact names and steps might differ depending on your printer’s brand and model, so consult your user manual if needed. Regularly printing a status report helps you stay ahead and avoid unexpected cartridge replacements.

    Interpret Ink Level Indicators

    Since printing a test page or status report reveals detailed ink levels for each cartridge, it’s an essential step to interpret your printer’s ink status accurately. When you print test page results, you’ll see visual ink level indicators like color swatches or bar graphs. These help you quickly assess how much ink remains and whether cartridges need replacing soon.

    To interpret ink level indicators effectively, look for low or empty cartridge warnings shown as symbols or empty bars. Compare color swatches to check if any specific ink color is running low. Use the status report regularly to monitor ink levels and avoid unexpected print quality issues.

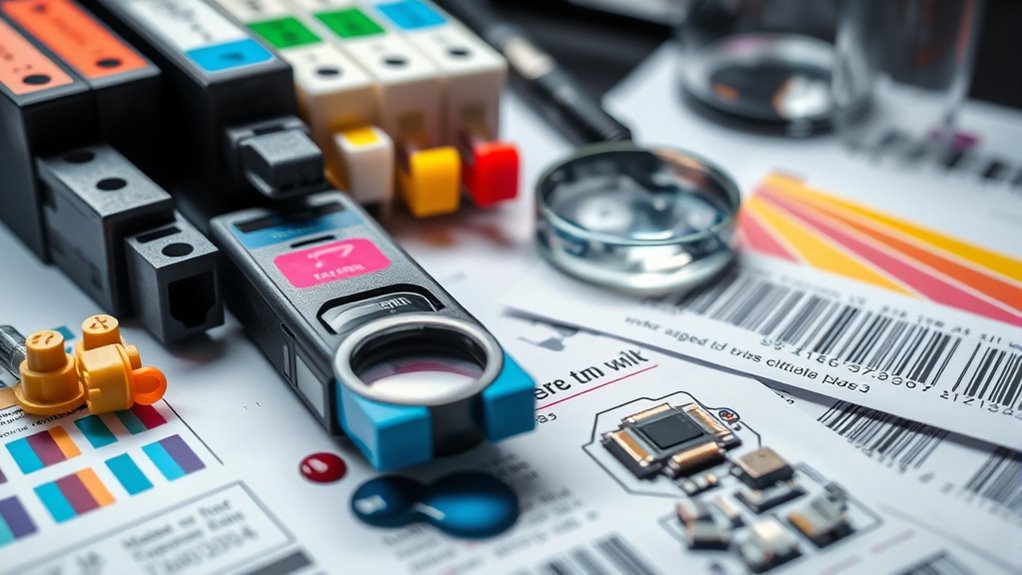
    Decode Ink Level Symbols to Understand What They Mean

    If you want to keep your printer running smoothly, you need to understand the ink level symbols it displays. These ink symbols give you a quick view of your cartridge status and help you avoid unexpected printing stops.

    For example, a solid droplet means your ink levels are full, while a partially filled droplet indicates low ink. If the droplet blinks or looks empty, you’re almost out of ink. Sometimes, you’ll see a question mark next to the ink symbol, which means the printer can’t detect the cartridge status.

    Toner cartridges usually show bars instead of droplets, with full, half, or empty bars representing toner levels.

    Here’s a simple guide:

    Symbol Meaning Cartridge Status
    Solid droplet Ink full Ready to print
    Partially filled Low ink Replace soon
    Blinking/Empty Ink very low or empty Replace immediately

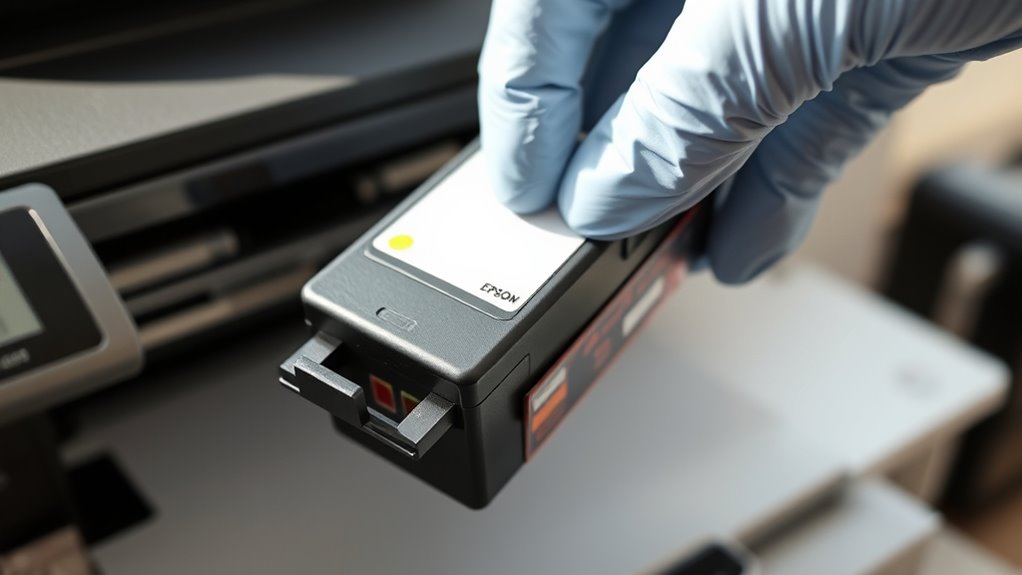
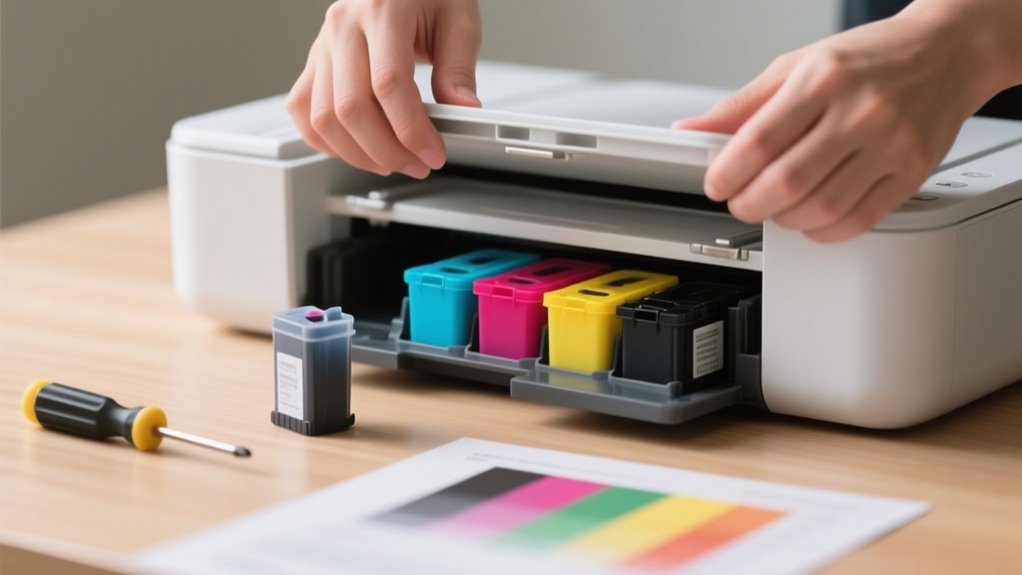
    Fix Missing or Incorrect Ink Level Readings

    Although your printer should display accurate ink levels, sometimes the readings go missing or show incorrect information. When this happens, don’t panic. There are a few straightforward fixes to get your printer back on track.

    Printers may occasionally show missing or incorrect ink levels, but simple fixes can quickly resolve these issues.

    First, verify your printer driver and firmware are up to date, as a firmware update often resolves bugs that cause false ink readings. Next, try to reset ink sensors according to your printer’s manual. This recalibration can fix glitches causing inaccurate or missing data.

    Finally, use the printer’s built-in display or manufacturer-specific software to verify ink levels directly, bypassing faulty digital reports.

    Here’s what you should do to fix incorrect ink level readings:

    • Update your printer’s firmware and drivers regularly.
    • Reset ink sensors or recalibrate them as instructed.
    • Restart your printer and run cleaning cycles if nozzles are clogged.

    These steps will help you maintain reliable ink levels and avoid surprises while printing.

    Track and Manage Ink Levels to Avoid Running Out

    To avoid running out of ink during essential print jobs, you should regularly check your printer’s ink levels. Most printers let you monitor ink levels through their control panels, dedicated software, or mobile apps, making it easy to stay updated.

    By setting up low ink notifications, you’ll get alerts before your ink cartridge runs dry, giving you time to replace it promptly. Using manufacturer-specific utilities or your device’s settings provides detailed info on each cartridge’s status, helping you track usage accurately.

    Keep spare ink cartridges handy and note how quickly you use them to manage your ink supply effectively. This proactive approach ensures you won’t face unexpected interruptions and keeps your printing smooth.

    Make it a habit to check ink levels frequently and respond to alerts, so you avoid the frustration of a mid-job ink outage.

    Frequently Asked Questions

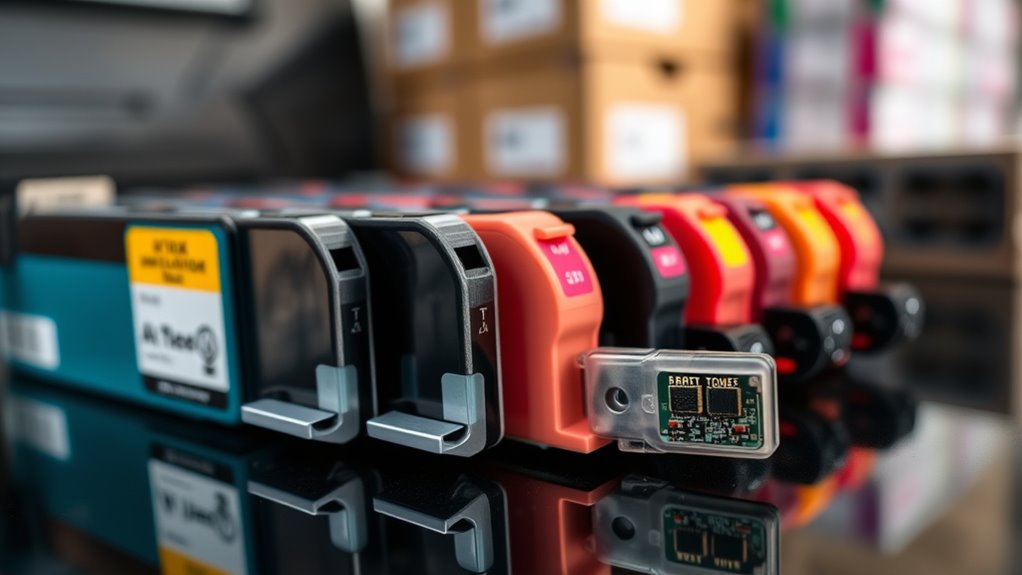
    Can Third-Party Ink Cartridges Affect Ink Level Readings?

    Yes, third-party ink cartridges can affect ink level readings because of ink cartridge compatibility issues. If the cartridge doesn’t match your printer’s sensor calibration, the refill indicator accuracy may suffer.

    Your printer might misread ink levels or show false warnings. To avoid this, you should make sure you buy cartridges designed for your specific printer model, so sensor calibration remains reliable and refill indicators stay accurate.

    How Often Should I Check My Printer Ink Levels?

    You should check your printer ink levels at least once a month to stay on top of your ink cartridge lifespan. If you print a lot, consider weekly checks as part of your printer maintenance checklist. This helps you catch low ink early and avoid surprises.

    Use refill frequency tips like noting how many pages you print before refilling. Staying consistent keeps your printer running smoothly and prints looking sharp.

    Do Ink Levels Display Differently on Mac vs. Windows?

    Yes, ink levels display differently on Mac versus Windows. You’ll find Windows offers detailed ink level accuracy, showing precise cartridge design data and clear display notifications within printer properties.

    Meanwhile, Mac provides simpler, icon-based alerts often through manufacturer apps, which may affect ink level accuracy. You’ll notice Windows emphasizes detailed monitoring, while Mac focuses on streamlined alerts, both shaped by cartridge design and software support unique to each system.

    Can I Check Ink Levels on a Wireless Printer Remotely?

    Yes, you can check ink levels on a wireless printer remotely by using wireless printer apps like HP Smart or Epson iPrint. These apps offer remote monitoring and often include ink level alerts, so you’ll know when it’s time to replace cartridges without being near the printer.

    Just connect your device to the printer’s network, and you’ll get real-time updates right on your smartphone or tablet for hassle-free ink management.

    What Causes Ink Level Sensors to Malfunction?

    Ink level sensors can act like a broken compass, leading you astray due to sensor calibration issues or ink sensor failure. Dried ink buildup, wiring damage, or misaligned cartridges often cause faulty readings.

    Firmware updates sometimes fix these glitches, but if your printer’s software is outdated, it might worsen the problem. Environmental factors like dust and humidity can wear down sensors, so keeping your printer clean and updated helps maintain accurate ink level detection.

    Conclusion

    Now that you know how to check your printer ink in just seven simple steps, you can avoid unexpected printing interruptions. Did you know that nearly 40% of people run out of ink right before an important print job?

    By regularly monitoring your ink levels using your printer’s software or control panel, you’ll stay ahead of the game. Keep your printer ready, and you’ll save time and frustration in the long run!

  • Change Epson Printer Ink in 7 Easy Steps

    Change Epson Printer Ink in 7 Easy Steps

    To change your Epson printer ink in seven easy steps, first identify the correct cartridge model by checking your printer or existing cartridges. Power on the printer and open the cartridge area.

    Carefully remove old cartridges, then gently shake and insert new ones until they click. Close everything securely and wait as the printer primes ink.

    If you use EcoTank, refill tanks up to the fill line and seal caps tightly.

    Keep following for helpful tips on troubleshooting and maintenance.

    Identify the Correct Epson Ink Cartridge Model

    check printer model number

    How do you guarantee you pick the right Epson ink cartridge? Start by checking your printer model number. This key detail guides you to compatible ink.

    Begin by identifying your printer model number to ensure you select the correct Epson ink cartridge.

    For example, if you own a WF-2750, you’ll need Epson 220XL cartridges. Next, consult your printer manual or visit Epson’s official website to find a list of Epson ink cartridges designed specifically for your printer model.

    You can also examine the labels on your existing cartridges. The model number is usually printed on the side or top. Look for color-coded or model-specific labels like Epson 252 or 252XL to avoid confusion.

    Finally, confirm the ink type, whether pigment or dye-based, to ensure the ink matches your printer’s specifications and printing needs. By following these steps, you’ll confidently select compatible ink that keeps your printer running smoothly without errors or poor print quality.

    Power On and Access Your Epson Printer’s Cartridge Area

    Before you open the cartridge area, make sure your Epson printer is powered on to prevent any damage or errors. Power on your printer and wait for the print head to stop moving or settle in the cartridge replacement position. This step is essential to safely access the cartridge area without causing mechanical issues.

    Next, lift the scanner bed or scanner lid, depending on your printer model, to access the internal cartridge compartment. Be gentle when opening the cartridge cover and avoid touching any internal components such as the printhead or contacts.

    Confirm that your printer’s LCD screen or indicator lights display a low ink warning or cartridge alert before proceeding. This guarantees you’re replacing ink at the right time. By following these steps, you’ll easily power on and access your Epson printer’s cartridge area, setting yourself up for a smooth ink cartridge replacement.

    Safely Remove Old Epson Ink Cartridges

    remove cartridges carefully upright

    Once your Epson printer is powered on and the print head has stopped moving, you can safely remove the old ink cartridges by squeezing the tab and lifting them straight out. Be sure to avoid touching the ink nozzles or contacts to prevent any damage.

    Handle the old cartridges carefully, keeping them upright to avoid ink leaks. If needed, place them on a clean surface or use a lint-free cloth or gloves to protect your hands and surroundings from ink stains.

    Before removal, make sure the print head is in the correct position, either by waiting for it to stop moving or manually moving it to the cartridge replacement area. This careful approach helps you remove the old ink cartridges smoothly without causing harm to your printer or making a mess.

    Following these steps guarantees your Epson printer is ready for the next phase of changing ink cartridges.

    Install New Epson Ink Cartridges Properly

    Before you install new Epson ink cartridges, give them a gentle shake to help the ink flow smoothly. It’s a simple step, but it makes a difference.

    Next, be sure to remove any protective tape carefully. You don’t want to damage the cartridge or leave any residue behind. Then, insert each cartridge firmly into its matching slot. You’ll usually hear a little click when it’s in place.

    Finally, close the cover securely. After that, follow the on-screen prompts on your printer to confirm the setup. That’s it—you’re all set!

    Preparing New Ink Cartridges

    To get your Epson printer ready for new ink, start by gently shaking the cartridge four to five times to guarantee the ink flows smoothly. When handling new ink cartridges, be careful to remove the protective tape without touching the gold contacts or nozzles, which could cause damage or poor performance.

    Properly preparing your cartridges is vital before installing them into the printer. Align each cartridge with its corresponding slot, matching the color or model number to avoid mistakes. Taking these careful steps ensures a smooth installation process and helps your printer recognize the new ink cartridges quickly.

    Installing Cartridges Securely

    Two key actions guarantee your Epson ink cartridges install securely: positioning the print head correctly and inserting each cartridge firmly until you hear a click. Before installing cartridges, make sure the printer is powered on and the print head is in place.

    When installing cartridges, follow these steps:

    1. Remove protective tape from the new cartridge without touching the gold contacts or nozzles.
    2. Insert the cartridge firmly into its slot until you hear a click, ensuring a secure fit.
    3. Close the cartridge cover carefully, confirming the cartridge is fully seated and locked.

    Confirming Proper Cartridge Setup

    After installing your Epson ink cartridges securely, you’ll want to confirm that everything is set up correctly to guarantee smooth printing. Turn on the printer and wait for it to finish initializing. Check the LCD screen for prompts confirming proper cartridge installation.

    Make sure each cartridge matches its color slot and that protective seals were removed without touching contacts. Close the cartridge cover gently, letting the printer recognize the new ink. Finally, verify ink levels on the LCD screen to avoid surprises during printing.

    Step Action Result
    1 Power on printer Initialization complete
    2 Insert cartridge correctly Click sound confirms secure
    3 Remove protective seals Avoids contact damage
    4 Close cartridge cover Printer recognizes ink
    5 Check LCD screen Confirm ink levels

    Prime and Verify Your New Epson Ink Cartridge

    Once you install your new Epson ink cartridge, the printer automatically starts priming the ink and moves the print head to the home position. This priming process usually takes a few minutes, preparing the ink for smooth printing.

    To guarantee everything’s set up correctly, here’s what you need to do:

    1. Verify the LCD screen shows confirmation messages like “Check” or “OK” before you close the scanner bed.
    2. Make sure the cartridge clicks securely into place; a loose cartridge can cause errors.
    3. Avoid touching the gold contact points on the cartridge, as this can prevent the printer from recognizing the new cartridge properly.

    Following these steps helps prime and verify your new cartridge effectively, preventing print errors and ensuring peak performance. Always pay attention to on-screen prompts to confirm your printer recognizes the cartridge before you start printing.

    Refill Ink Tanks in Epson EcoTank Printers

    shake pour secure check

    To refill your Epson EcoTank ink tanks, first give the ink bottles a good shake horizontally. This helps make sure the ink flows smoothly when you pour it.

    When you’re ready, slowly pour each color into its matching tank. Just be careful not to squeeze the bottle while filling—stop once you reach the marked line.

    After that, make sure to close the tank caps securely. It’s also a good idea to check for any leaks before you start printing again. Easy, right?

    EcoTank Ink Refill Steps

    When you need to refill the ink tanks in your Epson EcoTank printer, start by lifting the scanner bed and opening the ink tank cover to access the tanks. Follow these steps for a smooth ink refill:

    1. Remove the cap from the ink bottle and carefully pour ink into the matching color tank without squeezing the bottle.
    2. Fill each ink tank up to the designated fill line, then securely replace the bottle cap to avoid spills.
    3. Close the ink tank cover and wait for the printer to recognize the new ink levels before printing.

    Handling Ink Bottles Safely

    Although refilling your Epson EcoTank printer’s ink tanks is straightforward, handling the ink bottles safely is essential to avoid stains and spills. Always wear disposable gloves and use paper towels to protect your hands and surfaces while refilling ink.

    When you open the ink bottles, remove the caps carefully without squeezing the bottles to prevent accidental spills. Fill each tank slowly up to the designated fill line to avoid overfilling and leakage.

    Keep the ink bottles upright during and after refilling to maintain control and prevent messes. If you have leftover ink, store the bottles tightly sealed in a cool, dark place to preserve ink quality and prevent evaporation.

    Securing Ink Tank Caps

    Securing the ink tank caps properly is essential after refilling to prevent leaks and maintain ink quality. Once you’ve refilled your Epson EcoTank printer, follow these steps to fasten the ink tank cap:

    1. Wipe the ink tank cap and surrounding area with a clean, lint-free cloth to ensure a proper seal.
    2. Press the cap firmly until you hear a click, confirming it’s securely closed and preventing air from entering.
    3. Avoid over-tightening the cap to prevent damage to the sealing mechanism and avoid spills.

    Always close the ink tank cap immediately after refilling. This helps preserve ink quality, avoids contamination, and keeps your printer running smoothly. Taking these steps ensures your refilling process is clean and secure.

    Troubleshoot Common Epson Ink Cartridge Issues

    If your Epson printer displays errors like “Cartridge Not Recognized” or “Low Ink,” these issues often stem from cartridge installation problems or firmware restrictions. First, check cartridge recognition by removing the ink cartridge and cleaning the gold contact points with a lint-free cloth to remove dirt or ink buildup.

    Next, firmly reseat the cartridge until you hear a click, ensuring proper installation. Firmware updates may block third-party or refilled cartridges, causing errors like 0x69 or “Cartridge Cannot Be Recognized.” If you suspect this, check Epson’s website for firmware updates or consider reverting to an earlier version if possible.

    Furthermore, printhead cleaning can resolve print quality problems caused by clogged nozzles or ink flow issues. Use your printer’s maintenance menu to perform printhead cleaning, which can improve ink delivery and avoid streaky prints.

    Following these steps should help you troubleshoot common Epson ink cartridge issues efficiently.

    Frequently Asked Questions

    How Often Should I Replace Epson Ink Cartridges?

    You should replace Epson ink cartridges roughly every 200 to 300 pages, but ink cartridge longevity varies based on your printing habits. Regularly checking and replacing ink levels before they run too low helps maintain print quality.

    Performing printer ink calibration can also optimize ink usage, extending cartridge life. Keep an eye on low ink warnings and replace cartridges promptly to avoid clogs and make certain your prints look sharp and vibrant.

    Can I Use Third-Party Ink Cartridges in My Epson Printer?

    Using third-party ink cartridges in your Epson printer is like steering a colorful maze. You can save money, but watch the twists. Ink cartridge compatibility varies, so check your model before buying.

    Third-party ink quality can be hit or miss, so choose reputable brands. During cartridge installation, handle chips carefully to avoid errors.

    Firmware updates might block these cartridges. But with the right tips, you can keep printing smoothly without Epson’s original ink.

    What Should I Do if My Printer Doesn’T Recognize the New Cartridge?

    If your printer doesn’t recognize the new cartridge, start by performing an ink cartridge reset through the printer’s maintenance menu. Then, run printer calibration to help the device detect the cartridge properly.

    You should also check and adjust print quality settings to guarantee everything prints correctly. If recognition issues persist, turn off the printer, unplug it briefly, clean the cartridge contacts, then power it back on to complete the reset process.

    How Can I Store Unused Ink Cartridges Properly?

    Imagine you bought extra ink cartridges but noticed dried ink after a month. To avoid this, follow ink storage tips like keeping cartridges sealed in their original packaging using proper cartridge sealing methods.

    Store them upright in a cool, dark place with ideal storage conditions, between 59°F and 77°F, to maintain ink quality. Label each cartridge with the purchase date to track freshness and guarantee your printer always works smoothly.

    Are Epson Ink Cartridges Recyclable or Environmentally Friendly?

    Yes, Epson ink cartridges are recyclable and eco-friendly. You can participate in Epson’s ink cartridge recycling programs, which help reduce the environmental impact of ink by ensuring cartridges are properly reused or disposed of.

    Epson also uses eco-friendly packaging and recycled plastics in their cartridges, promoting sustainable printing. By recycling your cartridges, you minimize plastic waste and support Epson’s efforts to protect the environment.

    Conclusion

    Changing your Epson ink cartridge is like giving your printer a fresh splash of color, bringing your pages back to life. By following these simple steps, you’ll breeze through the process, ensuring vibrant prints every time.

    Just imagine your printer humming smoothly, ready to create masterpieces without a hiccup. Keep your ink flowing and your creativity glowing. Your Epson printer is now set to paint your ideas brilliantly on every sheet.

  • 5 Factors That Determine How Much Ink Costs

    5 Factors That Determine How Much Ink Costs

    You pay more for ink because manufacturers sell printers at a loss and depend on pricey cartridges to make money.

    Special ink formulas, microchips, and unique designs raise production costs and keep you locked into buying their cartridges.

    Limited supply and high demand push prices up even more.

    But you can find affordable third-party or refill options that save you money.

    If you want to understand how these factors work, there’s more to uncover.

    Why Printer Ink Costs So Much

    high ink cartridge costs

    Although it might surprise you, printer ink often costs more per ounce than luxury items like coffee because manufacturers sell printers at a loss and make their profit from expensive ink cartridges. When you consider the cost of OEM ink cartridges, which can range from $13 to $75 per ounce, it becomes clear why ink is so pricey.

    Printer ink can cost more per ounce than luxury coffee, as profits come mainly from pricey cartridges.

    The manufacturing process isn’t simple; it involves strict quality control, research for vibrant colors, and fast-drying formulas. Plus, proprietary cartridges often include microchips and vendor lock-in systems that limit third-party alternatives, keeping prices high.

    Your ink consumption also plays a role. Printers use ink in ways that boost demand, so you end up buying cartridges more frequently. Limited competition in the market means fewer affordable options, making the ink cartridges you rely on consistently expensive.

    Understanding these factors helps explain why printer ink’s cost can feel disproportionately high compared to other everyday products.

    How Selling Printers at a Loss Raises Ink Costs

    When manufacturers sell printers at a loss, they count on ink cartridge sales to turn a profit. This strategy, known as using a loss leader, means you might buy a printer for less than it costs to make.

    However, the ink costs you face afterward are much higher. Since the printer is sold cheaply, the company shifts its profit focus to the sale of proprietary ink cartridges.

    Because these cartridges are the only ones that work with your printer, you don’t have alternatives that might be less expensive. The high price of ink cartridges helps manufacturers recover their losses on the printer itself.

    As a result, you end up paying more for ink over time, making it a significant ongoing expense. Understanding this business model shows why ink costs are so high and helps you see the trade-off between the initial printer price and the long-term ink expenses.

    Why Special Ink Cartridges Make Ink More Expensive

    advanced technology and materials

    Because special ink cartridges include proprietary formulas and embedded microchips, their production costs run higher than standard cartridges. When you buy these special ink cartridges, you’re paying for more than just ink. You’re covering advanced technology and design that drive up production expenses. Here’s why:

    Proprietary formulations improve color vibrancy, drying times, and clog prevention. This requires costly research and materials.

    Embedded microchips and unique cartridge designs enforce vendor lock-in. This limits third-party alternatives and allows manufacturers to charge premium prices.

    Higher ink concentration and stringent quality standards increase material and manufacturing costs.

    How Supply and Demand Affect Ink Costs

    Special ink cartridges may cost more due to advanced technology, but the prices you see also reflect how supply and demand shape the market. When demand for specific ink colors or specialty inks rises, but supply remains limited, ink prices climb. Printer manufacturers often control ink availability, tightening supply.

    Furthermore, market fluctuations in raw materials impact production costs, which ripple through ink prices.

    Here’s how supply and demand influence ink costs:

    Factor Effect on Ink Prices
    High demand Drives prices up
    Limited supply Scarcity raises costs
    Raw material changes Increases production expenses
    Controlled distribution Limits competition, keeps prices high

    You’ll notice that these supply and demand dynamics create a closed market, where shortages and raw material costs directly affect what you pay for ink. Understanding this helps you see why ink prices aren’t just about technology—they reflect a complex balance of market forces.

    Affordable Alternatives: Third-Party and Refill Ink Options

    cost effective ink alternatives

    Although OEM ink cartridges often come with premium pricing, you can substantially cut costs by choosing third-party compatible cartridges or refill kits. These affordable alternatives help you save money without sacrificing print quality.

    Compatible ink options often cost 30-50% less than OEM cartridges, giving you immediate savings. Refill kits reduce the cost of ink even further, up to 60-70% per refill, by letting you reuse your original cartridges.

    Save 30-70% on ink costs with compatible cartridges and refill kits by reusing your original cartridges.

    When exploring these options, keep these points in mind:

    • Many compatible and remanufactured cartridges meet or exceed OEM standards and come with warranties, ensuring reliability.
    • Trusted suppliers offer compatible ink for as low as $2-$4 per cartridge, drastically lowering your overall printing expenses.
    • Using refill kits and third-party ink supports environmental sustainability by reducing waste and promoting reuse.

    Frequently Asked Questions

    How Does Ink Formulation Impact Environmental Safety?

    Ink formulation impacts environmental safety because you’ll want eco-friendly ingredients to reduce chemical toxicity. When you choose inks with biodegradable components, you help guarantee they break down naturally, lessening pollution.

    These formulations also help you meet regulatory standards aimed at protecting ecosystems and human health. By using safer, plant-based pigments and water-based solvents, you actively minimize hazardous waste and support a cleaner environment throughout the ink’s lifecycle.

    What Role Does Packaging Play in Ink Pricing?

    Packaging plays a starring role in ink pricing, acting like the frame around a masterpiece. When you choose intricate packaging design or premium container materials, you’re adding layers that boost cost.

    Branding strategies shape how eye-catching your product looks, influencing its price. Plus, packaging size matters. A larger container might save you money per unit, while smaller, custom sizes often hike expenses.

    You’ll find packaging is more than just a box; it’s a price driver.

    How Do Ink Expiration Dates Affect Cost and Usage?

    Ink expiration dates directly impact your costs and usage because ink shelf life determines how long it stays effective. If you overlook expiration warnings or store ink poorly, shelf stability drops, causing clogs and poor print quality.

    This forces you to use more ink and perform frequent cleaning cycles, raising expenses. By paying attention to storage conditions and using ink within its shelf life, you guarantee vibrant prints and minimize waste, saving money overall.

    Are There Health Risks Associated With Printer Ink?

    About 30% of people exposed to printer ink experience health hazards like skin irritation or respiratory issues. You should know ink toxicity poses inhalation risks, especially from fine particles or fumes released during printing.

    Prolonged exposure can worsen these effects, causing headaches or dizziness. To protect yourself, handle ink carefully, guarantee good ventilation, and wear gloves if needed. Taking these steps helps minimize your risk from printer ink.

    How Do Seasonal Sales Influence Ink Pricing?

    Seasonal sales influence ink pricing by introducing seasonal discounts that make cartridges more affordable. You can take advantage of promotional offers during back-to-school or holiday periods to save big.

    These sales often encourage bulk purchasing, which lowers the cost per cartridge. However, market fluctuations mean prices can vary throughout the year. So, buying during these sales helps you manage your ink budget more effectively and avoid paying higher prices later.

    Conclusion

    Now that you know why printer ink costs so much, you can make smarter choices when buying. Remember, “you get what you pay for,” so while third-party and refill options might save you money, quality can vary.

    Understanding how manufacturers price ink, from selling printers at a loss to supply and demand, helps you avoid surprises. With this knowledge, you’re better equipped to find the right balance between cost and quality for your printing needs.

  • How Long Does Ink Last in Your Printer?

    How Long Does Ink Last in Your Printer?

    If you use your printer infrequently, ink usually lasts about 2 to 3 months before it starts drying out and impacting print quality.

    To keep your ink fresh longer, try printing a small page every 10 to 14 days and store cartridges properly. Keep them upright, cool, and away from sunlight.

    Also, running regular cleaning cycles helps prevent clogs.

    Understanding these simple habits can help you avoid wasted ink and maintain sharp prints over time.

    How Long Does Printer Ink Last With Minimal Use?

    print regularly to prevent drying

    Although printer ink can last up to 2 to 3 months in cartridges with minimal use, you’ll want to print a few pages regularly to keep it from drying out. When you only print occasionally, like a few pages every month, you help maintain the ink’s shelf life and prevent clogs.

    Color ink cartridges tend to dry out faster than black ones, so paying attention to usage matters even more if you rely on color printing. Keeping your printer powered on or running a maintenance page every few weeks can also extend the ink’s usability.

    Why Does Printer Ink Dry Out Inside Cartridges?

    When you don’t use your printer regularly, the ink inside the cartridges can dry out quickly. This happens because liquid ink is prone to evaporation, especially if cartridge seals aren’t perfect. When air seeps inside, ink drying out occurs, leading to clogs at the print head.

    Over time, the ink stagnates in the nozzles, making prints faint or streaky.

    Cause Result
    Poor cartridge seals Ink evaporates quickly
    Infrequent printing Ink stagnates and clogs
    Complex ink chambers Color ink dries faster

    The print head’s tiny nozzles are vulnerable to drying, so ink drying out inside cartridges is common when you don’t print often. Although storage conditions matter, the main reasons are evaporation and imperfect seals that let air in.

    Keeping your printer active helps maintain smooth ink flow and avoids these issues.

    How Storage Conditions Affect Ink Cartridge Lifespan

    proper storage preserves ink

    If you want your ink cartridges to last longer, storing them properly is essential. The right storage conditions can greatly extend your ink lifespan by protecting the cartridges from environmental factors that cause ink deterioration.

    Keep your cartridges sealed in their original packaging and upright to minimize exposure to air. This helps prevent the ink from drying out or losing its quality.

    Avoid storing cartridges in places with direct sunlight, high heat, or humidity, as these conditions speed up ink deterioration and reduce effectiveness. Temperature fluctuations or excessive heat can cause the ink to thicken or clog, which hurts print performance.

    Ideally, store your cartridges in a cool, dry environment with stable temperatures between 60-75°F. By keeping these controlled storage conditions, you preserve the ink’s quality and make sure your printer delivers consistent results when you need it most.

    How Often Should You Print to Keep Ink Fresh?

    To keep your ink fresh and your printer functioning smoothly, you should print regularly, ideally at least once a month. Printing less often increases the risk of ink drying out, which can lead to printhead clogging and reduce your cartridge lifespan. Regular printing helps maintain ink flow and prevents blockages that compromise print quality and ink longevity.

    Print regularly, ideally monthly, to prevent ink drying, avoid clogging, and extend cartridge life.

    To maximize your printer’s health, consider these tips:

    • Print a few pages, including all colors, every 10 to 14 days to keep ink circulating.
    • Avoid letting long periods pass without use; infrequent printing causes more frequent cleaning cycles.
    • Even small print jobs, like a paragraph or two, considerably improve cartridge lifespan and prevent dried ink buildup.

    Differences Between Inkjet and Toner Cartridge Durability

    inkjet dries out quickly

    Though both inkjet and toner cartridges serve the same purpose, their durability differs considerably due to the nature of their ink composition. Inkjet cartridges contain liquid ink, which is prone to drying out, especially if you don’t use your printer regularly. Typically, inkjet cartridges last between 1 to 6 months after installation, but the ink can dry out within 2-3 months if left unused.

    Proper storage in a cool, dry place and keeping the cartridge upright can help extend their shelf life.

    On the other hand, toner cartridges use dry powder, which gives them a much longer shelf life, usually between 6 to 24 months. Toner cartridges are more durable over time because the powder doesn’t evaporate or dry out like liquid ink. This allows them to print thousands of pages before needing replacement.

    If durability and longer shelf life matter most to you, toner cartridges generally offer a more reliable option than inkjet cartridges.

    Signs Your Ink Cartridge Is Drying Out

    You’ll start seeing faded or streaky prints when your ink cartridge is drying out. Sometimes, the ink doesn’t flow properly, which can cause smudges or blotches on your pages—that’s a clear sign something’s wrong. Also, watch out for printhead clogs; they often lead to poor print quality and might even trigger error messages.

    Faded Or Streaky Prints

    When your prints start looking faded or show streaks, it usually means your ink cartridge is drying out or clogged. You’ll notice that the print quality drops, with colors appearing dull or incomplete compared to previous prints.

    This fading and streakiness happen because the ink isn’t flowing properly, often due to cartridges sitting unused for a while or running low. To keep your prints sharp, watch for these signs:

    • Lines, gaps, or blotches on the page, especially in color prints
    • Dull or inconsistent colors that don’t match earlier prints
    • Persistent streaks even after running cleaning cycles

    Addressing these issues early can save you from replacing cartridges prematurely and ensures your print quality stays consistent.

    Ink Flow Inconsistencies

    If your prints show streaks or missing sections, it often means your ink cartridge is drying out. Ink flow inconsistencies like these usually happen when dried ink clogs the nozzles, blocking proper ink distribution.

    If your cartridge’s ink has been sitting unused for weeks or is nearing the end of its lifespan, you’ll notice erratic or stopped ink flow causing printing issues. Running cleaning cycles might help temporarily, but they also use up more ink and shorten your cartridge lifespan.

    To avoid persistent ink drying out problems, replace or clean cartridges as soon as you see visible signs like faded colors, streaks, or gaps. Staying proactive guarantees smooth ink flow and consistent print quality without frustrating interruptions.

    Printhead Clogging Indicators

    Although printhead clogs can stem from various causes, one of the clearest signs your ink cartridge is drying out is the appearance of streaks, smudges, or faded prints on your pages. Printhead clogging often results from ink drying inside the nozzles, leading to nozzle failure and a drop in print quality.

    You might also see dried ink around the printhead or get error messages like “printhead error,” indicating ink drying issues.

    Watch for these signs:

    • Inconsistent lines or missing colors signaling nozzle failure
    • Visible dried ink buildup on the cartridge or printhead
    • Printer error messages related to cartridge recognition or printhead issues

    Recognizing these indicators early helps you avoid prolonged print quality problems due to dried ink.

    Tips to Extend the Life of Your Printer Ink Cartridges

    To extend the life of your printer ink cartridges, you should regularly print small documents or a maintenance page every 10 days to keep the ink flowing and prevent it from drying out.

    Leaving your printer powered on can also help, especially for color cartridges, by maintaining ink circulation and reducing ink drying out issues.

    Proper storage plays a key role; always keep cartridges sealed and stored upright in a cool, dry place to preserve ink quality and slow down ink degradation.

    Running regular maintenance cycles and cleaning the print heads will prevent clogs and guarantee smooth ink flow, which directly impacts cartridge lifespan.

    How Printer Settings Affect Ink Usage and Lifespan

    When you adjust your printer settings, you directly influence how much ink your printer uses and how long your cartridges last. Lowering the print resolution reduces ink consumption by using fewer dots per inch, which extends your ink lifespan.

    Printing in draft mode is another effective way to conserve ink, as it uses less ink per page compared to high-quality settings. Furthermore, tweaking print settings like font size, color saturation, and the complexity of graphics can notably impact how quickly your ink runs out.

    Consider these tips to optimize your ink usage:

    • Use draft mode for everyday printing to minimize ink consumption.
    • Lower print resolution for documents that don’t require high quality.
    • Print in grayscale or reduce color saturation to save color ink cartridges.

    Why Some Printer Inks Dry Faster and How to Prevent It

    If you don’t use your printer very often, the ink can dry out pretty quickly, especially the color cartridges. One easy way to prevent this is to keep your printer powered on and run a small maintenance print every 10 days or so.

    You can also help your ink last longer by storing the cartridges upright in a cool, dry place. Just make sure to avoid exposing them to high temperatures, as that can speed up drying too.

    Causes Of Ink Drying

    Although printer ink is designed to stay moist inside cartridges, it can dry out quickly when left unused for weeks, especially the color inks. Ink drying happens mainly due to environmental factors like heat, air exposure, and humidity, which accelerate moisture loss.

    Improper cartridge storage, such as leaving cartridges open or in warm places, also shortens ink longevity. Skipping regular maintenance cycles allows ink to dry in printheads, causing clogs and poor print quality.

    To prevent ink drying, focus on these key areas:

    • Store cartridges in sealed containers away from heat and direct sunlight.
    • Run maintenance cycles or print a small page every 10 days.
    • Keep your printer in a cool, dry environment to minimize environmental factors.

    These steps help maintain ink longevity and print quality.

    Printer Usage Frequency

    Why does ink in your printer dry out faster when you barely use it? Low frequency printing causes ink drying, especially in inkjet ink cartridges, which can dry up within 2-3 months of inactivity. When you don’t print regularly, ink sits idle, increasing evaporation and clog risks.

    Color cartridges are more prone to drying due to their complex formulas. To extend ink lifespan, printing small test pages every 10-14 days helps keep ink flowing and prevents clogs. Leaving your printer powered on or in standby mode can also maintain ink circulation, reducing drying.

    Using draft mode or lower resolution printing further conserves ink during infrequent use. So, consistent printer usage is key to preserving your ink cartridges and avoiding premature ink drying.

    Maintenance And Storage Tips

    Because environmental factors like heat, humidity, and sunlight speed up ink drying, you need to store your cartridges properly to keep them fresh. Ink drying out can clog printheads and waste ink. To prevent this, focus on proper maintenance and storage.

    Keep cartridges upright in a cool, dry place, and avoid exposing them to direct sunlight. Running cleaning cycles or printing small pages every 10 days keeps ink flowing and reduces drying issues. Regular use prevents ink from settling and drying inside the cartridge.

    • Store cartridges upright in a cool, dry environment
    • Print small documents or run cleaning cycles every 10 days
    • Keep the printer powered on or use it regularly to maintain ink fluidity

    Following these steps guarantees your ink lasts longer and performs better.

    How Regular Maintenance Prevents Ink Drying and Clogs

    If you want to keep your printer’s ink flowing smoothly, performing regular maintenance is essential. Ink drying is a common issue that can clog printer cartridges and shorten their ink lifespan. To prevent this, print a small document every 10 days to keep the ink circulating.

    Running the printer’s cleaning cycle periodically helps dissolve any dried ink, reducing the chance of clogs. Keeping your printer powered on between uses also maintains ink flow and minimizes drying problems.

    Furthermore, printing in draft mode or using grayscale settings lowers ink consumption, preserving cartridge health while maintaining print quality. As an alternative, use the scanner function to keep ink moist without excessive printing.

    Frequently Asked Questions

    Can Expired Ink Cartridges Damage My Printer?

    Yes, expired ink cartridges can damage your printer. Using them risks clogging the printhead and causing leaks, which harm printer maintenance efforts.

    Poor ink storage shortens cartridge lifespan and leads to degraded print quality. Ink compatibility also declines over time, making expired cartridges unreliable.

    To safeguard your printer, always check cartridge lifespan and use fresh, compatible ink. This helps ensure smooth operation and preserves your printer’s longevity.

    Is It Safe to Mix Different Brands of Ink Cartridges?

    It’s generally not safe to mix different brands of ink cartridges because ink compatibility varies widely. You’ll notice brand differences in ink formulation, which can cause clogging or poor print quality.

    Always check cartridge labels carefully before mixing. Using mixed inks or refills increases risks of damage and voids warranties.

    To avoid issues, stick to one brand’s cartridges that match your printer’s specifications.

    How Does Humidity Specifically Impact Ink Quality?

    Humidity effects impact your ink by causing moisture absorption, which dilutes the liquid ink and leads to quality degradation. High humidity promotes mold growth inside cartridges, while low humidity speeds up ink evaporation, drying it out. Both extremes harm your prints.

    You need to control storage conditions carefully, maintaining stable, moderate humidity to prevent clumping, clogging, and spoilage. That’s how humidity directly affects your ink’s performance and lifespan.

    What Are the Environmental Effects of Disposing Old Ink Cartridges?

    When you dispose of old ink cartridges improperly, you risk chemical leaching that contaminates soil and water, causing serious environmental pollution. Landfilling and incinerating cartridges release toxins that harm ecosystems and air quality.

    Instead, you should use recycling programs, which offer eco friendly alternatives by recovering materials and reducing waste. Proper cartridge disposal helps protect the environment and conserve resources, so always choose responsible methods.

    Can Ink Cartridges Be Refilled at Home Without Issues?

    You can do DIY refilling, avoid ink leakage, and save money, but only if you use quality refill kits, check ink compatibility, and follow instructions closely.

    Refill mistakes, like overfilling or using the wrong ink, can cause leaks, poor print quality, or even damage your printer.

    Conclusion

    You might think that printing less often saves ink, but ironically, infrequent use can cause ink to dry out and waste more. Keeping your cartridges fresh means printing regularly, storing them properly, and adjusting settings to reduce ink use.

    While inkjet cartridges dry faster than toner, proper maintenance prevents clogs and extends lifespan. So, challenge the idea that less printing saves ink. Smart habits actually keep your printer running longer and more efficiently.

  • How Ink Is Made Step by Step

    How Ink Is Made Step by Step

    To make ink step by step, start by selecting vibrant plant pigments like berries or bark, then clean and crush them.

    Extract colors using water, alcohol, or oil to suit your needs.

    Mix the pigments with natural binders such as gum arabic for smooth flow and durability.

    Filter out impurities and test the ink’s consistency and color quality.

    Store it in airtight containers to preserve it longer.

    Keep going, and you’ll uncover tips for perfecting and maintaining your natural ink.

    What Is Natural Ink and How It Works

    organic pigments create evolving ink

    Natural ink comes from pigments extracted directly from organic materials like flowers, leaves, and berries. When you immerse yourself in ink making with natural inks, you’re fundamentally capturing colors from nature.

    Creating natural ink means drawing vibrant colors straight from the heart of flowers, leaves, and berries.

    You extract pigments from various plant parts, bark, roots, or even kitchen scraps, and suspend these colorants in a liquid medium like water or oil. Then, you often add a natural binder such as gum arabic to help the pigment stick to your writing surface.

    What’s fascinating is how natural inks behave over time; their colors can shift, fade, or deepen because of their organic makeup. This means your ink isn’t static. It’s alive, evolving with time.

    The tannins and pigments in different plants influence both the hue and how long the ink lasts. So, when you make natural inks, you’re not just creating color. You’re embracing an alchemical process that connects you to nature’s ever-changing palette.

    Choosing Natural Pigments and Dyes for Ink

    When you’re picking natural pigments and dyes for your ink, it’s a good idea to focus on the right plant materials—things like berries, bark, or leaves. And don’t forget, the season when you harvest them can really change how intense or what shade the color turns out to be. So, you’ll want to extract the colors carefully to make sure you capture those unique organic hues each plant has to offer.

    Selecting Plant Materials

    Although selecting the right plant materials might seem simple, choosing those rich in pigments or tannins is key to making vibrant ink. You’ll want to pick berries, leaves, bark, flowers, or roots known for their strong color properties.

    For example, grape skins yield purple hues, while onion skins offer warm orange-brown tones. Using edible plants like elderberries or blackberries ensures your ink is non-toxic.

    To maximize pigment extraction, chop smaller plant pieces or skins to increase surface area before soaking, boiling, or fermenting them. Harvesting these materials at their peak, usually in July or August, guarantees the richest colors.

    Seasonal Color Variations

    How do the colors of plant-based inks change throughout the year? Seasonal color variations in natural pigments depend on when you harvest plants. Picking berries like elderberries or blackberries at peak ripeness in late summer yields vibrant, deep hues.

    Temperature and sunlight shifts also affect pigment intensity and stability. Using freshly gathered, in-season plant parts guarantees your inks burst with richer, longer-lasting colors than dried or off-season materials.

    Notice how these natural pigments evolve with the seasons, offering unique shades each time.

    Season Plant Source Color Emotion
    Spring Dandelions Fresh, hopeful
    Summer Blackberries Bold, vibrant
    Late Summer Elderberries Deep, rich
    Autumn Oak Galls Warm, earthy
    Winter Pine Needles Cool, calming

    Organic Color Extraction

    Since natural pigments come from various parts of plants, you’ll need to choose your sources carefully to get the colors you want. You can extract pigments from berries, flowers, bark, and roots by soaking, boiling, or fermenting them.

    For deep, long-lasting colors, consider plants like oak galls or walnut husks, which contain tannins. Keep in mind that the color depends on the plant part you use. Skins, seeds, or bark each offer different hues and intensities.

    During extraction, adjusting the pH with vinegar or baking soda can also change your dye’s shade. To get vibrant, high-quality natural pigments, harvest seasonal plants at their peak ripeness. This careful selection and extraction process guarantees your ink has rich, organic colors.

    Preparing Plant Materials for Natural Ink Extraction

    Before you start extracting natural ink, you’ll need to gather and ready the right plant materials, such as berries, flower petals, bark, or leaves. Begin by identifying suitable plant materials that offer rich pigments.

    Once collected, wash them thoroughly to remove dirt, pesticides, and any impurities that could affect the ink’s quality. Next, chop or crush the plant parts into smaller pieces; this increases the surface area, allowing for more efficient pigment release during ink extraction.

    You can use either fresh or dried plant materials depending on the color intensity and extraction technique you plan to use. Finally, prepare the plant materials for soaking, boiling, or fermenting, which are common methods to draw out the pigments effectively.

    Proper preparation ensures you get the best color and consistency from your natural ink extraction process.

    Picking the Best Solvent for Your Natural Ink

    choosing the right ink solvent

    When you’re picking a solvent for your natural ink, water is a great choice because it extracts pigments safely and easily. Plus, it’s super accessible and gentle to work with.

    If you want to keep those colors bright and vibrant, especially when you’re working with berries and roots, alcohol-based solvents do the trick really well. They help preserve that pop of color.

    Now, if you’re after richer, longer-lasting inks, oil-based solvents like linseed oil are definitely your best bet. They give your ink a depth and durability that stands the test of time.

    Water-Based Ink Benefits

    Although many solvents exist for natural ink making, water stands out as the most accessible and effective choice for extracting pigments from plant materials. You’ll find water easy to use for mixing and filtering, making it perfect whether you’re a beginner or working on small-scale projects.

    Water-based inks are non-toxic and environmentally friendly, so you can safely use them for art or writing without worry. When you use water, the drying time and flow of your ink improve, helping it adhere well to various surfaces.

    Adding gum arabic to your water-based ink boosts its stability, flow, and gloss, ensuring smooth application and a polished finish. Choosing water with gum arabic truly enhances your natural ink’s quality and performance.

    Oil-Based Ink Uses

    If you want a durable, water-resistant ink with a rich finish, oil-based options are an excellent choice. Oil-based ink uses solvents like linseed oil, tung oil, or mineral spirits to dissolve pigments, guaranteeing smooth application and longevity.

    Choosing the right solvent affects drying time, gloss, and flexibility, so pick one that suits your project’s needs. Natural solvents are ideal if you want an eco-friendly ink. Proper solvent selection also prevents pigment separation and clogging, maintaining ink quality.

    Keep in mind that working with these solvents requires good ventilation due to VOC emissions.

    • Linseed and tung oil for natural, slow-drying solvents
    • Mineral spirits for faster drying and higher gloss
    • Resistant to water and UV damage
    • Ideal for fine art and printmaking
    • Guarantee proper ventilation when handling solvents

    Alcohol Extraction Effects

    Picking the right solvent can make all the difference in your ink’s quality and performance. When you choose alcohol for extraction, you tap into its ability to quickly penetrate plant cell walls, pulling out vibrant pigments that water alone can’t dissolve.

    Alcohol-based extraction often results in brighter, more saturated colors because it extracts both water-soluble and fat-soluble pigments. Plus, using alcohol helps preserve your ink’s color and prevents mold, extending its shelf life.

    You’ll also save time, since alcohol extracts strong colors in just a few hours. Another benefit is that alcohol evaporates fast, so your ink dries quickly on paper, which is perfect for detailed calligraphy or art.

    Extracting Plant Colors: Methods and Timing

    plant color extraction timing

    When you extract colors from plants, you usually soak or boil parts like berries, leaves, or bark to release their pigments into a liquid form. Timing plays an essential role since many plants yield the most vibrant plant colors during late summer or early fall.

    Extraction methods vary depending on the plant part: skins often require boiling or scalding, while leaves may only need soaking. You can adjust extraction time from minutes to days to achieve your desired color intensity.

    Using heat, fermentation, or prolonged soaking breaks down cell walls, letting you capture richer hues.

    • Harvest plants at peak pigment production seasons
    • Soak leaves gently to preserve delicate colors
    • Boil tougher materials like bark or skins for stronger extraction
    • Extend soaking or ferment for deeper pigment release
    • Monitor extraction duration closely to avoid color fading

    How to Add Binders for Stable Natural Ink

    To keep your natural ink stable and smooth, you’ll want to add binders like gum arabic. These binders hold the pigment particles together and help the ink stick better to surfaces.

    It’s a good idea to mix the binder thoroughly, usually by dissolving it in warm water first. This helps create an even texture and prevents your ink from fading over time.

    You can also adjust the amount of binder depending on whether you want your ink to be thicker or more fluid. That way, you get the best results for whatever project you’re working on.

    Purpose Of Binders

    Although pigments give natural ink its color, binders play an essential role by acting as adhesives that hold those pigments together and help the ink stick properly to surfaces. When you add binders to natural ink, you guarantee the pigment particles don’t separate or settle, which keeps the ink consistent and extends its shelf life.

    Proper mixing is key. You need to blend the binder thoroughly for a smooth, stable ink.

    Here’s why binders matter:

    • They improve adhesion to paper or fabric
    • They prevent pigment settling over time
    • They enhance the ink’s flow and gloss
    • They stabilize the mixture for longer shelf life
    • They control the ink’s consistency based on the amount used

    Common Natural Binders

    Binders play a vital role in keeping your ink stable, and choosing the right natural binder can make all the difference. Gum arabic, derived from acacia tree sap, is the most common natural binder you’ll use to thicken and stabilize homemade inks. Just a few drops improve flow, adhesion, and glossiness, making your ink more durable on paper.

    Besides gum arabic, you can try other natural binders like egg yolk, gelatin, or honey in small amounts to enhance texture and stability. To use them, dissolve your chosen binder in warm water or liquid, then mix it thoroughly with your plant-based pigment or dye. Properly added natural binders help prevent pigment settling and mold growth, extending your ink’s shelf life.

    Adding Binders Properly

    How exactly should you add gum arabic to keep your natural ink smooth and stable? Start by dissolving gum arabic in warm water to guarantee it fully integrates, avoiding clumps. Then, gradually add this binder solution into your ink mixture while stirring continuously. This method keeps pigment particles evenly suspended, creating a durable, cohesive ink.

    Remember, the right balance of binders impacts your ink’s flow and thickness.

    • Dissolve gum arabic in warm water using a 1:4 to 1:6 ratio
    • Add the binder slowly to prevent clumping
    • Stir continuously for even dispersion
    • Incorporate preservatives like wintergreen oil to extend shelf life
    • Mix thoroughly until the binder is fully integrated

    Following these steps helps you achieve stable, high-quality natural ink.

    Mixing Ingredients for Smooth Natural Ink

    When you gently heat plant materials with water or oil, you’ll start to extract vibrant pigments without damaging their quality. This careful heating releases the color while preserving the natural vibrancy of your ingredients.

    To enhance extraction, you’ll want to stir regularly and use a fork or muddler to crush the plant pieces, helping pigments escape from fibers. Avoid boiling to keep the pigment intact.

    Here’s a quick guide on key steps for mixing your ingredients:

    Step Action Purpose
    Heat Gently warm mixture Extract pigments without damage
    Stir Regular stirring Prevent sticking, aid pigment release
    Mash Crush plant pieces Increase extraction efficiency
    Simmer Concentrate liquid Intensify color, adjust consistency

    Following these steps ensures your natural ink is smooth and richly colored, ready for the next stages of preparation.

    Filtering Ink to Remove Impurities

    Although you’ve carefully extracted vibrant pigments, filtering the ink is vital to remove any solid impurities that could clog your pens or affect the ink’s smoothness. Filtering involves passing the ink through a fine material like tissue paper or specialized filters to trap plant residues and other particles.

    Filtering ink through fine materials removes solid impurities, ensuring smooth flow and vibrant, clog-free writing.

    Before filtering, letting the mixture settle helps reduce sediment, making the process more efficient. Using multiple layers of tissue or dedicated filter paper ensures finer impurities are removed, resulting in a clearer, more consistent ink. Thorough filtering is essential for producing high-quality ink that performs well in detailed artwork or calligraphy.

    To enhance the filtering process, consider these tips:

    • Let the ink settle to separate heavier particles
    • Use multiple tissue layers or filter papers
    • Choose fine, specialized filters for better impurity removal
    • Filter slowly to avoid disturbing sediments
    • Regularly clean or replace filters to maintain efficiency

    This careful filtering guarantees smooth ink free of impurities.

    Testing Natural Ink Quality: Color, Viscosity, Performance

    Once you’ve filtered your ink to remove impurities, the next step is to test its quality by examining color, viscosity, and performance. Start by observing the ink’s color consistency and vibrancy, checking how it changes before and after drying. This helps you assess lightfastness and permanence, which are vital for professional or archival use.

    For viscosity, apply a small amount to a surface or use a viscometer to measure flow properties. You want the ink to flow smoothly without clogging your tools. Next, evaluate performance by testing adhesion, drying time, and resistance to smudging or fading.

    Regularly check for sediment or microbial growth to guarantee particle suspension stability. These tests confirm your natural ink meets artistic and functional standards, giving you confidence in its quality before moving on to use or packaging.

    Storing and Preserving Natural Ink for Longevity

    How can you guarantee your natural ink stays vibrant and usable for a long time? Proper storage and preservation are essential to maintain its quality. You want to prevent spoilage, microbial growth, and color changes, ensuring your ink remains fresh and reliable whenever you need it.

    Ensure your natural ink stays vibrant and fresh by preventing spoilage and preserving its quality properly.

    To effectively preserve your natural ink, follow these tips:

    • Store it in airtight containers and keep it in a cool, dark place to avoid exposure to light and air.
    • Add natural preservatives like cloves, wintergreen oil, or a small amount of alcohol to extend shelf life.
    • Refrigerate the ink to slow fermentation and mold development.
    • Check regularly for mold, sediment, or changes in color and smell; filter or discard if necessary.
    • Prepare and store ink in small batches to minimize waste and maintain freshness.

    These simple steps will help you preserve your natural ink’s quality and usability over time.

    Frequently Asked Questions

    What Safety Precautions Are Needed When Making Natural Ink?

    You need to prioritize chemical safety by wearing gloves, goggles, and a mask to protect yourself from harmful plant particles and allergens. Always source your ingredients carefully, ensuring they’re clean and safe.

    Work in a well-ventilated area to avoid inhaling fumes or dust. Use sanitized equipment to prevent contamination, and store your ink in labeled, airtight containers away from children and pets to avoid accidental ingestion or misuse.

    Can Natural Ink Be Used in All Types of Pens and Printers?

    You can’t just pour natural ink into every pen or printer, like expecting every key to fit every lock. Historically, natural ink’s evolution shows it’s perfect for dip and brush pens, reflecting cultural significance in calligraphy and art.

    But fountain pens and printers often clog or fade due to organic particles. Think of it as respecting tradition while adapting tools. You’ll need special care to use natural ink in modern devices.

    How Long Does It Take for Natural Ink to Dry Completely?

    The drying time for natural ink varies, but you can expect it to take anywhere from a few minutes to several hours. Environmental impact plays a role. Humidity and temperature affect how fast it dries.

    If you’re using water-based inks on porous surfaces, it usually dries quicker, around 10 to 30 minutes. Thicker or oil-based inks need more time, sometimes overnight, especially if you apply heavy layers.

    Are Natural Inks Environmentally Friendly Compared to Synthetic Inks?

    Natural inks are eco-friendly alternatives that paint a greener picture than synthetic ones. You’ll find they have a lighter chemical impact since they use renewable plant materials and fewer toxic substances.

    This means less pollution and waste, helping you reduce your carbon footprint. However, keep in mind that the environmental benefits depend on how responsibly those natural ingredients are sourced and what additives are included in the ink.

    What Are Common Problems When Using Natural Ink and How to Fix Them?

    You’ll often face ink consistency issues like sedimentation, causing uneven color. To fix this, shake and filter your ink before use.

    Color stability can suffer from pH changes or light exposure, so store your ink in a cool, dark place to keep it vibrant longer.

    Mold growth and drying cracks happen too, but adding antimicrobial agents and gum arabic improves preservation and flexibility, preventing those common problems.

    Conclusion

    You might think making ink is complicated, but it’s surprisingly simple when you use nature’s gifts. While synthetic inks flood the market with uniform colors, your natural ink carries unique hues and stories from plants you’ve carefully chosen and prepared.

    By extracting, mixing, and filtering with care, you create not just ink, but a living connection to the earth. So, embrace the process. Your ink isn’t just made, it’s crafted.

  • Does a Thermal Printer Need Ink?

    Does a Thermal Printer Need Ink?

    You don’t need ink for a thermal printer because it uses heat to create images. With direct thermal printers, heat activates special heat-sensitive paper that darkens without ink.

    Thermal transfer printers use heat to melt ink from a ribbon onto labels but still avoid liquid cartridges. This makes maintenance easier and printing faster.

    If you want to understand the key differences, durability, and when to replace consumables, there’s more valuable info ahead.

    How Thermal Printers Print Without Ink

    heat based printing technology

    How do thermal printers manage to print without ink? They rely on a clever printing process that uses heat rather than traditional ink cartridges. When you use a direct thermal printer, it heats specific areas on heat-sensitive paper, activating a chemical coating that turns black instantly.

    This means you don’t need any ink or toner, just special paper with that reactive layer. On the other hand, thermal transfer printers use a ribbon coated with ink. Heat melts the ink onto the label’s surface, but since it’s solid ink on a ribbon, you still avoid liquid ink cartridges.

    Both methods depend solely on heat to create images, which simplifies maintenance and lowers supply costs. So, by using heat-sensitive paper or thermal transfer ribbons, thermal printers offer a clean, efficient way to print without the mess and expense of traditional ink. You get crisp prints without worrying about running out of ink cartridges.

    Differences Between Direct Thermal and Thermal Transfer Printers

    You’ll notice that direct thermal printers use heat-sensitive paper that darkens when heated. On the other hand, thermal transfer printers melt ink from a ribbon onto the label. Because of this difference, thermal transfer prints tend to last longer and hold up better against wear and environmental factors. Knowing these distinctions can really help you pick the right printer for what you need.

    Printing Mechanism Differences

    Although both direct thermal and thermal transfer printers use heat as part of their printing process, they operate quite differently. In direct thermal printing, the printing mechanism relies on heat-sensitive paper that darkens when heated, producing images without any ink or ribbons, making it truly inkless.

    On the other hand, thermal transfer printers use ribbons coated with wax, resin, or both. When heated, these ribbons melt ink onto the label material, creating the image. So, while direct thermal printers activate a chemical coating on the paper itself, thermal transfer printers require ribbons to transfer ink.

    Understanding this key difference helps you choose the right printer based on your needs since one uses heat-sensitive paper alone and the other depends on ribbons as part of its printing mechanism.

    Durability And Applications

    Since durability varies greatly between the two, choosing the right printer depends on how long your prints need to last and the conditions they’ll face. Direct thermal printers use heat-sensitive paper, producing prints that fade faster and aren’t ideal for long-term or harsh environments.

    Thermal transfer printers, however, deliver higher durability by transferring ink from ribbons, making them perfect for demanding printing applications.

    Feature Direct Thermal Thermal Transfer
    Ink/Ribbon No ink, uses heat-sensitive paper Uses ribbon for ink transfer
    Durability Short-term, fades quickly Long-lasting, resists fading
    Environmental Resistance Sensitive to light & moisture Highly resistant
    Ideal Applications Receipts, short-term labels Barcodes, asset tags, outdoor use
    Cost Lower upfront Higher due to consumable ribbons

    Choose based on your durability needs and environment.

    Durability Differences Between Thermal Print Types

    thermal transfer outperforms direct

    When comparing thermal print types, you’ll notice that durability varies markedly between direct thermal and thermal transfer prints. Direct thermal printers use heat-sensitive paper, which means the print can fade within 6 months to a year, especially if exposed to heat, light, or chemicals. So, if you rely on direct thermal printing, you’ll want to store your prints in cool, dark places to extend their printing longevity.

    On the other hand, thermal transfer printing uses a ribbon to transfer ink onto more durable materials like polyester labels. This method offers far superior durability and resistance to UV rays, water, chemicals, and abrasion, often lasting several years. Thermal transfer prints are ideal when you need long-lasting labels for outdoor or industrial use.

    Both thermal printers eliminate the need for traditional ink, but when it comes to durability, thermal transfer clearly outperforms direct thermal, giving you prints that stand the test of time.

    Key Consumables for Thermal Printers

    If you want to keep your thermal printer running smoothly, understanding its key consumables is essential. Unlike traditional printers, thermal printers don’t use ink or toner. Instead, their inkless technology depends on specific materials to produce clear, lasting prints.

    Keeping your thermal printer running smoothly means understanding its unique, inkless consumables.

    The main consumables vary depending on the thermal printing type:

    • Thermal paper: Heat-sensitive rolls used in direct thermal printers.
    • Thermal transfer ribbons: Wax or resin-based films that transfer ink when heated.
    • Backing liners: Support materials for labels or tags.
    • Print heads: The component that applies heat, requiring occasional care.
    • Cleaning supplies: Essential for maintaining print quality and longevity.

    Thermal transfer printers rely on ribbons that don’t dry out like liquid ink, while direct thermal printers use heat-sensitive paper that reacts to the print head’s heat. Both consumables keep your printer efficient and cost-effective without needing traditional ink cartridges.

    When and Why to Replace Thermal Paper or Ribbons

    replace paper and ribbons

    You’ll want to replace thermal paper whenever the print starts to fade or becomes hard to read. It’s a good idea to keep an eye on this so your prints always look clear.

    Now, if you’re using a thermal transfer printer, the ribbons will wear out after a certain number of prints. How quickly this happens really depends on how much you use the printer.

    Thermal Paper Replacement Timing

    How do you know it’s time to replace your thermal paper or ribbons? Monitoring print quality is essential. When you notice fading or illegible prints, it’s a clear sign that replacement is necessary.

    Proper replacement timing is vital for effective thermal printer maintenance and to avoid downtime. Keep an eye on these signs:

    Print quality begins to fade or becomes inconsistent. Thermal paper shows signs of premature fading or discoloration. You’ve stored thermal paper improperly or past its shelf life.

    The volume of printing has increased, accelerating wear. Printed images appear faint or incomplete.

    Ribbon Usage And Lifespan

    Although thermal paper doesn’t require ribbons, thermal transfer printers rely on ribbons made of wax, resin, or a combination that wear out as you print. You’ll need to substitute these ribbons once their ink-like material runs out, which depends largely on your print volume.

    High-volume printing shortens the lifespan of ribbons, so expect more frequent replacements in busy settings. Unlike ink cartridges, ribbons don’t dry out but do wear out with continuous use.

    Properly storing ribbons and thermal paper in cool, dark places helps extend their usability, reducing how often you replace them. Knowing when and why to replace ribbons ensures consistent print quality and prevents interruptions in your thermal transfer printing process.

    How Thermal Printing Cuts Your Costs

    A thermal printer cuts your costs by eliminating the need for ink, toner, or cartridges, which are common expenses in traditional printing. With thermal printing, you enjoy an inkless process that markedly lowers your ongoing consumables costs. This technology uses heat-sensitive paper or ribbons, reducing maintenance costs and minimizing hardware failures.

    Thermal printers slash costs by removing ink, toner, and cartridge needs, lowering consumable and maintenance expenses.

    Choosing a thermal printer means you’ll benefit from:

    • Reduced consumables expenses due to inkless operation
    • Lower maintenance costs with fewer moving parts
    • Less downtime from hardware issues, cutting repair costs
    • Faster print speeds that boost productivity and reduce labor expenses
    • Cost-effectiveness ideal for high-volume printing needs

    Best Applications for Thermal Printers

    Saving on ink and maintenance is just one advantage of thermal printers; their real strength lies in where and how you use them. If you handle high-volume printing tasks, such as in retail or logistics, thermal printers deliver speed and reliability without frequent upkeep.

    You’ll find them perfect for producing thermal labels that need durability, like barcodes and receipts exposed to water, chemicals, or sunlight.

    When working with heat-sensitive paper, direct thermal printers shine for short-term labels like shipping tags or event tickets that don’t require long-lasting durability. For labels that must endure harsh conditions over time, thermal transfer printers provide extra resilience, making them ideal for asset tags and outdoor signage.

    Choosing the Right Thermal Printer for Your Business

    When choosing a thermal printer for your business, you’ll want to match the printer type to your specific labeling needs. If you need cost-effective, short-term labels, direct thermal printers are a smart choice since they don’t require ink or ribbons.

    For labels that must withstand harsh environments or last longer, thermal transfer printers, which use ribbons, provide superior durability and print quality.

    Thermal transfer printers use ribbons to deliver durable, high-quality labels ideal for harsh conditions and long-term use.

    Consider these key factors to decide:

    • Label longevity requirements
    • Environmental exposure and durability needs
    • Print volume and speed demands
    • Consumables cost, including ink and ribbons
    • Desired print quality and resolution

    Troubleshooting Common Thermal Printer Issues

    Although thermal printers don’t use ink, you might still face print quality issues like faded or unclear images. These problems often stem from a dirty print head or worn-out thermal paper. Start troubleshooting by inspecting the print head. Dust and residue buildup can cause incomplete images.

    Regular cleaning with a soft cloth and isopropyl alcohol keeps the print head in good condition and maintains print quality. Also, check your thermal paper. Using low-quality or incompatible paper can lead to poor adhesion and faded prints.

    Make sure you store your thermal paper in a cool, dark place to prevent premature fading. If prints continue to fade despite cleaning and proper paper, consider replacing the thermal paper roll. By following these steps, you can resolve common issues and guarantee your thermal printer produces clear, reliable prints without the need for ink.

    Tips for Extending Thermal Printer Consumable Life

    To extend the life of your thermal printer consumables, you should store thermal paper in cool, dark places and avoid exposing labels to direct sunlight or moisture. Proper environmental storage is essential for maintaining print quality and preventing premature fading.

    Effective consumable management also plays a critical role in maximizing your thermal printer lifespan.

    Here are some tips to help you:

    • Use high-quality thermal paper and ribbons for consistent results.
    • Regularly perform print head maintenance to avoid buildup and uneven prints.
    • Keep thermal labels away from heat and humidity to prevent deterioration.
    • Monitor your print volume and replace consumables promptly to avoid printing errors.
    • Store unused thermal paper in airtight containers to protect it from environmental damage.

    Frequently Asked Questions

    Can Thermal Printers Print in Color Without Ink?

    No, thermal printers can’t do color printing without ink alternatives like special ribbons. If you want color, you’ll need thermal transfer printers using multi-color ribbons. These affect print quality and material compatibility.

    These ribbons act as ink substitutes, but they’re costlier than standard direct thermal methods. So, while color printing’s possible, it usually means higher expenses and more complex materials compared to simple black-and-white thermal prints without ink.

    Are Thermal Printers Noisy During Operation?

    Like a whisper in a library, thermal printers keep noise levels impressively low. You won’t be disturbed by loud operational sounds because these quiet models rely on heating elements instead of noisy motors or fans.

    If you’re after sound reduction, their acoustic features shine, making them perfect for offices or homes where silence matters. So, you can count on thermal printers to operate smoothly without interrupting your peace.

    How Fast Do Thermal Printers Typically Print?

    Thermal printers typically print at speeds between 4 to 12 inches per second, depending on thermal paper types and print resolution. You’ll notice faster printing speed with lower resolution and simpler designs.

    Maintenance requirements are minimal, which adds to cost efficiency since you avoid ink expenses. Using the right thermal paper guarantees consistent quality and speed, making thermal printers ideal when you need quick, reliable printing without frequent upkeep.

    Do Thermal Printers Require Special Software Drivers?

    Yes, you do need special software drivers for your thermal printer. These drivers guarantee proper printer connectivity and help manage print head maintenance by controlling heat precisely.

    They also optimize thermal paper compatibility, which impacts print durability and reduces energy consumption. Without the right drivers, your prints might misalign or fade quickly.

    Can Thermal Printers Print on Materials Other Than Paper?

    Of course, your thermal printer isn’t just a one-trick pony stuck with boring old thermal paper! If you’re using direct thermal, you’re limited to heat-sensitive paper, which is perfect for barcode printing but not great for durability.

    Want labels that survive harsh environments? Thermal transfer printers let you print on polyester, vinyl, even metal, boosting print durability for tough label applications. So yes, your printer can handle more than paper, just choose the right tech!

    Conclusion

    You don’t always need ink to print, but that doesn’t mean you’re free from consumables. Direct thermal printers skip ink and rely on heat-sensitive paper. Thermal transfer printers use ribbons to create durable prints.

    One prioritizes simplicity, the other longevity. Knowing when to replace paper or ribbons keeps your printer humming smoothly. By choosing the right type and maintaining it well, you balance cost and quality, ensuring your business prints with precision every time.

  • Does a Laser Printer Need Ink and How to Print Without It

    Does a Laser Printer Need Ink and How to Print Without It

    You don’t need ink to print with a laser printer because it uses toner, a fine plastic powder, instead. A laser creates an electrostatic image on a photosensitive drum, attracting toner only to those areas.

    The toner then fuses to paper with heat and pressure, producing sharp, durable, and smudge-resistant prints.

    This process lasts longer and handles high-volume jobs better than ink cartridges.

    Keep exploring to find out how to get the best results and maintain your toner printer.

    How Laser Printers Print Without Ink

    toner laser electrostatic transfer

    Although laser printers don’t use traditional ink, they create images using toner, a fine powder made of plastic and pigment. In laser printing, a laser beam draws an electrostatic image on a photosensitive drum inside the printer.

    This drum holds an electric charge in specific areas that the laser alters, creating a pattern matching your document. Toner particles, which are also electrically charged, stick only to these laser-drawn areas on the photosensitive drum.

    Then, the drum rolls over paper, transferring the toner onto it. Finally, heat and pressure fuse the toner permanently onto the paper, producing sharp text and images without any liquid ink.

    You’ll notice this process is quite different from inkjet printers, which spray liquid ink directly. Laser printing’s reliance on toner and the photosensitive drum allows for fast, clean, and precise printing, making it a popular choice for both home and office use.

    What Is Toner and How It Replaces Ink in Laser Printing

    When you use a laser printer, toner takes the place of traditional ink by utilizing a fine, dry powder made mostly of plastic particles and pigments. Unlike ink, toner works through an electrostatic process: a laser beam selectively neutralizes parts of a charged drum, allowing toner particles to stick only to those areas.

    Then, heat and pressure fuse the toner onto the paper, creating clear, durable, and water-resistant prints that won’t smudge or dry out like ink.

    Toner cartridges in laser printers also offer a higher page yield compared to ink cartridges, often printing between 1,000 to 3,000 pages before needing replacement. This makes toner ideal for high-volume printing tasks.

    Why Laser Printers Don’t Use Ink Cartridges

    toner dry powder fusing

    You might be wondering why laser printers don’t use ink cartridges at all. Instead, they use toner, which is a dry powder that gets fused onto the paper with heat. This process gives you sharp, long-lasting prints really quickly. When you understand how toner works in laser printing, it’s easy to see why it’s better than regular ink.

    Toner vs Ink

    A laser printer doesn’t need ink cartridges because it uses dry toner powder instead of liquid ink. Toner is a fine plastic-based powder that sticks to paper through electrostatic charges and heat. This is different from inkjet printers, which spray liquid ink from cartridges onto the paper.

    This key difference means laser printers avoid problems like ink drying out or clogging, which can happen with inkjet cartridges. Toner cartridges also last much longer and offer a higher page yield, making them more cost-effective if you print a lot.

    Laser Printing Process

    How exactly does a laser printer create images without using ink cartridges? Instead of ink, it uses toner, a dry powder, and a precise laser beam in the printing process. The laser electrically charges a photosensitive drum, which then attracts the toner particles to form the image.

    Next, the toner transfers from the drum onto paper. Heat and pressure fuse the toner onto the page, producing sharp, durable prints without any liquid ink involved. This laser printing process eliminates common ink issues like smudging and drying time.

    Advantages Of Toner

    The laser printing process relies on toner, a dry powder that offers several advantages over traditional ink cartridges. When you use toner, you get sharper text and water-resistant images, ensuring consistent print quality every time. Toner doesn’t dry out like ink, so it’s reliable even if you don’t print often.

    Plus, toner cartridges deliver a higher page yield, making them ideal for high-volume printing without constant replacements.

    Here are key advantages of toner you’ll appreciate:

    • Long-lasting cartridges: Print thousands of pages before needing a replacement.
    • Fast, durable prints: Toner fuses with heat, creating smudge-proof documents quickly.
    • Consistent quality: Maintains sharp text and vibrant images, even after extended storage.

    Toner truly makes laser printers efficient and cost-effective for your printing needs.

    Toner’s Role in Durable, Smudge-Resistant Prints

    toner creates durable prints

    You’ll really notice how toner helps create prints that last much longer and resist smudging way better than ink. Basically, the heat melts the tiny plastic particles, which then stick firmly onto the paper. This makes your documents super durable and even water-resistant. Because of this process, your prints stay sharp and clean, no matter how often you handle them.

    Toner Durability Benefits

    Although laser printers don’t use ink, they rely on toner to deliver prints that stand up to everyday wear and tear. Toner durability comes from the fusing process, where heat and pressure permanently bond toner particles to the paper.

    This guarantees your prints stay smudge-proof and resist fading, even with frequent handling or exposure to humidity. The chemical makeup of toner, including plastic resins, plays a key role in this long-lasting quality.

    Here’s why toner durability benefits you:

    • Prints resist smudging and water damage thanks to strong fusing
    • Documents maintain clarity over time despite environmental factors
    • Toner-based prints outperform inkjet ones in durability and fade resistance

    With toner, you get reliable, tough prints built to last.

    Smudge-Resistant Printing Features

    Laser printers rely on toner’s unique heat-fusing process to create prints that resist smudging and wear. When you print, the toner’s plastic particles are melted and pressed onto the paper, bonding permanently through fusing.

    This heat-pressing step guarantees your prints stay smudge-resistant, even when handled or exposed to moisture. Unlike traditional ink, which can smear if wet, toner forms a water-resistant and durable surface that won’t smudge easily.

    The electrostatic method precisely places toner on the page, resulting in sharp, clear images that remain intact over time. Thanks to this fusing process, your laser-printed documents offer lasting quality, standing up to everyday use without losing their crisp, smudge-resistant finish.

    Preparing Your Design for Inkless Laser Printing

    When preparing your design for inkless laser printing, guarantee the lines are dark and crisp so the laser can create precise burn marks. Focus on high contrast to help the laser distinguish edges clearly, ensuring consistent results. Adjusting your design’s line thickness prevents overexposure while maintaining visibility.

    Also, choose the right format. Vector files like SVG keep your design sharp and detailed throughout the process.

    Keep these tips in mind:

    • Use high-contrast images with well-defined edges to maximize laser accuracy.
    • Optimize line thickness and density for uniform burn marks without smudging.
    • Convert your design to vector formats to preserve clarity during engraving.

    Before you finalize your project, test your design on scrap material to confirm the burn marks are dark enough. This step helps avoid wasted materials and ensures your inkless laser printing delivers crisp, clean results every time.

    Getting Sharp Prints From Your Laser Printer

    If you want your prints to stand out with sharp detail, you need to fine-tune your printer’s calibration and settings. Start by adjusting the toner density; too much toner can cause smudging, while too little results in faded prints. Proper calibration of the laser ensures that toner fuses evenly onto the paper, which is essential for crisp lines and clear images.

    Pay attention to your printer’s resolution and contrast settings. Higher resolution generally means better print quality with finer details. Also, regularly clean the photosensitive drum and fuser unit to prevent streaks or blurs caused by residue buildup.

    Using high-quality, smooth paper can further enhance sharpness by allowing toner to adhere properly without bleeding. By combining these steps—calibration, toner adjustment, maintenance, and the right paper—you’ll consistently produce sharp, professional-looking prints from your laser printer without relying on ink.

    Tips to Print Without Ink on Your Laser Printer

    Although you don’t need ink to print with your laser printer, you do need to guarantee it has enough toner and that the printer is well-maintained. To print without ink effectively, focus on keeping your toner cartridges full and your printer in good working order. Proper printer maintenance ensures sharp, clear prints every time.

    Here are some tips to help you print without ink on your laser printer:

    • Regularly check and replace toner cartridges before they run dry to avoid faded prints.
    • Use high-quality paper to enhance print clarity and prevent smudging.
    • Adjust printer settings to optimize toner density for darker, crisper images.

    Maintaining Your Toner Printer for Best Performance

    To keep your toner printer running smoothly and producing high-quality prints, you need to maintain its components regularly. Start by cleaning the printer’s interior, especially the toner cartridge and drum unit, to prevent buildup that can affect print quality.

    Use the maintenance kit recommended by your printer’s manufacturer and replace parts like fuser units and seals as instructed to keep everything functioning properly. Store toner cartridges in a cool, dry place and handle them carefully to avoid leaks and extend their lifespan.

    Regularly check toner levels through your printer’s software or control panel to avoid unexpected print failures and plan replacements timely. Don’t forget to calibrate your printer properly and update the firmware periodically.

    These steps optimize performance and help prevent issues such as streaks or inconsistent printing, ensuring your printer delivers the best print quality possible. Consistent maintenance will keep your toner printer reliable and efficient.

    Inkjet vs Laser Printers: Ink and Toner Compared

    You might be curious about how inkjet and laser printers differ beyond just their names. Well, inkjets use liquid ink cartridges, whereas lasers rely on dry toner powder that fuses to the paper with heat.

    This difference doesn’t just affect print speed; it also changes the kind of output you get and how long your supplies will last. So, depending on what you need, one might suit you better than the other.

    Inkjet Versus Laser

    How do inkjet and laser printers differ when it comes to ink and toner? Inkjet printers use liquid ink sprayed onto paper, while laser printers rely on dry toner powder fused with heat. This fundamental difference affects how they print and what they’re best suited for.

    Consider these points when choosing between them:

    • Inkjet printers excel at vibrant photo printing thanks to their liquid ink.
    • Laser printers produce crisp, fast text and have higher page yields per cartridge.
    • Toner in laser printers is a fine plastic and pigment powder, unlike the liquid ink in inkjets.

    Understanding these distinctions helps you pick the right printer for your needs, whether you prioritize colorful images or efficient document printing.

    Toner Composition Explained

    Although both ink and toner serve the same purpose of transferring color to paper, their compositions and application methods differ considerably. Toner in laser printers is a dry powder made of plastic, pigment, and silica, unlike the liquid ink used in inkjet printers.

    You’ll find that toner particles are negatively charged and adhere electrostatically to the positively charged drum inside the printer. This electrostatic process allows the toner powder to form a precise image on the paper before being fused with heat, creating a durable print.

    In contrast, inkjet printers spray liquid ink droplets directly onto the paper. Understanding this toner composition helps you see why laser printers don’t need traditional ink and why their printing process is distinct from inkjet technology.

    Printing Speed Differences

    Understanding the composition and application of toner versus ink also sheds light on why laser printers outperform inkjets in printing speed. Laser printers use dry toner fused quickly onto paper, allowing them to print hundreds of pages per minute in high-volume settings. In contrast, inkjet printers spray liquid ink droplets, which takes more time to dry and slows down the process.

    You’ll notice laser printers keep a consistent printing speed, even with complex documents or color images.

    Here’s why laser printers excel in printing speed:

    • Toner fuses rapidly, reducing print cycle time.
    • Laser printers handle large volumes efficiently.
    • Inkjet printers slow down with detailed or color prints.

    If speed matters, toner-based laser printers are the clear choice.

    Choosing the Best Printer for Inkless Printing

    When you’re choosing the best printer for inkless printing, it’s important to focus on laser models that use toner instead of liquid ink. Toner cartridges last much longer and print more pages. Laser printers use dry toner powder, which means you won’t need to worry about ink drying up or smudging.

    Plus, toner cartridges typically print between 1,000 to 3,000 pages, making them ideal for high-volume printing. Some advanced printers even use laser-induced carbonization, which removes the need for toner or ink entirely.

    Here’s a quick comparison to help you decide:

    Printer Type Inkless Feature
    Standard Laser Printer Uses toner cartridges
    High-Capacity Toner Longer print runs, cost-effective
    Laser Carbonization No toner or ink required
    Inkjet Printer Requires liquid ink (not inkless)

    Choose based on your volume and budget for efficient inkless printing.

    Frequently Asked Questions

    Can Laser Printers Print on Fabric Without Ink?

    You can’t use ink with laser printers since they rely on toner for fabric printing. To print on fabric without ink, you’ll need to focus on textile compatibility by treating or coating the fabric so the toner sticks properly.

    Using ink alternatives like heat-transfer sheets or fabric-compatible toner helps achieve durable prints. Just remember, untreated fabric won’t hold toner well, so preparing the surface is key for successful fabric printing with a laser printer.

    How Long Does Toner Last Compared to Ink?

    Think of toner as a marathon runner and ink as a sprinter. Toner shelf life outpaces ink by miles, offering cartridge longevity that can reach 3,000 pages or more, even hitting 10,000 with high-yield options.

    Ink vs toner? Inkjet cartridges tire quickly, lasting only 200 to 500 pages. So, when you need endurance and fewer replacements, toner’s dry powder form is your reliable champion in the printing race.

    Are Laser Printers More Eco-Friendly Than Inkjet Printers?

    Yes, laser printers are more eco-friendly than inkjet printers. You’ll notice they have a lower environmental impact because toner cartridges last longer and produce less waste.

    They also use less energy during printing, which reduces energy consumption overall. Plus, many toner cartridges are easier to recycle, helping you minimize your environmental footprint.

    Choosing a laser printer means you’re making a greener choice for your printing needs.

    Can Laser Printers Print in Color Without Ink Cartridges?

    Imagine watching vibrant colors emerge on paper without a drop of ink. Yes, your laser printer can print in color without ink cartridges.

    Instead, you’ll handle laser printer maintenance by focusing on the toner replacement process, swapping out cyan, magenta, yellow, and black toners. This method guarantees sharp print quality and favors laser printers over inkjets for durability.

    You’ll appreciate the clean, efficient color output that toner technology delivers every time.

    Is Toner Safe to Handle During Refills?

    Toner powder safety is vital during the refill process. You shouldn’t handle toner dust carelessly because it can irritate your skin and lungs. Always wear gloves and a mask to protect yourself from inhaling fine particles.

    When refilling, work in a well-ventilated area and clean spills promptly with a damp cloth to avoid spreading dust. Taking these refill process precautions guarantees you stay safe while handling toner cartridges.

    Conclusion

    Think of your laser printer as a painter who uses powdered pigment instead of liquid paint. It doesn’t rely on ink but on toner, a fine dust that creates sharp, lasting images.

    By understanding this, you’re not just printing—you’re crafting with precision and durability. Embrace toner’s power, maintain your printer well, and watch your designs come to life without the mess of ink.

    Your prints will stand strong, like a masterpiece framed in time.

  • Does Costco Sell Printer Ink?

    Does Costco Sell Printer Ink?

    Yes, Costco sells a variety of printer ink cartridges from top brands like HP, Canon, Epson, and Brother, both in-store and online. You’ll find standard, high-yield, and multipack options, including eco-friendly refills that save money and reduce waste.

    Just make sure you check your printer model and cartridge number for compatibility.

    Their prices often beat competitors by 10-20%, plus they offer helpful tips for refilling and troubleshooting if needed.

    Keep exploring to get the most from your ink purchases.

    What Printer Ink Brands Does Costco Sell?

    variety of branded cartridges

    Although inventory can vary by location, Costco sells printer ink cartridges for major brands like HP, Canon, Epson, and Brother both in-store and online. When you browse the Costco ink selection, you’ll find a variety of printer ink brands designed to meet different printing needs, including standard, high-yield, and multipack cartridges.

    This range ensures you can pick cartridges that match your usage, whether it’s for occasional home use or more frequent small business printing. Moreover, Costco offers compatible cartridges for select models, giving you cost-effective alternatives without sacrificing quality.

    These compatible cartridges, along with remanufactured options, make it easier to save money while maintaining reliable print performance. Keep in mind that availability of specific brands and types might differ between stores, so checking online can help you find exactly what you need.

    How To Buy Printer Ink At Costco

    To buy printer ink at Costco, you’ll need an active membership since purchases require it both in-store and online. Start by confirming your printer model and cartridge number to make certain cartridge compatibility.

    Costco offers a variety of options, including popular brands like HP, Canon, Epson, and Brother, so check availability either on their website or at your local warehouse. When browsing, compare prices of Costco’s refillable cartridges and multipacks with other retailers like Amazon or Staples to get the best deal.

    Once you find the right printer ink, inspect the packaging carefully for any damage and verify expiration dates to make sure you’re getting fresh, quality cartridges. By taking these steps, you’ll confidently purchase compatible printer ink at Costco that meets your needs without overspending.

    Types Of Printer Ink Cartridges At Costco

    costco printer ink options

    When shopping for printer ink cartridges at Costco, you’ll find a wide range of options designed to fit various printers and budgets. They stock OEM cartridges alongside remanufactured cartridges and compatible ink for popular brands like HP, Canon, Epson, and Brother. Whether you need standard, high-yield, or multipack cartridges, Costco has you covered with choices tailored to your printing volume and budget.

    Here’s what you can expect:

    • High-quality remanufactured cartridges that save you money without sacrificing performance
    • Compatible ink options that offer reliable printing for various brands
    • Multipacks and combo packs to reduce trips and costs
    • Eco-friendly refill kits to help you cut waste and extend cartridge life

    Costco’s selection suits both home users and small businesses looking for cost-effective, dependable printer ink cartridges.

    Comparing Costco Printer Ink Prices With Other Retailers

    If you want to stretch your budget without sacrificing quality, Costco’s printer ink prices are hard to beat. Costco offers cartridges at prices 10-20% lower than stores like Staples and Best Buy, making it a smart choice for regular ink buyers.

    For example, an HP 62XL black refill at Costco costs around $49.99, while Walgreens charges about $70.99 for the same cartridge. This shows how Costco’s cartridge prices can save you a significant amount, especially if you buy high-yield or bulk multipacks. These options often provide even greater savings compared to single-pack purchases elsewhere.

    Furthermore, Costco’s refillable ink cartridges can save up to 75% per cartridge compared to buying new ones from other retailers. Prices vary based on the cartridge model and printer brand, but whether you shop in-store or online, Costco consistently offers competitive pricing that helps you get more value for your money.

    How To Identify The Right Printer Ink Cartridge At Costco

    check printer model compatibility

    Before you head to Costco, take a moment to double-check your printer model and cartridge number. This way, you’ll make sure you pick the right ink without any hassle. They have a handy compatibility guide that helps you match your printer with the correct cartridge options. It’s a quick and easy step that saves you time and keeps you from running into compatibility issues later on.

    Cartridge Compatibility Guide

    Although finding the right printer ink cartridge at Costco might seem challenging, you can simplify the process by verifying your printer’s exact model number and cartridge part number from your printer manual or the manufacturer’s website. Ensuring cartridge compatibility means matching these details precisely to avoid errors or poor print quality.

    Always check packaging labels for supported printer models and cross-reference part numbers, especially if you’re considering compatible cartridges or remanufactured options. To help you stay confident:

    • Confirm your printer model and cartridge numbers before purchase
    • Look for clear compatibility labels on Costco’s packaging
    • Use official websites for accurate cartridge compatibility info
    • Ask Costco staff or Titan Office Solutions if you’re unsure

    This approach guarantees you pick the right cartridge for your printer model every time.

    Printer Model Verification

    When you want to buy printer ink at Costco, identifying the correct cartridge starts with knowing your printer’s model number. Printer model verification is key to ensuring compatibility. Check your printer’s manual or the manufacturer’s website for cartridge model numbers that match your device.

    At Costco, always compare these numbers with those on the cartridge packaging. You can also use a barcode scanner or visit Costco’s website for product details to confirm compatibility before purchasing.

    Printer Model Cartridge Model Numbers Compatibility Tip
    HP OfficeJet 5255 HP 62XL Match cartridge code exactly
    Canon PIXMA MG3620 Canon PG-245 Verify packaging labels
    Epson EcoTank ET-2720 Epson 212 Use official Costco product info

    How To Use Costco’s Inkjet Refill Services

    Using Costco’s inkjet refill service is super simple and eco-friendly. You just follow some clear steps to refill your cartridge carefully, making sure not to overfill or cause any leaks.

    And here’s the best part: refilling not only saves you money, but it also helps reduce plastic waste. So, it’s a win-win!

    Refill Process Steps

    Before refilling your inkjet cartridges at Costco, you’ll need to identify the compatible cartridge type and gather the proper manufacturer-recommended ink. This ensures the best refill process and maintains your printer’s print quality.

    Start by cleaning the cartridge nozzles to remove old ink and debris. Refill the cartridge slowly and carefully to avoid overflow or damage. Finally, test the cartridge in your printer to confirm proper ink flow and print quality before reinstalling it.

    Keep in mind:

    • Handling cartridges gently protects their delicate parts.
    • Using recommended ink guarantees consistent prints.
    • Following refill steps prevents costly mistakes.
    • Testing after refilling saves frustration later.

    Refill Tips And Benefits

    Although inkjet refilling might seem tricky, Costco’s on-site refill stations make the process straightforward and convenient. When you use these refill stations for cartridge refilling, you’ll benefit from high-quality ink that meets manufacturer standards, ensuring your prints remain sharp and vibrant.

    Before refilling, clean your cartridges to remove debris. This helps prevent clogs and damage. After refilling, test the cartridge to confirm proper ink flow and print quality.

    Regular maintenance, like cleaning nozzles and handling cartridges carefully, not only improves results but also extends cartridge life. By choosing Costco’s refill service, you save money, reduce waste, and enjoy reliable performance while supporting environmentally friendly printing practices.

    Why Choose Costco For Printer Ink Refills

    When you choose Costco for printer ink refills, you tap into significant savings and convenience. Costco ink refills offer up to 50% cartridge savings compared to buying new cartridges, making your printing budget stretch further.

    Plus, their eco-friendly printing approach helps reduce plastic waste by encouraging cartridge reuse and recycling. You get quality you can trust, backed by Costco’s satisfaction guarantee that makes exchanges hassle-free.

    Here’s why choosing Costco stands out:

    • Save money with affordable refill kits and remanufactured cartridges
    • Support sustainable practices that cut down on landfill waste
    • Enjoy the ease of refill stations at select stores for quick service
    • Rely on trusted brands like HP and Titan Office Solutions for quality ink

    How To Refill And Maintain Costco Printer Ink Cartridges

    To refill your Costco printer ink cartridges, the first step is to identify the right cartridge model and make sure you’re using the recommended ink. This helps avoid any compatibility issues. Next, take some time to clean the nozzles carefully—this makes a big difference in print quality.

    When you’re ready to refill, do it slowly to prevent spills or any damage to the cartridge. It’s worth taking your time here. Also, regular maintenance is key. Cleaning your cartridges regularly and always using quality ink will keep your prints looking sharp and help your cartridges last longer.

    Refill Process Steps

    Before you start refilling your Costco printer ink cartridges, make sure you’ve identified the compatible cartridges for your printer model. This guarantees everything fits and functions properly. The refill process demands care to maintain print quality and avoid damage.

    Begin by cleaning the cartridge nozzles and contacts to clear any dried ink or debris. Then, refill slowly with the recommended ink to prevent spills or air bubbles. Avoid cartridges with permanent seals that can’t be reopened.

    After refilling, print a test page to ensure smooth ink flow and crisp print quality.

    • Feel confident knowing your cartridges fit perfectly
    • Enjoy vibrant prints without costly replacements
    • Avoid frustration with clean, clog-free nozzles
    • Save money while protecting your printer’s performance

    Maintenance Tips

    Refilling your Costco printer ink cartridges is only part of the process; maintaining them properly keeps your prints sharp and your printer running smoothly. Before refilling cartridges, always clean the nozzles and contacts thoroughly to ensure proper ink flow and avoid clogs.

    Use manufacturer-recommended ink and follow refill instructions carefully to prevent leaks or damage. Refill slowly and steadily, avoiding air bubbles and overfilling, which can cause ink spillage or print head issues.

    After refilling, run a print head cleaning cycle to check for consistent ink distribution and peak print quality. Finally, store your refilled printer cartridges upright in a cool, dry place to maintain ink stability and extend their lifespan.

    Proper maintenance ensures your Costco cartridges perform their best every time.

    Environmental Benefits Of Costco Ink Refills

    While many people overlook the impact of their printing habits, choosing Costco’s ink refill services can considerably reduce plastic waste by allowing you to reuse cartridges instead of discarding them. Their refill programs encourage you to recycle and minimize the need for new cartridges, which lowers the environmental footprint linked to manufacturing and shipping.

    By refilling your cartridges, you help keep plastic out of landfills and reduce pollution.

    When you opt for Costco’s ink refills, you:

    • Cut down on plastic waste piling up in landfills
    • Support sustainable printing through responsible recycling
    • Decrease the demand for new cartridge production
    • Contribute to lowering plastic pollution in your community

    Costco’s commitment to eco-friendly refill options makes it easier for you to adopt greener printing habits without sacrificing convenience or quality.

    Troubleshooting Costco Printer Ink Issues

    If you encounter issues like cartridge leaks, poor print quality, or ink flow blockages with Costco printer ink, you can often fix them by cleaning the cartridge nozzles and checking that the cartridges are properly installed.

    Troubleshooting printer ink issues also means guaranteeing you use compatible, unexpired cartridges from Costco. Incompatible or expired cartridges may cause printing errors or cartridge recognition problems, which you can often resolve by resetting your printer or updating its software.

    If you use refilled cartridges, remember that improper preparation or incompatible ink can lead to smudging or inconsistent prints. Regularly inspect cartridges for damage, guarantee they’re sealed securely after refilling, and follow manufacturer refill guidelines.

    If print quality still drops, test the cartridge in a different printer or replace the ink to identify if the problem lies with the cartridge or the printer.

    Frequently Asked Questions

    Does Costco Offer Printer Ink Warranties or Satisfaction Guarantees?

    Yes, Costco offers a satisfaction guarantee on their ink refill services, even though they don’t usually provide a traditional ink warranty. If you’re not happy with the print quality or cartridge performance, you can use their return policy to exchange or get a refund for the refilled cartridges.

    Just make sure you follow proper refilling procedures to keep your satisfaction guarantee valid. You can always reach out to Costco’s customer service for help.

    Can Non-Members Purchase Printer Ink at Costco?

    Yes, you can buy printer ink at Costco without a membership, but membership restrictions apply. You might need a Costco gift card or pay with a debit or credit card in-store. Ink refill services may not be available to non-members, and bulk purchasing options typically require membership.

    It’s best to check your local store since policies vary, and you could face a service fee or surcharge when buying ink as a non-member.

    Are Costco Printer Ink Cartridges Compatible With All Printer Models?

    Costco printer ink cartridges aren’t compatible with all printer models. You’ll need to check printer compatibility carefully, as ink compatibility issues can arise if you use the wrong cartridge types.

    Costco offers cartridges for major brands, but newer or less common models might not be supported. Always verify your printer’s specifications and the cartridge details before buying to avoid problems and guarantee proper functioning with your specific printer.

    Does Costco Provide Online Tutorials for Printer Ink Installation?

    Yes, Costco provides printer ink tutorials that help you with ink installation guides and online printing tips. You can access step-by-step videos and written instructions right on their website or through customer support.

    These resources make it easy for you to handle cartridges properly, ensuring compatibility and peak print quality. Whether you’re new or experienced, these tutorials guide you through safe cleaning and maintenance for successful ink installation.

    Costco restocks popular printer ink cartridges like HP and Canon every one to two weeks, ensuring you get the best printer ink pricing. If you’re considering cartridge refill options, Costco often stocks recognized ink cartridge brands to suit your needs.

    Since restock frequency varies by location and demand, it’s smart to check with your local store or online. This way, you won’t miss out on affordable, quality ink for your printer.

    Conclusion

    If you’re looking to save, Costco offers printer ink at prices about 20% lower than many other retailers, making it a smart choice. With trusted brands and easy refills, you get quality and convenience in one place.

    Plus, choosing Costco helps reduce waste through eco-friendly refill options. So, next time you need ink, Costco’s got you covered with great deals and sustainable choices that keep both your printer and the planet running smoothly.

  • Do Canon Printers Come With Ink and How to Check Before Buying

    Do Canon Printers Come With Ink and How to Check Before Buying

    Yes, most Canon printers come with starter ink cartridges or refillable ink bottles, letting you print right away. Starter cartridges hold about 20% ink for initial setup and testing.

    While MegaTank models include full refillable ink tanks for high-volume printing.

    To check ink type and capacity before buying, look at product specs, user manuals, or packaging labels.

    Want to know how ink supplies vary by model and how to plan your purchases? Keep exploring for details.

    Do Canon Printers Come With Ink Cartridges?

    canon printers include starter cartridges

    Most Canon printers come with starter ink cartridges to get you printing right out of the box. These starter cartridges contain less ink than standard replacements, usually around 20% of full capacity, so they’re meant for initial setup and testing rather than prolonged use.

    Depending on your Canon printer model, the ink setup varies: two-cartridge systems include one black and one color cartridge, while individual cartridge systems separate each color. It’s important to keep an eye on your ink levels because these starter cartridges run out faster than you might expect.

    If you have a Canon MegaTank printer, you won’t find cartridges inside. Instead, it uses refillable ink bottles, offering a different way to manage your ink supply. Knowing that most Canon printers include these starter cartridges helps you understand what to expect in terms of ink levels and when it’s time to replace them for continuous printing.

    What Are Starter Ink Cartridges?

    Starter ink cartridges come with your new Canon printer to help you get it set up and test it out right away. They don’t hold as much ink as regular cartridges, so you’ll find yourself needing to replace them sooner than you might think. Knowing when to switch over to the full-capacity cartridges can really save you from running out of ink when you least expect it.

    Purpose Of Starter Cartridges

    Although they contain less ink than regular cartridges, these initial ink cartridges let you start using your new Canon printer right away. Starter cartridges are included to help you complete the initial setup and perform test printing without delay.

    They supply just enough ink in the ink tanks to get your printer up and running, but they’re not designed for extensive use. Once the ink in these starter cartridges runs out, you’ll need to replace them with full-capacity cartridges for ongoing printing needs.

    Understanding the purpose of starter cartridges helps you set realistic expectations. They’re meant to provide a smooth start, not a long-term supply. This way, you can prepare to purchase replacement ink cartridges sooner rather than later to keep your printer running smoothly.

    Ink Volume Differences

    When you unbox your new Canon printer, you’ll notice the included ink cartridges hold considerably less ink than the replacements you’ll buy later. These are starter ink cartridges, designed mainly for initial setup and testing, not for extended use.

    Starter cartridges typically contain about 20% or less of the ink volume found in full-sized replacements. Because of this smaller ink volume, their page yield is notably lower, meaning you’ll need to replace them sooner than standard cartridges.

    Manufacturers include these starter ink cartridges so you can start printing right away, but they’re not meant for high-volume or long-term printing. Understanding this difference helps you plan ahead for purchasing full-sized cartridges once the starter ones run out.

    Replacement Timing Considerations

    Because new printers come with cartridges that hold less ink, you’ll need to replace them sooner than you might expect. Many Canon printers include starter ink cartridges designed to get your printer up and running quickly. These starter cartridges contain about 20% or less ink compared to a standard yield cartridge, so their replacement timing is much shorter.

    Depending on how much you print, starter cartridges typically last only a few hundred pages. Once the ink runs out, you’ll want to switch to standard yield cartridges or high-yield options for longer-lasting performance. Understanding replacement timing helps you plan your purchases better and avoid interruptions in your printing tasks.

    Starter ink cartridges are convenient but temporary solutions, not meant for extended use.

    Differences Between Starter and Replacement Canon Ink Cartridges

    When you buy a new Canon printer, the starter cartridges that come with it actually have much less ink than the replacement ones. So, they tend to run out faster. Replacement cartridges, on the other hand, offer a higher page yield. This means you can print a lot more before needing to swap them out. Knowing the difference between starter and replacement cartridges can really help you plan your printing needs better.

    Starter Cartridge Ink Volume

    Starter Canon ink cartridges contain markedly less ink than their replacement counterparts, usually around 20% or less of the full capacity. This reduced ink volume is intentional, as starter cartridges in Canon printers are meant primarily for initial setup and testing, not extended use.

    When you buy a new Canon printer, the starter cartridge helps you get started but won’t last as long.

    Here’s what you should know about starter cartridge ink volume:

    • Holds markedly less ink than replacement cartridges
    • Designed for initial printer setup and calibration
    • Has a much lower page yield compared to standard cartridges
    • Replacement cartridges provide longer printing life
    • Packaging or specs detail exact ink volume and expected pages

    Understanding this helps you plan when to buy replacement ink for your Canon printer.

    Replacement Cartridge Page Yield

    Although initial cartridges get you printing right away, replacement Canon ink cartridges deliver a considerably higher page yield, letting you print more pages before needing a swap. Starter cartridges in Canon printers typically offer only about 200-300 pages for black ink and less for color because they contain roughly 20-30% of a full cartridge’s capacity.

    In contrast, replacement cartridges like the PGI-250 or CLI-251 series provide a much higher page yield, often exceeding 600 pages for black and 400 for color at standard coverage. Checking the page yield of Canon printers’ replacement cartridges helps you plan printing costs and frequency. Choosing higher-yield replacement cartridges reduces how often you change ink and saves money over time.

    Cartridge Usage And Purpose

    How long your Canon printer’s ink lasts depends heavily on the type of cartridge you use. Starter cartridges included with new printers are meant for the initial setup and testing. They contain less ink than replacement cartridges. Once you’ve completed the initial setup, you’ll want to switch to replacement ink cartridges for longer use.

    Here’s what to keep in mind:

    • Starter cartridges provide basic functionality for initial setup and short-term printing.
    • They usually hold less ink and aren’t refillable.
    • Replacement cartridges offer higher page yields and better cost efficiency.
    • Replacement cartridges support ongoing, high-volume printing.
    • Canon offers both individual color and multi-color starter and replacement cartridge options.

    Choosing the right cartridge ensures smooth printing without frequent interruptions.

    Which Canon Printers Include Color Ink?

    When you’re choosing a Canon printer for color projects, you’ll find that most PIXMA series and imageCLASS inkjet models include color ink cartridges to handle full-color printing. These Canon printers come equipped with the standard set of ink cartridges: cyan, magenta, yellow, and black. This way, you can print vibrant, full-color documents right out of the box.

    On the other hand, Canon laser monochrome printers, like the imageCLASS LBP series, don’t include color ink since they only use black toner for printing.

    Before buying, always check the product specifications or the box contents to confirm if the printer includes color ink cartridges. This step ensures you get the right printer for your needs without surprises.

    How Are Canon MegaTank Printers Supplied With Ink?

    refillable ink tanks included

    When you buy a Canon MegaTank printer, it actually comes with refillable ink tanks right in the printer. Plus, you get bottles of black, cyan, magenta, and yellow ink included. These ink bottles are sealed, which makes refilling super easy and mess-free—you just pour the ink directly into the tanks.

    This setup is great if you do a lot of printing because it supports high-volume use. You can print thousands of pages in each color without having to worry about changing the ink all the time. Pretty convenient, right?

    Ink Bottles Included

    Curious about what comes in the box with Canon MegaTank printers? These models stand out because they include refillable ink bottles designed to get you started right away. Here’s what you’ll find with the ink bottles included:

    • Multiple sealed ink bottles for cyan, magenta, yellow, and black
    • Refillable ink tanks built into the printer instead of cartridges
    • Enough ink to print thousands of pages before needing a refill
    • Bottles designed to prevent leaks during transport and setup
    • Immediate printing capability without buying extra ink

    With Canon MegaTank printers, you skip cartridge replacements. Instead, you simply top up the tanks with the included refillable ink bottles, making your printing efficient and cost-effective from day one.

    High-Volume Printing Benefits

    Beyond just including refillable ink bottles, Canon MegaTank printers come equipped with high-capacity ink tanks pre-filled to support heavy printing demands. Unlike traditional printers that rely on high-yield cartridges, MegaTank models supply you with enough ink right out of the box for high-volume printing.

    These transparent ink tanks let you easily monitor ink levels, so you know exactly when it’s time to refill. The included black and color ink bottles can print thousands of pages, up to 7,000 in black and 6,000 in color, dramatically lowering your ongoing ink costs.

    If you print frequently or in large volumes, these MegaTank printers offer a cost-effective, convenient solution that keeps you running longer without worrying about constantly replacing cartridges.

    How to Check Ink Cartridge Capacity and Page Yield

    Although ink cartridge capacity and page yield might seem confusing at first, you can easily find this information in your printer’s technical specifications or user manual. Checking these details helps you understand how long your ink will last and when to expect replacements. Starter cartridges usually have a lower page yield than standard or high-yield cartridges, so keep that in mind.

    To check ink cartridge capacity and page yield effectively, look for the cartridge model number (e.g., PG-245 or CL-246). Then, refer to the printer’s official documentation or user manual. You can also download manufacturer PDFs for exact page yield numbers.

    Compare starter cartridges’ lower page yield with standard options. It’s helpful to review third-party supplier estimates for compatible cartridges as well. This approach guarantees you choose the right cartridge based on your printing needs and avoid surprises with ink replacement frequency.

    How to Find Cartridge Info on Packaging and Online

    check packaging and online details

    Where can you quickly find the cartridge details before buying a Canon printer? Start by examining the printer’s packaging. Manufacturers often list the included cartridges or setup ink tanks right on the box, specifying model numbers and colors.

    Look for labels like “starter cartridges,” “setup ink,” or “initial ink supply” that indicate what comes inside. Next, check the product description and specifications online. Retailers and Canon’s official site usually provide detailed cartridge information, including the type and quantity included.

    Don’t overlook product images, as they often show the cartridges or ink tanks packaged with the printer. Furthermore, consult the user manual or product datasheet available on the manufacturer’s website; these documents clearly outline the cartridge types and initial ink capacity.

    Tips for Planning Canon Ink Purchases After Starter Runs Out

    Once your Canon printer’s starter cartridges run out, you’ll need to plan your next ink purchase carefully to avoid interruptions. Starter cartridges have less ink than standard ones, so it’s important to think about how often you print and how much ink you get from each cartridge before buying replacements.

    Here are some tips to help you choose the right cartridges:

    • Assess your monthly printing volume to decide between standard or high-yield cartridges.
    • Check the ink yield on replacement cartridge packaging to estimate how long they’ll last.
    • Consider high-yield cartridges if you print frequently. They offer better value and mean fewer replacements.
    • If you have a MegaTank model, plan your ink bottle purchases for high-volume printing.
    • Keep track of ink levels so you can reorder before you run completely out.

    Should You Use Compatible or Refilled Canon Cartridges?

    Why consider compatible or refilled Canon cartridges for your printer? Both options can save you money compared to genuine Canon cartridges. Compatible cartridges are third-party products designed to fit your Canon printer. They often offer good print quality and page yields.

    Refilled cartridges reuse original Canon cartridges by adding ink manually. This can also cut costs but may affect print quality or void your warranty.

    Here’s a quick comparison:

    Aspect Compatible Cartridges Refilled Cartridges
    Cost Usually lower than originals Lowest cost option
    Print Quality Can match originals with quality brands Variable; risk of lower print quality
    Risk to Printer Some risk if poorly made Risk if not properly refilled

    If you choose compatible cartridges, pick reputable suppliers with guarantees. This helps ensure quality and protects your printer.

    How to Tell If Your Canon Printer Includes Color or Black Ink

    Although many Canon printers come with ink cartridges included, it’s important to check whether your model has color or just black ink before buying. Canon printers that support color printing typically come with color ink cartridges—cyan, magenta, yellow, and black. To avoid surprises, you should verify the details beforehand.

    Here’s how to tell if your Canon printer includes color or black ink:

    • Check the product specifications and packaging for ink cartridge details.
    • Look for Canon PIXMA or imageCLASS inkjet models that usually include color ink.
    • Note that monochrome laser printers only come with black ink cartridges.
    • Identify if the model features refillable ink tanks like MegaTank that come with pre-filled color ink bottles.
    • Review the manufacturer’s product information or model number for ink cartridge type.

    Frequently Asked Questions

    How Long Do Canon Starter Ink Cartridges Typically Last?

    Canon starter ink cartridges typically last between 100 to 200 pages for black ink and 75 to 150 pages for color ink. Your ink cartridge lifespan depends on ink consumption rates, which vary with print quality and document complexity.

    Because starter cartridges hold less ink, you’ll experience a higher refill frequency compared to full-capacity cartridges. To reduce how often you replace ink, consider switching to high-yield cartridges if you print frequently.

    Can I Recycle Canon Ink Cartridges After Use?

    Yes, you can recycle Canon ink cartridges after use. Canon offers convenient recycling programs that simplify cartridge disposal, often including prepaid mailers to send back empty cartridges.

    Are There Warranty Implications if I Use Third-Party Ink?

    About 30% of printer issues stem from using non-genuine ink. Yes, using third-party ink can affect your Canon printer’s ink warranty.

    Manufacturers place restrictions on ink warranty coverage, meaning damage caused by third-party compatibility issues might not be covered. If you want to avoid voiding your warranty, stick to Canon-approved ink.

    Always check your printer’s ink warranty terms carefully before trying third-party cartridges.

    How Do Environmental Conditions Affect Canon Ink Cartridge Performance?

    Environmental conditions directly impact your Canon ink cartridge performance. Temperature changes can cause ink to thicken or expand, which might lead to clogs or inconsistent flow.

    High humidity slows ink drying, causing smudges or smears on your prints. Low humidity, on the other hand, may cause ink to dry too quickly and clog nozzles.

    Keeping your printer in a stable, dust-free environment helps maintain ideal ink delivery and print quality.

    Can I Upgrade My Canon Printer’s Ink System Later?

    It’s funny how you might want to upgrade your Canon printer’s ink system just when you run out of ink! But here’s the deal: most Canon printers don’t support ink cartridge compatibility changes or refills beyond what they’re designed for.

    You’ll need to check printer ink refill policies carefully because official vs third party ink often affects this. If you want refillable tanks, consider buying a compatible model made for that from the start.

    Conclusion

    When you buy a Canon printer, it often comes with starter ink cartridges. Think of them as a seed, enough to get your printing garden growing. Knowing whether your model includes color or just black ink can save you time and money.

    Always check the packaging or online details before purchasing. Planning ahead for ink replacements guarantees your printer keeps humming smoothly.

    Choose wisely between original, compatible, or refilled cartridges to avoid any hiccups down the road.

  • Top 7 Benefits of the Chase Ink Business Card

    Top 7 Benefits of the Chase Ink Business Card

    You’ll earn 3X points on key business expenses like shipping and travel, plus a 100,000-point welcome bonus when you spend $8,000 in three months.

    Employee cards help you boost rewards and manage spending easily.

    Redeem points flexibly for travel and cash back while enjoying strong travel and purchase protections.

    You’ll also get cell phone coverage, no foreign transaction fees, and DoorDash savings.

    Keep exploring to uncover even more ways this card supports your business.

    How to Earn 3X Points on Ink Business Preferred Expenses

    maximize rewards within cap

    Wondering how to maximize your rewards with the Chase Ink Business Preferred card? Focus on using it for all eligible business purchases in categories like shipping, advertising, internet, cable, phone, and travel. These are the key categories where you’ll earn 3X points per dollar spent.

    Keep in mind, the 3X points rate applies only to the first $150,000 spent annually across these categories, so tracking your spending is vital to stay within this annual cap.

    The 3X points rate applies only to the first $150,000 spent annually, so tracking your spending is essential.

    To maximize benefits, prioritize your Ink Business Preferred card for all eligible expenses in these categories instead of other payment methods. By combining your purchases up to the $150,000 limit, you can earn as many as 450,000 points each year, greatly boosting your rewards.

    Being mindful of spending limits ensures you don’t miss out on these valuable benefits and helps you make the most of your business purchases with the Ink Business Preferred.

    Take Advantage of the Ink Business Preferred 100,000-Point Welcome Bonus

    How can you quickly boost your Chase Ink Business Preferred rewards? By taking full advantage of the generous 100,000-point welcome bonus. To earn these bonus points, you simply need to meet the $8,000 spending requirement within the first three months.

    This spending limit is quite manageable for many small businesses, making the bonus attainable. Once you earn the bonus points, you can redeem them through Chase Ultimate Rewards for approximately $2,050 in value, depending on your chosen redemption options.

    You have flexible ways to redeem your points, including flights, hotel stays, gift cards, or bookings through the travel portal. Additionally, you can transfer points at a 1:1 ratio to 13 airline and hotel partners, unlocking even higher value.

    Use Ink Business Preferred Employee Cards to Boost Rewards and Control Spending

    employee cards boost rewards

    You can issue employee cards with customizable spending limits to keep business expenses in check. Every purchase they make earns 3X points that automatically pool into your main account, boosting your rewards. Plus, tracking expenses gets easier since all transactions are streamlined through these cards.

    It’s really convenient because you get to control how much each employee can spend, so there are no surprises. And since all the points go straight to your main account, your rewards add up faster without any extra effort on your part. Keeping an eye on expenses becomes a breeze too—everything is organized in one place.

    Employee Card Spending Limits

    One of the biggest advantages of the Chase Ink Business Preferred card is the ability to issue employee cards at no extra cost. This lets your team make purchases while you keep spending under control.

    You can set spending limits for each authorized staff member’s card. This gives you precise purchase control and helps prevent overspending on business expenses.

    All transactions made with employee cards earn the same reward points as your main account, boosting your overall rewards. Plus, every employee card purchase automatically consolidates into your primary account, simplifying expense tracking and reconciliation.

    This streamlined card management enhances spending oversight and reduces the hassle of manual reimbursements. It makes it easier to monitor and control your company’s finances efficiently.

    Shared Rewards Accumulation

    Although managing multiple employee cards might seem complex, the Chase Ink Business Preferred card makes it easy to boost your rewards while maintaining control. You can issue employee cards at no extra cost, allowing authorized employees to make purchases that earn rewards directly for you, the primary account holder.

    Every purchase made with these cards earns the same 3X points on eligible categories and 1X on others, maximizing reward accumulation across your team. Best of all, rewards from all employee cards are automatically pooled into your main account, streamlining reward pooling and giving you greater flexibility in redemption.

    This shared rewards accumulation ensures you capitalize on every business expense while maintaining oversight and simplifying expense tracking without manual calculations.

    Simplified Expense Tracking

    Managing multiple employee cards not only boosts your rewards but also streamlines expense tracking and spending control. With Chase Ink Business Cards, you can set individual spending limits, receive real-time purchase alerts, and consolidate all transactions into one account for easy reconciliation.

    This setup simplifies expense management, reduces manual reimbursements, and accelerates generating detailed expense reports. Plus, every purchase earns reward points, maximizing benefits while keeping business expenses in check.

    Feature Benefit
    Employee Cards Authorized spending with rewards
    Spending Limits Control business expenses
    Purchase Alerts Real-time monitoring
    Expense Reports Detailed quarterly insights
    Reconciliation Simplified tracking & management

    Redeem Points Flexibly for Travel, Cash Back, and More

    flexible rewards redemption options

    Because Chase Ink Business cards store your rewards in the Ultimate Rewards account, you can easily combine points from multiple Chase cards and redeem them in ways that suit your needs. This flexibility lets you maximize the value of your rewards whether you’re traveling or seeking cash back. You can:

    1. Redeem points through the Chase Travel portal at about 1.75 cents each, giving you convenient, flexible travel booking options.
    2. Transfer points at a 1:1 ratio to 13 airline and hotel partners, often unlocking higher-value redemptions for flights and stays.
    3. Convert points into cash back, gift cards, or statement credits, providing versatile redemption choices beyond travel.

    With Ultimate Rewards, your points aren’t locked into one use. You control how to redeem rewards, whether by cash back or premium travel experiences, making your rewards truly flexible and tailored to your business needs.

    Make the Most of Travel and Purchase Protections

    When you use your Chase Ink Business Preferred card, you get valuable travel and purchase protections that help shield your business from unexpected expenses. These travel benefits cover trip cancellation and trip interruption up to $5,000, trip delay coverage up to $500 per ticket, and baggage delay protection up to $3,000, easing worries during trips.

    Purchase protection safeguards your business purchases against damage or theft for 120 days, with coverage up to $10,000 per claim. Plus, travel accident insurance provides up to $500,000 in coverage, adding peace of mind.

    Protection Type Coverage Limit Benefit to You
    Trip Cancellation Up to $5,000 Avoid losing prepaid travel costs
    Trip Delay Coverage $500 per ticket Reimburse unexpected expenses
    Baggage Delay Up to $3,000 Replace essentials promptly
    Purchase Protection $10,000 per claim Safeguards business assets
    Travel Accident Insurance $500,000 Ensures safety on the go

    These protections keep your business resilient against travel and purchase risks.

    Get Cell Phone and Purchase Protection Benefits

    With the Chase Ink Business Preferred card, you’re covered for cell phone damage up to $1,000 per claim. Plus, you get extended warranty benefits that can add up to a year to your manufacturer’s warranty.

    On top of that, any new purchases you make are protected against theft or damage for 120 days, with limits up to $10,000 per claim. Just remember to charge those purchases to your card to make sure you qualify for these valuable protections.

    Cell Phone Damage Coverage

    Two key protection benefits of the Chase Ink Business Preferred card help safeguard your valuable tech purchases: cell phone damage coverage and purchase protection. The card offers robust cell phone protection, covering damage, breakage, and theft for eligible new cell phones charged to your card. Here’s what you need to know:

    1. Coverage includes up to $1,000 per claim with a $100 deductible, and you can file up to 3 claims annually.
    2. The protection applies only to new cell phones, excluding pre-owned devices, and lasts up to 120 days from the damage or theft incident.
    3. To qualify, the purchase must be made with your Chase Ink Business Preferred card, ensuring your insurance is activated.

    This coverage gives you peace of mind, protecting your essential business technology against unexpected mishaps.

    Extended Warranty Benefits

    Although most manufacturers offer warranties on their products, the Chase Ink Business Preferred card extends that protection by adding an extra year to the original warranty, up to three years total. This extended warranty gives you added peace of mind by providing a warranty extension on eligible items beyond the manufacturer’s warranty.

    Alongside this, the card offers purchase protection that covers damage coverage and theft protection for 120 days, reimbursing you up to $10,000 per claim with a generous claim limit. Plus, cell phone damage coverage is included, protecting you against theft or breakage up to $1,000 per claim, with up to three claims annually.

    Just remember, all purchase protections require you to charge your purchases to the Chase Ink Business Preferred card to qualify.

    Purchase Protection Limits

    How much protection do you get when using the Chase Ink Business Preferred card for your purchases? This card offers robust purchase protection coverage against damage or theft for eligible items, with a generous reimbursement limit. Here’s what you need to know:

    1. The purchase protection program covers damage or theft up to 120 days from the incident, with claims reimbursed up to $10,000 each and a $50,000 annual maximum.
    2. Cell phone protection applies to damage, theft, or breakage, covering up to $1,000 per claim (subject to a $100 deductible) and allows three claims per year.
    3. Purchases made with the card automatically qualify, safeguarding your high-value business assets and minimizing out-of-pocket expenses through timely claims.

    This extensive coverage ensures you’re well protected against unexpected losses.

    Avoid Foreign Fees and Enjoy DoorDash Perks

    When you travel internationally for business, the Chase Ink Business Preferred Credit Card saves you money by charging no foreign transaction fees. This means you can handle international expenses and purchases abroad without worrying about extra costs eating into your budget.

    With no foreign fees, every transaction abroad is more cost-effective, making it a smart choice for business travel.

    Beyond avoiding foreign transaction fees, this card also offers valuable DoorDash perks. After activation, you get up to $10 per month in savings on non-restaurant food delivery orders through DoorDash.

    That adds up to at least $120 annually, helping you save on convenient food delivery during busy workdays. Combining these benefits, the Chase Ink Business Preferred Card not only cuts costs on international spending but also enhances daily convenience with ongoing DoorDash perks.

    It’s a powerful tool for managing business travel expenses and enjoying reliable savings.

    Frequently Asked Questions

    What Is the Annual Fee for the Chase Ink Business Card?

    The annual fee for the Chase Ink Business Preferred credit card is $95. You’ll appreciate the clear annual fee structure that complements its strong credit card features like reward programs, sign-up bonuses, and travel benefits.

    While managing interest rates and credit score impact, you’ll also enjoy purchase protections, security features, and card customization. This fee is reasonable considering the value you get, making it easier for your business to thrive with solid perks and flexibility.

    Can I Add Multiple Employee Cards for Free?

    Yes, you can add multiple employee cards for free with no additional card fees. The cardholder limits let you set specific employee spending limits, giving you employee access control and helping manage expenses easily.

    The card issuance process is simple, and cardholder restrictions guarantee proper use. Plus, card management tools provide detailed cardholder reporting, streamlining oversight.

    These employee card benefits make tracking and controlling business spending much more efficient.

    Is There a Referral Bonus Program Available?

    Yes, you’ll find referral incentives with bonus activation when you invite others to apply. Make sure you meet the eligibility criteria to participate and keep an eye on referral tracking to see your progress.

    Partner networks can boost your earning potential, but watch for referral restrictions and program updates. Bonus tiers and promotional periods may affect how many points you earn, so stay informed to maximize rewards through the referral program.

    Does the Card Offer a Flexible Payment Plan Option?

    You’ve got a flexible repayment option that lets you spread out your business expenses without breaking the bank. With installment options and deferred payments, you can manage billing flexibility and payment scheduling to fit your cash flow.

    Interest options apply, so smart credit management is key. The card’s repayment plans work within billing cycles, giving you room for better financial planning.

    It’s a handy tool when you want to keep your finances sailing smoothly.

    Are There Any Limits on Cash Back Categories?

    You won’t face many cash back restrictions with Chase Ink cards, but some categories have earning caps or bonus thresholds. For example, certain bonus categories might have spend requirements or rebate caps annually.

    There are no category exclusions or promotional restrictions on basic cash back, and category rotation doesn’t apply. Redemption limits and cashback timing are flexible, so you can redeem rewards anytime without worrying about limits on your earnings.

    Conclusion

    By using your Chase Ink Business Preferred card, you can earn 3X points on travel and business expenses, making every dollar work harder for you. In fact, cardholders have redeemed over 100,000 welcome bonus points, giving a significant boost to their rewards right from the start.

    With flexible redemption options, travel protections, and no foreign fees, this card truly supports your business growth while saving you money. Don’t miss out on these valuable benefits.