Category: Ink

  • Where to Buy Printer Ink: 7 Best Online Stores

    Where to Buy Printer Ink: 7 Best Online Stores

    You can find quality printer ink at top online stores like Amazon, eBay, and InkJetSuperstore, where you’ll get better prices, wide selections, and convenient doorstep delivery.

    These retailers often offer brand-specific compatibility tools, customer reviews, and warranties, so you can buy confidently.

    If you prefer certified remanufactured or refilled ink, they’ve got affordable options too.

    Plus, subscription services and manufacturer sites deliver savings and easy recycling.

    Keep exploring to uncover insider tips and smart buying strategies.

    How To Find Compatible Printer Ink Cartridges

    use cartridge compatibility tools

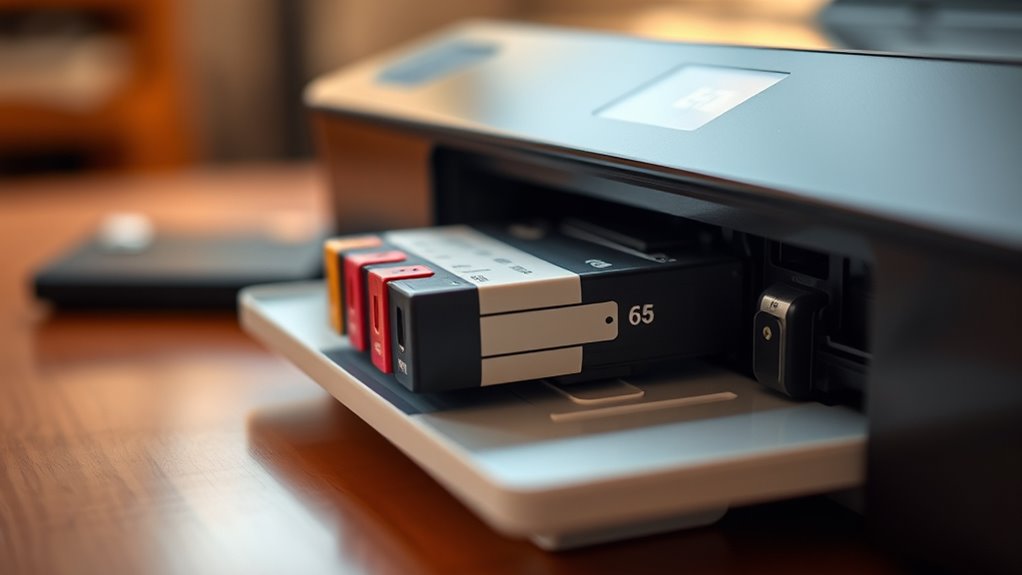
    Wondering how to find compatible printer ink cartridges without the hassle? Start by using brand-specific cartridge finder tools on retailer websites. These tools let you enter your printer’s series and model number precisely, ensuring you get the correct cartridges that match your printer’s specs.

    A reliable cartridge finder will offer filters and compatibility guides listing OEM, compatible, and remanufactured options. This helps you pick the best fit for your needs. Before buying, check customer reviews and product descriptions to confirm the cartridges perform well and maintain print quality.

    If you’re ever unsure about compatibility, don’t hesitate to reach out to customer support or use live chat features for quick answers. By following these steps, you’ll confidently select printer ink cartridges that work smoothly with your printer, saving time and avoiding frustrating mismatches.

    Best Online Retailers For Affordable Printer Ink

    If you want to save money on printer ink, shopping at online retailers is a smart move. Amazon often undercuts brick-and-mortar stores by about $5 to $11 on printer cartridges, making it a great starting point for low prices.

    eBay is another option where you can find both new and refilled cartridges at considerably reduced rates, with many vendors offering reliable options.

    For the lowest prices on OEM, compatible, and remanufactured cartridges, sites like InkJetSuperstore pass manufacturer discounts directly to you. Plus, many online stores offer weekly coupons and free shipping on orders over $50, adding even more savings.

    Compared to physical stores, these online retailers provide a wider selection, better deals, and the convenience of delivery right to your door. By choosing online, you get affordable printer cartridges without sacrificing quality or convenience.

    Where To Get Refills And Remanufactured Printer Ink

    refills remanufactured cartridges savings

    Beyond buying new cartridges, you can save even more by choosing refills or remanufactured ink. Refilled printer cartridges are a smart choice if you want to cut costs without sacrificing quality.

    Stores like Cartridge World and online platforms such as eBay offer these cartridges at prices much lower than new OEM options. You’ll often find remanufactured ink and toner cartridges on Amazon and eBay that come certified and tested for reliability.

    These options typically cost 30-60% less and often include warranties up to 12 months, giving you peace of mind. If you prefer a local option, many stores provide refill services that can bring your cartridge cost down to around $10.

    Plus, participating in recycling programs at retailers like Staples not only helps the environment but can also earn you discounts or rewards when you return used cartridges. Choosing refilled printer cartridges is both eco-friendly and budget-friendly.

    Why Buy Printer Ink Directly From Manufacturers

    Choosing to buy printer ink directly from manufacturers often gives you access to exclusive discounts, coupons, and promotional offers you won’t find through third-party sellers. When you buy ink straight from the source, you’re guaranteed authentic, high-quality products that perfectly fit your printer, including laser toner cartridges.

    This reduces the risk of leaks, spills, or damage that can happen with incompatible or counterfeit cartridges. Manufacturers also frequently provide free or discounted shipping, sometimes even next-day delivery, saving you time and money. Plus, buying direct guarantees you participate in official recycling programs, making it easier to dispose of used cartridges responsibly.

    While you might find cheaper deals elsewhere, the peace of mind and reliability you get from purchasing straight from manufacturers often outweigh the savings. If you want consistent quality and genuine products, buying directly is your best bet.

    Ink Subscription Services Explained

    convenient cost effective ink delivery

    Ink subscription services send ink straight to your door based on how much you print. It starts at just a few dollars a month, which is pretty affordable. They keep an eye on your printer’s ink levels remotely, so you won’t run out when you least expect it.

    On top of that, these plans often save you money. And they usually include easy recycling options, making it a more eco-friendly choice too.

    Subscription Plans Overview

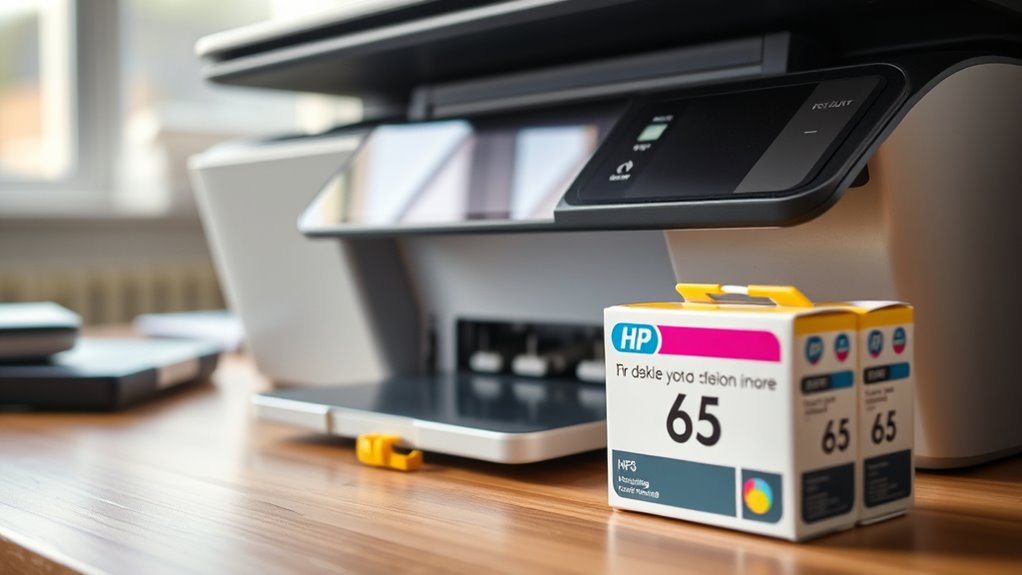
    Although traditional cartridge purchases remain common, subscription plans like HP’s Instant Ink offer a smarter way to manage your printing needs. With an ink subscription, your printer automatically orders HP Ink when levels run low, starting at just $2.99 per month.

    These plans include a set number of pages monthly, with extra pages billed at a discounted rate, helping you control costs. You’ll enjoy free shipping, easy cartridge recycling, and quick replacements, all eco-friendly and hassle-free.

    Plus, these subscriptions are flexible. You can change, pause, or cancel anytime without penalties. Many users save up to 50% compared to buying cartridges individually.

    If you want convenience and cost savings, subscription plans like HP’s are a practical choice to keep your printer running smoothly.

    Benefits Of Ink Delivery

    Subscription plans like HP’s Instant Ink make managing your printer supplies effortless by delivering ink right to your door before you run out. With an ink subscription, you’ll never face unexpected interruptions because cartridges arrive automatically based on your usage.

    These plans often come with free shipping, saving you extra costs and trips to the store. You can customize your subscription to fit your monthly printing needs, making it both convenient and budget-friendly.

    Plus, many services offer easy cartridge recycling options, helping you print more sustainably. By choosing ink delivery, you streamline your printing routine, avoid last-minute runs, and enjoy cost savings, all while keeping your printer ready to go without any hassle.

    Brick-And-Mortar Stores With Ink And Recycling Rewards

    When you need printer ink quickly, brick-and-mortar stores like Walmart and Staples have you covered with immediate in-store availability. It’s super convenient to just walk in and grab what you need right away.

    Plus, Staples offers recycling rewards, which is a nice bonus. When you bring in used HP cartridges, you can get cash or gift cards. It’s a great way to support eco-friendly recycling programs while saving a bit.

    In-Store Ink Availability

    Wondering where to grab printer ink quickly? Brick-and-mortar stores like Walmart and Staples let you buy printer cartridges on the spot, which is perfect for urgent needs. While prices may be higher than online, their convenience can’t be beaten.

    Staples also offers eco-friendly recycling rewards, encouraging responsible disposal and savings on future printer cartridge purchases. HP’s in-store deals include coupons and free next-day shipping for direct buys.

    Store Highlights
    Walmart Immediate purchase, higher prices
    Staples Recycling rewards, $4/cartridge
    HP Coupons, free next-day shipping
    Target Limited selection, quick pickup
    Best Buy Competitive prices, in-store stock

    These stores offer quick access but limited cartridge variety compared to online options.

    Recycling Reward Programs

    Although buying printer ink in-store offers convenience, participating in recycling reward programs adds extra value by turning your used cartridges into cash or discounts. These programs not only help you save money but also support eco-friendly disposal and sustainable printing.

    At Staples, for example, you can earn $4 per cartridge recycled, up to five cartridges. That means a $20 reward for recycling five or more. Rewards often come as store credits or discounts on future purchases, encouraging you to keep recycling.

    Here’s why you should join these recycling reward programs:

    • Earn cash or discounts on ink purchases by recycling cartridges.
    • Reduce environmental waste with responsible disposal.
    • Support sustainable printing while saving money.

    If you have questions, don’t hesitate to contact us for more details.

    How To Choose The Best Online Ink Store

    Since selecting the right online ink store can be overwhelming, you should focus on key features that guarantee a smooth and reliable purchase. Start by choosing online stores with compatibility tools and detailed printer model searches to ensure you get the correct ink cartridges.

    Look for clear guarantees like satisfaction warranties and quality certifications for peace of mind. Competitive pricing, bulk pack options, and regular discounts help you save more.

    Fast shipping with same-day processing and free delivery on qualifying orders adds convenience. Lastly, secure checkout and accessible customer support make your experience hassle-free.

    Feature What to Look For
    Compatibility Tools Printer model search, cartridge matchers
    Guarantees Satisfaction warranty, quality certified
    Pricing Competitive rates, bulk packs, coupons
    Shipping Same-day processing, free shipping
    Customer Support Easy contact, troubleshooting assistance

    Frequently Asked Questions

    How Long Does Printer Ink Typically Last Once Opened?

    Once opened, printer ink typically lasts between 6 months to 2 years, depending on the ink lifespan and how you handle storage. To get the most out of your ink, follow storage tips like sealing cartridges tightly and keeping them in a cool, dark place.

    Exposure to air and light speeds up drying or degradation, so proper storage really extends usability. Remember, manufacturers usually recommend using ink within 6 to 12 months for best quality.

    Can Printer Ink Damage My Printer if It’s Expired?

    Yes, expired printer ink can damage your printer. When the ink expiration date passes, the cartridge longevity decreases, causing the ink to dry out or separate. This leads to clogged printheads and inconsistent ink flow, which can harm your printer’s performance.

    Using expired ink might also cause leaks or malfunctions and void your warranty. To protect your printer, always monitor cartridge longevity and replace ink before it expires.

    What Should I Do With Empty Ink Cartridges?

    What will you do with empty ink cartridges once they’re spent? Don’t just toss them. Take advantage of ink cartridge recycling programs to keep harmful chemicals out of landfills.

    You can find refill station locations at stores like Staples or Office Depot, where you might also earn rewards for returning cartridges. Some manufacturers even offer free prepaid postage for recycling.

    Recycling helps the environment and keeps your printer running smoothly!

    Are There Eco-Friendly Printer Ink Options Available?

    Yes, you’ll find plenty of eco friendly alternatives for printer ink. Look for remanufactured or recycled cartridges, which reduce waste and often come in sustainable packaging.

    You can also choose biodegradable or plant-based inks that minimize environmental harm. Refillable cartridges let you reuse the same container multiple times, cutting down plastic waste.

    Plus, many brands offer recycling programs to guarantee you dispose of cartridges responsibly and support sustainability efforts.

    How Can I Troubleshoot Common Printer Ink Issues?

    To troubleshoot common printer ink issues, start with printer cleaning by running a cleaning cycle to clear clogged nozzles. Check that your ink cartridges are properly seated and not empty.

    Also, maintain proper ink cartridge storage by keeping cartridges sealed and stored in a cool, dry place when not in use. Regularly clean the printer’s interior with a lint-free cloth to prevent build-up that can affect print quality.

    Conclusion

    Finding the right printer ink doesn’t have to be a hassle. With so many options from trusted online retailers to manufacturer subscriptions and local stores offering recycling rewards, you’ve got plenty of ways to save and stay eco-friendly.

    Why settle for overpriced ink when you can get quality cartridges that fit your budget and needs? Just choose the best store for you, and you’ll keep your printer running smoothly without breaking the bank.

  • What Is Windows Ink and How to Use It

    What Is Windows Ink and How to Use It

    Windows Ink lets you use your digital pen or stylus to take notes, draw, and annotate directly on your Windows device. You can open the Windows Ink Workspace from the pen icon in the taskbar.

    There, apps like Sticky Notes, Sketchpad, and Screen Sketch help boost your creativity and productivity.

    You can also customize your pen’s settings for comfort and precision. Keep exploring, and you’ll discover useful tips, troubleshooting help, and advanced features to get the most from Windows Ink.

    What Is Windows Ink and Why Use It

    digital pen and drawing tools

    Although traditional penmanship has its charm, Windows Ink brings that natural writing and drawing experience to your digital Windows device. It makes it easier and faster to jot down notes, sketch ideas, or annotate screenshots. Windows Ink is a set of features designed specifically to enhance pen and stylus input, so you get a seamless, intuitive way to capture your thoughts or create art digitally.

    When you use Windows Ink, you gain access to handy tools like Sticky Notes, Sketchpad, and Screen Sketch, all aimed at boosting your productivity and creativity. The Windows Ink Workspace icon on your taskbar lets you quickly open these tools and customize your pen settings. Whether you’re an artist, student, or professional, Windows Ink makes handwriting and drawing feel natural on your device. It turns simple pen input into a powerful digital experience.

    Opening the Windows Ink Workspace in Windows 10 and 11

    To get started with Windows Ink, you first need to open the Windows Ink Workspace. It’s designed to make pen input seamless on Windows 10 and 11. You can quickly launch the workspace by clicking the pen icon in the System tray or by using the shortcut button on a compatible stylus like the Surface Pen. If you want, customize this shortcut button through Pen settings under Settings > Devices > Pen & Windows Ink.

    Here’s how to open and use Windows Ink Workspace:

    • Click the pen icon in the notification area (System tray) to open the workspace sidebar.
    • Use a pen or Surface Pen’s shortcut button to quickly launch Windows Ink.
    • Ink makes it easy to access pen-enabled apps like Sticky Notes, Sketchpad, and Screen sketch.
    • Use Sticky Notes to jot down ideas or reminders instantly.
    • The workspace has been available since the Windows 10 Anniversary update, designed to enhance pen input efficiency.

    Opening the workspace is your first step to getting the most out of pen input on Windows.

    Exploring Windows Ink Apps: Sticky Notes, Sketchpad, and Screen Sketch

    creative pen enabled productivity tools

    Curious about what you can do with Windows Ink? This feature includes core apps like Sticky Notes, Sketchpad, and Screen Sketch, all designed to boost your productivity and creativity with a pen-enabled device.

    Sticky Notes lets you jot down quick reminders, and it smartly recognizes phone numbers, links, and even provides Bing insights for extra convenience. Sketchpad offers a simple digital canvas where you can draw using various pen styles and rulers, then save your artwork as images.

    Screen Sketch allows you to capture your screen, annotate directly on the screenshot with drawing tools, and save or share your edits effortlessly. You’ll find all these apps neatly organized within the Windows Ink Workspace, making it easy to switch between them and use the right tool when inspiration strikes or tasks demand it.

    Using these Windows Ink apps, you can enhance your note-taking, sketching, and screen annotation with just a few clicks.

    Quickly Access Apps With the Windows Ink Pen Menu

    You can quickly open pen-enabled apps like Sticky Notes and Sketchpad using the Windows Ink Pen Menu right from your system tray. Just enable the Pen Menu icon in your Taskbar settings, and you’ll get access to a customizable sidebar with your favorite shortcuts. This way, you can launch your go-to ink apps instantly without having to hunt through menus. It’s a simple trick that makes using your pen even more convenient!

    Pen Menu Overview

    Where can you quickly find your favorite pen-enabled apps on Windows? The Pen Menu in Windows Ink is your go-to spot for seamless pen accessibility. Located in the system tray, this menu lets you launch essential apps instantly. Just tap the Pen icon, and you’ll see a sidebar packed with your most-used tools.

    Here’s what you can expect from the Pen Menu:

    • Quick access to Sticky Notes, Sketchpad, and Screen Sketch
    • Recent app shortcuts for easy multitasking
    • Easy enabling or disabling via Taskbar settings
    • Customizable shortcuts through Settings > Pen & Windows Ink
    • Streamlined pen-based workflows for efficient note-taking and annotation

    This menu keeps everything you need right at your fingertips, making pen use smoother than ever.

    Customizing Pen Shortcuts

    Although the Pen Menu already offers quick access to essential apps, customizing its shortcuts lets you tailor it to fit your workflow perfectly. With Pen customization, you can set up to four preferred apps or shortcuts for fast access.

    To start, tap the pen icon in the system tray or use your stylus’s shortcut button to open the Pen Menu. Then, head to Settings > Devices > Pen & Windows Ink and select “Edit pen menu.” Here, you can add or remove app shortcuts like OneNote, Whiteboard, or the Snipping Tool to streamline your tasks.

    This simple Pen customization boosts productivity by putting your most-used apps right at your fingertips, making your Windows Ink experience smoother and more efficient.

    Accessing Ink Apps

    When you need to quickly launch ink-enabled apps like Sticky Notes, Sketchpad, or Screen Sketch, the Windows Ink Workspace has you covered. You can open it by clicking the pen icon in the notification area or pressing a shortcut on compatible styluses.

    The workspace appears as a sidebar on the right, offering easy access to your favorite pen tools and apps. For better Ink customization, you can edit the menu to add or remove shortcuts. This keeps your workflow smooth and efficient.

    Here’s what you can do:

    • Open Sticky Notes instantly
    • Launch Sketchpad for quick drawing
    • Use Screen Sketch for screenshots
    • Customize which apps appear in the menu
    • Access all pen tools in one streamlined interface

    Customizing Your Pen Settings for Windows Ink

    You can easily tailor your pen button actions to fit your workflow by assigning tap, double-tap, or long-press to specific tasks. And don’t forget to set your writing hand preference—it makes your experience feel more comfortable and natural. These simple adjustments really help you get the most out of Windows Ink.

    Adjust Pen Button Actions

    Since customizing your pen button actions can greatly speed up your workflow, Windows lets you assign specific functions to your stylus buttons through the Settings menu. You can easily adjust your pen button actions by going to Settings > Devices > Pen & Windows Ink.

    Here’s what you can do to enhance your Pen Customization:

    • Assign different functions to the top and side buttons (if your stylus supports it).
    • Choose actions like opening apps, taking screenshots, or performing right-clicks.
    • Select your preferred action from the drop-down menu next to each button setting.
    • Streamline your workflow by setting quick access tools.
    • Tailor the pen buttons to suit your everyday tasks.

    These adjustments make your Windows Ink experience more efficient and personalized.

    Set Writing Hand Preference

    Although it might seem like a small detail, setting your writing hand preference in Windows Ink can considerably improve comfort and accuracy while using your pen. To customize this, head to Settings > Devices > Pen & Windows Ink, then select your preferred writing hand under “Writing hand.”

    Choosing the correct writing hand helps Windows optimize pen input by adjusting stroke direction and palm rejection. This means the system better understands your natural writing style, whether you’re left- or right-handed.

    How to Pair Your Digital Pen With Windows Ink Devices

    pair enable select test

    Before you start using your digital pen with Windows Ink, you’ll need to pair it with your device via Bluetooth. The pairing process is straightforward and guarantees your pen communicates smoothly with your Windows PC or tablet.

    Pair your digital pen via Bluetooth to ensure seamless communication with your Windows PC or tablet before using Windows Ink.

    Here’s how to pair your digital pen:

    • Enable Bluetooth on your Windows device by going to Settings > Bluetooth & devices.
    • Put your pen into pairing mode, usually by holding a button or removing the battery cover.
    • Click “Add device” in the Bluetooth settings to start searching.
    • Select your pen from the list of available devices.
    • Follow any on-screen prompts to complete the pairing process.

    Once paired, open a Windows Ink app like Sticky Notes or Sketchpad to test your pen’s functionality. This quick setup gets you ready to enjoy Windows Ink’s full capabilities with your digital pen.

    Managing Pen Batteries and Fixing Connection Issues

    To keep your digital pen working smoothly, you’ll need to manage its batteries carefully and address any connection issues promptly. Battery management is essential. Most pens use rechargeable batteries or AAAA batteries, which you should replace as per the manufacturer’s instructions.

    For example, with the Surface Pen, you pull the top end straight out to swap batteries, making sure to use the correct type. Regularly replacing or recharging the battery prevents connectivity problems and guarantees consistent performance.

    If your pen isn’t connecting, first check that it’s in pairing mode, usually by holding a specific button for a few seconds. Then, re-pair it through Windows Bluetooth settings.

    Also, verify the Bluetooth connection is active and free from interference. Low battery levels often cause connection drops, so maintaining proper battery management helps avoid frustrating disruptions.

    Practical Tips for Drawing and Annotating With Windows Ink

    You can start by exploring the drawing tools in Windows Ink, like Sketchpad’s pens and rulers, which help you create precise sketches. When you want to annotate, try using Screen Sketch—it’s great for marking up screenshots quickly and clearly. To get even better accuracy, customize your pen settings and turn on palm rejection. This makes your drawing sessions smoother and more controlled.

    Drawing Tools Overview

    Although it might seem simple, mastering Windows Ink’s drawing tools can transform how you create and annotate on your device. With Sketchpad and Screen Sketch, you can draw freely or annotate screenshots instantly using your stylus or finger.

    The tools offer customizable pen settings to fit your style, including stroke thickness and color blending for smooth gradations. Pressure sensitivity and tilt recognition make your sketches feel natural, just like using real pen and paper.

    Here’s what you’ll find:

    • Sketchpad features rulers and precision pens for detailed drawings
    • Screen Sketch lets you capture and mark up screenshots quickly
    • Adjustable pen colors with seamless color blending effects
    • Pressure and tilt sensitivity for realistic strokes
    • Customizable button functions for faster workflow

    These tools make digital drawing intuitive and efficient.

    Annotation Techniques Explained

    When you want to annotate quickly and with precision, Windows Ink offers versatile tools that adapt to your workflow. Using Screen Sketch, you can capture screenshots and immediately add notes or drawings with your pen or stylus.

    The Sketchpad provides digital rulers and multiple pen styles, allowing you to create clean lines and shapes effortlessly. You can customize pen button functions to switch between tools quickly, streamlining your process.

    Experiment with color blending by layering strokes in different hues and opacities, adding depth and clarity to your annotations. Saving your work is simple; you can embed stroke data within images for future edits or sharing. These techniques help you annotate efficiently while maintaining control and creativity in your projects.

    Enhancing Sketch Precision

    While mastering digital drawing takes practice, Windows Ink offers tools that help you enhance sketch precision effortlessly. You’ll find it easier to create detailed drawings and annotations with these practical tips:

    Use the digital ruler and shape tools in Sketchpad for clean lines and perfect angles. Adjust pen sensitivity to control line thickness and opacity, improving the detail and flow.

    Enable snap-to-grid or snap-to-shape features to align elements precisely. Practice steady hand movements and rely on the undo button to refine your work without stress.

    Take advantage of color blending and styluses with tilt recognition on high-resolution screens to add depth and realism.

    These features combine to make your sketches sharper and more professional.

    Where to Find Advanced Windows Ink Features and Support

    If you want to release the full potential of Windows Ink, you’ll find advanced features in the Windows Ink Workspace. It’s accessible from the system tray or via customizable shortcut buttons on compatible styluses.

    Inside, apps like Sticky Notes, Sketchpad, and Screen Sketch offer enhanced inking tools. For deeper feature customization, head to Settings > Devices > Pen & Windows Ink. There, you can tailor your pen’s behavior to suit your workflow.

    Developers can build or improve pen-enabled apps using Windows Ink APIs like InkCanvas and InkToolbar. Plus, Microsoft’s support resources, tutorials, and community forums provide valuable help and insights.

    Location Feature Purpose
    Windows Ink Workspace Sticky Notes Quick note-taking
    Windows Ink Workspace Sketchpad Freehand drawing
    Windows Ink Workspace Screen Sketch Annotate screenshots
    Settings > Pen & Ink Feature customization Adjust pen settings
    Microsoft Support Tutorials & Forums Troubleshooting and learning

    How Windows Ink Boosts Productivity for Note-Taking and Creativity

    Beyond exploring advanced features and settings, you’ll find that Windows Ink substantially enhances your productivity, especially for note-taking and creative tasks. It integrates smoothly into your daily routine, improving your creative workflow by letting you capture ideas and sketches quickly and naturally.

    Here’s how Windows Ink boosts your productivity:

    • Quick access to Sticky Notes and Sketchpad for jotting down ideas or drafting visuals instantly.
    • Customizable pen settings allow you to tailor your tools for precise annotations and drawings.
    • Palm rejection and pressure sensitivity make writing and sketching feel as natural as pen on paper.
    • Screen capture with inking tools lets you annotate directly on screenshots for faster feedback.
    • Visual organization of notes and sketches helps you manage information creatively and efficiently.

    Frequently Asked Questions

    Can Windows Ink Be Used With Non-Microsoft Digital Pens?

    Yes, you can use Windows Ink with non-Microsoft digital pens, but pen compatibility varies. Your pen needs to support Wacom, AES, or Microsoft Pen Protocol standards and have proper Bluetooth pairing if wireless.

    You might have to install specific drivers or software for full functionality. Keep in mind, accuracy and responsiveness depend on your pen’s hardware quality.

    You can customize settings, but ultimate support hinges on your pen’s compatibility and drivers.

    Is Windows Ink Compatible With Third-Party Drawing Software?

    Think of Windows Ink as a key. You can access great features, but only if the door’s made for it. When it comes to third-party compatibility, not all drawing software fully supports Windows Ink’s capabilities like pressure sensitivity or tilt.

    You’ll want to check if your favorite app explicitly integrates Windows Ink APIs to get the best experience. Otherwise, you might need to tweak settings or accept limited pen functionality.

    How Does Windows Ink Handle Handwriting Recognition Accuracy?

    Windows Ink boosts recognition precision by analyzing your pen strokes with advanced algorithms. You’ll get better results if you write clearly and consistently since the system adapts to your style over time.

    Factors like pen pressure and stroke speed also affect accuracy, so writing smoothly helps. Plus, you can customize language settings to enhance precision.

    Still, you might need to correct some text, especially in complex or critical cases.

    Can I Export My Windows Ink Drawings to Other File Formats?

    You know what they say: a picture is worth a thousand words. Yes, you can export your Windows Ink drawings to other file formats. Just use the app’s File Export options to save your sketches as PNG, JPEG, or even embed ink data in GIFs.

    This way, you’re free to share or insert your drawings into documents easily, ensuring compatibility across different platforms and uses.

    Does Windows Ink Support Multi-User Pen Input on One Device?

    No, Windows Ink doesn’t support multi-user pen input on one device. It’s designed for single-user interaction, so you can’t have multiple people drawing simultaneously with different pens.

    If you need multi-user support, you’ll have to look into specialized hardware or custom software solutions that allow concurrent pen input. Windows Ink focuses on individual use, so it won’t handle multi-user scenarios natively on the same device.

    Conclusion

    Now that you know what Windows Ink offers, why wouldn’t you take advantage of its powerful tools? Whether you’re jotting down quick notes, sketching ideas, or annotating screenshots, Windows Ink makes your workflow smoother and more creative.

    With easy access, customizable settings, and handy apps, it’s designed to boost your productivity. So, are you ready to transform how you interact with your device and bring your ideas to life effortlessly?

  • How to Use Invisible Ink on iPhone Step by Step

    How to Use Invisible Ink on iPhone Step by Step

    To use Invisible Ink on your iPhone, open the Messages app and start a conversation.

    Type your message or add a photo, then press and hold the send button to open the effects menu.

    Swipe to select Invisible Ink and tap send. The message appears blurred for privacy.

    The recipient just swipes to reveal it.

    Make sure both devices run iOS 10 or later with Reduce Motion off for best results.

    Keep going to explore tips and troubleshooting for a smoother experience.

    What Is Invisible Ink?

    hidden messages reveal surprises

    Although it might seem like a simple effect, Invisible Ink adds a fun layer of privacy to your iMessages by hiding text or images until the recipient swipes to reveal them. This feature was introduced with iMessage in iOS 10 to give your conversations a playful, secretive edge.

    Invisible Ink adds playful privacy by hiding your iMessages until the recipient swipes to reveal them.

    When you send a message with Invisible Ink, the content appears blurred or pixelated, making it unreadable at first glance. The recipient has to swipe over the message to uncover what you’ve sent, adding anticipation and a sense of surprise.

    Invisible Ink enhances privacy by preventing anyone nearby from casually reading your messages. Keep in mind, Invisible Ink works only within iMessage on iOS devices running iOS 10 or later, so both you and the recipient need compatible devices.

    This clever effect not only keeps your messages private but also makes your chats more engaging and interactive.

    Open Messages and Compose Invisible Ink Messages

    Open the Messages app on your iPhone, then either pick an existing conversation or tap the compose button to start a new one. This is where you’ll create your Invisible Ink message. When you’re ready, just type your message or add a photo before applying the effect.

    Launch Messages App

    When you want to send a message with Invisible Ink on your iPhone, start by launching the Messages app and either create a new message or choose an existing conversation. Tap the text input field and type your message.

    Instead of tapping the send button immediately, press and hold it, the blue arrow, to reveal message effects options. From the menu that appears, select “Invisible Ink.” This effect hides your message until the recipient swipes over it, adding a fun layer of surprise.

    Before sending, you can preview how your message looks with the Invisible Ink effect to make sure it’s just right. Once satisfied, hit the send button to deliver your concealed message. This simple process enhances your conversations with a unique, playful touch.

    Start New Conversation

    To start a new conversation and send a message with Invisible Ink on your iPhone, launch the Messages app and tap the compose button. Next, enter the recipient’s contact name or phone number to begin the conversation.

    Type your message as you normally would in the input field. When you’re ready to send it with the Invisible Ink effect, tap and hold the blue send button. This action opens the message effects menu.

    From there, select “Invisible Ink” to apply the effect to your message. Once selected, send it to surprise the recipient with a message that remains hidden until they swipe over it.

    This simple process lets you start conversations that add an extra layer of fun and privacy using Invisible Ink.

    Device & iOS Requirements for Invisible Ink

    ios 10 iphone compatibility

    Since Invisible Ink relies on iMessage, you’ll need an iPhone running iOS 10 or later with iMessage enabled to send messages using this feature. Device compatibility is straightforward: any iPhone that supports iOS 10 or later can use Invisible Ink.

    Make sure your device is updated to the latest iOS version to enjoy all messaging effects, including Invisible Ink. Remember, the recipient also needs an iPhone with iOS 10 or newer to see the effect properly.

    Here’s a quick overview of the device and iOS requirements:

    Requirement Details
    iOS Version iOS 10 or later
    Device Compatibility iPhones supporting iOS 10+
    Messaging Effects Available with latest iOS update
    iMessage Enabled Must be turned on

    Meeting these requirements guarantees smooth use of Invisible Ink in your conversations.

    Access the Effects Menu

    After typing your message, press and hold the blue send button to open the effects menu. If you have a newer iPhone, just press firmly. Older models will need a longer hold. From there, you can pick Invisible Ink from the options to send your message with a hidden effect.

    Opening Message Effects

    When you want to add a special touch to your message, open the Messages app and either start a new conversation or choose an existing one. To open the message effects menu, follow these steps:

    1. Type your message as usual.
    2. Press and hold the send button (the upward arrow) to open the message effects menu.
    3. Swipe left or right to preview different effects, including Invisible Ink.

    Holding Send Button

    If you want to add a special effect to your message, press and hold the blue send button in the Messages app after typing your text. When you hold the send button, a menu with various message effects appears, letting you preview different options.

    This method works on all iPhones, including older models without 3D Touch. By holding down the send button, you can easily access the effects menu where Invisible Ink and other effects are available.

    Simply keep holding until the message effects show up, then choose the effect you want before releasing the send button. This quick step allows you to enhance your message with fun effects, making your texts more engaging and interactive before sending them off.

    Selecting Invisible Ink

    How do you select Invisible Ink once the effects menu appears? It’s simple and quick. After you press and hold the blue Send button, the effects menu pops up. Here’s how to choose Invisible Ink:

    1. Swipe left or right through the effects menu to browse all available options.
    2. Tap on the Invisible Ink effect to select it. You’ll immediately see a preview of your message with the effect applied.
    3. Once satisfied with your selection, tap the Send arrow to deliver your message with Invisible Ink.

    On older iPhone models, holding down the Send button also brings up the effects menu, letting you select Invisible Ink easily. This way, you get a clear preview before sending, ensuring your message stays hidden until the recipient reveals it.

    Choose and Preview Invisible Ink

    Although sending a regular message is straightforward, you can add a fun twist by using Invisible Ink. To select this effect, type your message, then tap and hold the send button. A menu will pop up with several effects. Select “Invisible Ink.”

    Before you send, you can preview how your message looks. It appears blurred and hidden, with only the “Invisible Ink” label visible. This preview lets you confirm your choice and ensures your message has the desired secretive vibe.

    When you’re ready, tap the send arrow to deliver it. The recipient will need to swipe the message to reveal what you’ve hidden.

    Here’s a quick guide to help you choose and preview Invisible Ink:

    Step Action
    1 Type your message
    2 Tap and hold the send button
    3 Choose “Invisible Ink”
    4 Preview the blurred message
    5 Tap send when you’re satisfied

    Send Your Message With Invisible Ink

    send private blurred message

    Once you’ve previewed your message with the Invisible Ink effect and confirmed it looks just right, it’s time to send it. Sending your message with Invisible Ink adds a fun layer of privacy, making your text appear blurred until the recipient chooses to reveal it.

    Here’s how to send your message using this feature:

    1. Type your message in the Messages app as usual.
    2. Tap and hold the blue Send button to open the message effects menu.
    3. Select “Invisible Ink” from the options, then tap the Send arrow to deliver your message.

    Reveal Invisible Ink Messages

    When you receive an Invisible Ink message, you reveal its content by tapping and swiping over the blurred bubble or image. This simple gesture lets you swipe across the message, gradually unveiling the hidden content beneath the blur.

    Whether it’s a text message or an image, swiping over the effect temporarily reveals what’s concealed, allowing you to read or view it clearly.

    Once you stop interacting with the message, it automatically reverts to its obscured state, keeping the content private. If you find that the message doesn’t reveal when you swipe, check your device’s Accessibility settings to ensure Reduce Motion is turned off. This feature can interfere with the reveal animation.

    Troubleshoot Invisible Ink Issues

    If Invisible Ink isn’t working, the first thing to do is make sure that both you and the person you’re messaging have iMessage turned on. Also, double-check that your devices are updated to a compatible iOS version.

    Next, take a look at your device’s Reduce Motion setting. If it’s turned on, it can prevent message effects from showing up properly, so be sure to switch it off.

    Finally, it’s a good idea to confirm that the recipient’s device actually supports these effects. That way, you can be sure everything displays just as it’s supposed to.

    Enable iMessage And Updates

    To use Invisible Ink on your iPhone, start by making sure iMessage is enabled in Settings > Messages. Invisible Ink only works with iMessage, so this step is essential. Next, verify that your device runs iOS 10 or later, as earlier versions don’t support this feature.

    Keeping your iPhone updated guarantees smooth performance and access to the latest effects.

    Here’s what to do:

    1. Enable iMessage in Settings > Messages.
    2. Check for an iOS update by going to Settings > General > Software Update.
    3. Confirm the recipient also uses iMessage with iOS 10 or newer.

    Following these steps helps prevent issues with Invisible Ink and guarantees you and your contacts can enjoy the full messaging experience.

    Adjust Reduce Motion Settings

    After confirming iMessage is enabled and updated, you might still run into issues with Invisible Ink not displaying properly. One common cause is the Reduce Motion setting under Accessibility.

    To fix this, go to Settings > Accessibility > Reduce Motion and make sure the toggle is turned off. When Reduce Motion is enabled, it limits system animations and can prevent Visual Effects like Invisible Ink from showing correctly.

    If you’re unsure, try toggling Reduce Motion off and on to see if it resolves the issue. Disabling Reduce Motion restores full animation support, allowing Invisible Ink and other message effects to appear as intended.

    Adjusting this setting often fixes problems with Invisible Ink visibility, making your messages more engaging and fun.

    Check Device Compatibility

    Wondering why Invisible Ink isn’t working on your iPhone? It often comes down to device compatibility, iOS version, and iMessage settings. To make sure everything runs smoothly, follow these steps:

    1. Confirm your iPhone and the recipient’s device run iOS 10 or later, as Invisible Ink requires this minimum iOS version to function.
    2. Check that iMessage is enabled on both devices by going to Settings > Messages. Invisible Ink only works within iMessage conversations.
    3. Verify your Reduce Motion setting is off in Settings > Accessibility. If it’s on, the Invisible Ink effect might not appear correctly.

    Use Invisible Ink Creatively

    While Invisible Ink keeps your messages hidden at first glance, you can use it creatively to add excitement and privacy to your conversations. Invisible Ink lets you send private messages that only reveal their content when the recipient swipes over them, making your chats more engaging.

    Use this feature for creative messaging by hiding surprise announcements or spoilers, building suspense before revealing the full message. It’s also perfect for sharing sensitive information discreetly, maintaining your privacy without immediately exposing details.

    You can even combine Invisible Ink with images, blurring photos until the recipient chooses to view them. This adds an interactive element to your texts.

    This approach encourages your contacts to engage more actively with your messages, turning ordinary conversations into fun and intriguing exchanges. By using Invisible Ink creatively, you enhance both privacy and enjoyment in your iPhone messaging experience.

    Enhance Your Invisible Ink Experience

    To get the most out of Invisible Ink, preview your message effects before sending to make sure everything looks just right. This helps ensure your hidden message creates the perfect surprise when revealed. Here’s how to enhance your Invisible Ink experience:

    1. Use the hold-down gesture on the send button to open the effects menu and select Invisible Ink. This gives your message a slick, engaging reveal that stands out.
    2. Combine Invisible Ink with images or emojis for dynamic, playful messages that add personality and fun to your texts.
    3. Make sure the recipient’s device runs iOS 10 or later and hasn’t disabled Reduce Motion. Otherwise, the Invisible Ink effect might not display as intended.

    Frequently Asked Questions

    Can Invisible Ink Messages Be Saved or Forwarded by Recipients?

    Yes, you can save or forward Invisible Ink messages, but they aren’t automatically stored separately. The message stays hidden until you swipe to reveal it, which helps address some privacy concerns.

    Once revealed, you can copy or save it like any message. However, app compatibility varies when it comes to preserving encryption.

    If you forward the thread, the hidden content remains concealed until revealed. Keep in mind, screenshots capture the revealed content, which impacts privacy.

    Does Invisible Ink Work With Group Messages on iPhone?

    It’s funny how you might try Invisible Ink in a group chat just as everyone’s debating privacy! Yes, it works, but message privacy depends on app compatibility. Everyone needs iMessage on iOS 10 or later.

    Only your message gets blurred, so ink visibility stays personal. Each person swipes to reveal it individually, keeping your secret safe unless someone’s on an older system where the effect doesn’t show properly.

    Is There a Way to Customize the Invisible Ink Effect?

    You can’t customize the Invisible Ink effect on your iPhone right now. Invisible ink customization isn’t supported, so you won’t find options to change hidden message design or create personalized ink effects.

    The blur and animation are preset by Apple, keeping things simple and secure. If you’re hoping for more creative control, you’ll have to wait for future iOS updates since no official tools exist for personalizing invisible ink.

    Can Invisible Ink Be Used in Third-Party Messaging Apps?

    You can’t use Invisible Ink in third-party apps because it’s exclusive to iMessage and Apple’s messaging system. Its privacy relies on Apple’s message encryption and special animation, which third-party app compatibility doesn’t support.

    If you want that unique Invisible Ink privacy, both you and your recipient need iMessage on iOS devices. Otherwise, third-party apps might offer different privacy features, but they won’t replicate the exact Invisible Ink effect or encryption.

    Do Invisible Ink Messages Consume More Data or Storage?

    Invisible Ink messages don’t gobble up data or storage like a ravenous monster. You’ll barely notice any extra usage because the effect is processed on your device, not the network.

    Thanks to message encryption, your privacy concerns stay locked down without extra cost. Just remember, app compatibility is limited. Invisible Ink works best within iMessage, so third-party apps won’t boost your data or storage with this feature.

    Conclusion

    Now that you know how to use Invisible Ink on your iPhone, you can add a fun, mysterious touch to your messages. Remember, “actions speak louder than words,” so send your secret notes with style and surprise.

    Don’t forget to check your device and iOS compatibility, explore creative uses, and troubleshoot if needed. With a little practice, you’ll master this feature and keep your conversations both private and playful.

    Give it a try today!

  • What Is Ink Made From?

    What Is Ink Made From?

    Ink is made from a blend of pigments or dyes that give it color, solvents that help it flow smoothly and dry properly, resins that bind the color to surfaces, and additives that improve stability and performance.

    Pigments offer opacity, while dyes provide vivid hues.

    Solvents control drying and viscosity, and additives fine-tune ink’s durability.

    Different formulations serve various purposes, from everyday printing to secure, indelible marks.

    Exploring these components reveals how ink works in everyday and special applications.

    What’s Inside Ink? Key Components Explained

    components of ink formulation

    Although ink may seem simple, it actually contains several key components that work together to create the colors and effects you see on paper. At its core, ink relies on pigments or dyes to provide color.

    Pigments are tiny particles that give ink opacity and durability, often made from inorganic or organic materials. Dyes, on the other hand, dissolve completely, producing vivid, transparent hues. Both play essential roles depending on the ink type.

    Solvents act as carriers, suspending pigments or dissolving dyes to help you apply ink smoothly and guarantee it dries properly. Common solvents include water and various alcohols.

    Additives are also vital; they improve the ink’s flow, stability, and resistance to microbes. Surfactants help spread ink evenly, stabilizers keep the mixture consistent, and biocides prevent mold growth. Together, these components form a balanced formula that delivers the vibrant, lasting results you expect from ink.

    How Do Resins and Solvents Help Ink Work?

    You’ll find that resins act like binders, holding the pigment or dye firmly to the surface once the ink dries. On the other hand, solvents play a key role by dissolving these resins and controlling how smoothly the ink flows. So, when you put it all together, they make sure the ink dries properly, sticks well, and lasts longer.

    Role of Resins

    How do resins and solvents work together to make ink effective? Resins act as binders that guarantee the pigment or dye sticks firmly to the surface. As the solvent evaporates, resins form a protective film, enhancing durability and preventing smudging.

    Here’s how resins play their role:

    1. Adhesion: Resins bind pigments tightly to surfaces, preventing fading or washing away.
    2. Film Formation: They create a continuous film once the solvent evaporates, safeguarding the print.
    3. Customization: Different resins adjust flexibility, gloss, and compatibility with other ink components.

    Function of Solvents

    Why do solvents matter so much in ink formulation? Solvents dissolve resins and other ingredients, letting the ink flow smoothly and uniformly. They control drying time by evaporating at a set rate, ensuring the ink adheres well and finishes properly.

    Solvents also aid in the even dispersion of pigments and fillers, preventing clumps and ensuring consistent color. Plus, they affect the ink’s viscosity, surface tension, and compatibility with various surfaces.

    Here’s a quick look at how different solvents influence ink properties:

    Solvent Type Drying Time Effect on Viscosity
    Water Slow Low viscosity
    Alcohol Moderate Medium viscosity
    Ketones Fast High viscosity

    Choosing the right solvent balances drying time, dispersion, and viscosity for your application.

    What Types of Pigments and Dyes Give Ink Its Color?

    pigments and dyes roles

    You’ll find that ink gets its color mainly from two sources: pigments and dyes. Pigments are tiny solid particles that offer durability and opacity. On the other hand, dyes dissolve to create bright, vivid hues. Understanding these colorants helps you see how inks achieve their unique shades and properties.

    Pigment-Based Colorants

    Although pigments and dyes both give ink its color, they work in distinct ways that affect the ink’s appearance and durability. When it comes to pigment-based colorants, you’ll find they’re made of tiny, insoluble particles suspended in the ink binder.

    Here are key types you should know:

    1. Organic pigments, like carbon black or plant-derived dyes, offer bright, vibrant colors but usually have lower lightfastness. This means they can fade faster under sunlight.
    2. Inorganic pigments, such as titanium dioxide and iron oxide, are mineral-based and provide greater stability, opacity, and excellent resistance to fading.
    3. Specialty pigments include fluorescent, phosphorescent, or metallic particles, which add unique visual effects or security features to the ink.

    Understanding these pigments helps you choose ink with the right balance of color and durability.

    Dye-Based Colorants

    Because dyes dissolve easily in water, they create vibrant, transparent colors that bring ink to life. These water-soluble dyes, like eosin, methylene blue, and indigo, are organic pigments derived from plants or animals.

    You’ll find dyes such as logwood and madder known for their bright, intense hues. Unlike pigment-based colorants, dyes penetrate surfaces, offering vivid, luminous shades but less opacity.

    When you use dye-based colorants, you get rich, vibrant colors that stand out but may fade faster without pigments’ durability. By combining dyes with organic pigments, ink manufacturers balance transparency and color intensity, ensuring the ink looks lively while maintaining some level of stability.

    How Do Additives Improve Ink Quality and Performance?

    When you add specific additives to ink, you dramatically enhance its quality and performance. These components fine-tune properties like flow, adhesion, and durability, ensuring your prints come out flawless every time.

    Here’s how some key additives work:

    1. Wetting agents and thickeners improve how ink spreads and flows by reducing surface tension and adjusting viscosity. This means smoother application and consistent printing across various surfaces.
    2. UV stabilizers protect the ink from light damage, while biocides prevent microbial growth. Both help extend the ink’s shelf life and durability.
    3. Drying accelerators speed up evaporation and chemical curing, so your ink dries faster and resists smudging or fading.

    What Role Does Carbon Play in Ink Formulations?

    carbon black s durable pigment

    Additives can improve many aspects of ink, but the pigment you choose defines its color and opacity. Carbon, especially in the form of soot or lampblack, plays a vital role in ink formulations as a primary pigment. Its finely ground particles create a deep, intense black color that stands out in printing and drawing.

    You’ll appreciate carbon’s chemical stability. It resists fading and remains unaffected by light exposure, ensuring your ink maintains its boldness over time. This stability also makes carbon-based inks non-reactive and environmentally stable, which is why they’re widely used in both artistic and industrial applications.

    When suspended in a liquid binder, carbon black produces durable, fade-resistant ink that offers excellent opacity. So, when you choose carbon as your pigment, you’re opting for an ink that delivers lasting color and reliable performance across various uses.

    How Is Iron Gall Ink Made? A Historical Perspective

    If you want to understand how iron gall ink was made, you’ll need to look back at traditional methods that relied on natural materials. This ink was crafted by extracting tannic acids from oak galls and combining them with ferrous sulfate to produce a dark, lasting pigment.

    Here’s how the process typically worked: first, you’d crush oak galls and boil them to release tannic acids, the key ingredient. Next, you’d mix these tannins with ferrous sulfate, causing a chemical reaction that formed the ink’s distinctive black color.

    Crush and boil oak galls to release tannins, then mix with ferrous sulfate for rich, lasting black ink.

    Finally, gum arabic and water were added to bind and dilute the mixture, sometimes aging it to enhance stability. The iron-tannin complex starts black and darkens to brownish-black over time.

    Iron gall ink was highly valued in medieval Europe for its permanence, though its corrosive nature sometimes damaged manuscripts centuries later. Understanding this process reveals why iron gall ink was both revolutionary and challenging for historical documentation.

    How Does Modern Printer Ink Differ in Composition?

    Although modern printer inks share the basic purpose of marking surfaces, their compositions differ drastically from traditional inks like iron gall. You’ll find that printer inks rely on dyes or pigments suspended in specialized solvents, such as glycol derivatives and ketones, which help control drying time and surface tension.

    Additives play a crucial role too, enhancing flow, adhesion, and ensuring compatibility with digital printing technologies like inkjet or laser printers. These inks are engineered for precise viscosity and performance, unlike the simpler formulations of historical inks.

    Many modern inks also use water-based or vegetable oil-based solvents to reduce harmful volatile organic compounds, making them safer and more environmentally friendly. Advanced inks might even include nanoparticles or microencapsulated dyes to add unique properties like photochromism or conductivity.

    What Environmental and Health Concerns Surround Ink Ingredients?

    Because many ink ingredients contain hazardous substances like heavy metals and toxic dyes, you should be aware of the environmental and health risks they pose. Heavy metals such as lead, mercury, and cadmium can accumulate in the environment and harm both ecosystems and your health.

    Many inks contain hazardous heavy metals and dyes that pose serious environmental and health risks.

    Furthermore, volatile organic compounds (VOCs) in ink contribute to air pollution and can cause respiratory issues if inhaled frequently. Some pigments and dyes carry toxicity risks, causing skin irritation or allergic reactions.

    Here are three key concerns to keep in mind:

    1. Heavy metals in ink can contaminate soil and water, negatively impacting wildlife and humans.
    2. Volatile organic compounds released during ink use degrade indoor and outdoor air quality.
    3. Toxic pigments and dyes may cause neurological effects and skin problems upon exposure.

    Understanding these risks helps you choose safer ink products and promotes responsible disposal practices.

    How Is Indelible Ink Formulated for Secure Use?

    You’ll find that indelible ink relies on key chemical components like silver nitrate to create permanent marks on the skin. It’s pretty fascinating how this simple ingredient works to make the marks last. Now, how the ink is applied actually plays a big role in how effective and secure it is. So, let’s dive into the formulation techniques and also look at the challenges involved in keeping these marks tamper-proof.

    Chemical Components Used

    When you need indelible ink that stands up to washing and smudging, the chemical composition plays an essential role. It relies on carefully selected chemical compounds, stabilizers, pigments, and binders to ensure durability and clarity. Here’s what goes into it:

    1. Chemical Compounds: Silver nitrate or heavy metal salts create a permanent mark that resists washing and smudging.
    2. Binders and Stabilizers: Binders help the ink stick firmly to skin or surfaces, while stabilizers preserve its chemical stability and shelf life.
    3. Pigments: Specific dyes or pigments provide the visible color, usually black or blue, that remains long after application.

    This precise formula guarantees indelible ink is both effective for secure use and safe for human skin or other surfaces.

    Application Techniques

    How does indelible ink maintain its security and durability once applied? The answer lies in precise application techniques combined with carefully chosen ink ingredients. Silver nitrate, a key component, reacts with skin or paper to create a permanent mark. Stabilizers and preservatives guarantee long-lasting adhesion and prevent microbial growth.

    To optimize flow and thickness, formulators add thickening agents and surfactants, which improve how the ink spreads and sticks to surfaces. Balancing drying properties is essential. If the ink dries too fast, it won’t bond well; if it dries too slow, it may smudge.

    These factors together ensure the ink remains resistant to washing and fading, yet safe for users. By mastering these application techniques, indelible ink achieves secure, reliable performance in high-stakes uses like elections.

    Security Challenges

    Although indelible ink must remain visible and permanent, it also has to resist tampering and forgery. To guarantee security, indelible ink is carefully formulated with chemical stability and permanence in mind.

    You’ll find it typically contains compounds like silver nitrate or indelible dyes that create marks resistant to washing or erasure. Here’s how it tackles security challenges:

    1. It includes stabilizers and preservatives that maintain permanence over time, preventing fading or removal.
    2. The ink’s chemical stability withstands environmental factors such as water, heat, and light, keeping marks intact.
    3. Formulations are tailored to prevent manipulation or forgery, ensuring reliable authentication in elections and official documents.

    This balance of permanence and forgery prevention makes indelible ink a trusted tool for secure use.

    Innovations Shaping the Future of Ink Technology

    What if the ink you use could change color with temperature or light, or even conduct electricity? Thanks to advances in nanotechnology, smart inks are making this possible. These inks use microencapsulated dyes and quantum dots to respond to stimuli, offering dynamic color changes and enhanced security.

    Imagine ink that shifts color with heat or light and conducts electricity through nanotech innovation

    You’re also seeing a shift towards biodegradable, plant-based inks made from vegetable oils and natural pigments, which help reduce environmental impact. Conductive nanomaterials like graphene and carbon nanotubes are transforming inks into flexible circuits, powering wearable devices and printed electronics.

    This means the ink on your paper might soon double as a sensor or electronic component. Innovations in inkjet and 3D printing are pushing precision and functionality even further, enabling high-resolution applications in optics, electronics, and biomedicine.

    The future of ink technology is not just about color. It’s about smart, sustainable, and multifunctional materials that adapt and interact with their environment.

    Frequently Asked Questions

    How Is Ink Stored to Maintain Its Quality Over Time?

    To maintain ink’s quality over time, you should store it in airtight containers made from materials that don’t react with the ink’s chemical composition, like glass or certain plastics. Use preservation techniques such as keeping the ink in a cool, dry place, away from sunlight and temperature fluctuations.

    This minimizes environmental exposure effects like evaporation or chemical breakdown, ensuring the ink stays consistent and prevents contamination or color fading.

    Can Ink Ingredients Cause Allergic Reactions on Skin?

    Imagine your skin as a delicate garden. Chemical irritants in ink can be like invasive weeds. Yes, ink ingredients can cause allergic reactions, especially if you have skin sensitivity.

    Allergen exposure from dyes, solvents, or heavy metals in ink might trigger redness, itching, or dermatitis. If you notice irritation after contact, wash the area promptly and avoid repeated exposure to protect your skin’s health.

    What Is the Process for Recycling Used Ink Cartridges?

    When you recycle used ink cartridges, start by dropping them off at ink collection centers or participating in refill programs. Cartridge recycling involves sorting and cleaning plastic and metal parts, then shredding or melting plastics for reuse.

    Metal components get extracted and recycled to recover valuable materials. You can choose eco-friendly disposal options by refurbishing cartridges or processing them into raw materials, reducing waste and promoting sustainable practices.

    How Do Temperature Changes Affect Ink Performance?

    Did you know that just a 10°C rise can cut ink drying time almost in half? Temperature sensitivity plays a huge role in ink performance.

    When temperatures drop, ink viscosity increases, making flow sluggish and causing clogs. Higher heat speeds drying but can mess with color consistency, leading to fading or separation.

    To keep your prints sharp, you need to maintain stable temperatures, ensuring smooth flow and vibrant, consistent colors every time.

    Are There Inks Specifically Designed for Artistic Use?

    Yes, there are inks specifically designed for artistic use. You’ll find artistic ink types with carefully balanced ink pigmentation to deliver vibrant, intense colors. These inks often have tailored ink viscosity to suit different techniques, ensuring smooth flow and precision.

    Plus, they emphasize color longevity, so your artwork resists fading over time. Whether you work on paper, fabric, or canvas, these inks meet your creative needs with durability and rich, lasting hues.

    Conclusion

    So, next time you scribble or print, remember ink’s not just colorful goo. It’s a cocktail of resins, solvents, pigments, and secret additives working hard behind the scenes.

    Ironically, something so simple-looking actually involves complex chemistry and even raises environmental eyebrows. Who knew your everyday ink had such a dramatic backstory?

    But don’t worry, you’re not just making marks; you’re wielding a tiny masterpiece of science every time you write.

  • How Does Cricut Infusible Ink Work?

    How Does Cricut Infusible Ink Work?

    Cricut Infusible Ink works by infusing dye directly into compatible materials like polyester fabrics or coated surfaces when you apply heat and pressure.

    At around 385°F to 400°F, the dye bonds with the fibers, creating vibrant, permanent designs that won’t peel or crack.

    You’ll need to prepare your surface properly and mirror your design before cutting for the best results.

    Keep going, and you’ll uncover tips for perfect application and caring for your projects.

    What Is Cricut Infusible Ink?

    vibrant durable heat infused designs

    How exactly does Cricut Infusible Ink create such vibrant, lasting designs? Infusible Ink uses a unique heat infusion process that transfers dye-based colors directly into compatible surfaces. When you apply heat and pressure, the ink becomes part of the material’s fibers, making the design seamless, durable, and peel-proof. Unlike traditional vinyl or iron-on transfers, Infusible Ink doesn’t sit on top of the surface; it fuses within it.

    To get the best results, you’ll need to work with compatible surfaces, typically polyester-rich fabrics or specially coated items. These materials allow the ink to bond properly during heat infusion. Keep in mind, Infusible Ink won’t work on 100% cotton or uncoated materials because the ink can’t infuse correctly.

    The key is precise temperature and timing to ensure your design fully integrates, giving you vibrant, long-lasting results you’ll want to show off.

    How Cricut Infusible Ink Works

    Why does Cricut Infusible Ink produce such vibrant, lasting designs? It’s all about the unique heat transfer process. Instead of sitting on top of your project like traditional iron-on, Infusible Ink uses heat to infuse dye directly into compatible substrates.

    Cricut Infusible Ink creates vibrant, lasting designs by infusing dye directly into your project with heat.

    When you create your design with transfer sheets or pens and apply heat, usually between 385°F and 400°F, the ink activates and bonds with the material’s fibers or coating.

    This infusion means the design becomes part of the substrate itself, resulting in a smooth, professional look without any peeling, cracking, or fading. Once cooled, your design is permanent, peel-proof, flake-proof, and washable.

    You’ll notice the difference immediately: vibrant colors that last as long as the item does. Understanding this heat transfer method helps you appreciate why Infusible Ink delivers such stunning, durable results on the right compatible substrates.

    Compatible Blanks for Cricut Infusible Ink

    polyester coated compatible blanks

    Since Cricut Infusible Ink relies on bonding with polyester fibers or coatings, you’ll need to use blanks specifically made for this process. Only compatible blanks with a polyester coating or high polyester content guarantee the ink infuses correctly, creating vibrant, long-lasting designs. Avoid 100% cotton unless it’s sublimation-compatible or has a polyester coating.

    Here are four common types of compatible blanks:

    1. T-shirts and tote bags made from polyester or with a polyester coating
    2. Ceramic coasters with a special sublimation-compatible surface
    3. Pillow covers blended with polyester fibers
    4. Cork blanks designed for Infusible Ink use

    Cricut offers a variety of blanks in these categories, so you can pick the perfect base for your project. Remember, proper preparation like cleaning and preheating these blanks is key to achieving the best results with Infusible Ink.

    Designing Your Cricut Infusible Ink Project in Design Space

    When you set up your canvas in Design Space, be sure to size your design so it fits your blank perfectly. It’s really important to get that just right. Also, don’t forget to mirror your design before cutting—that way, it transfers the right way onto your project. Finally, make sure to select “Infusible Ink Transfer Sheet” as your material to get the best cutting results.

    Setting Up Canvas

    Although it might seem straightforward, setting up your canvas correctly in Cricut Design Space is essential for a successful Infusible Ink project. You want your design to fit perfectly and transfer smoothly. Here’s how to do it:

    1. Open Design Space and select or create your design, making sure it fits within your blank surface dimensions.
    2. Resize and position your design on the canvas, leaving space around the edges to avoid cutting errors.
    3. Hit the “Make It” button and select “Infusible Ink Transfer Sheet” as your material.
    4. Save your project, connect your cutting machine, and get ready to cut or draw.

    Mirroring Your Design

    Because your design will transfer as a mirror image onto your project, you need to flip it horizontally in Cricut Design Space before cutting or drawing. When working with Infusible Ink transfer sheets or pens, always select the “Mirror” option in Design Space. This step flips your design so it prints correctly on the final product.

    Mirroring is especially essential for designs with text or directional elements, ensuring they appear readable and properly oriented after transfer. If you skip this step, your design will be reversed, causing text and intricate details to look backward.

    This mistake can lead to wasted materials and time since you’ll have to redo the cut or draw. So, always double-check and mirror your design in Design Space to achieve perfect results with your Cricut Infusible Ink projects.

    Choosing Infusible Ink

    As you design your Cricut Infusible Ink project in Design Space, you’ll want to carefully choose the right transfer sheet or pen based on your design style. Selecting the right Infusible Ink transfer method guarantees vibrant, lasting results on your compatible Cricut blanks. Here’s how to get started:

    1. Mirror your design in Cricut Design Space to ensure proper transfer.
    2. Choose between transfer sheets or Infusible Ink pens/markers depending on whether you want a cut or drawn design.
    3. Resize and position your artwork within the blank’s dimensions for a perfect fit.
    4. Use the recommended material settings to cut or draw, then weed excess material, leaving only your design on the liner.

    Following these steps helps you create flawless, professional Infusible Ink projects every time.

    Cutting Infusible Ink Transfer Sheets: Best Practices

    When cutting Infusible Ink transfer sheets, you’ll want to place the sheet face-up on the Standard Grip Mat with the liner side down to guarantee proper cutting. Use Design Space to create and mirror your design before you cut, ensuring the cut design has the correct orientation.

    Select “Infusible Ink Transfer Sheet” as your material setting, then load the mat into your Cricut machine. After cutting, remove the design carefully, trim any excess material, and crack the cut lines lightly. This helps make weeding easier.

    When you weed, remove all the negative space, leaving only your desired design on the liner, ready for transfer.

    Step Tip
    Placement Sheet face-up, liner side down
    Design Setup Mirror design before cutting
    Material Selection Choose Infusible Ink Transfer Sheet
    Post-Cut Trim excess, crack cut lines
    Weeding Carefully remove negative space

    Preparing Your Blank for Infusible Ink Transfers

    prepare blank for transfer

    Before you start your Infusible Ink transfer, make sure your blank is clean and free of lint. You can use a lint roller or a clean cloth to get it just right.

    Also, try placing some cardstock inside your blank. This little trick helps prevent the ink from bleeding through to the other side.

    Cleaning And Lint Removal

    How do you guarantee your blank is perfectly ready for an Infusible Ink transfer? Proper cleaning and lint removal are key. Start by wiping your blank with a lint-free cloth to eliminate surface debris, dust, and oils.

    Follow these steps to prep your blank:

    1. Use a lint-free cloth or lint roller to remove dust and fibers.
    2. Check for and remove any surface debris that could affect adhesion.
    3. Make certain the blank is completely dry and free of lotions or oils.
    4. Give the surface one final once-over with a lint roller to pick up loose fibers.

    Using Cardstock Inside

    After you’ve thoroughly cleaned and prepped your blank, placing cardstock inside it helps guarantee your Infusible Ink transfer turns out flawless. The cardstock acts as a barrier, protecting the interior of your blank and ensuring the ink doesn’t bleed through to the backside.

    It also promotes even heat distribution during the heat transfer process, which is essential for a smooth, vibrant design. Preheating the blank with the cardstock inside removes moisture and flattens wrinkles, setting the stage for a clean transfer.

    For items like coasters or mugs, cardstock stabilizes the blank, preventing warping or uneven pressure while pressing. Always keep the cardstock inside as the blank cools completely after heat transfer; this maintains the shape and stability of your project.

    Applying Heat and Pressure for Perfect Infusion

    When you apply the right heat and pressure, the ink from your Cricut Infusible Ink transfer sheet or pen embeds deeply into the fibers of your chosen blank. This infusion process requires precise control of both heat and pressure to guarantee vibrant, lasting results. Here’s how to get it right:

    1. Set your Cricut EasyPress or heat press to the recommended temperature, usually between 385°F and 400°F.
    2. Apply even pressure across the entire design area to ensure consistent heat transfer.
    3. Press for the specified time, generally around 60 seconds, to fully infuse the ink without damaging the material.
    4. Let the blank cool completely before peeling off the transfer sheet to avoid smudging or incomplete infusion.

    Using Infusible Ink Pens and Markers for Custom Designs

    Applying heat and pressure isn’t limited to transfer sheets. You can also create custom designs using Cricut Infusible Ink pens and markers. These pens let you draw or color directly onto special transfer sheets or laser paper.

    When you use them with compatible Cricut machines, you can create intricate, personalized artwork that transfers beautifully through heat transfer. The ink infuses into the fibers of the material, producing vibrant, seamless, and durable designs.

    Before pressing, remember to mirror your design, especially if it includes text or directional elements. After drawing, place the design face-down on your blank, then apply heat and pressure to infuse the ink.

    Step Key Action
    Draw or color Create custom designs with Infusible Ink pens
    Mirror design Flip the image before pressing
    Heat transfer Apply heat and pressure to infuse the ink

    Special Tips for Hats, Baby Bodysuits, and Coasters

    Although working with different materials can be tricky, you can achieve professional results on hats, baby bodysuits, and coasters by following a few key tips. Proper Infusible Ink transfer depends on secure application and precise heat pressing. Here’s how to get it right:

    Master Infusible Ink transfers on hats, bodysuits, and coasters with secure application and precise heat pressing.

    1. For hats, secure the hat with the clasp, remove the insert, and fit it snugly on the hat form to guarantee an even transfer. Use heat resistant tape to keep your design from shifting.
    2. When working with baby bodysuits, place a Cricut EasyPress Mat inside to provide an even heat surface and prevent stretching. Secure your design with heat resistant tape for a smooth application.
    3. For coasters, position the design facing up and press at 400°F for 240 seconds without added pressure for maximum infusion.
    4. Always let your project cool completely before removing the transfer sheet to avoid smudging or incomplete transfer.

    Following these steps guarantees a flawless Infusible Ink transfer on tricky surfaces.

    Caring for and Troubleshooting Your Infusible Ink Projects

    To keep your Infusible Ink projects looking fresh, always wash them in cold water with mild detergent. And try to skip fabric softeners or bleach—they can mess with your design.

    Also, make sure you let the project cool completely before peeling off the transfer paper. This helps avoid any smudges or unwanted marks.

    If your design looks faded or uneven, don’t worry. Just double-check your heat settings and how you prepped the surface. These are common things to look at when troubleshooting.

    Cleaning And Maintenance

    When you care for your Infusible Ink projects properly, their vibrant designs stay bright and intact for a long time. Proper cleaning and maintenance are key to preserving your creations. Follow these tips to keep your Infusible Ink projects looking fresh:

    1. Clean with warm water and mild detergent to avoid damaging the design.
    2. Avoid abrasive tools, steel wool, or colored cleaners that can harm the infused surface.
    3. Let projects cool completely before handling or washing to prevent smudging or ink transfer.
    4. Regularly check your heat press to ensure consistent heat application for successful results.

    Also, store unused Infusible Ink sheets in a cool, dry place away from sunlight to maintain their quality. These simple steps will help your projects last and look their best.

    Common Troubleshooting Tips

    Proper care goes a long way in keeping your Infusible Ink projects vibrant, but sometimes issues still pop up. To guarantee a smooth transfer, always clean your blank surface thoroughly to remove dust, fibers, and oils before application.

    Use the correct heat and time settings from Cricut’s Heat Guide to avoid incomplete or over-infused designs. During pressing, don’t slide or reposition your project, as this can cause uneven transfer or ghosting.

    After heat application, allow your project to cool completely before handling to prevent smudging. Finally, when caring for your finished piece, avoid abrasive cleaners and fabric softeners to keep the ink vibrant and durable.

    Following these tips will help you troubleshoot common problems and enjoy flawless Infusible Ink results every time.

    Frequently Asked Questions

    Can Cricut Infusible Ink Be Used on Cotton Fabrics?

    You can’t use Cricut Infusible Ink on pure cotton fabrics if you want lasting design durability. Since it relies on fabric dyeing through heat transfer, it works best on polyester or poly-coated materials.

    On cotton, the ink won’t properly bond, causing your design to peel or flake over time. For strong, vibrant results, stick to blanks with at least 60% polyester content to guarantee your design lasts.

    How Long Does the Infusible Ink Design Last on Projects?

    You’ll find that Cricut Infusible Ink designs boast impressive ink durability, lasting for at least 50+ washes when applied correctly. The heat resistance of the ink guarantees it fuses into the fabric fibers, preventing color fading even after repeated use and washing.

    If you follow the recommended temperature, pressure, and cooling instructions, your design will stay vibrant and intact without peeling, cracking, or flaking. This helps maintain its original look for the long haul.

    Is It Safe to Use Infusible Ink on Food Containers?

    Think of infusible ink like a vibrant garden growing within fabric fibers, not a paint sitting on the surface. You shouldn’t use it on food containers because food safety is a top priority, and the ink isn’t tested for material compatibility with edible items.

    While the design durability is impressive on non-food surfaces, using it on anything that touches food risks contamination. Stick to food-safe materials to keep your projects both beautiful and safe.

    Can I Layer Multiple Infusible Ink Designs on One Blank?

    You shouldn’t layer multiple Infusible Ink designs on one blank because layering techniques can cause color blending issues and affect design complexity. Since the ink infuses into the material, adding layers risks bleeding and muddled colors.

    If you want to increase design complexity, try spacing separate designs carefully or test layering on scrap material first. Overall, one layer guarantees vibrant, clean results without compromising adhesion or color quality.

    What Is the Difference Between Infusible Ink and Regular Vinyl?

    The difference between Infusible Ink and regular vinyl lies in ink transfer and color longevity. With Infusible Ink, the design becomes part of the fabric fibers, giving you seamless, soft results and unmatched design precision.

    Vinyl sits on top, which can feel raised and may peel or crack over time. While vinyl keeps its color intact unless damaged, Infusible Ink’s colors slightly fade but stay permanently embedded for long-lasting wear.

    Conclusion

    Just like a chef carefully blends ingredients to create the perfect dish, you’ll find Cricut Infusible Ink melts seamlessly into your fabric, making your designs part of the material itself.

    Imagine a friend who once struggled with fading prints, now thrilled that their projects last wash after wash, vibrant and flawless.

    With the right blanks, heat, and pressure, your creations won’t just look good; they’ll truly become one with your canvas. Keep experimenting, and watch your art come alive!

  • What Is Alcohol Ink Used For?

    What Is Alcohol Ink Used For?

    You use alcohol ink to create vibrant, flowing artwork on non-porous surfaces like glass, ceramics, metal, and resin. It’s perfect for making abstract paintings, decorative home décor, jewelry, and mixed media projects thanks to its quick drying and easy blending properties.

    You can experiment with various tools and techniques to produce unique textures and effects. Keep going, and you’ll discover even more creative ways to apply and protect your alcohol ink art.

    What Is Alcohol Ink and How It Works

    vibrant fast drying transparent layers

    What makes alcohol ink unique is its vibrant, fast-drying pigment that works best on non-porous surfaces. You’ll find that this alcohol-based dye creates stunning effects because it disperses and blends effortlessly when applied.

    Alcohol ink stands out with its vibrant, fast-drying pigment that blends beautifully on smooth, non-porous surfaces.

    As you work, the alcohol in the ink causes the pigment to spread and interact, forming flowing, transparent layers filled with vibrant color. This interaction produces distinctive patterns and textures that you can’t achieve with traditional paints.

    If you dilute the ink with isopropyl alcohol, you’ll notice even more transparency and fluid movement, allowing you to control the depth and softness of your colors. Because of these qualities, alcohol ink is perfect for abstract art and decorative projects where you want bold, translucent visuals.

    When you use it, you tap into a medium that’s both dynamic and versatile, giving you a fresh way to bring your creative ideas to life on smooth, non-porous surfaces.

    Best Surfaces for Alcohol Ink Art

    Although alcohol ink can be applied to various materials, you’ll get the best results on non-porous surfaces like Yupo paper, ceramic tiles, glass, and plastic. These surfaces prevent ink absorption, allowing the vibrant colors to flow freely and blend smoothly.

    Yupo paper, a popular synthetic option, is water-resistant and won’t warp, making it perfect for detailed and vivid alcohol ink art. Ceramic tiles and glazed surfaces offer durability and can be sealed for decorative or functional pieces like coasters and plates. Using non-porous surfaces enhances your ability to control the ink’s movement and achieve rich blending effects.

    While you can use porous materials like canvas, they require special preparation to handle alcohol ink properly. Sticking to non-porous surfaces ensures your artwork maintains its vibrancy and allows you to experiment confidently with blending, dropping, and pouring techniques without worrying about unwanted absorption or dull colors.

    Techniques for Creating Unique Alcohol Ink Effects

    blend dilute manipulate experiment

    You can create stunning effects by blending and diluting alcohol inks with isopropyl alcohol. This helps you control transparency and color flow in your artwork. Plus, using tools like brushes, droppers, or heat guns lets you really play around with how the ink moves and interacts with the surface.

    Try experimenting by tilting or rocking your piece while the ink is still wet. This adds organic textures and makes each artwork truly one-of-a-kind. It’s all about having fun and seeing where the ink takes you!

    Blending And Dilution

    When you blend alcohol inks with isopropyl alcohol or specialized blending solutions, you create smooth shifts and soft gradients that bring your artwork to life. Dilution with high-percentage alcohol enhances transparency, letting you build delicate layers.

    Dropping alcohol onto wet ink causes natural spreading and unique textures, adding depth. Mastering blending and dilution techniques lets you design vibrant, nuanced pieces.

    Technique Effect Tip
    Blending Smooth gradients Use blending solution
    Dilution Increased transparency Try 99% isopropyl alcohol
    Dropping alcohol Organic shapes Apply on wet ink
    Layering Depth and complexity Build up thin layers
    Controlled spread Texture and interest Manipulate with straws

    Application Tools Usage

    Mastering blending and dilution sets the stage for experimenting with various application tools that shape how alcohol ink behaves on the surface. You can use droppers and squeeze bottles for precise placement, allowing controlled blending and layering of colors.

    Brushes help add fine details or lift excess ink, creating texture or negative space effects. Air tools like hairdryers or canned air blow the ink, encouraging spontaneous mixing and forming abstract, organic patterns.

    Spraying and tilting the surface further enhance this dynamic interaction. These techniques let you manipulate flow and color *shift*, giving you creative control while embracing the unpredictability that makes alcohol ink art so *engaging*. Using diverse application tools, you can achieve unique effects that elevate your artwork beyond simple brushstrokes.

    Surface Interaction Effects

    Although alcohol ink behaves differently on various surfaces, understanding these interactions helps you create striking effects. When you apply alcohol ink on wet surfaces, you facilitate smooth blending that produces flowing, marbled patterns.

    Dropping isopropyl alcohol onto wet ink triggers cellular effects, creating textured, bloom-like details that add depth. You can also use a straw or air blower to spread the ink organically, enhancing these surface interaction effects.

    Applying ink on dry surfaces, on the other hand, gives you sharp edges and distinct markings, perfect for contrast and detail. By manipulating the ink with tools like brushes or heat guns, you control the texture further, from soft gradients to intricate lines.

    Mastering these techniques lets you access endless creative possibilities with alcohol ink.

    Abstract Painting With Alcohol Ink

    vibrant fluid ink art

    When you use alcohol ink for abstract painting, you get to dive into some really cool fluid art techniques that make vibrant, flowing designs. It’s pretty fun to see how the colors blend smoothly, especially on non-porous surfaces like Yupo paper, which helps you achieve some stunning effects.

    And the best part? You can experiment with different surfaces and blending methods. This way, you discover unique textures and gradients that really make your artwork stand out. It’s all about playing around and seeing what happens!

    Fluid Art Techniques

    Because alcohol ink dries quickly, you can layer and rework your designs easily to create vibrant, abstract fluid art. Using alcohol inks on non-porous surfaces like Yupo paper or ceramic, you’ll explore fluid art techniques such as pouring, dropping, and tilting to manipulate the ink’s flow and texture.

    These methods let you craft mesmerizing, marbled effects that feel both spontaneous and controlled.

    Try these techniques to deepen your understanding:

    • Blow gently on the ink to create delicate, wispy patterns.
    • Use heat tools to encourage movement and texture.
    • Tilt your surface to guide the ink’s flow naturally.
    • Layer colors quickly to build luminosity and depth.

    These fluid art techniques harness alcohol inks’ fast-drying, transparent qualities for dynamic abstract compositions.

    Color Blending Effects

    Mastering fluid art techniques sets the stage for exploring color blending effects with alcohol ink. You’ll find alcohol inks perfect for creating smooth, seamless gradients thanks to their fluid nature.

    By diluting them with isopropyl alcohol, you can achieve transparent washes that offer soft gradations between hues. Using tools like air blowers or brushes, you can manipulate the inks to form organic patterns, like marbled swirls or infinity rings, that showcase vibrant color blending.

    Plus, alcohol ink’s quick-drying property lets you layer and reactivate dried areas to build complex, multi-dimensional works. This rapid drying encourages experimentation, helping you create dynamic abstract pieces with rich, fluid color interactions.

    With alcohol inks, you have a versatile medium for mastering striking color blending effects.

    Surface Compatibility

    Where can you best use alcohol ink to release its vibrant, flowing potential? You’ll want to focus on non-porous surfaces, as they offer the ideal surface compatibility for this medium. Smooth, slick materials like Yupo paper, glass, metal, and ceramic allow the ink to flow, blend, and create luminous abstract effects without soaking in.

    Preparing your surface with sealing or priming enhances color vibrancy and protects your piece from damage or ink reactivation. Keep these tips in mind for optimum results:

    • Choose non-porous surfaces to prevent ink absorption
    • Use sealing to lock in colors and protect the artwork
    • Opt for smooth surfaces to encourage fluid blending
    • Avoid porous materials that hinder ink flow and vibrancy

    Alcohol Ink in Resin and Mixed Media

    When you mix alcohol ink with resin, you release a world of vibrant colors and intricate patterns that bring your art to life. Alcohol inks in resin art create unique color dispersions, producing marbled and abstract effects that add depth and texture.

    Dropping alcohol ink onto curing resin allows you to achieve cellular or petri dish patterns with metallic or transparent highlights. This technique lets you experiment with color blending, layering, and fluid designs.

    Sealing alcohol inks in resin also protects your work from fading, giving it a glossy, durable finish perfect for jewelry, coasters, and decorative pieces.

    Technique Effect Application
    Alcohol ink drops Cellular patterns Resin surfaces
    Color blending Marbled effects Mixed media art
    Layering Depth and texture Jewelry and decor
    Sealing with resin Glossy, durable finish Long-lasting artwork

    Decorating Ceramics and Glass With Alcohol Ink

    How can you transform plain ceramics and glass into vibrant, eye-catching art? By decorating these smooth, non-porous surfaces with alcohol ink, you can create stunning, glossy finishes that bring your designs to life. Alcohol ink’s transparency and fluidity allow you to blend, layer, and manipulate colors easily, making it perfect for custom artwork on ceramic tiles, mugs, and glassware.

    When decorating ceramics and glass with alcohol ink, keep these tips in mind:

    Use glazed or smooth surfaces for better ink adhesion and a glossy look. Experiment with abstract designs, marbling, or gradient effects to add unique flair. Seal your artwork with resin or spray varnish to protect it from fading and damage. Take advantage of alcohol ink’s quick drying time to layer colors efficiently.

    With alcohol ink, decorating ceramics and glass becomes an accessible way to create personalized, vibrant pieces that stand out.

    Alcohol Ink for Furniture and Home Décor

    Although furniture and home décor often start as plain and simple, you can transform them into vibrant statement pieces using alcohol ink. This versatile medium works beautifully on surfaces like glass, ceramic, and wood, allowing you to add metallic, abstract, and colorful designs that stand out.

    You can customize tabletops, vases, or decorative tiles by blending and layering colors seamlessly, giving your furniture a unique, artistic flair. Once you’ve created your design, sealing it with resin or varnish protects your work, ensuring it lasts as part of your home décor.

    Using alcohol ink for furniture lets you express creativity and personalize your space with one-of-a-kind pieces that bring modern style and energy. Whether you want to refresh an old item or craft a bold new look, alcohol ink offers endless possibilities to elevate your home décor with vivid, eye-catching effects.

    Jewelry and Small Crafts With Alcohol Ink

    Why settle for ordinary jewelry and crafts when you can transform them with alcohol ink’s vibrant colors and unique effects? Using alcohol ink on jewelry and small crafts lets you create one-of-a-kind pieces with stunning marbled, metallic, or transparent finishes.

    Elevate your jewelry and crafts with alcohol ink’s vibrant hues and unique, mesmerizing finishes.

    Whether you’re working on pendants, beads, keychains, or decorative tags, alcohol ink adds a bold splash of color that stands out.

    Here’s why alcohol ink is perfect for your next project:

    It adheres beautifully to surfaces like metal, glass, ceramic, and plastic.

    You can blend and layer colors to achieve intricate, eye-catching designs.

    Small crafts such as charms and ornaments become vibrant statement pieces.

    The ink’s quick drying time speeds up your creative process.

    Sealing and Protecting Alcohol Ink Artwork

    After adding vibrant colors to your jewelry or crafts with alcohol ink, you’ll want to protect your work to keep it looking fresh. Sealing your artwork with varnish or resin prevents fading, UV damage, and environmental wear. It also stops the inks from reactivating, which can cause smudging or color spreading.

    Applying at least two coats of a UV-resistant spray enhances durability and guarantees your piece stays vibrant longer. Proper sealing makes cleaning easier and safeguards your art during handling or display. Keep sealed pieces out of direct sunlight to prolong their life.

    Step Purpose
    Use varnish or resin Protect from UV damage and fading
    Apply UV-resistant spray Enhance durability and longevity
    Coat twice Prevent smudging and color spreading
    Avoid direct sunlight Maintain vibrant colors
    Handle carefully Preserve artwork integrity

    Sealing truly helps protect your alcohol ink creations effectively.

    Where to Buy Alcohol Ink Supplies and Materials

    When you’re ready to gather your alcohol ink supplies, you can find a wide selection at popular art stores like Michaels and Hobby Lobby, as well as specialty online retailers such as Jackson’s Art and Blick Art Materials. These art stores and online retailers offer a variety of brands, including Ranger, Jacquard Piñata, Copic, and Spectrum Noir, each with unique color ranges and formulations.

    Buying from these sources guarantees you get quality materials to enhance your creativity.

    Consider these tips when shopping for your supplies:

    • Explore kits that bundle inks, blending solutions, and applicators, perfect for beginners and pros alike.
    • Check out Amazon Affiliates Shop Pages for convenient access and discounts.
    • Support content creators by purchasing through affiliate links, helping them share more tips and techniques.
    • Compare brands to find the best fit for your style and project needs.

    With these options, you’ll have everything needed to plunge into alcohol ink art confidently.

    Frequently Asked Questions

    Is Alcohol Ink Safe for Use Around Children and Pets?

    Alcohol ink can be safe around children and pets if you take proper precautions. For child safety, always keep containers sealed and out of reach to avoid spills or ingestion.

    Pet risks mainly come from accidental contact or inhaling fumes, so use it in well-ventilated areas and consider wearing masks. If you’re worried, non-toxic alternatives might be a better choice. Once dried and sealed, alcohol ink poses minimal risk in your home.

    How Long Does Alcohol Ink Take to Dry Completely?

    Think of alcohol ink drying like a sunset. It unfolds at its own pace. Your drying time usually ranges from 10 to 15 minutes for touch-dry, but complete drying can take up to 72 hours.

    Environmental factors like humidity and airflow affect this, as do your application techniques. Thinner layers dry faster, while thicker ones need patience. Using a heat gun speeds things up, helping you seal your masterpiece without smudging.

    Can Alcohol Ink Be Removed From Clothing or Skin?

    Yes, you can remove alcohol ink from clothing and skin with proper stain removal techniques. For skin cleaning, wash the area immediately using soap and an alcohol-based hand sanitizer or rubbing alcohol to lift the ink.

    When it comes to clothing treatment, blot the stain with rubbing alcohol or a stain remover before laundering. Keep in mind some fabrics need special care, and stubborn stains might require multiple treatments, so act quickly for best results.

    What Are the Best Storage Tips for Unopened Alcohol Ink?

    Imagine you’re prepping for a big project using color blending and transparency effects. To keep your unopened alcohol ink fresh, store it cool and dark, ideally between 60-75°F, and upright to prevent leaks.

    This way, you maintain the quality needed for technique variations. Avoid sunlight and humidity, which can ruin pigments. Following these tips guarantees your inks stay vibrant and ready whenever inspiration strikes.

    Are There Eco-Friendly or Non-Toxic Alcohol Ink Options Available?

    Yes, you can find eco friendly alternatives to traditional alcohol inks that use organic dye options, making them safer for you and the environment. Choosing non toxic ink benefits your health by reducing exposure to harmful chemicals and improves indoor air quality.

    Many brands now offer formulas with low VOCs or solvent-free ingredients. Just make sure you check labels carefully to confirm these features before buying to enjoy safer, greener art supplies.

    Conclusion

    Think of alcohol ink as a vibrant river flowing through your creative landscape, shaping every stone and leaf with its unpredictable dance. Whether you’re painting abstract dreams, crafting jewelry, or invigorating furniture, this liquid art breathes life into your vision.

    Just like a garden needs care, sealing your work protects its brilliance. So plunge in, explore the colorful currents, and let your imagination sail freely on this ever-changing, radiant tide.

  • What Ink Does HP DeskJet 7700 Use?

    What Ink Does HP DeskJet 7700 Use?

    Your HP DeskJet 7700 uses original or compatible HP 65 ink cartridges, available in black and tri-color options designed specifically for this model.

    You can choose between standard cartridges for moderate printing or high-yield (XL) versions that last longer and save money.

    Both types deliver vibrant colors and sharp text while protecting your printer’s warranty when installed properly.

    Keep your printer performing its best and explore the detailed differences in cartridge options, installation tips, and maintenance advice ahead.

    What HP 65 Cartridges Work With the DeskJet 7700?

    compatible hp 65 cartridges

    Wondering which HP 65 cartridges work with your DeskJet 7700? You’ll want to use the genuine HP 65 Black (F6U62AN) and HP 65 Tri-Color (F6U61AN) ink cartridges designed for this printer. These cartridges deliver reliable print quality, with the black cartridge printing around 200 pages and the tri-color about 165 pages, depending on your usage.

    Sticking to genuine HP 65 ink cartridges helps guarantee your prints come out sharp while keeping your printer’s warranty intact. If you’re looking to save money, you can also consider refillable or remanufactured HP 65 cartridges that are compatible with the DeskJet 7700. Just be aware that while these alternatives work, they might not always offer the same consistency in print quality as the original cartridges.

    Choosing Between Standard and High-Yield HP 65 Cartridges

    You’ll want to compare the page yield between standard and high-yield HP 65 cartridges to match your printing needs. If you print a lot, high-yield cartridges usually give you better cost efficiency. So, think about how much you actually print to figure out which option will save you the most money and time.

    Cartridge Yield Comparison

    How do you decide between the standard and high-yield HP 65 cartridges for your HP DeskJet 7700? Think about ink cartridge longevity, printing quality, and environmental impact. High-yield cartridges offer twice the page output, which means fewer replacements and less waste.

    Cartridge Type Page Yield Replacement Frequency
    Standard HP 65 165 pages More frequent
    High-Yield HP 65 330 pages Less frequent
    Environmental Impact Higher waste with standard Lower waste with high-yield

    If you print often, high-yield cartridges help minimize interruptions and reduce environmental impact by cutting down on cartridge waste. For occasional printing, the standard cartridge may be enough. Both keep excellent print quality, so your choice depends on how much you print and your preference for sustainability.

    Cost Efficiency Analysis

    When should you choose the standard HP 65 cartridge over the high-yield HP 65XL for your DeskJet 7700? If you print occasionally, the standard cartridge is more cost-effective despite its lower page yield. It offers reliable cartridge compatibility with your printer’s ink color options, making it a convenient choice without the upfront cost of the XL.

    On the other hand, if you print frequently, the HP 65XL’s higher yield lowers your cost per page and reduces how often you need to replace cartridges. While refill accessories exist, they might not match the efficiency of genuine cartridges.

    Balancing your printing habits with cartridge type helps you optimize expenses without sacrificing quality or convenience. Choose based on your usage for the best cost efficiency.

    Printing Volume Considerations

    Wondering which HP 65 cartridge suits your printing needs best? If you print occasionally or use various paper types, the standard HP 65 cartridge, yielding about 200 pages, might fit you well.

    However, if you prioritize print quality and print in high volume, the HP 65XL high-yield cartridge, producing roughly 400 pages, offers better value and fewer replacements.

    Also, following maintenance tips helps maintain consistent print quality regardless of cartridge choice.

    Cartridge Type Page Yield Best For
    HP 65 ~200 pages Low to moderate volume
    HP 65XL ~400 pages High-volume printing
    Both Various paper types
    HP 65XL Cost-effective usage
    HP 65 & 65XL Easy maintenance tips

    Which Colors Are Available for HP 65 Cartridges?

    You’ll find HP 65 cartridges come in three main colors: Black, Gray, and Tri-color. Each one has its own purpose. Black is great for sharp text, while Tri-color handles vibrant color prints. And if you need detailed grayscale images, Gray is the way to go. Knowing these options makes it easier to pick the right cartridge for your printing needs.

    Available HP 65 Colors

    The HP 65 ink cartridges come in four distinct colors to cover all your printing needs: Black, Cyan, Magenta, and Yellow. The Black cartridge prints about 200 pages, while each colored cartridge yields around 165 pages.

    These cartridges are designed specifically for printers like the HP DeskJet 7700, guaranteeing vibrant, accurate color calibration every time you print. To keep your printer running smoothly, follow basic printer maintenance tips like regular cleaning and proper cartridge handling.

    When replacing cartridges, consider ink cartridge recycling programs to reduce waste and support sustainability. Using the correct HP 65 colors ensures consistent print quality, whether you’re handling documents or photos.

    Proper care and cartridge choice will extend your printer’s life and maintain sharp, vivid output.

    Color Variants Overview

    To get the most out of your HP DeskJet 7700, you need to know which color options the HP 65 cartridges offer. These cartridges come in four vibrant color variants, each designed to work seamlessly with your printer’s color mixing and print calibration systems. This guarantees sharp images with accurate hues and ideal ink drying times. Here’s what you’ll find:

    1. HP 65 Black – perfect for crisp text and detailed monochrome prints.
    2. HP 65 Cyan – adds a bright, revitalizing blue tone.
    3. HP 65 Magenta – delivers rich reds and pinks.
    4. HP 65 Yellow – completes the palette with vivid yellows.

    Together, they provide balanced color output, maintaining consistent quality through precise print calibration and efficient ink drying.

    Cartridge Color Options

    Although selecting the right cartridge might seem straightforward, knowing the specific color options available for HP 65 cartridges can help you get the best results from your HP DeskJet 7700.

    The HP 65 series offers ink color variations including black, cyan, magenta, and yellow. You’ll find the black cartridge labeled simply as HP 65 Black, while the color cartridges come as HP 65 Cyan, Magenta, and Yellow.

    These cartridge color options let you print in vibrant, high-quality full color, matching the ink color choices to your printing needs. Whether you need sharp black text or rich color photos, choosing the right cartridge guarantees your prints look their best with your HP DeskJet 7700.

    Comparing Remanufactured and Original HP 65 Cartridges

    When deciding between remanufactured and original HP 65 cartridges for your DeskJet 7700, you’ll find both options deliver reliable performance. Original cartridges come with guaranteed compatibility and consistent quality. Remanufactured ones offer a budget-friendly, eco-conscious choice through ink cartridge recycling.

    However, you should watch for printer compatibility issues and follow cartridge storage tips to keep your prints sharp.

    Here’s what to contemplate:

    1. Cost savings: Remanufactured cartridges usually cost less without sacrificing quality.
    2. Environmental impact: Choosing remanufactured supports ink cartridge recycling efforts.
    3. Reliability: Original HP cartridges reduce the chance of printer compatibility issues.
    4. Convenience: Both types fit your DeskJet 7700 perfectly when stored properly.

    Ultimately, your choice balances budget, performance, and sustainability, letting you print confidently with either cartridge type.

    Page Yields for Each HP 65 Cartridge Color

    cartridge yields and management

    Since you rely on your HP DeskJet 7700 for everyday printing, understanding the page yields of each HP 65 cartridge color helps you manage your ink supply effectively. The black HP 65 cartridge typically yields around 300 pages, while the cyan, magenta, and yellow cartridges each offer about 300 pages as well.

    Keep in mind, these yields can vary depending on print density and the types of paper you use. Heavier paper types or high-density prints may consume more ink due to longer ink drying times needed to maintain color accuracy and prevent smudging.

    The HP 65 cartridges are designed to deliver sharp, vibrant colors that maintain accuracy across different documents, whether photos or text. By knowing these page yields, you can better anticipate when to replace cartridges and choose paper types that optimize performance without sacrificing print quality.

    This guarantees your prints stay crisp while extending the life of each cartridge.

    Cost Savings With Compatible and Remanufactured HP 65 Ink

    How can you cut printing costs without sacrificing quality? Compatible and remanufactured HP 65 ink cartridges offer a smart solution. You can save around $30 or more per set compared to original HP cartridges while enjoying similar page yields. Whether you print on different paper types or need high print resolution, these cartridges deliver consistent, vibrant results.

    Here’s why switching makes sense:

    1. Save money with individual cartridges priced at about $9 each.
    2. Get discounts when buying compatible inks in bulk.
    3. Maintain print quality across various paper types.
    4. Keep your printer running smoothly by following proper maintenance routines.

    Will Using HP 65 Cartridges Affect My Printer Warranty?

    genuine cartridges maintain warranty

    If you use genuine HP 65 cartridges, your printer warranty remains intact. Now, if you decide to go with compatible or remanufactured ink, it won’t automatically void your warranty—unless those cartridges actually cause damage to your printer. So, it’s really important to understand how HP’s damage proof requirements work and how they can impact your printer guarantee.

    Warranty Impact Of Compatible Ink

    Although you can use compatible HP 65 cartridges with your DeskJet 7700, doing so usually won’t void your printer’s warranty unless those cartridges cause damage. HP allows third-party ink if it doesn’t harm your device, and proof of damage from compatible ink is required to deny warranty coverage.

    To safeguard your warranty, keep purchase receipts and documentation. Remember, original cartridges offer guaranteed printer compatibility, but many compatible options pass strict printer compatibility testing.

    Here’s what matters most:

    1. Use cartridges that don’t affect ink drying time or print quality.
    2. Confirm cartridges come from reputable sources with proper printer compatibility testing.
    3. Practice responsible ink cartridge recycling to protect the environment.
    4. Keep all purchase records in case warranty questions arise.

    This way, you stay covered and eco-friendly.

    Damage Proof Requirements

    While using HP 65 cartridges in your DeskJet 7700 generally won’t affect your warranty, you need to make certain that any third-party or compatible cartridges don’t cause damage. Using cartridges that meet HP’s quality standards guarantees consistent paper quality, print speed, and color accuracy without harming your printer. Keep documentation and proof of purchase for warranty protection.

    Requirement Impact on Printer Recommendation
    Paper Quality Affects print output clarity Use recommended paper types
    Print Speed Can slow down if ink is poor Choose cartridges tested for speed
    Color Accuracy May degrade with low-quality ink Use HP-certified or reliable alternatives

    Ensuring these factors helps protect your printer and preserves your warranty coverage.

    Printer Guarantee Conditions

    Because HP DeskJet 7700 works seamlessly with HP 65 cartridges, using these genuine inks keeps your printer’s warranty intact. Sticking to authorized HP cartridges means you won’t risk voiding your warranty due to cartridge-related damage.

    HP emphasizes that only damage caused by non-HP or incompatible inks affects coverage. To guarantee your printer stays protected, remember these key points:

    1. Use genuine HP 65 cartridges for superior paper quality and consistent ink drying time.
    2. Avoid third-party cartridges that might slow printing speed or cause malfunctions.
    3. Follow HP’s guidelines to maintain warranty validity and prevent damage.
    4. Understand that warranty covers issues unless caused directly by non-authorized ink.

    Where to Buy HP 65 Cartridges for the DeskJet 7700

    If you need to replace your HP DeskJet 7700 ink, you can buy HP 65 cartridges from a variety of sources, including authorized retailers, office supply stores, and popular online marketplaces. Choosing where to buy depends on your priorities.

    Authorized retailers guarantee genuine cartridges, which support efficient printer maintenance and reduce issues like ink drying. Office supply stores offer convenience if you want the cartridge immediately.

    Online marketplaces often provide a wider selection, including compatible or remanufactured cartridges that cost less. Just be sure to verify compatibility with your DeskJet 7700 to avoid print quality problems.

    How to Install and Replace HP 65 Cartridges in Your Printer

    When you notice the print quality declining or the ink running low, it’s time to replace the HP 65 cartridges in your DeskJet 7700. Proper installation is key to smooth printer maintenance and avoiding ink drying time issues.

    Follow these steps to replace your cartridges:

    1. Open the printer’s front panel and gently press down on the cartridge to release it.
    2. Remove the old cartridge and dispose of or recycle it responsibly.
    3. Unpack the new HP 65 cartridge, remove the plastic tape, and insert it firmly until it clicks.
    4. Close the front panel and run a test print to confirm proper installation.

    Remember to store unused ink cartridges in a cool, dry place to prevent premature ink drying time. Good ink cartridge storage helps maintain the cartridge’s life and ensures consistent print quality.

    Regular printer maintenance like this keeps your DeskJet 7700 running smoothly and your prints sharp.

    How to Keep Your HP DeskJet 7700 Printing Sharp

    How do you keep your HP DeskJet 7700 printing sharp and vibrant every time? Start by using genuine or high-quality remanufactured HP 65 or 65XL cartridges. These cartridges deliver consistent ink flow and rich colors.

    Choose the right paper types for your print job. Glossy or photo paper enhances color vibrancy, while standard paper works well for everyday documents. Adjusting the print speed can also affect print quality; slower speeds often produce sharper images.

    Regular maintenance tips include cleaning the printhead and nozzles to prevent clogging and maintain crisp lines. Store your cartridges in a cool, dry place to avoid ink drying out, which can degrade print sharpness.

    Finally, replace empty cartridges promptly to preserve color accuracy and prevent damage. By combining the right cartridges, paper types, print speed adjustments, and maintenance tips, you’ll guarantee your HP DeskJet 7700 consistently produces sharp, vivid prints.

    Frequently Asked Questions

    Can I Use HP 65 Cartridges in Other HP Printer Models?

    You can’t use HP 65 cartridges in just any HP printer model because cartridge compatibility depends heavily on your printer model compatibility. HP 65 cartridges are designed for specific printers, so using them in incompatible models might cause errors or damage.

    Always check your printer’s user manual or HP’s website to confirm ink color options and cartridge compatibility before buying. This helps you avoid issues and guarantees your printer runs smoothly.

    How Do I Recycle Used HP 65 Ink Cartridges?

    Wondering how to recycle used HP 65 ink cartridges while ensuring ink cartridge compatibility? You can easily join HP’s free recycling program by dropping off cartridges at authorized collection sites or mailing them back.

    Not only does this reduce your environmental impact, but it also supports sustainable printing practices. Taking part in the recycling program benefits both you and the planet, making responsible disposal simple and effective.

    What Should I Do if My HP 65 Cartridge Is Not Recognized?

    If your HP 65 cartridge isn’t recognized, first check cartridge compatibility to verify you’re using the correct type. Remove the cartridge, inspect it for protective tape, and clean the contacts gently with a lint-free cloth.

    Reinstall it properly, making sure it’s seated firmly. Restart your printer to refresh recognition. For future ink storage, keep cartridges sealed and cool.

    Regular printer maintenance, like cleaning printheads, helps prevent recognition issues.

    Are HP 65 Cartridges Available in Photo or Specialty Inks?

    Think of HP 65 cartridges as a painter’s palette with limited but vibrant colors. You’ll find cartridge color options in standard black, color, and photo black, but no specialty inks like metallic or pastel.

    The photo black enhances ink compatibility with your DeskJet 7700, producing rich contrast. Plus, the ink drying time is optimized for sharp, smudge-free prints, especially when you’re working on high-quality photos.

    How Long Do HP 65 Cartridges Last After Opening?

    You can expect the ink lifespan of HP 65 cartridges to be about 6 to 12 months after opening. Cartridge expiry becomes a concern if you don’t use them regularly, as ink can dry out or clog the printhead.

    To extend their life, follow storage tips like keeping cartridges in a cool, dry place and sealing them properly. Using the ink within six months guarantees the best print quality and avoids issues.

    Conclusion

    Choosing the correct cartridge for your HP DeskJet 7700 guarantees seamless, sharp, and stunning prints. Whether you pick standard or high-yield HP 65 ink, you’ll power through pages with perfect pigmentation.

    Original or remanufactured, each cartridge color crafts crisp creations, keeping your printer protected and performing. By buying wisely and installing carefully, you’ll maintain marvelous, mistake-free masterpieces.

    So, stay sharp, save smart, and savor spectacular, smooth printing every time!

  • What Gets Ink Out of Fabric Quickly?

    What Gets Ink Out of Fabric Quickly?

    If you want to get ink out of fabric quickly, act fast before the stain sets. Use rubbing alcohol or hand sanitizer to gently blot fresh ink. These alcohol-based products break down ink pigments effectively.

    Avoid heat because it can lock the stain in permanently. Always test removers on hidden spots to protect your fabric.

    For tougher stains, repeat treatments every 15-30 minutes without drying the fabric. Keep going, and you’ll discover even more effective ink removal tips.

    Why Acting Quickly Matters for Ink Stains

    act quickly to prevent permanence

    Why does acting quickly matter when dealing with ink stains? Because immediate action makes all the difference in stain removal. When ink first lands on fabric, it hasn’t yet soaked deeply into the fabric fibers, so quick treatment can prevent the stain from setting.

    Once ink dries, it becomes much harder to remove. Dried ink resists cleaning agents and binds tightly to the fibers, making stain removal a tougher, longer process. If you wait too long, the ink penetrates more deeply, increasing the risk of permanent discoloration.

    How Rubbing Alcohol Lifts Ink Stains Effectively

    When you apply rubbing alcohol to an ink stain, it quickly breaks down the ink’s solvents, allowing the pigment to dissolve and lift from the fabric fibers. This makes rubbing alcohol a powerful agent for ink stain removal, especially on fresh stains.

    You want to apply it directly onto the ink stain so it can penetrate and loosen the ink effectively. After that, use blotting with a clean cloth to lift the dissolved ink without spreading it further. Remember, blotting is key because it helps you absorb the ink without rubbing it deeper into the fabric.

    If the stain is dried, rubbing alcohol might need more time or repeated applications to fully dissolve the ink. Before you start, always test rubbing alcohol on an inconspicuous area of your fabric to avoid discoloration or damage.

    Using these steps, you can tackle ink stains quickly and keep your fabric looking clean.

    Using Hand Sanitizer to Remove Ink Stains Easily

    hand sanitizer removes ink

    You can use hand sanitizer that contains at least 60% alcohol to break down ink stains quickly and safely on most fabrics. Just apply it generously to the stain.

    Then, let it sit for a few minutes. After that, gently scrub the area to help lift the ink without damaging the material.

    Once you’ve done that, rewashing the fabric is a good idea. This makes sure all the ink and any leftover sanitizer are completely gone.

    Hand Sanitizer Effectiveness

    How quickly you act can make all the difference when removing ink stains with hand sanitizer. Hand sanitizer contains alcohol, a powerful agent that dissolves ink pigments, making ink stain removal from fabric more effective.

    Applying a generous amount of hand sanitizer directly onto fresh ink stains boosts stain treatment success. You should gently rub the sanitizer into the fabric to help the alcohol penetrate and break down the ink.

    After treatment, rewashing the fabric is essential to rinse away loosened ink particles completely. For stubborn or older stains, multiple hand sanitizer applications may be necessary to fully lift the ink.

    Using hand sanitizer as an ink stain removal method combines convenience with effective stain treatment, especially when you act promptly on fresh fabric stains.

    Application Techniques Explained

    Acting quickly with hand sanitizer sets the stage for effective ink stain removal, but knowing the right application techniques makes the process even smoother. Start by applying hand sanitizer directly onto the ink stain to let its alcohol content break down the ink pigments. Make sure to use enough sanitizer to saturate the fabric thoroughly.

    After letting it sit for a few minutes, use a white cloth for gentle dabbing. This helps lift the ink without spreading it. Repeat the application and dabbing process as needed, especially for stubborn or dried ink stains.

    Consistent, careful dabbing combined with proper hand sanitizer application ensures quicker, more efficient stain removal, saving your fabric from lasting damage.

    Fabric Safety Tips

    Although hand sanitizer is a powerful tool for removing ink stains, you should always prioritize fabric safety to avoid damage. Before applying, perform a patch test on an inconspicuous area to check colorfastness. This step is crucial, especially for delicate fabrics like silk or wool.

    Use a generous amount of hand sanitizer directly on the stain, gently blotting rather than rubbing to protect the fabric fibers. Rinse with cold water before laundering for best stain removal results.

    Remember, hand sanitizer works best on fresh ink stains and might be less effective on dried or permanent ink.

    Step Action Fabric Safety Note
    1 Perform patch test Check colorfastness
    2 Apply hand sanitizer Use on fresh stains only
    3 Blot gently Avoid rubbing delicate fabrics
    4 Rinse with cold water Prevent fabric damage

    Using White Vinegar and Baking Soda to Remove Ink Stains

    vinegar and baking soda

    You’ll want to mix white vinegar and baking soda to create a fizzy paste that really targets ink stains. The vinegar works by breaking down the ink pigments, and the baking soda helps lift those pigments right out of the fabric fibers. Just apply the paste directly onto the stain, let it sit for a bit, and then rinse it thoroughly. That’s how you get the best results!

    Vinegar’s Role In Ink

    How exactly does white vinegar help remove ink stains from fabric? Vinegar acts as a mild acid that breaks down ink pigments, making it easier to remove them from fabric fibers. When you combine vinegar with baking soda, it creates a foaming reaction that lifts ink stains effectively.

    This natural method targets especially fresh, water-based inks, neutralizing dye molecules without harming delicate fabric.

    Keep these vinegar benefits in mind:

    • Mild acid helps break down ink pigments
    • Neutralizes water-based and fresh ink stains
    • Creates a foaming reaction with baking soda
    • Loosens ink for easy washing
    • Chemical-free and gentle on fabric

    Using vinegar is a smart, natural way to tackle ink stains without harsh chemicals.

    Baking Soda Application Tips

    When you mix equal parts white vinegar and water, then apply a baking soda paste to the ink stain, you create a powerful yet gentle cleaning solution. The baking soda acts as a mild abrasive that lifts the ink stain, while the vinegar helps break down the pigments.

    To use, apply the paste directly onto the fabric’s ink stain and let it sit for 10-15 minutes. Afterward, gently scrub the area with a soft toothbrush or cloth to boost stain removal without damaging the fabric.

    Always test this baking soda and vinegar mixture on a hidden spot first to avoid discoloration. This method effectively targets ink stains while being safe for most fabrics when used carefully.

    Combining Vinegar And Soda

    Although ink stains can be stubborn, combining white vinegar and baking soda creates a foaming action that helps lift fresh ink from fabric fibers. You can make a paste by mixing equal parts vinegar and baking soda. Apply this paste directly onto the ink stains on fabric to penetrate and loosen ink particles quickly.

    Keep these tips in mind:

    • Best for fresh ink stains before they set deeper
    • Apply paste generously over the stain
    • Gently blot or rub to lift ink
    • Rinse thoroughly with cold water after treatment
    • May not fully remove old or stubborn stains

    This vinegar and baking soda method offers a quick, easy way to tackle ink stains while they’re still fresh on your fabric.

    Safe Ways to Apply Ink Removers Without Damaging Fabric

    Since ink removers can sometimes harm fabric, you should always test them on a hidden spot first to check for discoloration or damage. Testing guarantees the remover won’t ruin your garment before you apply it to the visible stain.

    When ready, use a cotton swab or soft cloth to gently dab small amounts of ink removers onto the fabric. Avoid rubbing, which can distort or fray fibers. Hold the fabric taut to prevent stretching or tearing, especially when using solvents like rubbing alcohol.

    Applying ink removers carefully in this way prevents oversaturation that could weaken the fabric during drying. Always follow the manufacturer’s instructions and steer clear of harsh chemicals on delicate fabrics like silk or velvet. By combining careful testing and gentle application, you can safely remove ink without damaging your fabric.

    Quick Ink Removal for Different Fabrics

    How can you quickly tackle ink stains on different fabrics without causing damage? To remove ink fast and safely, you need to adjust your approach depending on the fabric type. Here’s how to act quickly and effectively:

    Quickly and safely remove ink stains by tailoring your approach to each fabric type for effective results.

    Test any ink remover on a hidden fabric spot to avoid damage or color bleeding. Use rubbing alcohol or hand sanitizer to blot fresh ink stains on most fabrics gently.

    For delicate fabrics like silk or wool, blot with cold water immediately and seek professional cleaning. Treat dried ink on sturdy fabrics like cotton or denim by soaking them before washing.

    Combine immediate blotting, alcohol-based solvents, and thorough washing to speed up ink stain removal.

    How to Use OxiClean for Ink Stains

    When you want to remove ink stains effectively, using OxiClean can be a reliable choice. Start by mixing OxiClean Versatile Stain Remover with warm water following the package instructions. Soak the ink-stained fabric in this solution for 1 to 6 hours, depending on how stubborn the stain is.

    If the ink is dried or especially tough, apply OxiClean Max Force Laundry Stain Remover directly to the stain and let it sit anywhere from 5 minutes up to a week for deeper penetration. After soaking or treating the fabric, run it through the hottest wash cycle safe for the material, as indicated on the care label.

    This wash cycle will help lift the ink stain effectively. Before full application, always test OxiClean on an inconspicuous spot to guarantee it won’t damage or discolor your fabric. With these steps, OxiClean offers a practical and efficient method for ink stain removal.

    Why You Should Avoid Heat When Treating Ink Stains

    Although it might be tempting to speed up drying or ironing, heat actually locks ink stains deeper into fabric fibers, making them much harder to remove. Using heat too soon can permanently set the stain, ruining your chances of effective cleaning.

    Avoid heat when treating ink stains; it locks ink deeper, making removal nearly impossible.

    Avoid hot water, ironing, or any form of drying that involves heat until the ink is fully treated.

    Here’s why you should steer clear of heat when dealing with ink stains:

    Heat causes the ink dye to set deeper into fabric fibers. Ironing or drying with heat can fix the stain permanently. Hot water can bond certain inks more strongly to the fabric. Heat also triggers chemical changes in ink, making stain removers less effective.

    Air drying or keeping the fabric cool prevents the stain from setting.

    How to Repeat Treatments for Tough or Dried Ink Stains

    When you’re tackling tough or dried ink stains, it’s a good idea to reapply your treatment every 15 to 30 minutes. This gives the fabric a little time to recover between each try.

    Make sure to keep a close eye on how the stain is responding after each application. You don’t want to accidentally damage the fabric by being too harsh.

    And here’s a key tip: don’t dry the fabric until the ink is completely gone. Otherwise, you risk setting the stain permanently, which is the last thing you want!

    When To Reapply

    If the ink stain doesn’t disappear after the first wash, don’t hesitate to reapply the treatment. Effective stain removal often requires repeating the process, especially with tough or dried ink stains. Here’s when and how to reapply:

    Wait 15-30 minutes before you reapply to allow the solvent to penetrate deeply. Use fresh solvent each time to avoid spreading dried ink back onto the fabric.

    Always re-treat before drying; heat can set the ink permanently. Repeat up to three times for stubborn stains, but test first on a hidden spot.

    Avoid applying heat until the stain is completely gone to prevent setting it further.

    Monitoring Stain Progress

    How can you tell if your ink stain treatment is working? After each wash, take time to carefully inspect the fabric for any remaining ink. Monitoring stain progress is essential, especially with stubborn stains that don’t lift easily.

    Always allow the fabric to air dry before checking, as drying in a machine may set any leftover ink. If the stain persists, don’t hesitate to repeat treatments. Applying your solvent or remover multiple times increases your chances of complete removal.

    Keep track of how many times you treat the fabric; some tough stains require several rounds over multiple days. By consistently inspecting fabric and repeating treatments as needed, you’ll improve the odds of fully erasing even the most persistent ink spots from your clothing.

    When to Seek Professional Cleaning for Ink Removal

    Although tackling ink stains yourself can be effective, you should turn to professional cleaning for delicate fabrics like silk or velvet to avoid damage. Professionals use specialized solvents and equipment designed for safe and thorough stain removal, especially on fragile materials.

    You’ll want to seek professional cleaning when:

    • Ink stains have dried for more than 48 hours, making home removal less effective
    • You’re dealing with delicate fabrics such as silk, suede, or velvet
    • The ink is from permanent markers or resin-based sources requiring specialized solvents
    • Large or persistent stains resist household treatments
    • Multiple home attempts have failed, risking further fabric damage

    Frequently Asked Questions

    Can Ink Stains Be Removed From Upholstery as Quickly as Fabric?

    You can remove ink stains from upholstery quickly if they’re temporary stains or fresh spills, especially on colorfast fabric. However, you won’t get the same speed as with fabric because upholstery fibers absorb ink faster.

    Old stains tend to become permanent marks, making quick removal tough. So, act fast to tackle fresh spills; otherwise, you might be stuck with stubborn, set-in ink that’s harder to lift from upholstery.

    Are There Any Natural Remedies for Ink Removal Besides Vinegar and Baking Soda?

    You might think natural remedies for ink removal are limited, but you’ve got plenty of eco-friendly solutions beyond vinegar and baking soda. Try lemon juice with salt or rubbing alcohol for effective homemade treatments that lift stains fast.

    Milk soaks and cornstarch paste also help with stain prevention by absorbing ink naturally. These options aren’t harsh on fabric or the environment, so you can confidently tackle ink stains using gentle, natural methods.

    How Long Should I Wait Before Laundering After Treating an Ink Stain?

    You should wait at least 15 to 30 minutes before laundering after treating an ink stain to allow the cleaning tools to work effectively. For tougher stains or certain ink formulations, waiting several hours or overnight helps with stain prevention.

    Consider your fabric types and stain severity. Delicate fabrics might need gentler, longer treatments. Always check the stain before drying. If it’s still visible, reapply treatment and wait longer to avoid setting the stain permanently.

    Does the Color of Ink Affect the Removal Process?

    Yes, ink color definitely affects the removal process. When you deal with ink stains, darker ink colors usually have deeper dye penetration and stronger ink composition, making them tougher to remove.

    Stain visibility also plays a role. You’ll notice light colors fade faster. Before treating, you should consider colorfastness testing to avoid fabric damage.

    Understanding the ink’s composition helps you choose the right remover and technique for a quicker, more effective cleanup.

    Can Ink Stains Be Removed From Synthetic Fabrics Differently Than Natural Fabrics?

    Don’t worry, you can successfully tackle ink stains on synthetic fibers differently than on natural fabrics. Synthetic fabrics often resist ink better, so you’ll need stronger stain removal agents like rubbing alcohol or specialized removers. You should always test these on a hidden spot first to avoid damage.

    Natural fabrics absorb ink deeply, requiring gentler, repeated treatments. Understanding these differences lets you act quickly and save your favorite clothes without stress or disappointment.

    Conclusion

    When ink decides to make an unwanted mark, acting swiftly gives you the upper hand. Using gentle friends like rubbing alcohol, hand sanitizer, or a clever mix of vinegar and baking soda can work wonders without ruffling your fabric’s feathers.

    Remember, warmth isn’t always a cozy companion here. Skip the heat to keep stains at bay. If stubborn spots linger, don’t hesitate to call in the pros who can give your fabric the VIP treatment it deserves.

  • What Does Ink Poisoning Do and How Do You Treat It?

    What Does Ink Poisoning Do and How Do You Treat It?

    Ink poisoning usually causes minor issues like skin or tongue staining and mild irritation. If ink gets in your eyes, it might cause redness or blurred vision.

    Ingesting small amounts is generally harmless, but larger amounts can cause nausea or breathing trouble.

    Treat exposure by rinsing eyes with cool water for 15 minutes and washing skin with soap.

    Seek medical help if symptoms worsen. Keep an eye out for serious signs and learn what else you should know to stay safe.

    What Is Ink Poisoning and Its Health Risks

    minor ink exposure risks

    Although ink poisoning sounds alarming, it usually results in only minor issues like skin or tongue staining rather than serious toxicity. When ink touches your skin, it mainly causes discoloration or mild irritation rather than poisoning.

    Ink exposure typically causes minor staining or irritation, not serious poisoning.

    If you accidentally ingest a small amount of ink from pens or markers, it’s typically harmless and won’t require medical treatment. However, swallowing larger quantities, especially from printer cartridges or stamp pads, increases the risk of poisoning and may need you to call a healthcare professional.

    The main health risks involve skin and eye irritation, not systemic poisoning. Treatment usually focuses on cleaning the affected skin to prevent further irritation.

    If you suspect significant ink ingestion or experience any unusual symptoms, don’t hesitate to call for medical advice. Understanding these health risks helps you respond appropriately without unnecessary panic, ensuring proper care when dealing with ink exposure.

    Symptoms of Ink Poisoning to Watch For

    You might notice stained skin or tongue after getting ink on you. Usually, that’s nothing to worry about if it’s just a small amount. Sometimes, ink can irritate your eyes or cause temporary discoloration if it gets in them. But if you start having symptoms that don’t go away, or if you’ve swallowed a lot of ink, it’s really important to get medical help right away.

    Common Ink Poisoning Symptoms

    What signs should you watch for if you suspect ink poisoning? Generally, symptoms from ink exposure are mild and localized. You might notice stained skin or a discolored tongue, which are harmless and temporary.

    However, if you ingest ink, even though toxicity is usually minimal, you could experience stomach upset. Pay attention to these common symptoms:

    1. Visible staining on skin or tongue following ink exposure.
    2. Mild irritation or discomfort, especially around the mouth or areas where ink contacted skin.
    3. Stomach discomfort or nausea after ink ingestion, which may require treatment if severe.

    If symptoms persist or worsen, especially after ingestion, seek medical attention promptly. Immediate treatment helps prevent complications from larger exposures, even though serious poisoning is rare.

    Eye And Skin Effects

    How does ink affect your eyes and skin if exposed? When ink comes into contact with your eyes, you might experience eye irritation, including redness, discomfort, and blurred vision. Fortunately, these symptoms are usually temporary and don’t cause permanent damage.

    If ink gets in your eyes, rinsing them with cool water until the irritation subsides helps reduce discomfort. On your skin, ink exposure often leads to skin staining rather than poisoning. Promptly washing the affected area can help remove the discoloration.

    It’s important to note that skin or eye contact with ink rarely causes systemic poisoning symptoms like headaches or nausea. So, while ink can be irritating and messy, the effects on your eyes and skin are generally temporary and manageable with proper rinsing and cleaning.

    When To Seek Help

    Although most ink exposures cause only mild irritation or staining, certain symptoms mean you should get medical help right away. If you notice any of the following after ink contact or ingestion, don’t hesitate to seek help:

    1. Persistent eye irritation, vision changes, or skin staining that doesn’t fade quickly.
    2. Ingesting large amounts of ink (over 1 oz/30 mL), even if symptoms seem mild.
    3. Signs of systemic poisoning like dizziness, nausea, or unusual drowsiness.

    If poisoning happens, give first aid and call your local emergency number or poison control center immediately. Early action can prevent complications, so always be cautious and get medical help without delay.

    First Aid for Ink Exposure and Ingestion

    If ink gets in your eyes, just rinse them with cool water for at least 15 minutes. If the irritation doesn’t go away, make sure to get medical help. For any ink on your skin, wash it off with soap and water.

    Usually, swallowing a little bit of ink isn’t harmful. But if you swallow more than an ounce or start feeling unwell, don’t hesitate to contact poison control or emergency services right away.

    Immediate Response Actions

    What should you do immediately after ink exposure or ingestion? Quick and proper action can prevent serious poisoning. Here’s what you need to do:

    1. If ink gets into your eyes, rinse thoroughly with cool water for at least 15 minutes to reduce irritation. For skin contact, wash with soap and water. There’s no poisoning risk from skin exposure.
    2. In case of ingestion, especially more than 1 oz (30 mL), call poison control at 1-800-222-1222 immediately. Don’t induce vomiting unless instructed.
    3. Seek emergency medical help if symptoms worsen or if advised by poison control. Monitor essential signs closely until medical help arrives.

    Taking these steps quickly helps minimize risk and ensures you get the right care for ink poisoning.

    Medical Care Guidelines

    How should you provide first aid after ink exposure or ingestion? First, rinse the affected skin or eyes with water for at least 15 minutes. If ink is ingested, don’t induce vomiting. Call poison control at 1-800-222-1222 immediately and seek urgent care.

    Medical treatment may include skin and eye irrigation, monitoring vital signs, and administering IV fluids or medications.

    Situation Immediate Action Medical Care Needed
    Skin Exposure Rinse with water 15 mins Irrigation, monitor vital signs
    Eye Exposure Flush eyes thoroughly Eye irrigation, urgent care
    Ink Ingestion Do not induce vomiting Emergency care, IV meds

    Prompt first aid and treatment improve outcomes markedly.

    How Ink Poisoning Affects the Skin and Eyes

    temporary skin and eye effects

    Although ink poisoning rarely causes serious health issues, it can temporarily affect your skin and eyes. When you come into skin contact with ink, you might notice skin staining. This staining is a common temporary effect and doesn’t lead to systemic poisoning.

    Similarly, if ink gets into your eyes, it can cause eye irritation and discolor the white part of your eye.

    Here’s how ink poisoning affects you:

    1. Skin staining from ink is temporary and can be removed easily with soap and water.
    2. Eye irritation caused by ink exposure usually subsides after thorough rinsing with cool water.
    3. Neither skin contact nor eye exposure to ink results in permanent damage or poisoning symptoms.

    What to Do If Ink Gets Into Your Eyes?

    If ink gets into your eyes, the first thing you should do is rinse them thoroughly with cool water for at least 15 minutes. Make sure not to rub your eyes while rinsing, as that can make things worse.

    Keep an eye out for any signs like persistent redness or discomfort—these could mean your eyes are irritated or even injured.

    If the symptoms don’t start to get better, don’t wait around. It’s important to seek medical help promptly to make sure everything is okay.

    Immediate Eye Rinsing

    Wondering what to do the moment ink splashes into your eyes? Immediate eye rinsing is crucial to minimize ink poisoning and chemical exposure effects. Here’s what you should do:

    1. Rinse your eyes gently with cool, clean water for at least 15 minutes to flush out the ink and reduce eye irritation. Avoid rubbing, as it can worsen the damage.
    2. Continue irrigating until the discomfort eases or you can get medical help. Persistent staining or irritation shouldn’t be ignored.
    3. Seek urgent care if you experience ongoing pain, blurred vision, or visible ink remains in your eyes after rinsing. Quick action is essential to prevent long-term complications.

    Prompt eye rinsing combined with timely medical attention ensures the best outcome in cases of ink exposure.

    Recognizing Irritation Signs

    When ink gets into your eyes, you’ll likely notice redness, irritation, or a burning sensation. These signs mean your eye is reacting to the foreign substance, causing pain and discomfort.

    To relieve irritation, rinse your eye thoroughly with cool, clean water for at least 15 minutes. Avoid rubbing your eye or applying any ointments without medical advice because this can make things worse.

    You might see temporary staining on the white part of your eye, but this usually fades without lasting effects. If the redness, pain, or discomfort continues after rinsing, it’s important to seek medical attention promptly.

    Recognizing these irritation signs early helps you take the right steps to protect your eyes and prevent further complications.

    When To Seek Help

    After rinsing your eye thoroughly to ease irritation, you need to know the signs that call for medical help. Ink poisoning in the eye can cause varying symptoms, some requiring emergency treatment. You should seek help if you experience any of the following:

    1. Persistent pain, redness, or blurred vision after rinsing.
    2. Symptoms that worsen or do not improve within a short time.
    3. Any unusual discharge or swelling around the eye.

    Don’t rub your eye or apply ointments, as these may worsen irritation. Temporary staining is common but usually harmless. If symptoms persist, contact a healthcare professional immediately for proper treatment. Prompt medical help guarantees the best outcome and prevents complications from ink poisoning in your eye.

    When to Seek Medical Help for Ink Poisoning

    If you ingest more than an ounce (30 mL) of ink or experience symptoms like vomiting, trouble breathing, or confusion, you need to get medical help right away. Contact poison control at 1-800-222-1222 immediately if you suspect ink ingestion, especially from printer cartridges or stamp pads. Urgent treatment is vital to avoid complications from a large amount of ink or toxic substances.

    Also, seek medical help if ink enters your eyes and causes persistent irritation or vision changes. When in doubt, always get a professional evaluation to guarantee your safety.

    When to Seek Medical Help Why It’s Urgent
    Ingested over 1 oz (30 mL) ink Large amount can cause poisoning
    Symptoms like vomiting, confusion Indicates serious systemic effects
    Eye exposure with vision changes Risk of lasting eye damage

    Don’t hesitate. Urgent treatment can prevent severe consequences.

    How Doctors Diagnose and Treat Ink Poisoning

    diagnosis treatment monitoring prevention

    Doctors use a combination of your medical history, observed symptoms, and details about the ink involved to diagnose ink poisoning accurately. To confirm the diagnosis and assess severity, they often perform medical tests like physical exams, blood work, or imaging to check for systemic absorption or complications.

    For treatment, doctors focus on supportive care tailored to your symptoms. This may involve irrigating affected areas such as skin or eyes to remove ink residues, and monitoring vital signs closely to detect any changes.

    They may also administer activated charcoal or induce vomiting if large amounts of ink were ingested and if it’s medically appropriate. Your healthcare provider will rely on poison control guidelines to determine the best course of action.

    Prompt diagnosis and treatment help prevent complications and guarantee a safer recovery from ink poisoning.

    Tattoo Ink Risks and How to Stay Safe

    While getting a tattoo can be a meaningful form of self-expression, you need to be aware of the risks associated with tattoo ink. Tattoo ink risks include allergic reactions, infections, and long-term skin problems caused by contaminated ink or unsterilized equipment.

    Allergic reactions often stem from pigments like red, yellow, green, or blue, leading to painful skin rashes. Since the FDA hasn’t approved pigments for cosmetic tattooing, unregulated inks increase your chances of adverse effects.

    To stay safe, always choose reputable tattoo artists who follow strict sterilization protocols and use sterile, FDA-approved inks whenever possible. Avoiding contaminated ink and ensuring proper hygiene during the tattoo process considerably reduces your infection risk.

    Being informed about these risks helps you make safer choices and enjoy your tattoo without complications.

    Preventing Ink Poisoning in Everyday Life

    Understanding the risks of tattoo ink is just one part of staying safe around ink products. Preventing ink poisoning starts with mindful handling and storage to avoid accidental ingestion or harmful ink exposure.

    You can protect yourself and others by following these key steps:

    1. Store ink-containing items like pens and markers out of reach of children to prevent accidental ingestion.
    2. Use ink products only in well-ventilated areas and clean any ink stains from your skin or surfaces promptly to reduce prolonged contact.
    3. Always read and follow ink product safety instructions, and avoid using unsterilized ink for tattoos to prevent infections and allergic reactions.

    How WebPOISONCONTROL Can Help You Quickly and Safely

    Wondering where to turn if you suspect ink poisoning? WebPOISONCONTROL is your go-to resource for quick guidance and expert advice. This fully automated, confidential online tool handles hundreds of cases daily, providing immediate first aid instructions and clear steps on when to seek emergency care.

    If you suspect ink poisoning, WebPOISONCONTROL offers quick, confidential guidance and first aid advice anytime.

    By entering specific details like the type and amount of ink involved, you get tailored recommendations that guarantee accurate and prompt assistance. WebPOISONCONTROL saves you from lengthy phone calls to traditional poison centers, making the response swift and efficient.

    Beyond managing emergencies, it offers follow-up resources to enhance poison prevention and safety education. Launched as a digital service in 2025, WebPOISONCONTROL has quickly become a trusted platform to help you safely navigate ink poisoning incidents online.

    With its user-friendly interface and reliable support, you can act confidently and quickly to protect yourself or others.

    Frequently Asked Questions

    Can Ink Poisoning Cause Allergic Reactions?

    Ink poisoning itself doesn’t typically cause an ink allergy or allergic symptoms because it’s more about toxicity than immune response. However, you might experience skin reactions or hypersensitivity reactions if you’re allergic to specific pigments in the ink.

    These allergic symptoms can include redness, itching, or swelling, sometimes even respiratory issues. If you notice these signs, it’s likely an allergic reaction rather than poisoning, so you should seek treatment for the immune response accordingly.

    Is Ink Poisoning More Dangerous for Children?

    Yes, ink poisoning is more dangerous for children due to their smaller size and developing bodies. If a child ingests ink, you need to watch for toxic symptoms like vomiting or difficulty breathing.

    Always take safety precautions by keeping inks out of reach and practicing hazard awareness. Perform a quick risk assessment if exposure happens, and contact poison control immediately for guidance.

    Prompt action can prevent serious complications in kids.

    How Long Does Ink Poisoning Recovery Take?

    Think of ink poisoning recovery like a fading stain; it depends on the severity. Once you spot symptoms, quick action with treatment options is key.

    Minor exposure often clears in 24 to 72 hours, but toxic ink types or larger ingestions may stretch recovery to weeks. Always take emergency measures seriously to avoid serious health consequences.

    Practicing poisoning prevention helps keep you safe from ink’s hidden dangers.

    Can Swallowing Small Amounts of Ink Be Harmless?

    Yes, swallowing small amounts of ink can be mostly harmless because ink absorption in your digestive system is minimal. The ink residue usually passes through without causing serious digestive impact.

    Since toxicity levels in small quantities are low, symptom severity tends to be mild or nonexistent. However, if you notice any unusual symptoms, don’t hesitate to seek medical intervention to rule out complications and guarantee your safety.

    Are Certain Types of Ink More Toxic Than Others?

    You might think all inks could knock out an elephant, but ink toxicity varies wildly! It all boils down to the chemical composition and ink formulations.

    Some inks contain toxic pigments or harsh solvents from ink manufacturing that make them far more dangerous than typical pen ink. Environmental exposure to these chemicals can worsen effects.

    Conclusion

    Ink poisoning might sneak in like a shadow, but you’re not powerless against it. By knowing the signs and acting fast, you can turn the tide before it takes hold.

    Treat ink exposure like a small spark. Handle it quickly to prevent a wildfire of symptoms. Stay aware, protect your skin and eyes, and don’t hesitate to seek help.

    With the right steps, you’ll keep ink’s dark side from staining your health.

  • How to Use Infusible Ink Transfer Sheets in 10 Easy Steps

    How to Use Infusible Ink Transfer Sheets in 10 Easy Steps

    To use Infusible Ink Transfer Sheets, start by mirroring your design in Cricut Design Space and cutting it with the transfer sheet liner side down on a Standard Grip Mat.

    Weed out excess ink carefully, trim the sheet, and prepare your blank surface by cleaning and preheating it.

    Align and tape your design before pressing with the recommended time and temperature.

    Let your project cool completely before peeling to guarantee vibrant, lasting results.

    Keep going to uncover handy tips for flawless application and care.

    Choose Your Design and Mirror It to Cut Accurately

    mirror design before cutting

    Before you cut your design, make sure you mirror it in Cricut Design Space. This step is vital because Infusible Ink transfer sheets are cut with the liner side down, meaning the printable side faces the mat.

    Always mirror your design in Cricut Design Space to ensure Infusible Ink prints correctly facing the mat.

    If you don’t mirror your design, the final transfer will be reversed or upside down. In Design Space, use the “Mirror” toggle button to flip your design horizontally before you send it to cut.

    Double-check that all elements, including text and images, are correctly mirrored to avoid mistakes. Also, verify that your cut lines are clear and precise so the machine cuts exactly where you want.

    Taking these precautions guarantees your design appears as intended on your blank surface once transferred. By carefully mirroring and reviewing your cut lines in Design Space, you’ll save yourself time and frustration, making your Infusible Ink project look professional and flawless.

    Prepare Your Infusible Ink Transfer Sheet and Cutting Mat

    When you’re ready to cut your design, place the Infusible Ink transfer sheet liner side down on a Standard Grip Mat to guarantee your machine cuts accurately. This position ensures precise alignment and prevents mistakes.

    Before placing the sheet, create and mirror your design in Cricut Design Space to match the transfer sheet’s requirements. Select “Infusible Ink Transfer Sheet” as your material setting for ideal blade pressure. If you have an older Cricut, pick “Custom” and adjust accordingly.

    After loading your cutting mat with the transfer sheet, make sure it’s firmly adhered to avoid shifting during cutting.

    Here’s a quick prep checklist for your transfer sheet and cutting mat:

    Step Action Tip
    1 Place liner side down Use Standard Grip Mat
    2 Mirror your design Use Cricut Design Space
    3 Select material setting Choose Infusible Ink sheet
    4 Secure transfer sheet on mat Prevents movement during cut

    Cut Your Design Using Your Cricut Machine

    mirror set cut weed

    Once you’ve mirrored your design and set the material to Infusible Ink Transfer Sheet, load your cutting mat and blade into your Cricut machine. Place the transfer sheet liner side down on a Standard Grip Mat to guarantee it sticks properly during cutting.

    Mirror your design, set the material, and place the transfer sheet liner side down on a Standard Grip Mat.

    In Cricut Design Space, double-check that you’ve selected the correct material setting. Choose “Infusible Ink Transfer Sheet” or switch to “Custom” if you’re using an older cutting machine model. Press the “Go” button, and your Cricut will precisely cut the design onto the transfer sheet.

    After the cut is complete, carefully remove the mat from the machine. The cut lines should be distinct, allowing you to crack them gently to prepare for weeding.

    While you’re not weeding just yet, this step ensures the cut design will lift cleanly from the excess transfer sheet. Using your Cricut cutting machine correctly guarantees crisp, accurate cuts, making the next steps smooth and effortless.

    Weed Excess Ink and Trim the Transfer Sheet

    Though cutting your design precisely is important, you’ll need to carefully weed away the excess Infusible Ink transfer sheet to leave only your design on the liner. This step guarantees your design transfers cleanly without unwanted ink.

    Use a weeding tool or tweezers to gently remove tiny or intricate pieces, being careful not to tear the transfer sheet. It helps to crack cut lines in your design beforehand; this makes weeding easier and protects delicate areas from damage.

    After weeding, trim the transfer sheet to fit your heat press or heat plate. Avoid overhang to ensure even heat distribution during transfer. Handle your trimmed transfer sheet with clean, dry hands to keep the adhesive intact and prevent debris from contaminating your design.

    • Weed excess ink carefully using a weeding tool or tweezers
    • Crack cut lines to simplify weeding and protect designs
    • Trim the transfer sheet to match your heat press size
    • Avoid overhang to ensure even heat application
    • Handle trimmed sheets with clean, dry hands to preserve quality

    Clean and Preheat Your Blank Surface

    clean preheat bond smooth

    Before applying your design, you’ll want to clean and preheat your blank surface thoroughly. Start by wiping the surface with a lint-free cloth to remove dust, lint, and debris. Then, use a lint roller to catch any tiny fibers or particles that could interfere with your transfer’s quality. This step guarantees a perfectly clean surface, which is vital for the Infusible Ink to bond well.

    Next, preheat your surface using a heat press or EasyPress. This removes any residual moisture and smooths out wrinkles, setting the stage for flawless adhesion. Remember to avoid pressing over seams or edges, as this can cause uneven transfers or damage. Always clean and preheat your surface right before applying the transfer sheet to get the best results. Taking these simple steps helps guarantee a smooth, vibrant design every time.

    Position and Secure the Transfer Design on Your Blank

    While placing your Infusible Ink transfer sheet, make sure the design side is face down on your blank surface so it directly contacts the material. This step is essential for a vibrant and accurate transfer.

    Before you apply heat, take time to carefully align the design to avoid any skewing or misplacement. To confirm the transfer sheet doesn’t shift during pressing, use Heat Resistant Tape to securely hold it in place.

    Also, check for air bubbles or wrinkles beneath the sheet, smoothing them out for an even finish. If needed, trim the excess liner to fit your heat press area to prevent uneven heat application.

    • Place the transfer sheet face down, design touching the blank
    • Use Heat Resistant Tape to securely hold the sheet
    • Align the design precisely before pressing
    • Remove air bubbles and wrinkles for smooth transfer
    • Trim excess liner to match heat press size and avoid overhang

    Set Your Heat Press Time and Temperature Using Cricut Guide

    When you’re ready to apply heat, consult the Cricut Heat Guide or app to set the exact time and temperature for your project. The guide helps you determine the precise heat press settings based on your material and design.

    Typically, Infusible Ink transfers require a temperature between 385°F and 400°F, but always check the Cricut Heat Guide for your specific blank. Before starting, set your Cricut EasyPress or heat press to the recommended temperature to guarantee ideal results.

    The Cricut Heat app also allows you to customize and verify the exact time and temperature, making it easier to avoid mistakes. Following these recommended settings ensures your design transfers vibrantly and lasts long without damaging the material.

    Taking this step seriously guarantees your project turns out just as you envision.

    Apply Heat Evenly and Follow Pressing Instructions

    Be sure to apply heat evenly by using a flat, smooth surface like a Cricut EasyPress. It’s important to follow the recommended time and temperature settings closely.

    Also, cover your transfer with butcher paper to protect your design. Press firmly, but don’t move the heat source while doing so.

    Ensure Even Heat

    To achieve a smooth, vibrant transfer, you’ll need to apply heat evenly and follow the pressing instructions carefully. Ensuring even heat is essential to avoid patchy or incomplete transfers. Use a Cricut EasyPress Mat to help maintain consistent temperature and provide a stable surface.

    Preheat your blank to remove moisture and wrinkles, allowing the heat to distribute uniformly. Cover your transfer with butcher paper to protect your project and promote even heat spread. Avoid sliding the EasyPress during pressing to keep steady pressure.

    Use recommended temperature settings from the Cricut Heat Guide. Preheat the blank surface before pressing. Place a Cricut EasyPress Mat underneath. Cover transfer with butcher paper extending beyond the heat plate. Apply steady pressure without moving the EasyPress.

    Follow Time And Temperature

    Although it might be tempting to rush through the process, you’ll achieve the best results by strictly following the recommended time and temperature settings from the Cricut Heat Guide or app. Apply consistent pressure and avoid sliding the heat press to assure even heat distribution.

    Precise time and temperature control guarantees vibrant, smooth transfers without smudging. Always let your project cool completely before removing the transfer sheet.

    Material Temperature (°F) Time (seconds)
    Cotton 385 40
    Polyester 400 45
    Infusible Ink 385 40

    Stick to these settings, and your design will transfer perfectly every time.

    Let Your Project Cool Before Peeling Transfer Materials

    You’ll want to let your project cool completely before peeling off the transfer sheet. This helps avoid smudges or smears. When the project cools, the ink sets firmly into the fibers, making sure your design stays vibrant and lasts longer.

    It’s a good idea to use tweezers or heat-resistant gloves to handle your project safely while it cools. That way, you won’t risk burning yourself or messing up your work.

    Importance Of Cooling

    Why does letting your project cool before peeling matter so much? Cooling is essential because it allows the ink to settle properly into the fibers, making sure your design stays vibrant and durable. If you peel off the transfer sheet too soon while it’s still hot, the design can lift or warp, ruining your work.

    Waiting 10-15 minutes or until the project reaches room temperature helps avoid these issues. Here’s why cooling is important:

    • Prevents smudging or smearing of the design
    • Ensures ink sets well into the surface fibers
    • Avoids distortion or lifting of the design
    • Minimizes transfer errors
    • Preserves the integrity of your final project

    Always let your project cool completely before removing the transfer sheet for the best results.

    Preventing Smudges And Smears

    Since the ink needs time to fully set, always let your project cool completely before peeling off the transfer sheet to prevent smudging or smears. Cooling allows the ink to bond with the surface fibers, ensuring a crisp, durable finish.

    If you peel too soon, the ink can smear or transfer unevenly, ruining your design. For smudge prevention, be patient and avoid rushing this step.

    When it’s fully cooled, peel carefully using tweezers or your fingers, lifting the transfer sheet slowly and steadily. This careful removal helps maintain clean edges and preserves the sharpness of your design.

    Handling Transfer Materials Safely

    How long should you wait before peeling off your Infusible Ink transfer sheet? Always wait for your project to cool completely before peeling. Cooling ensures the ink sets properly, preventing smudging and uneven transfer.

    Peeling too early can ruin your design and affect the final look. To handle transfer materials safely, keep these points in mind:

    • Let the project cool fully before peeling to avoid smears
    • Use tweezers to lift the transfer sheet gently
    • Avoid touching the design until it’s completely cooled
    • Cooling helps achieve vibrant, durable colors
    • Handle the project carefully to maintain a professional finish

    Care for Your Finished Infusible Ink Project Properly

    Once your Infusible Ink project has cooled completely, you’ll want to handle and care for it properly to keep the design looking vibrant and lasting longer. Always wait until your project is fully cool before removing the transfer paper to avoid smudging or transfer issues.

    When it’s time to wash your item, use cold water and a mild detergent. Steer clear of fabric softeners, bleach, or harsh scrubbing tools that can cause the colors to fade.

    To dry, opt for air drying or a low-heat setting in the dryer to protect the design’s vibrancy. For cleaning surfaces, use a soft, lint-free cloth or glass cleaner. Avoid abrasive pads that could damage the finish.

    Finally, store your finished project away from direct sunlight and extreme temperatures, which can cause fading or deterioration over time. By following these steps, you’ll guarantee your Infusible Ink creation stays beautiful and durable for years to come.

    Frequently Asked Questions

    Can Infusible Ink Sheets Be Used on Dark-Colored Blanks?

    You shouldn’t use Infusible Ink sheets on dark-colored blanks because ink compatibility is poor. The ink sublimates into the material, but on dark surfaces, your design won’t show up well or at all.

    This means your design won’t have the vibrant look you want, and the longevity after washing can be compromised. For dark blanks, consider printable heat transfer vinyl instead to make certain your design stays bright and lasts longer.

    What Materials Are Compatible With Infusible Ink Transfer Sheets?

    You’ll want to focus on fabric compatibility for the best results with Infusible Ink transfer sheets. These sheets work great on materials with at least 60% polyester or special sublimation coatings.

    Transfer sheet types vary, offering different ink color options like vibrant solids or patterns. Avoid 100% cotton since the ink won’t bond properly.

    Using compatible blanks like polyester t-shirts or coated mugs guarantees your design transfers smoothly and lasts longer.

    How Long Does the Infusible Ink Design Last After Washing?

    You can expect your Infusible Ink design to last through 50+ washes without noticeable color fading. Its washing durability is impressive because the vibrant colors are infused right into the material, not just sitting on top.

    To maximize design longevity, wash your items in cold water and avoid harsh chemicals. Also, proper heat pressing and letting the project cool fully help keep your design looking fresh and vivid for the long haul.

    Can I Use a Household Iron Instead of a Heat Press?

    You can use a household iron, but remember, “you get what you pay for.” Household appliances often lack the consistent heat and pressure needed for iron safety and proper heat transfer tips. Irons can cause uneven designs or damage your project.

    For the best results, a heat press or Cricut EasyPress is recommended. They provide even, precise heat and pressure, ensuring your Infusible Ink designs last longer and look professional.

    Are Infusible Ink Sheets Safe for Skin Contact?

    Infusible Ink sheets aren’t safe for direct skin contact because they can cause skin irritation despite using non-toxic materials. You should always handle the sheets carefully, preferably with gloves or tools, to avoid any ink safety issues.

    Once the ink transfers and bonds with your project’s surface, it’s safe to touch. So, while the final design is harmless, avoid touching the sheets themselves to prevent irritation.

    Conclusion

    Now that you’ve mastered these 10 easy steps, your creativity can truly take flight with infusible ink transfer sheets. Like a painter with a fresh canvas, you hold the power to create vibrant, lasting designs that won’t fade or crack.

    Just follow the process carefully, and your projects will shine with professional-quality results. So go ahead, let your imagination run wild and watch your ideas come to life in brilliant color!