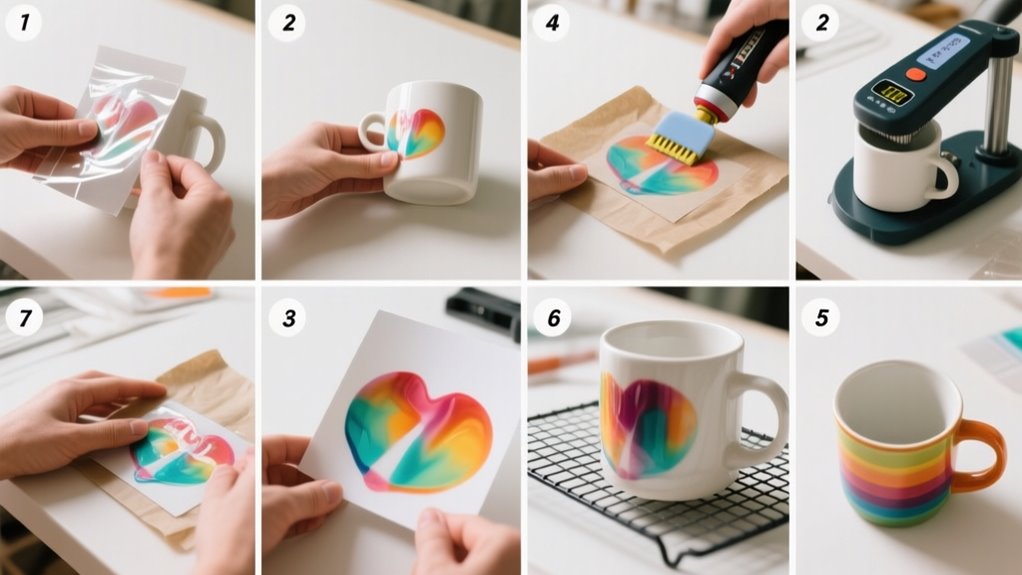
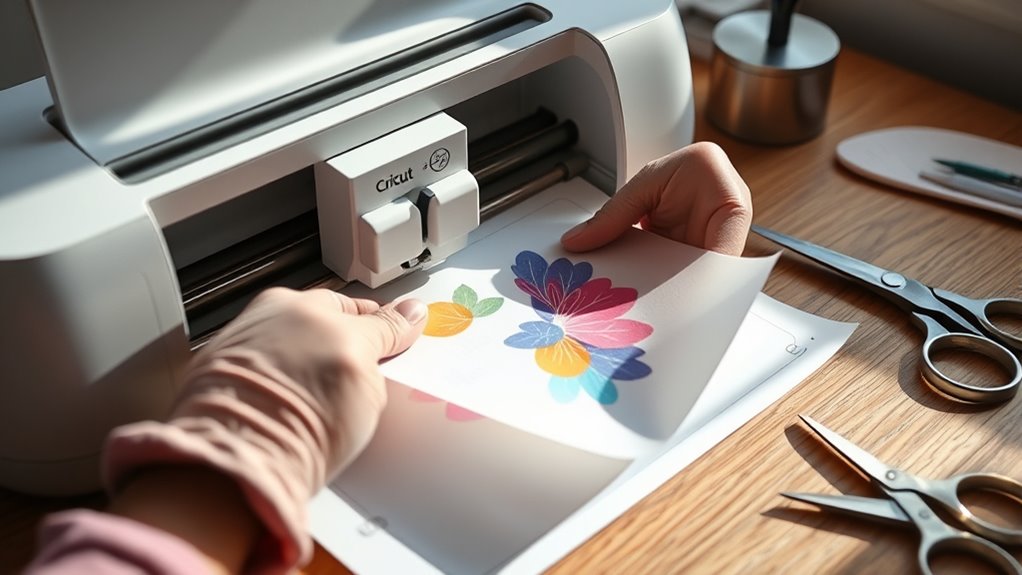
To use Infusible Ink Transfer Sheets, start by mirroring your design in Cricut Design Space and cutting it with the transfer sheet liner side down on a Standard Grip Mat.
Weed out excess ink carefully, trim the sheet, and prepare your blank surface by cleaning and preheating it.
Align and tape your design before pressing with the recommended time and temperature.
Let your project cool completely before peeling to guarantee vibrant, lasting results.
Keep going to uncover handy tips for flawless application and care.
Choose Your Design and Mirror It to Cut Accurately
Before you cut your design, make sure you mirror it in Cricut Design Space. This step is vital because Infusible Ink transfer sheets are cut with the liner side down, meaning the printable side faces the mat.
Always mirror your design in Cricut Design Space to ensure Infusible Ink prints correctly facing the mat.
If you don’t mirror your design, the final transfer will be reversed or upside down. In Design Space, use the “Mirror” toggle button to flip your design horizontally before you send it to cut.
Double-check that all elements, including text and images, are correctly mirrored to avoid mistakes. Also, verify that your cut lines are clear and precise so the machine cuts exactly where you want.
Taking these precautions guarantees your design appears as intended on your blank surface once transferred. By carefully mirroring and reviewing your cut lines in Design Space, you’ll save yourself time and frustration, making your Infusible Ink project look professional and flawless.
Prepare Your Infusible Ink Transfer Sheet and Cutting Mat
When you’re ready to cut your design, place the Infusible Ink transfer sheet liner side down on a Standard Grip Mat to guarantee your machine cuts accurately. This position ensures precise alignment and prevents mistakes.
Before placing the sheet, create and mirror your design in Cricut Design Space to match the transfer sheet’s requirements. Select “Infusible Ink Transfer Sheet” as your material setting for ideal blade pressure. If you have an older Cricut, pick “Custom” and adjust accordingly.
After loading your cutting mat with the transfer sheet, make sure it’s firmly adhered to avoid shifting during cutting.
Here’s a quick prep checklist for your transfer sheet and cutting mat:
| Step | Action | Tip |
|---|---|---|
| 1 | Place liner side down | Use Standard Grip Mat |
| 2 | Mirror your design | Use Cricut Design Space |
| 3 | Select material setting | Choose Infusible Ink sheet |
| 4 | Secure transfer sheet on mat | Prevents movement during cut |
Cut Your Design Using Your Cricut Machine
Once you’ve mirrored your design and set the material to Infusible Ink Transfer Sheet, load your cutting mat and blade into your Cricut machine. Place the transfer sheet liner side down on a Standard Grip Mat to guarantee it sticks properly during cutting.
Mirror your design, set the material, and place the transfer sheet liner side down on a Standard Grip Mat.
In Cricut Design Space, double-check that you’ve selected the correct material setting. Choose “Infusible Ink Transfer Sheet” or switch to “Custom” if you’re using an older cutting machine model. Press the “Go” button, and your Cricut will precisely cut the design onto the transfer sheet.
After the cut is complete, carefully remove the mat from the machine. The cut lines should be distinct, allowing you to crack them gently to prepare for weeding.
While you’re not weeding just yet, this step ensures the cut design will lift cleanly from the excess transfer sheet. Using your Cricut cutting machine correctly guarantees crisp, accurate cuts, making the next steps smooth and effortless.
Weed Excess Ink and Trim the Transfer Sheet
Though cutting your design precisely is important, you’ll need to carefully weed away the excess Infusible Ink transfer sheet to leave only your design on the liner. This step guarantees your design transfers cleanly without unwanted ink.
Use a weeding tool or tweezers to gently remove tiny or intricate pieces, being careful not to tear the transfer sheet. It helps to crack cut lines in your design beforehand; this makes weeding easier and protects delicate areas from damage.
After weeding, trim the transfer sheet to fit your heat press or heat plate. Avoid overhang to ensure even heat distribution during transfer. Handle your trimmed transfer sheet with clean, dry hands to keep the adhesive intact and prevent debris from contaminating your design.
- Weed excess ink carefully using a weeding tool or tweezers
- Crack cut lines to simplify weeding and protect designs
- Trim the transfer sheet to match your heat press size
- Avoid overhang to ensure even heat application
- Handle trimmed sheets with clean, dry hands to preserve quality
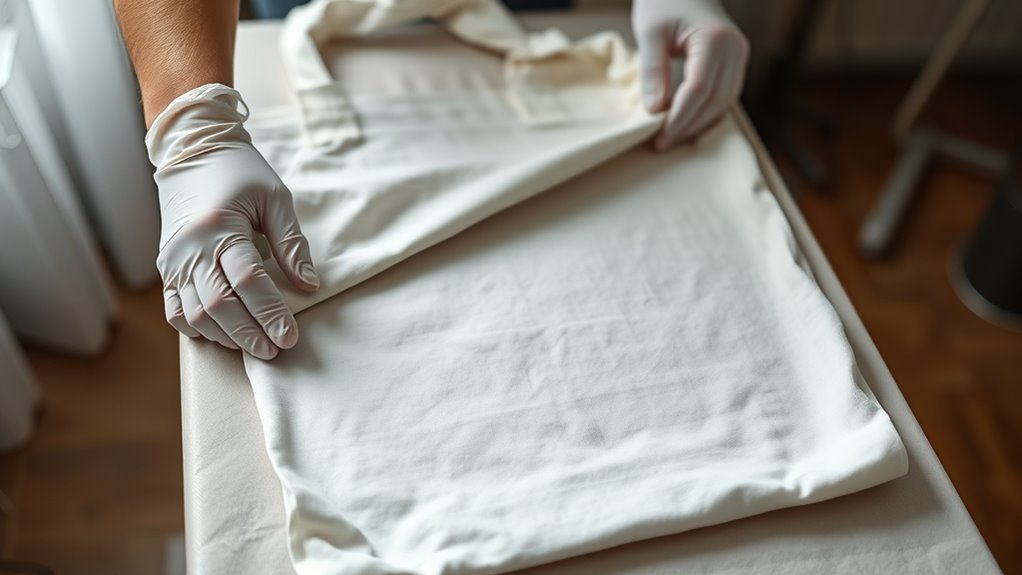
Clean and Preheat Your Blank Surface
Before applying your design, you’ll want to clean and preheat your blank surface thoroughly. Start by wiping the surface with a lint-free cloth to remove dust, lint, and debris. Then, use a lint roller to catch any tiny fibers or particles that could interfere with your transfer’s quality. This step guarantees a perfectly clean surface, which is vital for the Infusible Ink to bond well.
Next, preheat your surface using a heat press or EasyPress. This removes any residual moisture and smooths out wrinkles, setting the stage for flawless adhesion. Remember to avoid pressing over seams or edges, as this can cause uneven transfers or damage. Always clean and preheat your surface right before applying the transfer sheet to get the best results. Taking these simple steps helps guarantee a smooth, vibrant design every time.
Position and Secure the Transfer Design on Your Blank
While placing your Infusible Ink transfer sheet, make sure the design side is face down on your blank surface so it directly contacts the material. This step is essential for a vibrant and accurate transfer.
Before you apply heat, take time to carefully align the design to avoid any skewing or misplacement. To confirm the transfer sheet doesn’t shift during pressing, use Heat Resistant Tape to securely hold it in place.
Also, check for air bubbles or wrinkles beneath the sheet, smoothing them out for an even finish. If needed, trim the excess liner to fit your heat press area to prevent uneven heat application.
- Place the transfer sheet face down, design touching the blank
- Use Heat Resistant Tape to securely hold the sheet
- Align the design precisely before pressing
- Remove air bubbles and wrinkles for smooth transfer
- Trim excess liner to match heat press size and avoid overhang
Set Your Heat Press Time and Temperature Using Cricut Guide
When you’re ready to apply heat, consult the Cricut Heat Guide or app to set the exact time and temperature for your project. The guide helps you determine the precise heat press settings based on your material and design.
Typically, Infusible Ink transfers require a temperature between 385°F and 400°F, but always check the Cricut Heat Guide for your specific blank. Before starting, set your Cricut EasyPress or heat press to the recommended temperature to guarantee ideal results.
The Cricut Heat app also allows you to customize and verify the exact time and temperature, making it easier to avoid mistakes. Following these recommended settings ensures your design transfers vibrantly and lasts long without damaging the material.
Taking this step seriously guarantees your project turns out just as you envision.
Apply Heat Evenly and Follow Pressing Instructions
Be sure to apply heat evenly by using a flat, smooth surface like a Cricut EasyPress. It’s important to follow the recommended time and temperature settings closely.
Also, cover your transfer with butcher paper to protect your design. Press firmly, but don’t move the heat source while doing so.
Ensure Even Heat
To achieve a smooth, vibrant transfer, you’ll need to apply heat evenly and follow the pressing instructions carefully. Ensuring even heat is essential to avoid patchy or incomplete transfers. Use a Cricut EasyPress Mat to help maintain consistent temperature and provide a stable surface.
Preheat your blank to remove moisture and wrinkles, allowing the heat to distribute uniformly. Cover your transfer with butcher paper to protect your project and promote even heat spread. Avoid sliding the EasyPress during pressing to keep steady pressure.
Use recommended temperature settings from the Cricut Heat Guide. Preheat the blank surface before pressing. Place a Cricut EasyPress Mat underneath. Cover transfer with butcher paper extending beyond the heat plate. Apply steady pressure without moving the EasyPress.
Follow Time And Temperature
Although it might be tempting to rush through the process, you’ll achieve the best results by strictly following the recommended time and temperature settings from the Cricut Heat Guide or app. Apply consistent pressure and avoid sliding the heat press to assure even heat distribution.
Precise time and temperature control guarantees vibrant, smooth transfers without smudging. Always let your project cool completely before removing the transfer sheet.
| Material | Temperature (°F) | Time (seconds) |
|---|---|---|
| Cotton | 385 | 40 |
| Polyester | 400 | 45 |
| Infusible Ink | 385 | 40 |
Stick to these settings, and your design will transfer perfectly every time.
Let Your Project Cool Before Peeling Transfer Materials
You’ll want to let your project cool completely before peeling off the transfer sheet. This helps avoid smudges or smears. When the project cools, the ink sets firmly into the fibers, making sure your design stays vibrant and lasts longer.
It’s a good idea to use tweezers or heat-resistant gloves to handle your project safely while it cools. That way, you won’t risk burning yourself or messing up your work.
Importance Of Cooling
Why does letting your project cool before peeling matter so much? Cooling is essential because it allows the ink to settle properly into the fibers, making sure your design stays vibrant and durable. If you peel off the transfer sheet too soon while it’s still hot, the design can lift or warp, ruining your work.
Waiting 10-15 minutes or until the project reaches room temperature helps avoid these issues. Here’s why cooling is important:
- Prevents smudging or smearing of the design
- Ensures ink sets well into the surface fibers
- Avoids distortion or lifting of the design
- Minimizes transfer errors
- Preserves the integrity of your final project
Always let your project cool completely before removing the transfer sheet for the best results.
Preventing Smudges And Smears
Since the ink needs time to fully set, always let your project cool completely before peeling off the transfer sheet to prevent smudging or smears. Cooling allows the ink to bond with the surface fibers, ensuring a crisp, durable finish.
If you peel too soon, the ink can smear or transfer unevenly, ruining your design. For smudge prevention, be patient and avoid rushing this step.
When it’s fully cooled, peel carefully using tweezers or your fingers, lifting the transfer sheet slowly and steadily. This careful removal helps maintain clean edges and preserves the sharpness of your design.
Handling Transfer Materials Safely
How long should you wait before peeling off your Infusible Ink transfer sheet? Always wait for your project to cool completely before peeling. Cooling ensures the ink sets properly, preventing smudging and uneven transfer.
Peeling too early can ruin your design and affect the final look. To handle transfer materials safely, keep these points in mind:
- Let the project cool fully before peeling to avoid smears
- Use tweezers to lift the transfer sheet gently
- Avoid touching the design until it’s completely cooled
- Cooling helps achieve vibrant, durable colors
- Handle the project carefully to maintain a professional finish
Care for Your Finished Infusible Ink Project Properly
Once your Infusible Ink project has cooled completely, you’ll want to handle and care for it properly to keep the design looking vibrant and lasting longer. Always wait until your project is fully cool before removing the transfer paper to avoid smudging or transfer issues.
When it’s time to wash your item, use cold water and a mild detergent. Steer clear of fabric softeners, bleach, or harsh scrubbing tools that can cause the colors to fade.
To dry, opt for air drying or a low-heat setting in the dryer to protect the design’s vibrancy. For cleaning surfaces, use a soft, lint-free cloth or glass cleaner. Avoid abrasive pads that could damage the finish.
Finally, store your finished project away from direct sunlight and extreme temperatures, which can cause fading or deterioration over time. By following these steps, you’ll guarantee your Infusible Ink creation stays beautiful and durable for years to come.
Frequently Asked Questions
Can Infusible Ink Sheets Be Used on Dark-Colored Blanks?
You shouldn’t use Infusible Ink sheets on dark-colored blanks because ink compatibility is poor. The ink sublimates into the material, but on dark surfaces, your design won’t show up well or at all.
This means your design won’t have the vibrant look you want, and the longevity after washing can be compromised. For dark blanks, consider printable heat transfer vinyl instead to make certain your design stays bright and lasts longer.
What Materials Are Compatible With Infusible Ink Transfer Sheets?
You’ll want to focus on fabric compatibility for the best results with Infusible Ink transfer sheets. These sheets work great on materials with at least 60% polyester or special sublimation coatings.
Transfer sheet types vary, offering different ink color options like vibrant solids or patterns. Avoid 100% cotton since the ink won’t bond properly.
Using compatible blanks like polyester t-shirts or coated mugs guarantees your design transfers smoothly and lasts longer.
How Long Does the Infusible Ink Design Last After Washing?
You can expect your Infusible Ink design to last through 50+ washes without noticeable color fading. Its washing durability is impressive because the vibrant colors are infused right into the material, not just sitting on top.
To maximize design longevity, wash your items in cold water and avoid harsh chemicals. Also, proper heat pressing and letting the project cool fully help keep your design looking fresh and vivid for the long haul.
Can I Use a Household Iron Instead of a Heat Press?
You can use a household iron, but remember, “you get what you pay for.” Household appliances often lack the consistent heat and pressure needed for iron safety and proper heat transfer tips. Irons can cause uneven designs or damage your project.
For the best results, a heat press or Cricut EasyPress is recommended. They provide even, precise heat and pressure, ensuring your Infusible Ink designs last longer and look professional.
Are Infusible Ink Sheets Safe for Skin Contact?
Infusible Ink sheets aren’t safe for direct skin contact because they can cause skin irritation despite using non-toxic materials. You should always handle the sheets carefully, preferably with gloves or tools, to avoid any ink safety issues.
Once the ink transfers and bonds with your project’s surface, it’s safe to touch. So, while the final design is harmless, avoid touching the sheets themselves to prevent irritation.
Conclusion
Now that you’ve mastered these 10 easy steps, your creativity can truly take flight with infusible ink transfer sheets. Like a painter with a fresh canvas, you hold the power to create vibrant, lasting designs that won’t fade or crack.
Just follow the process carefully, and your projects will shine with professional-quality results. So go ahead, let your imagination run wild and watch your ideas come to life in brilliant color!
Leave a Reply