To use Infusible Ink Transfer Sheets, first cut and mirror your design on the sheet, then carefully weed away the excess ink.
Next, clean and preheat your blank, inserting cardstock inside to prevent bleed.
Secure your design with heat-resistant tape, then press at the recommended temperature and time.
Once pressed, let it cool completely before peeling off transfer materials.
Proper care afterward keeps your project vibrant and lasting.
Keep going to master tips for perfect results and longevity.
Cut Your Design on Infusible Ink Transfer Sheets

Before you start cutting, place your Infusible Ink Transfer Sheet liner side down on a Standard Grip Mat to guarantee proper alignment. Open Design Space and create or resize your design, making sure to mirror the image before cutting. This step is essential because it prevents your design from printing in reverse.
Next, select “Infusible Ink Transfer Sheet” as your material setting for ideal cutting. If you’re using an older Cricut model, switch to “Custom” and then choose the appropriate setting. Load your mat and blade into the machine, then press Go to cut your design with precision.
After cutting, gently remove the negative pieces by cracking the cut lines if needed. This careful removal helps prepare your design for the next stage without damaging the Infusible Ink Transfer Sheets. Following these steps guarantees your design cuts cleanly and accurately every time.
Weed Away Excess Infusible Ink for a Clean Design
Once you’ve cut your design, carefully crack and roll the cut lines to loosen the excess Infusible Ink from the transfer sheet. This makes the weeding process much easier.
Start removing the negative pieces around your design, leaving the positive image intact on the liner. Use tweezers or your fingers to gently pick away small or intricate bits of excess material, especially in detailed areas.
Carefully remove negative pieces, preserving the positive design, using tweezers or fingers for intricate details.
Working in a well-lit space helps you spot these tiny pieces and weed them precisely for a clean, professional look. Don’t forget to trim the liner to match your design’s size. This prevents overhang that could interfere with heat transfer later.
Taking your time during weeding ensures a neat final project, free of unwanted ink fragments. With careful weeding, your Infusible Ink design will transfer crisply and beautifully to your blank, making the effort well worth it.
Prepare Your Blank by Cleaning, Preheating, and Inserting Cardstock
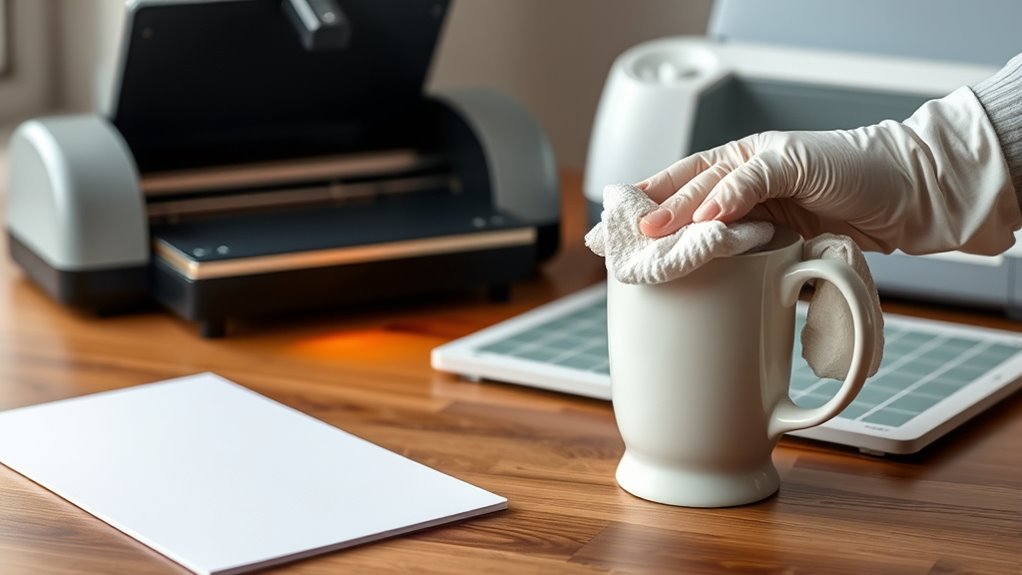
Before you start, go ahead and clean your blank thoroughly with a lint-free cloth to get rid of any dust or debris. This step is key to making sure your design comes out looking great.
Next up, preheat the blank. This helps eliminate any moisture and wrinkles, which means your transfer will be nice and smooth.
Finally, slip a piece of cardstock inside. This little trick prevents ink bleed and protects the back of your blank while you’re pressing. Easy, right?
Clean Blank Surface
Although it might seem simple, cleaning your blank surface thoroughly with a lint-free cloth is essential. This helps remove dust, debris, and fibers that could interfere with the Infusible Ink transfer. Proper cleaning guarantees a smooth and flawless transfer every time.
Here’s how to prepare your blank surface:
- Use a lint-free cloth to wipe away any dust or fibers.
- Select a flat area, avoiding seams or textured spots for best results.
- Make sure the surface is completely dry before proceeding.
- Avoid touching the cleaned surface with your fingers to prevent oils from transferring.
Preheat And Insert Cardstock
After cleaning your blank surface thoroughly, the next step is to preheat it briefly using a heat press or EasyPress. This quick preheat removes moisture and smooths out wrinkles, creating the perfect surface for your Infusible Ink transfer sheet.
If your blank has seams or edges, preheating helps flatten those areas, ensuring better ink adherence. Next, insert a piece of white cardstock inside the blank. This essential step prevents ink bleed through the material and protects the backside from any unwanted transfer marks during pressing.
Make sure the blank is cool before removing the cardstock to avoid smudges or distortion. By preheating and properly inserting cardstock, you set the stage for a clean, vibrant, and professional-looking transfer every time.
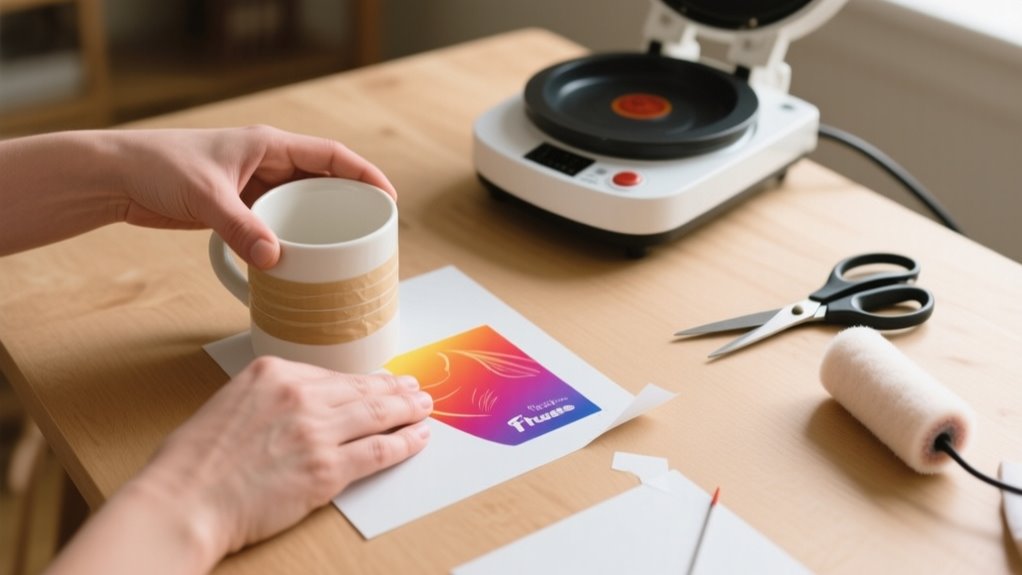
Secure and Position Your Design With Heat-Resistant Tape
When you secure your Infusible Ink transfer sheet with heat-resistant tape, you keep it firmly in place on your blank surface. This prevents any shifting during pressing. This step is essential for achieving clean, precise transfers. Here’s how to use heat-resistant tape effectively:
Securing your Infusible Ink transfer sheet with heat-resistant tape prevents shifting and ensures clean, precise transfers every time.
- Apply the tape around the edges of your design to hold it flat and minimize movement.
- For curved or textured items, like hats or ornaments, use smaller pieces of tape to conform the design smoothly without air gaps.
- Always place the tape on the liner side of the transfer sheet so it doesn’t touch the design face during heat application.
- After pressing, carefully peel off the tape to avoid lifting or damaging your design.
Using heat-resistant tape properly ensures your Infusible Ink transfer stays perfectly positioned. This gives you professional results every time.
Preheat and Press Your Design Using Recommended Time and Temperature
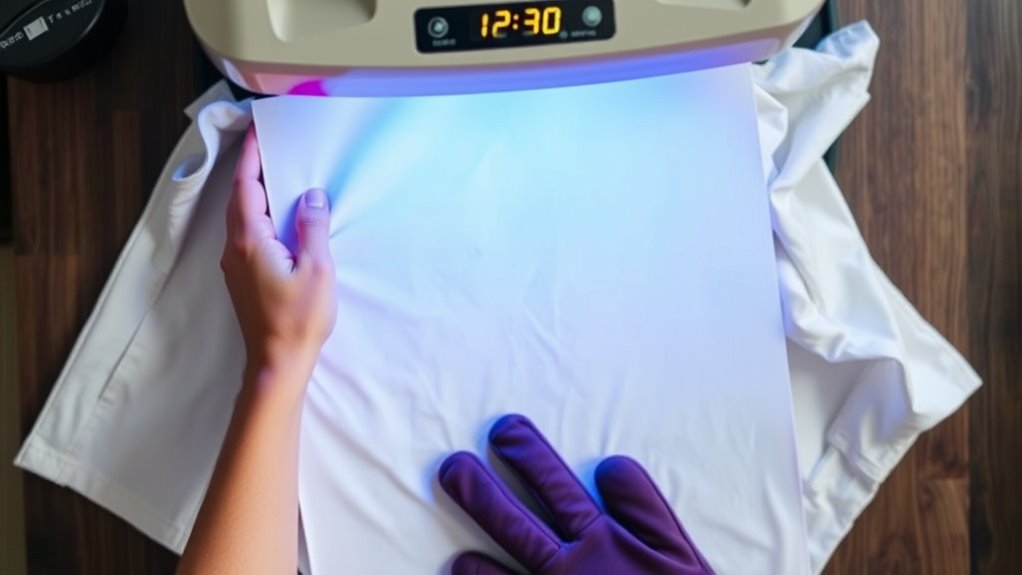
Before pressing your design, make sure to preheat your heat press or EasyPress to the exact temperature recommended in the Cricut Heat Guide. It’s important to set your timer according to your material’s instructions so the heat is applied just right.
Set Correct Heat
Although it’s tempting to jump right into pressing your design, you need to set the correct heat using the Cricut Heat Guide or app to guarantee the best results. This ensures your project turns out vibrant and durable.
Follow these steps to set the heat press properly:
- Check the Cricut Heat Guide or app for your project’s recommended temperature and time.
- Preheat your blank surface briefly to remove moisture and wrinkles.
- Use a Cricut EasyPress or heat press to apply consistent pressure. Don’t slide or move it during pressing.
- Let your project cool completely before removing the transfer sheet to lock in the ink.
Setting the right heat is vital for an even, long-lasting transfer every time.
Follow Timing Guidelines
Since precise timing and temperature are key, you’ll want to follow the Cricut Heat Guide or app’s recommendations exactly when preheating and pressing your design. Start by preheating your blank surface to remove moisture and wrinkles, ensuring even heat distribution.
Then, set your heat press or EasyPress to the specified temperature, typically around 385°F for Infusible Ink, and maintain consistent pressure. Press your design for the exact time indicated, usually about 40 seconds. This careful timing guarantees a full ink transfer without overexposure or damage.
Once pressing is complete, allow your project to cool completely before removing the transfer sheet to prevent smudging or incomplete transfer. Sticking to these timing guidelines will help you achieve flawless, vibrant results every time.
Remove Infusible Ink Transfer Materials and Let Your Project Cool
Once your project has finished heating, let it cool completely before removing the transfer sheet or butcher paper. This prevents smudging or damaging the design. Proper cooling guarantees the Infusible Ink sets permanently, giving you a vibrant, durable finish. Don’t rush this step. Handling your project while it’s still hot can cause the design to smear or become compromised.
Let your project cool completely before removing transfer materials to ensure a vibrant, smudge-free design.
Follow these steps for best results:
- Allow the project surface to cool entirely to the touch.
- Carefully lift the transfer sheet or butcher paper off once cooled.
- Use tweezers to gently remove any leftover transfer materials.
- Avoid touching the design during cooling to maintain its integrity.
Taking your time during the cooling phase protects your artwork and guarantees a flawless, long-lasting result.
How to Care for Your Finished Infusible Ink Project
After your Infusible Ink project has fully cooled and you’ve removed all transfer materials, it’s important to care for your finished piece properly to keep the design vibrant and intact. Whether you used Infusible Ink Transfer Sheets, Infusible Ink Pens, or Ink Pens and Markers with your Cricut EasyPress and cutting machine, handling your design with care extends its life.
Always wash your item with warm water and a gentle glass cleaner. Avoid abrasive scrubbers or colored cleansing agents that might damage the first color or overall design. Don’t machine wash or dry unless the instructions say it’s safe, as heat can cause fading or peeling.
Store your project in a cool, dry place away from direct sunlight to preserve colors. By following these simple steps, you’ll maintain the quality of your Infusible Ink creations and continue to enjoy the easy-to-use tools like Resistant Tape and Standard Grip mats that helped you learn how to use this fun craft technique.
Frequently Asked Questions
Can Infusible Ink Sheets Be Used on Cotton Fabrics?
You can’t effectively use Infusible Ink sheets on 100% cotton fabrics because of fabric compatibility issues. Infusible Ink requires at least 60% polyester content to sublimate properly. Cotton fibers don’t absorb the ink well, leading to dull or incomplete transfers.
If you want vibrant, lasting results, you’ll need to use polyester or poly-coated materials. Or, you can apply a polyester coating to your cotton fabric before using Infusible Ink sheets.
How Long Do Infusible Ink Designs Last Without Fading?
You’ll find Infusible Ink designs offer impressive durability, lasting many years without fading when applied and cared for properly. Durability concerns mainly arise if you expose them to harsh weather or scrub too hard.
On suitable surfaces like polyester or coated ceramics, your design can stay vibrant for 50+ washes. Just avoid abrasive cleaners and prolonged sunlight, and your artwork will maintain its clarity and color for a long time.
Is It Safe to Wash Infusible Ink Projects in a Washing Machine?
You probably worry about washing concerns, especially when your favorite infusible ink project looks brand new. Yes, you can safely wash it in a machine, but you should turn it inside out and use warm water on a gentle cycle.
Avoid harsh detergents or bleach, which can dull the design. Hand washing is even better for preserving vibrancy, but if you follow these steps, your design will stay sharp and colorful longer.
Can I Layer Multiple Colors of Infusible Ink on One Design?
Yes, you can do color layering with Infusible Ink, but you need to be careful. Instead of stacking sheets directly, cut and apply each color separately, positioning them precisely on your blank.
Overlapping during one press can cause bleeding or uneven colors. Use masking tape to keep layers aligned and test on scrap material first. This way, your multi-colored design stays vibrant and sharp without any unwanted color mixing.
What Should I Do if My Design Doesn’t Transfer Properly?
If your design doesn’t transfer properly, start with troubleshooting tips: double-check that you mirrored the design correctly before cutting. Make sure your heat press matches Cricut’s recommended temperature and time.
Preheat and clean the blank thoroughly, and place the transfer sheet liner side down, securing it with heat resistant tape. Don’t remove the transfer sheet until the project cools completely.
Following these steps will help you get a flawless transfer every time.
Conclusion
Now that you’ve mastered the art of using infusible ink transfer sheets, your creativity can truly take flight. Like a magician revealing a secret, your designs will seamlessly bond with your blanks, creating vibrant, lasting masterpieces.
Just remember to care for your projects gently, like tending a delicate flower, and they’ll stay stunning for years to come.
So go ahead, let your imagination run wild and watch your ideas come to life in vivid color!
Leave a Reply