To use infusible ink pens in 10 easy steps, start by choosing a compatible, light-colored blank and prepping it by cleaning and drying thoroughly.
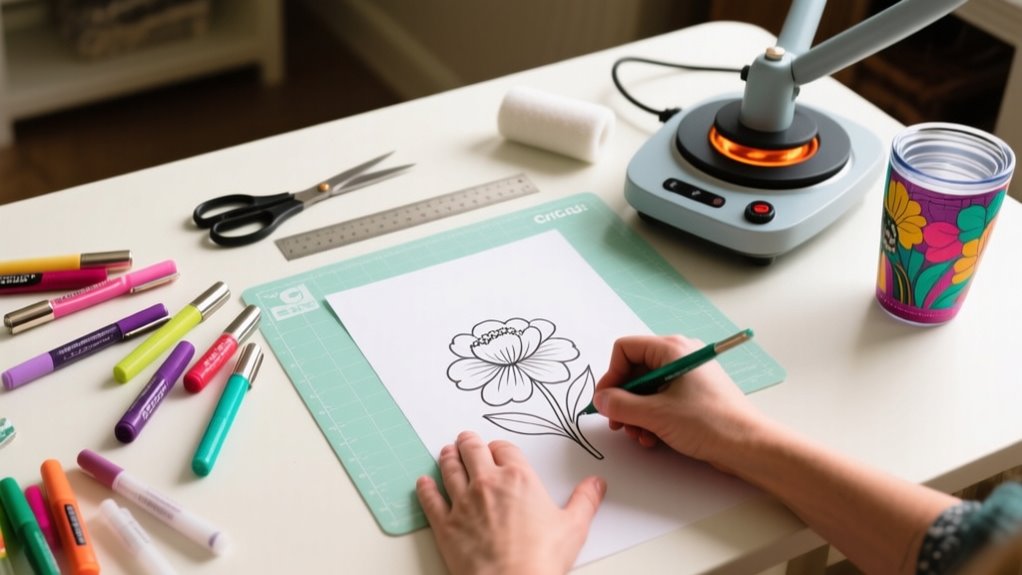
Draw your design with steady pressure on a suitable transfer sheet or blank, then let the ink dry completely.
Set your heat press to about 385°F and use butcher paper to protect your design.
Apply firm, even heat for around 40 seconds, then let your project cool fully before carefully removing transfer materials.
Keep going to discover tips that guarantee vibrant, lasting results.
How to Use Infusible Ink Pens: A Quick Overview
Wondering how to get started with Infusible Ink Pens? First, make sure your pen tip is clean and the pen is properly capped when not in use to avoid ink leakage. You’ll draw your design directly on compatible transfer sheets or blanks using steady pressure.
If you’re drawing on the liner side of a transfer sheet, mirror your design in Cricut Design Space so it appears correctly once transferred. After finishing your design, allow the ink to dry completely before heat pressing.
Then, follow specific heat press instructions, usually applying heat at a set temperature and time, to activate the ink for a permanent, vibrant result. Using Infusible Ink Pens lets you create sharp, customized designs easily and with lasting color.
Keep these basics in mind to confidently start your next craft project with Infusible Ink Pens and achieve professional-looking outcomes every time.
Choose the Right Blank for Infusible Ink Pens
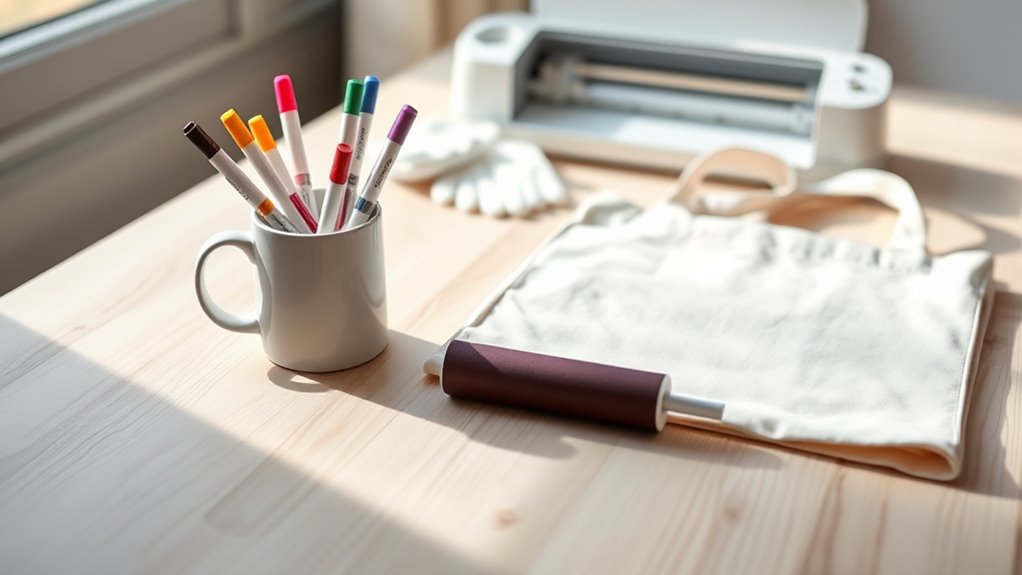
You’ll want to pick blanks made from polyester or specially coated materials designed for heat transfer to get the best results with Infusible Ink Pens. Before you start drawing, make sure to preheat and clean the blank to remove moisture, wrinkles, and debris—this helps create a smooth surface. Also, try to choose a light-colored or white blank so your colors really pop and the transfer comes out nice and clear.
Compatible Blank Materials
Where should you apply Infusible Ink Pens to achieve vibrant, lasting designs? You need to use compatible blanks specifically designed for heat transfer. These blanks must be heat-safe and made from polyester or a compatible polyester blend, as natural fibers like cotton won’t work well.
Always verify your blank’s surface is smooth, clean, and free of debris before drawing with the pens. Here are some great options to consider:
- Cricut ceramic mugs and coasters designed for Infusible Ink
- Polyester or polyester-blend fabric blanks that withstand heat
- Compatible transfer sheets recommended by the manufacturer
Choosing the right compatible blanks ensures your Infusible Ink Pens deliver bright, permanent results without damaging your materials during the heat transfer process.
Blank Preparation Tips
After selecting the right compatible blank for your project, preparing its surface properly can make all the difference in how your Infusible Ink Pens perform. For effective blank preparation, choose blanks labeled for Infusible Ink, like polyester or specially coated Cricut blanks, to guarantee the ink bonds well.
Make sure the blank surface is clean, dry, and free from oils or lotions. This prevents smudging and uneven color. Use a lint-free cloth or lint roller to remove any debris or fibers before drawing.
If recommended, preheat or pre-wash your blank to eliminate moisture and wrinkles, which can affect ink transfer quality. Avoid textured or porous surfaces, as they lead to inconsistent application and poor results.
Proper blank preparation sets you up for vibrant, smooth transfers every time.
Prepare and Clean Your Drawing Surface and Materials
Before you start drawing, make sure your surface is spotless. Wipe it down with a lint-free cloth to get rid of any dust and oils. If you need to, prep your material by lightly sanding or smoothing it—that way, your ink will stick better. Also, keep your workspace tidy to avoid any smudges or unwanted marks on your design.
Surface Cleaning Techniques
Although it might seem simple, thoroughly cleaning your drawing surface is essential to guarantee your Infusible Ink pens adhere properly and deliver vibrant results. Proper surface cleaning removes dust, oils, and residues that could interfere with ink transfer, ensuring crisp, bright designs.
Start by wiping your surface with a lint-free cloth, then apply a mild, non-abrasive cleaner or glass cleaner to eliminate smudges without damaging the material. Avoid harsh chemicals or abrasive tools that might scratch or harm the surface.
Before you begin drawing, make sure the surface is completely dry to prevent smudging or uneven ink application. Remember to regularly inspect and clean your materials for consistent, high-quality results.
Use a lint-free cloth to avoid leaving fibers behind
Choose gentle cleaners for residue-free surfaces
Ensure complete dryness before drawing to prevent smudges
Material Preparation Tips
When you prepare your drawing surface and materials properly, your Infusible Ink pens will perform at their best. Start by cleaning your surface with a lint-free cloth to remove oil, lotion, and debris. This essential step guarantees smooth ink flow and vibrant colors.
Place laser paper or transfer tape beneath your design to prevent ink bleed and protect surrounding areas during drawing. For effective material preparation, test your Infusible Ink pens on scrap paper to check ink flow and color consistency.
Store the pens horizontally to avoid clogging the tips. When you draw, apply consistent pressure for even lines and allow the ink to dry fully before handling or heat pressing. These tips help you achieve professional, long-lasting results every time.
Create Your Design and Allow Ink to Dry Completely
How long should you let your Infusible Ink pen design dry? After creating your design with Ink Pens or markers, allow it to dry completely for at least 15-30 minutes. Make sure the ink is dry to the touch and no longer tacky before using Infusible Ink Transfer Sheets or transferring with your Cricut EasyPress. This prevents smudging or bleeding during the transfer process.
To protect your design and guarantee the best results, follow these tips: Place laser paper or parchment paper over your design while it dries to avoid contamination. Keep your workspace clean, free of dust and fibers, especially when using Resistant Tape to secure your Infusible Ink Transfer Sheet. Remember that drying times vary by ink color and humidity; refer to Cricut’s guidelines for best results.
Whether you’re a new account user or adding a first color, drying your design thoroughly is key to a flawless transfer with your Infusible Ink Pens and Markers.
Set Your Heat Press to the Right Time and Temperature
You’ll want to set your heat press to the exact temperature and time recommended, usually around 385°F. It’s a good idea to check the Cricut Heat Guide or app to get the precise settings for your project. Before you start, make sure your press is fully heated and clean. This will help you get the best results possible.
Optimal Heat Settings
Although setting the right temperature and time can seem tricky, dialing your Cricut EasyPress to 385°F (195°C) guarantees vibrant, lasting results with Infusible Ink Pens. Proper heat settings are vital for transferring your design flawlessly. Use the Cricut Heat Guide or app to find the exact time, usually around 40 seconds. Make certain your heat press maintains consistent temperature to avoid uneven ink transfer.
To optimize your results, preheat your blank to remove moisture and wrinkles. Confirm your heat press temperature stays steady throughout the process. Let your project cool completely before handling to prevent smudging.
Following these heat settings tips will help your Infusible Ink Pen designs come out bold and permanent every time.
Temperature And Timing
Getting your heat press set to the right temperature and timing makes all the difference when working with Infusible Ink pens. Set your Cricut heat press to around 385°F (196°C), as recommended by the Cricut Heat Guide.
Preheat the press for at least 5 seconds to assure even temperature distribution before you start. Use the Cricut Heat Guide or app to find the exact press time, usually about 40 seconds. Apply steady pressure throughout the entire pressing process without sliding or lifting the press too soon.
After pressing, let your project cool completely so the ink can fully bond and set. Following these temperature and timing steps guarantees vibrant, long-lasting results every time you use Infusible Ink pens.
Position Your Design Correctly on the Blank
Before applying your design, make sure to position it carefully on the blank to guarantee even ink transfer and a professional finish. Start by cleaning the blank with a lint-free cloth to remove any debris that could interfere with placement. Center your design using measurements or guides to align it perfectly. Remember, your pens create the art, but proper positioning ensures it shines.
Keep these tips in mind when positioning your design:
- Avoid seams, edges, or uneven areas that may disrupt ink transfer.
- Place the design liner side up and secure it with Heat Resistant Tape to prevent shifting.
- Double-check the orientation and ensure the design lies flat to prevent smudging.
Taking these steps helps your infusible ink pens deliver vibrant, crisp designs every time. It sets you up for a flawless pressing process in the next step.
Protect Your Design With Butcher Paper Before Pressing
One essential step you shouldn’t skip is placing a sheet of butcher paper over your design before pressing. This simple action protects your Infusible Ink pens’ creation from direct heat and prevents unwanted ink transfer to your heat press.
Butcher paper acts as a barrier, ensuring even heat distribution and shielding your design from smudging or stray ink particles. It also keeps your press and surrounding items clean, avoiding contamination from ink transfer sheets.
For the best results, use a piece of butcher paper larger than the heat plate to fully cover your design area. After pressing, remove the butcher paper slowly and carefully to prevent smudging or accidental ink transfer onto other surfaces.
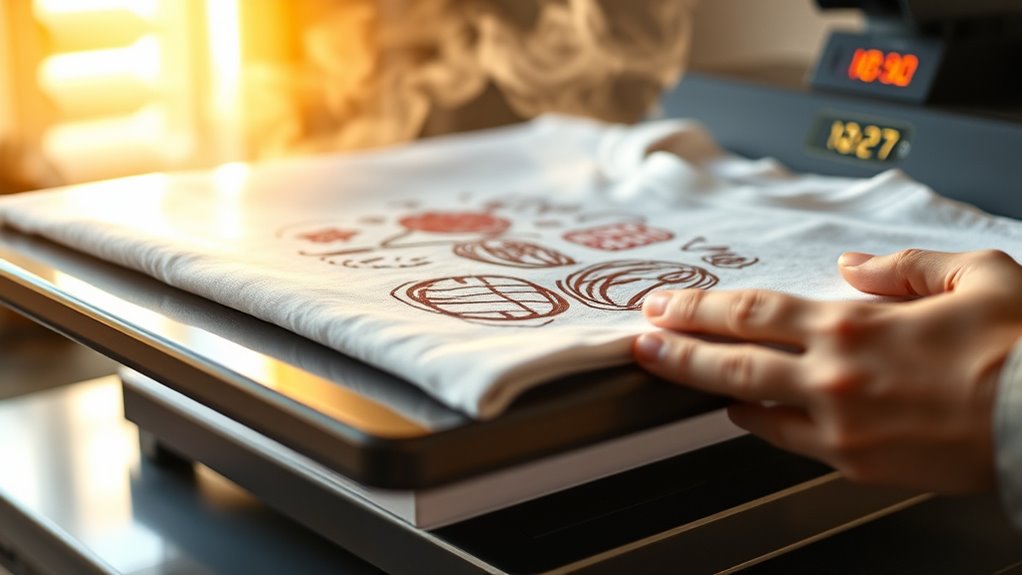
Apply Heat With Even Pressure and Proper Timing
Once the butcher paper is securely in place, it’s time to apply heat with even pressure and the right timing to guarantee your design transfers perfectly. You need to focus on pressure consistency, pressing firmly and uniformly across the entire design. Uneven pressure can cause blotchy or incomplete ink transfer.
Use your Cricut EasyPress or heat press and avoid sliding or lifting during this step to maintain steady heat and pressure.
Follow the recommended temperature and time settings found in the Cricut Heat Guide or app for your specific project. Preheating your blank surface helps remove moisture and wrinkles, ensuring a smooth, even transfer.
Keep these in mind for best results:
- Maintain firm, even pressure throughout the pressing process
- Stick strictly to the recommended time and temperature
- Avoid moving the press to ensure consistent heat application
This method ensures your Infusible Ink pen design bonds perfectly and looks professional.
Allow Your Project to Cool Before Removing Materials
Although it’s tempting to peel away your transfer materials right after pressing, you need to let your project cool completely to avoid smudging or damaging your design. This cooling phase is essential because it allows the ink to bond properly with the blank, ensuring a vibrant and durable finish.
If you remove your materials too soon, you risk smearing the ink or causing uneven transfer, which can ruin the look of your project. During this time, be patient and resist the urge to rush.
Once the project has fully cooled, use tongs or tweezers to carefully lift off the transfer sheets. This cautious step prevents any accidental damage to your design.
How to Care for Your Finished Infusible Ink Project
To keep your finished infusible ink project looking vibrant and fresh, you’ll need to handle it with care right from the start. First, always allow your project to cool completely before touching it to prevent any smudging or ink transfer.
When it comes to cleaning tips, use warm water paired with a gentle glass cleaner to carefully wash your piece. Avoid abrasive tools or harsh chemicals that could damage the ink or surface.
Here are key cleaning tips to maintain your project’s quality:
- Clean gently with warm water and mild glass cleaner to preserve vibrancy
- Avoid scrubbing, machine washing, or harsh cleaning agents to prevent fading
- Store in a cool, dry place to protect against deterioration over time
Frequently Asked Questions
Can Infusible Ink Pens Be Used on Dark-Colored Blanks?
You can’t effectively use Infusible Ink Pens on dark-colored blanks because of color compatibility issues. The dark surface absorbs the ink, making your design faint or invisible. To get vibrant results, you need a light-colored blank or add a white backing layer behind your design.
If you want to work on dark materials, you’ll want to explore alternative methods like sublimation or iron-on transfers for better visibility and contrast.
Are Infusible Ink Pens Safe for Children to Use?
Yes, Infusible Ink Pens are generally safe for children to use with proper child safety measures. You should supervise kids closely to prevent them from opening pen caps or inhaling fumes.
Make sure they use the pens as directed and clean up spills promptly. Teaching your child about safe handling and storage helps avoid accidental exposure, ensuring a fun and safe crafting experience.
How Long Do Infusible Ink Pens Typically Last Before Drying Out?
Imagine you use your infusible ink pen regularly, and you’ll typically enjoy a lifespan longevity of about 12 to 24 months before it starts drying out. If you leave it uncapped or expose it to air, the ink dries faster.
But by capping it tightly and storing it in a cool, dry place, you can extend its usability. Frequent use also helps keep the ink moist and flowing smoothly.
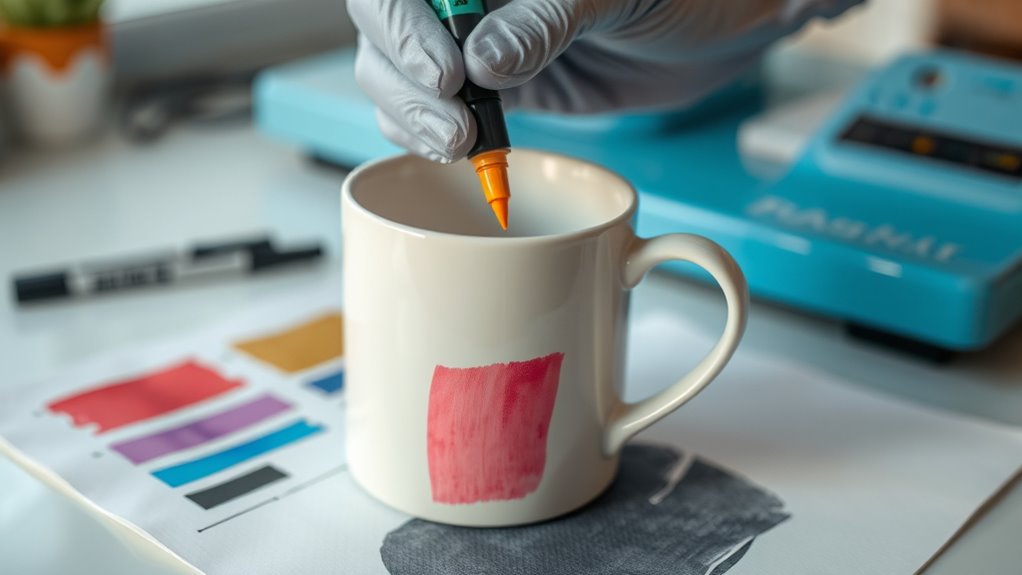
Can I Layer Different Colors With Infusible Ink Pens?
Yes, you can layer different colors with Infusible Ink Pens to create detailed designs. For effective color blending, apply one color at a time and let each layer dry completely before adding the next.
Use light pressure to avoid bleeding and achieve smooth progression. While layers don’t fuse together like traditional ink, carefully overlapping colors while the ink is still workable helps you create subtle shading and vibrant effects in your artwork.
Is It Possible to Erase or Correct Mistakes With Infusible Ink Pens?
Think of infusible ink pens like carving a statue; you can’t chisel back once it’s done. You can’t erase or correct mistakes with these pens after heat activation because the ink permanently bonds with the surface.
If you make a mistake, you’ll need to start fresh since the design is locked in. So, double-check your work before heat pressing to avoid costly errors you can’t fix later.
Conclusion
Remember, practice makes perfect when using infusible ink pens. By choosing the right blanks, preparing your surfaces carefully, and applying heat with precision, you’ll create vibrant, lasting designs every time.
Don’t rush the drying or cooling steps. They’re just as important as the rest. Follow these steps, and you’ll be amazed at how easy and fun it is to bring your creativity to life with infusible ink pens.
Keep experimenting and enjoy the process!
Leave a Reply