To use alcohol ink markers effectively, start by picking smooth paper and setting up your workspace with good lighting.
Choose a cohesive color palette and lightly sketch your design.
Apply light base colors first, then blend them while still wet for smooth gradations.
Gradually layer darker shades for depth and use various marker tips for details and large areas.
Finish by touching up edges and adding highlights for a polished look.
Keep going to uncover more pro tips and techniques.
Pick the Best Paper and Set Up Your Workspace
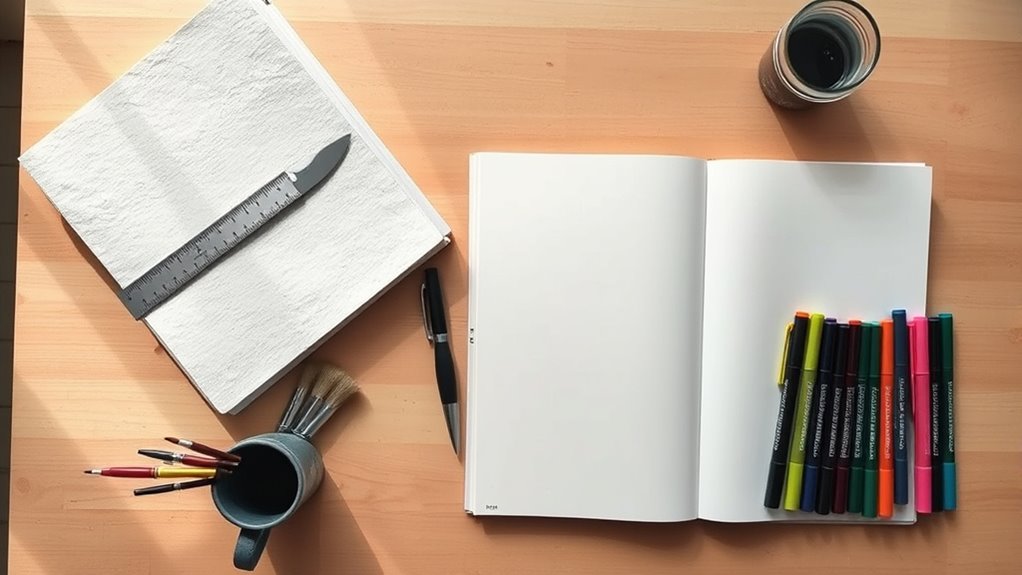
Before you start coloring, pick the right paper and set up your workspace thoughtfully. Choosing marker paper with a smooth surface is essential for controlling ink behavior and achieving flawless blending. Smooth bristol or watercolor paper works well, preventing ink bleed-through and ensuring your colors stay vibrant.
Select smooth marker, bristol, or watercolor paper for vibrant colors and seamless ink blending before you begin coloring.
For your workspace setup, find a clean, well-lit area with excellent lighting to reduce eye strain and highlight true marker hues. Place a scrap piece of paper beneath your work to protect your desk from any accidental ink bleed-through.
Organize your supplies efficiently by arranging markers, swatches, and reference images within easy reach. Keep your markers capped and stored horizontally to maintain ink consistency and prolong their lifespan.
This thoughtful supplies organization helps you maintain a smooth workflow, avoiding interruptions and allowing you to focus on creating beautiful, seamless color progressions with your alcohol ink markers.
Select Your Colors and Plan Your Sketch
Once your workspace is set and you’ve chosen the right paper, it’s time to select your colors and plan your sketch. Start by picking a cohesive color palette that fits your artwork’s theme. Warm yellows and browns work well for a natural feel, while vibrant blues and purples create a bold look.
Use a color chart or swatch sheet to test your markers and see how the colors appear on your paper. Lightly sketch your design with a pencil to map out the composition, pinpointing areas for shading and smooth color gradations.
Organize your selected markers nearby to speed up color application and enable seamless blending. Thoughtful planning here helps you decide where to apply light colors first and where to build darker shades, adding depth and dimension.
This preparation guarantees your final piece is balanced, with well-planned shading and color blending that bring your sketch to life.
Apply Light Colors First With Alcohol Markers
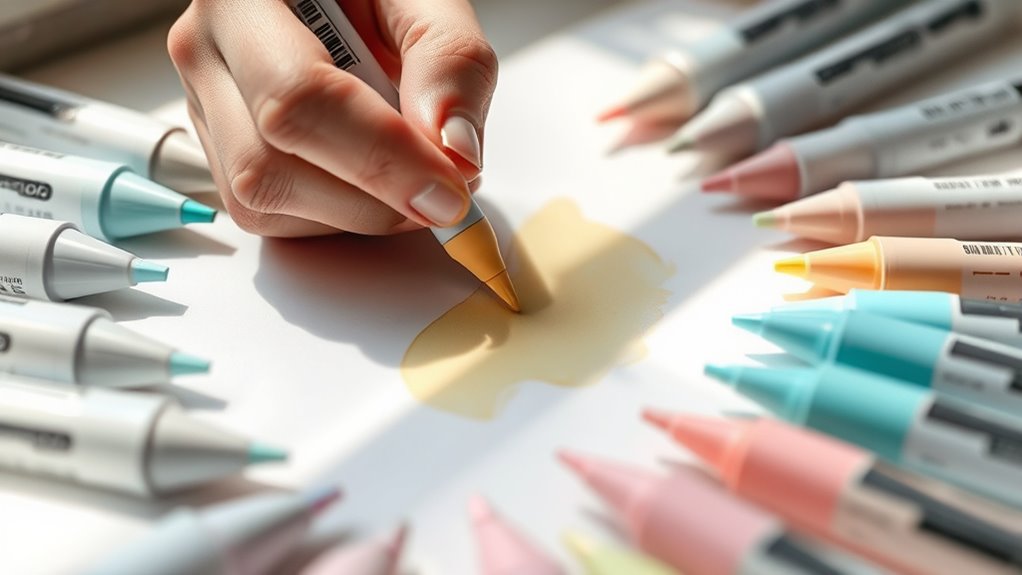
Though it might be tempting to plunge into bold colors, you’ll get the best results by applying the lightest shades first with your alcohol markers. Light colors form a crucial base layer, setting the foundation for your artwork.
Because they dry quickly, you can add darker tones without worrying about muddying your work. Starting light gives you better control and reduces the risk of over-darkening, letting you build depth gradually.
This approach also makes layering and blending smoother since the light hues won’t overpower darker pigments applied later.
| Step | Benefit | Tip |
|---|---|---|
| Apply light colors | Establish base layer | Use broad strokes |
| Let colors dry | Prevents smudging | Wait a few seconds |
| Layer darker shades | Build depth and contrast | Add gradually |
| Control blending | Avoid unwanted mixing | Work in small areas |
| Maintain foundation | Keep artwork balanced | Start light, then dark |
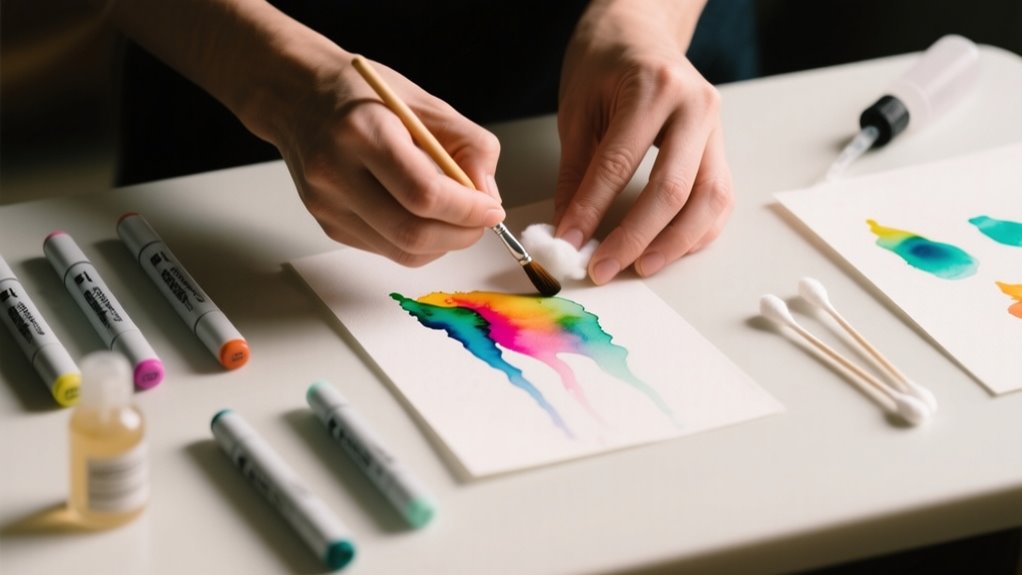
Blend Alcohol Marker Colors While Ink Is Wet
To blend alcohol marker colors smoothly, start by applying your lightest shade. Then, work quickly to add darker tones while the ink is still wet. Use gentle, overlapping strokes to layer colors and create seamless shifts.
Make sure to keep your marker tips moist and work in small sections. This helps avoid streaks and prevents the ink from drying too fast. It’s all about working quickly and carefully to get that perfect blend!
Wet Ink Blending
How can you achieve smooth, seamless color progressions with alcohol ink markers? Start by applying the lighter color first and work quickly while the ink is still wet. This wetness is key to effective blending.
Overlap the edges of different colors before they dry to allow a natural shift and prevent harsh lines. Use a blender marker or a damp brush to gently soften boundaries between wet ink areas for an even smoother blend.
Working in small sections helps maintain the wet ink, ensuring colors merge seamlessly. Remember, blending works best when colors are similar in tone or hue, as contrasting colors might need extra care.
Mastering wet ink blending lets you create beautiful, fluid gradients with your alcohol markers.
Layering Light To Dark
When you blend alcohol marker colors, starting with the lightest shade lets you take full advantage of the ink’s wetness for smooth shifts. Begin your layering light to dark by applying the light colors first, then quickly add darker shades while the ink is still wet. This approach guarantees seamless progressions between colors without harsh lines.
Use gentle, overlapping strokes to blend colors gradually, allowing the ink layers to merge naturally on the paper. Work in small sections to keep both the paper and marker tips damp, maximizing your blending window. Avoid layering dark colors over dry light areas, as this creates stark contrasts and interrupts smooth gradations.
Mastering this wet blending technique will give your artwork rich, cohesive layers with flawless color flow.
Layer Darker Shades for Depth and Shadows
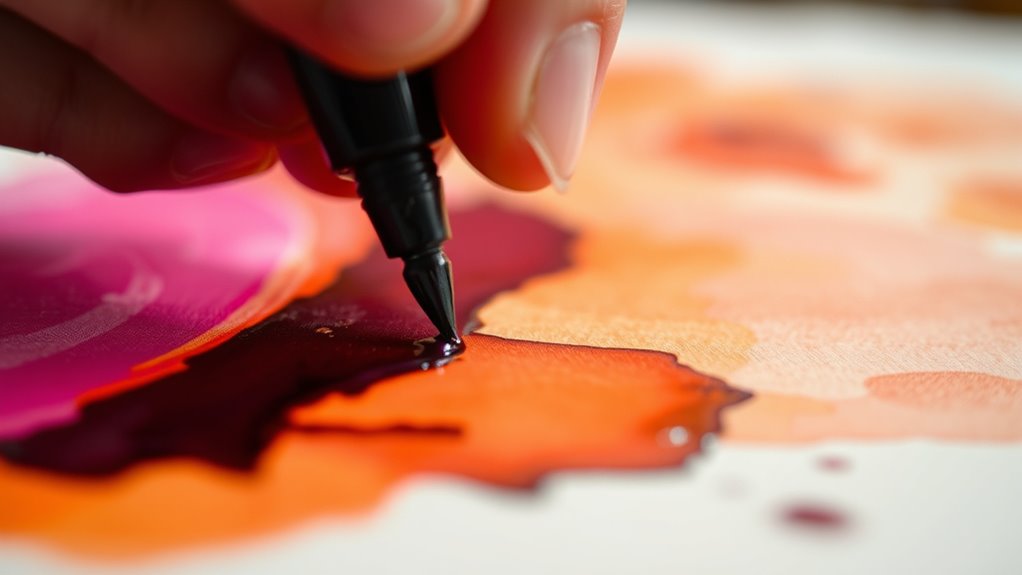
You’ll want to place darker shades carefully at the base or edges of your shapes to create realistic shadows. This technique instantly adds visual depth and makes your artwork pop.
Placement of Dark Shades
Where should you place darker shades to bring your artwork to life? Start by applying dark shades at the base or shadowed areas of shapes to create depth and dimension. Focus on layering these darker colors gradually over lighter tones, building intensity to enhance shadows without diminishing highlights.
Use dark shades to define edges and contours, which helps objects appear more three-dimensional. Blending darker tones smoothly into lighter areas prevents harsh lines and guarantees natural transitions in shadowed areas. Reserve the darkest shades for the deepest shadows, like underneath objects or within crevices, to add realism.
Creating Realistic Shadows
Building on the strategic placement of dark shades, creating realistic shadows brings your artwork to life by adding depth and dimension. You’ll want to layer darker shades of the same color where shadows naturally fall, like beneath objects or along edges.
Apply these dark shades gradually with a light hand, building up the shadow slowly to avoid harsh lines. Blending is key. Smooth gradations between dark and light areas ensure the shadows look natural and realistic.
Incorporate cooler or neutral gray tones within shadows to add subtle depth and complexity. By focusing on merging and gradual layering, your shadows will have a convincing softness, enhancing the overall depth and realism in your artwork without overpowering the piece.
Enhancing Visual Depth
Although adding shadows is important, layering darker shades over lighter areas truly enhances the sense of depth and realism in your artwork. Focus on shadows placement by applying darker shades at the base or lower parts of objects, mimicking natural shadows.
This layering technique adds dimensionality and brings your piece to life. Use gradual blending to soften progressions between dark and light tones, defining contours and emphasizing the three-dimensional form.
Apply darker colors in small, controlled areas to increase contrast without overwhelming the composition. Building up multiple layers of darker hues gradually prevents harsh lines, resulting in smoother, more natural-looking depth.
Mastering these steps guarantees your artwork gains visual depth and dynamic shadows, elevating its overall impact.
Use Different Marker Tips for Details and Large Areas
When you want to add depth and precision to your artwork, using different marker tips can make all the difference. Fine nibs are perfect for detailed work like outlines, tiny accents, and intricate patterns because they give you precise control.
For larger areas, brush tips are your go-to. Their flexibility allows for smooth blending and shading, creating organic, flowing strokes that enhance your piece.
Chisel tips are incredibly versatile. You can cover broad sections quickly or make thin, sharp lines along edges by tilting them.
Switching between fine nibs, brush tips, and chisel tips lets you shift seamlessly from detailed to broad coverage work, improving your overall technique. To maintain consistent ink flow and performance, be sure to clean and store each tip properly.
This care extends the lifespan of your markers and keeps your colors vibrant and sharp every time you use them.
Touch Up Edges and Add Highlights to Finish
To give your artwork a polished look, start by touching up edges and adding highlights that bring your piece to life. Use a colorless blender or a very light marker to gently refine and clean up edges, ensuring a crisp, professional finish.
If some edges appear too harsh, soften them with careful blending using a damp brush or the colorless blender, creating smooth gradations. To add contrast and definition, use a fine-tipped marker or pen to outline edges that need more emphasis.
Next, apply small touches of highlights with a white gel pen or opaque white paint on shiny or reflective surfaces. These bright spots add depth and make your artwork pop.
Step back frequently to assess where highlights or edge touch-ups will enhance visual interest. This careful attention to highlights, edges, and blending will refine and finish your piece beautifully, giving it a vibrant, dynamic look.
Frequently Asked Questions
How Do Alcohol Markers Compare to Water-Based Markers?
You’ll notice alcohol markers offer superior color vibrancy and ink saturation compared to water-based ones. Their marker blending relies on quick color layering, giving smooth progression, though they can cause more ink bleed.
Water-based markers blend with water but often lack the same shade selection and tip durability. Alcohol markers also boast better marker longevity due to refillable ink, making them ideal if you want rich colors and lasting tools for your artwork.
Can Alcohol Ink Markers Be Used on Fabric?
Yes, you can use alcohol ink markers for fabric application, especially on synthetic fabric types like polyester where marker adhesion is stronger. You’ll enjoy excellent color vibrancy, but watch out for bleeding tendency on loosely woven fabrics.
To boost design durability, pre-treat your fabric and heat set your work. For stain removal, act quickly and avoid harsh scrubbing. Follow cleaning tips carefully to keep your artwork vibrant and long-lasting.
Are Alcohol Markers Safe for Children to Use?
Alcohol markers aren’t the safest choice for kids due to marker toxicity and fumes. For proper child safety, you need ventilation requirements met and child supervision during use.
Avoid prolonged skin contact and follow age recommendations closely since young children are more sensitive. To guarantee safe handling, opt for non-toxic alternatives like water-based markers.
Always supervise your child and create a well-ventilated space to reduce risks when using alcohol markers.
How Long Do Alcohol Ink Markers Typically Last?
Marker longevity depends on your usage frequency and storage conditions. If you keep the cap sealed tightly and store markers horizontally, you’ll prevent ink fading and preserve color retention.
Tip wear happens faster than ink drying, so replacing tips might be necessary. Refillable markers let you extend life through ink refilling, boosting marker longevity.
With proper care, your alcohol ink markers can last 2 to 5 years before performance declines.
What Is the Best Way to Store Alcohol Markers?
The best way to store alcohol markers is by using dedicated storage containers or racks for marker organization and color coding. Keep them capped tightly to prevent marker drying and preserve ink longevity.
Store markers horizontally or tips down, avoiding sunlight or heat. For travel storage, use a sturdy case to protect tips. Regular cap maintenance prevents ink buildup.
When markers dry out, consider marker recycling options to reduce waste and keep your collection fresh.
Conclusion
Now that you know how to use alcohol ink markers step by step, are you ready to bring your artwork to life with vibrant colors and smooth blends?
Remember, practice makes perfect, so don’t be afraid to experiment with layering and blending techniques. With the right paper, colors, and a little patience, you’ll create stunning pieces that truly stand out.
Grab your markers and start creating your next masterpiece today!
Leave a Reply