First, find your printer model and compatible cartridge. Then power on your printer and open the cartridge access area.
Carefully remove the old cartridge, avoiding damage or leaks.
Prepare your new cartridge by removing protective tape. Then insert it firmly into the correct slot until it clicks.
Close the printer cover and print a test page to check for proper installation.
If you encounter issues, don’t worry. There are simple fixes to keep your printer running smoothly.
Find Your Printer Model and Ink Cartridge Type
Before you replace your ink cartridge, you’ll need to identify your printer model and the correct cartridge type. Start by checking the front, back, or bottom of your printer for the model number, like HP DeskJet 3755 or Canon PIXMA TS6320. Knowing this helps you find the right ink cartridges quickly.
You can also consult your printer’s user manual or visit the manufacturer’s website to discover compatible cartridge part numbers. Next, examine your existing cartridges for labels or codes such as HP 63 or Brother LC203. This ensures you pick the proper replacement.
Don’t forget to confirm if your printer uses individual cartridges for each color or a combined multi-color cartridge system. Ultimately, verify whether your printer requires dye-based or pigment-based ink cartridges to match its specifications. Identifying these details guarantees you get the right cartridge for your printer model, avoiding installation issues or print quality problems.
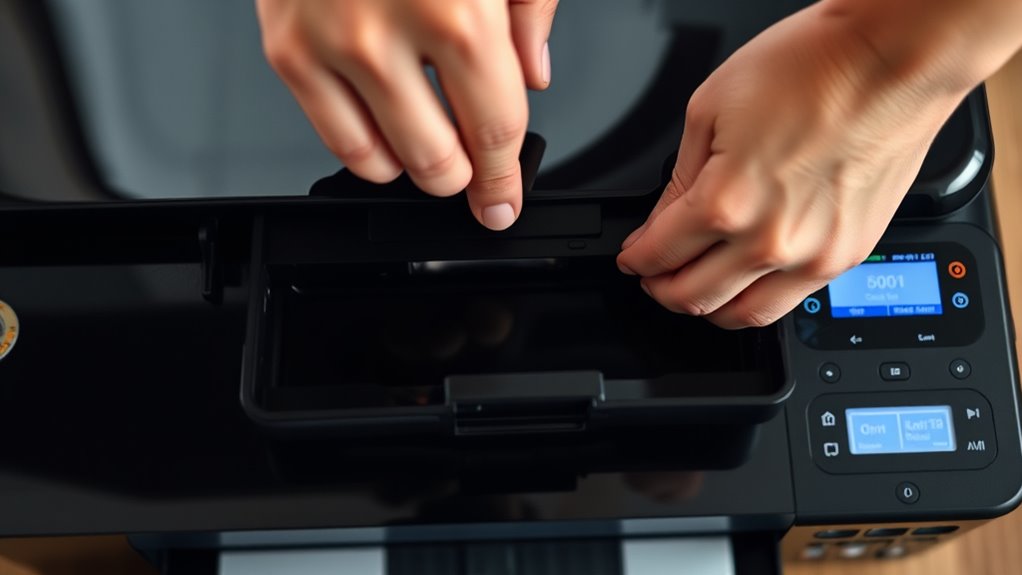
Power On the Printer and Open the Cartridge Access Area
First, make sure your printer is powered on and has fully settled. Then, find the cartridge access area—it’s usually at the front or on top of the printer. Go ahead and carefully open the printer cover to expose the cartridges, but be gentle and don’t force it.
Ensure Printer Is On
How do you make certain your printer is ready for an ink cartridge replacement? First, turn on your printer and confirm it’s connected to a power source. Wait patiently as the printer initializes. This guarantees it’s ready to recognize new cartridges.
Avoid opening the cartridge access area before the printer signals readiness, which you can check via its display or indicator lights. If you open the access while the printer is off or busy, it could cause errors or misalignment.
Also, make sure the printer has finished any ongoing printing or cleaning tasks before you proceed. By following these steps, you’ll keep your printer in good shape and prepare it properly for a smooth cartridge replacement.
Locate Cartridge Access
Where exactly do you find the cartridge access area on your printer? Typically, the cartridge access door or cover is located at the front or top of the printer.
First, make sure your printer is powered on and has completed its startup process. Then, look for the access panel that houses the cartridges. When you open this panel, the carriage or print head will automatically move to the designated cartridge access position and stop.
It’s important to wait until the printer is fully idle and no printing jobs are running to avoid errors or misalignment. By carefully opening the cartridge access area at the correct location, you’ll be ready to replace your ink cartridge without causing damage to the printer.
Open Printer Cover Carefully
Before you open the printer cover, make sure the device is powered on and completely idle to prevent any errors or damage. Check that the printer’s display or indicator lights are stable, and listen for any noise to confirm it’s stationary.
Next, locate the designated latch or handle to unlock the printer cover. Open it carefully, lifting gently to avoid damaging any components. Take your time when you open the cartridge access area, as rushing might snap or break internal parts.
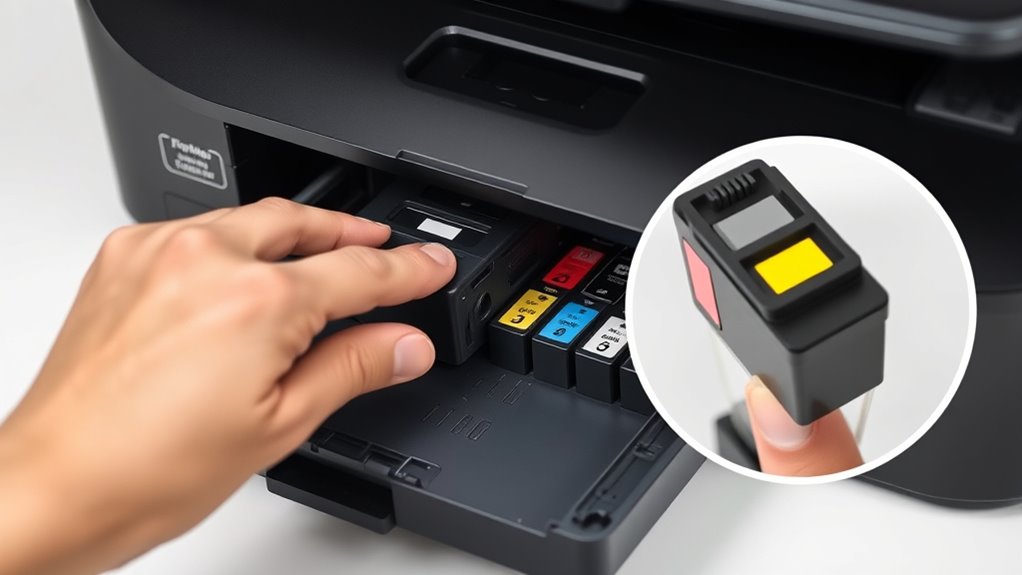
Remove the Old Ink Cartridge Safely
Since safety is key, always turn off your printer and unplug it before you start removing the old ink cartridge. First, open the access door carefully to reveal the cartridge compartment.
Prioritize safety by turning off and unplugging your printer before accessing the ink cartridge compartment.
Locate the old cartridges inside, then gently press or release the cartridge lock or latch to unlock the ink cartridge. Be sure to handle the cartridge with care. Avoid touching the micro-chip or nozzles, as this could cause damage.
Slowly lift the old cartridge straight out of its slot to remove it. Once removed, follow the manufacturer’s recycling instructions or your local regulations to dispose of the old cartridges properly.
Taking these steps ensures you remove the old ink cartridge safely without harming your printer or the cartridge itself. Always handle components with care to keep your printer in good condition and ready for the new cartridge installation.
Prepare the New Ink Cartridge for Installation
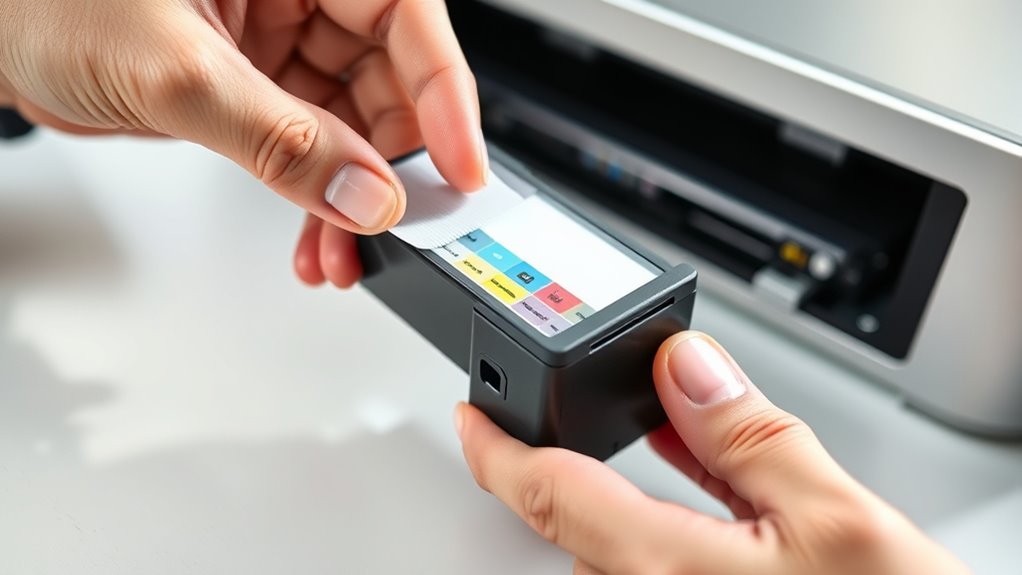
How should you handle the new ink cartridge to guarantee a smooth installation? First, remove the new cartridge from its packaging carefully. Avoid touching the copper-colored micro-chip or nozzles, as oils from your fingers can damage them.
Next, check for any protective tape or covers on the contacts and nozzles, and peel them off according to the instructions. It’s crucial to verify that this cartridge matches your printer’s model number and color requirements before proceeding.
Also, ensure the cartridge is at room temperature to prevent ink clumping or clogs during use. When handling the cartridge, hold it by the edges, steering clear of the copper contacts to avoid contamination or damage.
Taking these steps will prepare your new cartridge properly, setting the stage for a successful installation.
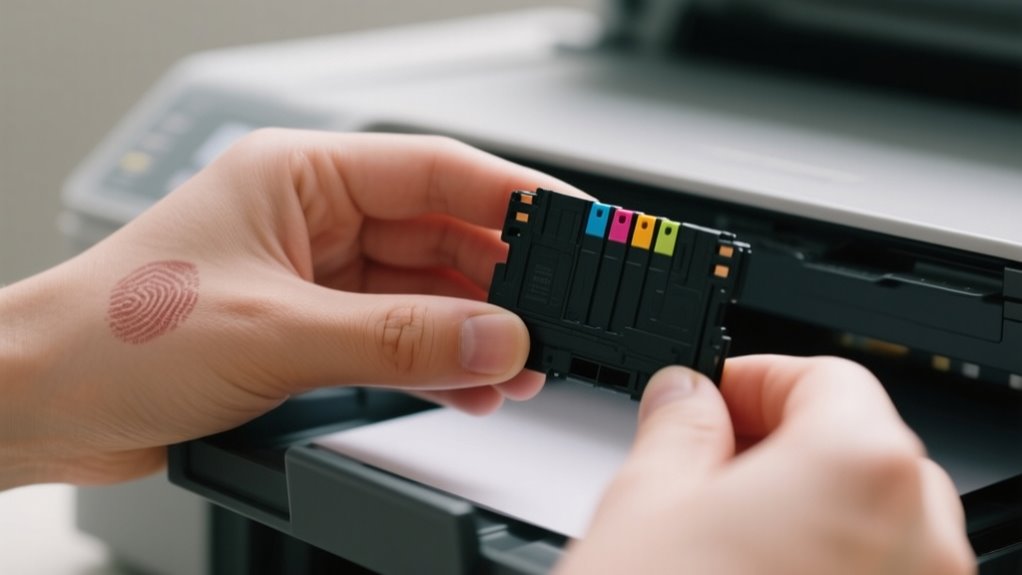
Insert the New Ink Cartridge Correctly
Once you’ve prepared the new cartridge carefully, it’s time to insert it into your printer. Start by matching the color-coded or labeled end of the cartridge to the corresponding slot. This helps you replace cartridges correctly without confusion.
Hold the cartridge straight and avoid forcing it into the slot. Slide it gently into the carriage until it clicks, signaling that it’s fully seated.
Be sure to align the micro-chip on the cartridge with the printer’s contacts. Don’t touch the copper or green chip, as oils from your fingers can interfere with the connection.
Once inserted, close the printer cover gently. Your printer will automatically recognize the new cartridge, confirming a successful replacement.
Following these steps guarantees your printer functions smoothly and your new cartridges perform at their best.
Close the Printer and Print a Test Page
After you insert the new ink cartridge, make sure you close the printer cover completely so the device can recognize it. Wait for the status lights to stabilize. This signals that the printer has finished its internal processing.
Only then should you print a test page. Use your printer’s control panel or software menu to select the “Print Test Page” option. This helps confirm that the cartridge is properly installed and recognized.
Check the test page for any streaks, missing colors, or smudges to ensure everything is working correctly.
| Step | Action | Purpose |
|---|---|---|
| 1 | Close printer cover | Enable cartridge recognition |
| 2 | Wait for status lights to stabilize | Confirm internal processing |
| 3 | Select “Print Test Page” | Verify installation |
| 4 | Review test page quality | Detect print issues |
| 5 | Proceed if print is clear | Finish cartridge replacement |
Troubleshoot Common Ink Cartridge Installation Issues
If your test page shows errors or the printer doesn’t recognize the new cartridge, you’ll need to troubleshoot the installation. First, make sure the cartridge replacement is fully seated and clicks into place; improper seating often causes recognition issues.
Next, check that all protective tape and caps have been completely removed from the cartridge before installation, as leftover tape can block ink flow or signals. Then, clean the electrical contacts on both the cartridge and inside the printer with a lint-free, damp cloth to improve connectivity.
Also, inspect the printer for any obstructions or paper jams that might interfere with proper cartridge placement. If the printer doesn’t recognize the cartridge after these steps, try resetting the printer by unplugging it for 10 minutes and then restarting it.
These straightforward steps usually resolve common ink cartridge installation issues and get your printer working smoothly again.
Frequently Asked Questions
How Long Does a New Ink Cartridge Typically Last?
A new ink cartridge typically lasts between 200 to 300 pages, but high-yield cartridges can extend that to 400 to 600 pages. Your ink cartridge lifespan depends on your printing habits and the type of documents you print.
To improve cartridge durability and reduce refill frequency, you should follow ink consumption tips like printing in draft mode and avoiding color-heavy pages when possible. Proper storage also helps maintain your cartridge’s effectiveness over time.
Can I Use Third-Party Ink Cartridges Safely?
You can use third-party ink cartridges safely if you consider third-party compatibility, ink quality concerns, and warranty implications. You can save money with third-party options, but you can also risk inconsistent print quality or voiding your warranty.
You should buy from reputable suppliers to guarantee quality and compatibility. Check your printer’s guidelines before using third-party ink to protect your printer and maintain cost savings without surprises.
What Should I Do if My Printer Doesn’T Recognize the Cartridge?
If your printer doesn’t recognize the cartridge, start by performing a printer reset. Turn it off, unplug it for 10 minutes, then plug it back in. Next, check for firmware updates that might fix recognition bugs.
Make sure the cartridge is properly seated and aligned because poor cartridge alignment can cause ink flow issues. Also, clean the contacts gently to improve the connection.
If problems persist, try replacing the cartridge with a new one.
How Do I Recycle or Dispose of Old Ink Cartridges?
Picture your old ink cartridge as a tiny pollutant waiting to harm soil and water. To guarantee eco friendly disposal, you can join cartridge recycling programs offered by manufacturers or local stores. These programs reduce environmental impact by refurbishing or reclaiming materials.
Always follow proper disposal methods and local guidelines. Some areas treat cartridges as hazardous waste. Use prepaid envelopes or drop-off spots to recycle easily and protect the planet every time you replace a cartridge.
Can Ink Cartridges Dry Out if Unused for a Long Time?
Yes, ink cartridges can dry out if you leave them unused for a long time. Causes of ink drying include evaporation and clogged print head nozzles.
For proper ink cartridge maintenance, store cartridges in sealed bags or original packaging to slow drying. Watch for signs of cartridge failure like streaky prints or faded colors.
Regularly printing small documents helps keep the ink moist, preventing drying and ensuring your printer works smoothly.
Conclusion
Replacing your ink cartridge is easier than you think. Once you get the ball rolling, it’s smooth sailing from there. Just follow the steps carefully, and you’ll have your printer up and running in no time.
Remember, patience is key, and a little attention to detail goes a long way. If issues pop up, don’t hesitate to troubleshoot. Soon enough, you’ll be printing like a pro without breaking a sweat!
Leave a Reply